
Grow Room Setups
Before You Start
Is This Guide Right for You?
This guide helps you turn a tent, closet, cabinet, or spare room into a space that is safe, serviceable, and easy to understand before plants make every mistake more expensive.
If you still need the fundamentals of indoor environmental control, begin with Indoor Growing Basics. Once the layout is taking shape, use Ventilation Systems to design the room's air path.
Setting Up a Grow Room That Fits the Home
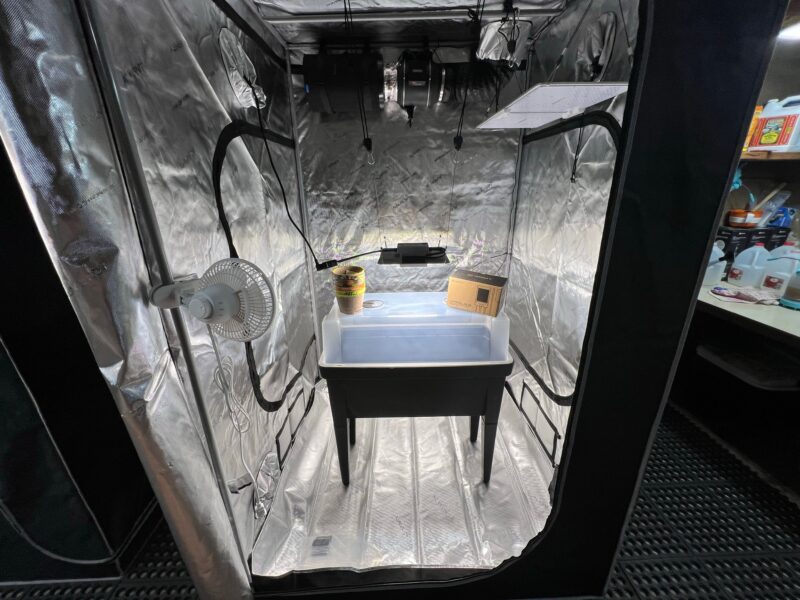
Setting up a grow room is where all the separate decisions finally meet. The light, air path, containers, electrical supply, water route, and daily routine have to fit the same space—and they also have to fit the way you actually live. That sounds like a lot at first, but it becomes manageable when we make the decisions in the right order.
We will compare purpose-built rooms, grow tents, closets, wardrobes, cabinets, Space Buckets, open support racks, multi-zone systems, and larger modular environments. You will see what each one needs, where it saves money, where it becomes awkward, and which upgrades are worth paying for. We will also build a reuse-first setup, a balanced beginner tent, and an above-standard home system so the equipment list always has a reason behind it.
Use this guide only for lawful cultivation with the property owner's permission. Local rules may control plant numbers, locked access, visibility, odor, wiring, ventilation, and alterations. When structural, mains electrical, fire, roofing, or HVAC work exceeds your competence, bring in a qualified professional.
“Can I start in any spare corner and move the enclosure later?”
Question sent by: Allison Carter, via email.
You can move a small enclosure later, but the first corner still needs safe power, a workable air path, water containment, access, and stable seasonal conditions. A filled tent or cabinet is far less movable than an empty shell, and rushed relocation can damage plants, ducting, or electrical connections. Test the host room first and choose a position that can complete the cycle safely. Treat mobility as a backup, not as an excuse for a weak starting location.
How Much Growing Space Do You Actually Need?
Let’s begin with the question most growers actually have: how much do you want this room to produce, and how much canopy can you comfortably manage? Those two questions are connected, but they are not identical. The enclosure still needs room for containers, drainage, hanging hardware, filters, ducting, fans, sensors, and your hands. If every square inch looks full on paper, the real garden will usually feel cramped.
Lighting is one of the largest levers in that decision. More usable light can support more photosynthesis and more flower, but the wattage printed on a fixture is only its electrical input. Two lights drawing the same power can differ in photon output, distribution, efficacy, dimming, and heat. Genetics, plant health, root volume, temperature, humidity, irrigation, disease pressure, training, and the time spent building the canopy still decide how much of that light the plant can use.
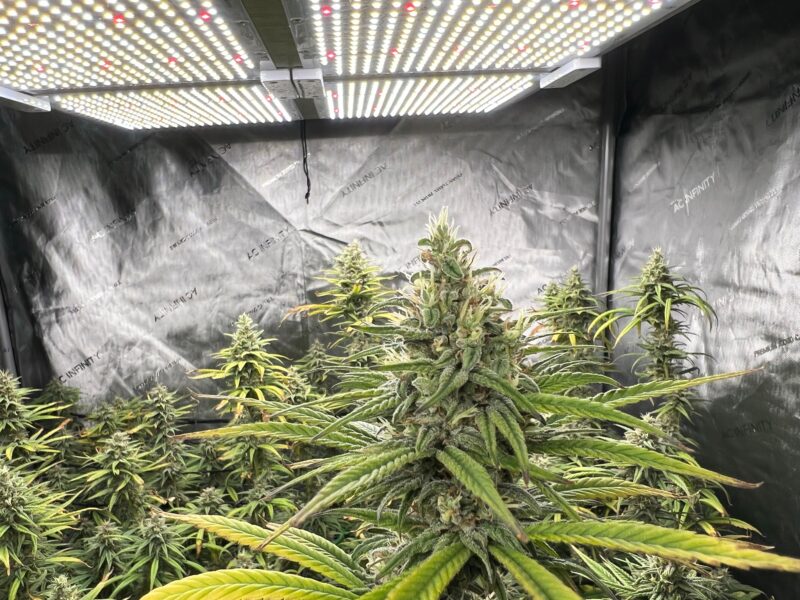
Use a fixture's published PPF and canopy PPFD map to see whether its light reaches the planned area evenly. Then confirm that the room can manage the fixture's heat and the water vapor produced by the canopy. This is the useful way to think about “more light”: it can raise the room's production ceiling only while the rest of the environment keeps up.
“Is the advertised tent floor area the same as usable canopy space?”
Question sent by: MaplePorch, via Facebook page.
No. The advertised dimensions describe the enclosure shell. Usable canopy becomes smaller after we reserve room for trays, containers, intake openings, circulation, ducting, equipment, door movement, and our own hands. Height also disappears into the root zone, fixture, hangers, filter, and safe light separation. Plan from the complete vertical and horizontal stack. A smaller canopy that can be reached and lit evenly is more useful than a crowded floor that only looks larger on paper.
Use Wattage as a Rough Planning Check, Not a Harvest Promise
The familiar grams-per-watt calculation can still help with early budgeting, so long as we use it honestly. The table below applies a broad historical 0.5–1.0 grams of dried flower per watt planning range to a stable, well-managed indoor setup. Modern LEDs usually deliver more usable photons from each watt, but HPS, MH or CMH, CFL, and linear fluorescent lamps can all support healthy growth when the fixture, canopy, and climate suit one another. Equal wattage does not mean equal canopy light: ballast losses, reflector design, lamp age, spectrum, hanging distance, and heat management all change the result. Treat these figures as a quick comparison of possible room scales—not a guarantee or a beginner target.
| Fixture Input | Approximate Dried Flower | Approx. Ounces | How to Read It |
|---|---|---|---|
| 200 W | 100–200 g | 3.5–7.1 oz | A broad planning bracket for a small, healthy and evenly lit canopy. |
| 400 W | 200–400 g | 7.1–14.1 oz | Coverage, root health and environmental stability still set the real result. |
| 600 W | 300–600 g | 10.6–21.2 oz | Heat, moisture removal and canopy uniformity become increasingly important. |
| 800 W | 400–800 g | 14.1–28.2 oz | A larger electrical input only helps when the whole footprint receives usable light. |
| 1,000 W | 500–1,000 g | 17.6–35.3 oz | Circuit capacity, climate equipment and room design are now major parts of the plan. |
As you can see, the numbers rise with input power because the same broad efficiency bracket is being multiplied—not because a wattage label guarantees a harvest. Use this table to estimate scale, then use the checks below to decide whether the room can actually support that scale.
Choose the Light as Part of the Room, Not as a Separate Purchase
This is where the room begins to feel real. A light does not have to be the newest type to grow a healthy plant, but every light asks something different from the enclosure. LED, HID, and fluorescent systems can all make sense when we match them to the footprint, stage, ceiling height, electrical capacity, and climate instead of comparing wattage labels alone.
| Lighting Family | How It Changes the Plan |
|---|---|
| Modern LED |
Best fit: Most full-cycle tents, low ceilings, rooms where electricity and cooling matter, and growers who want dimming or a broad fixture footprint. Plan for: Driver and fixture heat still enter the room. Verify photon efficacy, canopy map, dimming range, dimensions, warranty, and the real wall draw rather than relying on a model name. |
| HPS (HID) |
Best fit: A full-cycle or flowering room with enough height, safe ballast and reflector installation, strong ventilation, and a climate that can use the radiant heat. Plan for: HPS is proven and widely understood after decades of use, so an existing, carefully inspected system can be practical and economical. Its familiarity is valuable, but it is not automatically more electrically efficient or universally better in spectrum than a modern LED. |
| MH or CMH (HID) |
Best fit: Growers who already own a compatible, serviceable HID system or deliberately want a high-intensity discharge setup and can manage its clearance and heat. Plan for: Confirm that the lamp, ballast, reflector, socket, and rated operating position belong together. Lamp age changes output, and substitutions should never be guessed. |
| CFL, T5, or T8 fluorescent |
Best fit: Propagation, seedlings, young vegetative plants, shelves, or a very small low-cost canopy where safe fixtures are already available. Plan for: The entry price can be low, but flowering a dense canopy may require so many lamps, sockets, and input watts that the original saving disappears. Use a reflector, adjustable height, guarded connections, and measured canopy light. |
HID remains in this guide because it can produce excellent results in a compatible room, not because age alone makes it the best technology. Modern LEDs generally produce more photosynthetic photons per joule and give us more control over output and fixture placement. Fluorescent lighting remains useful at the other end of the scale: it can be a sensible way to begin with propagation or a tiny canopy, particularly when a safe fixture is already on hand.
WHAT TO REMEMBER: Equal input watts do not create equal canopy light. Compare the complete system: delivered photons, coverage, radiant heat, ballast or driver losses, lamp age, clearance, ventilation, and electricity cost.
| Planning Question | Measure First | Why It Matters | Do Not Assume |
|---|---|---|---|
| How large is the canopy? | Usable length and width after access and equipment are reserved | Sets the footprint that lighting and circulation must cover | Tent floor dimensions equal usable canopy |
| How much height remains? | Container, tray, plant, support, fixture, hangers, filter, and safe separation | Determines whether the plant and equipment fit through the full cycle | The advertised tent height is available to the plant |
| Can the room support the light? | Fixture map, actual input power, circuit capacity, host-room temperature | Connects photon delivery to electricity and heat management | More watts always create better results |
| Can moisture leave? | Host-room humidity, exhaust route, canopy size, irrigation volume, lights-off trend | Predicts condensation, mold pressure, and dehumidification need | A strong fan always solves humidity |
| Can you service the garden? | Door swing, aisle, reach to back plants, removable trays and filters | Determines whether problems can be found and corrected early | Every physically fitting plant is practically manageable |
For a first indoor garden, choose a canopy small enough that every leaf zone, container, tray, and connection can be reached. Leave room to learn. Expansion is easier after actual energy, temperature, humidity, and maintenance records exist.
“How much can I harvest from a certain wattage?”
Question sent by: Ethan Miller, via contact form.
Wattage alone cannot answer that responsibly. Use it to estimate electrical input and heat, then use the fixture's photon data to evaluate canopy coverage. Genetics, plant health, cycle length, root-zone management, environment, and canopy uniformity all change harvest. Plan a safe, even environment first and treat production as a conditional range, not a guarantee.
Choosing the Right Location for Your Grow Room
The location decides what the enclosure can borrow from the building. Look for stable seasonal conditions, a dry and washable floor, safe electrical capacity, an intentional air route, easy inspection, and a low-consequence water path. Reject any location that blocks an exit, hides unresolved mold, interferes with combustion or electrical equipment, or depends on unsafe temporary wiring.
Basement Grow Rooms
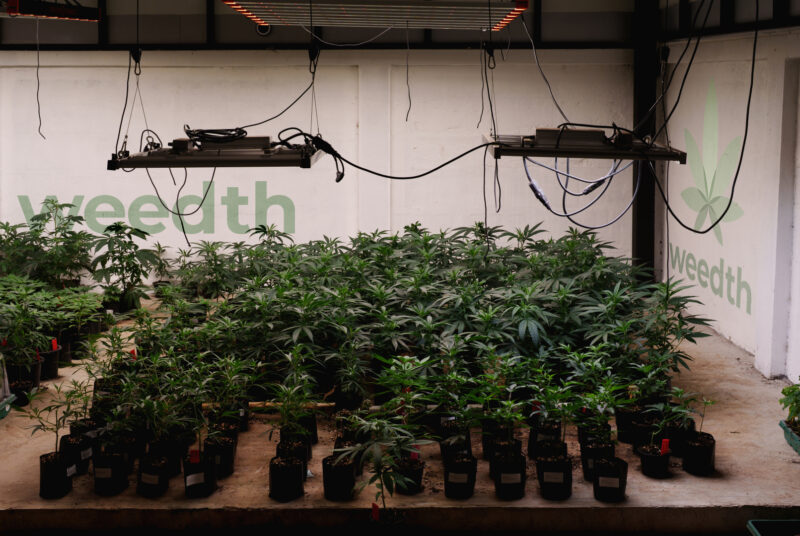
Basements can offer stable temperatures and useful separation from living rooms, but they must be checked for groundwater, condensation, damp walls, mold history, radon requirements, floor drains, pests, and cold root zones. Do not cover moisture staining with reflective film. Repair the source, dry the structure, and protect containers from a cold slab where measurements show it is necessary.
Exhausting warm, humid air into a cool basement can create condensation on walls or pipes. Compare canopy conditions with basement surfaces and the outdoor season. A dry summer basement may behave differently after rain or during winter.
The detailed basement preparation sequence appears later, beside the other complete build guides. For now, use these location checks to decide whether the basement deserves a place on your shortlist.
Attic Grow Rooms
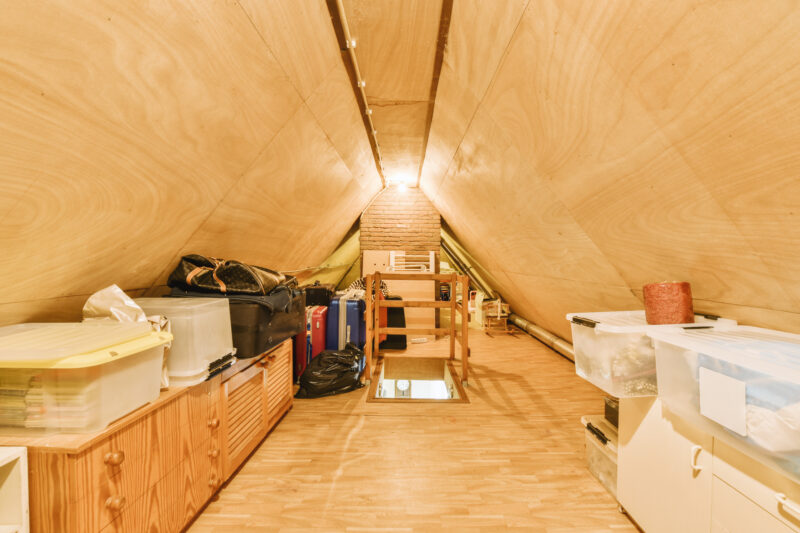
Attics often combine severe summer heat, winter cold, limited headroom, awkward access, insulation, concealed wiring, and structural uncertainty. They can also put water and high electrical loads above finished rooms. Use an attic only when the structure, access, insulation, fire safety, electrical supply, and climate strategy have been assessed. Privacy is not a reason to accept an unsafe building location.
Main-Floor and Spare-Room Setups
A spare bedroom or main-floor closet is accessible and often benefits from the home's climate control. It can also expose carpet, drywall, shared HVAC, visitors, children, and animals to heat, moisture, light, odor, and equipment. Use a waterproof tray, preserve the room's exit and smoke detection, and do not assume that shared HVAC should carry grow-room humidity or odor through the home.
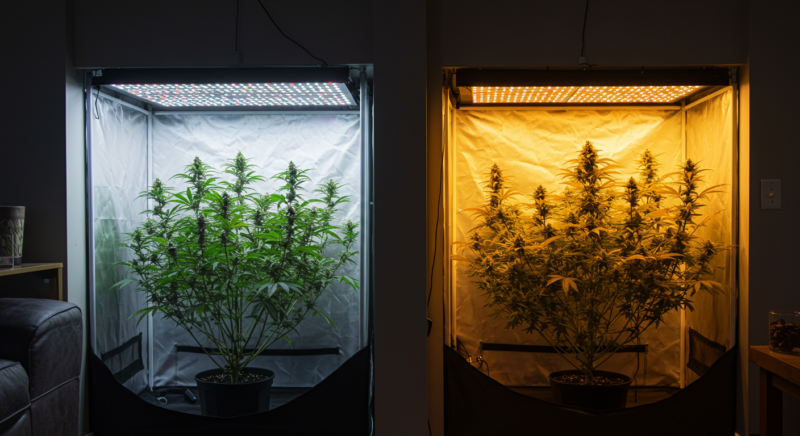
Using Two Enclosures in One Room
Two tents or separated zones can support different light schedules, propagation, quarantine, or a staggered workflow. Their loads combine in the host room. When both lights operate, the room receives both heat loads. When both canopies release moisture, the room receives both latent loads. Separate timers and light control do not create separate building climates.
Begin with one stable enclosure. Leave capacity for a second if future expansion matters, then add it after real measurements show that the room, circuit, air path, and routine can support it.
Choosing the Right Indoor Growing Environment
A grow room is not defined by its size. It is any legal indoor space where light, air, temperature, humidity, water, cleanliness, and access can be managed deliberately. That space might be a purpose-built room, a removable tent, an unused wardrobe, a converted cabinet, or a small DIY enclosure. The best option is not the largest or most expensive one. It is the option that fits the building, the budget, the climate, and the amount of attention the grower can realistically provide.
Before choosing an enclosure, confirm that cultivation is lawful where you live, that you have permission to use the property, and that the proposed location does not block an exit, overload an electrical circuit, or expose children, visitors, or animals to equipment and supplies. Rules can govern plant numbers, locked access, visibility, odor, electrical work, and changes to rented property. A technically good design is still the wrong design if it conflicts with local law, a lease, a building rule, or basic household safety.
Use this part of the guide to compare the possibilities without getting buried in assembly details. First we will decide which enclosure fits the room and routine. Later, the build section takes the strongest options one by one and shows how to measure, inspect, assemble, ventilate, lightproof, wire safely, and test them.
Host Room
The host room is the larger room or building zone that contains the tent, cabinet, bucket, or other enclosure. A tent can control light and airflow inside its fabric shell, but it cannot create cool, dry intake air from nothing. The temperature, humidity, electrical capacity, and ventilation options of the host room set the limits for every smaller enclosure placed inside it.
Start With the Host Room, Not the Shopping List
A common beginner mistake is buying a complete kit before checking the room where it will operate. Measure the available floor area, ceiling height, door width, outlet locations, circuit capacity, water route, drainage route, and possible exhaust path. Then observe the room with the household operating normally. A cool spare room in winter may become a hot room in summer. A dry basement may become damp after heavy rain. A closet may appear large until ducting, a filter, the light, containers, saucers, and access space are added.
Think about the room in four layers. The first is the plant footprint, the actual canopy area. The second is the equipment zone above, beside, and below the plants. The third is the service zone needed to water, inspect, clean, raise the light, and remove a plant. The fourth is the building zone, where heat, moisture, sound, and exhaust ultimately go. Designs fail when only the first layer is measured.
“Can I put a grow tent inside a closet?”
Question sent by: Mason, via Facebook page.
Sometimes, but the closet must be treated as the host room. The tent still needs a path for intake and filtered exhaust, and the closet must release the heat and moisture that leave the tent. If the closet door stays closed and there is no air path, the tent can end up recirculating its own warm exhaust. Measure the closet, include the duct bends and filter, and test it with the light running before bringing plants in.
Compare the Main Indoor Growing Environments
| Environment | Best For | Main Strength | Main Limitation | What It Needs Most |
|---|---|---|---|---|
| Grow tent | Most beginners, renters, and small home gardens | Fast installation, predictable openings, reflective interior, removable | Fabric, zippers, poles, and ports limit durability and custom layout | A suitable host room, correctly sized exhaust, safe electrical supply, and floor protection |
| Closet or wardrobe | Very small budgets and unused built-in space | Uses space you may already have and can look tidy when closed | Heat, shallow depth, limited access, and difficult duct routing | A reversible air path, moisture protection, safe light mounting, and enough internal height |
| Purpose-built cabinet | One compact garden where furniture-like dimensions matter | Rigid walls, organized equipment, and durable mounting points | More cutting, sealing, heat management, and maintenance work | Fire-safe materials, planned ventilation openings, removable trays, and accessible wiring |
| Space bucket or stacked-bin enclosure | Learning, propagation, or a very small legal plant in severe space limits | Low material cost, modular height, and a small footprint | Minimal canopy area, little equipment clearance, and rapid heat or humidity changes | Low-heat lighting, guarded fans, safe cable entries, drainage containment, and frequent observation |
| Dedicated grow room | Growers with a suitable permanent room and permission to modify it | Best service access, scalable canopy, and flexible environmental control | Higher construction, climate-control, cleaning, and operating demands | Electrical planning, moisture management, washable surfaces, controlled access, and HVAC strategy |
| Multi-zone room or two tents | Growers who need separate light schedules or plant stages | Independent schedules and cleaner workflow between stages | More equipment, more failure points, and greater electrical and climate load | Separate timers, light-tight zoning, balanced airflow, and clear sanitation workflow |
| Detached or unconditioned structure | Lawful gardens where the main home has no suitable space | Keeps noise, moisture, and work away from living rooms | Weather extremes, condensation, access, water, insulation, and security | Building assessment, insulation, heating or cooling plan, safe power, and remote alerts |
This comparison is a starting point, not a promise that every option works in every home. A small tent in a stable spare room can be easier to control than a large purpose-built room in an attic. A free wardrobe can reduce the enclosure cost, but the savings disappear if it requires major ventilation work or constant air conditioning. The enclosure price is only one part of the real cost.
“Which indoor setup is easiest to change if I move?”
Question sent by: Derek, via contact form.
A freestanding grow tent is usually the most reversible because it can be disassembled without cutting the building or permanently altering furniture. A purpose-built cabinet can also move if it fits through the doorway and its electrical and ventilation parts disconnect cleanly. Converted closets and dedicated rooms are less portable. Before choosing, measure the complete exit route—not only the final location—and keep every modification lawful, inspectable, and compatible with the property owner's rules.
Grow Tents: The Most Forgiving Starting Point
A grow tent is often the easiest place to begin because much of the enclosure work is already done for you. The reflective shell, duct ports, cable openings, intake vents, and hanging bars give the room a clear shape without permanent construction. You can assemble it, test it, adjust it, and remove it later. That balance of control and reversibility is why tents make sense for so many first indoor setups.
A purpose-built grow tent is different from an ordinary camping tent. Its shell is intended to limit light exchange, the inner surface helps return stray light toward the canopy, and the pattern normally includes low intake vents, high duct ports, cable sleeves, equipment bars, and a removable floor liner. Those details save time because the basic air and equipment routes already exist.
An ordinary tent can sometimes be adapted for a tiny experimental setup, but it should never be treated as equivalent by default. Thin fabric may glow, curved poles may not support equipment, zippers may leak light, and the shell may have no safe high exhaust or low intake route. Cutting a hole can weaken or fray the material. If a non-grow tent is considered at all, support the light and fan independently, verify the material and fire precautions, and test both directions of light exchange before trusting the dark period.
Here is the part that catches people out: the number on the box describes the fabric shell, not the usable garden. We still have to subtract the container and tray, mature plant height, support structure, fixture, hangers, safe light separation, filter, and ducting. A short tent can work beautifully with the right plan, but a tent that only just fits the room may become frustrating if its door cannot open or the filter blocks every adjustment.
“Should I buy a grow tent before checking the host room?”
Question sent by: Hannah Lewis, via Facebook page.
Check the host room first. A tent cannot manufacture cool, dry intake air, create electrical capacity, or provide a safe exhaust route on its own. Measure the room, observe its warmest and most humid periods, then choose a tent that leaves access around the door, ducts, cables, and service areas. A smaller tent in a stable room usually performs better than a large tent squeezed into a hot, damp, or inaccessible location.
What a Tent Still Needs
- A stable host room: the tent takes in the room's air and returns heat and moisture to that room unless exhaust is routed elsewhere.
- A real exhaust path: a fan moving air inside a sealed bedroom does not remove heat from the bedroom.
- Floor protection: the removable liner is useful, but a rigid waterproof tray or protected floor adds another layer against spills.
- Independent circulation: exhaust exchanges air; circulation fans mix the air around and through the canopy. They are not the same job.
- Load-aware hanging: the light, fan, and filter must remain within the frame and bar ratings. Heavy components should be secured with redundant supports where appropriate.
- Space outside the tent: nutrient mixing, tools, watering, drainage, and maintenance should not all happen inside the canopy.
If this enclosure matches your room and routine, the complete selection, inspection, light-leak test, ventilation, electrical, and commissioning sequence appears in the build section later in this guide.
IMPORTANT: A tent is an enclosure, not climate equipment. Size the fan, filter, lighting, cooling, dehumidification, and intake strategy from the host-room conditions and the garden's real heat and moisture load.
Closet and Wardrobe Growing
If you already have an unused closet or wardrobe, it is natural to wonder why you should buy a tent at all. Sometimes you should not. A dry, structurally sound enclosure with useful height and a simple exhaust route can remove a large cost from the project. The savings disappear, however, when a narrow door, low ceiling, weak furniture panels, or awkward cable and air routes force you into constant repairs and workarounds.
Begin by emptying the space completely. Do not store clothes, cardboard, chemicals, paint, cleaning products, or household clutter beside the garden. Check for carpet, moisture staining, unsealed wall penetrations, heat-producing utilities, and hidden electrical junctions. Protect the floor with a removable waterproof tray. If the wardrobe is particleboard or laminated furniture, keep wet containers off the panels and inspect edges for swelling. Furniture panels are not structural ceiling joists, so do not assume they can carry a heavy fixture or carbon filter.
A wardrobe conversion normally needs two separated air openings: a low intake and a high exhaust. The intake should not sit directly beside the exhaust on the outer wall, or the enclosure may pull back the air it just expelled. Cable entries need smooth edges or grommets so sheet metal or cut wood cannot damage insulation. Fans need guards, and every opening needs to remain serviceable for cleaning.
“Does a closet still need ventilation if the room already has air conditioning?”
Question sent by: WestCoastRoots, via email.
Yes. Room air conditioning may keep the surrounding space comfortable, but heat and moisture can still collect inside a closed closet. The enclosure needs a deliberate intake, exhaust, and circulation path that exchanges air without defeating the dark period. The host-room system then handles the load released from the closet. Test both spaces together: a cool bedroom does not prove that air is moving through the canopy or that moisture is leaving the cabinet.
When a Closet Saves Money
It saves money when the space already has enough height, a washable or protectable floor, a safe outlet nearby, and a practical exhaust route. It does not save money when it requires extensive carpentry, a new circuit, a large dehumidifier, repeated repairs to moisture-damaged panels, or permanent changes that violate a lease. A small tent placed inside a larger closet can sometimes be simpler because the tent provides ready-made ports and a removable liner, but the closet still needs to release the tent's exhaust.
The complete reversible conversion sequence appears later with the other build guides. That is where we measure the usable stack, protect the floor, form the air route, mount equipment, control light leaks, and test the empty wardrobe before a plant enters.
Purpose-Built Grow Cabinets
A purpose-built cabinet is a rigid enclosure designed around a particular light, fan, container, and plant height. Compared with a tent, it offers solid mounting points, better protection from accidental bumps, and a clean furniture-like footprint. Compared with a reused wardrobe, it can be planned correctly from the beginning. Its weakness is that every mistake in dimensions or airflow becomes part of the structure.
“Can I build a grow cabinet from MDF?”
Question sent by: Colin Fraser, via contact form.
MDF can form a rigid cabinet, but unfinished edges absorb moisture, swell, and become difficult to clean. If it is used, every face, cut edge, fastener hole, and floor joint needs a durable finish appropriate for a warm, humid enclosure, and water still needs a separate removable tray. Plywood, coated panels, or metal may tolerate repeated servicing better. Whatever material you choose, keep it away from hot components and never assume the cabinet skin can safely support hanging equipment.
Plan the cabinet from the inside out. Draw the container and drainage tray first, then the expected canopy, fixture and hanging space, exhaust path, filter location, and service door. Make the tray removable. Allow access to the back of fans and filters. Do not permanently bury drivers, power strips, or controllers where a water spill or failed component cannot be reached quickly. Removable panels are more valuable than a perfectly seamless box.
Use materials appropriate for a warm, humid, electrically powered enclosure. Avoid exposed absorbent insulation, easily ignited decorative fabrics, and surfaces that cannot be cleaned. Seal cut edges against moisture. Do not use household foil as electrical or thermal protection. If the design requires new mains wiring, structural ceiling loads, or unfamiliar fire-rated construction, involve a qualified professional.
A cabinet is not a sealed appliance
A DIY cabinet combines heat, moisture, electricity, moving fan blades, and suspended equipment. Provide guarded airflow, strain relief at cable entries, spill containment, and a clear way to disconnect power. Never place it against a heater, furnace, boiler, water heater, or required electrical-panel clearance.
Space Buckets and Other Micro-Grow Enclosures
A Space Bucket is one of those projects that can be genuinely satisfying: a few carefully chosen modules become a complete micro-environment in a footprint where a tent simply will not fit. The name describes the format, not a standardized product. Some versions use one large container with a top light and small fans; others add stackable spacer rings as the plant grows. Opaque storage bins can follow the same idea, but every material and electrical component still has to be judged for heat, moisture, strength, and intended use.
The small footprint is both the attraction and the challenge. You will see the effect of a light-height change, a watering event, or a blocked fan very quickly, which makes the bucket a useful learning environment. It also means there is almost no room for the system to hide a mistake. The root zone, leaves, fixture, and fans sit close together, so temperature and humidity can move fast and access becomes precious.
“Is a taller Space Bucket always better?”
Question sent by: QuietLeaf, via Facebook page.
Extra height can improve light separation and training room, but only while the stack remains stable, serviceable, and easy to lift apart. More spacer rings also create more joints where light and air can leak, and a tall narrow tower becomes easier to tip. Build the minimum useful height, test the complete stack empty, and add one ring at a time when the plant plan truly needs it. A compact system you can safely open and clean is better than a tall system that becomes awkward.
What a Safer Micro Enclosure Needs
- An opaque, stable enclosure that will not tip when the top section is removed.
- An appropriately sized complete LED, CFL, or fluorescent fixture with all drivers, ballasts, sockets, and connections protected from water and given their required clearance.
- Guarded intake and exhaust fans, secure fasteners, and no exposed moving blades.
- Smooth, protected cable openings and a drip loop before cords reach plugs or controllers.
- A removable saucer or tray that can catch the full expected runoff.
- A temperature and humidity sensor at plant level, not pressed against the wall or directly in the fan stream.
- Enough vertical separation between leaves and the fixture at every stage.
- A way to open, inspect, clean, and disconnect the unit without lifting energized equipment over wet media.
Micro enclosures reward compact planning. A shallow, wide container may preserve more vertical room than a tall pot. A dimmable, evenly distributed fixture is easier to manage than a concentrated lamp. Training can keep the canopy below the light, but the enclosure should not depend on constant emergency bending. If the plant repeatedly touches the fixture or blocks all airflow, the enclosure is too small for that plant.
The complete Space Bucket materials list and step-by-step build appears later. Read the overview first, because the container, light, fans, wiring, runoff, and final plant height must be chosen as one small system.
REMEMBER: A micro enclosure should be controlled, not airtight. Deliberate intake, guarded exhaust, water containment, protected wiring, and removable parts matter more than making the shell look completely sealed.
Open Shelves and Utility Racks
An open shelf under a small light can be useful for seedlings, houseplants, propagation, or other lawful plants that do not require strict darkness or odor containment. It is not a complete flowering environment. Light spills into the room, the room receives all heat and humidity directly, and there is no controlled path through a filter. An open rack can still serve as a support zone beside a main enclosure, but it should not be presented as a substitute when a crop requires an uninterrupted dark period and controlled exhaust.
Vertical racks can multiply canopy area, but each tier creates its own heat, airflow, irrigation, electrical, and access problem. In a home setting, multi-tier growing often adds more complexity than useful area. It belongs in this guide as an advanced design concept, not as the default way to use a small room.
“Can an open shelf work without reflective walls?”
Question sent by: Vanessa, via email.
Yes, especially for propagation, seedlings, or a small vegetative area using a modest fixture, but the surrounding room becomes part of the system. Escaping light reduces efficiency, and the room must provide any required dark period, temperature control, humidity management, and lawful privacy. Keep water contained, secure the fixture independently, and prevent people or animals from contacting equipment. For flowering, an enclosure usually gives more predictable light control and odor routing than an exposed household shelf.
Dedicated Grow Rooms
A dedicated room offers the most freedom. Lights can be arranged around the actual canopy, environmental equipment can be sized for the room, and there is room for work aisles, storage, drainage, and independent zones. The cost is that the room itself becomes part of the controlled system. Walls, ceiling, floor, door, windows, wiring, ventilation, and neighboring rooms all matter.
Start with the building envelope. Repair leaks and moisture problems before covering them. Use washable, light-colored surfaces and a floor system that contains spills without trapping hidden water against wood or drywall. Protect windows without creating condensation pockets. Keep access to electrical panels, plumbing shutoffs, smoke alarms, and required exits. A grow room should not make the home harder to escape, inspect, or repair.
A room-sized garden also changes the equipment strategy. Portable exhaust alone may not control summer heat or late-flower moisture. An air conditioner removes sensible heat, while dehumidification removes moisture, and one appliance does not always solve both loads at the same time. A room can appear stable during early growth and become difficult later when a larger canopy transpires more water. Plan for the peak plant load, not the empty-room test.
The room around the enclosure always wins
A tent, cabinet, or bucket can sharpen control, but it cannot escape the conditions around it. When intake air is already hot and humid, increasing exhaust may simply import more heat and moisture. Before buying a stronger fan, compare intake conditions, exhaust conditions, and the host room. The useful fix is often outside the enclosure.
Spare Rooms, Basements, Attics, Garages, and Outbuildings
These are locations rather than enclosure types. A tent can sit in a spare room, a cabinet can sit in a basement, and a purpose-built room can occupy a detached structure. Judge the location by temperature stability, moisture history, insulation, electrical capacity, access, water route, exhaust route, and the consequences of a leak.
- Spare room: usually accessible and climate-moderated, but carpet, shared HVAC, windows, visitors, and household noise need planning.
- Basement: often cooler and more stable, but groundwater, condensation, radon requirements, floor drains, cold root zones, and mold history matter.
- Attic: often has poor access and severe seasonal heat. Structural loading, insulation, roof penetrations, and fire safety can make it unsuitable.
- Garage: offers space and a large door, but vehicles, fuel, solvents, dust, pests, freezing temperatures, and summer heat are serious conflicts.
- Detached structure: separates the garden from living space, but requires lawful access, suitable construction, secure power, water, climate control, and reliable monitoring.
Do not place an enclosure in a furnace room, boiler room, electrical closet, required exit route, or any space that must remain clear for building service. Avoid rooms with unresolved leaks or visible mold. If the location needs structural, roofing, mains electrical, or HVAC work, the budget should include qualified trades rather than treating those changes as DIY accessories.
“Is a garage automatically better than an attic because it is larger?”
Question sent by: Trevor Miles, via contact form.
Not automatically. A garage may offer easier access and more height, but it can also freeze, overheat, collect dust and pests, or share air with vehicles, fuel, and solvents. An attic has its own structural, access, condensation, and summer-heat risks. Compare both spaces through representative weather and normal household use. Choose the location with the safer building envelope, power, water route, exhaust path, and service access—not simply the larger floor area.
Prefabricated Pods, Containers, and Modular Rooms
Prefabricated rooms and converted containers can provide a durable, separated environment for lawful cultivation where space and regulations allow. They are not simply large tents. Metal shells experience strong solar gain and can condense moisture on cold surfaces. Insulation, vapor control, fire-rated exits, electrical design, drainage, structural loading, HVAC, and local permits become building-level questions.
For a home grower, a modular pod is usually justified only when the main building has no suitable space and the site can support a permanent installation. For commercial or institutional facilities, modular rooms can help separate crop stages and sanitation zones, but they require engineering around peak heat and moisture loads. They should not be marketed as plug-and-play if site utilities and code compliance have not been resolved.
“Is a shipping container already suitable because it is weatherproof?”
Question sent by: CedarLaneGrower, via X.
Weatherproof cargo construction does not make a container climate-ready. Sun can create severe heat, cold surfaces can condense moisture, and an uninsulated metal shell can swing rapidly between extremes. A safe conversion needs site approval, drainage, insulation strategy, vapor control, permanent-quality power, cooling and dehumidification calculations, fire-safe exits, and a serviceable air path. Treat the container as a building shell that still needs engineering, not as a finished grow room.
One Room, Two Tents, or Multiple Zones?
Separate zones can support different light schedules, plant stages, quarantine, propagation, or drying. They also multiply timers, sensors, fans, filters, watering routes, and opportunities for failure. A first-time grower normally benefits from making one enclosure stable before adding a second.
If two zones share the same host room, their loads combine. When both lights turn on, the room sees both heat loads. When both canopies transpire, the room sees both moisture loads. Exhaust from one enclosure should not become the intake for the other unless the whole system was designed for that path. Each photoperiod zone needs reliable light separation, but it also needs safe access and airflow.
“Should I build a vegetative room and a flowering room from the beginning?”
Question sent by: MapleBackyard, via Facebook page.
Only if you already need separate schedules and can support the extra electrical, airflow, and maintenance load. One stable enclosure teaches more than two unstable ones. Leave physical and electrical capacity for a second zone, then add it after the first space has completed a full lights-on and lights-off test under realistic moisture conditions.
A Decision Order That Prevents Expensive Mistakes
- Confirm legality and permission. Know the limits on plant count, access, visibility, odor, and property changes.
- Choose the host room. Check seasonal temperature, humidity, moisture history, electrical capacity, water, drainage, and exhaust.
- Define the canopy. Decide how much plant area you can manage, not how many products you want to buy.
- Select the enclosure. Tent, closet, cabinet, bucket, or room should fit the canopy and service space.
- Map heat and moisture. Identify where light heat and plant transpiration will go during both day and night cycles.
- Plan electricity and water separately. Keep connections elevated, protected, and away from runoff routes.
- Choose equipment by measured need. Use fixture maps, fan curves, filter ratings, and controller capacities rather than package labels alone.
- Dry-run the empty space. Test every system before plants make the room harder to change.
“What should I measure before making the shopping list?”
Question sent by: UrbanGardenMike, via contact form.
Start with the host room: usable floor and height, door swing, outlet and circuit capacity, water route, drainage, intake conditions, exhaust route, and seasonal temperature and humidity. Then draw the canopy, equipment zone, and service path. Those measurements decide the enclosure and environmental load; only then should the light, fan, filter, and climate equipment be selected. Shopping first reverses that logic and often leaves expensive components fighting a room they were never sized to handle.
Outbuildings and Detached Structures
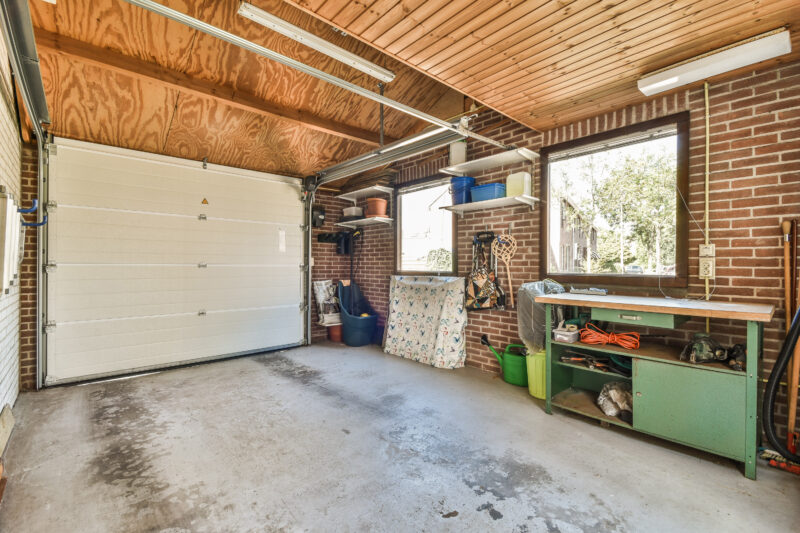
A lawful garage, shed, barn, or detached room can keep work, sound, and moisture away from living space. It also faces stronger weather swings, pest entry, dust, condensation, water-access, and security challenges. Check insulation, structural condition, safe permanent power, drainage, fire separation, and remote monitoring. Do not store fuel, solvents, vehicles, or combustion equipment in the same controlled area.
The best detached space is not the one that attracts the least attention. It is the one that can be accessed lawfully, inspected regularly, and maintained without improvising power or water. If the building cannot hold stable conditions during local extremes, use a smaller conditioned indoor enclosure instead.
“How often should I inspect a detached grow space?”
Question sent by: Megan Wallace, via Facebook page.
Inspect it often enough that a failed fan, leak, heater, or power interruption cannot develop unnoticed. Remote temperature, humidity, water, and power alerts are valuable, but they do not replace physical visits by someone able to respond. During commissioning and major weather changes, check more frequently and record what changes between visits. A detached space should have a clear emergency plan, safe access, and manual shutoffs; distance is never a reason to make the garden effectively unattended.
Build Your Indoor Growing Space Step by Step
By now, you should have a shortlist rather than a shopping cart. That is exactly where we want to be. The overview showed what each environment can offer and where it can fail; this section turns the suitable choice into a build sequence. You do not need to read every project today. Follow the one that matches your building, then return to the shared lighting, air, water, safety, and commissioning sections for the final system checks.
Keep each project reversible until the room proves itself. Measure first, assemble the shell, create the air route, protect water from electricity, install the light that suits the canopy and climate, and run the empty space through complete schedules. A permanent finish should be the last step, not the first.
ADVICE: Photograph the empty location, measurements, outlet and duct positions, equipment labels, and the finished cable and air routes. Those records make later maintenance, troubleshooting, and safe upgrades much easier.
Build a Basement Grow Area Step by Step
A basement can become a remarkably stable host room, but only after the building proves that it can remain dry, ventilated, and serviceable. The goal is not to cover unfinished surfaces until they look like a grow room. The goal is to solve water, moisture, air, electrical, and access problems while they are still visible. The sequence below explains the inspection and preparation that must happen before equipment turns an empty basement into a controlled garden.
Step 1: Read the Basement's Moisture History
Inspect after rain and during the most humid local season when possible. Look for efflorescence, water lines, rusted fasteners, peeling paint, darkened joists, musty odor, condensation on pipes, swollen wood, staining around windows, and evidence that a floor drain has backed up. Ask what happens during storms, snowmelt, power failures, and sump-pump outages. A single dry afternoon does not establish that a basement is dry.
Check local requirements for radon, combustion appliances, egress, and basement use. Do not block inspection access to foundations, drains, shutoffs, meters, furnaces, water heaters, panels, or cleanouts. Keep the cultivation area separate from fuel, solvents, laundry lint, and other household sources of contamination.
IMPORTANT: Never hide active moisture behind film, panels, or insulation. Repair the source, dry the material, and confirm that it remains dry before building in front of it.
Step 2: Repair Water Entry Before Adding Reflective Surfaces
Correct roof drainage, grading, leaks, seepage, plumbing failures, or condensate problems at their source. Dry affected materials promptly and remove damaged porous material according to the extent of the problem and local guidance. Do not trap damp masonry or wood behind plastic film, foam panels, or a permanent enclosure. Reflective finishes can wait; a visible, dry wall is easier to inspect than a beautiful surface hiding water.
Step 3: Map the Cold Surfaces
Basement air may feel comfortable while the slab, exterior wall, pipe, or rim joist is cold enough for condensation. Compare surface and air conditions during both light periods. Warm humid exhaust striking cold masonry can create a wet boundary far from the plant. Keep the enclosure away from known condensation zones and avoid directing exhaust at cold walls or pipes. Where insulation or vapor control is needed, use a design appropriate to the local building assembly rather than sealing the wall by guesswork.
| Basement Signal | Details |
|---|---|
| White mineral deposits or tide marks |
What It May Mean: Past or active moisture moving through masonry. Response Before Setup: Identify drainage or seepage source and verify drying across wet weather. |
| Condensation on pipes or walls |
What It May Mean: Surface temperature is below the air's dew point. Response Before Setup: Control moisture and surface conditions; do not aim warm humid exhaust at the surface. |
| Musty odor or stained porous material |
What It May Mean: Possible hidden or historical microbial growth. Response Before Setup: Investigate and remediate the source before covering or enclosing it. |
| Cold slab and slow container drying |
What It May Mean: Root-zone temperature and evaporation differ from room-air readings. Response Before Setup: Measure at container level and use a stable insulating stand when needed. |
| Sump pump or floor drain dependency |
What It May Mean: Water safety changes during outages or backups. Response Before Setup: Keep equipment above risk level and create an alarm and failure-response plan. |
Step 4: Create a Cleanable Floor and Water Route
Keep containers and runoff inside a removable waterproof tray. Protect the path used to carry and mix water, and make sure a spill does not run toward electrical equipment, finished walls, or stored goods. A floor drain can reduce consequences only when it is lawful, clean, functional, and protected from backup; it is not permission to discharge nutrient solution or cleaning chemicals. Collect and dispose of runoff responsibly according to local rules.
Step 5: Separate the Grow Zone From Building Services
Preserve clearances around electrical panels, combustion appliances, flues, boilers, furnaces, water heaters, pumps, meters, and shutoff valves. The enclosure must not obstruct an exit or reduce the required access route. Avoid borrowing combustion-air openings as grow-room ventilation. If the basement shares air with the rest of the home, understand how exhaust and pressure can affect odor, humidity, and appliance safety.
Step 6: Plan Permanent-Quality Power and a Deliberate Air Path
Basements often tempt growers to run long extension cords from another room. That is a warning that the site is not ready. Inventory fixture, fan, dehumidifier, heater, pump, and controller loads, including startup behavior, then confirm the circuit and protection with a qualified electrician where necessary. Keep connections elevated and visible. Route exhaust to an approved destination that will not send moisture into a crawlspace, wall, ceiling, attic, or neighboring room.
Step 7: Test the Host Room Before Installing a Large Enclosure
Measure the empty basement for several days across normal household activity, including laundry, showers, rain, and nighttime temperature changes. Then operate the intended light and air equipment without plants. A basement that needs constant dehumidification before the canopy exists may become expensive at peak transpiration. Start with a smaller enclosure when the room's capacity is uncertain, and expand only after real data shows margin.
Step 8: Build for Inspection, Not Concealment
Leave access behind the tent or room, keep foundation surfaces and pipe joints visible where possible, and use removable panels instead of permanent layers that hide leaks. Add a leak alarm at the lowest practical point and a temperature-humidity sensor outside the enclosure. Recheck the basement after storms and seasonal changes. The finished area should make building problems easier to notice, not harder.
“My basement feels cool and dry. Do I still need a dehumidifier?”
Question sent by: LakeEffectGrow, via contact form.
Not automatically. Measure the empty basement, the enclosure, and the lights-off period as the canopy develops. Cool air can feel dry while cold walls still collect condensation, and a dehumidifier adds heat while it removes moisture. Buy capacity for a measured load, then confirm where the condensate will drain safely.
Build an Attic Grow Space Step by Step
An attic can look like unused free space, but it is often the part of the building with the fastest temperature swings and the least forgiving access. We should earn the right to use it. The structure, roof, insulation, wiring, escape route, water risk, and worst-season climate must all work before a tent or cabinet goes upstairs.
Step 1: Confirm Structure, Access, and Permission
Confirm that the floor is designed for occupancy and for the combined load of people, equipment, water, containers, and any enclosure. Do not assume that visible boards over ceiling joists form a usable floor. Keep required access to roof spaces, junction boxes, vents, chimneys, and building services open. A qualified building professional should assess uncertain structure, altered framing, or a proposed permanent conversion.
Walk the full route from the water source to the proposed garden. Tight stairs, pull-down ladders, low beams, and narrow hatches turn ordinary watering and emergency access into a risk. If a full container, tray, fixture, or fan cannot be carried and serviced safely, choose a smaller enclosure or another room.
Step 2: Measure the Worst Season Before Building
Record temperature and humidity at floor, canopy, and roof-deck height through the warmest practical daytime period and a cool night. Repeat when outdoor conditions change. An attic that feels comfortable in spring can become unusable beneath a summer roof, while winter cold can create condensation where warm humid air meets sheathing or framing.
Do not size the project from one pleasant reading. Estimate the combined heat from lights, ballasts or drivers, fans, dehumidification, and other equipment, then test a representative load. If the empty attic already approaches the equipment's operating limits, a larger fan inside a tent cannot create cool intake air from nowhere.
Step 3: Inspect Roof and Moisture Paths
Look for staining, damp insulation, rusty fasteners, daylight around penetrations, mold-like growth, blocked vents, and evidence of ice dams or wind-driven rain. Repair the source before covering anything. Never exhaust grow-room moisture loosely into the attic; warm humid air can condense on the underside of a cool roof and damage materials far from the enclosure.
Step 4: Preserve the Building's Insulation and Ventilation Strategy
Roof and attic assemblies manage heat and moisture differently across climates. Keep soffit, ridge, gable, or mechanical ventilation paths functioning as designed. Do not pack insulation against heat-producing equipment or cut a vapor-control layer by guesswork. Where insulation, air sealing, or a new duct penetration is needed, use a design appropriate to the building and local code.
Step 5: Create a Low-Consequence Water Zone
Place the enclosure inside rigid waterproof containment with raised edges, then add a leak alarm at the lowest point. Keep the wet zone away from ceiling penetrations and electrical junctions below. Hand-carry only an amount of water that can be controlled safely, or use a professionally planned supply and drainage route. A tray buys response time; it does not make an upstairs flood harmless.
Step 6: Provide Safe Power, Detection, and Shutdown Access
Inventory every continuous and intermittent load, including lighting, ballast or driver, exhaust, circulation, cooling, heating, dehumidification, pumps, and controls. Do not rely on an extension cord through a hatch or stairwell. Preserve smoke detection, egress, equipment clearances, and access to a clearly labeled shutdown. Obtain qualified electrical work where a new circuit or permanent wiring is required.
Step 7: Choose a Small Enclosure and a Deliberate Air Route
A removable tent or cabinet usually carries less building risk than immediately finishing the whole attic. Leave inspection space around it. Route exhaust only to a lawful destination designed to accept the heat and moisture, and keep discharge separated from intake. A short tent may fit beneath the roofline, but calculate the container, plant, fixture, hangers, filter, and clearance before buying it.
Step 8: Commission During a Realistic Weather Window
Run the empty enclosure through complete light and dark cycles with the intended light technology and air equipment. Record canopy level, host attic, outside conditions, roof-adjacent temperature, humidity, and power draw. Test alarms and the shutdown route. If safe conditions depend on perfect weather, an open hatch, or constant supervision, the attic is not ready.
IMPORTANT: Privacy does not cancel building physics. An attic is suitable only when it remains structurally sound, accessible, dry, electrically safe, and controllable during the local hot and cold extremes.
Build a Spare-Room or Main-Floor Grow Space Step by Step
A spare room is attractive because it is easy to reach and may already share the home's comfortable temperature range. That convenience is valuable. It also means the garden sits close to carpet, drywall, shared air, visitors, animals, and everyday household traffic, so the best conversion remains clean, reversible, and easy to inspect.
Step 1: Decide Whether the Room Hosts an Enclosure or Becomes the Enclosure
For most first setups, a tent inside the room is simpler than converting every wall and window. It contains light, gives equipment a clear frame, and can be removed later. A full-room conversion makes more sense only when the electrical, air, moisture, cleaning, and access plan justifies the permanent work.
Step 2: Empty, Clean, and Inspect
Remove stored fabrics, cardboard, clutter, and anything that blocks wall or floor inspection. Check around windows, baseboards, plumbing walls, vents, and exterior corners for leaks, condensation, pests, or damaged finishes. Repair the source of moisture before protecting the surface.
Step 3: Protect the Floor Without Hiding It
Use rigid waterproof containment beneath the wet zone. Carpet needs particular caution because a small spill can remain hidden beneath a liner. Keep enough exposed perimeter to inspect for dampness, and place a leak alarm where water would collect first. Do not permanently trap a questionable floor beneath film.
Step 4: Preserve Egress, Detection, and Household Access
The enclosure, duct, and cables must not block the room door, required window access, smoke detector, outlet, or heating and cooling equipment. Keep supplies secured from children, visitors, and animals. If the room must still serve another household purpose, draw that route before choosing the garden footprint.
Step 5: Map Intake, Exhaust, and Shared HVAC
A tent that exhausts back into a closed bedroom eventually heats and humidifies that bedroom. Decide where replacement air comes from and where warm humid air can go. Do not feed moisture into a wall, ceiling, closet, or shared return. Check how exhaust pressure affects doors, odor movement, and any combustion appliances elsewhere in the building.
Step 6: Build the Electrical and Water Routine Around Separation
Keep controls and connections elevated, visible, and outside the expected runoff path. Use correctly rated timers and protection required for the location. Carry and mix water on a protected surface, and leave a clear route for removing runoff. A simple hand-watered room still needs a spill plan.
Step 7: Control Light Without Making the Room Unsafe
Use the enclosure's own opaque shell first. Window treatment must remain lawful, reversible where required, and compatible with egress and condensation control. Test for light entering during the dark period and light escaping during operation, but do not cover heaters, vents, detectors, or electrical equipment.
Step 8: Run the Room as the Household Will Actually Use It
Complete a dry run with the door in its normal position, normal heating or cooling active, and nearby showers, cooking, laundry, or sleeping routines unchanged. Listen for vibration and track temperature and humidity inside the enclosure and in the room. A setup is ready when it works without turning the rest of the home into its hidden climate system.
Build a Grow Tent Step by Step
Let’s build it in the order that makes later adjustments easier. We will decide where the air enters and leaves, reserve the full vertical stack, keep wet work away from power, and make sure every component can still be reached after the canopy fills. The frame and fabric are only the shell; the host room still carries the final heat, moisture, electrical, and drainage burden. Work only in a lawful location where you have permission to install and operate the equipment.
Before You Buy: Choose by Usable Space and Service Access
Do not let the floor dimensions make the decision alone. The right tent leaves enough height for the container, plant, support, fixture, hangers, and safe separation, while still allowing the door to open and the equipment to be serviced. A slightly smaller tent with full access often produces a calmer, more controllable garden than the biggest shell squeezed into the room.
“Do I need the biggest tent that fits my room?”
Question sent by: Chloe Bennett, via email.
No. Choose the smallest enclosure that comfortably supports your planned canopy, equipment, and access. An oversized tent costs more to light and condition, while an undersized tent leaves no room to work. Measure the complete vertical stack and make sure you can reach every plant without crawling under equipment or removing half the garden.
| Check Before Purchase | What to Look For |
|---|---|
| Footprint and height |
Measure the host room, door swing, working aisle, ceiling, container, mature canopy, fixture, filter, and hanging hardware. Advertised height is not plant height. |
| Shell and zippers |
Look for an opaque outer shell, durable seams, covered zipper paths, and a cleanable reflective interior. No fabric specification replaces a real light-leak test after assembly. |
| Ports and sleeves |
Match the number, diameter, and position of duct and cable openings to the air plan. More holes are not useful when they sit on the wrong side or cannot close securely. |
| Frame and bars |
Confirm published load ratings and the location of upper support bars. Preserve margin for the light, filter, fan, straps, and any secondary restraints. |
| Doors and observation access |
Decide whether every container and back corner can be reached. Side access may be more valuable than a small increase in floor area. |
| Floor liner and replacement parts |
Prefer a removable, raised-edge liner and parts that can be replaced. A rigid tray beneath the wet zone is still wise when the host floor is vulnerable. |
Step 1: Measure the Host Room, Not Only the Tent Footprint
Mark the proposed footprint on the floor and then add working space outside the doors. Check ceiling height, baseboards, radiators, windows, outlets, door swing, and the route used to carry water. Leave enough clearance to open the tent fully, remove a container without tipping it, clean behind the enclosure, and reach the filter or fan. A tent pressed tightly between walls may fit on paper and still be impossible to maintain.
Now calculate the internal vertical stack. Add the tray and container, expected plant and support height, safe fixture-to-canopy distance, fixture thickness, hanging hardware, and any filter or duct installed above the light. This calculation decides whether equipment can remain overhead or should move outside the tent. It also reveals whether a shorter container, compact cultivar, or wider training plan is needed.
Step 2: Inspect Every Part Before Assembly
Lay the poles, corners, hanging bars, liner, straps, ports, and fabric on a clean floor. Compare them with the manufacturer's parts list and load ratings. Look for bent poles, damaged stitching, sharp burrs, stuck zippers, or missing connectors. Resolve those problems before the tent carries a light, fan, or filter. Do not treat the published frame limit as a target; preserve a safety margin and distribute weight across the intended support bars.
Step 3: Assemble the Frame and Fit the Fabric Without Forcing It
Build the lower rectangle, vertical posts, and top frame in the sequence supplied for the enclosure. Confirm every connector is fully seated and the frame stands square before pulling the shell over it. Work gradually around the corners. Forcing one tight corner can damage a zipper or seam and may twist the frame. Install the removable floor liner after the shell is seated, then place a rigid waterproof tray or protected floor beneath the growing area when a spill would damage the host room.
Step 4: Perform the Two-Direction Light-Leak Test
Darken the host room, switch on the tent light, close every zipper and sleeve, and inspect the outside slowly. Mark glowing seams, pinholes, loose port covers, and zipper gaps without staring directly at the fixture. Then reverse the test: make the tent dark, illuminate the host room, sit inside briefly with the grow light safely off, and allow your eyes to adjust. This second pass finds outside light that could interrupt the plant's dark period.
Close unused ports with their intended covers and correct small removable gaps without blocking ventilation or creating a hot surface. A large glow, torn seam, failed zipper, or translucent shell is a product or enclosure problem, not something to hide beneath layers of improvised material. Repeat the test after ducting and cables are installed because those routes can reopen a gap.
MASTER TIP: The first golden rule after assembling any enclosure is simple: prove that darkness stays dark. Test before plants enter, then test again after every port, cable, fan, and duct is in place.
Step 5: Draw the Air Route Before Hanging Equipment
Plan cooler intake air low in the enclosure and warmer exhaust high on the opposite side. Keep the intake and exhaust separated outside the tent so discharged air is not immediately pulled back in. Decide whether the filter and fan will hang inside, sit outside, or use a mixed arrangement. Short, smooth duct runs with gentle bends preserve more airflow than long crushed ducting. If air must travel through a filter, bends, silencers, or a long run, size the fan from its delivered airflow under restriction rather than its unrestricted rating.
| Tent Component | Details |
|---|---|
| Exhaust fan |
Why It Is Needed: Moves heat and moisture out of the enclosure and creates the intended air path. When It May Be Conditional: A truly engineered conditioned room may use another verified exchange strategy, but a fan moving air only inside the tent is not exhaust. |
| Carbon filter |
Why It Is Needed: Controls odor when law, household comfort, or the location requires it. When It May Be Conditional: It is conditional when odor control is genuinely unnecessary; it must still be compatible with the fan and airflow direction when used. |
| Circulation fan |
Why It Is Needed: Mixes air around and through the canopy to reduce stagnant pockets. When It May Be Conditional: Fan number and size depend on canopy depth; harsh direct wind is not the goal. |
| Waterproof tray |
Why It Is Needed: Limits the consequence of runoff, a missed saucer, or a small leak. When It May Be Conditional: The required capacity depends on the floor and irrigation volume, but every setup needs a deliberate water-containment plan. |
| Environmental sensors |
Why It Is Needed: Show what the plant experiences during lights-on and lights-off periods. When It May Be Conditional: Remote logging is optional; a reliable local temperature and humidity reading is not. |
PRO TIP: Draw the duct route at its real diameter and bend radius. A line that looks easy on paper may occupy the same ceiling space needed by the filter, light hangers, or door.
Step 6: Hang the Heaviest Air Equipment First
If the carbon filter and exhaust fan will be overhead, install them before the light while the tent is empty. Use rated straps or hangers attached to the intended frame members. Give heavy components a second independent retention point where practical, and keep them away from the fabric so vibration does not abrade the shell. Check that the filter can be removed later without dismantling the entire garden. Equipment that cannot be serviced will eventually be neglected.
“Should I hang the light before the exhaust system?”
Question sent by: Sophie Anderson, via contact form.
Plan both together, but hang the heaviest filter, fan, and main ducting first when they will sit overhead. Then position the light around the remaining safe height and airflow. This sequence prevents a finished light installation from blocking the equipment that is harder to lift and service. Test the complete vertical stack before plants enter.
Step 7: Install the Light and Protect the Adjustment Range
Hang the fixture from rated hardware and center it over the planned canopy, not automatically in the geometric center of an empty tent. Confirm the driver, dimmer, and cable connections remain accessible. Raise and lower the fixture through its full intended range while the tent is empty. Cords must not carry fixture weight or tighten when the light moves. If the light shares the upper zone with a filter, make sure neither blocks the other or prevents the fixture from reaching a safe height.
IMPORTANT: Install suspended equipment as though you will need to inspect and remove it with plants in the tent. A clean service route and redundant support are more valuable than using every centimeter of ceiling space.
Step 8: Complete Intake, Exhaust, and Circulation
Open only the ports the system needs and close unused ones to control the air route and light leakage. A passive intake must provide enough free area to avoid pulling the tent walls inward excessively or starving the fan. Add screened or filtered intake protection where dust and pests are a concern, remembering that every screen adds resistance. Place circulation fans so leaves move gently and air crosses above and below the canopy. Do not aim a strong stream continuously at one tender shoot.
Step 9: Route Electricity Above the Water Line
Keep power strips, plug connections, drivers, and controllers elevated and outside likely runoff paths. Use drip loops before cords reach connections, protect cables where they pass through ports, and keep enough slack for doors and adjustable lights. Do not overload outlets, daisy-chain power strips, bury extension connections under the tent, or run damaged flexible cords through doors. Where the room requires new circuits, permanent wiring, or wet-location protection, use a qualified electrician and follow local code.
Step 10: Place Sensors Where the Plant Lives
Place the main temperature and humidity sensor near canopy height, shaded from direct fixture radiation and outside the direct stream of a fan or humidifier. Add a second reading in the host room when possible. The difference between the intake room and the canopy tells us whether the enclosure is adding excessive heat or moisture. Move the canopy sensor as the plant grows rather than leaving it at the original seedling height.
Step 11: Commission the Empty Tent
Run the completed tent for at least one full programmed day and night cycle before plants enter. Record canopy-level and host-room temperature and humidity near the end of lights-on, shortly after lights-off, and before the next light period. Check noise, vibration, light leaks, negative pressure, duct temperature, zipper operation, and the response after a brief power interruption. Then repeat the test with clean water in the trays or containers so the water route and nighttime humidity response are not imaginary.
Correct the largest limitation first. If the host room keeps heating, a larger tent fan may only move the same heat around the home. If the tent collapses inward, improve intake area before assuming the exhaust needs more speed. If humidity rises after lights-off, plan dehumidification, timed exhaust, or a host-room change before the canopy becomes dense.
Grow Tent Advantages and Drawbacks
Advantages: tents are reversible, washable, comparatively fast to assemble, and easier to modify than permanent rooms. Standard ports simplify ducting, the reflective shell defines the light area, and equipment can move to a new room later. They are a strong starting point when the host room is already reasonably stable.
Drawbacks: fabric and zippers can leak light, frames have limited load capacity, and the tent does not remove heat or moisture from the building. Large filters consume headroom, thin shells transmit fan noise, and access becomes difficult when the canopy fills every wall. A tent is an enclosure, not a substitute for a suitable room.
The best tent size and hanging order are therefore site decisions. Use the checklist above, then compare it with the shorter sizing question that follows.
REMEMBER: Tent dimensions describe the fabric shell, not the usable plant area. Ducting, a filter, hanging hardware, containers, trays, sensors, and access space all reduce what the plants can actually use.
Build a Closet or Wardrobe Grow Space Step by Step
Before we cut anything, let’s separate two projects that look similar but behave differently. A built-in closet is part of the home and may involve walls, fire separation, shared air, and landlord permission. A wardrobe is furniture: easier to move, but often made from thin particleboard that cannot safely support heavy equipment. In both cases, the best conversion stays reversible, inspectable, and dry.
Step 1: Confirm Permission and Choose the Type of Conversion
Check local cultivation rules, lease terms, property permission, and any restrictions on altering doors, walls, or ventilation. Decide whether the space will be a simple enclosure inside a stable room or whether it truly needs openings through furniture or building surfaces. If permanent exhaust, a new circuit, or structural work is required, treat it as building work rather than a casual cabinet modification.
Step 2: Empty, Clean, and Inspect the Entire Space
Remove clothes, boxes, carpet remnants, paper, chemicals, aerosols, paint, and stored household goods. Inspect corners, the ceiling, baseboards, hinge side, back panel, and floor for moisture staining, swelling, mold, pests, loose laminates, exposed fasteners, or hidden heat-producing equipment. A musty closet should be repaired and dried before reflective material hides the evidence. Do not place a grow enclosure around a water heater, electrical panel, furnace, or required service clearance.
Step 3: Draw the Internal Stack and Door Access
Measure clear internal width, depth, and height with the door closed. Subtract the tray, container, plant, support, light distance, fixture, hangers, fan, filter, and cable bend radius. Then test whether the door opening is wide enough to remove the tray and container. A large internal volume is not useful when the plant or equipment cannot pass through the door.
| Conversion Type | Details |
|---|---|
| Built-in closet |
Strongest Use Case: Uses existing height and a room-quality structure when alterations are permitted. Main Limitation: Exhaust, shared HVAC, carpet, wall penetrations, and restoration can turn it into a building project. |
| Freestanding wardrobe |
Strongest Use Case: Reversible furniture footprint for a very small, lightweight setup. Main Limitation: Thin panels, narrow doors, moisture-sensitive edges, and low load capacity. |
| Small tent inside a closet |
Strongest Use Case: Adds ready-made ports, reflective walls, and a liner while the closet provides visual separation. Main Limitation: The closet must still release the tent's heat and moisture; double enclosure reduces usable space. |
| Open closet with tent in the room |
Strongest Use Case: Uses the closet for dry storage while the tent handles the plant environment. Main Limitation: Needs enough room outside the tent and does not hide fan noise or host-room humidity. |
Step 4: Protect the Floor and Moisture-Sensitive Edges
Install a removable waterproof tray sized for the complete container area and expected runoff. Keep a second absorbent cleanup layer outside the door during watering, then remove it when dry rather than leaving damp fabric in the enclosure. Seal exposed cut edges of suitable furniture materials with a compatible finish, but never use coatings to conceal active mold or water entry. Lift containers slightly when a cold slab or wet panel keeps the root zone colder than the measured room air.
Step 5: Create a Low Intake and High Exhaust Path
Air should enter low, pass the plant and light, and leave high. In a wardrobe, openings can be made only after confirming the panel is non-structural and free of wiring or hardware. Use an appropriate cutting method, smooth every edge, and install a sleeve, grille, or grommet so vibration and sharp material cannot damage ducts or cables. In a built-in closet, do not cut walls, ceilings, doors, or fire-rated assemblies until the route has been approved and hidden utilities are understood.
Separate the exterior intake and exhaust as much as the room allows. Exhausting into the same closed closet or wall cavity only relocates heat and moisture. If the host room is the exhaust destination, it needs its own path to release the combined load. A door gap may serve as part of a passive intake only when it provides enough free area and does not create an unacceptable light leak.
Step 6: Add Safe, Independent Equipment Supports
Use structural support intended for the load. Do not suspend a heavy filter or fixture from a thin wardrobe roof, clothing rail, decorative shelf pin, adhesive hook, or cable. A freestanding internal frame can carry equipment without asking furniture panels to behave like ceiling joists. Keep a safety margin below all published ratings and use secondary retention where a falling component could strike the plant or container.
Step 7: Control Light Without Choking the Intake
Weather stripping around a door can reduce light leakage, but a completely sealed door can also starve a passive intake. Treat light control and airflow as one design. Use a baffled intake path that turns light without crushing air volume, and inspect it for dust. Check the room in darkness after the light has been on long enough to warm seams and panels; materials can move slightly as temperature changes.
Step 8: Route Cables and Controls for Daily Access
Install smooth cable entries above the tray and create drip loops before plugs or controllers. Keep power distribution elevated, visible, and reachable without moving the plant. Drivers and controllers need their own ventilation and must remain within their temperature ratings. Do not place a timer behind the container, tape adapters to the floor, or close a wardrobe door on a flexible cord. If the existing outlet or circuit is questionable, stop and use a qualified electrician.
ADVICE: Keep the conversion reversible. A removable intake panel, freestanding equipment frame, waterproof tray, and replaceable door seal are usually easier to inspect and restore than permanent holes and hidden wiring.
Step 9: Install Air Movement, Sensors, and Odor Control
Use a guarded circulation fan that moves leaves gently without occupying the plant's entire headroom. Place the canopy sensor away from the light beam, wall, and direct fan stream. Add a host-room sensor outside the wardrobe. When odor control is required, match the filter and fan as a system and include the filter's resistance in the airflow plan. A small enclosure can develop strong negative pressure quickly; excessive suction is not proof of good exchange.
Step 10: Run a Reversible Empty-Room Test
Operate the complete wardrobe for a full light and dark cycle with the door closed. Record temperature and humidity inside and outside, inspect every cable and support, confirm the door opens freely, and test power-loss recovery. Add a container of clean water or wet medium for a second test so nighttime moisture is represented. If panels become warm, edges swell, condensation forms, or the room around the wardrobe keeps heating, correct the source before plants enter.
Commissioning
Commissioning is the controlled test period before plants are added. Power, airflow, lighting, sensors, water containment, alarms, and recovery from simple failures are checked individually and together while corrections are still low-risk.
Wardrobe and Closet Advantages and Drawbacks
Advantages: an existing enclosure can lower initial cost, blend into a room, and preserve floor area. A carefully converted wardrobe can be moved, while a built-in closet may offer more usable height than a short tent. Reusing sound materials can be sensible when the air path and electrical plan remain simple.
Drawbacks: narrow doors, limited depth, moisture-sensitive panels, poor structural support, and difficult ventilation can erase the savings. Built-in closets may share walls or air with living spaces, and furniture interiors are not automatically fire-, heat-, or water-resistant. The lower the conversion cost, the more important it is to avoid improvised wiring and hidden moisture.
The door test exposes the real layout
Before calling a closet finished, we open every door, carry in a watering container, reach the back corners, and remove the largest tray as if the garden were already full. If that simple rehearsal becomes a balancing act, we change the layout before the plant makes access harder.
“Can I convert a rented wardrobe without cutting it?”
Question sent by: Hannah, via Facebook page.
Sometimes. A freestanding internal frame, removable tray, door-gap or replaceable-panel intake, and duct routed through an existing opening can keep the project reversible. The enclosure still needs a real exhaust destination and safe cable route. If the only workable design requires permanent wall changes or overloaded furniture panels, a small tent is usually the cleaner choice.
After the conversion plan is complete, compare its full cost with a tent rather than treating the empty wardrobe as free equipment.
“If I already own a wardrobe, can I skip buying a tent?”
Question sent by: Avery Collins, via contact form.
Yes, if the wardrobe can be made light-controlled, ventilated, washable, and electrically safe without turning into an expensive construction project. Price the openings, fans, mounting hardware, floor tray, seals, and restoration work first. A free cabinet is only cheaper when its conversion remains simple.
Build a Purpose-Built Grow Cabinet Step by Step
A cabinet sits between a wardrobe conversion and a tent. It can be compact, discreet, and visually tidy, but the smaller box magnifies heat, noise, access, and wiring mistakes. Treat it as a ventilated enclosure that lives inside a host room, not as a sealed appliance that can solve its own climate.
Step 1: Choose a Stable, Cleanable Shell
Use a rigid cabinet that stands square, closes reliably, and has no swollen panels, loose back, exposed sharp hardware, strong chemical odor, or hidden pest damage. Confirm that shelves and hanging rails can be removed without weakening the structure. Anchor tall furniture against tipping where appropriate, but never assume a thin panel can carry a light or filter.
Step 2: Draw the Full Vertical Stack
Measure the saucer, container, root zone, trained canopy, fixture, hangers, sensor, air gap, and access needed to remove each part. Door openings can be narrower than the interior, so test the largest tray and container through the actual door. Plan how the plant leaves the cabinet without touching an energized fixture.
Step 3: Protect the Base and Every Cut Edge
Install removable rigid containment with raised edges. Seal or edge every opening so cables and duct cannot rub against raw metal, splintered wood, or cut composite board. Do not let water reach particleboard edges; once they swell, the cabinet becomes difficult to clean and may no longer close correctly.
Step 4: Form a Low Intake and High Exhaust
Place intake low and exhaust high with enough separation to sweep the cabinet rather than short-circuit directly between holes. Size openings from the fan's real restricted performance. Add a light trap that preserves free area instead of stuffing the intake with dense material. Guard accessible blades and keep leaves away from the fan.
Step 5: Install Independent Supports
Support the light, fan, and filter from members rated for their combined weight or from an independent frame. Use mechanical fasteners and a secondary restraint where appropriate. Adhesive hooks, thin backing board, and clothing rails of unknown capacity are not overhead equipment supports.
Step 6: Match the Light to the Small Rectangle
A compact dimmable LED usually gives the easiest control in a short cabinet. A complete T5, T8, or CFL fixture can be a low-cost option for propagation or a shallow young canopy when safe equipment is already available. HID can grow plants well, but a small cabinet often lacks the clearance and ventilation needed for its radiant heat. Choose from canopy measurements and the complete heat plan, not from lamp price alone.
Step 7: Keep Mains Connections Outside the Wet Interior
Route cords through smooth grommets with strain relief and drip loops. Place power supplies, controllers, plugs, and power strips outside the runoff zone with the ventilation their instructions require. Do not build exposed sockets or splices into a humid cabinet.
Step 8: Seal Light Gently and Preserve Airflow
Adjust hinges and catches before adding removable weather seals. Darken the host room, operate the light, and mark leaks; then reverse the test to find outside light entering the cabinet. Correct gaps around doors and cable routes without compressing the intake or preventing the door from opening quickly.
Step 9: Commission for Heat, Noise, and Serviceability
Run complete light and dark cycles, record canopy and host-room conditions, and check surface temperatures around the fixture, exhaust, driver, ballast, and cable openings. Open the door, remove the saucer, adjust the light, and clean the intake during the test. If ordinary service requires dismantling live equipment, redesign before plants enter.
Build a Space Bucket Step by Step
Now let’s turn the idea into a buildable system. We want rigid opaque containers, a low-heat dimmable light, guarded low-voltage fans, plug-in components used within their ratings, a removable runoff tray, and no exposed mains-voltage connections inside the humid container. Treat the bucket as a compact modular enclosure—not as a shortcut around electrical, fire, moisture, or cultivation rules—and build it only for lawful cultivation in a dry, inspectable host room.
Space Bucket Materials and Tools
| Part | Details |
|---|---|
| Base and spacer containers |
What to Look For: Opaque, clean, rigid containers of known material that stack securely; enough total height for the complete plant and light system. Why It Matters: Unknown or brittle plastic can deform, crack, or produce sharp edges. A stable stack is essential when the top is removed. |
| Removable top |
What to Look For: A rigid lid or top section that supports the intended fixture without relying on tape or adhesive alone. Why It Matters: The light must remain secure and removable without lifting energized parts over wet media. |
| Light |
What to Look For: A compact dimmable LED, or a complete and properly mounted CFL or fluorescent fixture suited to the enclosure, with guarded connections and all required clearances. Why It Matters: A concentrated lamp, too many bulbs, or an oversized fixture can create a hot spot before the average air temperature looks high. The cheapest lamp is not economical if sockets, wiring, heat, and replacement bulbs multiply. |
| Intake and exhaust |
What to Look For: Guarded, correctly oriented fans—preferably low-voltage inside the container—with suitable grilles, filters, and secure fasteners. Why It Matters: Small volumes change temperature quickly; guards protect fingers, leaves, and cables. |
| Cable protection |
What to Look For: Grommets, sleeves, strain relief, drip loops, and elevated external connections. Why It Matters: Cut plastic edges and runoff should never contact cable insulation or plug connections. |
| Water control |
What to Look For: A wide container or fabric pot that fits the footprint, plus a removable saucer able to hold expected runoff. Why It Matters: The base should not drain onto the host-room floor, and the saucer must be removable without dismantling the bucket. |
| Monitoring |
What to Look For: A compact temperature and humidity sensor at canopy height and a reliable timer or controller rated for the load. Why It Matters: Changes happen quickly in a micro enclosure; guesses are not fast enough. |
| Cutting and finishing tools |
What to Look For: Tools appropriate to the material, eye protection, a stable work surface, files or edge trim, and ventilation for the work area. Why It Matters: Clean holes and smooth edges reduce cable, duct, and hand injuries. Do not melt plastic with an improvised hot tool. |
Step 1: Choose the Diameter, Height, and Plant Plan Together
Begin with the container and canopy, not the lamp. Draw a side view of the complete stack: saucer, root container, plant structure, safe light distance, fixture thickness, fan openings, lid, and the space needed to lift the top. A shallow, wide root container often preserves more useful height than a tall narrow pot. Plan one compact canopy that can be reached from the opening; a micro enclosure is not the place to crowd several independent plants.
Use enough spacer rings to add height gradually. Every ring should lock into the stack without rocking. If the proposed container narrows sharply, becomes top-heavy, or cannot stand securely with the light installed, choose a different shell. Stability is a requirement, not a cosmetic improvement.
Step 2: Clean, Inspect, and Dry-Fit the Containers
Wash new or reused containers with an appropriate mild cleaner, rinse them, and let them dry fully. Reject containers that held unknown chemicals, fuel, pesticides, or strong solvents. Stack the base, rings, and top on a level floor. Mark alignment points so fan openings, access points, and seams return to the same orientation after cleaning. Lift the top and remove the saucer several times to prove daily access works before any holes are cut.
Step 3: Build Stackable Spacer Rings
“How many spacer rings should I build for a Space Bucket?”
Question sent by: Lucas Morgan, via email.
Build from the complete vertical stack, not a fixed number. Add the saucer, root container, planned canopy, safe light distance, fixture, and service clearance, then divide the remaining shell into stable removable rings. Two or three useful rings are better than a tall wobbly tower. Keep one spare ring only if it locks securely and does not tempt you to exceed the light or airflow capacity.
Mark a consistent band around each spacer container so the remaining rim nests securely with the next section. Cut only on a stable work surface using a method appropriate for that material. Wear eye protection, control the workpiece, and keep the area ventilated. Smooth every cut edge with a file, trim, or protective channel. Do not use an open flame, soldering iron, or improvised heated blade to melt ventilation holes; uncontrolled heat can deform the shell and create fumes.
Dry-fit the finished rings and apply a gentle sideways load at the top. The stack should not slip apart or wobble. Use mechanical clips or another removable locking method if the geometry does not hold reliably. Tape can help control small light leaks, but it should not be the only structural connection.
MASTER TIP: Mark every spacer ring with its orientation and final order before drilling fan or cable openings. Dry-fit the complete stack, twist and lift the removable top, and confirm that no ring can slip during service.
Step 4: Mark a Low Intake and High Exhaust
Place the intake low enough to bring cooler air past the root container without blowing directly into wet media. Place the exhaust high near the warmest zone, usually below or beside the light rather than where leaves can block it. Keep the two openings separated around the container. When the intake is passive, provide more free intake area than the exhaust outlet so the fan is not starved. A dust screen, filter, or light baffle reduces free area, so oversize the opening and keep it clean.
Use a cardboard template to check fan body, grille, fasteners, and cable position before cutting. Confirm no opening weakens the locking rim. After cutting, smooth the edges and fit grilles or sleeves. Air should have a deliberate path from the intake, across the canopy, and out through the top zone.
Step 5: Install Guarded Fans and Verify Direction
Mount the intake and exhaust with mechanical fasteners suited to the shell. Install guards on any accessible blade side. Follow the arrows on the fan body, then confirm airflow with a strip of lightweight paper before the plant enters. Keep the fan cable clear of blades and use strain relief where it exits the enclosure. Low-voltage fans keep mains connections outside the bucket, but their power supply must still be correctly rated and kept dry with ventilation around it.
Keep improvised mains wiring out of the bucket
Do not place open lamp holders, exposed splices, bare terminals, homemade mains adapters, or unprotected plug connections inside the humid enclosure. Use complete listed plug-in components within their instructions, keep connections elevated and outside the runoff path, and ask a qualified electrician to handle any new permanent wiring.
Step 6: Build a Removable Light Top
Center the fixture over the usable canopy and attach it to a rigid lid or top frame with rated mechanical hardware. Preserve the manufacturer's clearance around heat sinks, drivers, ballasts, sockets, and ventilation openings. The top should lift off without pulling cables tight or exposing energized contacts. Mount a driver or ballast outside the enclosure only when the equipment design allows it and all cable, enclosure, and clearance requirements are followed.
A compact dimmable LED is usually the simplest full-cycle choice because output can be reduced as the plant approaches the top and usable light can be spread across the small circle. A safe CFL or compact fluorescent fixture can lower the entry cost for propagation, early vegetative growth, or a very small experiment when it is already available. CFLs are not heat-free: several bulbs and sockets can turn the lid into a crowded, warm electrical zone. Linear T5 or T8 fixtures are usually better suited to a shelf or short rectangular cabinet than a round bucket.
| Micro-Light Option | Use It Honestly |
|---|---|
| Compact dimmable LED |
Strength: Efficient, low-profile, adjustable, and easier to distribute across a small canopy. Check: Actual wall draw, dimensions, driver location, dimming range, canopy map, clearances, and surface temperature. |
| CFL or compact fluorescent fixture |
Strength: Low initial cost when a complete safe fixture is already available; useful for young plants and a tiny canopy. Check: Socket rating, glass protection, reflector, total input watts, heat from every lamp and ballast, and whether the complete fixture can remain outside the wet zone. |
| Small HID |
Strength: High-intensity discharge lighting can grow plants well in a compatible enclosure. Check: A bucket rarely provides the clearance, radiant-heat margin, ballast arrangement, or ventilation that HID expects. Do not force a high-intensity system into a volume that cannot support it. |
Whichever source you choose, start conservatively, measure the canopy response, and increase delivered light only when temperature, distance, and plant behavior remain acceptable. The goal is even usable light, not the highest possible wattage inside a small volume.
Step 7: Finish the Interior and Control Light Leaks
Many opaque light-colored interiors already reflect enough light for a micro enclosure. If a liner is added, choose a washable material suitable for the expected heat and humidity, attach it without loose flaps near fans, and avoid creating hidden water pockets. Do not use crumpled household foil: it tears, creates sharp edges, and is not an electrical or fire barrier. Close light leaks with removable seals only after confirming they do not block the air route.
Step 8: Install the Root Zone and Runoff System
Place a stable saucer in the base and check that it can be removed through the opening while full enough to represent normal runoff. The plant container should not block the intake or press against fan guards. Leave space to inspect the medium surface and container sides. A small reservoir of standing runoff can rapidly raise humidity and reduce root-zone oxygen, so remove it rather than allowing the base bucket to become a drain.
Step 9: Route Cables, Add Drip Loops, and Place the Sensor
Pass cables through smooth grommets above the maximum water level. Add strain relief and a drip loop before each external plug or controller. Keep adapters and power strips elevated outside the bucket. Place the sensor near the canopy, shaded from direct light and outside the fan's strongest stream. Use an external host-room sensor as well; a bucket cannot cool below the air it receives without a separate conditioning system.
Step 10: Assemble the Stack and Perform a Stability Test
Lock the base, spacer rings, and light top together in their marked orientation. With power disconnected, open and close every access point, lift the top, remove the saucer, and imitate a normal watering session. Apply a gentle push from several directions. If the top shifts, the fan hits a wall, or cables pull tight, redesign the connection before energizing the system. Keep the bucket away from curtains, heaters, combustible storage, pets, children, and busy walkways.
Step 11: Run a 24–48 Hour Empty Commissioning Test
Operate the light, fans, and timer through at least two complete light and dark periods. Record canopy-level temperature and humidity near the beginning and end of each period. Inspect the hottest surface, fan vibration, cable warmth, noise, odors, and the temperature of external adapters. Test the effect of the highest intended light setting; do not assume the initial dimmed test represents the final load.
Then add the container with damp medium or clean water and repeat the dark-period observation. Moisture often peaks after the light turns off and temperature falls. Briefly disconnect the exhaust to learn how quickly conditions move and how you will respond to a fan failure. Restore it promptly; the exercise is for planning, not for proving the bucket can operate without ventilation.
Step 12: Establish a Simple Maintenance Routine
| Interval | Details |
|---|---|
| Daily |
Check: Canopy clearance, temperature, humidity, fan operation, standing runoff, unusual noise or odor. Action: Correct small changes before the plant reaches the light or blocks the air path. |
| Each watering |
Check: Saucer capacity, cable position, leaks, medium access, and stability while the top is open. Action: Remove runoff and confirm no connection entered the water path. |
| Weekly |
Check: Intake screen, fan guards, fasteners, grommets, light supports, and sensor agreement. Action: Clean dust, tighten only as appropriate, and replace damaged protection. |
| Between cycles |
Check: All interior surfaces, hidden seams, fans, tray, container rings, and cable exits. Action: Disconnect power, disassemble, clean, dry completely, and reject damaged parts. |
A small enclosure rewards short routines
A Space Bucket stays dependable when we give it a few minutes often: feel for a slowing fan, look for dust at the guard, check cable strain, lift the runoff tray, and confirm the sensor against what the plant is showing. Small systems react quickly, so small observations made early carry real value.
Space Bucket Advantages and Drawbacks
Advantages: a bucket has a tiny footprint, can be modular, and makes one compact plant easy to observe. It can use materials already available, and the short air path can be simple when the host room is stable. It teaches the relationship between light height, airflow, watering, and plant structure quickly.
Drawbacks: the same small volume changes heat and humidity quickly, offers little filter space, and limits root volume and canopy height. DIY shells vary in material quality, cutting creates failure points, and access becomes difficult as the plant fills the diameter. A low purchase cost is not worthwhile if it depends on unsafe wiring or constant emergency training.
A finished bucket should now be judged as a complete environment. The cost question that follows helps decide whether this compact format still makes sense after every safe component is included.
“Is a space bucket the cheapest possible indoor setup?”
Question sent by: CedarRoute, via Facebook page.
It can be inexpensive when you already own suitable materials and need only a very small canopy. It stops being cheap when several fans, adapters, improvised filters, replacement containers, and repeated lighting upgrades are added. Compare the complete cost with a small tent or used cabinet, and give safety and access more weight than the price of the empty enclosure.
Build a Dedicated Grow Room Step by Step
A dedicated room gives us the most freedom, but it also transfers every enclosure job to the building. The walls must manage light, the floor must manage water, the electrical system must carry the whole load, and the room must remove its own heat and moisture. Begin on paper and involve qualified trades where the work affects structure, wiring, plumbing, fire separation, or permanent ventilation.
Step 1: Define the Canopy, Workflow, and Legal Limits
Mark the usable canopy, access aisles, door swing, plant movement, mixing area, quarantine area, tools, and emergency route. Leave wall access for cleaning and inspection. The legal plant limit, property permission, and household security plan set the maximum scale before lighting does.
Step 2: Inspect the Building Envelope
Confirm that walls, ceiling, windows, and floor are dry and sound. Resolve leaks, condensation, pests, damaged insulation, and mold history before adding finishes. Choose washable, light-colored surfaces that do not hide active moisture. A reflective finish helps with stray light; it cannot repair a poor fixture layout or a wet wall.
Step 3: Design Water Containment and Drainage
Create a continuous low-consequence wet zone with raised containment, leak detection, and a clean route for bringing water in and taking runoff out. Any permanent drain, supply, condensate line, or pump must be suitable for the use and local rules. Keep nutrient solution and cleaning chemicals out of public drains or natural water unless lawful disposal guidance permits them.
Step 4: Design Electrical Capacity From the Complete Load
List lighting, HID ballasts or LED drivers, exhaust, circulation, cooling, heating, dehumidification, pumps, controllers, and future margin. Include startup current and continuous-load requirements. Place enough permanent outlets above the wet zone to avoid extension-cord dependence. Use required ground-fault protection, correct controls, clear labeling, and qualified electrical design.
Step 5: Choose Lighting by Canopy Map and Climate
Modern LED bar or panel fixtures are often the best home-room choice when high photon efficacy, dimming, broad distribution, and lower radiant heat at the canopy reduce operating and cooling demands. HPS remains a proven option where ceiling height, reflector clearance, ballast installation, ventilation, and electricity can support it; its extra radiant heat may be useful in a cold room and costly in a warm one. MH or CMH may suit an existing compatible HID plan, while fluorescent fixtures are most efficient as a separate propagation or young-plant zone.
Lay fixtures out from published maps and measurements rather than dividing room area by nominal watts. Preserve adjustment range and safe access. Every electrical light eventually becomes heat in the building; efficient photon delivery simply produces the target canopy light with fewer input watts.
Step 6: Engineer the Air and Moisture Path
Estimate sensible heat and plant moisture, then decide what exhaust, cooling, heating, and dehumidification actually carry those loads. Separate intake from exhaust, prevent recirculation, insulate ducts where condensation is possible, and provide lawful condensate removal. Odor filtration adds resistance and must be included in fan selection.
Step 7: Add Circulation Without Creating a Wind Tunnel
Use several controllable guarded fans when needed to mix air above, within, and below the canopy. Aim for gentle leaf movement and the removal of stagnant pockets, not a fixed hard stream. Keep fans accessible for cleaning and secure every overhead unit.
Step 8: Install Monitoring, Alarms, and Manual Overrides
Measure at canopy level, in the host zone, and at any known hot, cold, or damp boundary. Log light-on and light-off conditions. Add water, temperature, humidity, power-loss, and smoke alerts as the risk justifies. Controllers should fail predictably, and every critical system needs a visible manual shutdown.
Step 9: Commission in Stages
Test power first, then circulation, exhaust, lighting, climate equipment, water handling, and finally the combined wet load. Run through complete schedules and a representative warm period. Confirm that the room recovers from a door opening, a simulated fan stop, and normal watering. Record the settings that work so later troubleshooting begins with evidence.
MASTER ADVICE: A premium room is not the room with the most equipment. It is the room whose light, air, water, electricity, monitoring, and maintenance routes remain understandable when something goes wrong.
Build a Garage, Shed, or Detached Grow Space Step by Step
A detached space separates noise and routine from the home, but it also loses the home's free climate support. Before equipment enters, check legal use, secure access, structure, insulation, pests, dust, water, permanent power, fire separation, and the coldest and hottest local conditions.
Step 1: Record the Empty Building Across Weather Changes
Measure temperature, humidity, surface condensation, and water entry after sun, rain, wind, and a cold night. Inspect roof, walls, slab, doors, and penetrations. Repair the building before asking grow equipment to compensate for it.
Step 2: Create a Conditioned Inner Zone
A small insulated tent or cleanable room within the structure is usually easier to control than the entire garage or shed. Preserve service access and keep the cultivation zone separate from vehicles, fuel, solvents, fertilizers, tools that create sparks, and combustion appliances.
Step 3: Bring in Safe Permanent Utilities
Do not run permanent power through an outdoor extension lead or move open water across unprotected electrical connections. Confirm circuit, grounding, weather exposure, freeze protection, supply, drainage, and condensate disposal with qualified help where required.
Step 4: Plan for Pests, Dust, and Security
Seal building gaps appropriately, screen intakes without choking airflow, keep vegetation and stored materials from creating pest harborage, and make filters accessible for inspection. Use lawful locks, lighting, and monitoring that protect the property without creating hazards.
Step 5: Commission and Prepare for Failure
Test during realistic weather with every load operating. Add remote temperature, humidity, power, and water alerts when the site is not checked daily. Define what happens during a power outage, frozen supply, failed fan, severe storm, or blocked access. A remote garden needs a shorter response plan, not a longer list of gadgets.
Budgeting for an Indoor Grow Without Buying the Wrong Things
Budgeting becomes much easier once we stop asking, “What is the cheapest tent?” and start asking, “What does this room still need to work?” An inexpensive enclosure can be a great beginning, but it is not a bargain if the room then needs major cooling, unsafe temporary wiring, or constant moisture repair. Let’s budget by function first and choose products second.
Keep two totals in view. Capital costs buy durable items such as the fixture, enclosure, fan, controller, tray, and sensors. Operating costs return through electricity, water, media, nutrients, filter replacement, climate control, cleaning supplies, and failed components. This is where a slightly better light or fan can earn its place: not because expensive automatically means better, but because efficiency, durability, and control can reduce the cost of running the room.
Minimum Viable Environment
The minimum viable environment is the smallest setup that can safely provide the plant with an appropriate light cycle, usable light across the canopy, air exchange, circulation, temperature and humidity monitoring, water containment, and a manageable root zone. It is not the shortest possible shopping list. It is the least equipment that still covers the risks of the specific site.
What Is Essential and What Can Wait?
| Priority Layer | How to Treat It |
|---|---|
| Required before plants enter | A lawful and suitable space; a safe electrical supply; a fixture matched to the canopy; a properly rated timer or controller; air exchange or another proven climate strategy; gentle circulation; temperature and humidity monitoring; containers and root-zone material; water containment; and a reliable way to water and feed. |
| Required when the site creates the risk | A carbon filter where odor must be controlled; dehumidification where night or late-canopy humidity cannot be managed; heating or cooling where the host room leaves the safe operating range; active intake where passive intake cannot supply the exhaust; and a leak alarm where water damage would be serious. |
| Strong upgrades after the basic room is stable | A dimmable high-efficacy fixture, variable-speed EC fan, second canopy sensor, host-room sensor, remote alerting, more durable trays, quieter ducting, better hanging hardware, and a controller that coordinates temperature and humidity. |
| Optional convenience items | App control, cameras, automatic irrigation, dosing equipment, advanced data logging, spare propagation lights, premium storage, and cosmetic room finishes. These can reduce labor, but they should not replace a safe light, air path, and water plan. |
| Advanced systems | Supplemental CO2, sealed-room HVAC, multi-zone irrigation, vertical racks, high-pressure aeroponics, and commercial automation. Each adds dependencies and should follow proven control of the simpler environment. |
Carbon filtration is a good example of a conditional priority. It is not needed to make photosynthesis happen, but it becomes essential where odor control is required by law, neighbors, household comfort, or the chosen location. A humidifier is useful in a genuinely dry room, yet harmful when purchased automatically and used without measurement. Equipment becomes essential because a measured problem makes it essential.
“Should I buy a carbon filter or spend that money on the light?”
Question sent by: QuietCanopy, via email.
First decide whether odor control is required for your location. If it is required, the filter and matching fan are part of the minimum setup, not a later luxury. If odor is not currently a constraint, protect enough budget for a safe, evenly covering light and basic environmental control. Do not buy extra nutrients or decorative accessories while the room still lacks reliable airflow, monitoring, or spill protection.
How to Divide a Fixed Setup Budget
Percentages are more durable than exact prices because equipment markets and currencies change. The ranges below assume a small, legal home setup starting without major building work. Move money between categories when the host room already provides a function. For example, an existing washable closet may reduce the enclosure share, while a humid coastal room may require more climate-control capacity.
| Budget Area | Planning Share | Do Not Sacrifice | Adjust When |
|---|---|---|---|
| Lighting | 30-40% | Published power draw, useful canopy map, dimming, electrical safety certification, and reliable mounting | Spend less for a tiny propagation area; spend more when the fixture will remain through several enclosure upgrades |
| Enclosure and light control | 10-20% | Enough height, safe access, washable surfaces, stable supports, and a contained floor | Spend less when using a suitable existing closet; spend more for a durable room or high-quality frame |
| Air exchange, circulation, and odor | 15-25% | A realistic air path, fan capacity after restrictions, guarded circulation, and filter compatibility where needed | Increase for long ducts, hot lights, noise limits, or required odor control |
| Electrical control and monitoring | 8-15% | Appropriately rated timer or controller, safe distribution, temperature and humidity measurement, elevated connections | Increase when a qualified electrician, dedicated circuit, remote alarm, or additional sensor is needed |
| Root zone, water, and spill control | 10-15% | Sound containers, suitable medium, basic nutrition, pH or EC tools when the method requires them, saucers or trays | Increase for hydroponics, difficult water, automatic irrigation, or a high-consequence floor |
| Contingency and first replacements | 10-15% | Spare timer, fan plan, fast access to essential parts, and money for an overlooked fitting or duct adapter | Do not spend the final budget on optional accessories; a working reserve prevents unsafe improvisation |
A fixed percentage is not a command. It is a way to notice when the shopping cart is unbalanced. If half the budget is going to automation while the fixture has no credible intensity map, the priorities are wrong. If an expensive light is placed in a damp closet with no exhaust route, the priorities are also wrong.
“Should I follow one fixed budget percentage for every setup?”
Question sent by: Joshua Grant, via email.
No. Percentages are planning prompts, not universal rules. A stable spare room may let more of the budget go toward lighting and monitoring, while a hot attic or damp basement may require climate or building work before a large fixture makes sense. Protect safety, water containment, basic airflow, and reliable measurement first. Then spend the remaining money on the limitation that most affects usable canopy and control. The room should decide the percentages, not the other way around.
Updated 2026 Price Table for Indoor Growing Equipment
If you prefer to see the whole setup in one place, this comparison makes the tradeoffs much easier to spot. The figures are 2026 planning examples in US dollars, checked against current small-tent and home-grow equipment pricing. They are not fixed quotes or product endorsements. Sales, taxes, shipping, country, electrical standards, climate, and equipment you already own can move every column.
| Item | Super Grow Budget | Normal Budget | Cheap Budget | Super Cheap Budget |
|---|---|---|---|---|
| Grow light | $750 | $350 | $220 | $110 |
| Circulation fans | $100 | $55 | $35 | $20 |
| Carbon filter, where needed | $220 | $120 | $70 | $50 |
| Exhaust fan and basic ducting | $180 | $90 | $55 | $35 |
| Thermometer / hygrometer | $50 | $30 | $18 | $12 |
| Tent or reflective surfaces | $100 | $60 | $30 | $10 |
| Containers and runoff trays | $100 | $50 | $30 | $20 |
| Base nutrition | $100 | $60 | $35 | $20 |
| Soil or soilless mix | $100 | $50 | $30 | $20 |
| Tools and hangers | $220 | $100 | $50 | $0 |
| pH, EC and water tools | $150 | $70 | $30 | $15 |
| Construction and safety supplies | $250 | $120 | $70 | $25 |
| Contingency and replacements | $180 | $90 | $50 | $30 |
| Estimated total | $2,500 | $1,245 | $723 | $367 |
As you can see, the Super Cheap column is a reuse-first setup: it assumes the host room is already suitable, tools are on hand, watering is manual, and no major electrical, cooling, or building work is needed. The higher columns do not simply add accessories. They buy more light quality, environmental margin, durability, quieter operation, measurement, and replacement capacity.
The $367 floor is not a universal promise, and the $2,500 column is not a spending target. Use the table to see where the money goes, then remove anything your site genuinely does not need and move that money toward the weakest required function. The figures exclude genetics or plant material, recurring electricity, water, replacement media and nutrients, permits, taxes, shipping, and major professional construction.
“Should I reserve part of the setup budget for electricity and replacement parts?”
Question sent by: Nina Hoffmann, via Facebook page.
Yes. Spending the entire budget on the enclosure and light leaves no margin for electricity, filters, lamps where applicable, sensors, cleaning supplies, trays, hangers, or a failed fan. Keep an operating reserve and calculate the monthly load before buying. A slightly smaller garden with money left for measurement and maintenance is more dependable than a large setup that cannot be run or repaired through the full cycle.
2026 Cost by Enclosure Type
The budget tier shows where the money goes; the enclosure comparison below shows how the host space changes the total. This is where an existing wardrobe can genuinely save money—and where a difficult attic or damp basement can erase that saving.
| Environment | 2026 Planning Range |
|---|---|
| DIY Space Bucket or micro enclosure |
Basic working range: $120–$350. Balanced-control range: $250–$600 with a better dimmable light, protected fans, monitoring, and safer modular hardware. |
| Existing closet or wardrobe conversion |
Basic working range: $250–$700. Balanced-control range: $600–$1,400 with proper supports, exhaust, odor control where required, trays, and improved monitoring. |
| Small 2 × 2 ft tent setup |
Basic working range: $300–$500. Balanced-control range: $500–$900 with higher-quality lighting, a matched fan and filter, controls, and stronger water protection. |
| Small 3 × 3 ft tent setup |
Basic working range: $425–$700. Balanced-control range: $700–$1,300 with stronger environmental margin and durable components. |
| 2 × 4 or 4 × 4 ft home tent |
Basic working range: $550–$1,000. Balanced-control range: $1,000–$2,200 depending on light quality, air path, odor control, monitoring, and host-room climate. |
| Above-standard dedicated home room |
Equipment-led starting range: $2,500–$7,500+. Site-specific reality: electrical, HVAC, drainage, insulation, permits, and professional labor can exceed equipment cost. |
These ranges assume no hidden building repair. A stable spare room with a short air path may stay near the lower end; a hot attic, damp basement, long duct route, difficult water source, or required dedicated circuit can move the same enclosure well beyond it.
Where Those 2026 Costs Usually Move
| Component Group | Details |
|---|---|
| Enclosure and floor protection |
Small-Setup Range: $50–$300 What Changes the Cost: Reused wardrobe versus new tent, frame quality, height, tray capacity, and reversible sealing. |
| Dimmable lighting |
Small-Setup Range: $80–$450 What Changes the Cost: Canopy area, efficacy, distribution, published maps, driver quality, certification, and warranty support. |
| Exhaust, ducting, and odor control |
Small-Setup Range: $70–$350 What Changes the Cost: Fan size under restriction, filter need, duct length, noise control, and replacement schedule. |
| Circulation and monitoring |
Small-Setup Range: $30–$180 What Changes the Cost: Guarded fans, reliable sensors, data logging, alarms, and controller load rating. |
| Containers, water, and root-zone basics |
Small-Setup Range: $60–$250 What Changes the Cost: Growing method, medium volume, runoff handling, water quality, and measurement needs. |
| Heating, cooling, or dehumidification |
Small-Setup Range: $0–$1,500+ What Changes the Cost: A stable host room may need little; difficult climates and mature canopies may require major capacity. |
| Electrical or building work |
Small-Setup Range: Site-specific What Changes the Cost: Dedicated circuits, permitted penetrations, drainage, structural support, repair, and qualified labor. |
Use these figures to compare complete environments, not shopping-cart discounts. A $150 cabinet that needs $700 of ventilation and moisture repair is not a $150 setup. A more efficient light can justify a larger initial share because it affects both delivered light and cooling demand over several cycles. Spend first on the safe electrical supply, suitable light, real air path, water containment, and basic monitoring; automation and cosmetic upgrades can follow after the room is stable.
MASTER ADVICE: Keep 10–15% of the setup budget unspent until the empty-room and wet-load tests are complete. That reserve is more useful than an early accessory because the room will reveal which adapter, tray, fan, sensor, or climate correction it actually needs.
Low-Budget Indoor Setup Using an Existing Closet or Cabinet
The lowest-cost responsible setup begins with a space that already solves part of the enclosure problem. An unused closet, sturdy wardrobe, or simple cabinet may work if it is lawful, dry, cleanable, tall enough, and easy to ventilate. This example is intentionally basic. It avoids promising a specific yield because genetics, canopy management, light delivery, root volume, environment, and grower decisions all change the result.
Core Configuration
- Enclosure: an existing empty closet or rigid cabinet with a protected floor and reversible seals.
- Canopy: one small, manageable plant area with enough room to reach every side.
- Light: for a compact full-cycle canopy, a dimmable LED with published wall draw and a usable coverage map is usually the simplest choice. For propagation, seedlings, or a very small young canopy, an existing complete CFL, T5, or T8 fluorescent fixture can lower the starting cost when it is safe, adjustable, and measured at canopy level.
- Light control: a timer or controller rated for the fixture load.
- Air exchange: a small inline or mixed-flow exhaust fan with a separated low intake. Add a compatible carbon filter when odor control is required.
- Circulation: one guarded, adjustable fan that moves leaves gently without blasting one point continuously.
- Monitoring: one combined temperature and humidity sensor at canopy level and, ideally, a second simple reading in the host room.
- Water protection: a removable tray or saucer able to hold expected runoff, plus elevated electrical connections.
- Root zone: a simple container and forgiving medium that match the grower's watering habits. Start with a straightforward nutrient program rather than a shelf of additives.
Three Honest Lighting Paths for a Tight Budget
Reuse-first fluorescent path: If a complete, undamaged CFL, T5, or T8 fixture is already available, use it for propagation or a shallow young canopy with a reflector and adjustable height. Count every lamp and ballast watt, measure heat, and check growth uniformity. The saving disappears when many bulbs and sockets are added to imitate a high-output flowering fixture.
Compact full-cycle LED path: Put more of the fixed budget into one appropriately sized dimmable fixture with credible electrical construction and canopy data. This usually gives a small closet more height, distribution, and climate margin than a cluster of improvised lamps.
Existing HID path: A serviceable HPS, MH, or CMH system may cost less to acquire and can produce strong results, but only a tall, well-ventilated space should shortlist it. Add the compatible ballast, reflector, lamp condition, clearance, replacement lamp, and cooling cost before calling it cheap. A used HID bargain that forces new cooling equipment may be the most expensive option in the room.
Keep a driver or ballast outside the cabinet only when the equipment design allows it and the wiring can remain protected. Route exhaust toward the host room's real exit path rather than directly back into the intake. Keep storage outside the cabinet. Test the light and fan for at least a complete light and dark cycle, then repeat the test during the warmest part of the day.
ADVICE: The cheapest light is not always the one with the lowest purchase price. Compare the complete fixture, safe hanging hardware, electricity, heat-removal demand, lamp replacement where applicable, and usable canopy coverage.
Where This Setup Saves Money
It avoids a new tent, elaborate automation, a separate intake fan, decorative reflective film, and advanced irrigation. Flat white cleanable walls can be adequate when the closet already has them. Hand watering can be more reliable than a cheap automatic system in a one-plant space. One trustworthy sensor is better than several unverified displays.
Where Not to Cut Cost
Do not use damaged cords, unguarded fans, improvised mains wiring, an underrated timer, a fixture with unknown electrical construction, or a tray too small for the expected runoff. Do not place plugs on the floor. Do not treat the household smoke alarm, safe egress, or electrical-panel clearance as optional. The cheapest setup must still be a safe household setup.
“Can I start without a tent, carbon filter, or automatic irrigation?”
Question sent by: NorthWindowGrow, via contact form.
You may not need a tent if an existing closet or cabinet already provides safe enclosure and light control. You may not need automatic irrigation for a small, accessible garden. A carbon filter depends on odor rules and the household situation. None of those savings removes the need for a safe light, measured temperature and humidity, an air path, circulation, and spill containment.
Balanced Beginner Setup in a Grow Tent
This is the most practical starting point for many growers because it limits construction while leaving room to learn. The goal is not to buy the largest kit. It is to create a stable, accessible enclosure whose components are compatible.
Core Configuration
- A tent tall enough for the complete vertical stack and wide enough for access.
- A lighting system matched to the footprint and host-room climate: usually a dimmable LED with a published canopy map; alternatively, a compatible HPS, MH, or CMH system when height, ballast, reflector, radiant heat, and ventilation are fully planned. Keep CFL or linear fluorescent fixtures for a separate propagation or young-plant zone unless measurements support the intended larger canopy.
- A variable-speed inline exhaust fan selected from its performance curve, not only its free-air rating.
- A carbon filter matched to the fan and duct diameter when odor control is needed.
- Short, smooth ducting with as few sharp bends as the room allows.
- One or two guarded circulation fans positioned to mix air above and below the canopy without constant windburn.
- A canopy-level temperature and humidity probe, a host-room meter, and a simple maximum/minimum record.
- A waterproof tray, saucers, leak alarm, and a clear route for carrying water in and runoff out.
- A rated controller or timer, organized elevated cables, and a circuit load checked with every device operating.
Spend extra on the fixture when it offers verifiable photon output, even coverage, useful support, and recognized electrical certification. Dimming is a strong LED advantage; with HID, spend attention on a compatible ballast, reflector, correct lamp, safe operating position, replacement schedule, and heat clearance. Spend extra on the exhaust system when the duct is long, the filter is restrictive, HID adds a strong radiant load, or noise must stay low. A slightly larger controllable fan running slowly can be quieter than a small fan forced to run at full speed, but only when it remains compatible with the filter and air path.
Do not assume a tent kit proves compatibility. Check the fixture dimensions, bar weight limits, fan curve, filter rating, duct diameter, controller load rating, and plug type. Kits are convenient shopping bundles, not engineering approval.
“Is a complete tent kit the safest choice for a beginner?”
Question sent by: Noah Campbell, via email.
It can simplify purchasing, but inspect every component as if it were bought separately. Confirm that the light fits the tent, the fan can overcome the filter and duct resistance, the timer can carry the electrical load, and the hanging bars can support the equipment. Convenience is useful only when the parts are genuinely compatible.
Above-Standard Home Setup
An above-standard home setup invests in measurement, efficiency, quiet operation, and failure prevention rather than simply increasing wattage. A strong example uses a well-constructed tent or washable dedicated enclosure inside a climate-stable room, with enough clearance to service every component.
Preferred Equipment Profile
- Lighting: a high-efficacy dimmable LED bar fixture with published PPF, photon efficacy, third-party safety certification, and a measured intensity map. A removable or remote-mountable driver can help with heat when supported by the design.
- Exhaust: a controllable EC inline fan with a performance curve, correctly matched carbon filter, smooth rigid or semi-rigid ducting, and vibration isolation.
- Circulation: multiple low-speed guarded fans arranged to remove still zones without pointing a hard stream at one leaf surface.
- Climate: a host room capable of managing the combined heat and moisture load, with appropriately sized cooling or dehumidification when measurements show they are needed.
- Monitoring: one sensor near canopy level, another in the host room, maximum/minimum history, and remote alerts for temperature, humidity, power loss, or water where available.
- Electrical safety: a professionally assessed circuit, suitable ground-fault protection where required, correctly rated controls, no permanent dependence on extension cords, and connections elevated away from water.
- Water management: rigid containment, leak detection, a washable work surface, a measured mixing routine, and drainage that does not require carrying open runoff above live electrical equipment.
- Serviceability: spare hangers, accessible filters, labeled cords, clear shutoffs, replacement plans for critical fans and timers, and room to remove equipment without dismantling the canopy.
This setup may still be compact. Quality comes from how well the parts work together. A modest canopy with even light, stable leaf-level conditions, reliable watering, and accessible maintenance is a better home system than a crowded room built around the highest possible wattage.
The best upgrade is often the one that removes uncertainty
A brighter light is easy to notice, but a second sensor, a leak alarm, a variable-speed fan, or a more reliable timer can prevent the failures that ruin an otherwise good cycle. Upgrade the weakest measured function. If the canopy is even and light is sufficient, more light may only increase heat, moisture demand, and operating cost.
How to Prioritize the Next Dollar
- Make the space safe. Resolve circuit, water, mounting, exit, and fire risks first.
- Provide enough usable light. Buy for canopy coverage and efficacy, not the largest advertised replacement wattage.
- Create a controllable enclosure. Use a tent, cabinet, or room that contains light and supports an intentional air path.
- Control heat and moisture. Exhaust, circulation, cooling, heating, and dehumidification follow measured conditions.
- Protect the root zone. Use reliable containers, suitable medium, basic nutrition, and a repeatable watering method.
- Measure before automating. A trustworthy sensor and written log reveal what the controller needs to do.
- Add odor control where required. Size the filter and fan together, then verify negative pressure and odor breakthrough.
- Buy convenience last. Cameras, app control, automatic dosing, and premium accessories are valuable only after the core environment works.
“If I can afford one premium component, should it be the light?”
Question sent by: Olivia Harris, via contact form.
Often yes, because a well-specified, efficient, dimmable fixture can remain useful through several enclosure upgrades. But it should not consume the money needed for safe power, airflow, monitoring, and water containment. The best fixture cannot compensate for a room that overheats, stays wet, or cannot be serviced safely.
Buying Used Equipment Without Importing Problems
Used tents, rigid trays, shelving, and some fans can reduce cost if they are structurally sound and can be cleaned. Inspect zippers, seams, pinholes, corrosion, bearings, blades, plugs, strain relief, and mounting points. Ask why the item was removed. Clean and quarantine it before bringing it near plants.
“Which used components are usually worth considering?”
Question sent by: RainyPatio, via email.
Rigid, washable, non-electrical structure is often the easiest category to evaluate: frames, intact shelving, trays, and undamaged hardware can be inspected and cleaned. Fans require closer checks for bearings, cords, blades, and mounting points. Be cautious with modified lights, damaged electrical equipment, contaminated irrigation parts, and carbon filters with unknown remaining life. The best used purchase is one whose condition and function can be verified before it enters the garden.
Be cautious with used lights that have no credible specifications, damaged housings, modified cords, noisy drivers, darkened diodes, or missing hanging hardware. A used carbon filter has an unknown remaining adsorption capacity and is difficult to verify before odor appears. Used humidifiers and irrigation parts can carry mineral scale and biological growth. Savings disappear when an uncertain component fails during a critical period.
ADVICE: Buy durable, washable structure used when it passes inspection. Buy critical electrical and measurement equipment for reliability, traceable specifications, and support. Never let a bargain force unsafe wiring or an unverified hanging load.
Estimate Operating Cost Before You Build
Electrical cost begins with actual power draw, not the marketing name of the fixture. Multiply device watts by hours of daily operation, divide by 1,000 to obtain kilowatt-hours, then multiply by the local electricity rate. Do this for the light, exhaust fan, circulation fans, dehumidifier, air conditioner, heater, pumps, and controllers. Climate equipment may cycle, so a plug-in energy meter or controller history gives a better real-world estimate after testing.
Also budget for media, nutrients, water treatment where needed, filter replacement, cleaning, pest monitoring, calibration, failed timers, fan cleaning, and the time required to inspect the space. A higher-efficacy light can reduce both lighting electricity and the heat that climate equipment must remove. A badly placed enclosure may consume more climate energy than the plants themselves.
“Can I estimate operating cost before I know the exact climate load?”
Question sent by: Cody, via contact form.
You can build a useful range. Multiply each device's kilowatts by expected daily runtime and the local electricity rate, then calculate mild-season and difficult-season cases for cooling, dehumidification, or heating. Add filter, lamp where applicable, and maintenance replacements over their expected life. The result will not be exact, but it will reveal whether the room is affordable to operate and which assumptions need measurement before the setup grows larger.
Hidden Costs That Commonly Surprise Beginners
- Duct adapters, clamps, hangers, grommets, and vibration isolation.
- A second fan or longer duct after the first air path proves restrictive.
- A dehumidifier that becomes necessary only when the canopy is large.
- Host-room cooling during the warm season.
- Waterproof trays, runoff handling, and repairs after a spill.
- Replacement carbon filters and prefilters.
- Electrical work or a dedicated circuit.
- Noise control after a fan is heard through walls or floors.
- Spare controllers, sensors, and emergency replacement parts.
WHAT TO REMEMBER: A budget buffer is part of the equipment list. It pays for the small missing parts, replacement fan, extra tray, sensor, filter, or electrical correction that becomes obvious only after assembly.
A Practical Upgrade Path
Begin with one stable enclosure. Record temperature and humidity at canopy level and in the host room, lights on and lights off. Measure actual electrical use. Observe the corners and lower canopy for still air. Check how quickly runoff can be removed. Once the weakest point is clear, upgrade that point.
If temperature rises but humidity remains manageable, improve the heat path or cooling. If humidity rises when lights turn off, work on dehumidification, airflow, and night setpoints. If the center canopy receives strong light while the edges stretch, improve coverage before adding total power. If odor appears while the tent still shows negative pressure, inspect filter life, bypass leaks, duct connections, and fan compatibility.
Expansion should repeat a proven module rather than multiply an unresolved problem. A second tent added to a hot room creates more heat. A larger light added to a weak circuit creates more risk. A controller added to a badly placed sensor automates the wrong reading. Stability comes before scale.
“Should I automate irrigation and climate from day one?”
Question sent by: GreenShelf, via X.
Start with reliable timers, independent monitoring, and useful alarms, then automate only the tasks you already understand. Automation repeats sensor errors, blocked lines, and poor setpoints just as faithfully as good decisions. Run the room manually long enough to learn its normal temperature, humidity, water use, and recovery time. Add one control at a time, keep a manual override, and verify that a failed sensor or power interruption leaves the garden in a safer state.
Tools and Supplies for Grow Closet Construction
When setting up a grow closet, having the right tools and supplies on hand can make the process much smoother. Whether you’re using hand tools or power tools, preparation is key to creating an efficient and productive growing environment. Here’s a breakdown of the tools and materials you’ll need to get started.
Tools Normally Needed

Saws: Japanese hand saws are particularly useful for their precision in cutting wood. You’ll want one flat saw for cutting boards and another type for cutting circular holes for ventilation and cords. Alternatively, a power saw can speed up the process for larger cuts.

Electric Drill: A versatile tool for making holes in various materials like wood, metal, or even ceramic. Make sure you have a set of drill bits for different surfaces.
Battery-Powered Screwdriver: Handy for quickly driving screws without the hassle of manual labor. Make sure it’s fully charged before starting your project.

Hammer: A standard claw hammer works great for securing nails and small tasks around the grow closet.
Pliers: Useful for gripping, holding, or pulling out nails. They come in handy for various tasks, from tightening bolts to holding wires in place.
Putty Knife: Necessary for applying caulk or putty to seal any gaps or holes in your grow room, especially when aiming to prevent light or air leaks.
Tape Measure: Essential for ensuring accurate measurements when cutting materials or placing equipment inside the grow space.
Supplies Normally Needed
Drywall Screws: These are crucial for securing drywall to the framing if you are constructing walls or partitions within your grow space.
Rack Screws and Nuts: You’ll need these for attaching shelves or other equipment where standard screws won’t suffice.
Butterfly Bolts: Useful for hanging heavier equipment like lights or ventilation systems from the ceiling or walls. They provide extra security to prevent any unwanted falls or accidents.
Caulk: Use silicone-based caulk to seal gaps or cracks in the grow room, particularly around doors and ventilation openings. This prevents air or light leaks.

Cable Ties: These are essential for organizing and fastening cords, hoses, and other equipment in your grow space. With a simple tug, you can secure everything in place without the risk of tangling.
Duct Tape: A must-have for quick fixes and securing temporary fittings. It’s ideal for sealing ventilation ducts, lightproofing areas, or temporarily holding equipment in place.

Plastic Sheeting for Walls: Use this heavy-duty plastic sheeting to line your grow room walls, helping to waterproof and insulate the area. It’s also helpful for containing light within the grow space.

Hook-and-loop fastener: Excellent for sealing doors or sectioning off areas in your grow room, offering easy access and adjustment when needed.

Plywood (1 x 1 m) for Ceiling: This will serve as a solid base to hang lights, ventilation fans, or other equipment from the ceiling. Make sure it’s properly secured to prevent any accidents.
Power Tools and Additional Items
Battery-Powered Electric Screwdriver: A fully charged electric screwdriver with multiple driver heads will save time and make quick work of assembling your grow room components.
Set of Drill Bits: Ensure you have drill bits for wood, metal, and ceramic so that you can easily attach any necessary hardware to various surfaces.

Copyright Notice
© 2026 Weedth. All Rights Reserved.
The content provided on this website, including text, images, graphics, and other materials, is the intellectual property of Weedth unless otherwise stated. Unauthorized reproduction, distribution, or use of any material on this site without prior written consent is strictly prohibited.
For permission requests or inquiries, please contact: weedth.company@gmail.com
Useful links

© 2020 - 2026 • Weedth – Cannabis Cultivation & Knowledge Hub • All Rights Reserved • Powered by Growers, For Growers