
Grow Lights
Lighting for Indoor Cannabis Grow: The Complete Guide
Before You Start
Is This Guide Right for You?
This guide is for indoor growers who want to understand light type, spectrum, intensity, distance, heat, and schedules without turning the grow room into a physics exam.
If canopy lighting is only one part of a room you have not planned yet, start with Indoor Growing Basics. If you are ready to match lights to a real enclosure and layout, continue with Grow Room Setups.
Importance of Light for Cannabis Grow
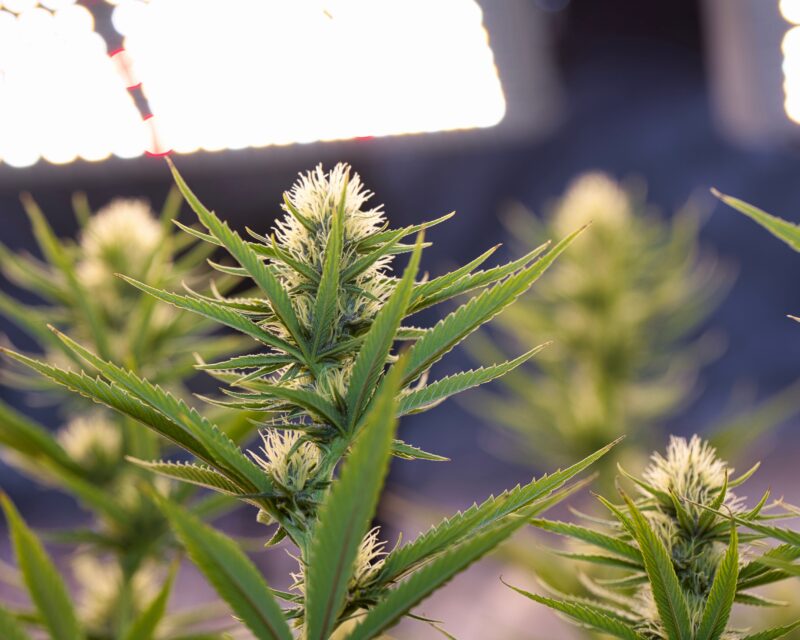
Light is one of the main environmental controls in an indoor cannabis garden. It powers photosynthesis and strongly influences plant structure, flower mass, water use, and the amount of heat the room must remove. It does not work alone, however. Genetics, root health, nutrition, temperature, humidity, carbon dioxide, canopy management, and harvest timing still shape the final result.
PAR
Photosynthetically active radiation is the conventional 400 to 700 nanometer photon range used in plant-light measurements. PAR describes a wavelength range; it is not a measurement of intensity, coverage, or daily dose by itself.
Artificial lighting gives an indoor grower control over intensity, duration, distribution, and spectrum. Sunlight delivers enormous photon output without an electricity bill, but it changes with weather, season, latitude, and shade. Indoors, the useful question is not which source is universally best. It is which system delivers the required light evenly, safely, and efficiently for this room.
How Light Affects Cannabis Growth
Photosynthesis converts light energy, carbon dioxide, and water into carbohydrates the plant can use. Increasing usable light can raise photosynthesis and flower yield while the rest of the environment keeps pace, but the response eventually becomes less efficient and excessive intensity can damage the upper canopy. Light should therefore be increased as a measured input, not treated as an unlimited accelerator.
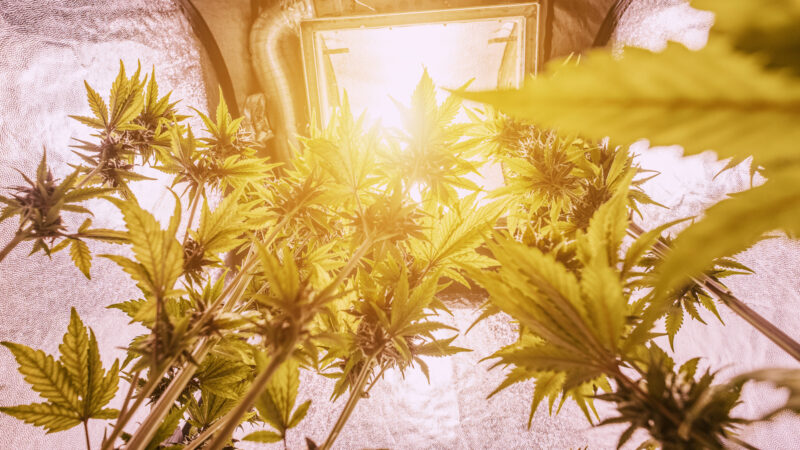
Marijuana is highly sensitive to changes in light, especially as it transitions from vegetative growth to flowering. This sensitivity is due to the plant’s internal biological clock, known as photoperiodism. Growers can control when cannabis switches from vegetative growth to flowering by manipulating light cycles. In nature, cannabis flowers respond to the shortening days of late summer and fall. Indoors, growers use a 12/12 light cycle to mimic this seasonal change and trigger flowering.
“The plant is green and growing. How can I tell whether it actually needs more light?”
Question sent by: Ethan Miller, via contact form.
Color alone is not enough. Compare internode spacing, leaf angle, growth rate, canopy density, and measured PPFD at the leaves. If the plant stretches while the environment and root zone are stable, weak or uneven light becomes a stronger possibility.
Natural Sunlight vs. Artificial Lighting
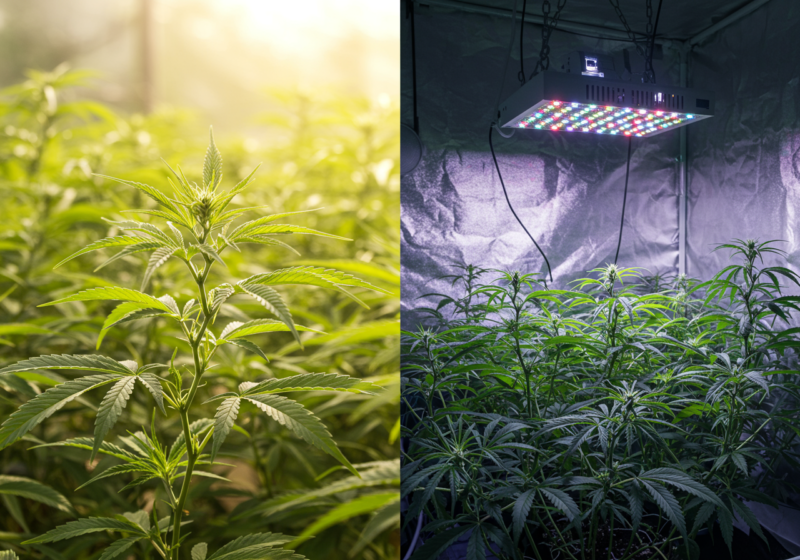
Sunlight is powerful, broad, and free at the point of use, while an indoor fixture provides repeatable timing and a controllable canopy target. Neither source is automatically superior in every situation. Artificial lighting earns its value through consistency, distribution, climate integration, and the ability to produce a planned daily light integral.
Artificial lighting systems for growing cannabis usually include the following components:
- Light engine: Diodes, fluorescent tubes, or discharge lamps produce photons. Compare PPF and spectrum rather than the marketing wattage.
- Optics or reflector: Lenses, bars, boards, and reflectors shape distribution. Their job is even canopy delivery, not merely a bright center.
- Driver or ballast: LEDs use drivers, while HID lamps use ballasts. The power component must match the light source and carry the required safety rating.
- Timer or controller: The switching device must handle the actual load and preserve a consistent photoperiod.
- Electrical and suspension hardware: Receptacles, cables, connectors, hangers, and support points must be rated, dry, strain-relieved, and installed for the equipment load.
With artificial lighting, you can create optimal conditions for cannabis at every stage of its life cycle - from seedling to flowering.
The useful comparison is the controlled dose reaching the canopy, not whether a light source appears natural or artificial.
Important: A sunny window and an unobstructed outdoor sky are not equivalent. Glass, angle, duration, and one-sided exposure can reduce or distort the light that reaches an indoor plant.
That distinction becomes useful when we compare the real canopy rather than the brightness visible to our eyes.
“If sunlight is free, why not keep an indoor cannabis plant beside a bright window?”
Question sent by: Chloe Bennett, via email.
Window light is filtered, changes quickly with season and angle, and usually reaches only one side of the plant. It may support a small plant temporarily, but a productive indoor canopy needs a measured and repeatable light field rather than a bright-looking window.
Types of Light Sources for Cannabis Growth
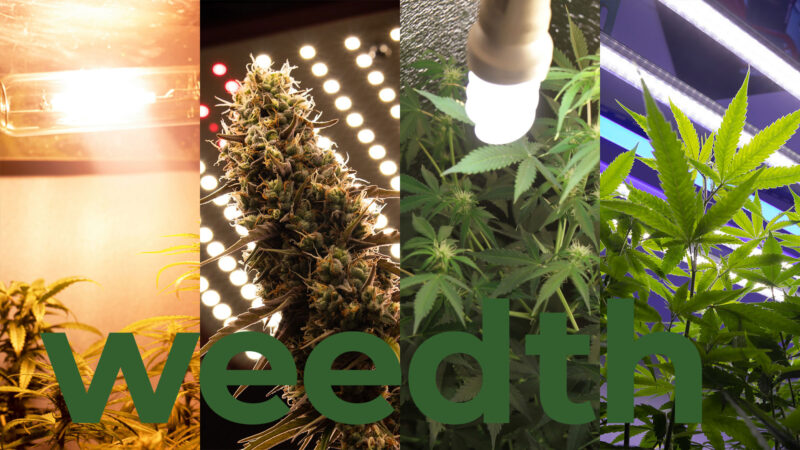
Several types of artificial lights are available for indoor cannabis growing, each with its own strengths and weaknesses. The most common types are:
- High-Intensity Discharge (HID) Lights
- Fluorescent Lights
- Compact Fluorescent Lamps (CFLs)
- Light-Emitting Diodes (LEDs)
Each light source provides different light intensity levels, color spectrum, and efficiency. Choosing the right light depends on your grow space, budget, and goals for your crop.
Types of HID Lights
Metal Halide (MH) Lights
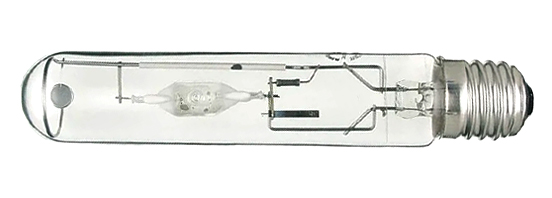
Metal Halide (MH) lights emit a blue-white spectrum, typically in the range of 5000K to 6500K closely resembling natural sunlight during the spring and early summer months. This spectrum is ideal for the vegetative stage of cannabis growth, where the plant focuses on building a strong structure with thick stems, branches, and dense foliage. The higher color temperature of MH lights is particularly effective for promoting leaf development, node growth, and overall plant health during this phase. The blue spectrum encourages compact growth by preventing the plant from stretching, which can weaken its structure and result in thin, lanky plants.
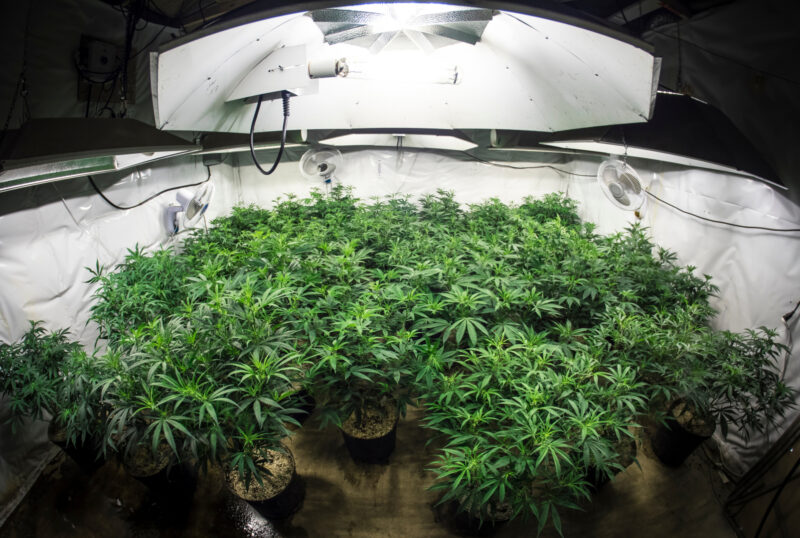
MH lights are highly beneficial for growers aiming to achieve bushy, well-structured plants. This light spectrum helps keep internodal spacing short, resulting in a sturdier plant that can support the heavy buds produced during the flowering stage. Many growers also use MH lights during the first few weeks of flowering to ease the plant’s transition from vegetative growth to bud production. By giving plants a consistent blue light spectrum during the early stages of flowering, growers can help the plant focus on creating strong branches before it shifts energy to flower formation.
MH lights are typically not used throughout the entire flowering stage because the blue spectrum is less effective at stimulating bud growth. However, their importance during the vegetative phase cannot be overstated, as they lay the foundation for a high-yielding harvest.
High-Pressure Sodium (HPS) Lights
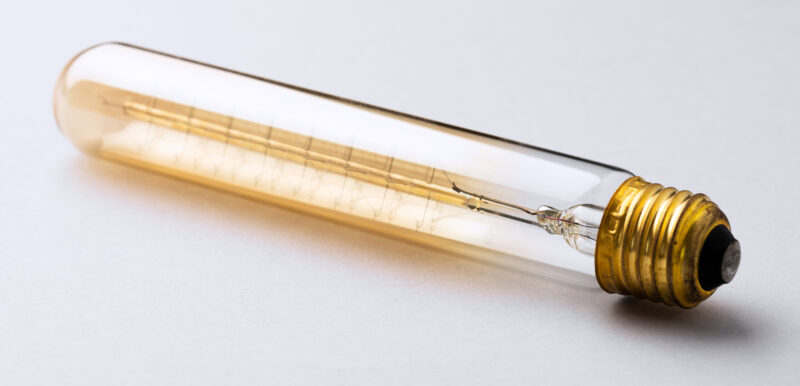
HPS lamps produce an amber-rich spectrum with a relatively small blue fraction. That spectrum can support high flower yield, but it does not imitate one exact season and its red or far-red content does not guarantee denser or more potent flowers. Compare the entire system by photon output, distribution, efficacy, heat, and plant response.
HPS fixtures can produce strong flower yields when photon output, coverage, and climate are well managed. Their amber-rich spectrum tends to encourage taller morphology than some blue-rich LED spectra, but HPS does not guarantee greater potency. Flower mass, cannabinoid concentration, and total cannabinoid yield are separate measurements, and research has not identified one lamp technology that wins every cultivar and environment.
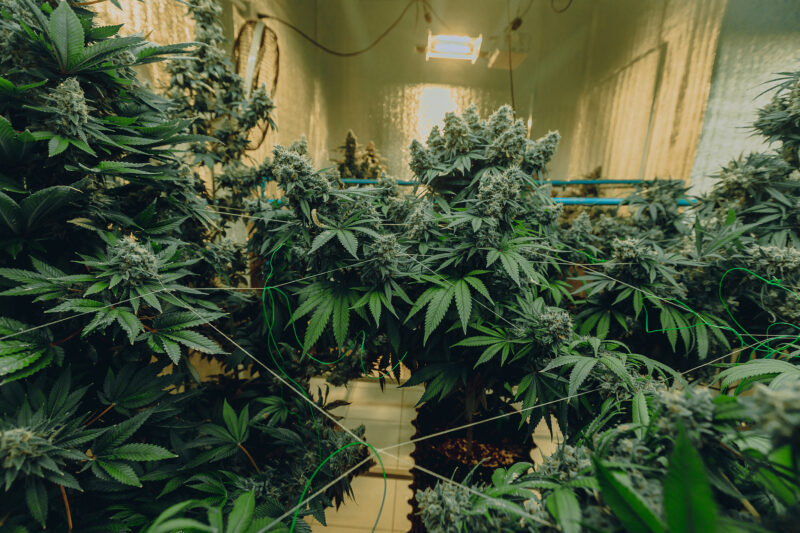
For many growers, the ideal strategy is to use HPS lights exclusively during the flowering stage, following a period of vegetative growth under MH lights. This combination of blue spectrum light for vegetative growth and red spectrum light for flowering maximizes the plant’s potential and ensures a high-quality, high-yield harvest.
Ceramic Metal Halide (CMH) Lights
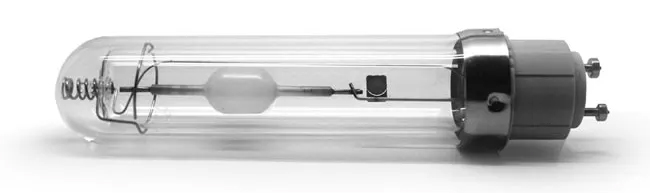
Ceramic Metal Halide (CMH) lights, also known as Light Emitting Ceramic (LEC) lights, represent an advanced form of traditional MH technology. CMH lights offer a full-spectrum output, with color temperatures typically ranging from 3000K to 4200K. This spectrum provides a balance of both blue and red wavelengths, making CMH lights suitable for both the vegetative and flowering stages of cannabis growth. The ability to use CMH lights throughout the entire growth cycle makes them highly efficient and versatile for growers looking to simplify their lighting setup without compromising plant health.
One of the standout features of CMH lights is their high color rendering index (CRI), which measures how accurately colors are represented under the light. CMH lights typically have a CRI of 90 or higher, which means they closely mimic natural sunlight and provide an accurate visual representation of the plant’s color. This allows growers to easily monitor plant health, spotting issues like nutrient deficiencies or pest infestations early.
CMH fixtures provide a broader spectrum than many traditional HPS systems and can be useful where a grower already owns compatible equipment. Compare them by PPF, PPE, coverage, heat load, lamp age, and replacement cost rather than lumens alone. Some CMH lamps emit ultraviolet radiation, but that does not guarantee higher THC or resin. UV exposure must be evaluated as a plant-stress and human-safety decision, not as a potency shortcut.
Dual Arc HID Bulbs

Dual Arc HID bulbs combine the benefits of both Metal Halide (MH) and High-Pressure Sodium (HPS) lights into a single bulb. These bulbs contain two arc tubes - one that emits a blue-white spectrum for vegetative growth and another that produces a red-orange spectrum for flowering. This unique combination provides full-spectrum lighting, allowing growers to use a single light throughout the entire cannabis life cycle without needing to switch bulbs between the vegetative and flowering stages.
Dual Arc bulbs are designed to be an all-in-one solution for growers who want the best of both worlds. The blue spectrum promotes strong vegetative growth, while the red spectrum supports bud development during flowering. This continuous, full-spectrum light ensures that plants receive the correct wavelengths at each stage, helping them thrive from seedling to harvest.
Although Dual Arc bulbs are more expensive than traditional MH or HPS bulbs, they offer the advantage of convenience and efficiency. Growers do not need to invest in separate lighting setups for different growth stages, and the consistent full-spectrum light can simplify the overall grow process. These bulbs are ideal for growers who want to maximize their yields while minimizing the complexity of their lighting system.
“Is CMH automatically better than HPS because its spectrum looks more natural?”
Question sent by: Mason, via Facebook page.
No. Spectrum is only one part of performance. Compare photon output, electrical efficiency, coverage, heat, lamp age, reflector design, room dimensions, and the crop goal before deciding which HID system fits.
Advantages of HID Lights
- High Light Output: HID lights deliver intense light that penetrates deep into the plant canopy, ensuring that even lower leaves and branches receive sufficient light. This is crucial for maximizing both yield and bud density.
- Full-Spectrum Options: With MH, HPS, CMH, and Dual Arc bulbs, HID lights offer a variety of spectrum options to suit the needs of cannabis plants at every stage. Growers can choose between blue light for vegetative growth, red light for flowering, or a combination of both with CMH or Dual Arc bulbs.
- Energy Efficiency (CMH Lights): While traditional MH and HPS lights are known for their energy consumption, CMH lights offer a more efficient solution with a higher lumens-per-watt ratio. This means growers can achieve better results with less energy consumption.
- Proven Results: HID lights have been a cornerstone of cannabis cultivation for decades, consistently delivering high-quality plants with increased cannabinoid and resin production.
- Enhanced UV Output (CMH): CMH lights, in particular, emit ultraviolet (UV) light, which can stimulate trichome production and increase cannabinoid content, leading to more potent buds.
- Penetration Depth: The intense light produced by HID bulbs has greater penetration depth, allowing it to reach lower parts of the plant, which is beneficial for growing taller plants with a dense canopy.
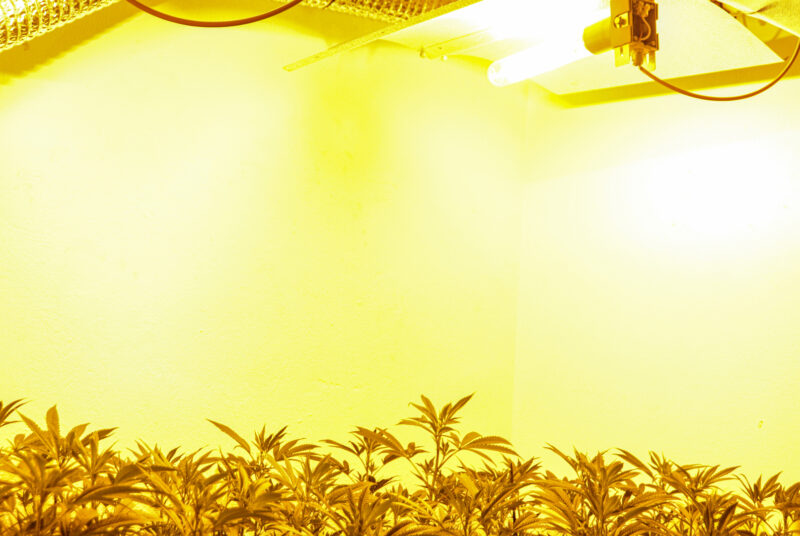
“Why do leaves under HPS feel warmer than leaves in an LED room at the same air temperature?”
Question sent by: Avery Collins, via contact form.
HID fixtures can deliver more radiant energy directly to the canopy. The room thermometer may match while leaf temperature does not, so measure at canopy level and judge the plant, airflow, and radiant exposure together.
Disadvantages of HID Lights
- Heat Generation: HID lights, including MH, HPS, CMH, and Dual Arc bulbs, produce significant amounts of heat. This requires growers to implement cooling systems and proper ventilation to maintain optimal grow room temperatures and prevent heat stress.
- Energy Consumption (Except CMH): Traditional MH and HPS lights are less energy-efficient than modern lighting solutions like LED lights. This can lead to higher electricity costs, particularly in large-scale grows where multiple HID lights are used.
- Bulb Lifespan: HID bulbs need to be replaced more frequently than LEDs, which can add to the ongoing maintenance costs. CMH bulbs tend to have a longer lifespan compared to traditional MH and HPS bulbs but still require periodic replacement.
- Cost of Cooling Systems: Because HID lights generate substantial heat, growers must invest in cooling systems, air-cooled reflectors, and exhaust fans to prevent the grow space from overheating, which increases the total setup cost.
HID limitations should be corrected as part of the whole lighting and climate system.
Advice: Do not solve canopy heat by distance alone. Verify PPFD, leaf temperature, room heat removal, reflector clearance, wiring, and edge coverage after every height change.
The next decision should follow the new PPFD and temperature pattern, not the old hanging height.
“Can I solve every HID heat problem by raising the lamp?”
Question sent by: Liam Parker, via email.
Raising the lamp can lower canopy intensity and radiant load, but it can also weaken edge coverage and waste vertical space. Heat still enters the room, so ventilation, cooling, reflector design, lamp power, and canopy mapping may also need attention.
Best Uses for HID Lights
HID systems remain capable production tools, especially where the room, ventilation, electrical service, and operating budget were designed around them. They are no longer the automatic choice for maximum yield or quality. Modern LEDs can deliver similar or better canopy uniformity with higher photon efficacy, while an existing HID system may still be economical when its infrastructure is already paid for.
- MH lights: A blue-rich HID option that can support compact vegetative morphology, with the usual HID heat and ballast requirements.
- HPS lights: A capable amber-rich flowering source, but not a requirement for bud formation, resin, or THC production.
- CMH and Dual Arc Bulbs: Full-spectrum options that can be used throughout both vegetative and flowering stages, providing an efficient and simplified lighting solution for the entire grow cycle.
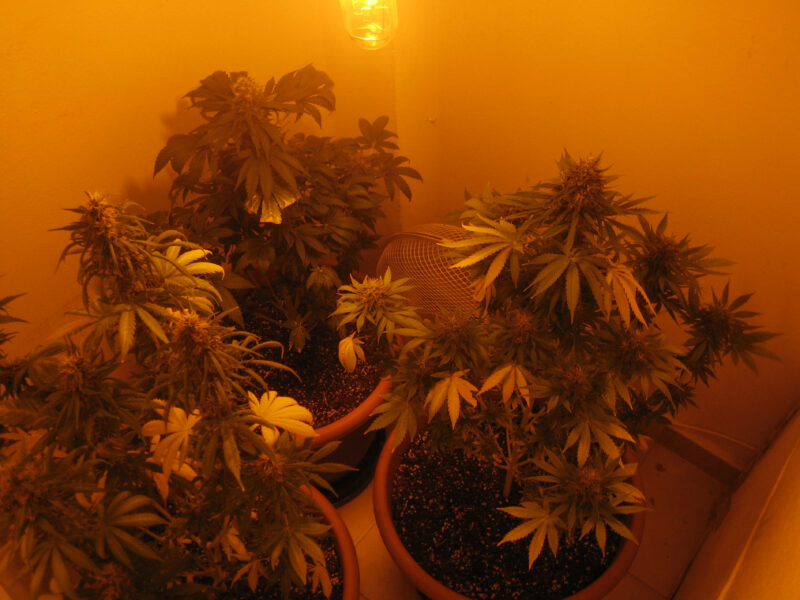
“Should I replace a working HPS setup with LED immediately?”
Question sent by: Emma, via Facebook page.
Not by default. Compare electricity, cooling, lamp replacement, canopy uniformity, purchase cost, and expected service life. An efficient LED may lower operating cost, while a well-designed paid-for HPS room may still make economic sense.
Using HID Lights Effectively
HID lights, while incredibly powerful, require careful management to be used effectively in cannabis cultivation. These lights generate a lot of heat, so maintaining the proper distance between the lights and the plants is critical to prevent burning or heat stress. The recommended distance between HID lights and the plant canopy depends on the wattage of the lights:
- Lower-output HID systems: Begin within the manufacturer's tested hanging range, then check canopy PPFD and leaf temperature before moving closer.
- Mid-output HID systems: Use the reflector's coverage data and a canopy grid. Wattage alone cannot predict a safe distance.
- High-output HID systems: Confirm both photon intensity and radiant heat. More clearance may be necessary, but the correct value depends on reflector, cooling, and canopy target.
Cooling and Ventilation:
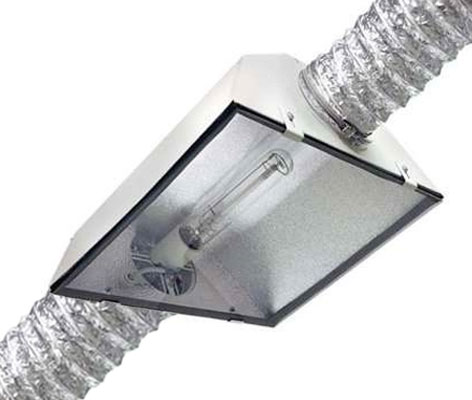
The intense heat output from HID lights makes ventilation and cooling a crucial part of any grow setup. Growers typically use air-cooled reflectors, exhaust fans, or even air conditioning to manage the temperature in their grow rooms. Maintaining an optimal temperature (between 70°F and 85°F) is essential for healthy cannabis growth, and poor ventilation can lead to heat stress, wilted plants, and reduced yields.
Reflectors and Light Distribution:
To maximize the efficiency of HID lights, most growers use reflectors to direct as much light as possible toward the plant canopy. These reflectors help ensure that the light is evenly distributed, minimizing wasted light and ensuring that all parts of the plant receive adequate illumination. Air-cooled reflectors are particularly useful, as they help reduce heat buildup while focusing light where it’s needed most.
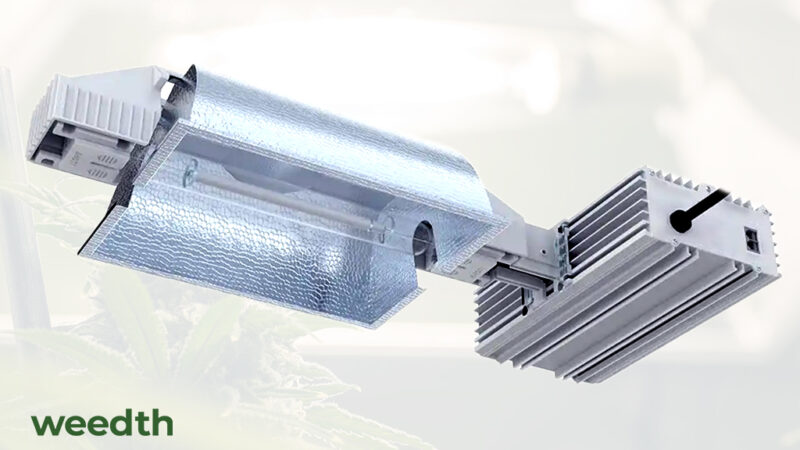
Combining MH and HPS for Full Cycle Growing:
For growers looking to optimize their cannabis plants’ entire life cycle, using both MH and HPS lights in tandem is a common strategy. The MH lights can be used during the vegetative stage to encourage strong, leafy growth, while the HPS lights take over during the flowering stage to promote dense, resinous buds. This combination provides the best of light ensuring that the plants receive the right spectrum at each stage of development.
“The manufacturer gives one hanging distance. Should I keep it for the entire grow?”
Question sent by: CedarRoute, via Facebook page.
Treat that distance as a starting point, not a permanent rule. Plant height, reflector, lamp power, acclimation, room temperature, leaf temperature, and measured canopy intensity all change what is appropriate.
HID Lighting Components and Accessories
To get the most out of an HID lighting setup, there are several components and accessories that growers should consider:
- Ballasts: HID lights require a ballast to regulate the electrical current. There are two main types of ballasts: magnetic and digital. Digital ballasts are more energy-efficient and produce less heat than magnetic ballasts, making them the preferred choice for most modern growers.
- Reflectors: Reflectors direct light toward the plants. They come in different shapes and sizes, including air-cooled versions that help manage heat. Choosing the right reflector can improve light distribution and efficiency.
- Timers: Timers are essential for automating the light cycle, ensuring that plants receive the right amount of light each day. Most growers use a 18/6 light cycle (18 hours on, 6 hours off) during vegetative growth and 12/12 during flowering to mimic natural light patterns.
“Can any digital ballast safely run any HID lamp with the same wattage?”
Question sent by: MapleBackyard, via Facebook page.
Do not assume compatibility from wattage alone. Lamp type, ignition method, voltage, dimming support, connector rating, and manufacturer approval must match. Incompatible equipment can shorten lamp life, behave unpredictably, or create an electrical hazard.
Fluorescent Lights

Fluorescent lights are a popular choice for beginners and small-scale cannabis growers because they are affordable, energy-efficient, and produce relatively little heat. These qualities make fluorescent lighting suitable for small grow spaces, and they are particularly effective during the early stages of plant growth, such as seedling and vegetative phases. The cool, soft light they emit provides gentle illumination that helps young plants grow without the risk of heat damage.
T5 Fluorescent Tubes
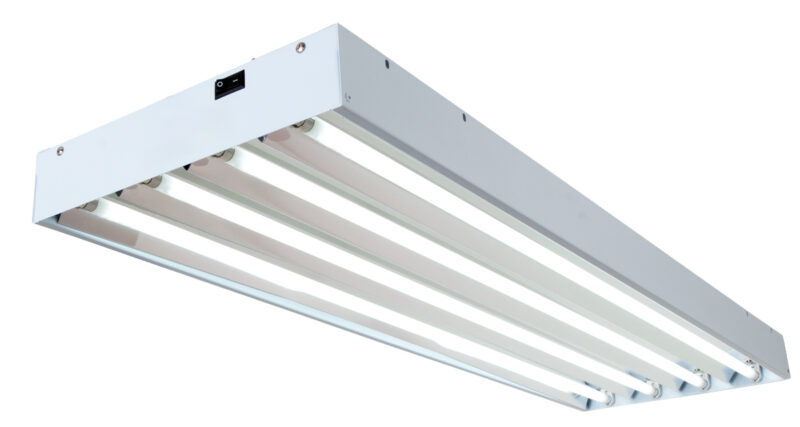
Among the different types of fluorescent lights, T5 fluorescent tubes are the most widely used for growing cannabis. These long, narrow tubes emit light over a wide area, making them ideal for growers who need to cover multiple plants or larger grow trays. They are available in a variety of light spectrums, allowing you to adjust the color temperature depending on your plant’s needs. For example, cool white (around 6500K) is ideal for vegetative growth, while warm red (around 2700K) can be beneficial as plants transition into flowering.
Advantages of T5 Fluorescent Tubes:
- Energy-Efficient: Compared to more powerful grow lights like HID (high-intensity discharge), T5 lights consume significantly less energy, making them an affordable option in terms of electricity costs.
- Low Heat Emission: T5 lights produce very little heat, which means they can be placed close to your plants without risking heat stress. This is particularly useful when growing delicate seedlings or clones that are more susceptible to temperature fluctuations.
- Ideal for Early Growth Stages: T5 fluorescent lights are particularly effective for seedlings, clones, and young plants during their early vegetative growth. The light they provide encourages steady, healthy growth without overwhelming the plants.
Disadvantages of T5 Fluorescent Tubes:
- Limited for Flowering: While T5 lights excel in the early growth stages, they lack the light intensity required for robust flowering. Cannabis plants need stronger light during the flowering phase to produce dense, resinous buds, and T5 lights generally do not provide the necessary intensity.
- Requires Multiple Fixtures: To cover larger grow areas, you will need several T5 fixtures, which can become cumbersome and require more space. Each fixture needs its own positioning to ensure uniform light coverage over the entire plant canopy.
Best Uses for T5 Fluorescent Lights:
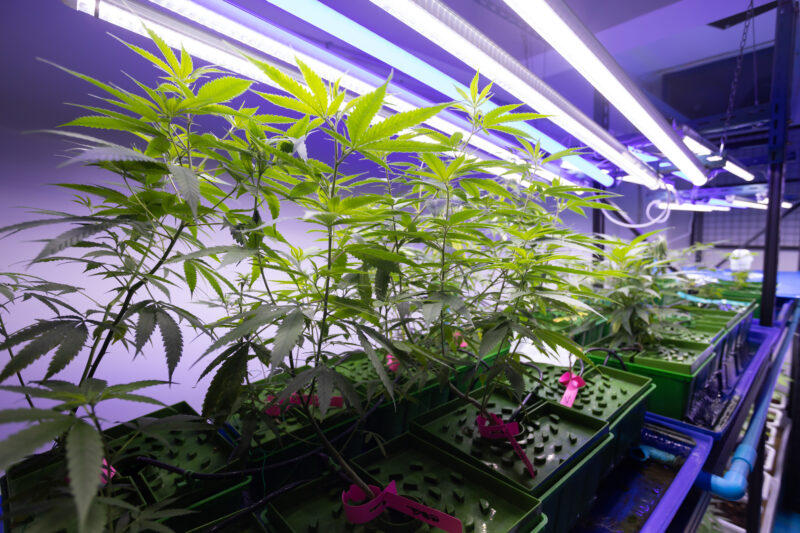
T5 lights are best suited for early vegetative growth, clones, and seedlings. They are often used in small grow tents or as supplemental lighting in larger setups. If you’re growing cannabis in a confined space and prefer a low-cost, low-heat option for the initial stages of growth, T5 fluorescent tubes offer an excellent balance between efficiency and effectiveness.
“Can T5 fluorescent lights carry a cannabis plant through flowering?”
Question sent by: QuietCanopy, via email.
They can sustain a small, low-density canopy, but flower production is usually limited by intensity and penetration. Measure the actual canopy dose and keep expectations proportional to the fixture rather than assuming every light that maintains green leaves can finish dense flowers.
Compact Fluorescent Lamps (CFLs)
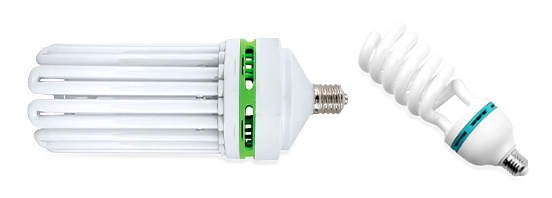
Compact Fluorescent Lamps (CFLs) are another type of fluorescent lighting, but they are distinct from the larger T5 fluorescent tubes. CFLs are small, spiral-shaped bulbs that can be found in most hardware stores, making them a convenient and affordable option for cannabis growers who are just getting started or working with limited space. CFLs are easy to set up since they fit into standard light fixtures, and they come in a range of color temperatures, allowing you to select the right spectrum for different growth stages.
Advantages of CFLs:
- Affordability: CFL bulbs are relatively inexpensive compared to other grow lights. This makes them an accessible option for beginner growers or those who want to experiment with small-scale indoor cannabis cultivation.
- Availability: CFLs are widely available in most retail stores, meaning you won’t have trouble sourcing replacement bulbs or expanding your grow setup with additional lighting.
- Easy Setup: Unlike other types of grow lights that require specialized fixtures or ballasts, CFLs can be screwed into standard light sockets. This makes them easy to install and operate, even for growers with limited experience or technical know-how.
- Great for Small Spaces: CFLs are ideal for small grow spaces, such as a closet or a small grow tent. They work well for growing single plants or a few small cannabis plants, especially when combined with reflective surfaces to maximize light efficiency.
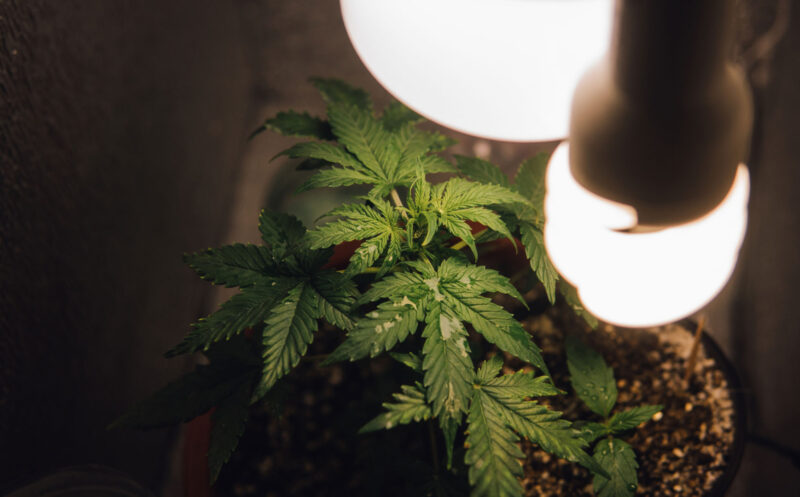
Disadvantages of CFLs:
- Low Light Intensity: One of the main drawbacks of CFLs is their relatively low light intensity. This limits their effectiveness for growing larger plants or for achieving dense, high-quality buds during the flowering stage. While CFLs can support cannabis during the vegetative phase, they are often inadequate for flowering without additional lighting.
- Multiple Bulbs Needed: Because CFLs have lower light output than more powerful lighting options, you will need multiple bulbs to properly cover even a small grow area. This can make achieving uniform light distribution across your plants challenging, especially if you are growing more than one plant at a time.
Best Uses for CFLs:
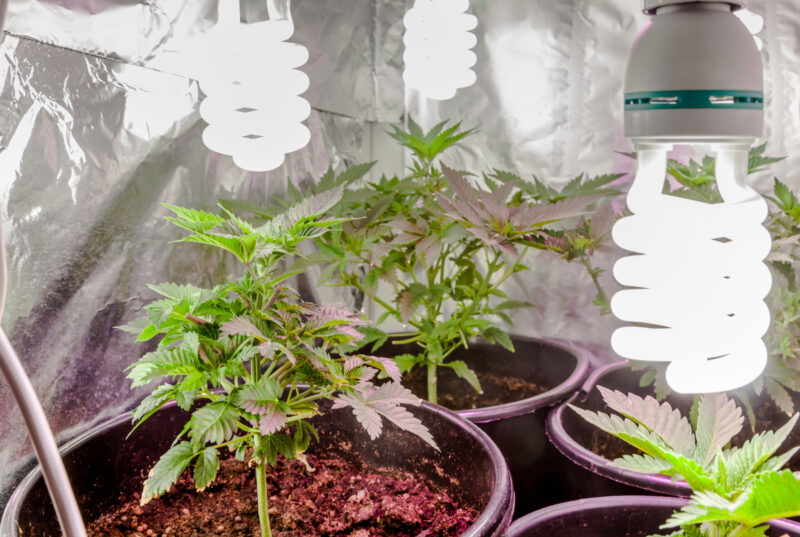
CFLs are best suited for hobbyist growers who are working in small spaces and focusing on growing a single plant or starting seedlings and clones. While they can be used throughout the entire growing cycle, their limitations during the flowering stage mean that they may not produce the same yields or bud density as more powerful grow lights. CFLs are an excellent beginner level option for those new to cannabis cultivation or for growers who need an inexpensive, easy-to-use lighting solution.
Optimizing CFLs in Your Grow:
Keep CFLs close enough to prevent weak, stretched growth, but confirm the distance with leaf temperature and coverage. Lamp shape, wattage, ventilation, and plant age can make a single inch value misleading.
“Can I combine several household CFL bulbs instead of buying one grow light?”
Question sent by: NorthWindowGrow, via contact form.
A small arrangement can support seedlings or a very compact plant, but sockets, adapters, uneven coverage, heat concentration, and wiring quickly become limiting. Add the real wattage and map the canopy before assuming many small bulbs equal one well-designed fixture.
Light-Emitting Diodes (LEDs)
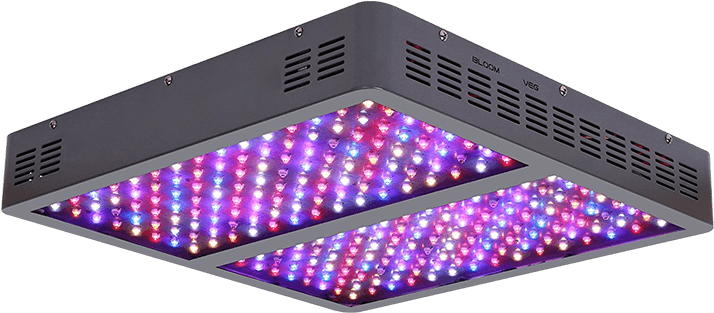
LED grow lights are becoming increasingly popular among cannabis growers due to their efficiency, long lifespan, and low heat output. Modern LED lights can be highly customizable, allowing growers to switch between spectrums for the vegetative and flowering stages.
Advantages of LED Lights:
- Energy-efficient: LEDs consume far less electricity than HID lights, making them cost-effective for long-term growing.
- Low heat output: LEDs run much cooler than HPS or MH lights, reducing the need for extensive cooling and ventilation systems.
- Customizable spectrum: Many LED grow lights come with both vegetative and flowering modes, making it easy to switch between the blue and red spectrums as needed.
- Long lifespan: LEDs have a much longer lifespan than other types of bulbs, often lasting 50,000 hours or more.
Disadvantages:
- Higher initial cost: High-quality LED grow lights can be expensive upfront, though they save money in the long run through lower energy consumption.
- Spectrum quality: Not all LED grow lights are designed equal. Low-quality models may not provide the correct spectrum or intensity for optimal cannabis growth.
Using LED Lights Effectively
When using LEDs, it’s important to choose lights with a full spectrum that covers both the blue and red wavelengths needed for vegetative growth and flowering. Many LED grow lights come with adjustable settings, allowing you to switch between vegetative and flowering modes. If you’re using white or blue daylight LEDs during the vegetative stage, switch to red or orange 2700K–3000K lights or activate the flowering mode when transitioning to flowering. This ensures your plants receive the proper spectrum for bud development.
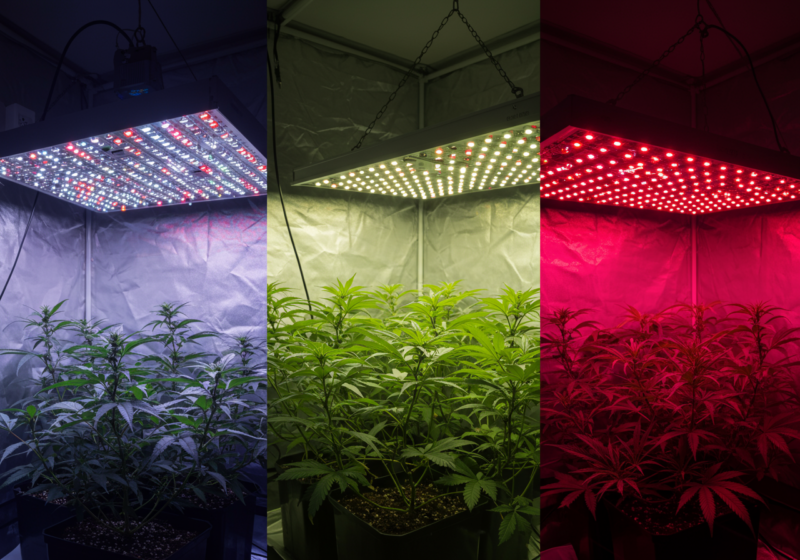
Place LEDs according to the manufacturer's PPFD map, then measure at several canopy points. Adjust height and dimming together to improve uniformity instead of chasing one universal distance.
“Do LEDs need replacement if every diode still turns on?”
Question sent by: Noah Campbell, via email.
Possibly. LEDs and drivers can lose output gradually without failing completely. Compare current power draw and canopy readings with earlier records; a fixture that still looks bright to us may be delivering less light or less uniform output to the plant.
Light Spectrum for Grow Stages
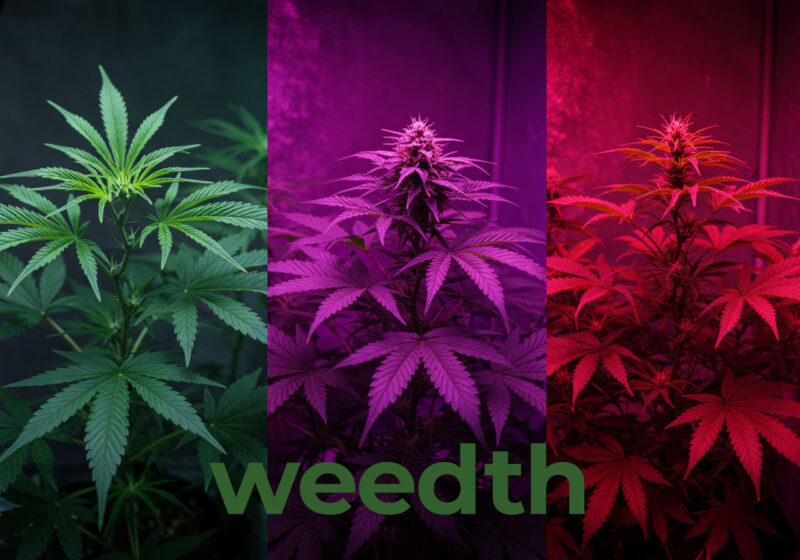
Cannabis responds to a continuous distribution of wavelengths rather than two isolated colors. Blue, green, red, and far-red photons can change photosynthesis and morphology in different ways. UV sits outside conventional PAR and must be treated separately. Spectrum matters, but its effect cannot be separated from intensity, photoperiod, genetics, and fixture efficacy.
Blue Spectrum: Vegetative Growth
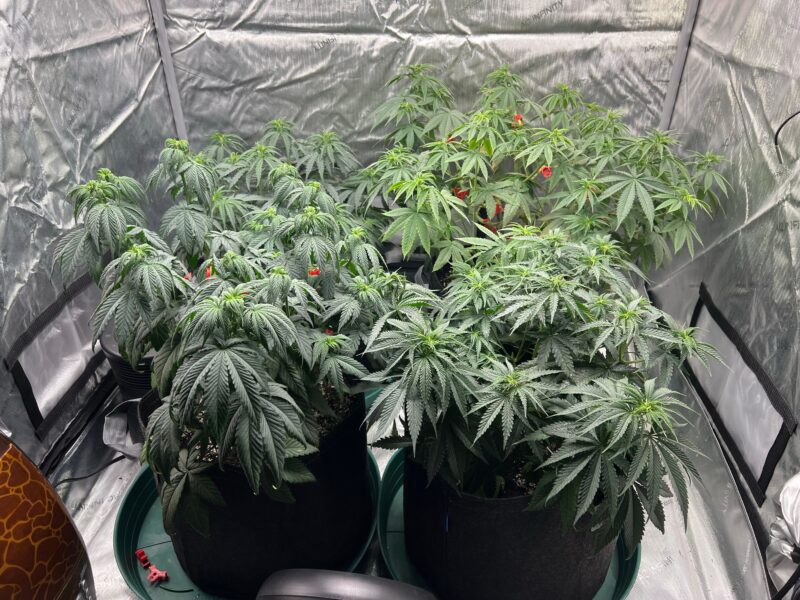
A white fixture with a higher correlated color temperature often contains a larger blue fraction, and blue photons commonly encourage shorter internodes and more compact morphology. CCT is only a visual summary of white light, not a measurement of blue photons, so compare the actual spectral power distribution when possible.
CCT Is Not a Spectrum Measurement
Correlated color temperature describes the appearance of white light. Two fixtures with the same Kelvin value can distribute photons differently, so use the spectral chart for plant-light comparisons.
Benefits of Blue Spectrum for Vegetative Growth:
- Compact Growth: Blue light promotes short, dense growth, preventing plants from becoming too tall or spindly. This is important in indoor setups where space is limited and light needs to reach all parts of the plant.
- Healthy Leaves and Stems: Blue light supports the development of large, healthy leaves and thick stems, both of which are essential for efficient photosynthesis and nutrient transport.
Best Light Sources for the Blue Spectrum:
- Metal halide: Its blue-rich output can help limit extension growth during vegetative development, although a suitable white LED can serve the same stage.
- Daylight CFLs: CFL bulbs in the 6400K–6500K range are also a good option for vegetative growth.
- LEDs in vegetative mode: Many full-spectrum LED grow lights allow you to switch to a vegetative mode that enhances blue light, promoting strong growth.
Compact growth is an observed plant response, not proof that blue light alone controls architecture.
“Will adding more blue light keep every cannabis plant short?”
Question sent by: Olivia Harris, via contact form.
Blue fraction can influence morphology, but genetics, total photon dose, temperature, plant spacing, and far-red exposure also affect stretch. Use the spectral chart and plant response instead of treating blue light as a universal height control.
Red Spectrum: Flowering
Red photons are highly effective for photosynthesis and are common in efficient flowering fixtures. A warm white or red-rich spectrum can support flower production, but red light is not a stand-alone switch for resin or potency. Cannabis can complete its full cycle under a broad white spectrum, and the plant responds to the combined photon distribution, intensity, duration, and cultivar genetics.
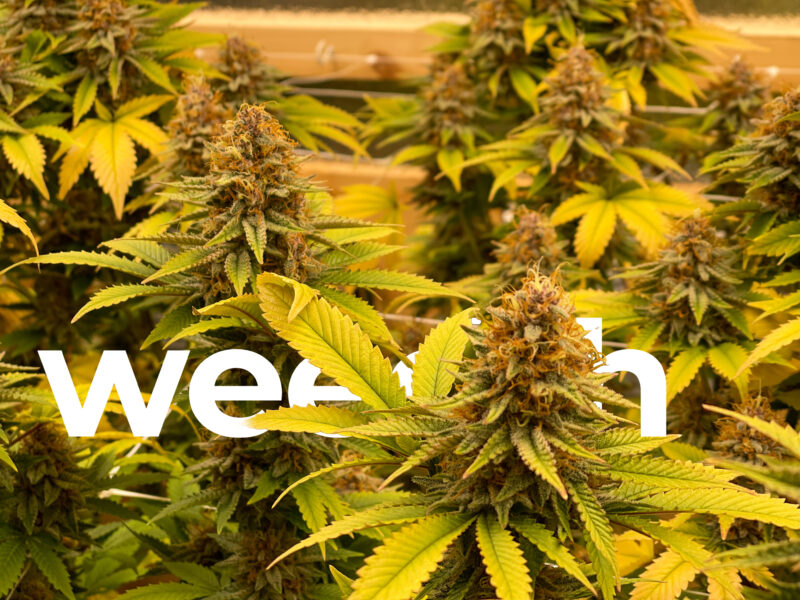
Benefits of Red Spectrum for Flowering:
- Flower production: Red photons contribute efficiently to photosynthesis, while the final flower mass and chemistry still depend on total photon delivery, spectrum balance, genetics, and the surrounding environment.
- Maximizes Yield: The red spectrum triggers hormonal responses in the plant that are crucial for producing dense, resinous flowers.
Best Light Sources for the Red Spectrum:
- High-Pressure Sodium (HPS) lights: HPS lights are widely used during the flowering stage due to their strong output in the red spectrum.
- Warm CFLs: CFL bulbs with a color temperature of 2700K provide the red wavelengths needed for flowering.
- LEDs in flowering mode: Many full-spectrum LED lights have a flowering mode that increases the intensity of red light, ensuring your plants receive the right spectrum for bud production.
“Does more red light always mean larger flowers?”
Question sent by: Jack, via Facebook page.
No. Red photons are photosynthetically useful, but yield depends on total dose, spectrum balance, canopy uniformity, environment, genetics, and duration. A red-heavy fixture does not compensate for weak coverage or a stressed root zone.
Full Spectrum: Covering All Phases of Growth
Full-spectrum is a broad marketing term, not a guarantee that a fixture reproduces sunlight. Most modern white grow LEDs cover much of the visible range and may add deep red or far-red diodes. Many contain little or no UV. Read the spectral chart instead of assuming the label describes every wavelength.
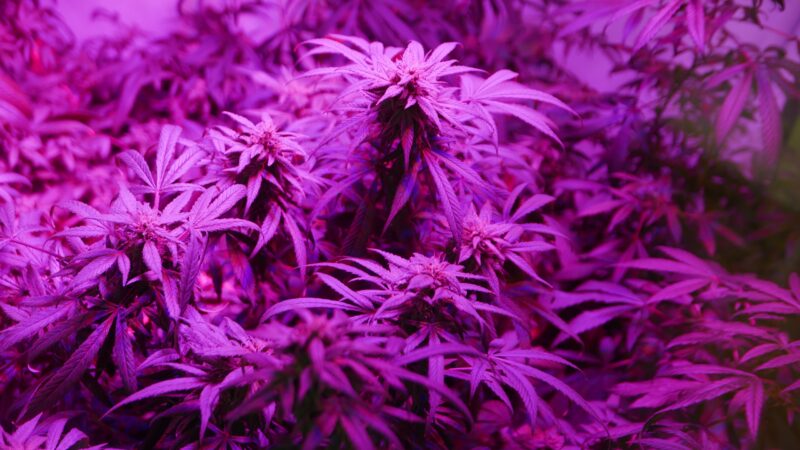
Advantages of Full-Spectrum Lighting:
- Optimized for all growth stages: Full-spectrum lights eliminate the need to switch between different bulbs or light types as your plants transition from vegetative to flowering. You can simply adjust the intensity or mode with the right LED lights.
- Mimics natural sunlight: Full-spectrum LEDs balance blue, red, green, and UV light, creating an environment that closely mimics natural outdoor conditions for plant growth.
- Healthier plant growth: Full-spectrum lights support more efficient photosynthesis, improving overall plant health and resilience.
Ultraviolet (UV) Light for Trichome Production
Ultraviolet radiation sits outside the 400 to 700 nanometer photosynthetic range. UV can trigger stress and protective responses, but controlled cannabis studies have produced mixed results, including trials with no increase in flower yield or cannabinoid concentration. It should never be presented as a reliable way to raise THC.
UV Exposure Is a Human Safety Hazard
UV can injure eyes and skin before discomfort provides a useful warning. Do not improvise exposure times or enter an illuminated UV area without shielding, documented procedures, and appropriate protective equipment.
- UV supplementation: Use only equipment intended for horticulture, follow its measured output and safety instructions, and prevent human or animal exposure. There is no universal number of hours or hanging distance that applies to every UV source.
Important
UV can injure eyes and skin before the hazard feels obvious. Do not enter an illuminated UV zone without a documented safety procedure, appropriate shielding, and protective equipment. If those controls are not available, skip UV supplementation.
A white fixture still needs a spectral chart and credible performance data.
“If a grow light looks white, is it automatically full spectrum?”
Question sent by: Lucas Morgan, via email.
White appearance does not reveal the complete spectral distribution. Review the measured spectrum, output, efficacy, and coverage. “Full spectrum” is a broad marketing description, not a guarantee that every wavelength is present in a useful proportion.
Spectrum Adjustments for CFL and LED Growers
For growers using CFL or LED lights, it’s important to adjust your lighting when transitioning from vegetative growth to flowering. The ability to fine-tune the light spectrum is especially important when using LED grow lights, as many models allow you to switch between different light settings to optimize growth during each stage.
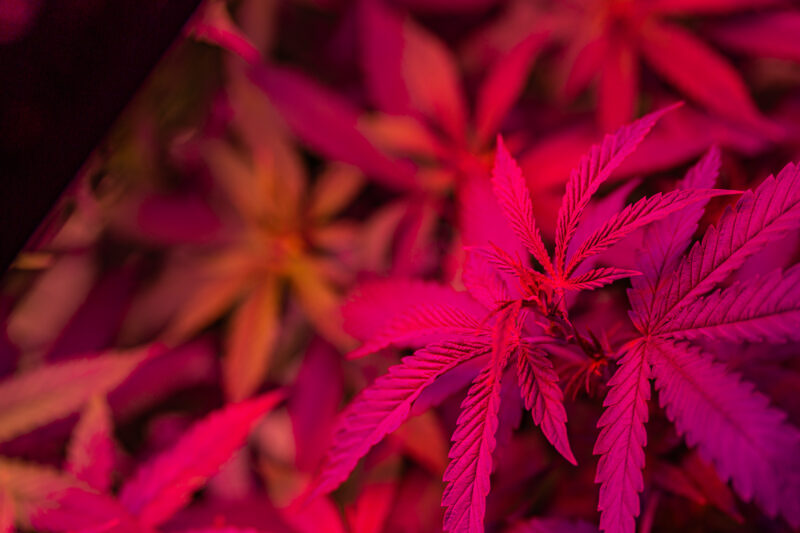
How to Adjust Light Spectrum:
Transition from Vegetative to Flowering:
If you’re using white or blue daylight CFLs or LEDs during the vegetative stage, switch to red or orange 2700K–3000K lights when transitioning to the flowering phase. This change mimics the natural seasonal shift in sunlight, helping to trigger bud formation.
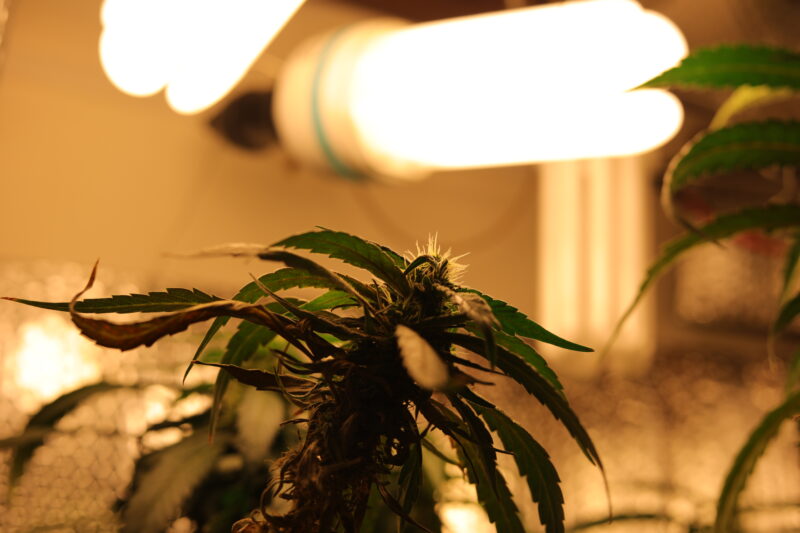
LED grow lights: If you’re using full-spectrum LED grow lights, make sure to switch from vegetative mode to flowering mode when entering the 12/12 light cycle. Many LED lights allow you to customize the spectrum, which helps the plant receive the correct wavelengths for bud development.
Combining Blue and Red Light:
Full-spectrum LED lights often include a combination of both blue and red light, allowing the grower to adjust the balance as needed. During the flowering stage, you can reduce the amount of blue light while increasing red light to maximize bud formation.
Green and far-red light: Green photons contribute to photosynthesis and can move deeper through dense leaves than strongly absorbed blue or red photons. Far-red changes phytochrome signaling and can alter extension growth and flowering responses, but it can also encourage unwanted stretch. Neither wavelength is a universal shortcut to faster flowering or better quality.
What is Full-Spectrum Lighting?
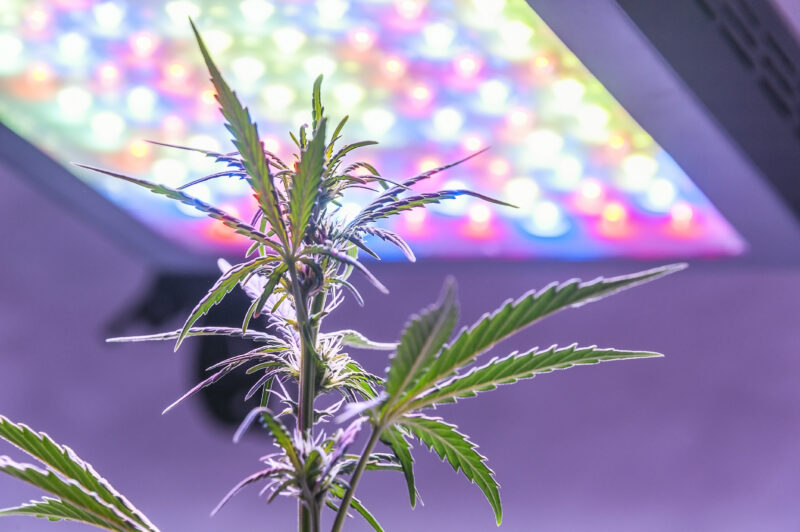
Full-spectrum lighting simplifies your grow setup by supporting all stages of cannabis growth with just one light system. Unlike traditional setups that require different bulbs for vegetative and flowering phases, full-spectrum LED grow lights provide a balanced mix of blue, red, and other essential wavelengths that mimic natural sunlight more closely.
Why Full-Spectrum Lighting is Ideal:
- Broad visible output: A well-designed white LED can support every growth stage without changing lamps, while UV or far-red should be confirmed on the spectral chart rather than assumed.
- Energy efficiency: LED grow lights use significantly less energy than traditional HID or CFL systems, making them a more cost-effective option for long-term grows.
- Simplified growing process: There’s no need to switch between different bulbs or light types with full-spectrum lights. You can simply adjust the intensity or switch between vegetative and flowering modes, making it easier to manage your grow room.
Light Intensity and Placement
Light intensity is determining the health and productivity of your cannabis plants. Light intensity directly affects photosynthesis, and the more intense the light, the more energy the plant can produce. However, carefully managing the intensity is crucial, and you need enough light to drive growth but not so much that it causes light burn or stress.
Measuring Light for Plants: PPF, PPFD, and DLI
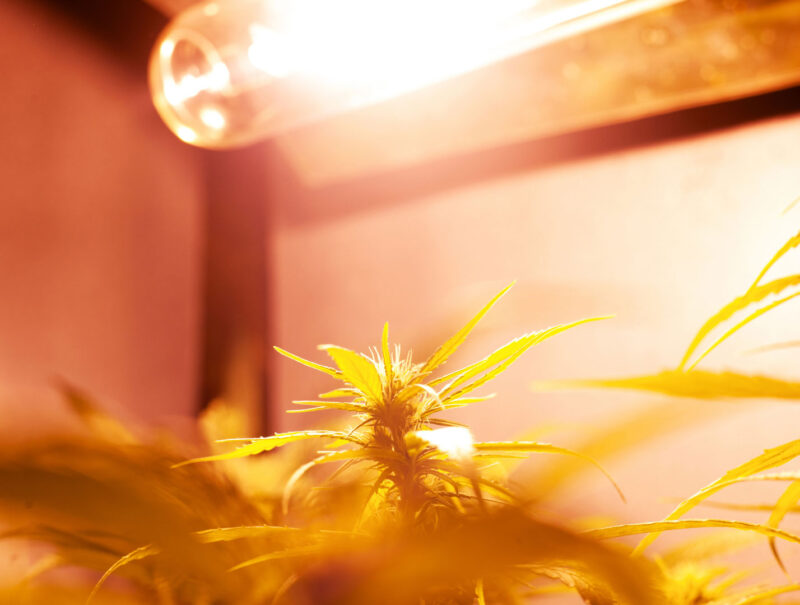
Lumens and lux weight light according to human vision, so they are not the preferred units for comparing horticultural fixtures. PAR describes the 400 to 700 nanometer waveband used for conventional photosynthetic measurements. PPF describes photons emitted each second, PPFD describes photons arriving on each square meter per second, and DLI adds those arriving photons across the full light period.
Useful starting targets depend on cultivar, stage, photoperiod, carbon dioxide, temperature, and the capacity of the root zone. Treat the following as adjustable starting points, not universal requirements:
- Vegetative growth: roughly 300 to 600 µmol/m²/s PPFD is a practical starting range for many healthy plants, with gradual acclimation.
- Flowering: roughly 600 to 1,000 µmol/m²/s PPFD is a common non-enriched starting range, but cultivar and environment decide whether the upper end is useful.
Master Tip
More usable light can support more flower only while the canopy, roots, water supply, nutrition, carbon dioxide, and climate can use it. Increase intensity in measured steps and watch the whole system respond.
Light Distance: Getting the Right Height
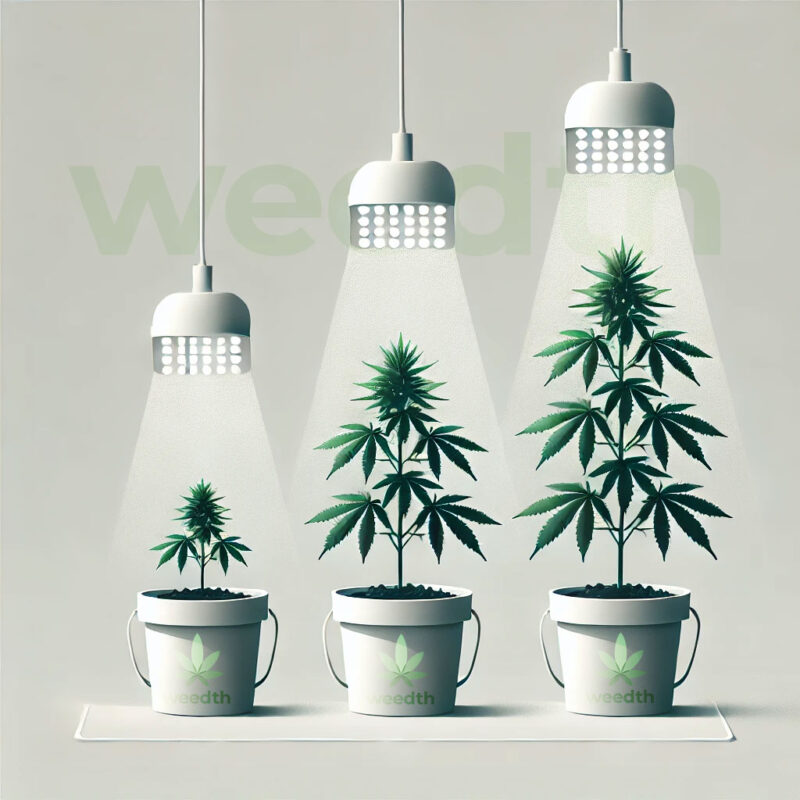
The distance between your light source and the plant canopy is crucial for maximizing light absorption while avoiding damage. Each type of light - whether HID, LED, or CFL - has a recommended distance based on its wattage and intensity.
HID Lights (Metal Halide and High-Pressure Sodium):
- Lower-output HID systems: Begin within the manufacturer's tested hanging range, then check canopy PPFD and leaf temperature before moving closer.
- Mid-output HID systems: Use the reflector's coverage data and a canopy grid. Wattage alone cannot predict a safe distance.
- High-output HID systems: Confirm both photon intensity and radiant heat. More clearance may be necessary, but the correct value depends on reflector, cooling, and canopy target.
LED placement: Use the fixture's PPFD map and dimmer setting as the starting point. Confirm average intensity, edge intensity, leaf temperature, and plant response at the actual canopy height.
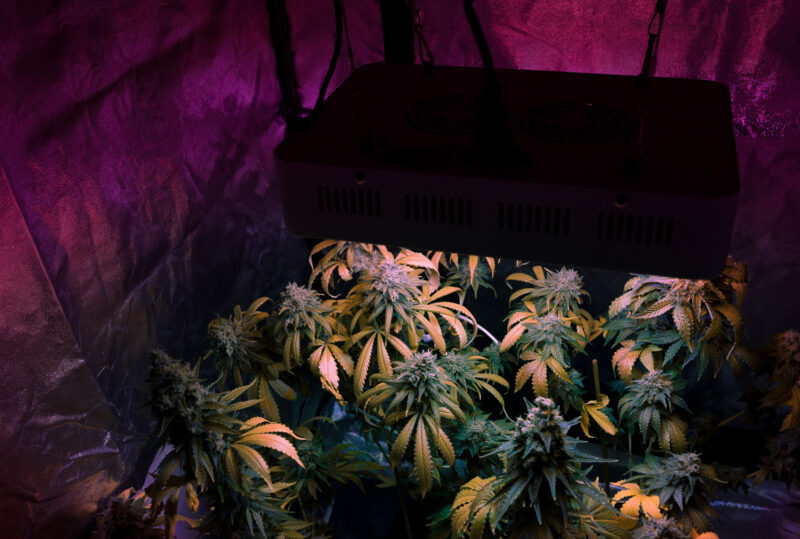
CFL placement: CFLs usually need close placement because their photon output falls quickly with distance, but leaf temperature and coverage still decide how close is safe.
Adjusting Light Height During Growth
The optimal distance between the light and your plants will change as your cannabis grows, so it’s important to regularly adjust the height of your lights:
- Seedlings and clones: Start with gentle, even light. Adjust height or dimming from measured PPFD and plant posture rather than a fixed distance.
- Vegetative plants: Increase intensity gradually as leaf area and root capacity expand. Re-map the canopy after training or a major height change.
- Flowering plants: Maintain the planned PPFD across the top and edges, then watch for bleaching, upward leaf curl, stalled growth, and excess leaf temperature.
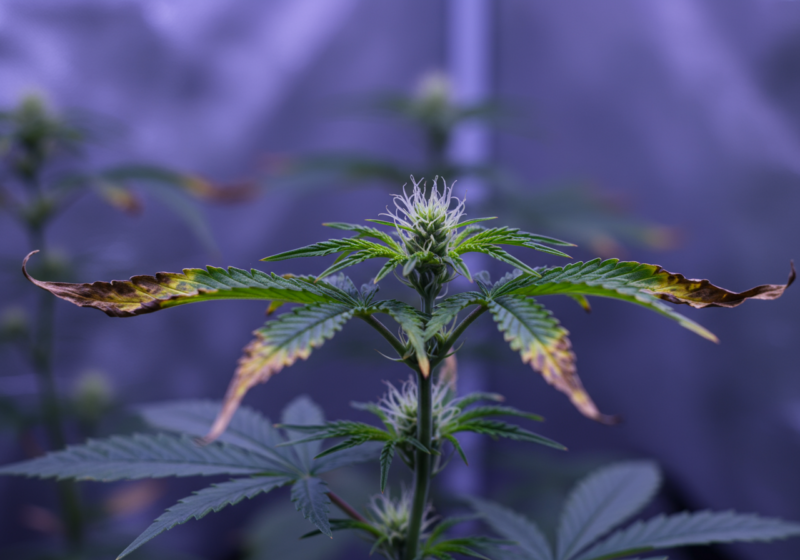
It is important to monitor the plants daily for signs of light burn, such as browning or curling leaves, especially on the topmost buds that are closest to the light. Conversely, if the plants start stretching or developing long internodes, they may be too far from the light and reaching for it.
Maximizing Light Penetration
The amount of light that reaches the plant’s lower branches - called light penetration - is another crucial factor. Light can reach all plant parts with proper penetration, resulting in more even growth and larger yields. Here’s how to improve light penetration:
- Keep the canopy level: By using training techniques like topping, low-stress training (LST), and Screen of Green (ScrOG), you can keep the plant canopy even and ensure that all parts of the plant receive direct light.
- Use reflective surfaces: Reflective walls or Mylar sheets around the grow room can bounce light back onto the lower parts of the plant, improving light penetration and making more efficient use of your light source.
- Rotate your plants: If you’re working in a smaller grow space, rotating your plants can ensure that all sides receive equal light exposure, promoting even growth throughout the canopy.
Ballasts
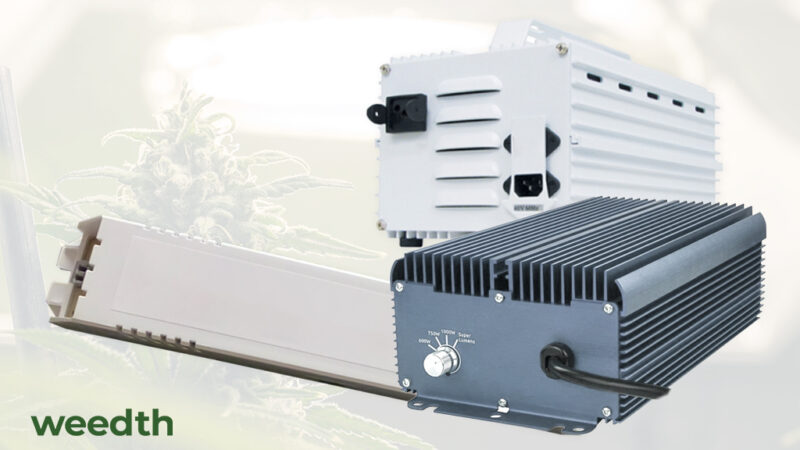
Your ballast is an essential component in any HID lighting setup. Without a ballast, your bulbs won’t work properly, and worse, they could burn out quickly. A ballast controls the electrical current flowing to your light bulb, making sure it operates efficiently and safely.
Types of Ballasts
There are two main types of ballasts for cannabis cultivation: magnetic and digital (electronic).
Magnetic ballasts: These are the traditional ballasts that have been used for years. While reliable, they run hotter and are less energy-efficient than modern digital ballasts.
- Pros: Cheaper upfront cost, reliable.
- Cons: Runs hot, less energy-efficient, bulkier.
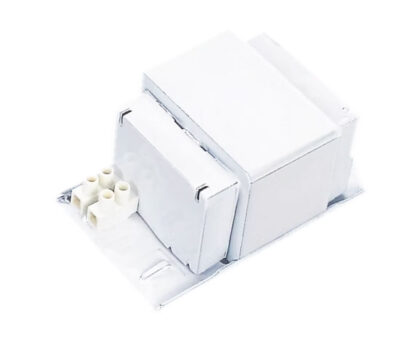
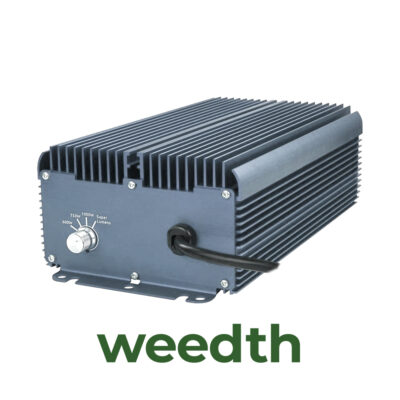
Digital ballasts: These are the newer, more efficient option. Digital ballasts run cooler, use less energy, and offer better performance overall. Many digital ballasts are also dimmable, allowing you to adjust the wattage to match the growth stage of your plants.
-
-
- Pros: More energy-efficient, cooler, quieter, can often run both MH and HPS bulbs.
- Cons: Higher upfront cost, more prone to electrical interference if not properly shielded.
-
Choosing the Right Ballast
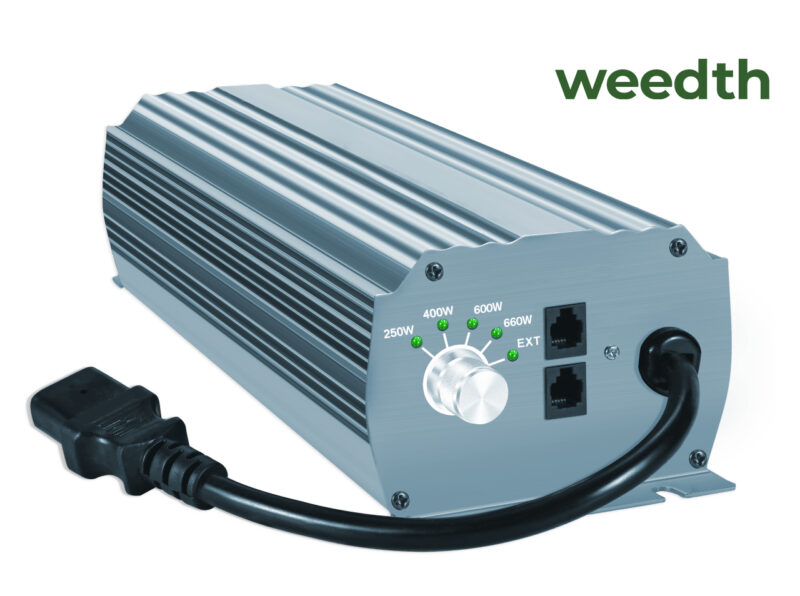
It’s crucial to match your ballast’s wattage to your grow light’s wattage. Using the wrong ballast can cause your bulbs to burn out prematurely or fail to reach their full brightness. For example, a 600-watt ballast should be paired with a 600-watt HPS or MH bulb. Many digital ballasts are switchable, meaning they can run both metal halide and high-pressure sodium bulbs with the flip of a switch, making them a versatile option.
Tip: Invest in a dimmable ballast to control light intensity as your plants progress through different growth stages. This way, you can lower the intensity during the vegetative stage and ramp it up during flowering.
Reflectors: Maximizing Light Efficiency
In any grow room, the proper use of reflectors is key to maximizing light efficiency. Light bulbs emit light in all directions, and without a reflector, much of that light will be wasted. Reflectors direct light back toward the plants, concentrating it where needed most. Simply put, a good reflector ensures that the light energy you’re paying for is fully utilized.
Choosing the Right Reflector

There are several types of reflectors and each with own advantages:
- Open-ended reflectors: These are basic curved reflectors that allow heat to dissipate more easily. They are ideal for HID lights, which generate a lot of heat. However, they can sometimes distribute light unevenly, so placement is key.
- Enclosed (air-cooled) reflectors: These reflectors enclose the bulb in a glass casing, allowing you to use ventilation to pull the heat away from the bulb. This helps keep the grow room cooler, making these reflectors a good option if heat is an issue.
- Wing reflectors: Adjustable wings provide a wide spread of light, making them useful for increasing the coverage area. They are also great for minimizing shadow areas in the grow space.
- Parabolic reflectors: These dome-shaped reflectors focus the light downward, which is great for plants directly below the lamp but may not cover a wide area effectively.
Reflective Surfaces: Boosting Light Efficiency
Reflective surfaces are an easy and cost-effective way to increase light efficiency in your grow room. By covering the walls, ceiling, and even the floor with reflective material, you can bounce light back onto your plants, ensuring that all parts of the plant receive as much light as possible.
Types of Reflective Materials
There are several materials commonly used to reflect light in a grow room:
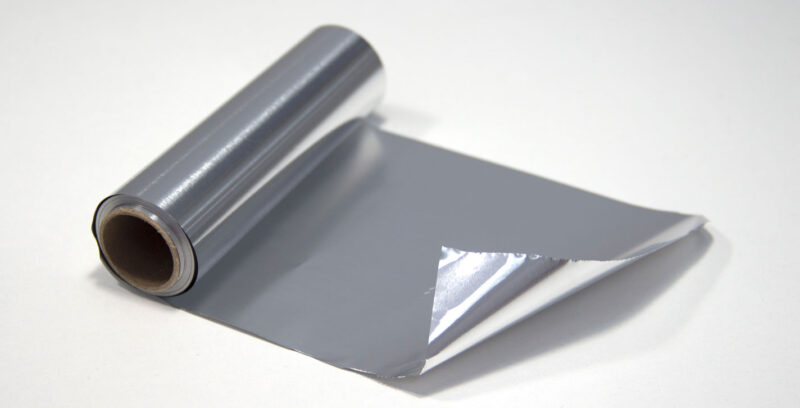
Mylar: Mylar is one of the most effective reflective materials, with a reflectivity of around 90-95%. It’s a shiny, metallic film that is easy to install and highly efficient at bouncing light back toward the plants. Mylar sheets can be hung on walls, ceilings, and even the floor to ensure that no light is wasted.
Flat white paint: A clean matte white surface can provide diffuse reflection with fewer sharp hot spots than wrinkled film. Performance depends on paint, cleanliness, age, and installation, so avoid treating one reflectivity percentage as universal.

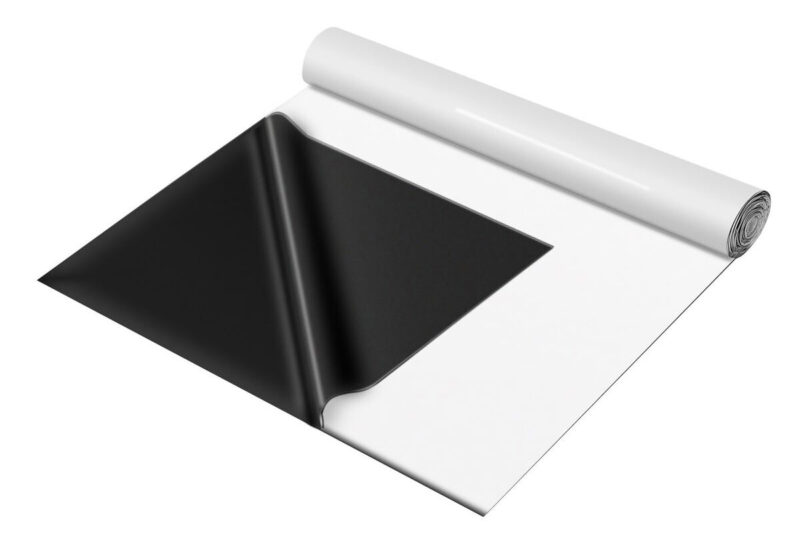
Panda Film: Panda film is a two-sided plastic sheet - one side is black, and the other is white. The white side is used for its reflective properties, while the black side helps block out external light. Panda film is a good option for lining the grow room to reflect light while also controlling external light interference.
How to Use Reflective Materials Effectively
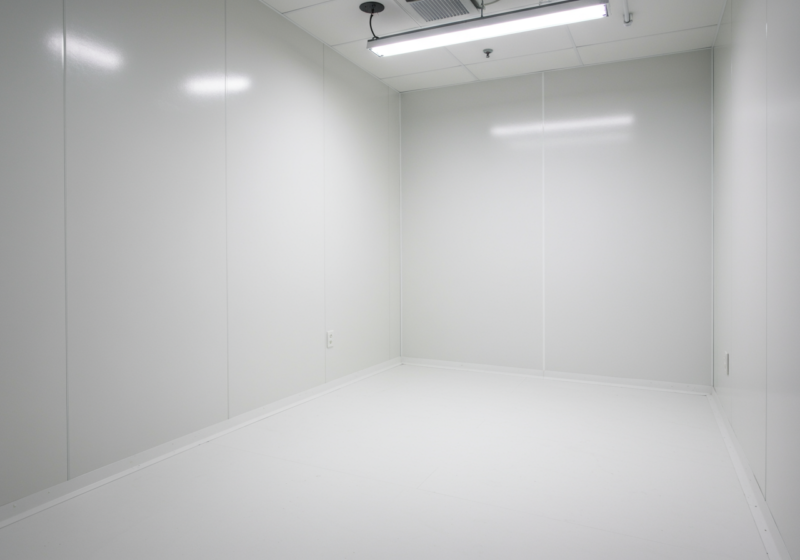
To maximize the benefits of reflective materials, ensure that they are installed properly:
- Line the walls and ceiling with reflective materials to bounce light back onto the plants. Reflective materials help ensure that light is dispersed evenly, reducing shadows and increasing the amount of light that reaches the lower branches of the plant.
- Cover the floor: Even the floor of your grow room can reflect light back onto the plants, especially if you’re working with a small grow space where light intensity is critical.
- Avoid wrinkles and folds: When installing reflective materials, make sure they are smooth and free of wrinkles. Wrinkles can create shadows or uneven light distribution, reducing the effectiveness of the reflective surface.
Tip: Reflective surfaces are essential in larger grow rooms where light intensity can drop off toward the edges of the space. By reflecting light back onto the plants, you increase overall light efficiency without needing to add more lights.
Reflection is most valuable after the fixture and canopy already fit one another.
Remember: Reflective material can redirect stray photons, but it cannot replace missing fixture output. Re-map the edges after installation and keep surfaces clean, flat, dry, and safely separated from electrical equipment.
Once the edge readings are known, we can decide whether reflection improved the layout enough.
“Can reflective walls compensate for an undersized fixture?”
Question sent by: Sophie Anderson, via contact form.
Reflective surfaces can recover some stray light and improve edges, but they cannot create photons. If the measured canopy dose remains too low, improve the fixture plan, coverage, or canopy size instead of relying on brighter walls.
Managing Light Distribution
Maximizing light distribution is crucial for ensuring that every part of your plant receives adequate light. Uneven light distribution can lead to underdeveloped buds, wasted energy, and lower yields. Here’s how to manage light distribution efficiently:
- Use Reflective Walls: Line the walls of your grow room with Mylar, flat white paint, or reflective materials. Reflective surfaces help bounce light back onto your plants, ensuring even the lower branches get enough light to develop properly.
- Employ Light Movers: Light movers shift your grow lights back and forth over the canopy, ensuring all parts of the plant receive light evenly. This is especially helpful when using high-intensity lights like HPS or MH, as it reduces the risk of hot spots and promotes even growth across the canopy.
- Rotate Plants: In smaller setups, rotating your plants regularly helps ensure that each side receives equal light. This promotes more uniform growth and prevents any side of the plant from being under-lit.
- Maintain an even canopy: Training can keep productive tops within a narrower PPFD and temperature range. Uniform exposure usually matters more than trying to force deep penetration through an unmanaged canopy.
Uniformity is a property of the whole measured canopy, so it should be recorded after every meaningful layout change.
Canopy Uniformity
Uniformity describes how evenly light is distributed across the measured canopy. Minimum-to-average and maximum-to-average comparisons help reveal weak edges and hot centers that a single average PPFD number can hide.
A uniform map should be established before rotation is used as a routine correction.
“Should I rotate the pots every day to correct uneven light?”
Question sent by: Hannah, via Facebook page.
Rotation may help a small movable garden, but it can also hide a poor layout and make training inconsistent. Map the canopy first. Correct fixture position and spacing when possible, then use rotation only as a deliberate secondary tool.
Supplemental Lighting
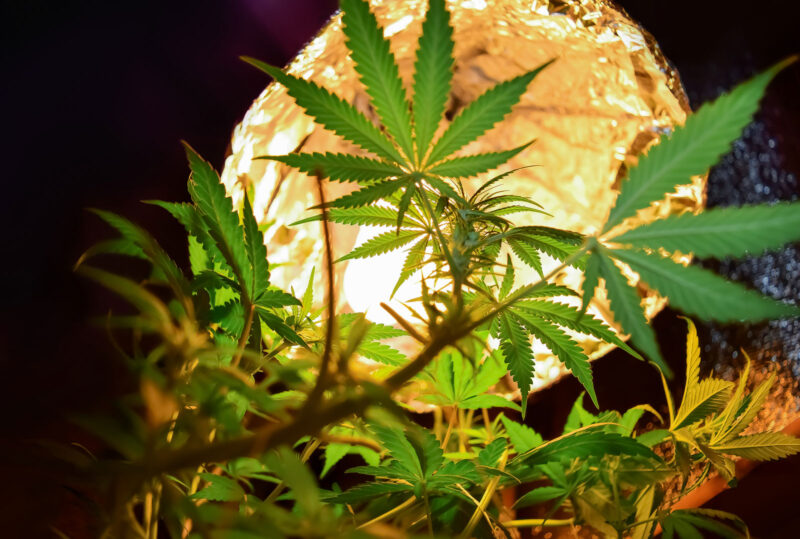
Supplemental lighting provides additional light where the main grow lights may not reach or boost overall light levels during critical growth stages. Here are the most common types of supplemental lighting used in cannabis cultivation:
Fluorescent Lights for Seedlings and Clones
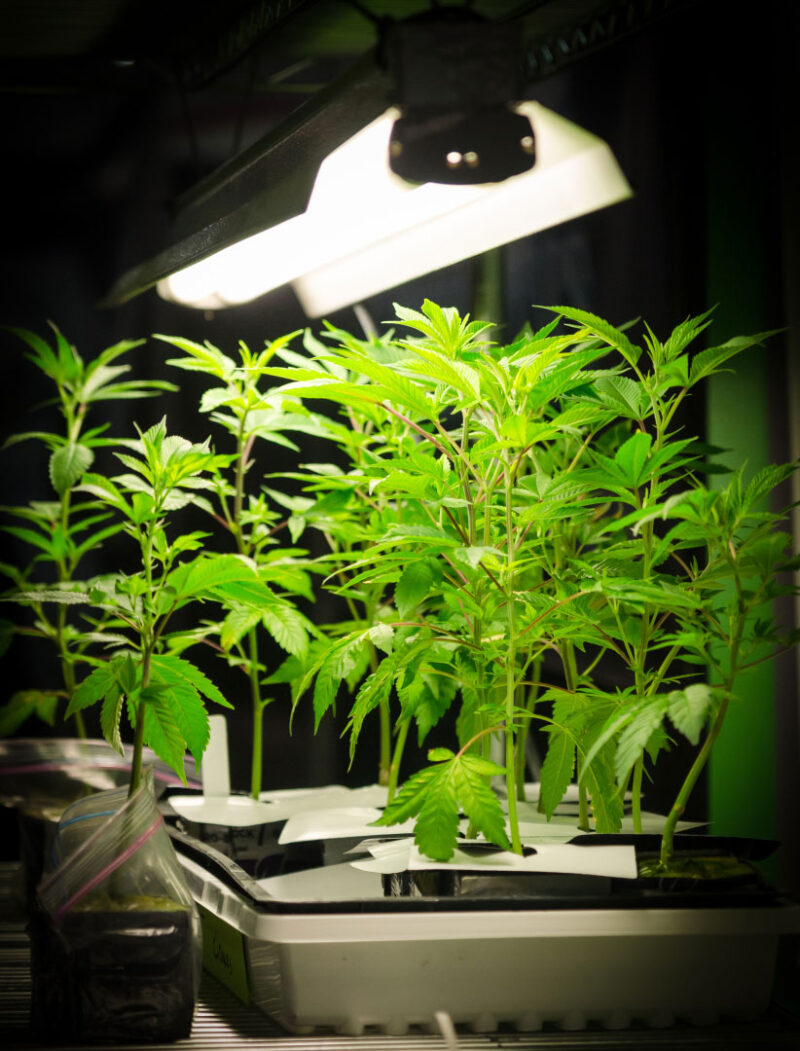
Fluorescent lights (including T5 and CFL bulbs) are commonly used as supplemental lighting for seedlings and clones. These lights provide a gentle, diffuse light that is perfect for the early stages of plant development. Fluorescents can be placed close to young plants without causing heat stress, helping them establish strong roots and stems.
- Best for seedlings and clones: Fluorescent lights are perfect for young plants that need gentle light to establish strong roots and stems.
Side lighting for lower buds: Adding CFLs or T5s along the sides of your plants can help improve light penetration to the lower branches, encouraging bud development lower down the plant.
Side Lighting for Larger Plants
In larger grows, especially where plants have been trained with techniques like LST or ScrOG, the lower parts of the plant can often be shaded by the canopy above. Adding side lighting can ensure that the lower branches receive enough light to produce healthy buds. LED strips or CFLs can be positioned along the sides of the plants to improve light penetration.
Boosting Light During Flowering
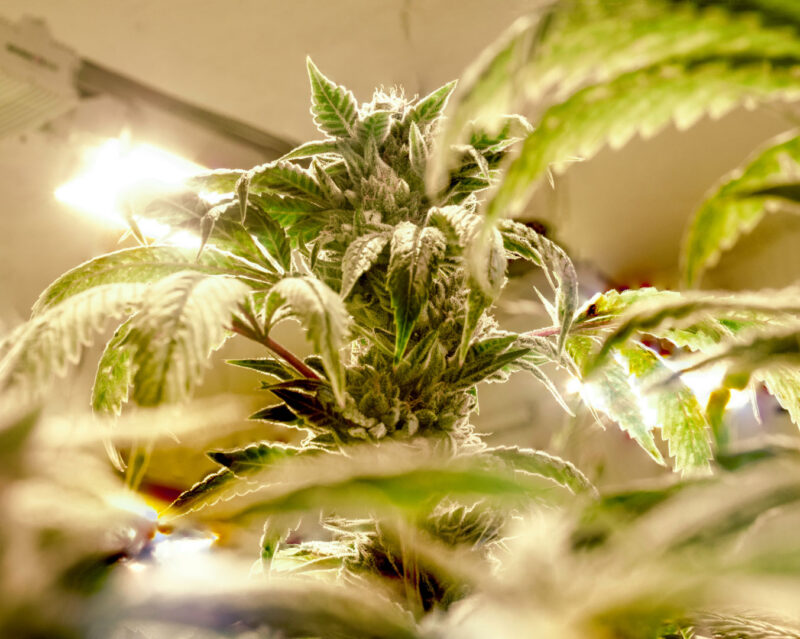
Supplemental fixtures can raise PPFD in a measured weak zone, but adding lamps without a new canopy map may create heat and hot spots rather than useful production. Include their photon output, electrical load, and airflow obstruction in the plan.
Field Advice
Add supplemental light only where measurements and canopy structure show that productive tissue can use it. Compare a treated section with an untreated section before expanding the system.
UVB Light Supplementation
UVB supplementation attracts attention because cannabis trichomes have protective functions, but the popular claim is stronger than the evidence. Responses vary by genotype, UV wavelength, dose, timing, background spectrum, and environment. A grower should expect possible stress first, not assume a potency increase.
How UVB Light Affects Plants
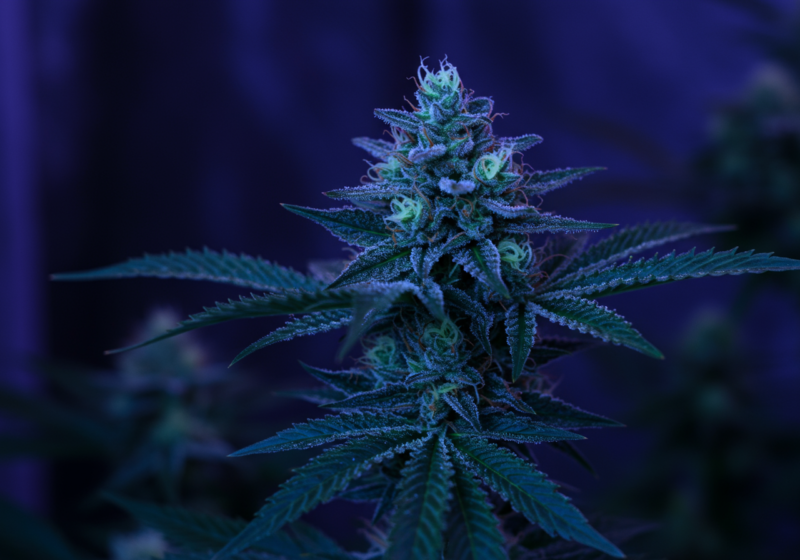
Trichomes contain cannabinoids and aromatic compounds, yet their abundance does not translate directly into a predictable THC percentage. UV exposure can alter plant responses, but controlled research has found neutral, positive, and negative outcomes depending on the treatment. The practical conclusion is caution: UV is an experimental variable with a narrow safety margin.
Benefits of UVB Light Supplementation:
- Possible response: Some genotypes may change surface traits or secondary-metabolite profiles, while others show little useful response.
- Possible cost: Excess UV can reduce photosynthetic area, damage tissue, lower yield, and expose people to avoidable risk.
How to Use UVB Lights
If UV is tested at all, treat it as a small controlled trial rather than a room-wide recipe. Establish a non-UV control, document the fixture output and exposure, protect people and pets, and stop if the canopy shows damage. The primary grow light must already provide an appropriate PPFD and DLI.
Best practices for using UVB lights:
- Timing: Follow a documented protocol for the exact fixture and crop area. Generic exposure-hour recipes cannot account for UV photon output.
- Distance: Base placement on measured UV irradiance and the manufacturer's safety information, not a universal inch value.
- Use with HPS or LED lights: UVB lights should be used in conjunction with your regular grow lights (HPS or LED). They are meant to supplement, not replace your primary light source.
Tip: UVB light is most effective during the last few weeks of the flowering stage when trichome production is at its highest. This is when you’ll see the biggest increase in resin production.
Plant-light experimentation stops where human and animal exposure begins.
Never Forget: UV can damage eyes and skin. Use shielding, interlocks, clear labeling, scheduled access control, and the manufacturer’s safety instructions; never depend on memory alone.
UV equipment must be treated as a human safety system before it is treated as a plant-light accessory.
“Can I enter the room for only a minute while UVB lamps are on?”
Question sent by: SoilAndSun, via Facebook page.
Avoid intentional exposure. UV radiation can injure eyes and skin, and the risk is not made harmless by a short visit. Interlock or schedule the system so people and animals cannot enter while it operates, and follow the lamp manufacturer’s safety requirements.
Light Movers: Maximizing Coverage
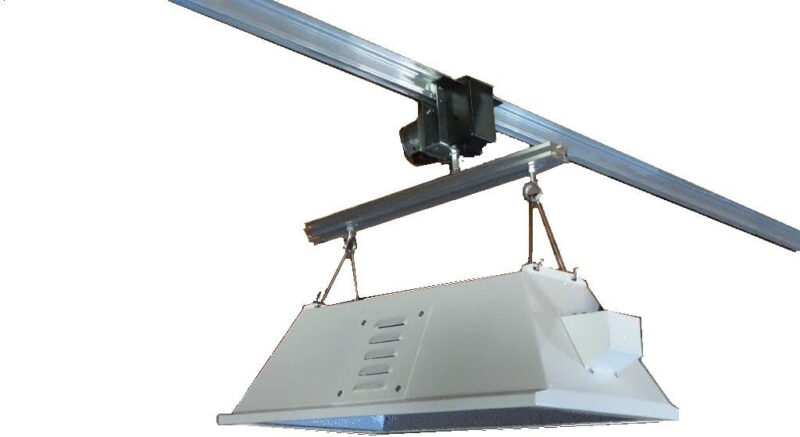
Light movers are mechanical systems that allow grow lights to move back and forth across the plant canopy. They help distribute light more evenly across your plants, ensuring that all areas receive consistent illumination. Light movers can be especially useful in larger grow spaces where a single stationary light might not cover the entire canopy efficiently.
How Light Movers Work
Light movers are mounted on tracks or rails that move the light back and forth over the plants, covering a wider area than a fixed light can. This movement helps reduce the risk of hot spots (areas where the light is too intense) and shadow zones (areas where the light doesn’t reach). By moving the light, you ensure more uniform growth across the entire plant, as every part of the canopy gets equal exposure to the light.
Benefits of Using Light Movers
- Increases coverage: Light movers allow you to cover a larger grow area with fewer lights, as the moving light can reach more plants without the need for additional fixtures.
- Reduces heat stress: Because the light is constantly moving, no single spot on the plant is exposed to the full intensity of the light for too long, reducing the risk of heat stress or light burn.
- Improves light penetration: Moving lights help ensure that even lower branches and leaves receive adequate light, promoting more uniform growth throughout the plant.
Tip: Light movers are particularly useful when using high-intensity lights like HPS or MH, as these lights can generate a lot of heat. By moving the light, you avoid concentrating too much heat in one spot, keeping the plants healthier and reducing the need for excessive ventilation.
Movement is a distribution tool, so its result still needs to be measured across the full light period.
“Can a light mover replace the fixture output needed for the whole canopy?”
Question sent by: PineBenchGrower, via email.
A mover redistributes existing light across time; it does not increase total photons. It can soften a stationary hot spot, but DLI, edge coverage, mechanical reliability, and the dark interval between passes still need to be evaluated.
Light Schedules and Using Timers Automation
Once you’ve selected your lights and set up your grow room, it’s crucial to manage the light schedules properly. Cannabis plants depend on specific light cycles to regulate their growth, and using timers can automate the process, ensuring consistency.
Vegetative Growth: 18/6 or 24/0 Light Cycle
Photoperiod cultivars commonly remain vegetative under an 18/6 schedule. Longer schedules raise DLI at the same PPFD, but they also increase electricity use and may leave less time for the room to cool. Faster growth is not guaranteed simply because the lights stay on longer.
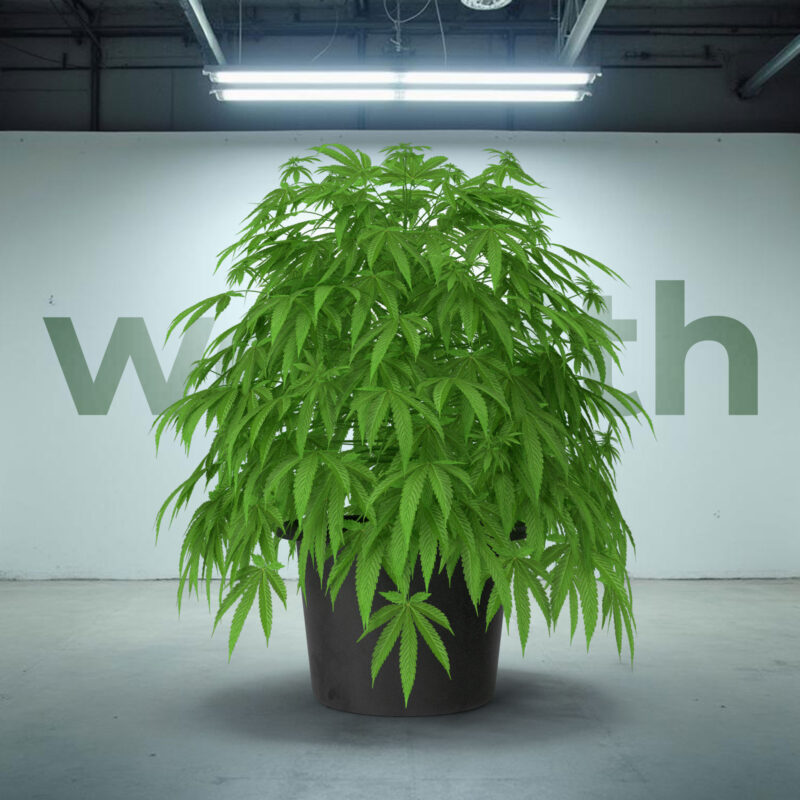
A 24/0 schedule keeps light available continuously, yet evidence does not establish it as universally superior to 18/6. Compare schedules by total daily photons, plant response, room recovery, and cost. If 18/6 already supplies the intended DLI, adding six more hours may add expense without a proportional gain.
Darkness must be dependable
A flowering schedule is only as reliable as its dark period. I check the timer under real load, watch one complete on-and-off transition, and look for indicator lamps, controller reboots, door light, and delayed relays that can quietly interrupt the plan.
Once we know darkness is truly dark and repeatable, small schedule decisions become much easier. A dependable ordinary schedule is more useful than an ambitious schedule controlled by unreliable equipment.
Flowering: 12/12 Light Cycle
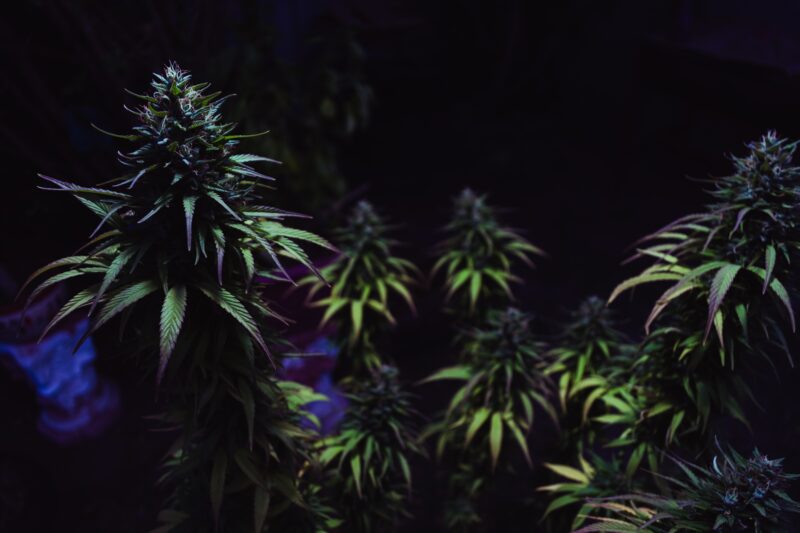
A 12/12 schedule is a reliable flowering program for most photoperiod cannabis and gives a consistent commercial baseline. Flowering thresholds vary among genotypes, so longer days may work for some cultivars, but they should be tested deliberately. Keep the dark period consistent and investigate light leaks because repeated interruptions can delay, disrupt, or partially reverse flowering.
Important
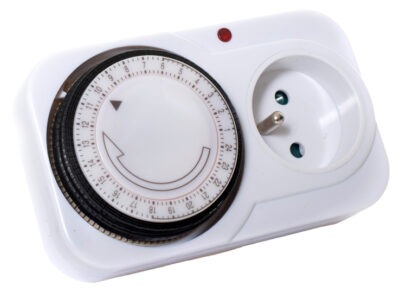
The timer or controller must be rated for the fixture voltage, continuous current, and load type. A household timer can fail even when its printed wattage appears high enough.
Autoflowering Strains and Light Schedules
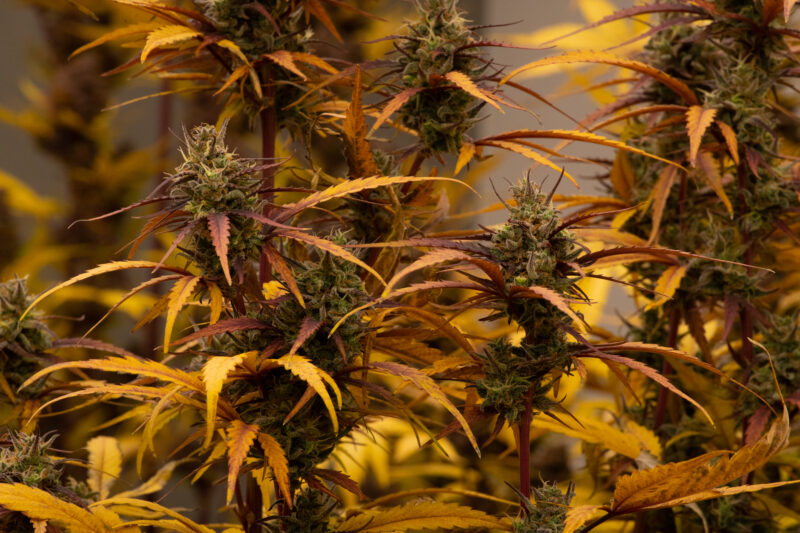
Autoflowering cultivars initiate flowering primarily through age and genetics rather than a deliberate switch to 12/12. The onset is not fixed at two to four weeks for every seed. Plant size, cultivar, root restriction, stress, and environment can shift the visible transition.
- Choose a schedule by DLI: 18/6 and 20/4 are common. A 24/0 schedule is possible, but it adds hours and cost. There is not enough evidence to call one schedule universally most efficient.
- Work with the short timeline: Avoid abrupt intensity jumps and root-zone setbacks. A broad-spectrum fixture can remain in place throughout the cycle; a mandatory blue-to-red switch is not required.
Advice
Do not raise intensity simply because flowering has appeared. Calculate the DLI, confirm canopy uniformity, and increase PPFD only when the plant and environment are using the current dose well.
Using Timers and Automation for Lighting Control
In any indoor grow setup, timers are a critical tool for automating the light schedule. Maintaining consistent light cycles is essential for healthy plant growth, and timers make this process automatic, ensuring that your plants receive the right amount of light at each stage of growth without manual intervention.
Why Timers are Important
Using timers allows you to automate the on/off cycles of your grow lights, ensuring that the light schedule is consistent and reliable. This consistency is crucial for both photoperiod strains, which depend on precise light cycles to trigger flowering, and autoflowers, which benefit from uninterrupted light schedules for maximizing growth.
Key benefits of timers:
- Consistency: Timers ensure that your plants receive light at the same time every day, which helps reduce stress and promote healthy growth.
- Efficiency: Automating the light cycle reduces the need for constant monitoring, freeing up time for other tasks.
- Energy savings: Timers can help reduce energy waste by turning off the lights exactly when needed, avoiding the risk of lights staying on longer than necessary.
Choosing the Right Timer
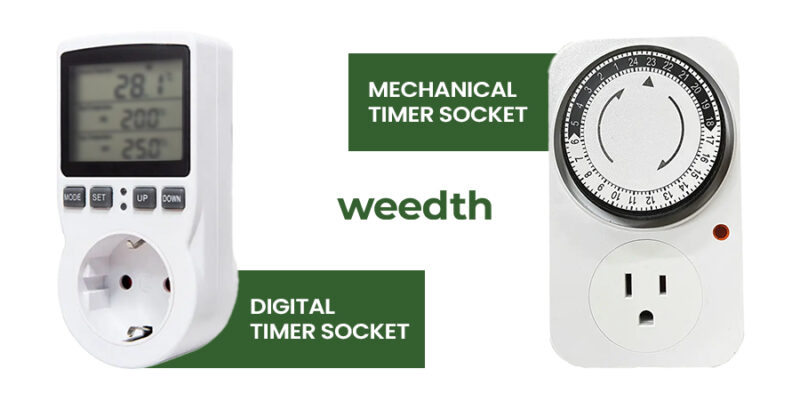
There are several types of timers available for managing your grow lights, each with its own advantages.
Mechanical Timers: These are the most basic and affordable timers. They use a dial to set the on/off cycles and are easy to use.
-
- Advantages: Simple, inexpensive, and reliable.
- Disadvantages: Less precise than digital timers and can be prone to wear over time.
Digital Timers: These timers offer more precision and flexibility. They allow you to set exact on/off times and are more durable than mechanical timers.
-
- Advantages: Accurate, programmable, and durable.
- Disadvantages: Slightly more expensive than mechanical timers, but worth the investment for serious growers.
Smart Timers: These timers are connected to a smart home system or smartphone app, allowing you to control the light schedule remotely. This level of control can be helpful for large grow setups or growers who need to manage multiple grow rooms.
-
- Advantages: Remote control, precise scheduling, and the ability to monitor light cycles from anywhere.
- Disadvantages: More expensive and requires a Wi-Fi connection.
Tip: For HID lights, make sure to use heavy-duty timers that can handle the high wattage of your grow lights. Basic timers may not be rated for the power requirements of high-intensity lights, which could lead to malfunctions or even fire hazards.
Automation should remove uncertainty rather than hide it.
Master Tip: Test the timer with the real fixture load, confirm one complete transition, and record what happens after a power interruption. A schedule is dependable only when its controller returns predictably.
With the controller verified, we can judge the schedule itself without confusing it with an equipment fault.
“Will a timer error of a few minutes ruin the flowering cycle?”
Question sent by: UrbanRooted, via Facebook page.
A single small timing error is usually less concerning than repeated interruptions or light during the intended dark period. Correct the schedule, check the timer and backup behavior, and watch for recurrence instead of making several compensating changes.
Lighting Setups for Different Grow Spaces
The size of your grow space will dictate the type of lighting setup you need. Whether you’re working with a small closet grow or a large commercial setup, tailoring your lighting system to the size of your space is essential for achieving the best results.
Small Grow Spaces (Closets, Cabinets, Tents)
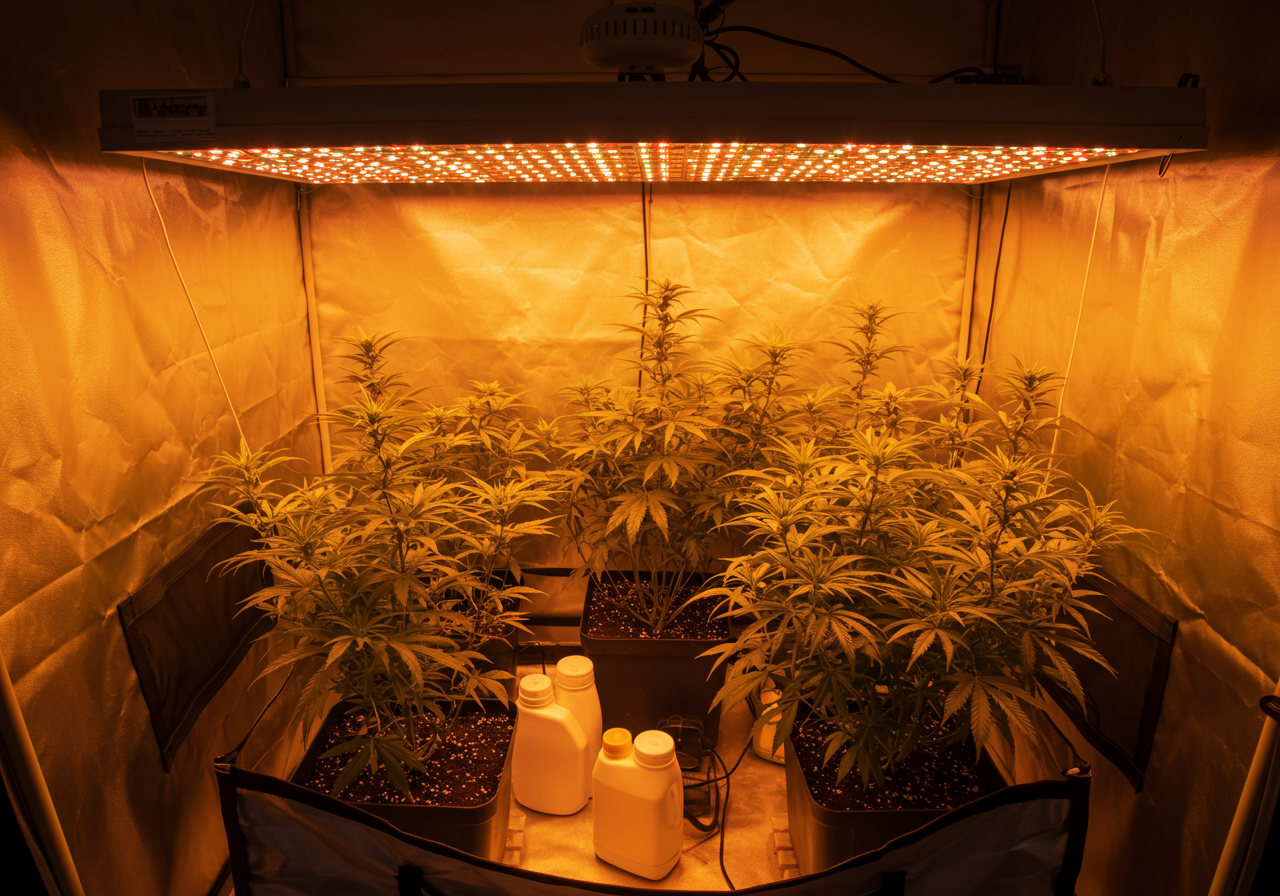
A small enclosure magnifies both uneven coverage and heat. Choose a fixture that physically fits with safe clearance and can dim low enough for young plants while still reaching the planned flowering PPFD. Modern LEDs are common, while T5 or CFL equipment is now mainly useful for propagation, temporary spaces, or equipment already owned.
- Fluorescent and CFL Lights: These lights are great for small grows because they don’t produce as much heat as HID lights. They can be placed close to the plants without causing heat stress, which is crucial in a confined space.
- LED Lights: LED grow lights are increasingly popular for small grow spaces. They are energy-efficient, produce less heat, and can provide both the blue spectrum (for vegetative growth) and the red spectrum (for flowering) in one fixture. Make sure to switch to flowering mode or adjust to 2700K–3000K color temperature when transitioning to flowering.
Medium Grow Spaces (Small Rooms, Large Tents)
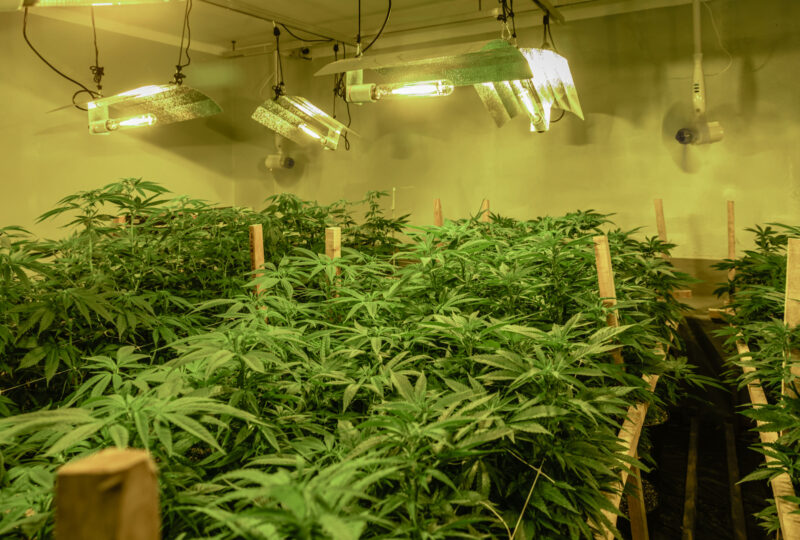
For medium-sized grow spaces, HID lights (metal halide and high-pressure sodium) are the most common choice. They provide high-intensity light, which is necessary for robust growth and large yields. However, you’ll need to manage heat carefully in these spaces.
- Plan photons, not nominal watts: Calculate the canopy area, target average PPFD, total PPF, expected uniformity, and cooling load. Then compare LED, HPS, or CMH systems that can meet that plan.
- Air-cooled reflectors: It’s important to control heat in medium grow spaces, especially when using HID lights. Air-cooled reflectors with ventilation systems can help keep the grow room temperature within the optimal range for plant growth.
Large Grow Spaces (Commercial Setups, Large Rooms)
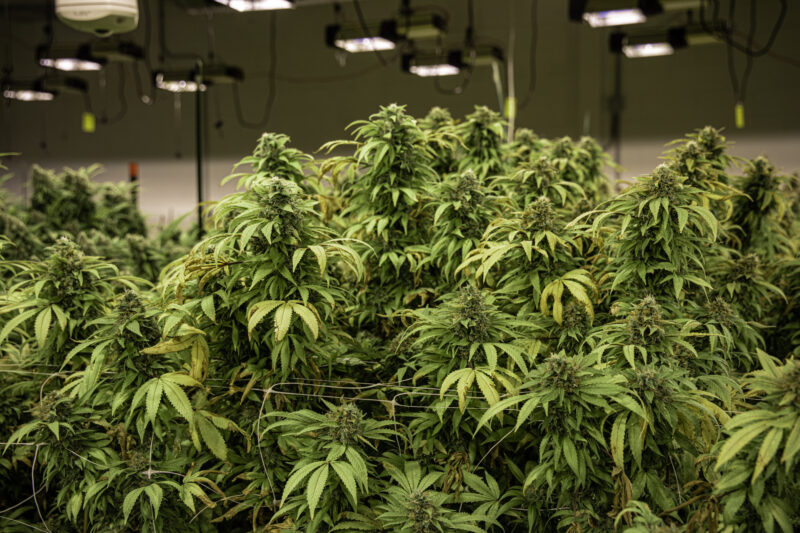
In large grow spaces, high-intensity lights and efficient light distribution are critical. Growers often use 1000-watt HPS lights or high-output LED lights to ensure that the entire canopy receives sufficient light. Multiple light fixtures, combined with light movers and reflective walls, help to maximize light coverage.
- Build a fixture layout: Large rooms usually perform better when multiple fixtures create overlapping, measurable coverage. A single watt category does not define the best system.
- Consider movement only when it solves a measured problem: Light movers can reduce stationary hot spots in some legacy layouts, but a well-spaced fixed array often provides simpler and more repeatable uniformity.
Tip: In large grow spaces, using air-cooled reflectors and ventilation systems is key to managing the heat generated by high-wattage lights. Proper ventilation helps maintain the optimal temperature and humidity levels, ensuring that your plants grow healthily without being stressed by excessive heat.
Once the fixture fits the canopy, the next decisions belong to airflow, room layout, and complete environmental control.
The room itself changes how the same fixture delivers light and releases heat.
“Can I use the same fixture wattage in a tent and an open room of the same floor size?”
Question sent by: FrostLineGarden, via contact form.
Not automatically. Wall reflectivity, ceiling height, airflow, fixture shape, canopy dimensions, and environmental control change delivery. Compare the measured canopy map and heat load in the actual space rather than copying watts from another room.
Managing Heat from Lights
One of the biggest challenges when using powerful grow lights, especially HID systems, is managing the heat they produce. Too much heat can stress your plants, cause light burn, and even stunt growth or reduce yields. Proper temperature and ventilation management are essential for keeping your plants healthy and maximizing the effectiveness of your lighting system.
Why Temperature Management is Crucial
Cannabis temperature response depends on cultivar, stage, PPFD, carbon dioxide, humidity, airflow, root temperature, and leaf temperature. Use air-temperature ranges as starting context rather than hard boundaries. The important question is whether photosynthesis, transpiration, and root water supply remain balanced under the installed light.
Optimal temperature range for cannabis:
- Vegetative growth: Many rooms operate successfully within a broad moderate range, but the correct setpoint depends on leaf temperature, humidity, light intensity, and whether carbon dioxide is ambient or enriched.
- Flowering: Coordinate air temperature with leaf temperature, humidity, PPFD, and cultivar response. A modest night reduction may be useful, but deliberately chilling the room is not a reliable way to increase resin or density.
Heat Management for HID Lights
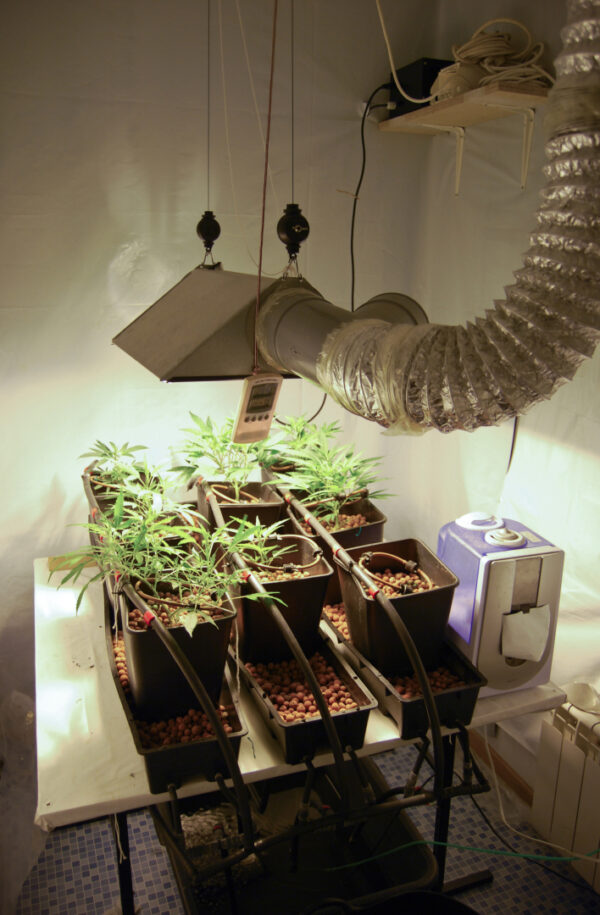
HID lights (metal halide and high-pressure sodium) are notorious for running hot, especially in small grow rooms or enclosed spaces. Without proper heat management, the grow room can quickly become too hot, leading to heat stress on your plants. There are several methods to manage heat from HID lights:
- Air-cooled reflectors: Air-cooled reflectors have built-in ducting that allows you to attach exhaust fans to pull heat away from the bulb. This prevents heat from building up in the grow room and helps maintain a stable temperature. Air-cooled reflectors are a must when using high-wattage HID lights in smaller spaces.
- Exhaust systems: Proper ventilation is critical when using HID lights. Installing an exhaust system with inline fans will help remove hot air from the grow space and replace it with fresh, cooler air. Place your exhaust fan at the top of the grow room since heat rises. Ideally, you want to create negative pressure, meaning more air is being pulled out than being pulled in, which helps keep temperatures stable.
- Oscillating fans: In addition to an exhaust system, oscillating fans help circulate air within the grow room, distributing heat evenly and preventing hot spots. Fans should be placed at different levels of the grow room to promote airflow around and through the plants, preventing humidity buildup and mold.
- Distance between lights and plants: Maintaining the proper distance between your HID lights and the canopy is essential to avoid heat stress. The higher the wattage, the greater the distance should be. For example:
- Lower-output HID: Verify canopy PPFD and radiant heat with the installed reflector.
- Mid-output HID: Measure more than the center point because reflector hot spots can be severe.
- High-output HID: Treat cooling, reflector glass, air movement, and canopy clearance as one system.
Tip: If your plants are exhibiting signs of heat stress (curling leaves, wilting, or yellowing), check the temperature at the canopy level using a thermometer or temperature gauge. If necessary, raise the lights and increase ventilation.
Heat Management for LED and CFL Lights
LED fixtures often send less long-wave radiant heat toward the canopy than HID fixtures, so leaf temperature may be lower at the same air temperature. They still add almost all consumed electrical power to the room as heat. Drivers, heat sinks, exhaust capacity, and canopy temperature therefore remain part of the lighting plan.
Heat belongs to the whole room
Moving a driver or ballast can change where the heat enters the space, but it never makes consumed electricity disappear. I follow the heat path from the fixture and driver to the tent, lung room, exhaust, and building rather than judging one component in isolation.
Let’s compare canopy temperature, intake temperature, exhaust temperature, and actual power draw. Once the whole path is visible, the useful correction is usually clearer than simply raising the light or increasing one fan speed.
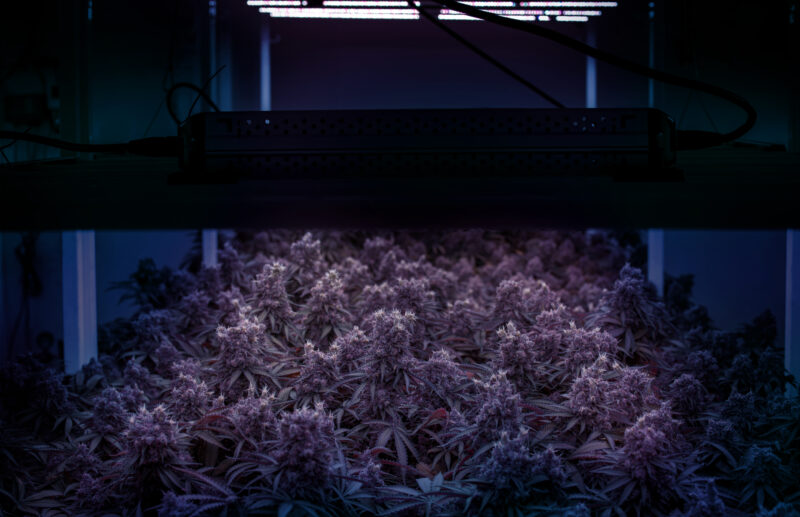
Do not use fixture surface temperature as a hanging-distance rule. A high-output LED can cause excessive PPFD while the air still feels comfortable. Follow the fixture's PPFD map, measure at canopy height, and confirm with leaf posture, color, and temperature.
Radiant Heat
Radiant heat travels directly from a hot source to leaves and surfaces without first warming all the room air. This is why two rooms with the same air temperature can produce different leaf temperatures under different fixture types.
CFLs add less room heat than many HID fixtures, but close lamps can still create leaf hot spots. Check temperature at the leaf surface and make sure every lamp is securely mounted away from water.
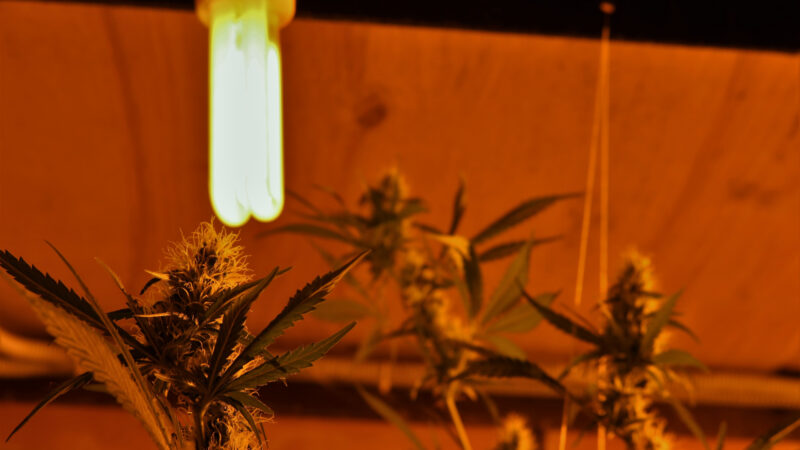
In both cases, use oscillating fans to keep the air moving and prevent hot air from building up around the plants.
The Importance of Ventilation
Proper ventilation does more than just control temperature - it’s also essential for maintaining humidity levels and ensuring a constant supply of CO2 to your plants. Cannabis plants use CO2 during photosynthesis, and without fresh air, CO2 levels can drop, reducing the plant’s ability to produce energy and grow efficiently.
Ventilation tips:
- Exhaust fans: Install exhaust fans to pull hot air out of the grow room. The fan should be placed near the top of the room, where the hottest air collects. Ensure that fresh air is coming in from the bottom of the grow room to replace the hot air being removed.
- Intake fans: In larger grow spaces, intake fans may be necessary to pull fresh air into the room. Make sure the intake and exhaust fans are balanced to create consistent airflow.
- Carbon dioxide: Fresh-air exchange is the simplest supply for most small rooms. CO₂ enrichment belongs only in a sealed, monitored environment that can coordinate concentration, PPFD, temperature, irrigation, and worker safety. It is not a substitute for ventilation or a weak lighting plan.
Tip: Use hygrometers to monitor the temperature and humidity inside the grow room. Keeping the temperature and humidity in the optimal range is essential for healthy plants and large yields.
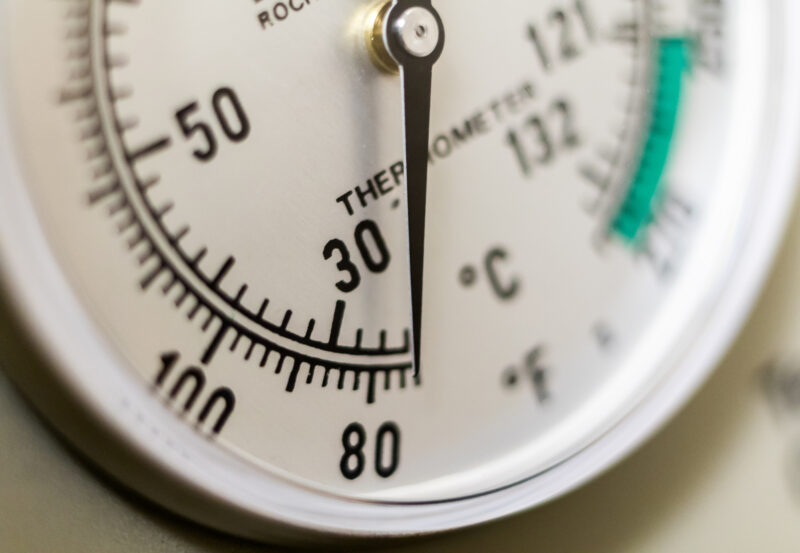
Heat management begins with measurements taken where the leaves are, then expands to the room around them.
Important: Air temperature, leaf temperature, radiant load, humidity, and airflow can disagree. Use them together before deciding that a fixture is too hot or that ventilation is sufficient.
After every heat source is located, the canopy response tells us whether relocation actually helped.
“I moved the LED driver outside the tent. Why does the room still get warmer?”
Question sent by: Caleb Thompson, via contact form.
The fixture still converts electrical energy into heat, and the remote driver usually remains somewhere inside the larger room. Moving it can reduce heat inside the tent, but it does not remove that heat from the building.
Light Burn and Heat Stress: Recognizing and Solving Common Problems
Even with proper lighting setups, it’s possible to encounter issues like light burn and heat stress if lights are placed too close to the plant canopy or if the room becomes too hot. Recognizing these signs early is essential to preventing long-term damage to your plants.
What is Light Burn?
Light burn occurs when the light is too intense, causing the top leaves and buds to become scorched or bleached. It typically happens when lights are placed too close to the canopy, and it’s more common with HID and LED lights due to their high intensity.
Symptoms of Light Burn:
- The leaves closest to the light turn yellow or white and begin to curl upward.
- The tips of the leaves may appear burnt or crispy.
- Bleaching of the top colas, where the buds appear white or bleached instead of vibrant green.
Bleaching should be evaluated at the exact affected height and position before changing nutrition.
Photobleaching
Photobleaching is the loss of visible pigment in tissue exposed to excessive light. It often appears on the highest or most intensely lit flowers and leaves, while lower growth remains normally colored.
Solving Light Burn
The best way to prevent light burn is to ensure the lights are at the proper distance from the plant canopy. Here’s how to correct light burn:
- Reduce the dose: Raise or dim the fixture, then re-measure the affected canopy area. Record the setting so the change can be evaluated rather than guessed.
- Use light movers: If raising the lights isn’t enough, consider using a light mover to distribute the light more evenly and reduce the intensity in one spot.
Heat Stress: What it Looks Like and How to Fix It
Heat stress occurs when the grow room becomes too hot for the plants to handle. High temperatures cause the plant to lose more water through transpiration than it can absorb, leading to wilting, curling leaves, and stunted growth.
Symptoms of Heat Stress:
- Curling leaves: The edges of the leaves curl up or down as the plant tries to conserve water.
- Wilting: The entire plant may droop or appear limp.
- Slowed growth: Heat-stressed plants often stop growing as they conserve energy to survive.
- Yellowing: Leaves may start to turn yellow or develop brown, crispy edges.
Solving Heat Stress
To resolve heat stress, it’s essential to lower the temperature in the grow room and improve airflow:
- Increase ventilation: Add or upgrade exhaust fans to pull hot air out of the grow space. Ensure that fresh, cool air is being brought in to replace the hot air.
- Use oscillating fans: Keep the air circulating throughout the grow room to prevent hot spots and improve overall airflow around the plants.
- Raise the lights: If your lights are too close to the canopy, raise them to reduce heat exposure. HID lights, in particular, can generate a lot of heat, so maintaining the right distance is key.
Remember
Measure temperature at canopy height in shaded moving air, then compare it with leaf temperature and plant response. One ceiling or wall reading cannot describe the canopy climate.
The correction should match the measured cause, not the most dramatic-looking leaf.
What to Remember: Light stress, radiant heat, hot dry air, root stress, and nutrient problems can overlap. Record location, PPFD, leaf temperature, and recent changes before altering the feed.
The symptom must then be compared with nearby tops before the entire room is adjusted.
“Only one top is bleaching. Why is the whole canopy not affected?”
Question sent by: Owen Mitchell, via email.
One branch may sit in a local PPFD hot spot, closer to the fixture, or in weaker airflow. Map that exact position and compare leaf temperature and height with neighboring tops before changing the entire room.
Because these symptoms can share the same canopy, each correction should be checked at its exact location.
“Can stronger exhaust let me keep the grow light too close?”
Question sent by: Grace, via Facebook page.
Better ventilation can reduce air and leaf temperature, but it does not erase excessive photon dose or radiant exposure. Correct distance and intensity using measurements, then size airflow for the remaining heat and humidity load.
Electrical Safety in Your Grow Room
One of the most critical aspects of managing grow lights - especially powerful HID and LED systems - is ensuring that your electrical setup is safe and capable of handling the load. Grow lights consume a lot of electricity, and if your wiring isn’t up to code, it can lead to overheating, electrical fires, or equipment failure.
Calculate Electrical Load
Before setting up your grow lights, it’s important to calculate the electrical load you’ll be placing on your circuits. Most grow lights come in 400-watt, 600-watt, and 1000-watt varieties, and it’s crucial to understand how much electricity each will consume.
Electrical load formula:
Watts / Voltage = Amps
For example, if you’re using a 1000-watt light on a 120-volt circuit, the calculation would be:
1000 watts / 120 volts = 8.3 amps
Do not decide circuit capacity from lamp wattage alone. Add the actual input of lights, drivers, fans, pumps, dehumidifiers, air conditioning, controllers, and startup current, then have the installation checked against local rules for continuous loads. Breaker rating, conductor size, receptacles, timer contacts, voltage, and equipment certification must agree. A breaker should never be enlarged to stop nuisance trips.
Practical circuit planning: Keep lighting and climate loads within verified circuit capacity. Fans, air conditioners, heaters, and dehumidifiers can draw heavily or create startup surges, so include them in the same load plan.
Repeated Trips Are a Fault Signal
A tripping breaker, hot plug, discoloration, buzzing connection, or melting odor requires investigation. Do not reset protection repeatedly or move the same load to an unverified extension cord.
Ground Fault Circuit Interrupters (GFCIs)
A Ground Fault Circuit Interrupter (GFCI) is a critical safety feature in any grow room, especially if you’re growing in a hydroponic setup or if there’s any chance of water exposure near electrical equipment. GFCIs are designed to cut power immediately if they detect any imbalance in the electrical current, preventing electrical shock or fires.
Where to install GFCIs:
- Near water sources: If your grow room has any water reservoirs, pumps, or hydroponic systems, GFCI outlets are a must.
- Whole-circuit protection: A qualified electrician can determine whether a GFCI or other protective device is required and compatible with the equipment and local code.
How It Works:
Before the Lights Turn On
- Confirm the total continuous load with all environmental equipment included.
- Use correctly rated receptacles, timers, relays, connectors, and protective devices.
- Keep drivers, power strips, and connections above possible water leaks.
- Secure the fixture with rated hangers and support points.
- Route cables with strain relief and away from sharp edges and hot surfaces.
- Test the timer schedule and confirm the dark period stays dark.
- Record the first PPFD map, dimmer setting, and hanging height.
Detects Current Imbalance:
- A GFCI monitors the current flow between the hot (live) and neutral wires.
- If it detects an imbalance (as little as 4-6mA), indicating leakage to the ground (e.g., through water or a human body), it immediately shuts off power.
Rapid Power Cutoff:
- The power is cut off within milliseconds to prevent electrocution.
- This is why GFCIs are essential in wet environments where electrical hazards are higher.
Reset and Test Buttons:
- RESET (Gray Button): After a trip, pressing this button restores power once the fault is cleared.
- TEST (Red Button): Pressing this button simulates a fault and ensures the GFCI is functioning correctly.
Preventing Electrical Fires
With the high wattage required for grow lights, overheating and fires are real risks if your electrical system isn’t managed correctly. Here are some tips to prevent electrical fires in your grow room:
- Avoid permanent extension-cord wiring: Use properly installed receptacles for continuous equipment. If a temporary cord is unavoidable, it must be grounded, undamaged, correctly rated, fully uncoiled, kept dry, and used only as allowed by its instructions and local code.
- Don’t overload outlets: Never plug too many devices into a single outlet or power strip. Spread the load across multiple circuits to reduce the risk of overloading.
- Use listed protection correctly: A surge protector does not add circuit capacity. Any power strip, controller, relay, or contactor must be listed for the voltage, load type, and continuous current it will carry.
- Inspect wiring regularly: Periodically check all wiring and connections in your grow room for signs of wear, fraying, or overheating. Replace any damaged wiring immediately.
Important
Place an appropriate, inspected fire extinguisher where it can be reached without moving toward a fire, and make sure everyone knows the exit plan. If electrical equipment is hot, discolored, buzzing, wet, or repeatedly tripping protection, disconnect it only if safe and call a qualified electrician.
A lighting plan is incomplete until its electrical path has been checked from circuit to fixture.
Never Forget: Do not improvise a circuit upgrade or treat a larger breaker as extra capacity. A qualified electrician should verify wiring, protection, grounding, continuous load, moisture exposure, and local code requirements.
Electrical safety cannot be judged only by whether the lights remain on.
“The breaker never trips. Does that prove my grow-light circuit is safe?”
Question sent by: Mia Sullivan, via contact form.
No. A breaker is only one protective layer, and some wiring, connection, timer, moisture, or continuous-load problems may develop without an immediate trip. Confirm the circuit, devices, conductor size, connections, and local requirements with a qualified electrician.
Connections and controls deserve the same attention as the permanent circuit.
“Can I plug a grow-light timer into an extension cord?”
Question sent by: Logan Wright, via email.
Only if every component is permitted and properly rated for the actual continuous load and environment, but a permanent grow should not depend on a casual household extension setup. Keep connections dry and accessible, avoid coiled cords and adapters, and have uncertain circuits reviewed professionally.
Troubleshooting Lighting Systems: Common Issues and Solutions
Even with the best planning, issues with your lighting system can arise. Whether it’s a technical malfunction, plant stress, or improper setup, understanding how to troubleshoot common problems with your lighting system will help you maintain a healthy grow environment and avoid setbacks in your cannabis cultivation.
Flickering or Dimming Lights
Flickering or dimming lights are often caused by electrical issues, such as faulty wiring, a failing ballast, or an overloaded circuit. Flickering lights can stress your plants and interfere with their growth cycles, so it’s important to address this problem immediately.
Possible Causes:
- Faulty Ballast: If you’re using HID lights and notice flickering, the ballast may be failing. Ballasts wear out over time and can cause inconsistent power to the bulbs.
- Overloaded Circuit: If you’re running too many lights or other high-wattage devices (like fans and dehumidifiers) on the same circuit, it could cause the lights to flicker or dim as the circuit struggles to handle the load.
- Loose Wiring: Poorly connected wires or damaged sockets can cause inconsistent power delivery to your lights, resulting in flickering or dimming.
Solutions:
- Check the Ballast: If your lights are flickering, start by checking the ballast. Replace it if necessary, especially if it’s an older magnetic ballast. Upgrading to a digital ballast can improve light consistency and energy efficiency.
- Inspect Wiring: Ensure that all wiring is properly connected and that there are no loose or frayed wires. If you’re unsure, consider hiring an electrician to inspect your grow room’s electrical system.
- Correct the circuit safely: Stop using the overloaded circuit and have a qualified electrician evaluate dedicated capacity, breaker size, conductor size, receptacles, and local code. Never install a larger breaker or convert a circuit to 20 amps without confirming that the entire circuit is designed for it.
“My LED flickers on a phone camera but not to my eyes. Is the fixture failing?”
Question sent by: Felix Schneider, via Facebook page.
Camera banding can reveal driver modulation that human vision does not notice, but it does not diagnose failure by itself. Check visible flicker, power stability, dimmer behavior, heat, noise, plant response, and manufacturer guidance before replacing the fixture.
Common Lighting Mistakes and How to Avoid Them
Even experienced growers can make mistakes when setting up or managing their lighting systems. Avoiding these common mistakes can improve your plant’s growth and prevent unnecessary problems throughout the grow cycle.
Mistake #1: Placing Lights Too Close or Too Far from Plants
One of the most common mistakes is placing lights either too close or too far from the plant canopy. Lights that are too close can cause light burn, while lights that are too far away can lead to stretching, where the plant grows tall and lanky in search of more light.
Solution:
- Set HID height from the reflector's tested coverage, measured PPFD, and canopy temperature, not wattage alone.
- Set LED height and dimming from the manufacturer's PPFD map, then verify several canopy points.
Monitor your plants regularly. If you see browning or yellowing leaves at the top, raise the lights to prevent light burn. If the plants stretch or develop long internodes, lower the lights to increase intensity.
Mistake #2: Incorrect Light Spectrum at the Wrong Growth Stage
A white fixture with a higher correlated color temperature often contains a larger blue fraction, and blue photons commonly encourage shorter internodes and more compact morphology. CCT is only a visual summary of white light, not a measurement of blue photons, so compare the actual spectral power distribution when possible.
Solution:
- During the vegetative stage, use lights with a blue spectrum (MH, daylight CFLs, or LEDs in vegetative mode).
- During flowering, switch to lights with a red spectrum (HPS, warm CFLs, or LEDs in flowering mode). If using LED lights with both vegetative and flowering settings, ensure you switch modes when transitioning to the flowering stage.
Mistake #3: Ignoring Light Spread and Coverage
Many growers focus on light intensity but forget about light spread - ensuring that light is evenly distributed across the entire grow space. Uneven light distribution can lead to underdeveloped buds in areas that receive less light, ultimately reducing your yield.
Solution:
- Use reflectors to direct light back toward the plants and improve light coverage.
- Consider adding side lighting or using light movers to ensure that all parts of the plant receive sufficient light.
- Regularly rotate your plants if you’re working in a small grow space to ensure all sides receive equal light exposure.
“The leaves are praying upward. Does that prove the light intensity is perfect?”
Question sent by: WestCoastLeaf, via Facebook page.
No single leaf posture proves a perfect setting. Upright leaves can accompany active growth, but also examine PPFD, DLI, leaf temperature, edge curl, bleaching, water use, and whether the posture remains healthy across the full light period.
Mistake #4: Using Incorrect Timers
Another common mistake is using the wrong type of timer for your lighting system. Mechanical timers may not handle the wattage required for HID lights, which can lead to malfunctions or even fire hazards.
Solution:
- Use heavy-duty timers specifically designed for high-wattage grow lights, especially HID systems. Ensure that your timer can handle the electrical load of your lighting system to avoid potential safety risks.
Grow Light Numbers That Actually Help You Plan
A grow light becomes easier to choose when we stop asking whether it looks bright and start asking what reaches the canopy. Four measurements do most of the useful work: PPF, PPFD, DLI, and PPE. They describe different parts of the system, so one cannot replace the others.
Remember
A fixture specification is a chain. Watts describe input, PPF describes output, PPFD describes delivery, DLI describes the day, and PPE describes efficiency.
Wattage still matters because it affects electricity use and heat load, but watts describe electrical input. They do not tell us how many photosynthetic photons a fixture produces, where those photons land, or how evenly the canopy receives them. Two fixtures with the same input power can perform very differently.
PPF: Total Photon Output
Photosynthetic photon flux, abbreviated PPF, is the number of photons within the conventional 400 to 700 nanometer photosynthetic range that a fixture emits each second. It is expressed as micromoles per second, written µmol/s.
Begin with the canopy, not the carton
The most useful number is the one measured where the leaves actually live. A strong specification can help us shortlist a fixture, but it cannot know the room dimensions, hanging height, reflective surfaces, plant training, or edge losses.
I begin with the canopy shape and the daily photon goal, then work backward to fixture output and electrical cost. That order prevents a large marketing number from deciding the room before the plant has been considered.
PPF is useful for comparing total output, but it does not describe coverage. A fixture may have a high PPF and concentrate too much of it in the center, while another fixture with similar output spreads photons more evenly across the intended area.
PPF Is Output, Not Coverage
PPF tells us how many photosynthetic photons leave the fixture each second. PPFD tells us how densely those photons arrive at the canopy. A strong PPF number still needs a credible PPFD map.
PPFD: What Reaches Each Square Meter
Photosynthetic photon flux density, abbreviated PPFD, describes the photon rate arriving at a surface. Its unit is µmol/m²/s. This is the number most growers mean when they ask how much light the canopy is receiving.
One center reading is not a canopy measurement. A useful PPFD map includes the corners, edges, intermediate points, and center at the actual plant height. Average PPFD tells us the overall dose rate, while the minimum and maximum reveal how uneven the layout may be.
DLI: The Full Daily Photon Dose
Daily light integral, abbreviated DLI, adds the photosynthetic photons received over the entire light period. It is expressed as moles per square meter per day, written mol/m²/day. DLI connects PPFD with photoperiod, which is why a schedule cannot be evaluated by hours alone.
Daily Light Integral (DLI)
DLI is the total photosynthetic photon dose received per square meter during one day. It lets us compare different combinations of intensity and light hours.
The calculation is straightforward:
DLI = PPFD × light hours × 3,600 ÷ 1,000,000
A canopy receiving 600 µmol/m²/s for 12 hours receives a DLI of 25.92 mol/m²/day. The same PPFD for 18 hours provides 38.88 mol/m²/day. The fixture did not become stronger, but the plant received more photons across the day.
Master Tip
Whenever the schedule changes, recalculate DLI before changing the dimmer. Photoperiod and intensity are two parts of the same daily dose.
| Average PPFD | 12-hour DLI | Longer photoperiods |
|---|---|---|
| 200 µmol/m²/s | 8.64 mol/m²/day | 18 h: 12.96 mol/m²/day 20 h: 14.40 mol/m²/day 24 h: 17.28 mol/m²/day |
| 400 µmol/m²/s | 17.28 mol/m²/day | 18 h: 25.92 mol/m²/day 20 h: 28.80 mol/m²/day 24 h: 34.56 mol/m²/day |
| 600 µmol/m²/s | 25.92 mol/m²/day | 18 h: 38.88 mol/m²/day 20 h: 43.20 mol/m²/day 24 h: 51.84 mol/m²/day |
| 800 µmol/m²/s | 34.56 mol/m²/day | 18 h: 51.84 mol/m²/day 20 h: 57.60 mol/m²/day 24 h: 69.12 mol/m²/day |
| 1,000 µmol/m²/s | 43.20 mol/m²/day | 18 h: 64.80 mol/m²/day 20 h: 72.00 mol/m²/day 24 h: 86.40 mol/m²/day |
This table is a calculator, not a recommendation to chase the highest number. The useful DLI is the dose a particular canopy can convert under its real temperature, carbon dioxide, water supply, root health, and genetics.
“If I extend the day from 18/6 to 20/4, should I lower PPFD?”
Question sent by: BalconyBotanist, via email.
Possibly. A longer day raises DLI at the same PPFD. Calculate both schedules, then choose the combination that supplies the intended daily dose without pushing the canopy or electricity budget beyond what is useful.
PPE: Fixture Efficiency
Photosynthetic photon efficacy, abbreviated PPE, compares PPF with electrical input. It is expressed as µmol/J. A fixture rated at 2.8 µmol/J produces more photosynthetic photons per unit of electricity than one rated at 1.8 µmol/J, assuming the ratings were measured honestly and under comparable conditions.
PPE affects operating cost and room heat, but it does not guarantee a good layout. A highly efficient fixture can still have poor edge coverage, unsuitable dimensions, unreliable dimming, or a driver that does not suit the room. Efficiency belongs beside the PPFD map, safety certification, warranty, and physical design.
| Metric | Meaning and unit | Copyright Notice © 2026 Weedth. All Rights Reserved. The content provided on this website, including text, images, graphics, and other materials, is the intellectual property of Weedth unless otherwise stated. Unauthorized reproduction, distribution, or use of any material on this site without prior written consent is strictly prohibited. For permission requests or inquiries, please contact: weedth.company@gmail.com Useful links© 2020 - 2026 • Weedth – Cannabis Cultivation & Knowledge Hub • All Rights Reserved • Powered by Growers, For Growers |
|---|
