Outdoor Grow Comprehensive Guide
Before You Start
Is This Guide Right for You?
This guide follows an outdoor grow from legal site planning and seed choice through soil, training, flowering, water, security, harvest, and the practical realities of caring for plants in the open.
If you are still deciding whether outdoor cultivation fits your life, begin with Grow Basics. If you want a shorter orientation before committing to the full guide, read Outdoor Growing Basics first.
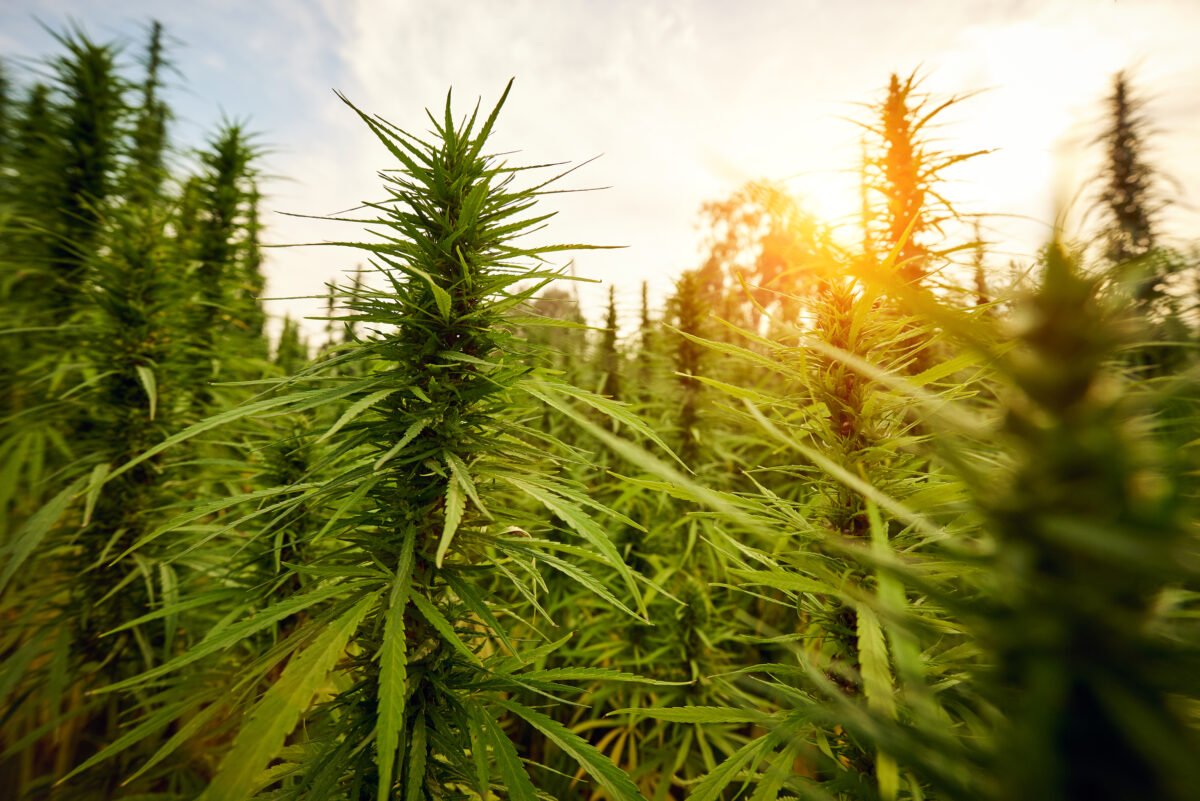
Growing marijuana outdoors can yield incredibly impressive, with some plants growing up to 20 feet tall! Outdoor cultivation lets you take advantage of natural sunlight and fresh air, which does wonders for cannabis plants. While growing outdoors comes with risks such as pests and thieves, It also offers the advantage of being much more affordable because it doesn’t require costly grow lights or ventilation systems. With a bit of planning and maintenance, outdoor grows can produce strong, robust plants.
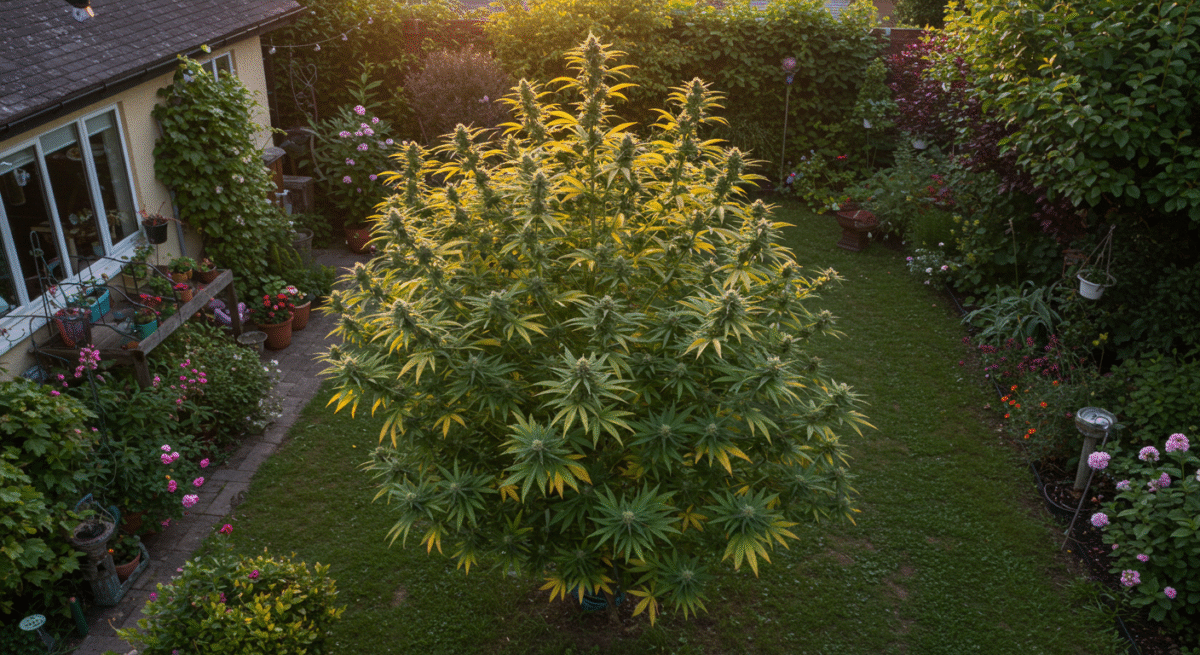
The best part of growing outdoors is the free sunlight! With no need for artificial lighting, cannabis plants can soak up full-spectrum light all day long, resulting in stronger plants and higher yields. Male plants tend to die around the 12th week of growth, while female plants can keep going for an additional 3 to 5 weeks. Mature female plants can weigh twice as much as their male counterparts; that’s why proper care and patience are key.
Outdoor plants don’t need costly ventilation systems since they naturally get all the fresh air they need. Despite this, the wild environment also means outdoor growers must be ready to face challenges like unpredictable weather, pests, and even thieves. Keeping your grow safe is a major priority, so secure your grow area well and maintain privacy.
Important: Grow cannabis only where cultivation is legal and only on land you own or have explicit permission to use. Local rules may also govern plant counts, visibility, locked areas, water collection, odors, structures, and possession after harvest.
Overview of the Cannabis Plant
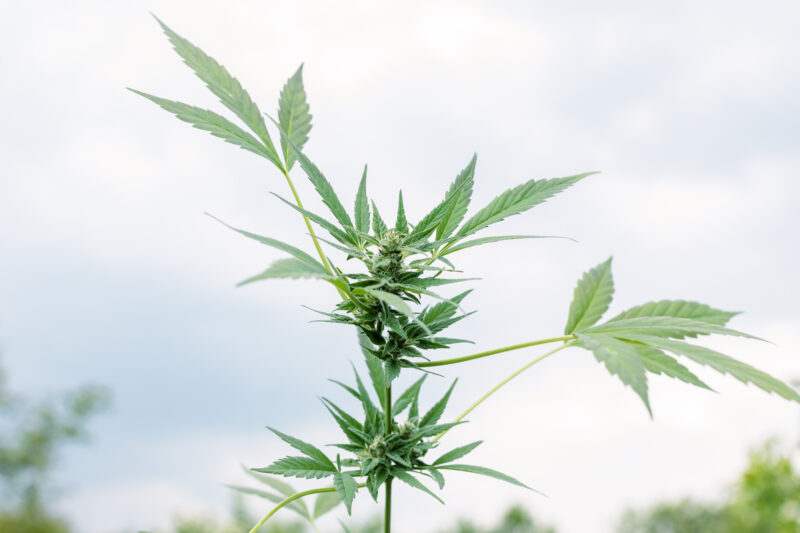
The cannabis plant is as ancient as agriculture itself. For thousands of years, humans have cultivated it for a variety of uses: medicine, fiber, food, and more recently, for its psychoactive properties. Over time, cannabis has evolved under human care, developing into a diverse family of plants with unique characteristics. To grow cannabis successfully, whether for personal use or on a larger scale, understanding its rich history, biology, and the differences between its various forms—Indica, Sativa, and hybrids—is essential.
Two Legal Outdoor Site Models
Outdoor cultivation can happen close to home or at a remote rural site. The legal boundary does not change with distance: grow only where cultivation is lawful and only on land you own or have explicit permission to use. Public land, an unused-looking field, a forest clearing, or someone else’s property is not an acceptable substitute for permission.
1. Home or Nearby Outdoor Garden
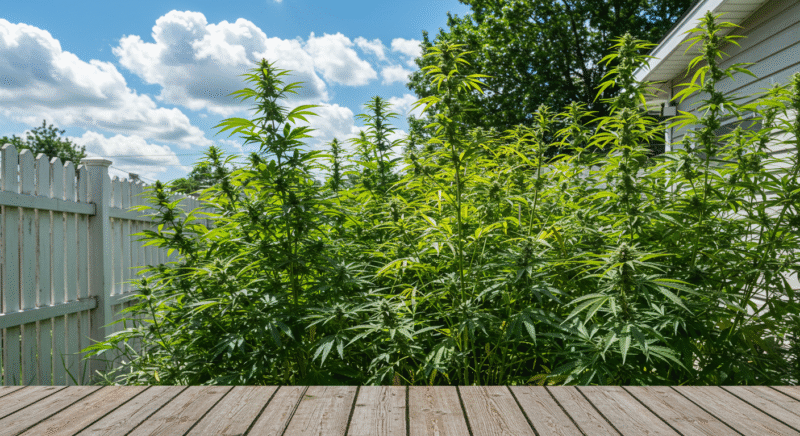
A garden near home makes frequent observation, hand watering, storm preparation, and quick pest checks easier. It does not give complete control over the environment, but it shortens the time between a problem appearing and you seeing it. A simple container or prepared bed can be enough; fencing, permanent irrigation, and shelters are tools for specific risks, not automatic requirements.
2. Legal Remote Rural Garden
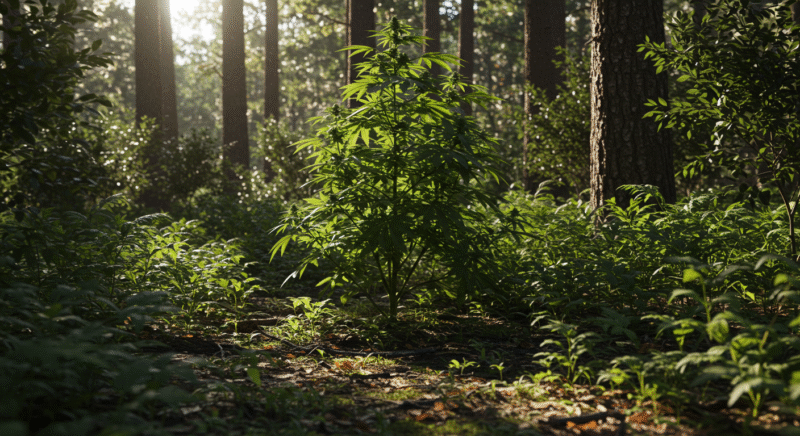
Some growers cannot use the space around their home because sunlight is poor, wildlife pressure is constant, nearby activity is disruptive, or a lawful rural property offers a better season. This guide uses remote rural growing for a site on your own land or land you have written permission to use. It does not mean trespassing, hiding evidence, inventing a cover story, or cultivating illegally.
A remote site exchanges convenience for planning. Before planting, confirm legal access, water rights, local plant-count and visibility rules, fire restrictions, safe parking, phone coverage, and the time required for a real inspection. Map seasonal shade, watch for animal trails, test the root zone, and decide how you will respond if an emitter blocks, a storm breaks a branch, or the site becomes inaccessible.
Important: Distance does not reduce responsibility. A remote plant still needs lawful access, clean water, regular physical inspection, humane wildlife protection, and a safe harvest and transport plan.
Permission is not optional
Never plant on public land or another person’s property without explicit permission. This guide does not recommend trespass, concealment tactics, environmental damage, or unlawful cultivation.
Advantages of Growing Outdoors
Outdoor cultivation gives the plant access to sunlight, seasonal space, natural air movement, and—where the ground is suitable—far more root volume than most rooms can provide. When the law, cultivar, finish window, water supply, and local weather all fit, that space can support a much larger plant and a greater total harvest than a restricted indoor footprint. Sunlight also arrives as a broad, changing spectrum without the electricity cost of producing it.
That advantage is potential, not a guarantee. Roots still need oxygen, leaves still need usable light, and flowers still need a realistic chance to dry after rain or heavy dew. Wind can stimulate structural acclimation, but severe wind can tear tissue and loosen roots. Rain can reduce irrigation demand, but prolonged wetness can increase disease risk. Nature supplies powerful inputs and equally powerful uncertainty.
Outdoor and Indoor: Different Strengths
| Question | Outdoor tendency | Indoor tendency |
|---|---|---|
| Plant size and total harvest | Open headroom and large root zones can support very large plants and high per-plant yield when the season fits. | Room height, light footprint, container volume, and plant density usually define the ceiling. |
| Environmental control | Sun, rain, humidity, wind, pests, smoke, frost, and heat vary with the site and season. | Light, temperature, humidity, irrigation, and sanitation can be managed more consistently. |
| Flower structure | Flowers may be large but can be less uniform or looser where light distribution, humidity, or genetics favor that structure. | Controlled light and climate often produce more uniform, compact flowers, but density is not guaranteed. |
| Chemical profile | Sunlight and a living outdoor system can produce distinctive profiles; one two-cultivar study found greater abundance and diversity of several terpenes outdoors. | Repeatable controls can improve batch consistency, but the result still depends on cultivar and management. |
| Main risk | Variability and exposure. | Cost, equipment dependence, and limited space. |
Judge the plant, not the address
Outdoor space can let a plant build a broad root system, a strong supported frame, and an exceptional total harvest when the sun path and finish window fit. An ordinary indoor room may simply not offer the same physical freedom.
But the address never decides quality. Let’s read the plant itself: genetics, canopy light, water, disease pressure, harvest timing, and postharvest handling determine what the scale, the lab, and the flower finally show.
What to Remember: Outdoor conditions can create a larger and remarkably resilient plant, while indoor conditions can create greater uniformity and control. Quality must be observed and measured; it should never be awarded automatically to either method.
Risks of Outdoor Cultivation
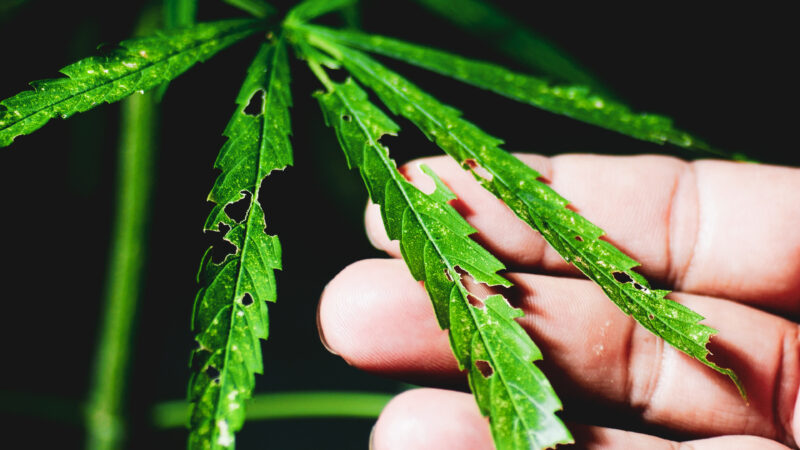
While outdoor growing has its benefits, it does come with several risks. Wildlife like deer and rodents may try to snack on your plants, while bugs can infest and destroy crops if left unchecked. Weather conditions like strong winds, heavy rain, or storms can also tear apart your plants and cause damage. These are some of the reasons many outdoor growers opt for a greenhouse or decide to grow indoors where the environment can be controlled.
Design around the site you actually have
Use the real sun path, soil, water access, wind direction, frost dates, and privacy limits as your starting point. Choose the plant and system that fit those conditions.
Build the plan around an idealized plant
Do not select a long-season, enormous cultivar first and then hope a shaded, wet, visible garden will somehow accommodate it.
“Is outdoor growing really cheaper if I still need soil, fencing, and irrigation?”
Question sent by: Evan Ross, via email.
Yes, outdoor growing can be cheaper when the site already gives you useful sunlight, a workable root zone, and practical water access. A fence, permanent irrigation line, custom soil, or shelter is not mandatory; each is an optional solution for a specific risk. Hand watering, simple containers or prepared ground, and balanced nutrition may be enough. The tradeoff is less control over weather, pests, and security, so choose genetics that fit your season and add only the precautions your garden truly needs. Our goal is a lawful, conscious grow with healthy plants and strong results. Keep reading with us!
Outdoor Pest and Disease Management
Outdoor plants host life. Finding an insect does not automatically mean there is an infestation, and finding damage does not tell you which organism caused it. Integrated pest management begins with correct identification, regular scouting, sanitation, physical prevention, and a response proportional to the risk.
Integrated Pest Management (IPM)
A decision process that combines prevention, monitoring, identification, thresholds, cultural practices, physical controls, biological controls, and legally permitted pesticides when necessary. The goal is not to sterilize the garden. It is to prevent unacceptable damage with the least disruptive effective action.
A Five-Minute Scouting Route
Check the newest growth, several upper and lower leaf surfaces, branch unions, the shaded interior, the soil line, and a few flower interiors without crushing them. Look for living organisms and their evidence: eggs, cast skins, honeydew, webbing, frass, feeding patterns, discoloration, odor, and tissue that remains wet.
Scout more often after receiving a new plant, after nearby vegetation is cut, during hot dry mite weather, after long rain, and as flowers become dense. Photograph the same area with scale and date so you can tell whether it is changing.
| Symptom | Possible cause | How to confirm | Corrective action | Prevention |
|---|---|---|---|---|
| Sticky leaves and clusters on stems | Aphids or another honeydew-producing insect | Inspect new growth and leaf undersides for insects, cast skins, and ants attending colonies. | Isolate new material, remove heavily colonized tips when practical, use water or a crop-legal targeted control, and protect natural enemies. | Inspect incoming plants and control nearby host weeds without destroying all beneficial habitat. |
| Fine stippling, bronzing, or webbing | Spider mites | Use magnification on leaf undersides and tap leaves over white paper to look for moving mites. | Reduce dust and severe plant stress, remove badly damaged tissue, and use a correctly identified biological or crop-legal control. | Scout hot dry areas and avoid broad-spectrum sprays that remove predators. |
| Twisted new growth with no obvious insect | Russet or broad mites, herbicide exposure, nutrient or root stress | Examine growing tips with strong magnification and compare affected plants, spray history, and root conditions. | Quarantine, confirm the cause, remove severely affected material, and use only a control labeled for the crop and site. | Start clean, separate new plants, clean tools, and inspect meristems before symptoms spread. |
| Chewed flowers, holes, and dark pellets | Caterpillar feeding | Open the damaged area carefully and look for larvae, entry holes, silk, and frass. | Remove the larva and contaminated flower tissue, then inspect nearby flowers. Use netting or a legal stage-appropriate control if needed. | Monitor moth activity, inspect flowers frequently, and install netting before pressure becomes high. |
| White powder on leaf or flower surfaces | Powdery mildew | Use magnification and compare with dried spray residue or dust. Confirm through a plant clinic when uncertain. | Remove heavily infected material without shaking spores, improve canopy access, and use only locally legal controls appropriate for the growth stage. | Use clean stock, adequate spacing, resistant material where documented, and early scouting. |
| Brown soft tissue inside a dense flower | Botrytis gray mold or another flower rot | Inspect the interior for dead tissue, gray sporulation, water-soaked areas, and spread into the stem. | Remove the affected flower and a clean margin into a bag. Do not consume visibly moldy material. Correct moisture and airflow conditions. | Choose an early and open cultivar, support branches, keep flowers off wet surfaces, and inspect after rain. |
| Plant wilts while soil remains wet | Root-zone oxygen loss, root disease, stem injury, or vascular problem | Check drainage, root odor and color, stem base, irrigation distribution, and whether only one section of the plant is affected. | Stop automatic watering, restore drainage and oxygen, remove standing water, and seek diagnosis before adding fertilizer. | Use a draining root zone, clean propagation material, and irrigation based on measured need. |
Flowering changes the control options
A product that can be used on an ornamental leaf may be unsuitable or illegal on cannabis flowers. Residues, inhalation exposure, beneficial insects, preharvest intervals, and local registration matter. Never improvise a pesticide mixture because it is described as natural.
How We Read a Scouting Round
When we scout an outdoor garden, we do not begin with a spray bottle or a fertilizer dose. We first decide whether the change is local or plant-wide, new or old, and still spreading or already stable. That order matters because an insect colony, saturated roots, wind injury, spray drift, and a nutrient imbalance can produce overlapping symptoms while requiring completely different responses.
- Map the pattern: Note the first plant, first branch, plant height, leaf age, and whether the symptom faces a path, fence, prevailing wind, wet hollow, or irrigation emitter.
- Inspect both sides: Look above and below leaves, inside protected growing tips, along stems, at branch unions, and within flowers without shaking suspect tissue over the canopy.
- Check the root zone: Surface dryness does not describe conditions deeper in a bed or container. Compare moisture, drainage, odor, stem-base condition, and irrigation coverage before calling a symptom hunger.
- Review the recent history: Weather, transplanting, pruning, feeding, pH correction, neighboring sprays, and a changed watering schedule may explain why the pattern began when it did.
- Confirm before treating: Magnification, a hand lens, a soil or water test, and a qualified plant diagnostic service can prevent a confident-looking but incorrect treatment.
The clue is often smaller than the damage. Cast skins and honeydew suggest sap-feeding insects; silk, entry holes, and dark frass point toward a feeding larva; internal brown flower tissue after wet weather raises a different concern from an old dry leaf spot. We follow the evidence, isolate suspect material when practical, and choose the narrowest lawful response that fits the growth stage.
After any correction, we return to the same marked leaves, tips, or flowers. The rate of new damage is the result we are measuring; an old mark remaining visible is not proof that the correction failed.
The first question: “What changed?”
The most dramatic damaged leaf is rarely the best place to begin. First, let’s find the first plant, branch, weather event, or management change connected to the symptom. That is usually where the story starts to become clear.
Next, we can mark the affected point, take a dated photo, and return to the same tissue. If the mark remains but no new damage appears, we are probably looking at an old scar rather than an active problem. That distinction changes what we do next.
Choosing the Right Seeds for Outdoors
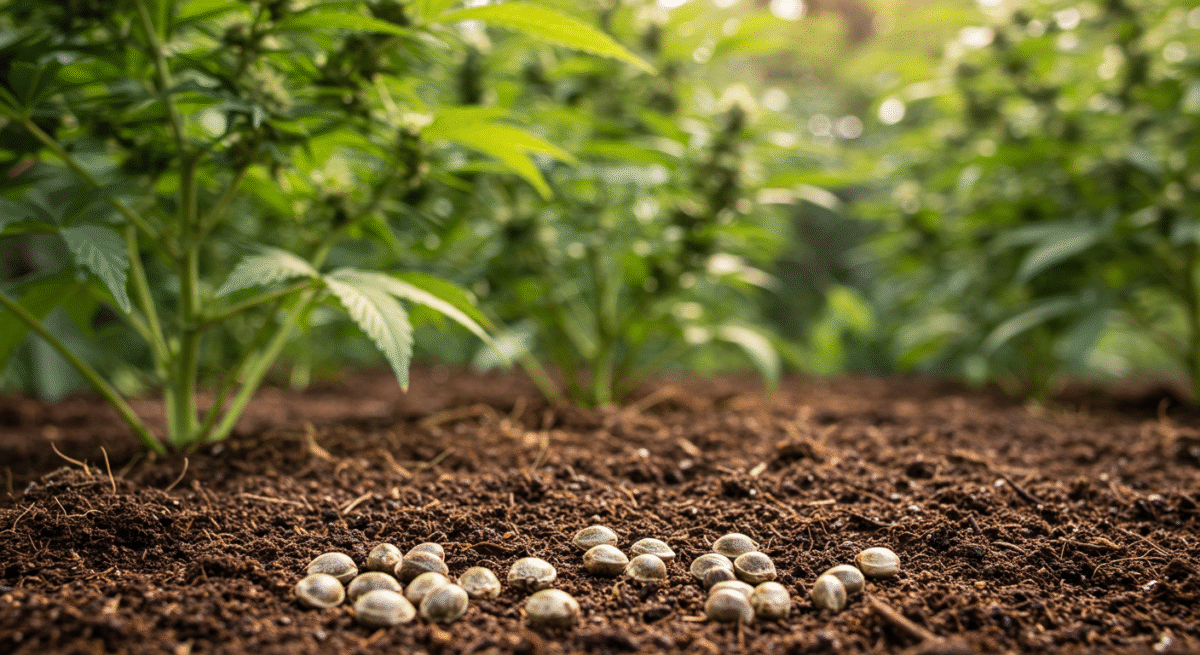
If you’re committed to growing outdoors, make sure you start with the right seeds. Outdoor strains are bred to handle difficult conditions like varying weather patterns, pests, and other challenges. High-yielding strains, especially those resistant to pests and cooler temperatures, are ideal if you plan to plant early in the season.
Experimenting with different outdoor strains during your first grow season is also smart. Try a few varieties and take notes on their growing patterns, yields, and resistance to pests and diseases. This will help you determine the best strain for your specific environment and security needs. If you’re growing in your backyard, avoid tall Sativa strains that could peek over the fence and attract unwanted attention.
Master Tip: Buy for the season first, the garden second, and the name last. “Fast,” “resistant,” and “outdoor” are useful claims only when the seller explains what was observed, where it was observed, and how consistent the line is.
“The seed page says “outdoor.” Is that enough for a wet autumn?”
Question sent by: Maya Collins, via Facebook page.
No. “Outdoor” may only mean the line was tested or marketed for open-air cultivation. Ask for finish timing, flower density, disease observations, and the climate where it was selected. A cultivar that performs outdoors in a dry region may struggle in your wet autumn. Use the claim as a starting clue, not the final decision.
Starting Seeds Indoors

For better germination success, don’t plant seeds directly into the soil. Instead, germinate them indoors using the paper towel method. Once you see white roots sprouting, transplant the seedlings into small pots and let them grow indoors until they develop at least two adult leaves. Once they’re strong enough, carefully move them outside, being mindful to avoid temperature shock from the indoor-to-outdoor transition.
“Can I sow directly into the final outdoor pot instead of using paper towels?”
Question sent by: SeedNorth, via contact form.
Yes, if the medium is light, warm, evenly moist, and protected from heavy rain and pests. Direct sowing avoids handling the first root. The tradeoff is that progress is less visible and a large wet pot can stay saturated around a tiny root. Moisten the seed zone, not the entire container repeatedly, and be patient.
Using Soil for Outdoor Growing
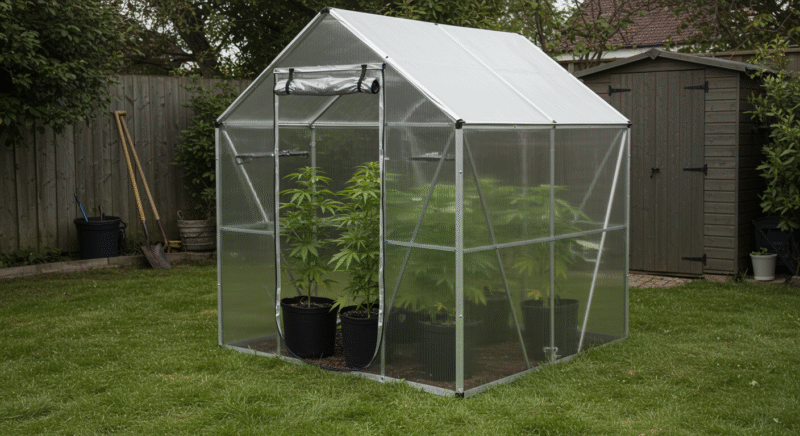
If you’re not growing in a greenhouse, soil is the best growing medium for outdoor cannabis. Hydroponic systems are less reliable in outdoor environments due to factors like evaporation and unpredictable weather, so sticking to the soil will give your plants a better chance of thriving.
Managing Your Outdoor Grow
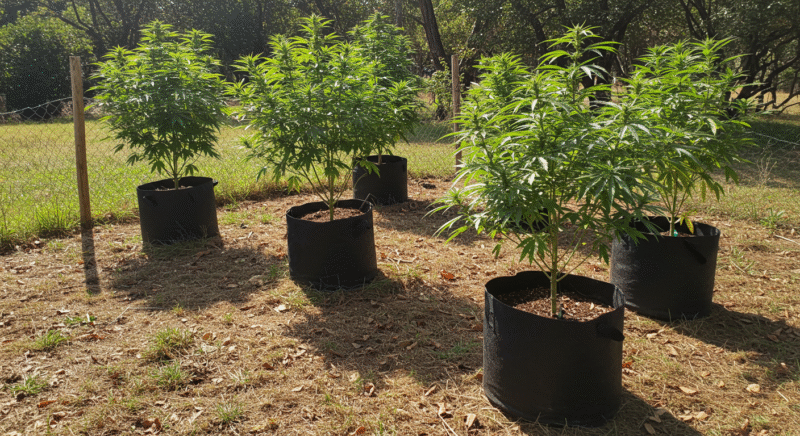
Once your plants are outdoors, regular maintenance is a must. Ideally, visit your grow site every two weeks to check on your plants, although more frequent visits may be necessary if your plants have higher water needs. Using large pots for your plants is a good idea, so you can easily move them if necessary. If you’re worried about privacy, you can dig a hole and place the pot inside to reduce the plant’s height and keep it out of sight.
A fence around your grow area is crucial to keep out larger pests like deer, and if you’re growing near a home, make sure your plants aren’t visible to neighbors or passersby.
“How often should I visit an outdoor plant in a large container?”
Question sent by: Jordan, via email.
Let weather and root volume set the frequency. During mild vegetative weather, a large container may be stable for a while. During heat, wind, or flowering, conditions can change within a day. Check often enough to catch irrigation failure, leaning branches, pests, and wet flowers before damage spreads. A fixed two-week visit schedule is too slow for most container grows.
Legal Considerations
When growing cannabis especially outdoors, it is important to understand the legal landscape you’re operating in. Laws governing cannabis cultivation vary significantly from country to country, state to state, and even county to county. Depending on where you live, growing cannabis may be fully legal, decriminalized, or completely prohibited. Even in places where it is legal, there are often strict rules governing how and where you can grow. This section will guide you through the basics of understanding regional laws, responsible growing practices in legal areas, and the importance of security and privacy.
Regional Laws and Regulations

Before you even think about planting seeds, take the time to research your region’s specific laws on cannabis cultivation. While cannabis is legal for recreational or medicinal purposes in some areas, others have very strict regulations or prohibit it entirely.
In regions where cannabis cultivation is allowed, there are typically limitations on the number of plants you can grow. For example, many places only allow adults to grow a certain number of plants, often six or fewer, for personal use. Exceeding this limit can result in fines, confiscation of plants, or even criminal charges, so it’s crucial to stay within legal limits.
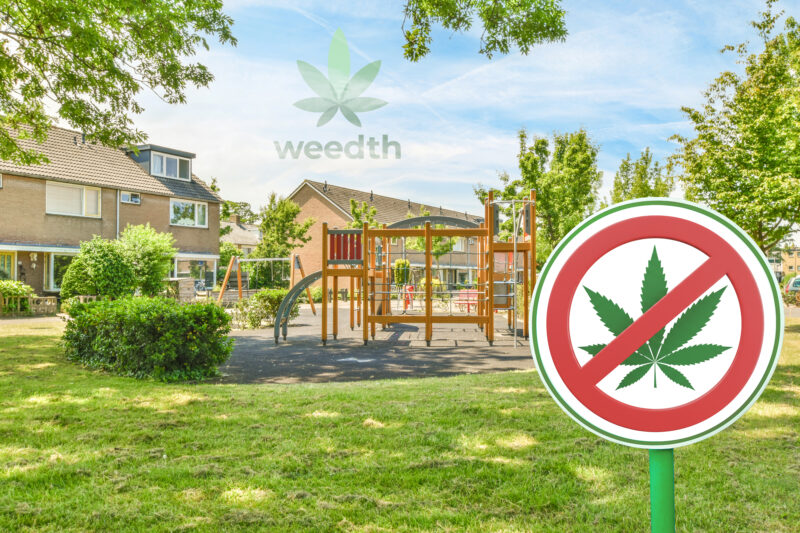
Additionally, some areas have specific zoning laws regarding where you can grow cannabis. Even if growing is legal in your country or state, you may be prohibited from cultivating plants in certain types of residential areas near schools, parks, or other public facilities. Be aware of any distance requirements and how local zoning codes may affect your grow site.
For growers in regions where cannabis cultivation is illegal or restricted, the risks are significantly higher. Cultivation in such areas can lead to severe penalties, including imprisonment. If you decide to grow in an area where it is not legal, you must weigh the potential consequences carefully and be extremely discreet in your practices.
Responsible Growing Practices in Legal Areas

Even in places where cannabis cultivation is fully legal, there is responsible growing practices are essential. Legalization comes with regulations planned to protect not just growers but also the public, the environment, and neighboring properties.
Adherence to Plant Limits: Always stay within the legal plant limits set by your jurisdiction. Keeping your plant numbers low ensures you stay within legal bounds and makes your operation easier to manage and more sustainable.
Odor Control: Cannabis plants have a strong, distinctive odor when flowering stage. In legal grow areas, you’ll still want to be respectful of your neighbors. Failing to control odors could lead to complaints, which could attract unwanted attention from law enforcement or municipal authorities. Invest in proper odor control solutions, such as carbon filters or odor-blocking compounds if you have a green house, especially for outdoor grows where the wind can carry the smell.
Environmental Impact: Responsible growers also take environmental considerations into account. Ensure that your growing methods are sustainable and do not harm the surrounding ecosystem. Use organic fertilizers and pest control methods to avoid chemical runoff into local water sources. In areas prone to drought, consider water-efficient growing techniques, such as drip irrigation or rainwater harvesting, to minimize your environmental footprint.
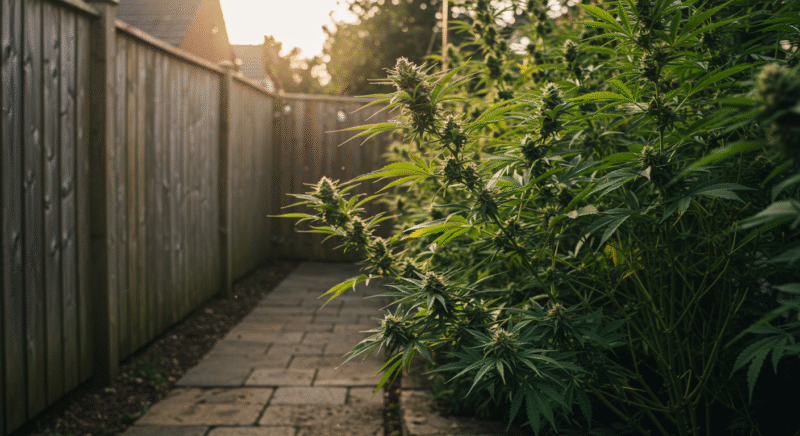
Respect for Privacy and Property: Even if you have permission to grow, keep your plants within the bounds of your own property. Overstepping onto a neighbor’s land or encroaching on public space can cause legal issues. Always ask permission if your plants are near someone else’s property, and ensure that your grow operation isn’t negatively impacting others.
This guide is not a substitute for local law
Weedth can explain cultivation principles, but it cannot determine what is legal at your address. Use current government or regulatory sources and obtain qualified advice when the rule is unclear.
Security and Privacy Concerns
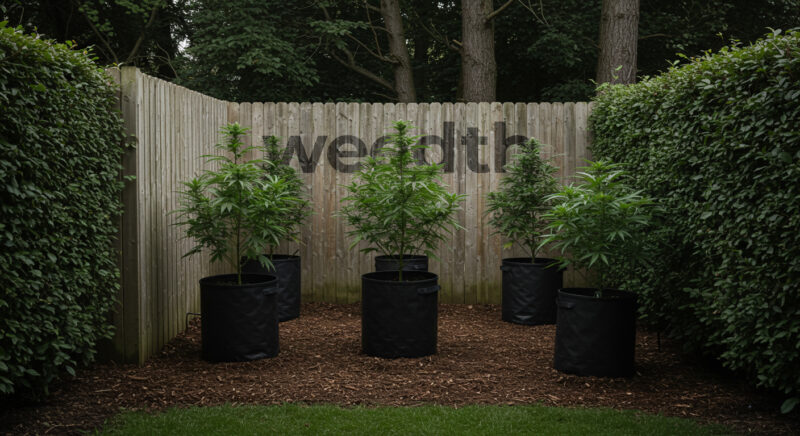
Security and privacy are important concerns. The value of cannabis plants makes them attractive to thieves, and a lack of privacy can lead to unwanted attention from both law enforcement and other people.
Physical Security: Outdoor grows are particularly vulnerable to theft. The open environment makes it easier for people to discover your plants, and if someone stumbles upon your grow operation, they may try to steal your crop. To deter theft, use fencing or natural barriers like hedges and trees to hide your plants from view. In more remote areas, game cameras or motion-activated lights can help you monitor the area without having to be physically present. If growing on private property, keep the garden hidden from street view as much as possible.
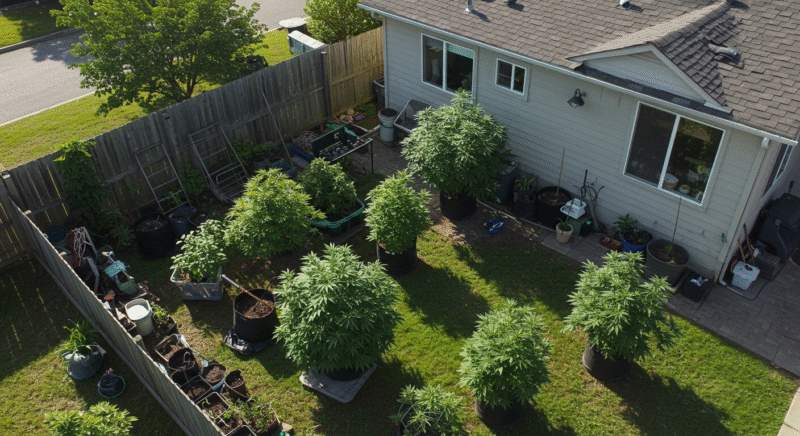
Discreet Growing Techniques: Privacy is just as important as security. Even in legal growing areas, you may not want the entire neighborhood knowing about your grow. Guerrilla growing techniques, such as planting among other vegetation or using low-visibility strains that stay short and bushy, can help conceal your crop. For backyard grows, placing plants near taller garden plants or using trellises can obscure their presence from casual onlookers.
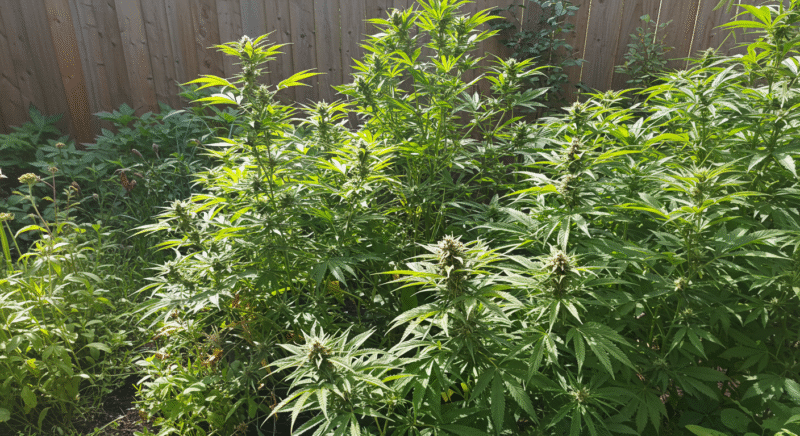
Digital Privacy: With the increasing use of technology in grow operations, maintaining digital privacy is also essential. If you’re documenting your grow on social media or other online platforms, be careful about what information you share. Avoid giving away details about the location of your grow site or showing identifiable landmarks that could reveal where your operation is. Law enforcement agencies and opportunistic thieves alike can use the internet to track down grow operations.

Security in Storage: Once harvested, your cannabis must also be stored securely. Many growers store dried cannabis in airtight containers, often in cool, dark spaces like basements or closets. However, it’s important to make sure these storage areas are also secure from theft. Consider investing in a lockable cabinet or safe for long-term storage, especially if you live with other people who may not be aware of your grow operation.

Security Signage and Visual Deterrents: Visible security measures can significantly reduce the likelihood of theft or unwanted intrusion into your cannabis garden. Posting signs around the perimeter of your grow area is a simple yet effective deterrent. Signs that indicate the presence of security cameras, alarms, guard dogs, or private property notices can discourage potential thieves from approaching your grow operation. Even if you don’t actually have a security camera or a dog, these signs alone often serve as psychological deterrents. For growers who prefer subtlety, discreet yet clear signs—such as "Private Property," "Protected by Surveillance," or "Guard Dog on Duty"—can provide an additional layer of protection without explicitly revealing the presence of cannabis plants. Always ensure that any signage you choose complies with local laws and regulations regarding property warnings and notifications.
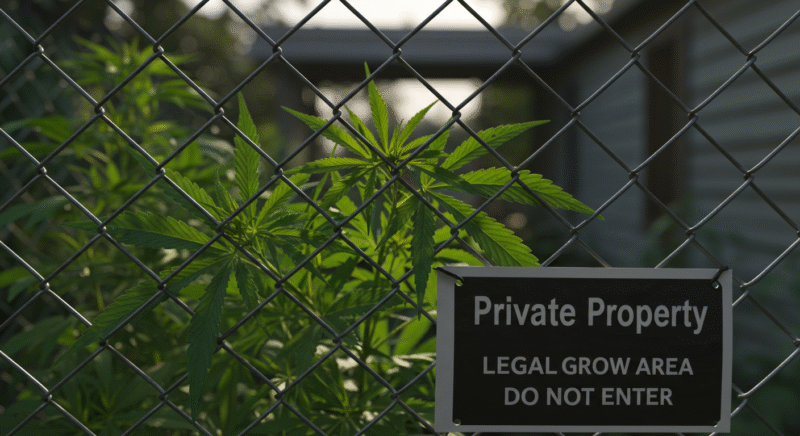
Protective Dogs as Security Measures:
In addition to signs and visual deterrents, many growers find protective dogs to be highly effective in enhancing security. Dogs are naturally alert to unusual noises or movements, providing early warning if someone approaches your grow area. Breeds traditionally known for their guarding abilities, such as German Shepherds, Rottweilers, or Dobermans, can be especially effective in deterring intruders. Beyond security, dogs can also provide companionship and peace of mind for growers working in remote areas or isolated locations. However, keep in mind that owning a protective dog comes with significant responsibility and commitment, including proper training, care, and ensuring your dog does not inadvertently draw attention to your operation. Always ensure your choice aligns with your personal situation, local regulations, and ability to responsibly care for the animal.
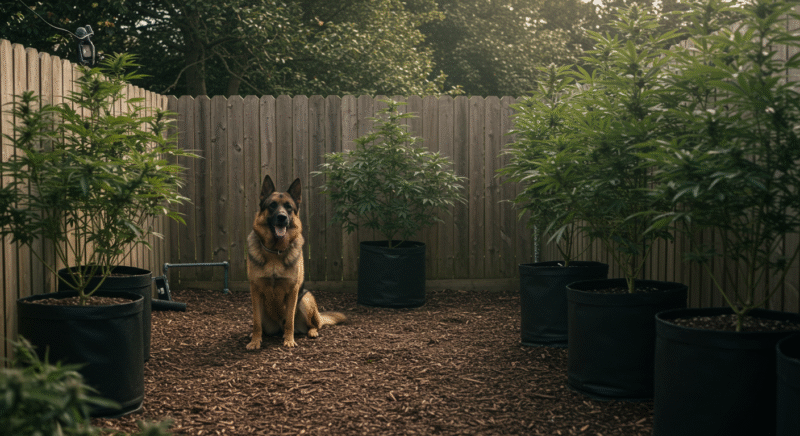
Remember: The safest garden is boring from the outside: lawful, locked, tidy, quiet, and free of clues about harvest timing or stored material.
“Will a tall privacy fence solve both security and airflow?”
Question sent by: Avery Brooks, via Facebook page.
It can reduce visibility and access, but a solid fence can also create shade, reflected heat, and turbulent or stagnant pockets. Observe the sun and wind around the finished barrier. Leave legal working space around the plant, avoid packing foliage against the fence, and make sure gates, cameras, and lighting respect neighboring property.
Planning Your Outdoor Grow
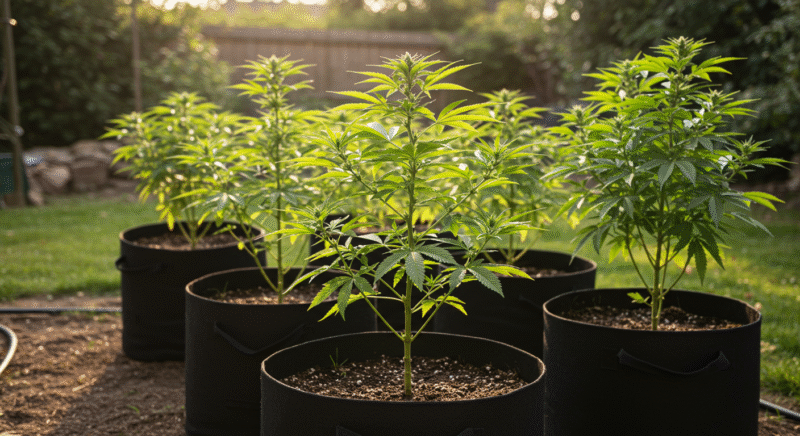
Choosing the Location
Selecting the right location is the foundation of a successful outdoor cannabis grow. Your plants need a spot where they can grow under natural conditions, especially sunlight and protection from the elements. Your chosen location will determine your plants’ health, yield, and security. Factors like light exposure, soil quality, accessibility to water, and privacy must all be considered when picking the perfect grow site. You’re setting the stage for a healthy, productive harvest by carefully planning where you grow.

Microclimate
The climate immediately around the plant. A fence, wall, slope, tree line, wet hollow, paved surface, or wind corridor can make one part of a garden warmer, colder, wetter, darker, or windier than the regional forecast suggests.
Let ordinary rain test the site
A dry afternoon can make almost any location look cooperative. The first ordinary wet week tells a more useful story: water may collect around one root zone, a wall may delay morning drying, or a narrow passage may turn moderate wind into a damaging gust.
Before planting, I like to watch the site through one normal rain event and one clear day from morning to late afternoon. Those two observations often reveal more than a single reading taken in perfect weather.
Site Decisions That Control the Whole Season
Use this table as a first-pass filter. A site does not need to be perfect, but every weak point needs a realistic correction that can be maintained through flowering.
| Site factor | What a workable answer looks like |
|---|---|
| Legality and access | Cultivation is currently permitted, the landowner has agreed, and the garden can meet plant-count, visibility, locking, and setback rules. |
| Direct light | The plant receives a long, open period of direct sun, especially from late morning through afternoon, without a new seasonal shadow taking over. |
| Drainage | Water moves away after irrigation or rain. The planting hole does not remain saturated while the surface merely looks dry. |
| Water | The source is reliable, lawful, and practical during the hottest part of the season. The delivery system can be inspected and repaired. |
| Air movement | Leaves move gently, but the site is not a wind tunnel. Dense flower sites can dry after rain without branches being repeatedly whipped. |
| Season length | The cultivar can finish before the normal period of destructive frost, persistent rain, or low autumn light. |
| Security | The area is locked where required, not casually visible, and accessible for safe harvest and transport. |
Field Advice: If two major site factors cannot be corrected, change the location or change the growing system. Do not ask one plant to compensate for deep shade, trapped water, unreliable access, and a season that is too short at the same time.
Light Exposure

Sunlight drives photosynthesis, so a site that delivers more usable light across the canopy generally gives the plant more energy for roots, stems, leaves, and flowers. That is the useful meaning behind “more light, more bud”: when water, root-zone oxygen, nutrition, temperature, and plant health are not limiting, greater canopy light can raise potential flower mass.
The Importance of Sunlight
A bright, open site is usually a strong starting point, but hours of daylight alone do not describe what the leaves receive. Buildings, trees, slope, latitude, season, smoke, and canopy crowding change daily light. Log direct-sun periods and seasonal shadows, then watch leaf temperature and water demand during the brightest hours. In a hot or dry site, intense midday radiation can become stress before it becomes extra growth.
Controlled cannabis research has shown dry inflorescence yield and apical flower density increasing as canopy light increased across the tested range, while cannabinoid concentration did not increase with the light treatments. In practical terms, more usable light can mean more total flower; it does not automatically mean a higher THC or CBD percentage.
What to Remember: More usable light usually means more potential flower mass when the plant can use that energy. It is not a promise of greater potency, and excessive heat, drought, or damaged leaves can turn additional radiation into stress.
Sunlight and Seasonal Changes
Before planting your seeds or seedlings, the first step is to thoroughly assess your grow site’s light exposure. A good time to do this is in the spring, as the angle and intensity of the sun in early spring will give you a clear indication of the light conditions your plants will experience throughout the growing season.
Cannabis needs plenty of direct sunlight from mid-morning to mid-afternoon. The ideal window for exposure is between 10 a.m. and 4 p.m., though an 8 a.m. to 5 p.m. range is even better. This direct sun will provide the light intensity needed to drive photosynthesis and encourage your plants to grow rapidly and healthily.
The sun’s position in the sky changes with the seasons due to the earth’s rotation, so it’s important to factor this in when choosing a location. The sun’s path will vary from spring to fall, and the height of summer brings the most direct sunlight. Go out to your grow site early in the growing season and track the sun’s path throughout the day. Make sure no large structures, trees, or other obstacles will cast shadows over your plants during the critical midday hours. Even something that might seem like a small obstruction can significantly limit the potential of your plants if it blocks the sunlight for long periods.
Tip: Start by observing the sun’s movement across your grow site. Imagine the sun’s path as a 360-degree arc that moves from east to west over your growing area. Try to imagine how this path will change in the summer, fall, and early spring.
Sunlight Exposure Based on Geographic Location
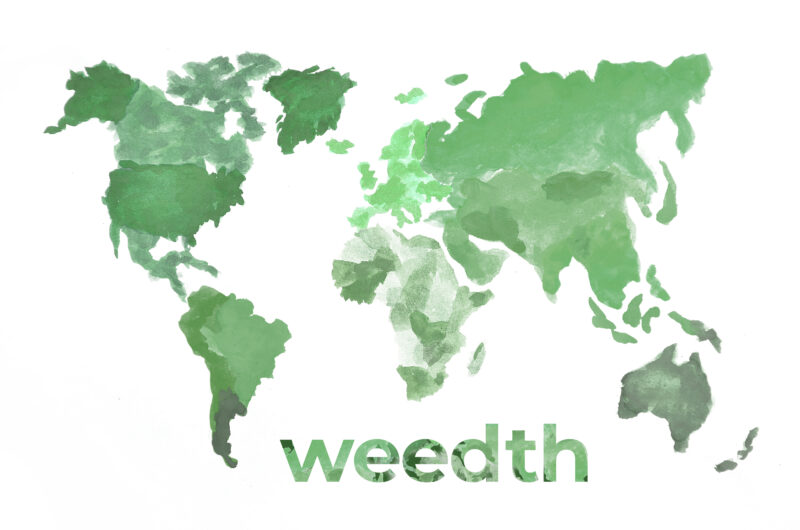
Cannabis can be grown successfully in a wide range of environments, but your geographic location will influence how much sunlight your plants can receive throughout the growing season.
Northern Hemisphere Growers (Above 30° Latitude)
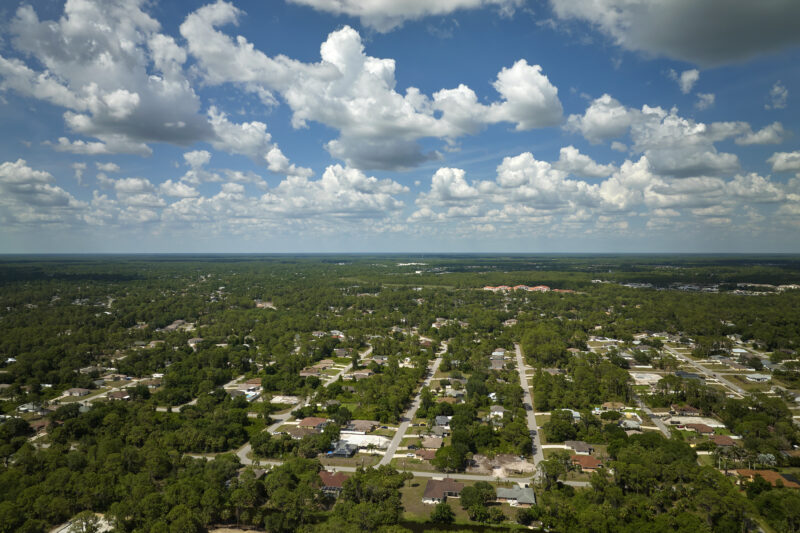
The growing season is shorter in northern regions such as Canada, northern Europe, or parts of the US, and the sun sits lower in the sky. This makes it essential to start your plants early in the year, preferably in April or May, so they can benefit from the longer daylight hours of summer. In these regions, it’s especially important to position your grow site to capture the maximum amount of sunlight during the summer months, as days will shorten significantly by late September or October. A south-facing slope or an area that receives full sun from morning until late afternoon is ideal.
Southern Hemisphere Growers (Below 30° Latitude)
In southern regions like parts of South America, Africa, or Australia, the growing season is longer, and sunlight is more consistent year-round. However, during the peak of summer, the intense heat can stress your plants, especially during the afternoon. Consider a site with full morning sun and some light afternoon shade in these climates to protect your plants from extreme heat while ensuring they get the light they need. Be sure your plants get at least 5-6 hours of direct sun each day for the best results.
Equatorial Growers (Near the Equator)
Day lengths are more consistent year-round near the equator, meaning cannabis can be grown outdoors throughout the year. However, growers in these regions need to watch out for humidity and heavy rainfall, which can affect plant health. Make sure your grow site gets plenty of sunlight to dry out the plants and prevent mold from forming. A location that receives full sun throughout the day is optimal for cannabis grown in equatorial regions.
In summary, cannabis plants respond best to full, uninterrupted sunlight, and the south-facing side of a hill or slope typically offers the most consistent exposure. Large, open areas on the northern side of a property can also receive excellent southern exposure, ensuring that your plants are bathed in sunlight throughout the day. If you have limited sunlight exposure, morning light is often preferable to afternoon light. Cannabis plants that receive full morning sun will begin photosynthesis earlier in the day, leading to more vigorous growth.
“My garden gets long summer days, so why is the plant still stretching toward one side?”
Question sent by: Noah Tremblay, via email.
Day length is not the same as direct light at the canopy. A tree, wall, or roof may block the most useful hours even when sunrise and sunset are far apart. Watch the actual shadow path and compare the open-sky side with the shaded side. Rotation can help containers, but it cannot replace a site with adequate direct sun.
Maximizing Light Reflection for Increased Yields
In addition to selecting the best location for sunlight exposure, there are some clever tricks you can use to boost light intensity. One of the easiest ways to increase your plants’ light exposure is by utilizing reflective surfaces near your grow area.
If your plants are growing near a wall or fence, painting it flat white can significantly enhance the light your plants receive. The white surface will reflect sunlight back onto your plants, effectively increasing the amount of light hitting them. This simple adjustment can lead to up to 10% higher yields without the need for any additional energy inputs. It’s an effective, low-cost way to improve your grow without adding complexity.
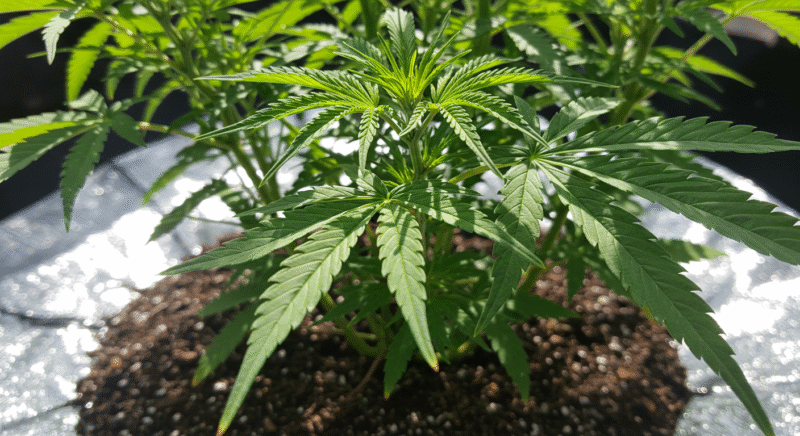
Another option is to use reflective mulches or white ground covers around the base of your plants. These materials reflect light back onto the lower parts of the plant, ensuring that even the lower branches receive sufficient light. This method is particularly useful for dense, bushy plants where the upper leaves might block sunlight from reaching the lower parts.
Avoiding Light Obstructions and Managing Shadows
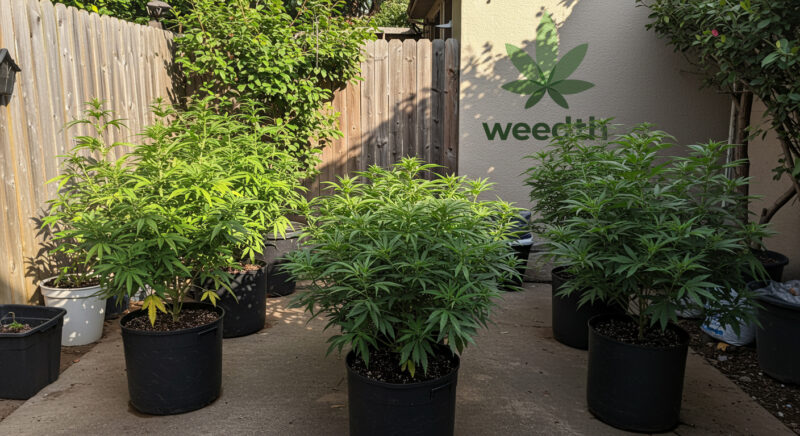
When selecting your grow site, be sure to account for potential obstructions that might cast shadows over your plants during the day. Trees, buildings, and even fences can block sunlight and limit the amount of exposure your plants receive. Remember that as the sun moves across the sky, the angle of sunlight will change, so what seems like a sunny spot in the morning could be shaded by afternoon.
In addition, as the seasons change, the sun’s path will shift. A location that gets full sun in early summer might be partially shaded by fall, when the sun is lower in the sky. If you live in an area with shorter growing seasons, make sure your grow site is positioned to capture the maximum amount of sunlight throughout the entire season.
“The site is sunny now. Can autumn shadows really change that much?”
Question sent by: BirchSignal, via Instagram.
Yes. The sun’s path becomes lower and shadows lengthen as the season changes. A fence or tree that barely matters in midsummer can remove hours of late-season light. Check a sun-path tool or observe comparable dates, and pay particular attention to morning sun, which helps dry dew and rain from flowering plants.
The Importance of Full Sun for Greenhouse Growing
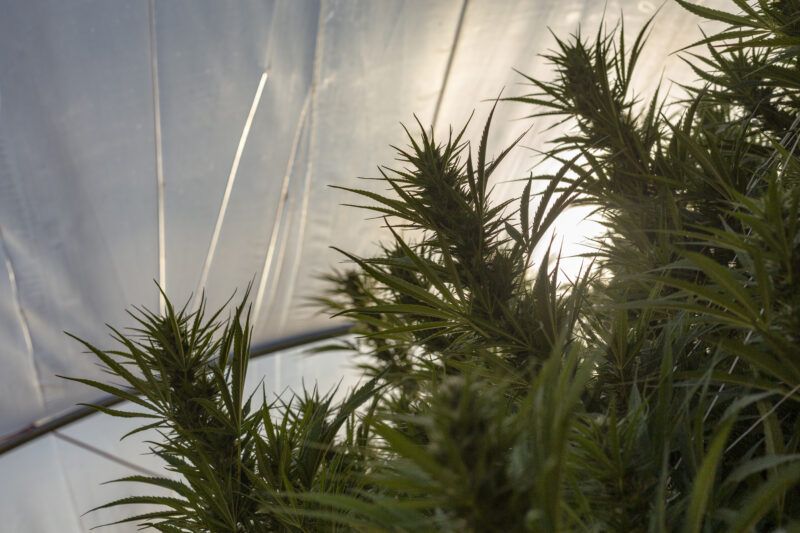
If you’re growing cannabis in a greenhouse ensuring that your plants receive full sun exposure is just as important. A greenhouse can provide protection from harsh weather conditions, pests, and other outdoor risks, but it still relies on natural sunlight to support the plants’ growth. Position your greenhouse in a location that gets at least six to eight hours of direct sunlight daily, ideally from the morning through mid-afternoon. If your greenhouse is in a spot that gets too much shade, you may need to consider supplemental lighting to ensure your plants get the light they need to thrive.
Practical Tips for Ensuring Proper Light Exposure
Here are a few additional tips to ensure that your outdoor cannabis plants receive the optimal amount of sunlight:
Use the Winter Sun as a Guide: Even though cannabis is typically grown during the spring and summer months, the amount of sunlight your grow site receives in the winter can be a useful indicator of how much light it will get in the growing season. By observing the winter sun, you can identify any potential obstacles that might block sunlight during the spring or fall.
Monitor Light Patterns: If you’re not sure how much sunlight your grow site will get, use a light meter to measure the amount of direct sunlight throughout the day. This can help you find the best location for your plants.
Optimize Plant Placement: If you have limited space or access to sunlight, consider planting your cannabis in pots that can be moved throughout the day to follow the sun. This is especially useful if you’re growing in a backyard or smaller area where sunlight is limited at certain times of the day.
Account for Seasonal Changes: As the seasons change, the sun’s angle will shift, so make sure to consider how sunlight will change throughout the growing season. Planning for these changes in advance can help ensure that your plants get the consistent light exposure they need.
Weather and Microclimate Management
Regional forecasts are useful, but the plant experiences the garden, not the nearest weather station. A low corner may freeze while a raised bed a few meters away stays above freezing. A wall can reflect useful spring warmth and then create damaging heat in midsummer. Read the forecast together with the site.
| Weather signal | What to do before it arrives |
|---|---|
| Cold, clear, calm night | Expect frost to be more likely in exposed low areas. Water only if the root zone is genuinely dry, secure covers above the canopy, and remove wet covers after conditions improve. |
| Hot, dry, windy day | Check root-zone moisture early, shade young containers if necessary, secure pots and branches, and avoid heavy pruning or transplanting. |
| Long rain event | Clear blocked drains, support flower-bearing branches, keep foliage off the soil, and plan a careful inspection as soon as surfaces begin to dry. |
| Hail or severe storm | Move portable containers to shelter, install support before the wind begins, and use a cover that cannot collapse onto the plant. |
| Smoke or ash | Avoid unnecessary handling while ash is falling, protect irrigation storage, and inspect leaf surfaces and flowers after air quality improves. |
Frost and Cannabis Grow Outdoors

When growing cannabis outdoors, frost is one of the greatest threats to your plants, especially as the season changes and temperatures begin to dip. Frost occurs when air temperatures drop below 32°F (0°C), leading to the formation of ice crystals on leaves, which can injure or even kill your plants. For cannabis, particularly those not bred for extreme climates, frost can be devastating if you don’t take the right precautions.
“The forecast says 2°C. Do I still need to prepare for frost?”
Question sent by: Sophie Martin, via Facebook page.
Possibly. Forecast temperature is measured under standardized conditions and may not match an exposed leaf in your garden. Clear sky, calm air, low ground, and a dry site can increase frost risk. Prepare a supported breathable cover, secure it before dark, and protect seedlings and containers first. Remove wet covers when the day warms.
Frost: Clear Skies, Wind, and Location
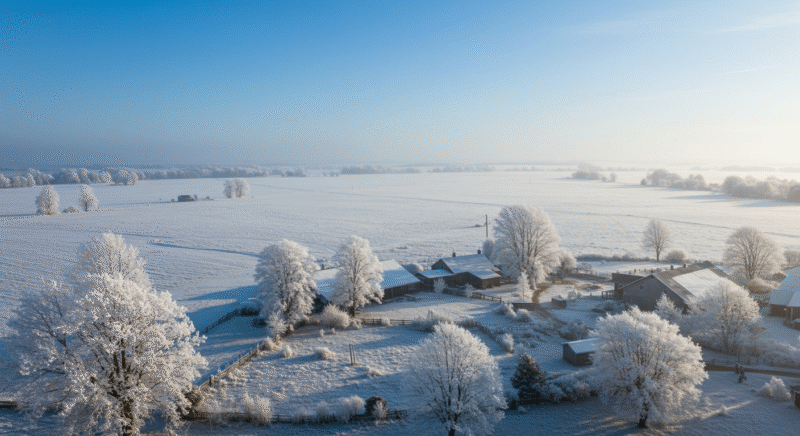
Frost typically forms on nights with clear skies and calm winds. When the afternoon temperatures start to fall rapidly under these conditions, especially with a cool breeze from the northwest, this may indicate the arrival of a cold air mass, which can lead to a hard freeze. A hard or killing frost brings temperatures that dip below freezing and can wipe out most plants except for the hardiest varieties. These types of frosts are especially dangerous for cannabis, as they can severely damage or even kill the plants overnight.
On cloudy nights, the picture is different. Clouds act as a blanket, trapping the day’s heat close to the ground, which can help protect your cannabis plants from frost. When clouds are present, they can keep the temperature from plummeting too low, offering a layer of protection for your crops. Always keep an eye on the forecast; cloudy nights are your friend when it comes to protecting your plants from frost damage.
Wind plays a crucial role too. If the night is calm and still, the coldest air settles at ground level, creating the perfect conditions for frost to form, especially on your lower leaves and buds. However, a light breeze can prevent cold air from settling and keep temperatures slightly higher, which can protect your plants. But if the wind itself is freezing, it can be equally damaging, so you’ll need to watch for both wind speed and temperature.
Let the coldest corner set the plan
Cold settles unevenly. A low pocket or an open, still part of the garden can be colder at canopy height even when a nearby sheltered bed looks almost identical.
Place a minimum thermometer beside the leaves and plan around the coldest repeated reading, not the warmest corner. Once we know where cold settles first, we can choose safer positions for young plants and prepare protection before late flowers need it.
Humidity and Moisture: Your Allies Against Frost

Humidity and moisture levels in the air can be your plant’s best defense against frost. When the air is humid, moisture condenses and releases heat, which can protect your plants from freezing. This is why mornings with dew are often not as damaging as frost. If the air is dry, on the other hand, moisture from the soil evaporates, which draws heat away from your plants. Keeping your soil moist, particularly before a predicted frost, is key to helping your plants survive. The moisture in the soil will release heat overnight, raising the temperature slightly around your plants, which could make the difference between life and death for your crop.
Remember: Frost protection is a system: healthy roots, suitable genetics, a warm micro-site, secure support, and a dry removable cover. A single plastic sheet touching the canopy is not a complete plan.
“Should I soak the bed before a cold night because wet soil stays warmer?”
Question sent by: Lukas, via email.
Only if the root zone is genuinely dry, and water early enough for the surface to settle. Moist soil can store and release heat, but saturated roots lose oxygen and wet foliage raises other risks. Do not flood a heavy bed to gain a small thermal benefit. Combine appropriate moisture with a good micro-site and a secure cover.
Location, Location, Location
Elevation matters, but a universal temperature drop should not be used as a garden forecast. Broad atmospheric lapse rates describe large air masses; frost at plant height is shaped by slope, cold-air drainage, wind, cloud cover, surface moisture, nearby structures, and canopy height. A higher site may be colder overall, while a valley floor or enclosed low pocket can become colder on a clear, calm night because dense cold air settles there.
Place a minimum thermometer or data logger at canopy height in the coldest suspected part of the garden and record several nights. Choose the slope and aspect that receive useful late-day sun in your hemisphere, avoid obvious cold-air pockets, and use shelter that slows damaging wind without trapping humid air. Buildings, fences, trees, and water can modify a microclimate, but none of them guarantees frost protection.
Master Tip: The forecast is regional. The thermometer beside the flowers is local. Build your frost plan from repeated canopy-height readings, not from an incorrect fixed conversion for every 1,000 feet of elevation.
Soil Matters
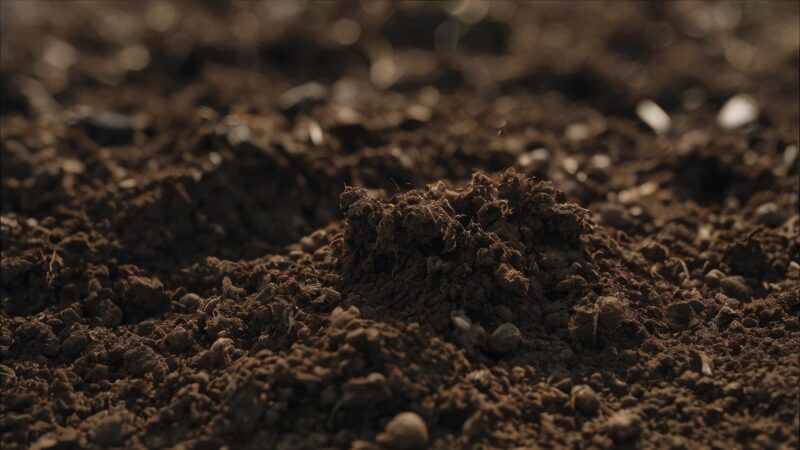
The type of soil you use can also influence frost risk. Deep, fertile, well-draining soil holds moisture better than poor, sandy soil, and this moisture releases heat during the night, protecting your plants. If your plants are growing in heavily mulched soil, though, be cautious—mulch can trap moisture and heat in the soil, reducing the amount that radiates into the air and increasing the likelihood of frost. In general, the more humid the air is the higher the dew point will be and the less likely frost is to form.
Plants’ Frost Tolerance
Some plants are naturally more resistant to frost than others. Young, actively growing cannabis plants are the most vulnerable to frost damage, especially if they are still developing tender new leaves. However, some strains of cannabis, particularly those with maroon or bronze leaves, tend to be more frost-tolerant, as these darker leaves absorb and retain heat better than lighter-colored ones. Cannabis plants with downy or hairy leaves also tend to be more resistant to frost because the tiny hairs trap heat close to the leaf surface.
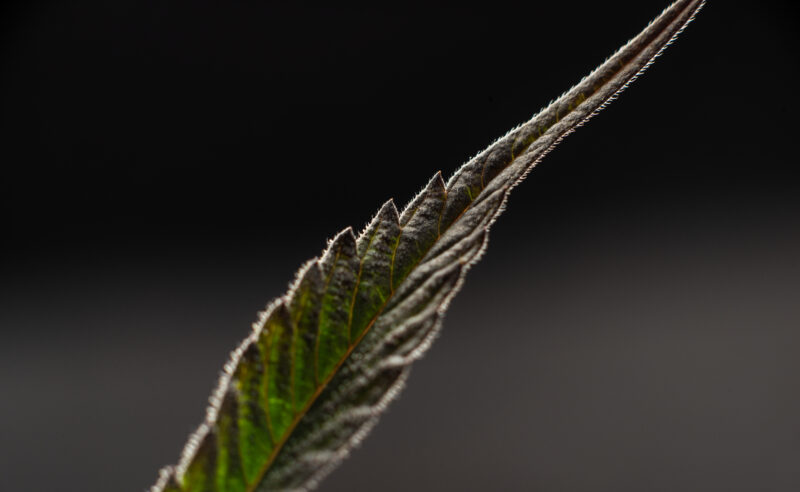
Compact, bushy plants are generally more resistant to frost damage than tall, leggy ones because they expose less surface area to cold winds. Similarly, closely spaced plants can help protect each other by forming a microclimate that retains warmth and shields individual plants from direct exposure to frost.
Preparing for Frost
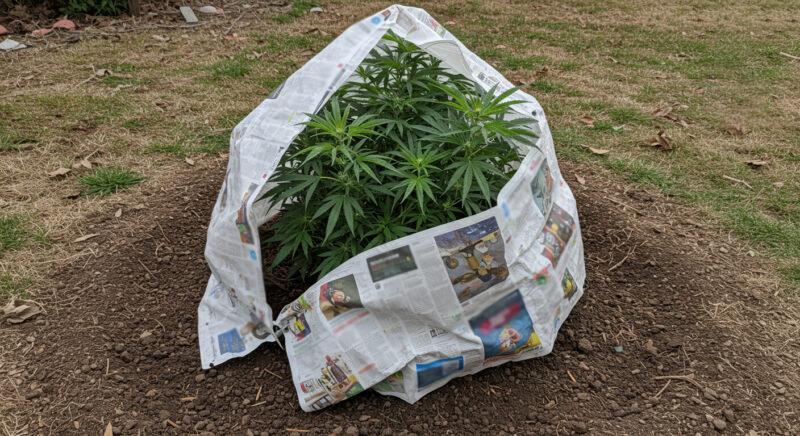
If a frost is in the forecast, there are several steps you can take to protect your cannabis plants. First, cover your plants to retain as much soil heat as possible and to shield them from cold winds. You can use newspapers, tarps, blankets, or even straw—anything that traps the heat rising from the ground can help. Just make sure to cover your plants before sunset so they can retain the heat from the day. Secure any lightweight coverings so they don’t blow away if the wind picks up during the night.
Watering your plants thoroughly before a frost can also help. Moist soil holds heat better than dry soil, and as the water evaporates overnight, it will release heat that can protect your plants. Some commercial growers even leave sprinklers running all night to coat their plants in ice—the process of water freezing actually releases heat, keeping the plants alive beneath a layer of ice. If you decide to go this route, make sure the sprinklers continue running as long as the temperatures stay below freezing; otherwise, your plants may suffer severe damage.
“Can I leave frost cloth on for several days if the weather stays cold?”
Question sent by: MapleMornings, via contact form.
Usually it should be vented or removed when temperatures rise and light returns. A cover left wet and closed can trap humidity, reduce light, rub the plant, and overheat unexpectedly in sun. Use it as temporary protection, inspect contact points and supports, and let the canopy dry whenever conditions allow.
Frost Damage and Temperature Effects
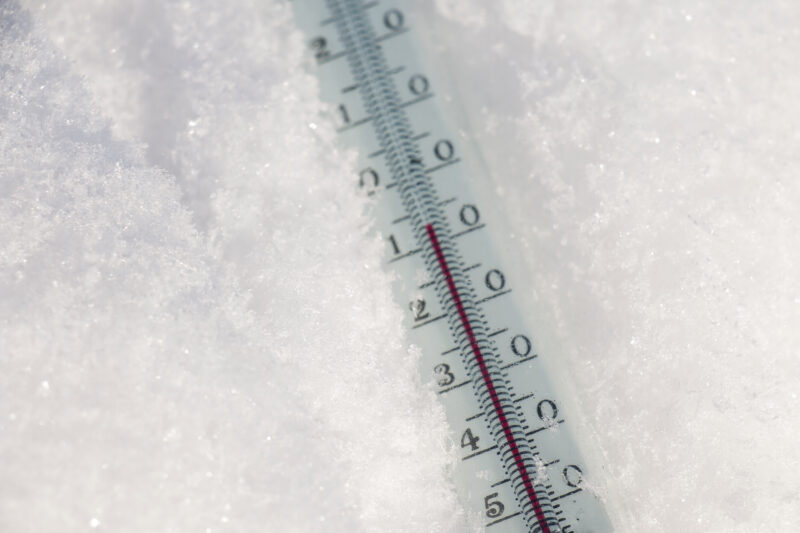
Different temperatures can have varying effects on your plants. Here’s a breakdown of what to expect:
- Light Freeze (29-32°F/-2 to 0°C): This is a mild frost, which will likely kill tender plants but leave hardier vegetation intact.
- Moderate Freeze (25-28°F/-4 to -2°C): This range causes significant damage to most plants, including fruit blossoms and semi-hardy varieties.
- Severe Freeze (24°F/-4°C or colder): At these temperatures, most vegetation, including cannabis, is heavily damaged or killed.
Cold temperatures can also change the appearance of your plants. When exposed to frost, some cannabis strains may turn purple or red, especially around the buds and leaves. While this can be a stunning visual effect, it’s usually a sign that the plant is under stress. If you see these color changes, it’s time to take immediate action to protect your crop.
When’s the Best Time to Grow?
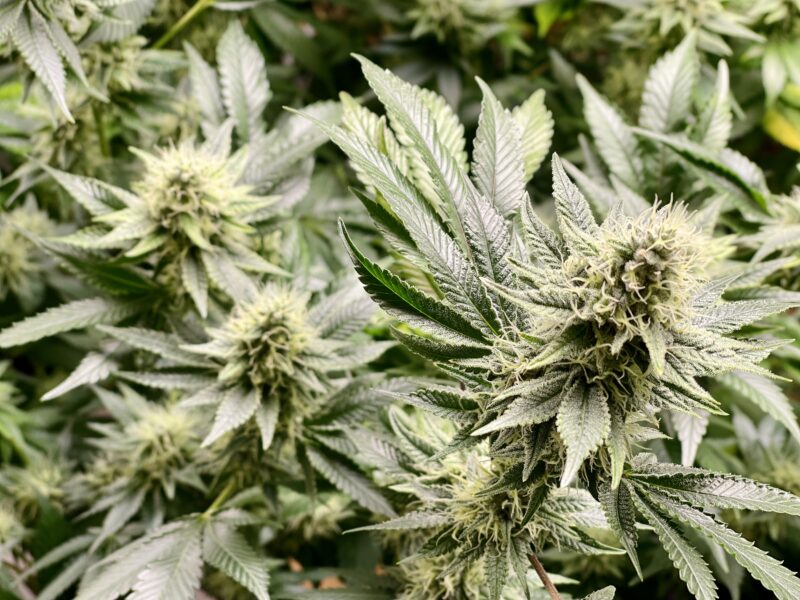
Cannabis plants are adaptable and can thrive anywhere you can grow. They need about three months from seed to harvest when grown outdoors—or just two months if you start them indoors. Experienced growers agree that the ideal time to begin your outdoor marijuana grow is in March or April, or early May at the latest. This timing allows your plants to mature and start flowering by August or September when daylight hours begin to shorten.
Paying attention to your local frost dates is critical. Talk to nearby growers or check the farmer’s almanac to determine the year’s last frost. Always plant after the last frost to avoid damage to your young plants. If you’re concerned about frost or have a colder climate, start the plants indoors and gradually move them outside during the day, bringing them back in at night. This process is called “hardening off” where you help the plants acclimate to outdoor conditions to avoid shock. Tossing indoor plants straight into outdoor conditions can lead to stunted growth or worse.
Starting your plants indoors is generally the easiest way to kick off the growing season. Indoors, you can control the environment more easily, using a CO2-enriched atmosphere and metal halide lights to boost early growth. This head start can make a huge difference, especially in climates with shorter growing seasons.
Field Advice: Write down the local first and last frost dates, then add the cultivar’s likely outdoor finish. Planning from both ends of the season is more useful than copying a month from a grower in another climate.
Wind
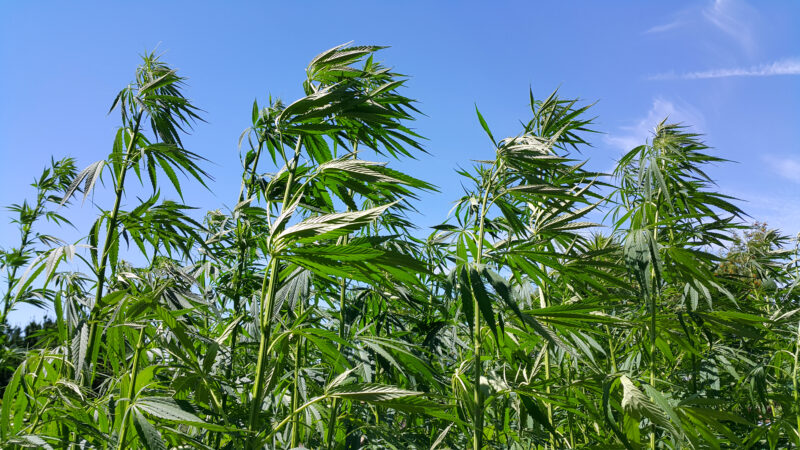
Wind is an essential environmental factor in any outdoor cannabis growing operation. It plays a crucial role in your plants’ development and overall health but wind can be both beneficial and harmful, depending on its intensity, direction, and duration. Understanding how wind affects cannabis growth is key to ensuring a successful outdoor grow and preventing stress or damage to your plants. In this section, we will explore the complex relationship between wind and cannabis, focusing on how wind influences plant physiology, growth patterns, and your garden’s microclimate.
“How much leaf movement is too much wind?”
Question sent by: Cole Ramirez, via Facebook page.
Watch the plant’s posture and recovery. Gentle movement is normal. Persistent folding, whipping, branch rubbing, leaning containers, torn leaf edges, and rapid midday drying indicate excessive exposure. Check the same site during gusts, not only calm periods. Add porous wind reduction and structural support before heavy flowers increase the load.
Benefits of Wind for Cannabis Growth
In moderate amounts wind is an essential part of healthy plant development. When growing cannabis outdoors, a gentle breeze can offer numerous advantages to your plants, improving everything from structural integrity to pest and disease prevention.
Strengthening Plant Structure
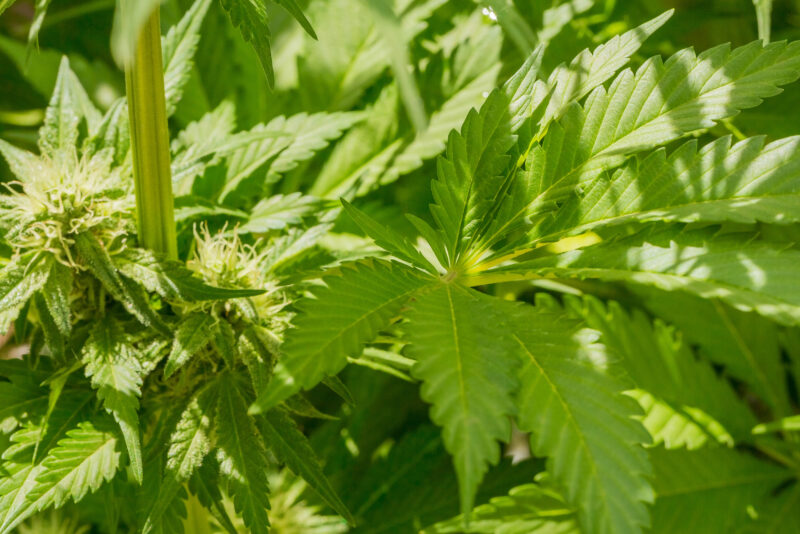
One of the most significant benefits of wind for cannabis plants is the way it helps strengthen plant stems and develop robust root systems. When exposed to a gentle breeze, cannabis plants naturally respond by fortifying their stems and branches to resist movement. This process, known as thigmomorphogenesis, refers to the physiological changes plants undergo in response to mechanical stress, such as the movement caused by wind.
- Stem Thickening: As the wind moves plants back and forth, it triggers hormonal responses that result in the thickening of the stem tissue, particularly in young plants. Thicker stems and stronger branches are essential for supporting the weight of large, dense buds during the flowering stage.
- Root Development: Wind exposure also encourages the plant to establish a stronger root system, as the roots anchor the plant more securely in the soil to prevent it from being uprooted. This deeper, more extensive root system improves the plant’s ability to absorb water and nutrients, which can directly contribute to increased vigor and yield.
Enhancing Air Circulation and Preventing Pests and Mold
“The white coating wipes off. Does that mean it is only dust?”
Question sent by: Nattapong, via Instagram.
Not necessarily. Powdery mildew can be disturbed or smeared, and dried spray residue can also look white. Inspect the pattern with magnification, check sheltered leaves and nearby plants, and compare it with your spray history. If the identity remains uncertain, use a plant diagnostic service. Shaking a suspected leaf over the canopy is a poor test because it can spread spores.
Good airflow around your cannabis plants is crucial for maintaining a healthy growing environment. Wind helps to improve air circulation, which in turn:
- Reduces humidity levels around the plant, particularly within the dense foliage. Lower humidity is vital for preventing mold and mildew, especially during the flowering stage when plants are more susceptible to these issues.
- Helps prevent pests from settling on your plants. Many pests, such as aphids, spider mites, and whiteflies, thrive in still, stagnant environments. Wind makes it harder for these pests to establish colonies, as they prefer calm areas to feed and reproduce.
- Promotes gas exchange: Cannabis plants, like all plants, rely on the process of photosynthesis to convert sunlight into energy. During this process, they absorb carbon dioxide (CO₂) from the air and release oxygen (O₂). Wind facilitates this gas exchange by constantly refreshing the air around the leaves, ensuring the plant has a steady supply of CO₂, which supports faster and healthier growth.
Pro Tip: If you live in a humid climate where mold and mildew are common problems, consistent airflow (even moderate wind) is your best defense. Be cautious with overly strong winds, as they can increase transpiration and dry out your plants too quickly.
Cooling Plants and Regulating Temperature
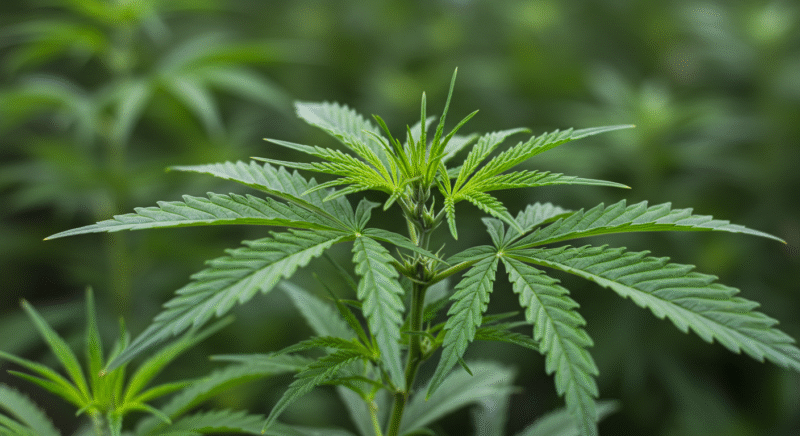
Wind helps to moderate temperatures around your cannabis plants by cooling them during hot weather. As the wind moves across the leaves, it aids in the process of evapotranspiration, where moisture is released from the plant’s stomata (tiny openings on the leaves). This process cools the plant’s surface, helping to regulate its temperature, especially during the hot summer months when temperatures can soar.
Cannabis thrives in temperatures between 70-85°F (21-29°C). While the plants can tolerate warmer conditions, extreme heat can cause stress and slow growth. In such cases, wind acts as a natural cooling mechanism, preventing heat stress and reducing the risk of wilting or leaf scorch.
Evapotranspiration also helps to pull water and nutrients up from the soil into the plant’s vascular system, ensuring that the plant remains hydrated and well-nourished, even in hot weather.
Dangers of Excessive Wind for Plants
While wind in moderation provides many benefits, excessive wind can be extremely harmful to cannabis plants, especially if it is persistent or combined with other environmental stressors like extreme temperatures or low humidity. Let’s take a closer look at how strong or constant wind can damage your plants.
Physical Damage to Plants
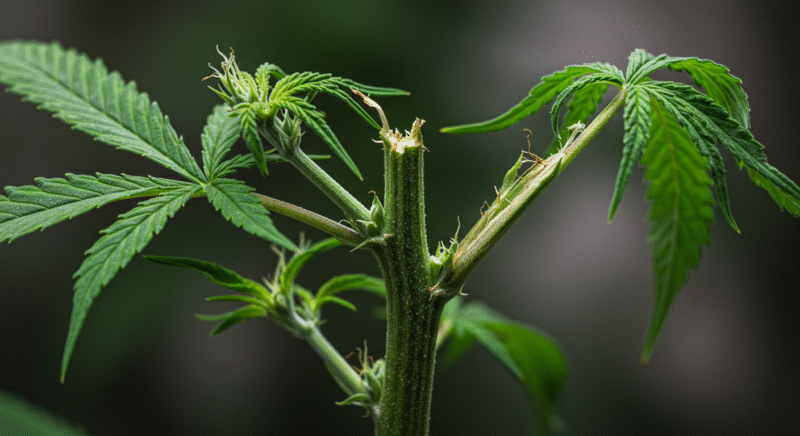
Cannabis plants are not withstand high winds for long periods. Strong gusts of wind can cause structural damage, such as:
Broken Branches: Heavy winds can snap stems and branches, especially during the flowering stage when the plants are top-heavy with resinous buds. This can reduce yields and compromise the overall health of the plant. Even if the damage is not immediately visible, continuous bending and twisting can weaken branches over time.
Pro Tip: When branches are most vulnerable during the flowering stage, consider providing additional support to prevent snapping. You can use trellises, stakes, or plant cages to reinforce your plants, ensuring they remain upright and stable in case of sudden gusts.
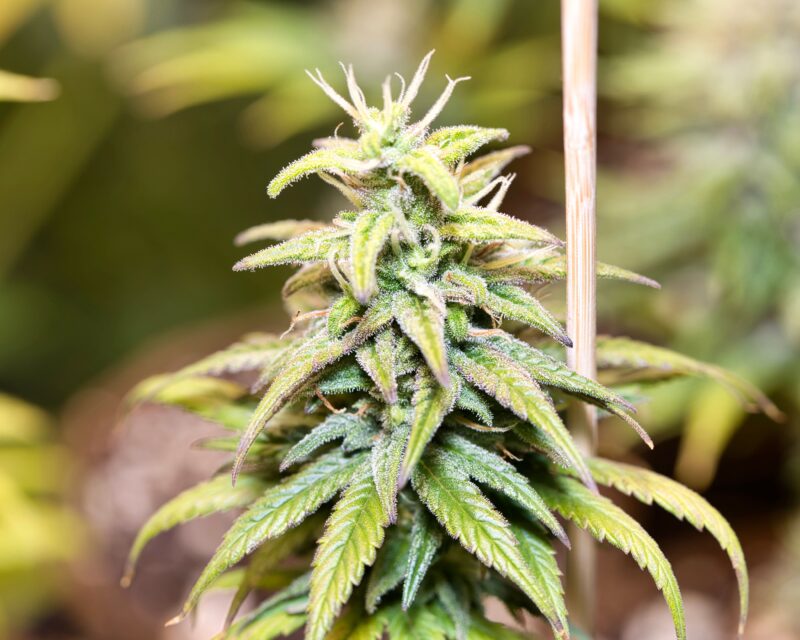
Windburn: Just as strong sunlight can cause leaf burn, excessive wind can cause windburn, where the edges of the leaves become dry, curled, or brittle. This occurs because strong winds cause excessive evaporation from the leaves, leading to dehydration. When the rate of moisture loss exceeds the plant’s ability to uptake water through its roots, leaves become scorched or withered.
Increased Transpiration and Dehydration
Transpiration is the process by which water evaporates from the leaves into the atmosphere, cooling the plant and enabling nutrient uptake. In moderate conditions, transpiration is an essential and beneficial process. However, transpiration rates can spike dramatically in high winds, leading to rapid moisture loss. This is particularly dangerous in environments with low humidity or during dry seasons.
Water Stress: When wind forces plants to lose water too quickly, it can lead to water stress. The roots may not be able to draw water from the soil fast enough to replace what’s lost through the leaves, resulting in wilting, stunted growth, or even plant death in extreme cases.
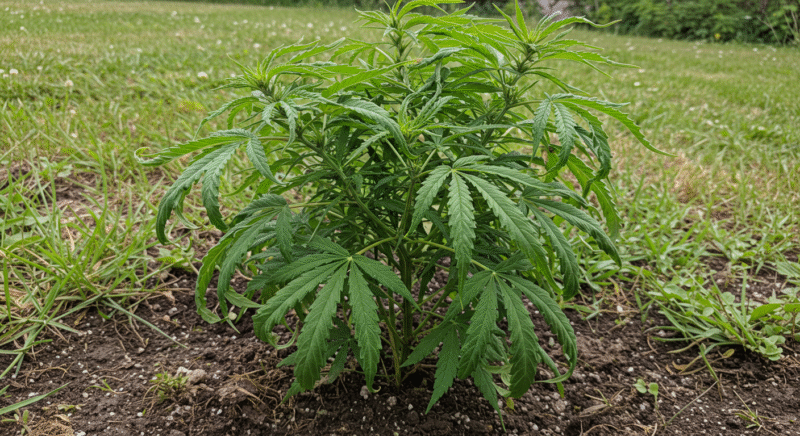
Nutrient Deficiency: Because water is the primary vehicle for transporting nutrients from the soil to the plant, excessive transpiration caused by strong wind can also lead to nutrient deficiencies. Without adequate water, plants struggle to absorb and distribute key nutrients like nitrogen, potassium, and phosphorus, which are essential for growth and flowering.
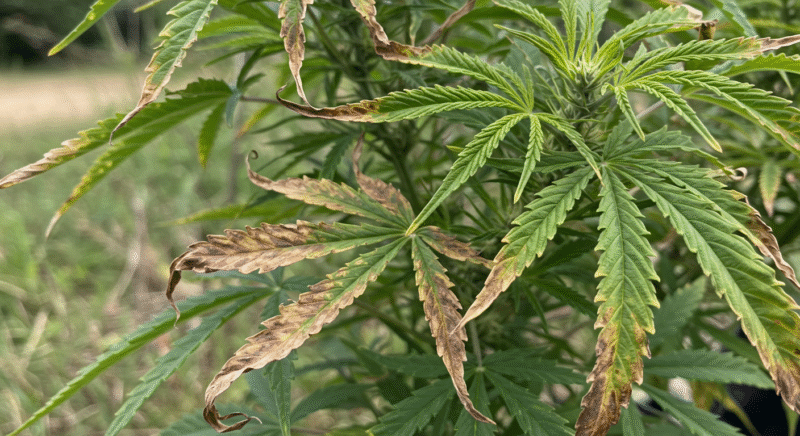
Pro Tip: During prolonged periods of high wind, increase watering frequency to help your plants cope with the increased rate of water loss. Use mulch around the base of your plants to retain moisture and protect the root zone from drying out too quickly.
Impact on Pollination and Flowering
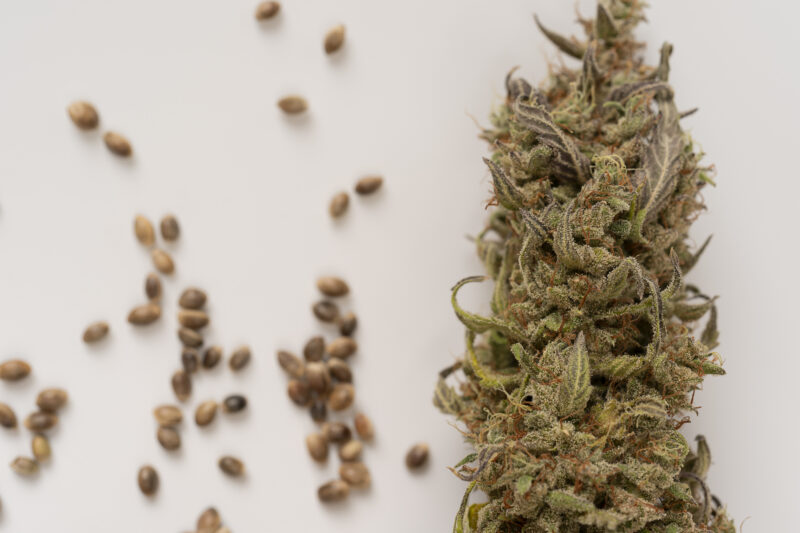
flower buds and Cannabis seeds isolated on white background. close up top view, medical use concept
For cannabis growers, the flowering stage is the most critical part of the growing cycle, as it determines the quality and yield of your harvest. During this time, excessive wind can be particularly damaging.
Disruption of Flower Formation: Constant wind can interfere with the delicate process of flower development, especially in early flowering. The physical stress from wind can cause flowers to develop unevenly or lead to fewer bud sites, reducing overall yields.
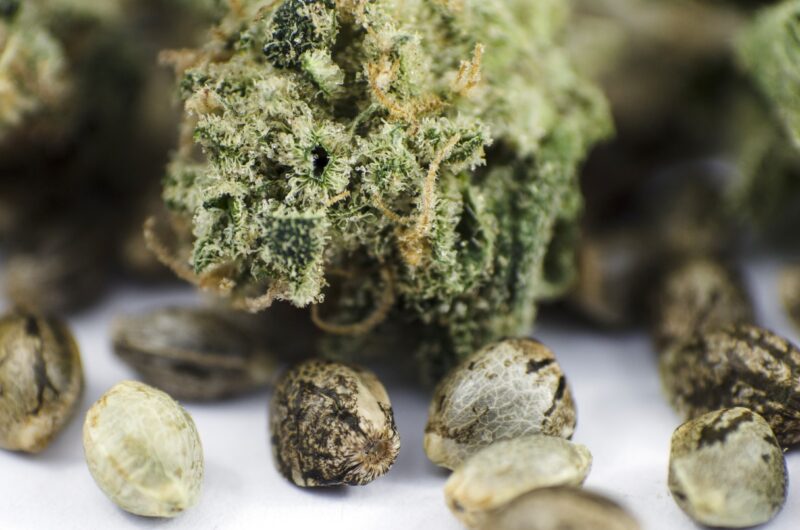
Pollination in Seed-Producing Plants: Wind can play a role in pollination for growers producing seeds. While cannabis is typically pollinated through the air (pollen is carried by wind), overly strong or erratic winds can disrupt this process, causing inefficient or incomplete pollination. In contrast, too little wind can limit pollen distribution, affecting seed development.
Pro Tip: If you are growing cannabis for seed production, monitor wind conditions closely during the pollination window to ensure optimal pollen dispersal. Avoid high-wind days by sheltering your plants or using controlled environments like greenhouses if necessary.

Microclimate Creation and Wind’s Role
One of the most subtle but important roles that wind plays in outdoor growing is its ability to influence the microclimate, the localized climate around your plants. Every garden, regardless of its size, has a unique microclimate that is shaped by factors like wind patterns, sunlight exposure, humidity, and topography.
Wind and Temperature Regulation
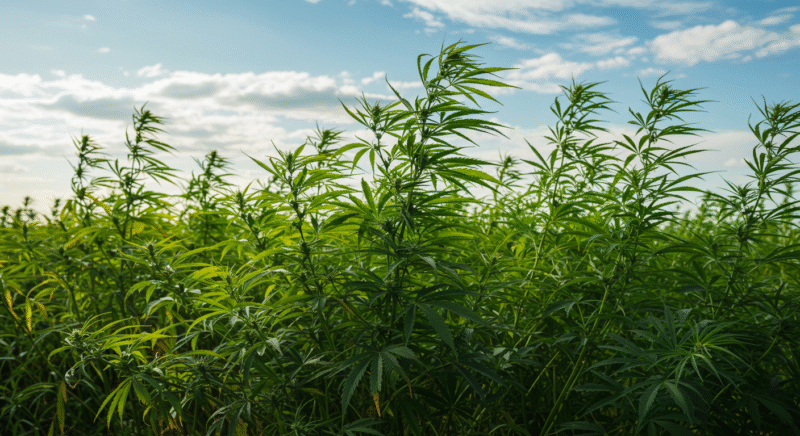
Wind acts as a moderator in your garden’s microclimate. It can cool plants during hot days, preventing heat stress, and also encourage air movement during colder nights, which helps protect against frost by mixing warm and cool air.
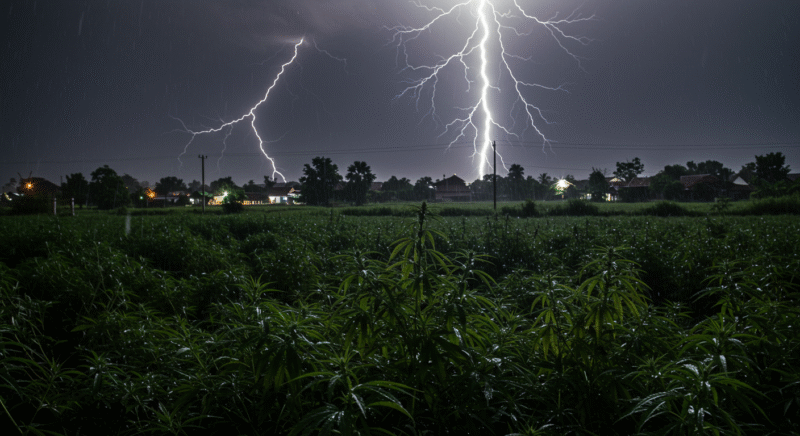
Frost Prevention: In colder climates, low-lying areas are often prone to frost because cold air naturally sinks and pools in valleys or depressions. Wind helps to disperse this cold air, reducing the likelihood of frost settling on your plants. Frost can damage or even kill cannabis plants by freezing the water inside their cells, causing tissue damage.
Wind and Humidity Management
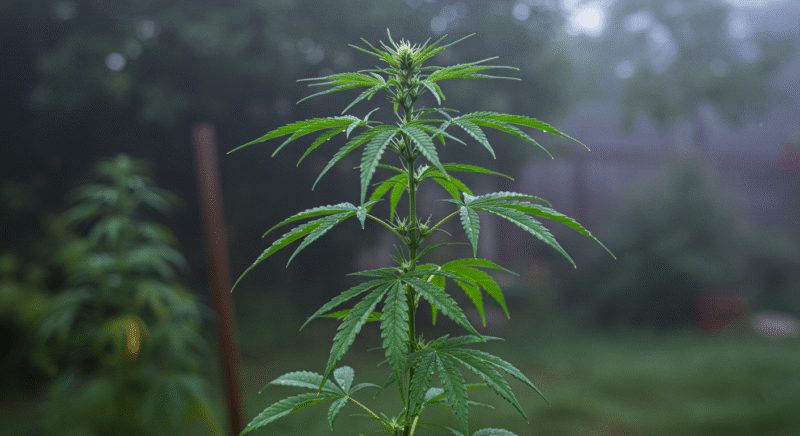
Wind also plays a vital role in managing the humidity levels around your cannabis plants. In humid climates, airflow is essential to prevent moisture buildup, especially in dense canopies where trapped humidity can lead to mold, mildew, and bud rot. Conversely, wind can exacerbate low humidity in arid climates, drying out plants faster than they can replenish moisture.
Pro Tip: In areas where humidity fluctuates drastically, it’s important to pay close attention to how wind interacts with your grow space. You may need to adjust your irrigation schedule or even create artificial wind barriers to maintain a more stable microclimate.
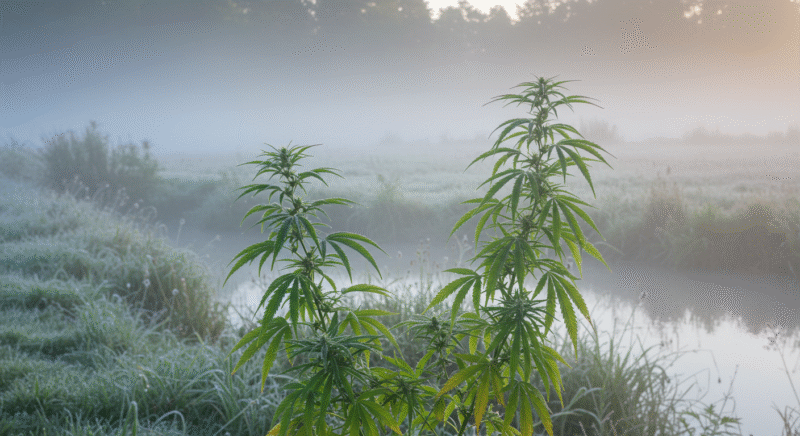
Windbreaks, Shelter, and Security in Outdoor Cannabis Growing
When it comes to growing cannabis outdoors, you need to think beyond just sunlight and soil. The environment can be unpredictable and challenging, subjecting your plants to a variety of potential stressors like strong winds, heavy rain, animals, and even human interference. A successful outdoor grow operation requires careful management of natural elements and robust strategies to protect your plants from external threats. That’s where windbreaks, shelter, and security come into play.
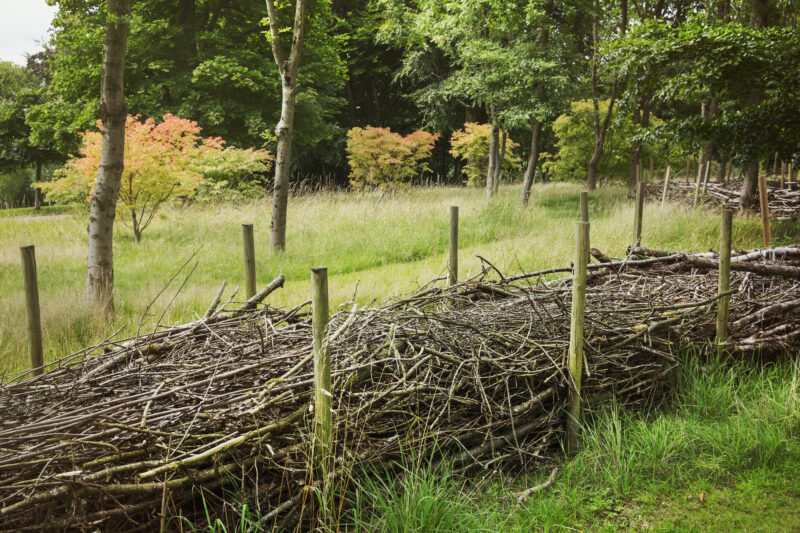
we’ll dive deep into how to protect your plants from the forces of nature and outside threats. We’ll cover everything from setting up natural and artificial windbreaks to prevent wind damage, to building shelters that shield your crop from extreme weather, as well as security strategies to protect against pests, animals, and thieves. Each section will be expanded with real-world examples, detailed techniques, and practical tips for growers at every experience level.
“Should a windbreak be solid so no wind reaches the plants?”
Question sent by: Tamar G., via email.
A solid wall can push air over and around it, creating turbulence and dead zones. A porous barrier usually reduces speed more gradually. The correct distance and height depend on the site, so observe leaf movement on both sides. The aim is gentler exchange, not stagnant air around a dense canopy.
Designing Effective Windbreaks
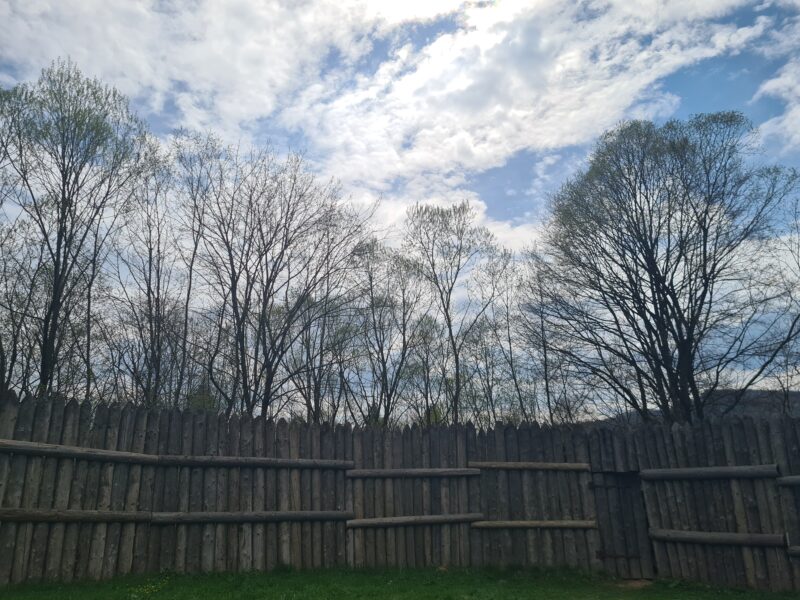
A windbreak is a barrier that reduces the wind speed over a distance, creating a more stable microclimate for your plants. Effective windbreaks protect your crop from direct damage, prevent excessive soil drying, help maintain a consistent temperature around the plants, and can even enhance humidity control.
Key Elements of a Windbreak
Height: The taller the windbreak, the larger the area it will protect. As a general rule, a windbreak will provide protection for a distance equal to 10 times its height. For example, a 10-foot tall windbreak can shield an area extending 100 feet beyond it. However, the most effective protection will be within the first 2-5 times the windbreak’s height.
Pro Tip: If your grow area is large, consider setting up multiple windbreaks in strategic positions to protect the entire site.
Permeability: Windbreaks should not completely block the wind. A good windbreak allows some air to pass through, which reduces the likelihood of creating turbulence or pressure zones that could actually increase wind damage in certain areas. The ideal permeability for a windbreak is around 50-60%.
Best Materials for Permeable Windbreaks:
-
- Natural hedges like shrubs or small trees.
- Slatted fences that allow wind to filter through.
- Mesh screens designed to diffuse wind without completely blocking it.
Length: The length of your windbreak is just as important as its height. For best results, the windbreak should extend beyond the edges of your grow area so that it slows the wind before it reaches your plants. Ideally, the windbreak should extend at least twice as far as the width of your grow space.
Always leave an inspection lane
A windbreak can protect the canopy while hiding the side that needs the most attention. Behind a tight barrier, ties loosen, weeds rise, and wet leaves can remain unnoticed.
Leave enough space to walk, inspect, and repair the protected side without brushing through the plant. If we cannot reach what the barrier is protecting, one risk has simply been exchanged for another.
Types of Windbreaks
Natural Windbreaks (Living Barriers)
Natural windbreaks involve using plants, trees, or shrubs to create a barrier that both shields your cannabis crop from wind and blends seamlessly into your garden. These living barriers provide excellent long-term protection and offer additional benefits like increased biodiversity, shade, and support for beneficial insects.
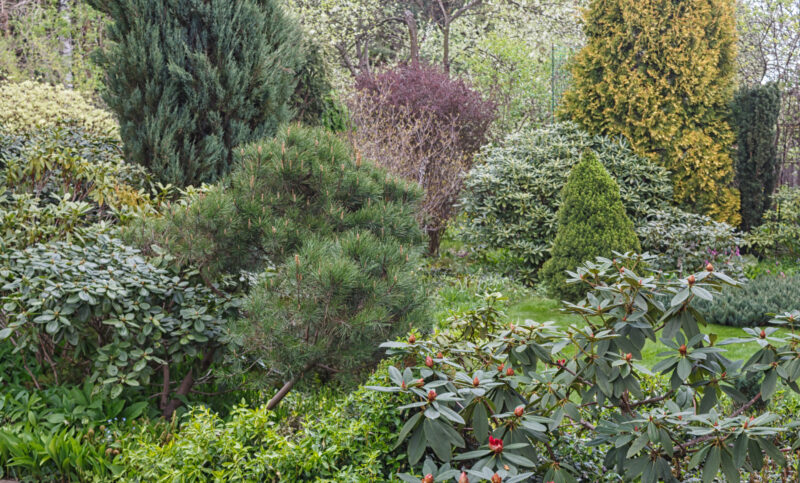
Trees: Fast-growing species like poplars, willows, or cypress trees are great choices for long-term windbreaks. These trees can grow several feet yearly and form dense barriers once they mature. Coniferous trees like junipers or pines are also useful, as they provide year-round protection in colder climates.

Pro Tip: When planting trees for a windbreak, space them 6-10 feet apart to allow for future growth. Planting too closely can cause competition for resources while planting too far apart reduces the windbreak’s effectiveness.
Shrubs: For a shorter, denser windbreak, consider shrubs like hawthorn, elderberry, or bamboo. Bamboo, in particular, is a favorite among growers because of its rapid growth and tall height, though clumping varieties are preferred to avoid the spread of invasive species.
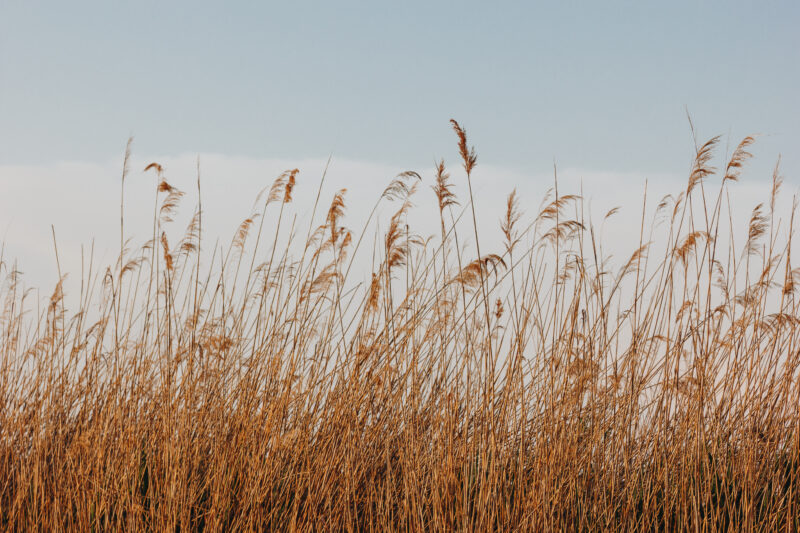
Tall Grasses: Fast-growing grasses like switchgrass, pampas grass, or reed grass are excellent choices for adding a wind buffer around smaller grow operations. They also bring aesthetic value and encourage wildlife diversity.
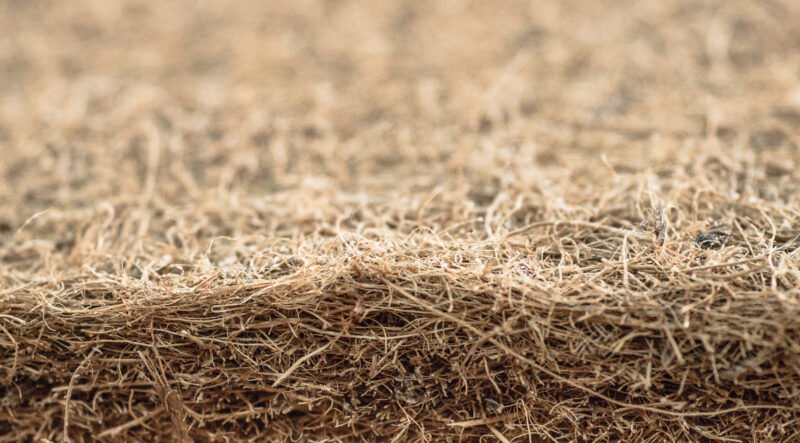
Straw Mulch: Straw mulch is a simple yet effective addition to any outdoor cannabis grow, especially in smaller, low-impact operations. When applied around the base of your plants, it helps regulate soil temperature, retain moisture, and suppress weed growth, all essential for healthy root development. Additionally, straw mulch protects the soil from erosion caused by wind or heavy rain, and prevents water splash that could spread soil-borne pathogens onto your plants. Combined with natural windbreaks like shrubs and tall grasses, straw mulch completes a holistic, low-maintenance strategy for protecting your grow from environmental stress.
Artificial Windbreaks (Man-Made Barriers)
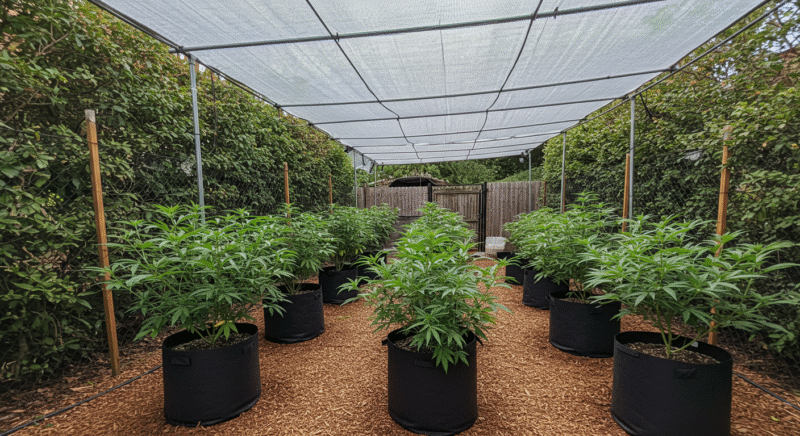
If you need immediate protection or a flexible solution, artificial windbreaks provide a practical and effective method for reducing wind. These barriers can be adjusted, moved, or even reinforced over time depending on your grow’s needs.
- Mesh Screens: Lightweight, UV-resistant mesh is a popular choice for quick and effective wind protection. It comes in various densities, allowing you to control the amount of wind you want to block. Screens are easy to install and don’t require as much maintenance as living windbreaks.
- Slatted Fences: Wooden or plastic slatted fences work well for blocking wind while still allowing air circulation. They are often used in areas with high winds because they can withstand stronger gusts without creating damaging air pressure zones.
- Shade Cloth: While often used to provide protection from excessive sunlight, shade cloth can also serve as a windbreak. Choose a cloth with a wind-reduction rating of around 50% for optimal results.
Shelter from Extreme Weather
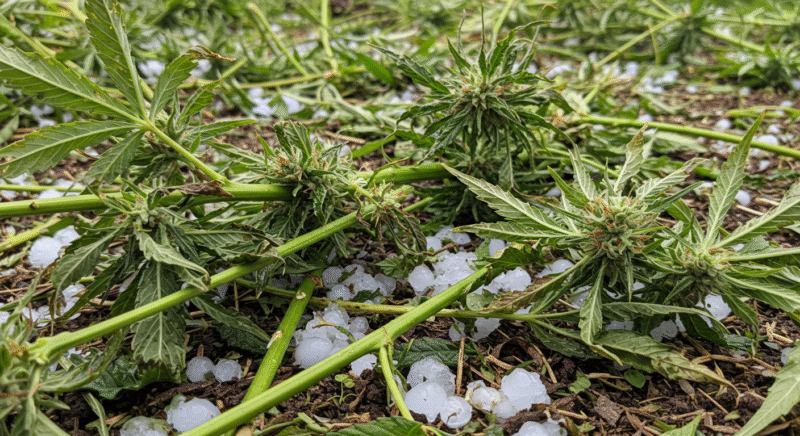
Beyond the wind, outdoor cannabis growers need to think about protection from other weather conditions, including heavy rain, hail, intense sunlight, and even early frosts. Different sheltering techniques can help mitigate the risk posed by these elements.
Rain and Hail Protection
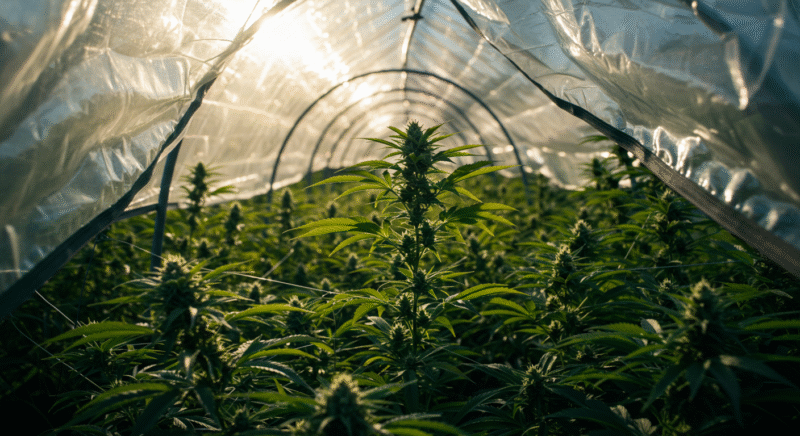
While rain is generally beneficial for outdoor cannabis, heavy downpours can saturate the soil, suffocate roots, and increase the likelihood of mold, mildew, or nutrient leaching. Worse, hail can devastate a garden in a matter of minutes by shredding leaves, breaking stems, and damaging buds.
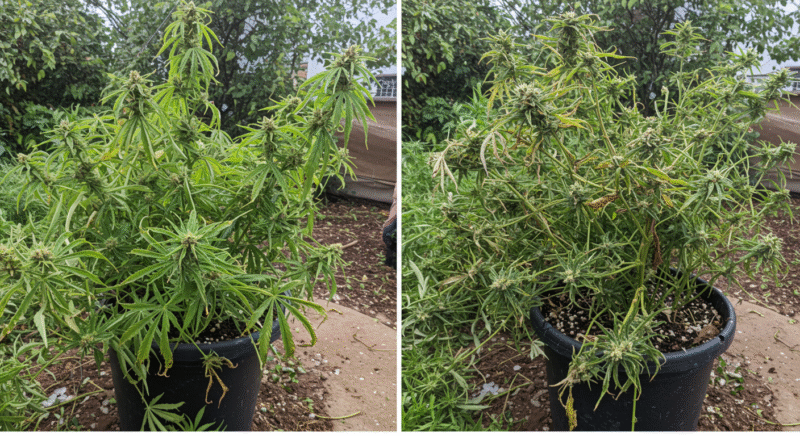
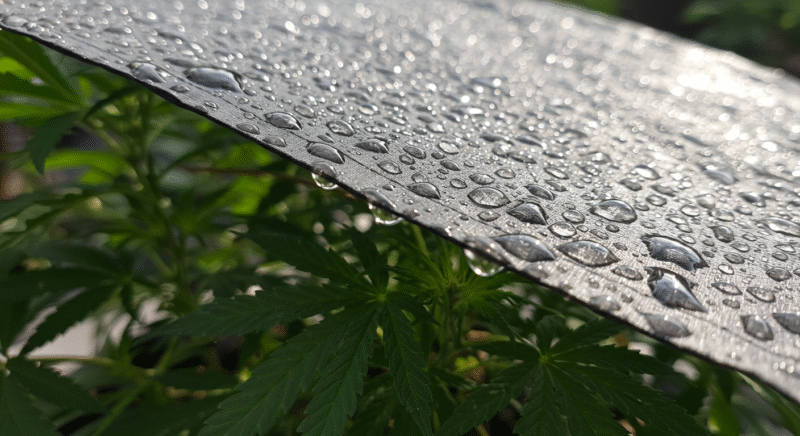
Tarp Covers and Hoop Houses: Temporary structures like tarps or hoop houses made from PVC pipes and plastic sheeting offer quick, flexible protection from rain and hail. These shelters can be easily put up during a storm and taken down when the weather clears.
Pro Tip: When using tarps, make sure they are angled to allow proper water runoff. Accumulating water can cause tarps to sag and collapse, which could damage your plants.
Greenhouses: A greenhouse or polytunnel is an excellent investment for long-term protection. These structures shield your plants from rain, hail, wind, and pests while still allowing full-spectrum sunlight to reach your crop. Greenhouses also extend your growing season by trapping heat during colder months.
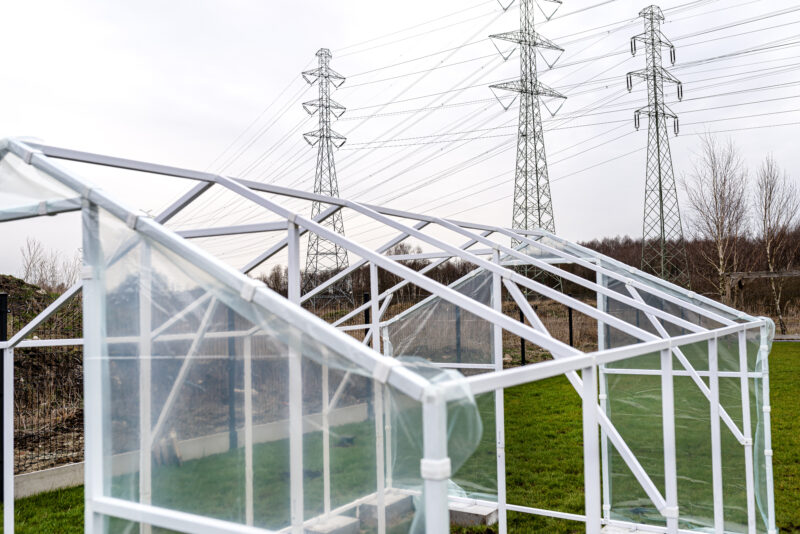
Ventilation is Key: In warm weather, greenhouses can overheat, so ensure that you have proper ventilation—either through roll-up sides, vents, or fans—to maintain optimal temperatures and humidity levels.
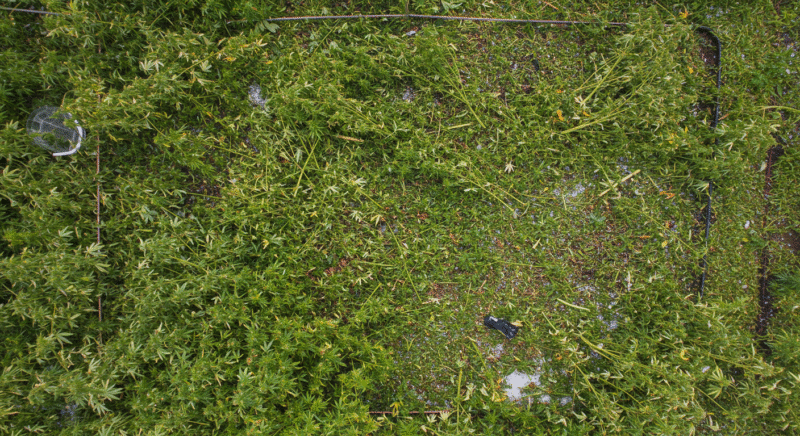
Netting and Covers for Hail Protection: Hail can cause sudden damage to an outdoor cannabis crop, and installing hail netting over your plants is a smart precaution. This netting can be draped over structures or fastened to stakes around your grow area to catch and disperse hail before it hits your plants.
Managing Excessive Sun Exposure
While cannabis loves sunlight, intense heat and prolonged exposure to strong sunlight can lead to heat stress and sunburn, especially during peak summer months. Plants may wilt, dry out, or suffer from leaf damage if not properly protected.
Shade Cloth: A simple and effective way to manage excessive sunlight is by using a shade cloth to filter the intensity of the sun’s rays. Cannabis thrives in full sun, but during the hottest part of the day (usually midday), a 20-30% shade cloth can reduce heat stress without depriving your plants of needed light.

Pro Tip: During a heat wave, change one variable at a time. Check moisture below the surface before adding water. A hot plant and an overwatered plant can both droop, but the root zones need opposite responses.
“The leaves droop every hot afternoon and recover at night. Am I underwatering?”
Question sent by: DesertKite, via Instagram.
Maybe, but do not decide from posture alone. Check moisture below the surface, container temperature, wind, and whether the plant recovers fully. Temporary midday droop can occur when water loss exceeds root supply. If the root zone is still wet, more water may worsen oxygen stress. Shade the container, improve irrigation timing, and monitor the evening recovery.
Security: Protecting Against Thieves, Animals, and Fire
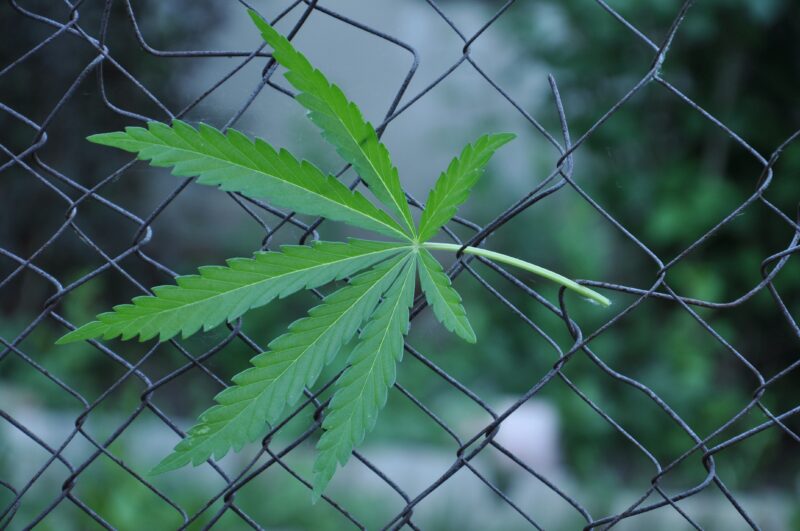
Beyond the elements, outdoor cannabis plants face additional threats such as pests, wild animals, theft, and even fire hazards. The same structures used for wind and weather protection can often serve double duty for security. Let’s explore how to protect your crop from these threats.
Animal Protection
Many animals view your cannabis plants as an attractive food source, especially during the early stages of growth. Depending on your region, threats can range from deer, rabbits, and birds to smaller pests like rodents.

Fencing for Animal Control: A sturdy fence is one of the most reliable ways to keep animals out of your garden. Different animals require different types of fencing:
- For Deer: Install a fence at least 8 feet tall. Deer are strong jumpers, and anything shorter won’t be effective.
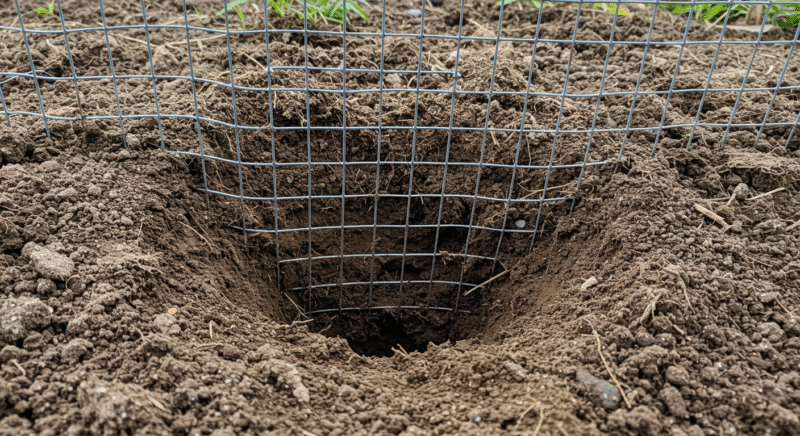
- For Small Animals: For rabbits, groundhogs, or raccoons, use wire mesh with openings smaller than 2 inches. Bury the mesh at least 6 inches underground to prevent animals from digging beneath it.
Natural Animal Deterrents:
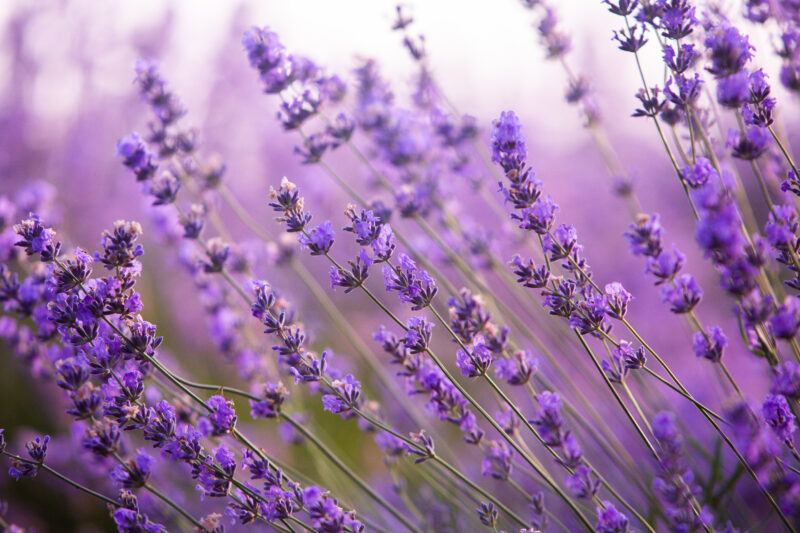
- Strong-Smelling Herbs: Plant herbs like rosemary, mint, or lavender around the perimeter of your garden. These strong odors act as a natural deterrent for many animals.
- Motion-Activated Sprinklers: Animals like deer and rabbits can be startled by sudden movement. Motion-activated sprinklers release a burst of water when triggered, scaring away unwanted intruders without harming them.

Bird Protection: Birds, especially during the flowering stage, can peck at your buds, causing significant damage.
- Bird Netting: Drape bird netting over your plants to prevent birds from landing on them.
- Scare Devices: Hanging reflective objects like old CDs, or using commercially available reflective tape, can deter birds from approaching your garden.

“Deer have never touched my other plants. Do I still need a fence?”
Question sent by: Emma Clarke, via Facebook page.
Past behavior lowers uncertainty but does not remove it. A new food source, drought, seasonal movement, or one curious animal can change the pattern overnight. Use local wildlife evidence and protect young plants first. A lawful barrier is easier to install before the canopy fills the space and before an animal learns that the garden is accessible.
Heavy Rain, Hail, and Storm Recovery
Storm preparation should happen before branches carry full flower weight. Use soft ties with room for stem expansion, support the plant from more than one direction, and make sure water has a route out of beds and container saucers.
After a storm, make the area safe first. Then inspect from the base upward. Look for a shifted root ball, split unions, branches rubbing against supports, soil splashed into the canopy, and flowers that remain compressed and wet. Support salvageable tissue promptly, but remove crushed or contaminated material that cannot dry.
Wait until the storm is quiet
Damage is difficult to read while leaves are wet and branches are still being pushed out of position. The useful inspection begins when conditions calm down and the plant can be seen in its normal structure.
Then let’s work from the base upward: check the root ball, branch unions, supports, repaired breaks, and flower interiors. A branch may be saved by early support while trapped moisture around the repair becomes the next danger, so structural repair and moisture management belong to the same recovery job.
Advice: Do not shake or squeeze wet flowers aggressively. Support the branch, improve air movement around it, and inspect the interior carefully. Rough handling can spread spores and push contaminated tissue deeper into a dense flower.
Protecting Against Theft
Outdoor cannabis plants can be tempting for thieves, especially if they are visible from the road or easily accessible. Here are several ways to deter human intruders:
Natural Concealment: The less visible your plants are, the less likely they are to be targeted. Use tall plants, shrubs, or trees as natural cover.
-
- Corn or Sunflowers: Grow corn or sunflowers around the perimeter of your garden. These fast-growing plants reach impressive heights and can conceal your cannabis plants from view.
-
- Thorny Plants: Consider planting thorny shrubs like roses or blackberries around the outer edges of your garden. They create a natural barrier and make it harder for intruders to reach your plants without getting scratched.
High-Security Fencing: For more serious theft deterrence, a solid, tall fence with a locked gate is your best bet.
-
- Barbed Wire Fencing: Adding barbed wire to the top of a chain-link or privacy fence increases your garden’s security by making it harder to climb or breach. This type of fencing is commonly used in high-security areas and serves as a strong visual and physical deterrent against intruders. Just make sure it complies with local regulations, especially in residential zones.

-
- Privacy Fences: A tall, solid fence that blocks the view into your grow area is ideal for keeping prying eyes away.
- Electric Fencing: If security is a major concern, installing an electric fence around your garden adds an extra layer of protection, though you should ensure it’s compliant with local laws.
Clearly visible security signage indicating surveillance cameras or guard dogs can further enhance the effectiveness of fences by providing an additional deterrent. Use truthful, lawful signage that does not create a dangerous misunderstanding for visitors or emergency responders.
Important: Use only perimeter systems that are lawful for the property and professionally designed where electrical or injury risk is involved. Never improvise energized wire, hidden traps, or hazards that can injure workers, visitors, emergency responders, children, wildlife, or animals. Check local fencing, electrical, fire, signage, access, and liability rules, and use visible warnings wherever required.
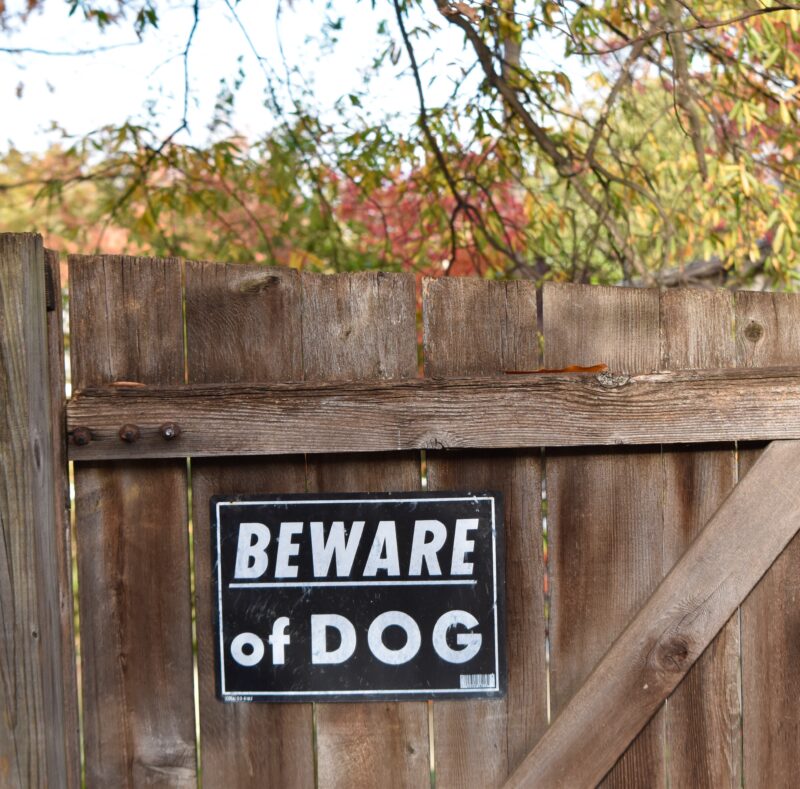
Surveillance and Alarms: Modern technology offers excellent tools to secure your grow.
-
- Cameras: Install motion-activated cameras around your grow site. Many systems can send real-time alerts to your phone, allowing you to monitor your crop even when you’re not on-site.

-
- Motion Sensors with Lights or Alarms: Intruders are less likely to stick around if they trigger a loud noise or are suddenly bathed in bright light. These systems are inexpensive and highly effective in scaring off potential thieves.
Guard Dogs: If your grow is located on private property, having a dog can serve as both a physical deterrent and an early warning system. Dogs are especially effective at warding off nighttime intruders.

A dog is family before it is a deterrent
If a dog shares the property, that animal is family before it is security. It deserves affection, companionship, clean water, appropriate food, shelter from heat and cold, exercise, humane training, rest, and veterinary care.
A dog can alert the household and make an occupied property feel occupied, but it should never be trained or positioned as a hidden weapon. Secure boundaries, safe visitor procedures, local animal-control rules, and the dog’s welfare come first.
Discretion: The fewer people who know about your grow, the safer it will be. Avoid discussing your garden openly, especially with neighbors or online. Maintaining discretion is one of your strongest security tools.
Fire Safety Precautions
Outdoor grow operations can carry certain fire risks, particularly in dry regions or during drought conditions. Electrical equipment used in surveillance systems, electric fences, and outdoor lighting can potentially spark fires if improperly maintained or installed. Additionally, dried vegetation or improperly stored gardening materials can significantly increase fire hazards. Here are some key fire safety measures to help ensure your outdoor cannabis garden remains safe:
-
Regular Maintenance of Electrical Equipment:
Periodically check surveillance cameras, motion-activated lights, and electric fences for damaged wires, loose connections, or signs of overheating. Replace damaged components promptly. -
Proper Storage of Flammable Materials:
Keep fertilizers, pesticides, and other gardening supplies stored safely in cool, dry, and well-ventilated spaces. Avoid storing flammable liquids or gases near electrical devices or direct sunlight.
-
Clear Vegetation:
Maintain a clear buffer zone around your garden by regularly removing dead or dried plants, leaves, and branches. A clean garden lowers fire risk and makes it easier to spot security threats.
-
Fire Extinguishing Tools:
Keep basic firefighting tools readily available, including fire extinguishers, hoses, or buckets filled with sand or water. Familiarize yourself and anyone else working on your grow site with their locations and proper use.
-
Emergency Access:
Ensure clear pathways to your grow area, allowing quick access for emergency responders in case of fire. Clearly mark emergency entrances or exits.

-
Local Fire Regulations:
Stay informed about local fire regulations, especially during high-risk seasons. Adhere strictly to fire bans or restrictions on equipment use issued by local authorities.
Combining Windbreaks, Shelter, and Security
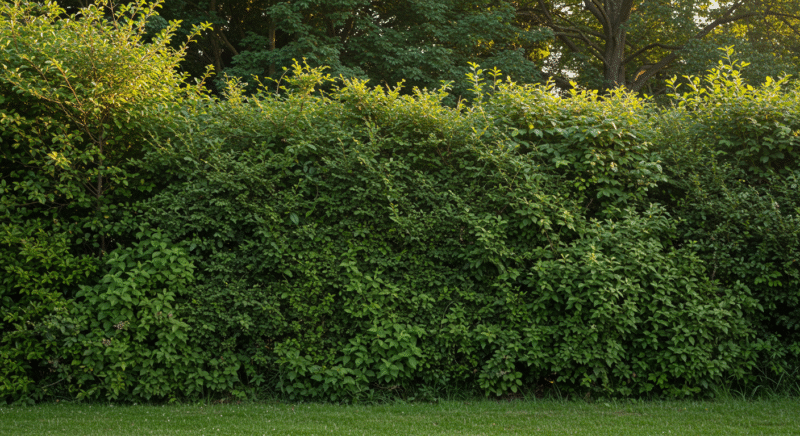
One of the best strategies for outdoor growing is to combine windbreaks, shelters, and security measures into a comprehensive system that protects your plants from the environment and secures them from animals and thieves.
- Fences as Windbreaks: Use privacy fences that double as windbreaks, sheltering your plants from the wind while keeping your garden out of sight.
- Natural Barriers for Concealment and Wind Protection: Shrubs and trees not only block wind but also act as camouflage, making it harder for intruders to spot your plants.
- Raised Beds or Greenhouses: Growing in raised beds or inside a locked greenhouse provides physical protection while allowing you to control environmental factors like wind, rain, and temperature.
- Barbed Wire for Added Security: For growers in theft-prone or remote areas, installing barbed wire on top of fences adds a strong visual and physical deterrent. It discourages intruders from attempting to climb over and helps protect not just your plants, but also your personal safety, especially if your garden is close to your home or living space. Be sure to check local regulations before installation.
Drainage and Soil
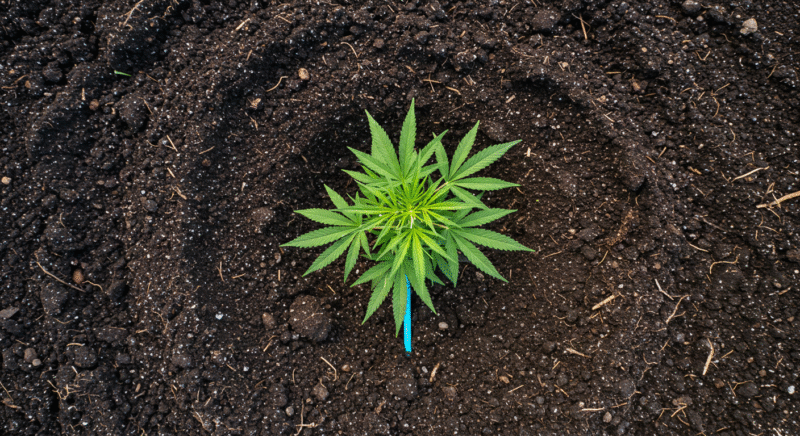
Soil is the foundation of your garden, it’s as important as sunlight and water. The quality of your soil and its ability to manage moisture directly impact your plants’ health, growth, and productivity. Proper soil composition provides essential nutrients, supports root development, and retains moisture, while effective drainage ensures that excess water doesn’t cause root rot, mold, or other moisture-related problems.
We’ll explore how to prepare and manage soil that promotes healthy cannabis growth and how to optimize drainage for different climates and growing conditions. Whether you’re planting directly in the ground, using raised beds, or growing in containers, understanding the right balance of soil structure and drainage is key to a successful outdoor cannabis grow.
“My native soil is clay. Does that mean I must use containers?”
Question sent by: Tyler Morgan, via email.
Not automatically. Clay can hold nutrients and water well, but structure and drainage vary. Dig inspection holes, observe the site after rain, and test the soil. A broad raised bed or well-planned amendment may work. Mixing a small hole of light soil into dense clay can create a basin, so improve the root zone as a system.
Identifying Draining Locations
When cultivating cannabis outdoors, proper drainage is absolutely critical. Without well-draining soil, your plants can suffer from waterlogged roots, which leads to a host of problems such as root rot, fungal infections, and nutrient deficiencies that can kill your crop. Cannabis thrives in soil that strikes the perfect balance between retaining moisture and allowing excess water to escape. Identifying well-draining locations before planting is essential, particularly if you’re growing directly in the ground instead of using containers.
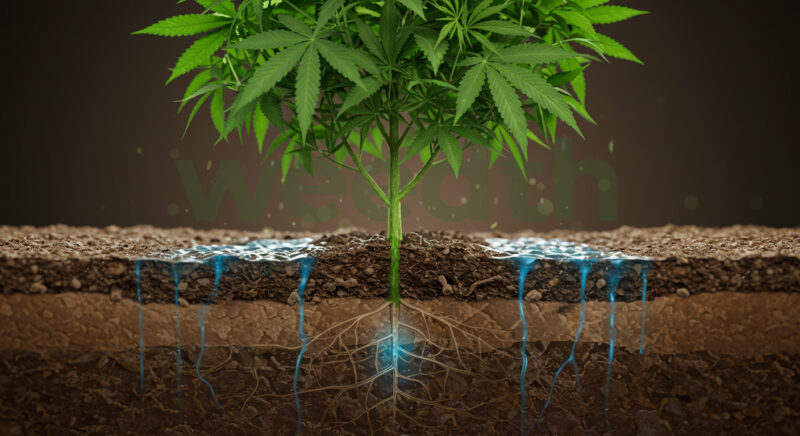
In this section, we’ll break down the key factors for identifying well-draining locations, explain how to assess potential grow sites, and point out red flags to avoid when setting up your outdoor cannabis garden.
Infiltration is not the same as drainage
Infiltration describes how water enters the soil surface. Drainage describes how water moves through and away from the root zone. A crusted surface can infiltrate slowly over a well-drained subsoil, while a loose top layer can hide a saturated layer below.
“Water disappeared from my test hole quickly. Is drainage confirmed?”
Question sent by: Fenna, via contact form.
It is a useful clue, not complete proof. Dry cracks, animal channels, or a loose top layer can move water quickly while deeper soil remains restrictive. Repeat observations after the ground is already moist and inspect soil horizons. Also watch the actual planting area during prolonged rain, because seasonal saturation may not appear in one short test.
Why Drainage Matters for Cannabis Plants
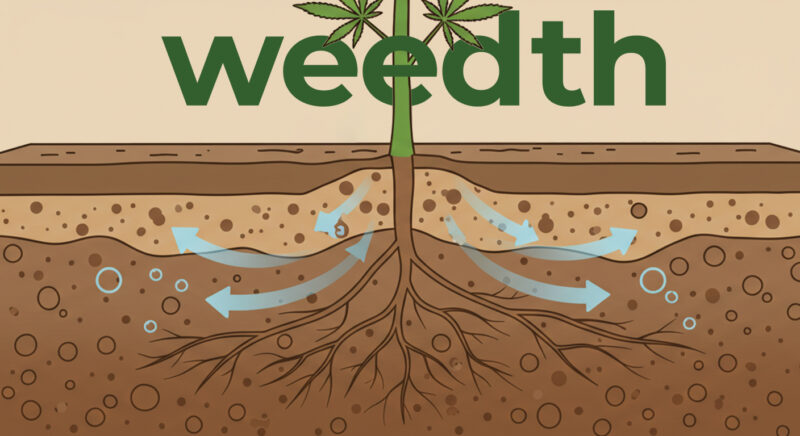
Before diving into how to identify well-draining locations, it’s important to understand why drainage is so essential for cannabis cultivation. Cannabis, while resilient, is particularly sensitive when it comes to root health. The roots need access to both water and oxygen, and proper drainage ensures they get both. If the roots sit in waterlogged soil for too long, they’re deprived of oxygen, leading to root suffocation, stunted growth, and the growth of harmful pathogens like fungi and bacteria.
Good drainage ensures that:
- Excess water is quickly drained away from the root zone, preventing soggy conditions that can suffocate the roots.
- The soil stays aerated, allowing oxygen to reach the roots.
- Nutrient leaching (when water washes nutrients away too quickly) is minimized, ensuring your plants can absorb the nutrients they need.
“Why does the plant look hungry when the bed is still wet?”
Question sent by: Lotte V., via email.
Start with the roots. Saturated soil can limit oxygen and reduce water and nutrient uptake, producing pale or wilted growth even when fertilizer is present. Check drainage, smell, root condition, irrigation coverage, and the stem base before feeding. Adding nutrients to an oxygen-poor root zone often increases salt stress without restoring root function.
Key Factors to Identify Well-Draining Locations
Slope and Elevation

One of the first things to consider when choosing a location for your outdoor grow is the slope and elevation of the land. Water always flows downhill, so areas with a gentle slope typically have better drainage than flat or low-lying spots where water might collect and stagnate.
Gentle Slopes: A slight incline is ideal for outdoor cannabis cultivation. A slope between 2-5% is usually best, as it allows water to drain away without causing erosion or nutrient runoff.
Higher Ground: Higher elevations drain more efficiently than lower areas. If your grow site is located at the base of a hill or in a valley, water is more likely to accumulate there after rain, leading to poor drainage.
Pro Tip: Avoid steep slopes, as water might run off too quickly, taking valuable nutrients and topsoil with it before the plants have a chance to absorb them.
Avoiding Low-Lying Areas and Depressions

Low-lying areas or natural depressions in the landscape are often prone to water accumulation and are not ideal for cannabis cultivation. These spots can stay wet for days after rain or irrigation, leading to soggy roots and an increased risk of fungal diseases.
- Flood-Prone Areas: Stay away from areas that tend to flood after heavy rains. Even if these locations drain well most of the time, flooding can drown your plants or wash them away completely.
- Natural Basins or Valleys: Although valleys can sometimes create a favorable microclimate, they often trap moisture, leading to high humidity levels and poor drainage.
Note: After it rains, visit the location you’re considering for your grow. Observe any areas where water pools or lingers long after the rain has stopped. These are locations you should avoid.
Soil Testing for Drainage

The slope and elevation are important, but the soil itself plays a significant role in drainage. Before choosing a location for your grow, you’ll want to test how well the soil drains.
Here’s an easy test to assess drainage:
- Dig a Hole Test: Dig a hole about 1-2 feet deep and 1 foot wide in your potential grow site. Fill the hole with water and let it drain completely. Then, refill the hole and monitor how long it takes for the water to drain. Ideally, the water should drain within 30 minutes to an hour. If it takes several hours or longer, the soil is likely too compacted or rich in clay, and you may need to amend it or find a different location.
Pro Tip: If your soil doesn’t drain well, consider raised beds or mounds. These can significantly improve drainage by raising the plants above the poorly draining ground.
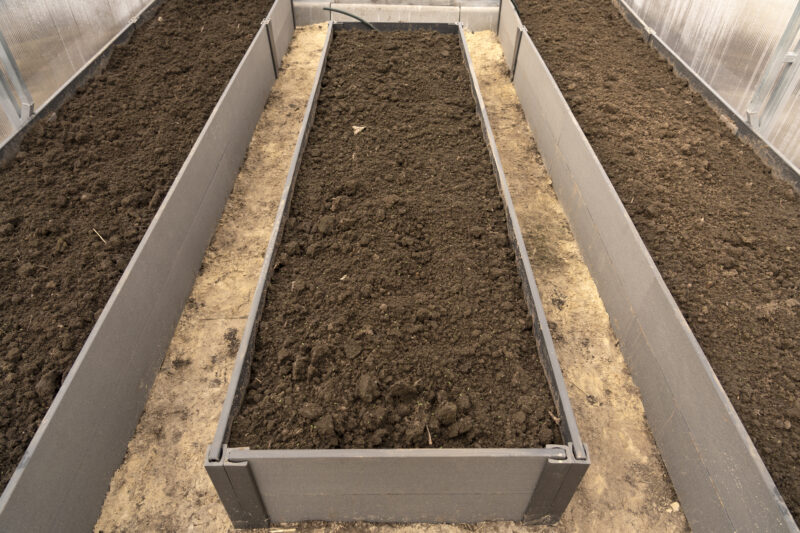
Vegetation and Ground Cover Indicators
The vegetation that grows naturally in an area can offer important clues about the drainage capabilities of the soil. Certain types of plants thrive in well-drained soils, while others prefer more water-retentive conditions.
Well-Drained Areas: Areas with grasses, wildflowers, and drought-tolerant plants like clover or dandelions typically indicate good drainage.

Poor Drainage Indicators: Moisture-loving plants like moss, ferns, or cattails suggest the area may be too wet and prone to poor drainage.
Pro Tip: In dry climates, you might need to irrigate more frequently, even in well-draining areas. Monitor soil moisture closely and adjust your watering schedule as needed to maintain the right balance.
Wind and Sun Exposure

Drainage is closely tied to other environmental factors such as wind and sunlight. Sites that receive ample sunlight will naturally dry out faster after rain, promoting better drainage. Moderate wind can also help evaporate excess moisture from the soil surface.
- Full Sun Exposure: Choose a location that receives at least 6-8 hours of direct sunlight per day. Full sun helps dry out the soil and prevents water from lingering too long.
- Wind Protection: While moderate wind helps with drying, too much exposure to wind can dry out the soil too quickly or cause erosion. It’s important to find a balance between sunlight and wind protection when selecting your grow site.
Adjusting Drainage in Less-Than-Ideal Locations
If your grow site doesn’t have perfect drainage, don’t worry. There are several ways to improve drainage and make a less-than-ideal location work for cannabis cultivation.
Raised Beds
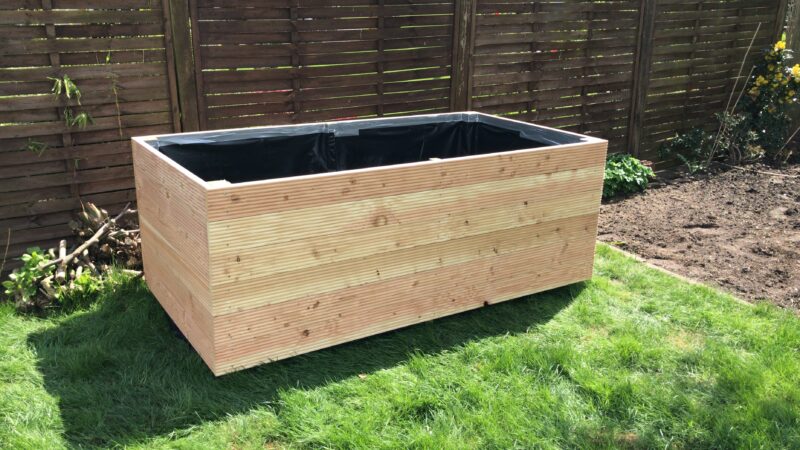
One of the most effective ways to improve drainage is by using raised beds. These beds elevate the plants above ground level, allowing water to drain away from the root zone more efficiently. You can also fill raised beds with a custom soil mix that provides the perfect balance of drainage and moisture retention.
Soil Amendments
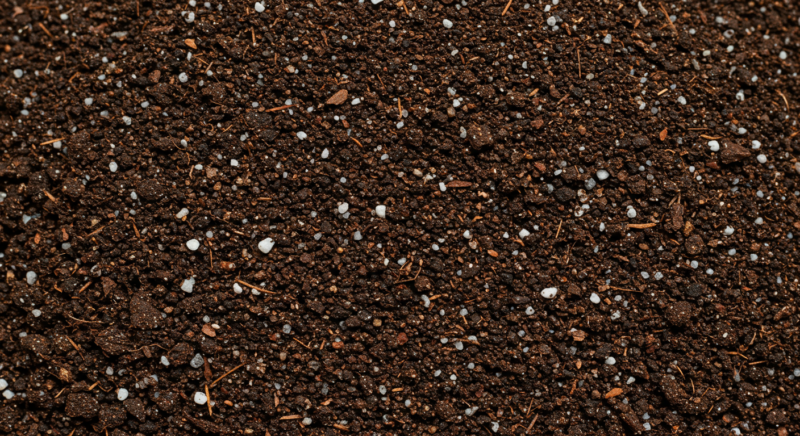
If your soil is heavy with clay or compacts easily, amending it with organic matter can improve its structure and drainage capabilities. Adding compost, perlite, or peat moss can help break up dense soils, increase aeration, and create a more hospitable environment for your cannabis roots.
French Drains or Swales
Installing drainage systems like French drains or swales can significantly improve water flow and prevent waterlogging for larger grow operations. A French drain consists of a perforated pipe buried in a gravel-filled trench, which helps channel excess water away from your grow area. Swales are shallow ditches that divert water away from your plants, ensuring they don’t sit in soggy soil.
Assessing Natural Soil Quality and Texture
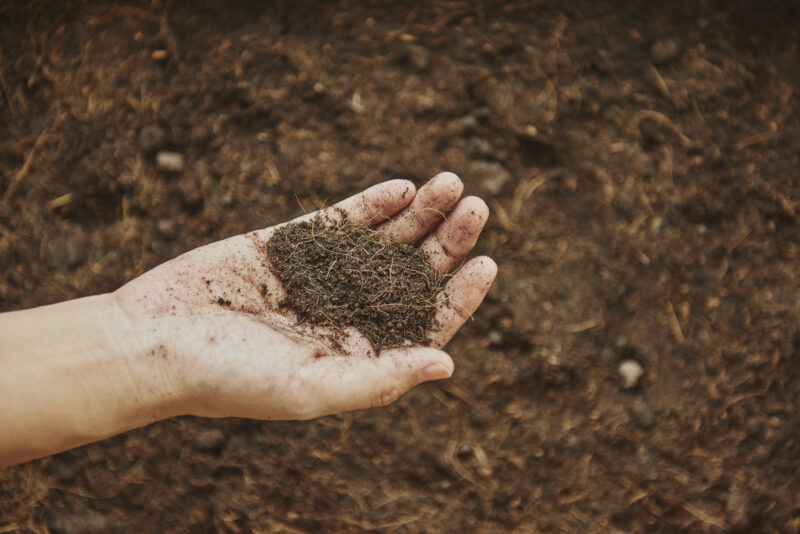
When growing cannabis outdoors, the soil you choose can make or break your crop. The health and productivity of your cannabis plants largely depend on the quality of the soil, which acts as the primary medium through which they receive water, nutrients, and oxygen. The texture of the soil whether it’s sandy, loamy, or clay-heavy also plays a crucial role in water retention, drainage, and root development. In this article, we’ll dive deep into how to assess the natural soil quality and texture at your grow site, ensuring that your cannabis plants are rooted in the best possible environment.
Why Soil Quality Matters for Cannabis
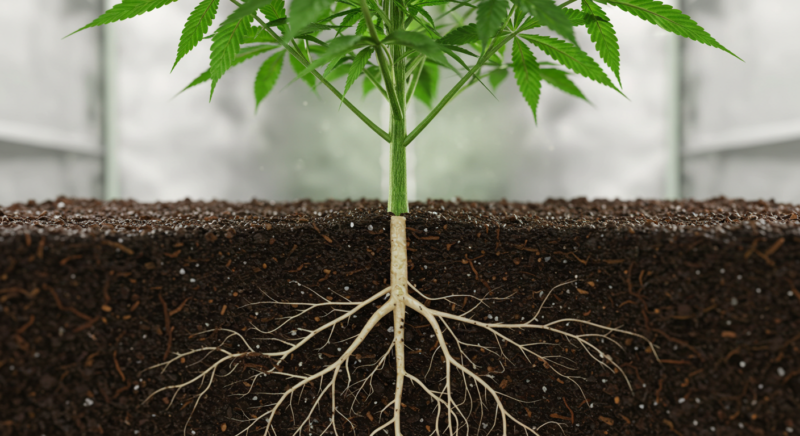
Cannabis is a versatile plant, but it thrives best in soil that offers a delicate balance of nutrients, moisture, and aeration. The right soil can support healthy root growth, provide essential nutrients, and retain moisture without becoming waterlogged. On the other hand, poor-quality soil can lead to a host of issues, including nutrient deficiencies, root rot, and stunted growth.
Healthy, well-structured soil allows cannabis plants to develop strong, extensive root systems, which in turn help support vigorous vegetative growth and maximize yields. Understanding your soil’s natural quality and texture will help you decide whether any amendments are needed before planting and what kind of maintenance your outdoor grow may require throughout the season.
Basic Components of Soil
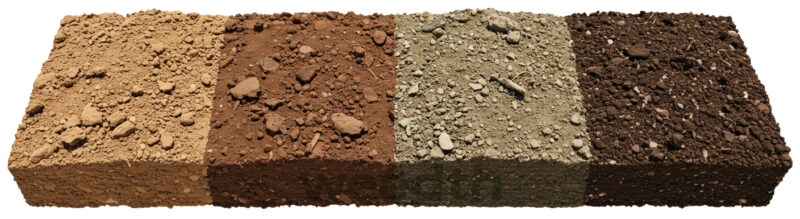
Before assessing soil quality, it’s essential to understand the three primary components of soil:
Sand: This is the coarsest soil type, with large particles that allow for good drainage and aeration but poor nutrient retention. Sandy soils are fast-draining but often require more frequent watering and fertilization to keep cannabis plants thriving.

Silt: Finer than sand but coarser than clay, silt has moderate drainage and moisture retention. It is rich in nutrients and is considered fertile but may compact easily, limiting root aeration.

Clay: The smallest soil particles are found in clay. It holds water and nutrients well but can easily become compacted, leading to poor drainage and insufficient oxygen supply for roots.

Loam is considered the ideal soil for cannabis cultivation. It’s a balanced mix of sand, silt, and clay that offers good drainage, nutrient retention, and root aeration. The goal is to find or amend your natural soil to create a loamy texture for optimal cannabis growth.
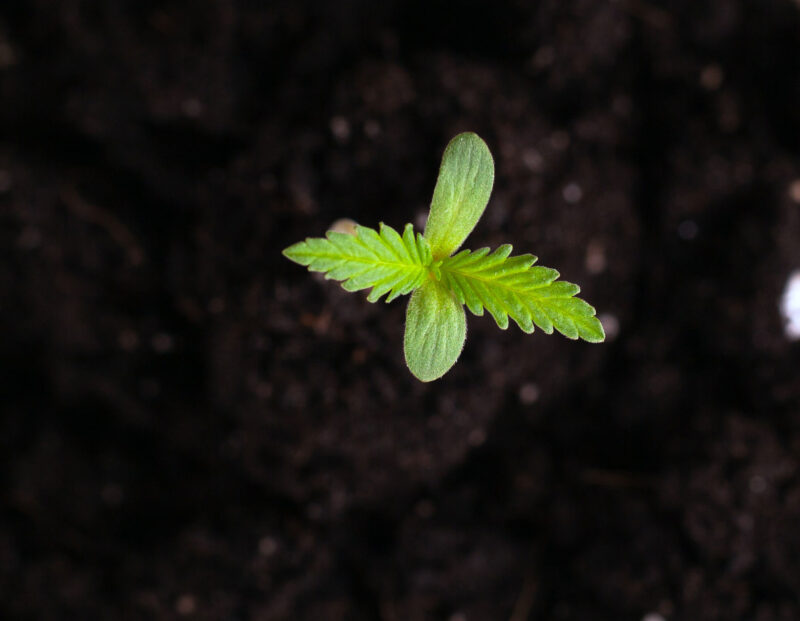
Simple Soil Tests You Can Do
The best way to determine the quality and texture of your soil is by getting your hands dirty, literally. Here are a few simple tests you can do to assess the natural soil quality and texture at your outdoor grow site:
Soil Texture Test
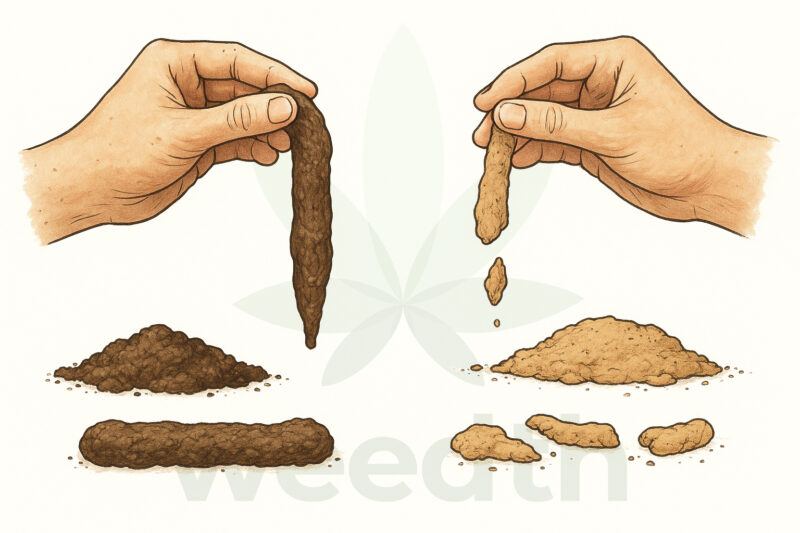
To get a quick sense of your soil’s composition, take a handful of soil, moisten it with a little water, and rub it between your fingers.
- Sandy soil feels gritty and won’t hold its shape when squeezed.
- Silty soil feels smooth or slippery and may form a loose, crumbly ball when pressed.
- Clay soil feels sticky or heavy, forming a firm ball when pressed.
The texture test will give you a general idea of whether you’re working with predominantly sandy, silty, or clay soil. Ideally, you want a soil that feels somewhat gritty yet can hold its shape when squeezed, indicating a loamy composition with a good balance of drainage and moisture retention.
Organic Matter: The Key to Nutrient-Rich Soil

Healthy soil is rich in organic matter, composed of decomposed plant material, microbes, and other organisms. Organic matter improves soil structure, helps retain moisture, and provides a slow-release source of nutrients as it breaks down. Compost, humus, and manure are all examples of organic matter that can boost soil fertility.
Signs of high organic matter content include:
Dark color: Soil rich in organic matter tends to be dark brown or black.
Crumbly texture: Well-structured soil with lots of organic matter will feel loose and crumbly, making it easy for roots to spread.
Earthworms: If you see earthworms in your soil, that’s a great sign! They indicate a healthy, living soil ecosystem full of beneficial organisms that improve fertility.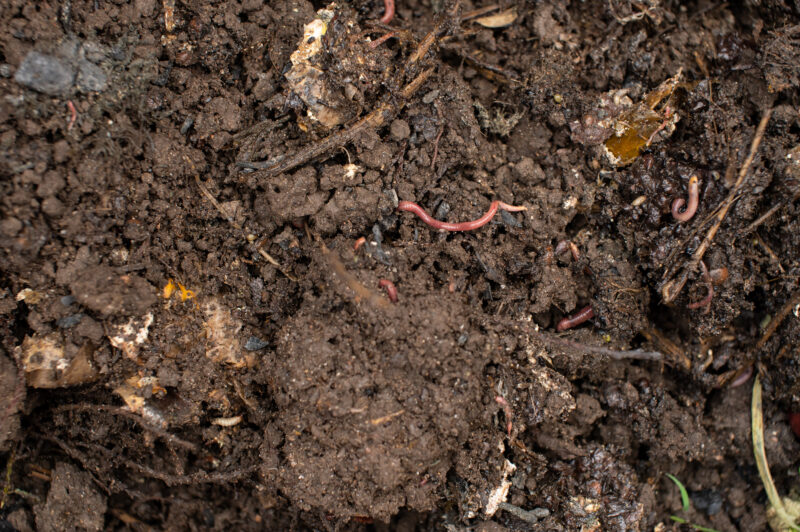
The Ribbon Test
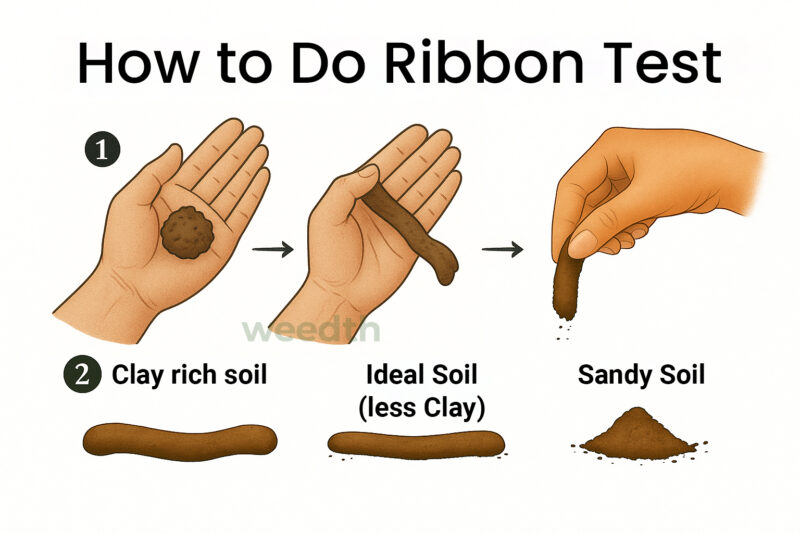
The ribbon test is another way to evaluate the clay content in your soil. Take a small amount of moist soil and roll it between your palms to form a ribbon or rope shape.
- If you can easily form a ribbon longer than 2 inches before it breaks, your soil has a high clay content.
- If the ribbon breaks before reaching 2 inches, your soil contains less clay, which is generally better for cannabis.
Clay-heavy soil is dense and retains water, which can suffocate the roots of cannabis plants, making them more susceptible to root rot and fungal issues. On the other hand, sandy soils may not hold together at all, meaning they’ll drain too quickly, potentially leading to dehydration and nutrient leaching.
Drainage Test
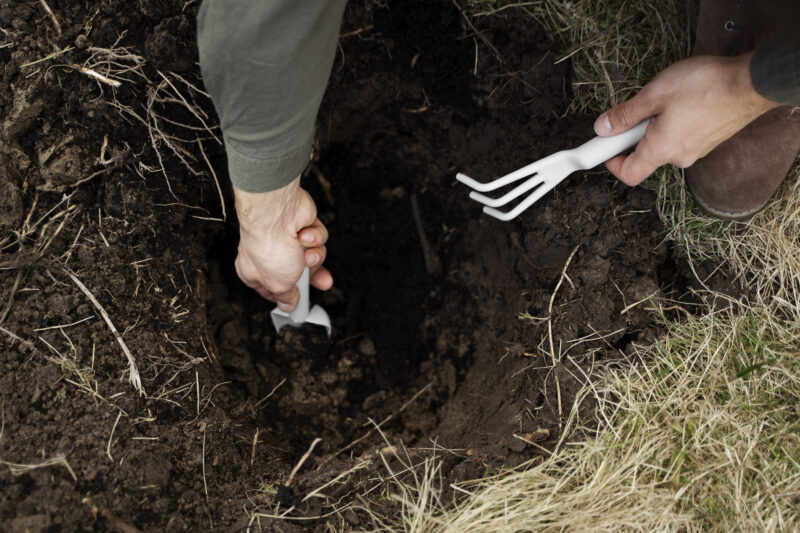
Drainage is crucial when growing cannabis outdoors, as poor drainage can lead to waterlogged roots, which can severely stunt growth or kill your plants. To test your soil’s drainage:
- Dig a hole approximately 1-2 feet deep and 1 foot wide in your prospective grow area.
- Fill the hole with water and let it drain completely.
- Refill the hole and time how long it takes for the water to drain.
If the water drains within 30 minutes to an hour, you have well-draining soil. If it takes several hours or more, the soil may be too compacted or clay-heavy. In this case, you might need to improve the drainage by adding organic matter or sand to the soil, or consider using raised beds.
Compaction Test
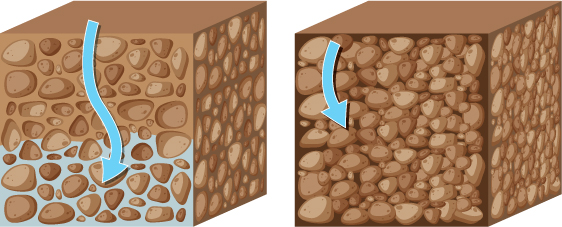
Soil compaction limits root growth and reduces aeration, making it harder for cannabis plants to access water and nutrients. You can test your soil for compaction by simply pushing a stick or shovel into the soil. If the stick easily sinks in, the soil is loose and well-aerated. If it’s difficult to penetrate, the soil is compacted and may require loosening or amendment before planting.
Soil pH Test
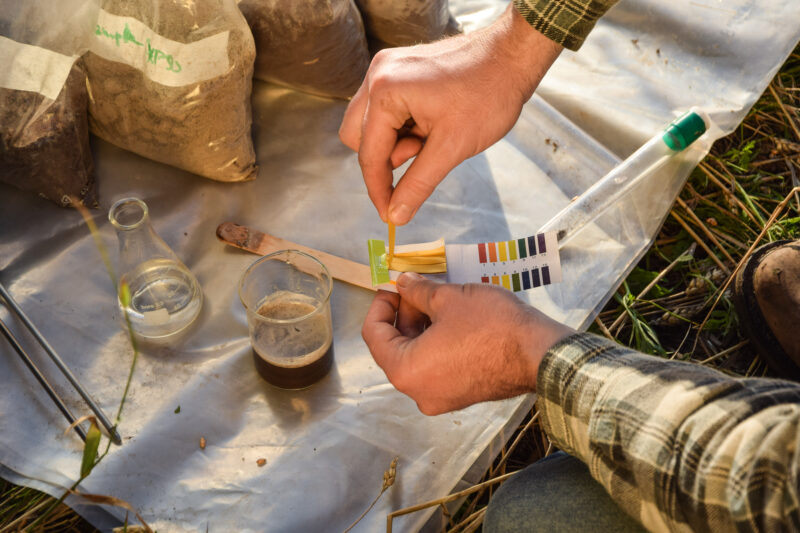
The pH of your soil is just as important as its nutrient content. Cannabis plants prefer a slightly acidic pH, between 6.0 and 7.0. If the soil is too acidic (below 6.0) or too alkaline (above 7.0), your plants will struggle to absorb the nutrients they need, even if those nutrients are present in the soil.
To test your soil’s pH:
Soil pH test kits: These are simple to use and can give you an accurate reading of your soil’s acidity or alkalinity.
pH meters: For a more precise reading, a digital pH meter is a great tool, especially if you plan to monitor the soil throughout the grow season.
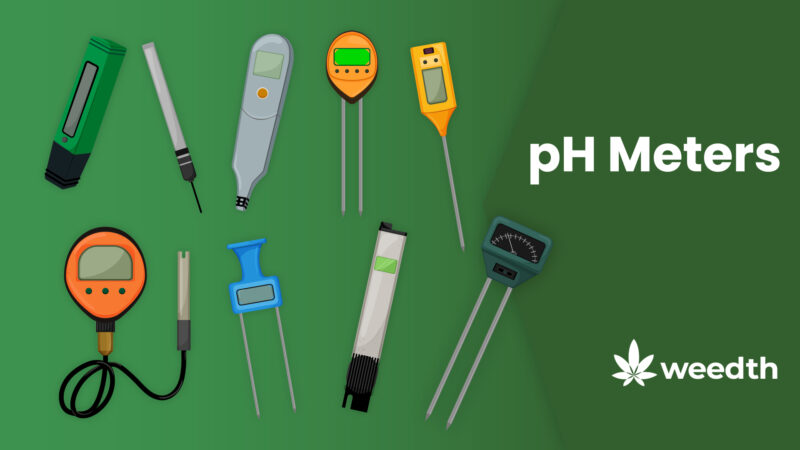
Adjusting pH
If your soil’s pH is out of range, here’s how to adjust it:
- To raise pH (for more alkaline soil): Add dolomitic lime or wood ash. These materials are best applied in the fall so they have time to adjust the soil before planting in the spring.
- To lower pH (for more acidic soil): Add sulfur, peat moss, or pine needles. Be cautious with sulfur, as it can take time to work, and adding too much too quickly can overshoot your target pH.
Pro Tip: Adjust pH gradually. Extreme swings in pH can shock your plants, leading to nutrient lockout or stress. It’s better to adjust in small increments and re-test regularly.
Testing for Nutrients
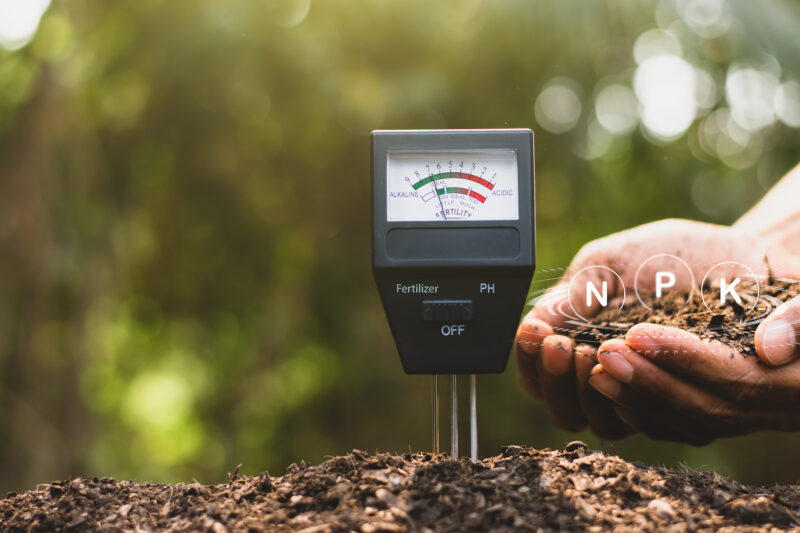
Cannabis plants need a balance of three primary nutrients: nitrogen (N), phosphorus (P), and potassium (K)—often referred to as NPK. These nutrients, along with secondary elements like calcium, magnesium, and sulfur, support different stages of plant growth. Nitrogen promotes leafy growth, phosphorus supports root development and flowering, and potassium aids in overall plant health and resilience.
While you can visually inspect your soil, the best way to know what nutrients are present is through soil testing kits. These kits are available at garden centers or online and give you a basic reading of the soil’s nutrient levels.
- Nitrogen Deficiency: If the leaves of your cannabis plants are yellowing from the bottom up, your soil might be low in nitrogen.
- Phosphorus Deficiency: A lack of phosphorus often shows up as purple or dark discoloration in the stems and leaves.
- Potassium Deficiency: Potassium deficiency may cause yellowing along the edges of leaves or brown spots, especially on older foliage.
Observing the Natural Vegetation
Another excellent way to assess soil quality is by observing the types of plants already growing in your potential grow area. The presence of certain plants can give you clues about the soil’s fertility and drainage capabilities.
Remember:
Healthy native grasses and wildflowers: These are good indicators of well-draining, fertile soil.
Moss, ferns, or other moisture-loving plants: These suggest the area may have poor drainage or be too wet for cannabis.
Additionally, check for signs of soil erosion or compaction. Soil that erodes easily is often too loose or sandy, while soil with a crusted surface may be compacted and difficult for roots to penetrate.
Amending Soil for Optimal Texture and Quality
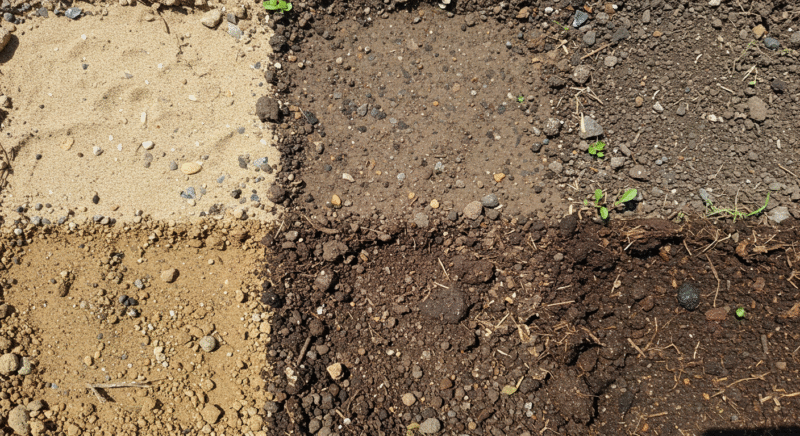
If your soil doesn’t quite meet the ideal conditions for growing cannabis, don’t worry most soil can be amended to suit your plants’ needs. Here are some common amendments to improve soil texture and quality:
Improving Soil Texture
- Clay Soils: If your soil is too clay-heavy, amend it with organic matter like compost or well-rotted manure, which will improve aeration and drainage. Adding perlite or sand can also help loosen the soil, making it easier for water to drain and roots to breathe.
- Sandy Soils: Sandy soils drain too quickly and often lack nutrients. Adding organic matter like compost, coconut coir, or peat moss helps sandy soils retain moisture and nutrients. You can also mix in vermiculite to increase water-holding capacity.
- Silty Soils: These soils are usually pretty good for cannabis but can benefit from the addition of compost or well-rotted manure to further improve fertility and structure. Silty soils can compact easily, so keep an eye on soil aeration.
Boosting Organic Matter and Nutrients
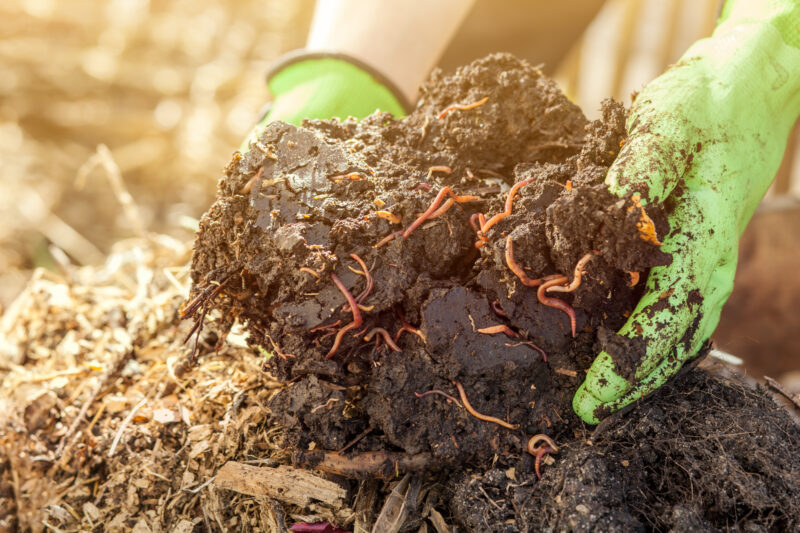
- Compost: Rich in nutrients and beneficial microbes, compost is one of the best soil amendments. It improves soil structure, moisture retention, and nutrient availability. Apply a generous layer of compost and mix it into the top 6-12 inches of soil.
- Manure: Well-aged manure (from cows, horses, or chickens) is another excellent source of organic matter and nutrients. Just make sure it’s fully composted to avoid burning your plants with excess nitrogen.
- Worm Castings: Worm castings are packed with nutrients and beneficial microbes that boost soil health and plant growth. They can be mixed into the soil or applied as a top dressing.
Preparing the Soil

Healthy, nutrient-rich soil ensures your plants develop strong roots, absorb essential nutrients, and thrive throughout their life cycle. Whether you’re working with natural soil in your backyard, a remote guerrilla growing location, or a custom-built raised bed, preparing the soil properly will set the stage for a bountiful harvest. Your plants will have everything they need with the right preparation to flourish under the sun.
What is Soil Composition?

Soil composition refers to the proportion of minerals, organic matter, air, and water in the soil. The ideal soil has a balance of all these components, each playing a vital role in plant health:
- Mineral Content: The mineral particles in soil(sand, silt, and clay)determine the soil’s texture, structure, and drainage ability.
- Organic Matter: Composed of decomposed plant material, animal waste, and microorganisms, organic matter is essential for nutrient availability, water retention, and soil structure.
- Air: Roots need oxygen to absorb nutrients and grow. Good soil has enough air spaces, or pores, to prevent compaction and encourage healthy root development.
- Water: Proper moisture retention is critical for cannabis, as it allows nutrients to be accessible to the roots without waterlogging the soil.
Each soil type(sandy, clayey, or loamy)has a unique mix of these elements, impacting drainage, nutrient retention, and root growth.
“Is “soil composition” just the percentage of sand, silt, and clay?”
Question sent by: Owen Park, via Facebook page.
That percentage describes texture. A working soil also includes structure, pore space, organic matter, mineral content, roots, organisms, water, and air. Two soils with similar texture can drain and feed very differently because their aggregation, compaction, and organic matter differ. Use texture as one layer of the root-zone diagnosis.
Building the Perfect Growing Medium
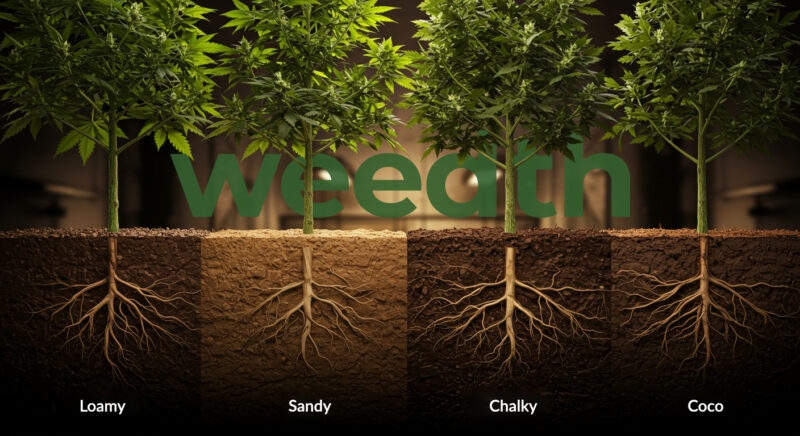
Before diving into specific soil types, it’s essential to understand the components that make up healthy soil. Soil comprises three primary particles: sand, silt, and clay. These particles’ proportions define the soil’s texture affecting drainage, nutrient retention, and aeration. Each particle type has distinct properties:
- Sand: The largest soil particles. Sandy soil is gritty to the touch, and it drains water quickly, which helps prevent waterlogging and can lead to nutrient leaching. Sandy soils tend to be low in nutrients unless amended.
- Silt: Medium-sized particles. Silt feels smooth and powdery when dry. It retains more moisture than sand and is more fertile, making it a good balance for drainage and water retention. However, silty soils can become compacted, reducing aeration.
- Clay: The smallest particles. Clay is sticky and retains water exceptionally well, but it often drains poorly and compacts easily, limiting root growth and oxygen availability. While clay is nutrient-rich, its poor structure can make those nutrients less accessible to plants.
What Makes Loam Soil Ideal for Cannabis?
When growing cannabis outdoors, the ideal soil type is often called loam. Loam soil is a well-balanced blend of sand, silt, and clay, typically composed of about 40% sand, 40% silt, and 20% clay. This combination provides the best of all worlds—excellent drainage, moisture retention, and nutrient availability—while maintaining proper aeration for healthy root development.
Let’s explore why loam is so effective for cannabis grow:
“The soil feels like loam in my hand. Can I skip the lab test?”
Question sent by: PrairieFox77, via email.
A hand test can estimate texture, but it cannot show pH, soluble salts, nutrient levels, heavy metals, or other contamination. If the site has an unknown history or you plan to invest a full season in it, a laboratory test is useful. The hand test tells you how the soil may behave physically, not whether everything in it is suitable.
Balanced Drainage and Water Retention
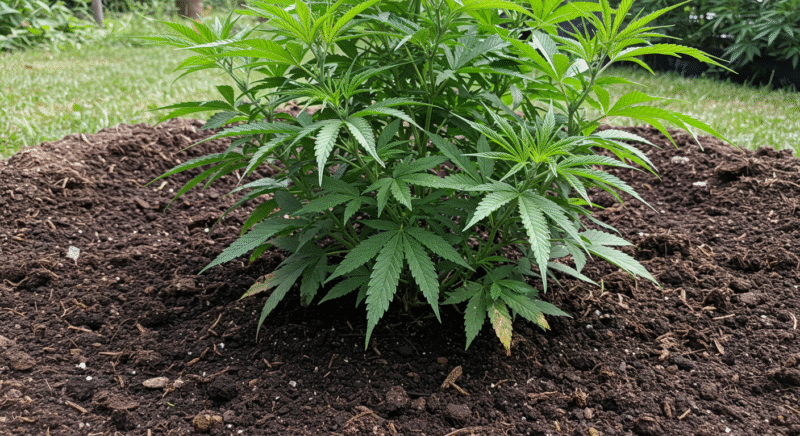
Cannabis plants are sensitive to both under-watering and over-watering. Loam soil strikes the perfect balance between holding enough moisture to keep your plants hydrated while allowing excess water to drain away efficiently. This prevents the roots from sitting in water for too long, which can lead to root rot or fungal infections.
- Sandy content in loam provides quick drainage, ensuring that water doesn’t stagnate in the soil.
- Clay content retains enough moisture to keep the plants hydrated during dry spells.
- Silt improves moisture retention without compromising drainage, making loam soil particularly well-suited to cannabis, which needs consistent but not excessive watering.
Nutrient Retention and Availability

Loam soil is naturally fertile because its combination of silt and clay particles retains nutrients well. The clay and silt particles have a higher cation exchange capacity (CEC), meaning they hold onto essential nutrients like nitrogen, phosphorus, and potassium and slowly release them to the plant as needed.
- Clay particles have a high capacity to bind with nutrients, ensuring that essential elements don’t leach away with water.
- Silt particles help make these nutrients more available to the roots.
This slow release of nutrients is ideal for cannabis plants, which require different amounts of nutrients at various stages of growth. Loamy soils can maintain a steady supply of nutrients, reducing the need for constant fertilization.
Good Aeration and Root Penetration
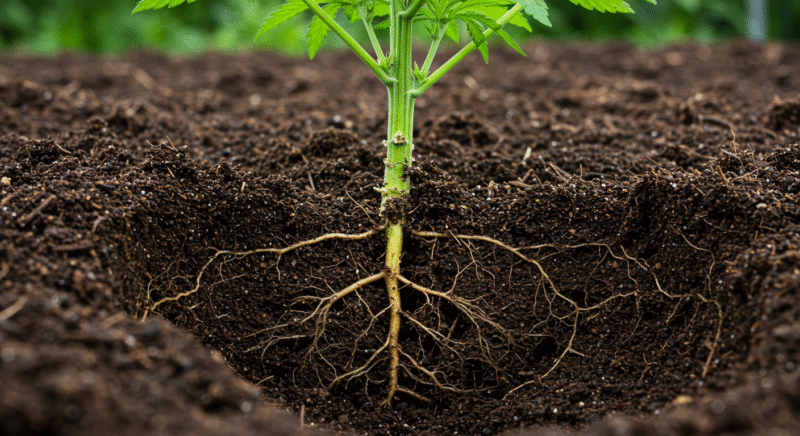
Cannabis plants need well-aerated soil for healthy root growth. Roots require oxygen to absorb nutrients and water effectively, and compacted soil can suffocate the roots by limiting air flow. The balance of sand and silt in loam provides loose, aerated soil that allows roots to grow deep and access nutrients and water more efficiently.
- Sand creates space between soil particles, allowing air to circulate.
- Silt ensures that the soil doesn’t become too dense, which is crucial for root development and oxygen absorption.
With well-aerated loam soil, roots can expand quickly, supporting vigorous plant growth and larger yields.
Microbial Life and Organic Matter
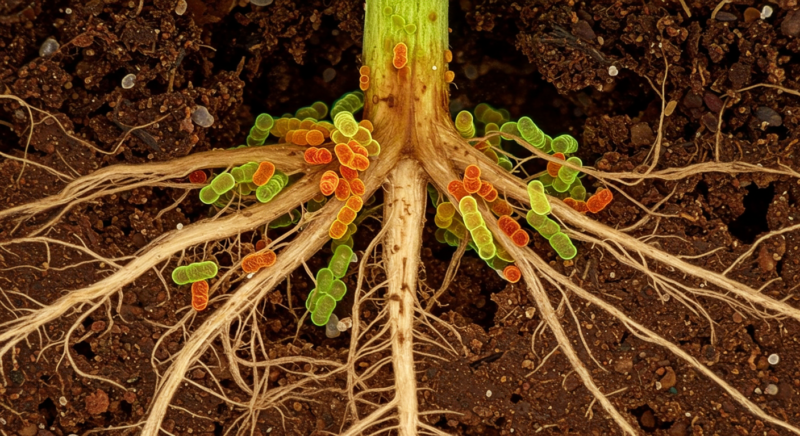
Healthy soil is teeming with beneficial microbes—bacteria, fungi, and other microorganisms—that help break down organic material and convert it into nutrients that cannabis plants can absorb. Loamy soil, with its balanced structure, provides the perfect environment for these microorganisms to thrive.
Adding organic matter such as compost, humus, or worm castings to loam soil can further enhance its fertility by introducing beneficial microbes and increasing nutrient availability. This rich ecosystem supports not just the plants but also the soil itself, leading to healthier, more resilient cannabis plants.
Soil Types
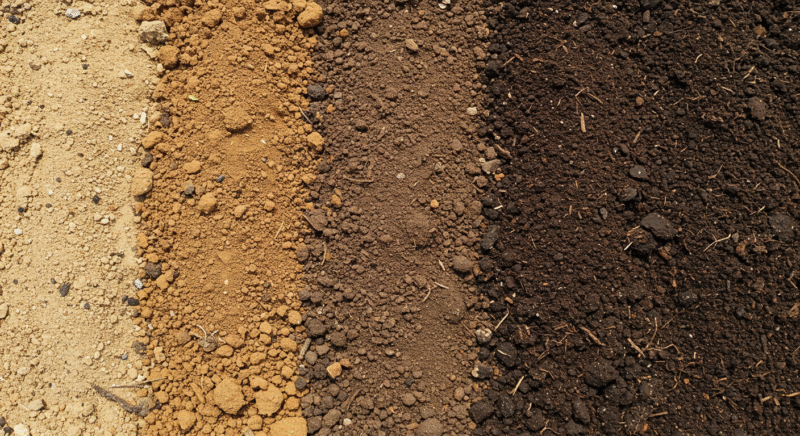
While loam is considered the ideal soil for cannabis but not every grower is lucky enough to start with it. Depending on your location, you might be dealing with sandy, clayey, or a different type of soil altogether. Understanding the characteristics of these different soil types(and how to amend them)can help you make the most of what’s available.
Sandy Soil

Sandy soil is composed mostly of large particles and has a gritty texture. It’s quick-draining, meaning it doesn’t hold water well, which can be a double-edged sword for cannabis cultivation.
Advantages of Sandy Soil:
- Fast Drainage: Sandy soils prevent water from accumulating around the roots, reducing the risk of root rot.
- Easy to Work: It’s light and easy to dig, which makes planting and working with it less labor-intensive.
Disadvantages of Sandy Soil:
- Poor Water Retention: Because it drains so quickly, sandy soil doesn’t hold onto water or nutrients. This can lead to your plants drying out too quickly, especially in hot weather.
- Low Nutrient Content: Sandy soil has a low CEC, meaning it doesn’t retain nutrients well. You’ll need to supplement sandy soils with regular fertilization to ensure your plants get the necessary nutrients.
Improving Sandy Soil for Cannabis:
- Add Organic Matter: Incorporating compost, well-rotted manure, or worm castings will help sandy soil retain moisture and nutrients.
- Mulching: Mulching around your plants’ base helps reduce evaporation and keep the soil cooler, which is particularly important in sandy soils that dry out quickly.
- Amend with Peat or Coco Coir: Both peat and coconut coir hold water well and can help balance out the quick-draining nature of sandy soils.
Clayey Soil
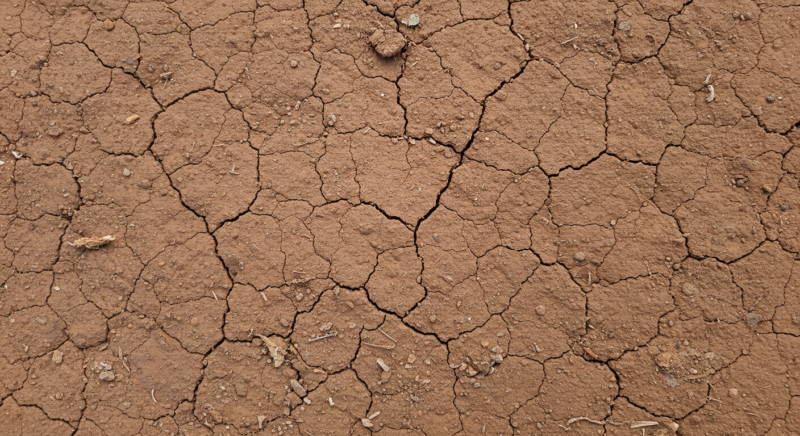
Clayey soil contains perfect particles that compact easily, making it dense and heavy. It feels sticky when wet and hard when dry. While clay soils are rich in nutrients, they often suffer from poor drainage and aeration.
Advantages of Clayey Soil:
- High Nutrient Retention: Clay soils have a high CEC, meaning they hold onto nutrients well and can provide a rich growing environment.
- Water Retention: Clay soil holds water for long periods, which can be beneficial in dry climates.
Disadvantages of Clayey Soil:
- Poor Drainage: Because it holds water so well, clay soil often becomes waterlogged, leading to root rot and oxygen deprivation.
- Compaction: Clay soils can become compacted, making it difficult for roots to penetrate and for oxygen to reach the root zone. This can stunt plant growth and reduce yields.
Improving Clayey Soil for Cannabis:
- Amend with Organic Matter: Organic matter like compost or aged manure helps break up compacted clay soils and improves their structure, making them easier to work with and improving drainage.
- Perlite or Sand: Adding perlite or coarse sand to clay soils improves aeration and helps water drain more freely.
- Raised Beds: Growing in raised beds filled with a custom soil mix can help avoid the issues associated with planting directly in heavy clay soils.
Loamy Soil
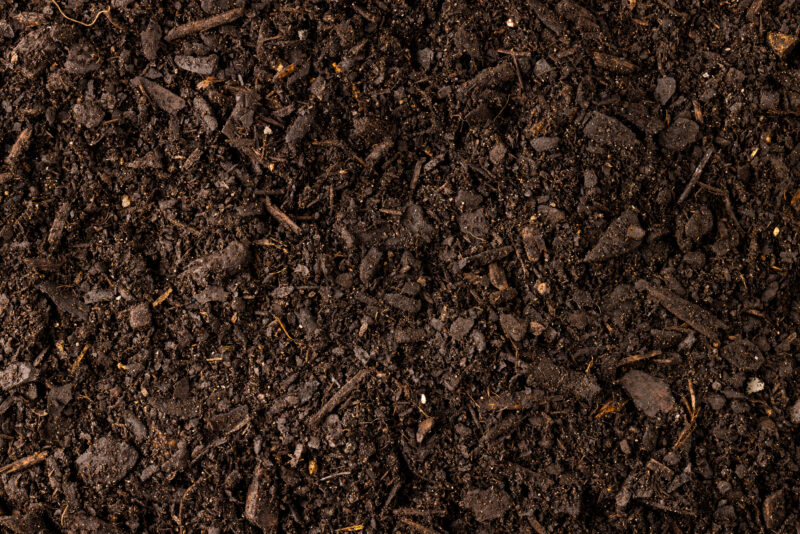
As mentioned earlier, loamy soil is the ideal medium for cannabis cultivation because it offers a balanced mix of sand, silt, and clay. It drains well but retains enough moisture, holds nutrients, and provides good aeration for roots.
Advantages of Loamy Soil:
- Perfect Balance: Loamy soils provide excellent drainage, moisture retention, and nutrient availability. They are easy to work with and provide a fertile growing environment for cannabis.
- Supports Healthy Root Growth: Loam’s balanced structure allows roots to grow deep and wide, supporting vigorous plant growth.
- Good for Microbial Life: Loam supports a rich community of beneficial microorganisms that enhance nutrient cycling and soil fertility.
Disadvantages of Loamy Soil:
- Maintenance: While loamy soils are ideal, they still require regular maintenance, such as adding organic matter, monitoring pH, and managing nutrient levels to remain productive over time.
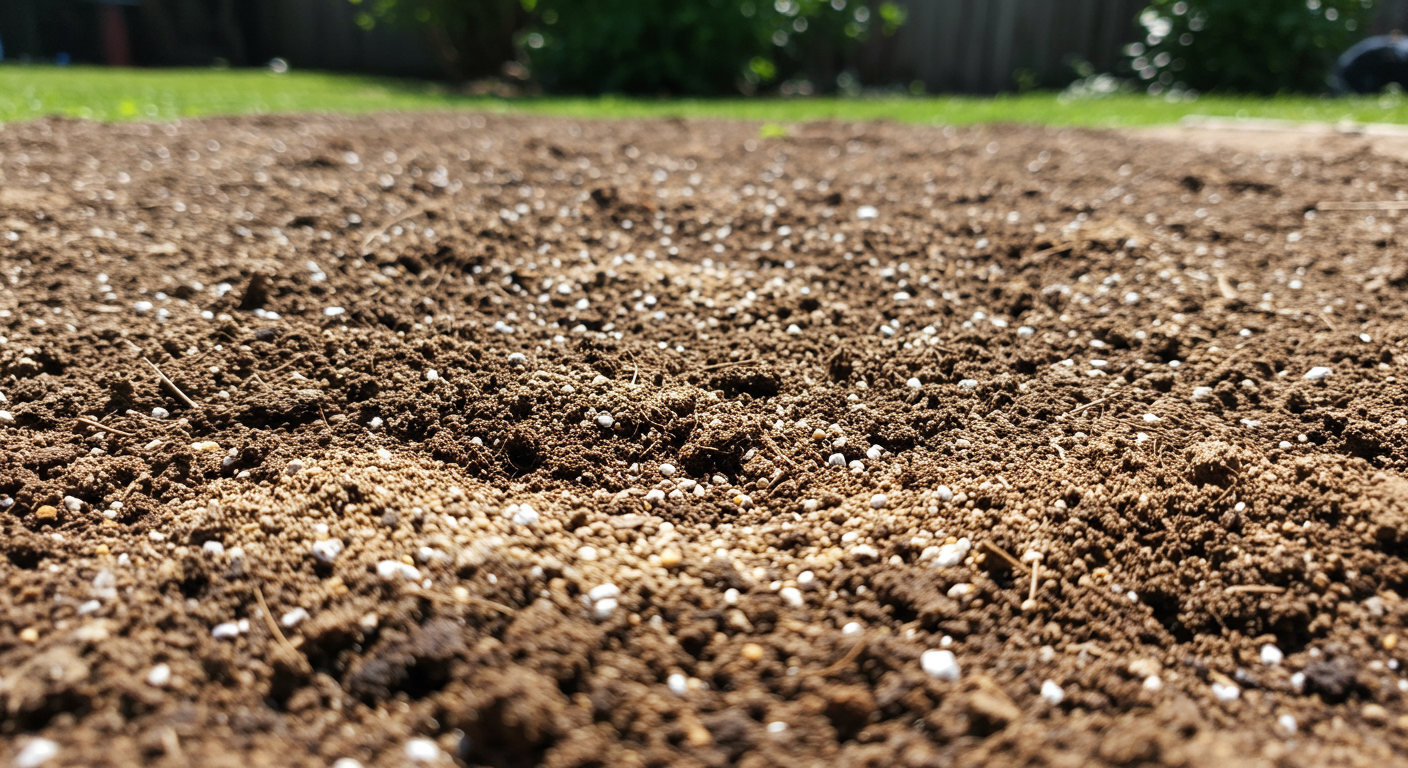
Maintaining Loamy Soil for Cannabis:
- Regularly Add Organic Matter: Even in loamy soil, adding compost or other organic amendments each growing season will help maintain its structure and fertility.
- Monitor pH: Cannabis thrives in slightly acidic soil. Regularly test the pH of your loam soil and adjust as needed with lime (to raise pH) or sulfur (to lower pH).
Wet the test mix before trusting it
A dry soil mix can feel light and perfectly open in the hand, then behave very differently after repeated irrigation. Fine particles settle, compost shrinks, and a wet layer can form below a surface that still looks promising.
I build and wet a small test volume before filling every bed or container. The change in weight, structure, and drainage after several cycles is the result I trust.
Preparing Your Soil Step-by-Step
- Assess Your Native Soil: Use the texture test (hand squeeze or jar test) to determine your soil type and assess any amendments needed.
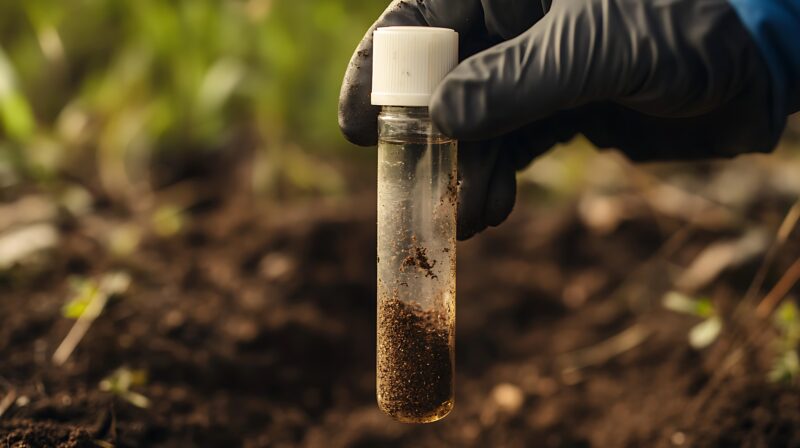
- Amend Based on Soil Type:
- For sandy soil, add compost, coconut coir, and peat moss.
- For clay soil, add perlite, coarse sand, and gypsum.
- For loamy soil, a light compost amendment should be enough to maintain fertilit
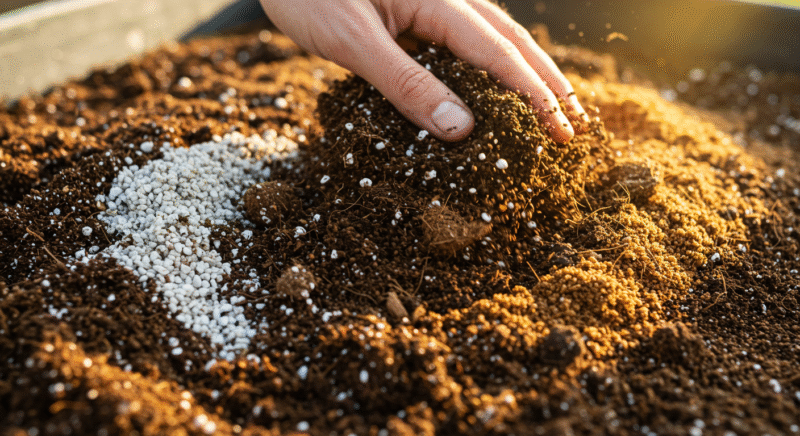
- Adjust pH: Use a soil pH test to ensure your soil is in the 6.0–7.0 range. If not, adjust with lime (to raise pH) or sulfur (to lower pH)
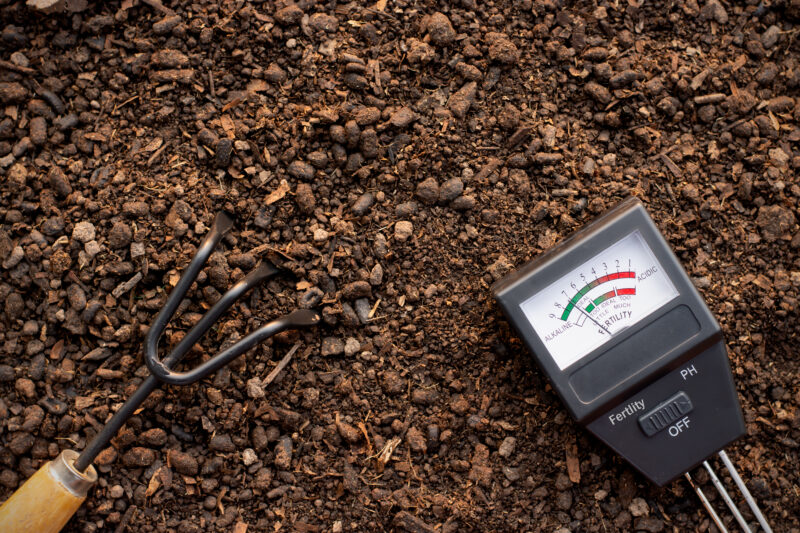
- Add Organic Matter: Incorporate compost, well-aged manure, or worm castings to improve soil structure and introduce beneficial microbes.
- Turn and Aerate the Soil: Loosen the top 12–18 inches of soil to improve aeration, especially if dealing with compacted clay.
- Test for Drainage: Before planting, test your soil’s drainage by filling a small hole with water and timing how long it takes to drain. Aim for water to disappear within 30 minutes to 1 hour.
“Can I prepare each planting hole with a rich soil mix and leave the rest alone?”
Question sent by: Mila Grant, via Facebook page.
A sharply different pocket can hold water or restrict roots at the boundary, especially in dense native soil. Prepare a broad zone and blend transitions where practical. Large plants explore beyond the original hole. If the native ground is unsuitable, a raised bed or container with known drainage may be more predictable than a small amended basin.
Amending Soil for Outdoor Cannabis: Creating the Perfect Growing Medium
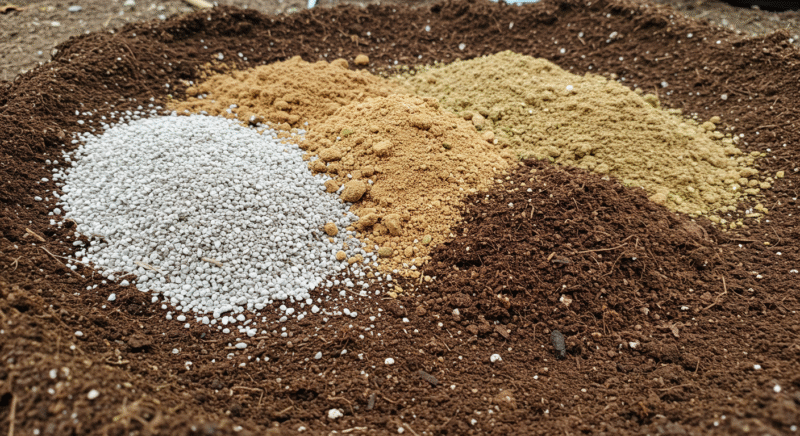
Amending soil is a critical step in preparing your outdoor cannabis garden, ensuring that your plants have the right nutrients, drainage, and pH balance for optimal growth. While cannabis is a resilient plant, its full potential can only be unlocked when grown in a well-prepared soil environment that supports healthy roots, strong stems, and lush foliage. Beginners and seasoned growers must understand how to amend soil and balance pH levels providing a solid foundation for robust cannabis plants.
Why Soil Amendments Are Important
Soil amendments enhance the natural composition of your soil, improving drainage, nutrient retention, and the overall health of the soil ecosystem. Adding organic matter, minerals, and other amendments is especially beneficial if your native soil has heavy clay or is overly sandy, as these soils can pose challenges for cannabis cultivation:
- Improving Drainage: Heavy soils retain too much water, which can suffocate roots and promote fungal growth. Sandy soils, drain too quickly and don’t retain moisture or nutrients effectively. Amendments help create a balanced environment for root health and moisture control.
- Increasing Nutrient Content: Cannabis requires a range of nutrients, including nitrogen, phosphorus, potassium, and trace minerals. Amending the soil with organic compost and mineral-rich additives ensures plants have a steady supply of essential nutrients.
- Enhancing Soil Structure: Soil structure refers to the arrangement of soil particles and pores. Healthy soil should be loose and friable, allowing roots to grow freely and access oxygen. Amendments like perlite and vermiculite help create this ideal structure, encouraging better root development and nutrient uptake.
Key Soil Amendments
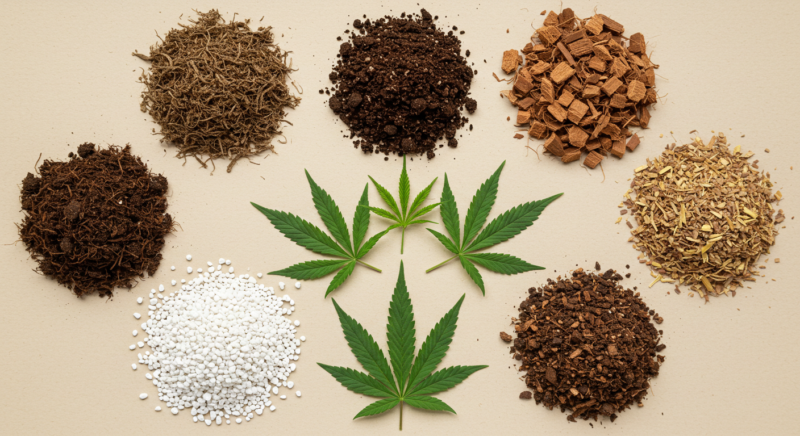
Now let’s explore the various soil amendments that are most beneficial for cannabis cultivation. These include organic compost, perlite, and various other materials that improve soil fertility, texture, and structure.
Organic Compost
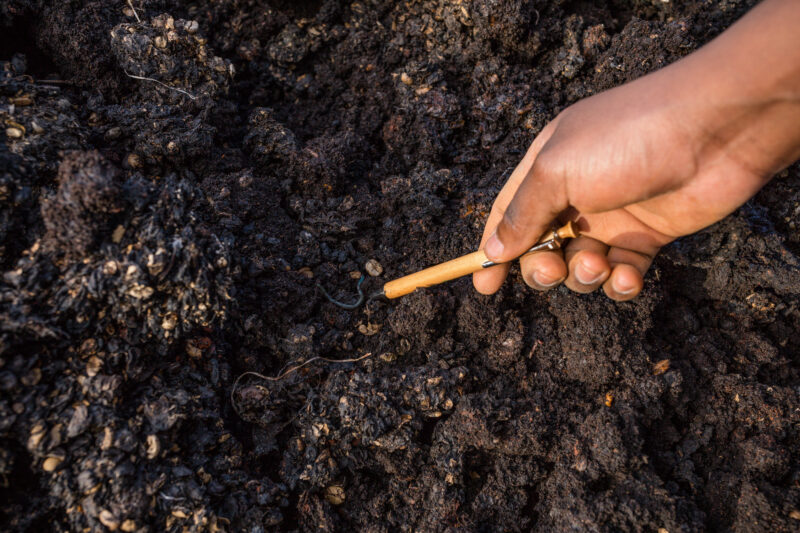
Compost is perhaps the single most important amendment you can add to your soil. Rich in organic matter, compost improves your soil’s structure, moisture retention, and fertility by providing a steady supply of nutrients that are slowly released over time.
What is Compost?
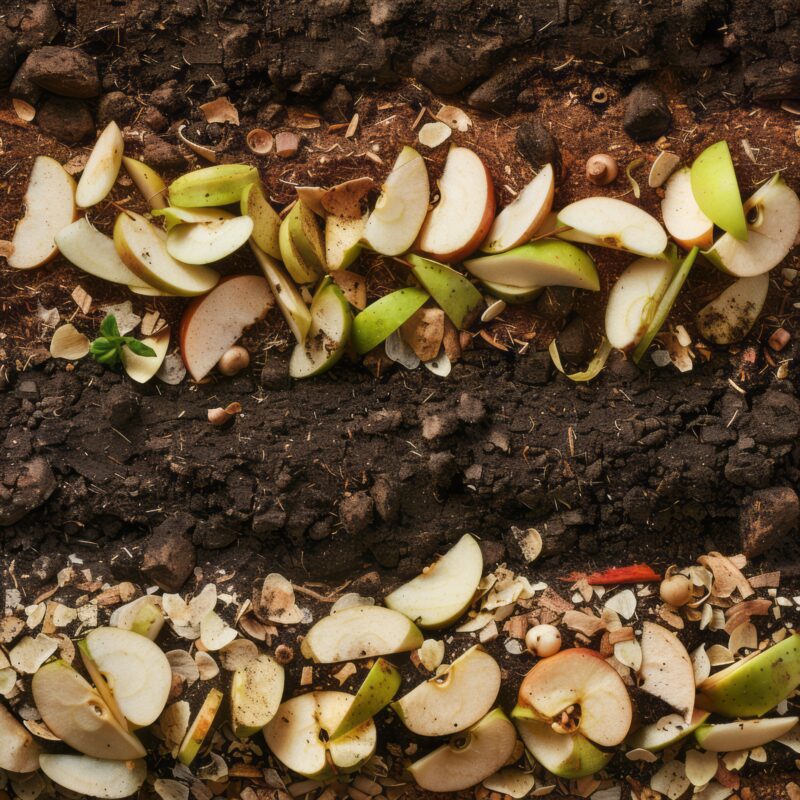
Compost is decomposed organic material, typically made from plant matter (like leaves, grass clippings, and food waste) and sometimes animal manure. It’s teeming with beneficial microbes that help break down complex organic matter into nutrients that your plants can absorb. Compost also enhances the soil’s ability to retain moisture while promoting proper drainage.
Benefits of Compost for Cannabis:
- Nutrient-Rich: Compost contains nitrogen, phosphorus, potassium, and trace elements like calcium, magnesium, and sulfur, all essential for cannabis growth.
- Improves Water Retention: Compost helps sandy soils hold onto moisture and nutrients while improving the drainage of heavy clay soils.
- Promotes Microbial Life: Compost provides a habitat for beneficial microorganisms like bacteria, fungi, and earthworms, which help break down organic material into a form that cannabis plants can easily absorb.
- Boosts Aeration: The organic matter in compost improves soil aeration, preventing compaction and ensuring that plant roots can access oxygen.
How to Add Compost:
- Mix it in: Incorporate compost into the top 6-12 inches of soil before planting. Use a shovel or a garden fork to work the compost into the soil, ensuring that it’s evenly distributed.
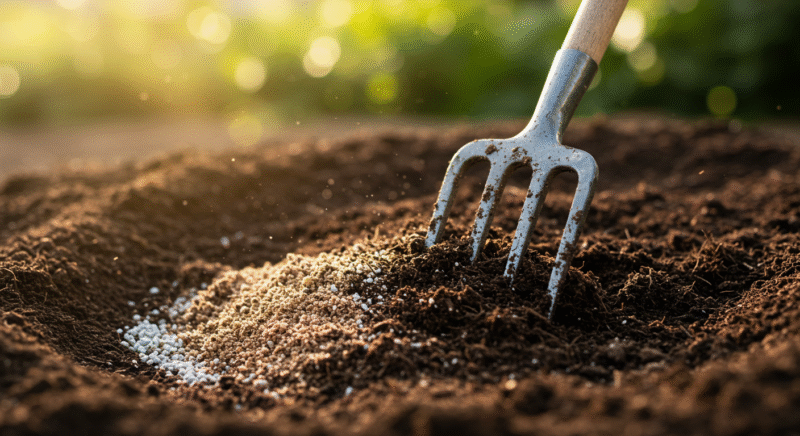
- Top-dressing: You can also add compost as a top-dressing around the base of your plants during the growing season. This method allows the nutrients to slowly leach into the soil with each watering, feeding your plants over time.
Pro Tip: Aim for about 20-30% of your soil mix to be compost for cannabis. Too much compost can make the soil too dense and rich, potentially causing nutrient burn.
Perlite
Perlite is a lightweight, porous material made from volcanic glass that’s been superheated. It’s often used in gardening to improve soil drainage and aeration, making it an essential amendment for cannabis growers, especially those dealing with heavy soils.
Why Perlite is Important for Cannabis:
- Improves Drainage: Perlite allows excess water to drain quickly through the soil, which helps prevent waterlogged roots and root rot, a common issue in compacted or clay-heavy soils.
- Enhances Aeration: By creating air pockets in the soil, perlite ensures that plant roots have access to oxygen. This is critical for nutrient uptake and healthy root development.
- Reduces Compaction: Perlite’s porous nature helps prevent soil from becoming too compacted, which is especially beneficial for plants with dense root systems like cannabis.
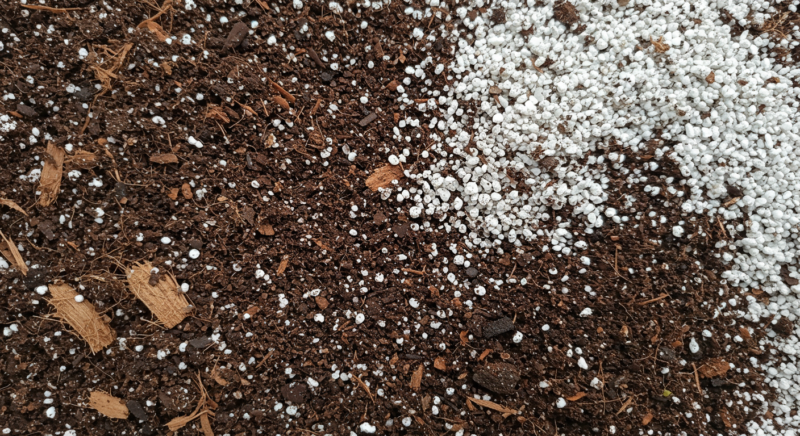
How to Use Perlite:
- Mix into Soil: For cannabis, perlite should make up about 10-20% of your soil mix, depending on how well your soil drains naturally. For heavy clay soils, you might need closer to 30% perlite to ensure good aeration and drainage.
- Raised Beds or Containers: Perlite is particularly useful in raised beds or containers, where soil compaction and drainage issues are more common. It helps keep the growing medium light and well-aerated.
Note: Don’t overdo it with perlite. While it improves drainage, too much can cause the soil to dry out too quickly, especially in hot arid climates. Balance is important.
Vermiculite
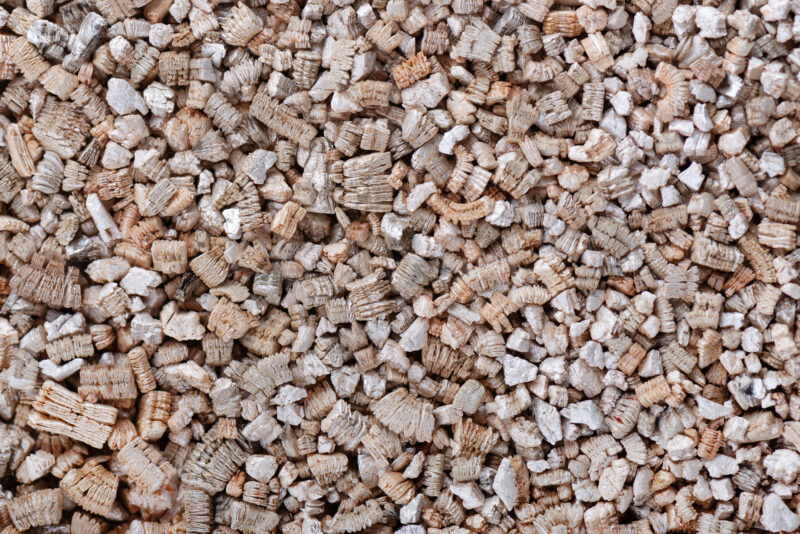
Vermiculite is another mineral amendment that, like perlite, is often used to improve soil structure. However, vermiculite retains more moisture than perlite, making it a better choice for growers in dry climates or those using particularly sandy soils.
Why Vermiculite is Beneficial for Cannabis:
- Water Retention: Vermiculite holds water in the soil, which helps plants stay hydrated between waterings. This is especially useful for sandy soils that drain too quickly.
- Increases CEC (Cation Exchange Capacity): Vermiculite has a high CEC, meaning it holds onto nutrients and makes them available to the plant roots over time. This helps prevent nutrient leaching and ensures a steady supply of essential minerals.
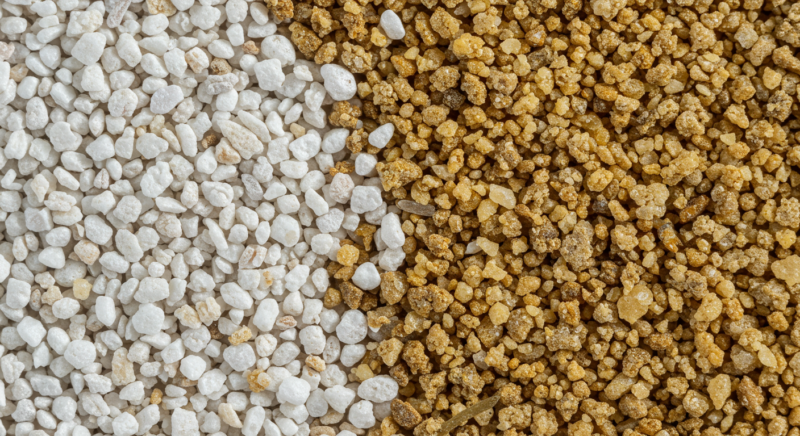
How to Use Vermiculite:
- Mix into Soil: Similar to perlite, vermiculite should be mixed into your soil at a ratio of about 10-20%. It’s particularly effective when used alongside compost and perlite, as the combination provides both water retention and good aeration.
Pro Tip: Use vermiculite in areas with dry, hot climates where water conservation is critical. It can help reduce watering frequency, especially during droughts or intense heat.
Worm Castings
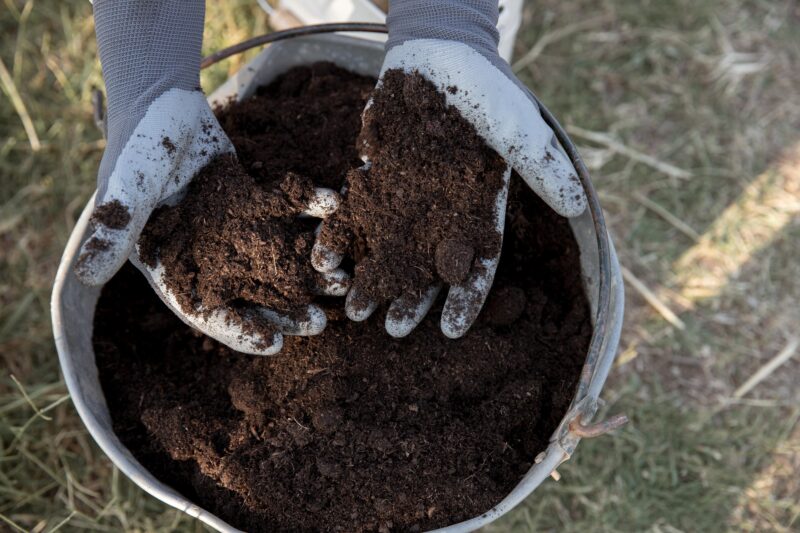
Worm castings, also known as vermicompost, are the nutrient-rich waste produced by earthworms. They are an incredibly potent soil amendment that boosts soil fertility, encourages microbial life, and improves soil structure.
Benefits of Worm Castings:
- Nutrient-Dense: Worm castings are packed with essential nutrients like nitrogen, phosphorus, potassium, and a wide range of micronutrients. These nutrients are released slowly over time, ensuring that your plants are fed consistently throughout their growth cycle.
- Promotes Beneficial Microorganisms: Worm castings introduce and support beneficial bacteria and fungi that help break down organic matter and release nutrients in a form that your plants can absorb easily.
- Improves Soil Texture: Worm castings help improve soil structure, boosting aeration and moisture retention without causing compaction.
How to Use Worm Castings:
- Mix into Soil: Worm castings can be mixed directly into your soil at a ratio of about 10-15%. They work best when combined with other organic matter like compost.
- Top-Dressing: Apply a layer of worm castings around the base of your plants as a slow-release fertilizer. Each time you water, nutrients will leach into the soil and feed the roots.
Remember: Worm castings are often mild, but no amendment is literally incapable of causing an imbalance. Product analysis, rate, medium, plant size, and existing fertility still matter.
Balancing Soil pH for cannabis (6.0-7.0)

Along with texture and nutrients, pH balance is one of the most important factors in soil health. Cannabis plants prefer a slightly acidic soil, with a pH range of 6.0 to 7.0. If the soil is too acidic (below 6.0) or too alkaline (above 7.0), the plant’s ability to absorb nutrients is impaired, even if those nutrients are present in the soil. This leads to nutrient lockout, where your plants display signs of deficiency despite nutrient-rich soil.
Master Advice: A pH reading is a clue. Pair it with a calibrated method, the correct sample type, plant symptoms, and a soil or water test before making a large correction.
“My soil pH is 7.2. Should I lower it immediately?”
Question sent by: Jonas Weber, via email.
Not from one reading. Confirm the method, sample several locations, review the soil type and water alkalinity, and look at plant performance. A slightly high result may not justify an aggressive correction. Sulfur acts slowly and the required amount depends on buffering. Large unmeasured changes can create a worse root zone than the original number.
Why pH Matters
The pH level of your soil directly impacts the availability of nutrients. Different nutrients are more or less available to plants at specific pH levels. In cannabis, the sweet spot is between 6.0 and 7.0, where most macro and micronutrients are readily available for uptake.
For example:
- Nitrogen, phosphorus, and potassium—the key nutrients in cannabis growing—are most available in soil with a pH of 6.0-7.0.
- If the pH drops below 6.0, important nutrients like calcium and magnesium become less available, leading to deficiencies.
- Similarly, if the pH climbs above 7.0, nutrients like iron, zinc, and manganese are less accessible, which can stunt plant growth.
How to Test Soil pH
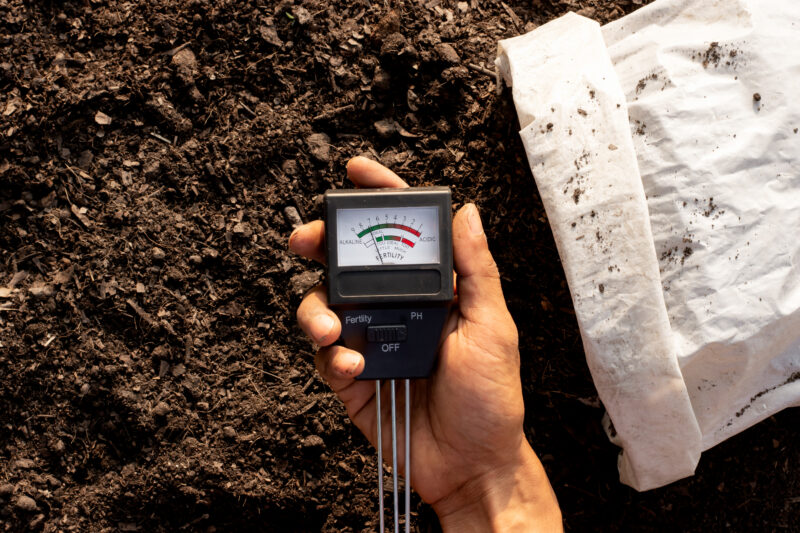
Testing Soil pH
To maintain the optimal pH range, it’s essential to regularly test your soil. You can do this using:
- Soil pH Test Kits: These simple kits are widely available and offer a quick, reasonably accurate way to test your soil’s pH.
- Digital pH Meters: For more precise readings, invest in a digital pH meter. This tool gives you an accurate measurement and is reusable, making it a great investment for long-term cannabis cultivation.
Note: Always test your soil pH both before planting and periodically throughout the growing season. Fluctuations can happen over time due to watering, nutrient amendments, or environmental changes.
Cannabis Plant Biology: Beyond Indica and Sativa Labels
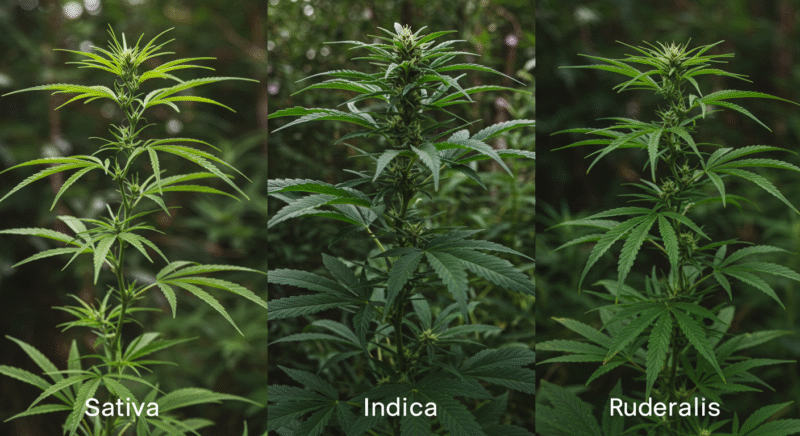
Cannabis plants show real differences in architecture, flowering behavior, chemistry, and environmental response, but the familiar indica, sativa, and hybrid labels do not reliably organize all of those traits. For outdoor cultivation, the useful task is to connect a named cultivar, seed lot, or clone to observations that can be checked: provenance, finish window, plant structure, flower architecture, disease response, and a laboratory result from the harvested batch where testing is available or required.
Strain, cultivar, seed, and phenotype
“Strain” is common cannabis language. “Cultivar” is the more precise horticultural term for a cultivated line. A seed is one genetic individual produced by reproduction, not a miniature copy of the finished flower. A phenotype is the set of traits expressed by that individual under its environment.
“If indica and sativa are unreliable, what should I write on my plant label?”
Question sent by: Casey Nguyen, via Facebook page.
Keep the cultivar name and source, then add information that can be checked: seed lot, seed type, germination date, plant number, growth structure, first flower date, finish date, and any laboratory result. You do not need to erase familiar language. You need to avoid asking that language to predict traits it cannot reliably predict.
Indica and Sativa: Familiar Labels, Limited Predictions
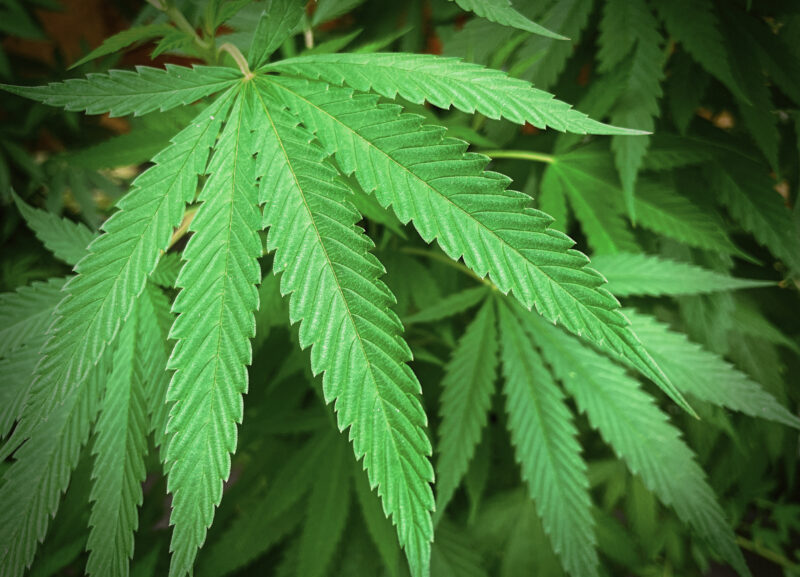
“Indica” and “sativa” are familiar cannabis labels, but they are not dependable outdoor specifications. A genome-wide study of more than 100 commercial samples found that products carrying those labels were largely genetically indistinct at the whole-genome level. Some label patterns were associated with particular terpene synthase genes and aromas, yet the label still did not reliably describe ancestry, finish date, plant architecture, cannabinoid percentage, or effect.
You can keep the label as part of the cultivar’s commercial identity, but do not let it replace measurements. Broad or narrow leaflets are visible traits. They do not prove how a person will feel, how much a plant will yield, or whether it will finish before a wet autumn.
Describe the Plant You Can Measure
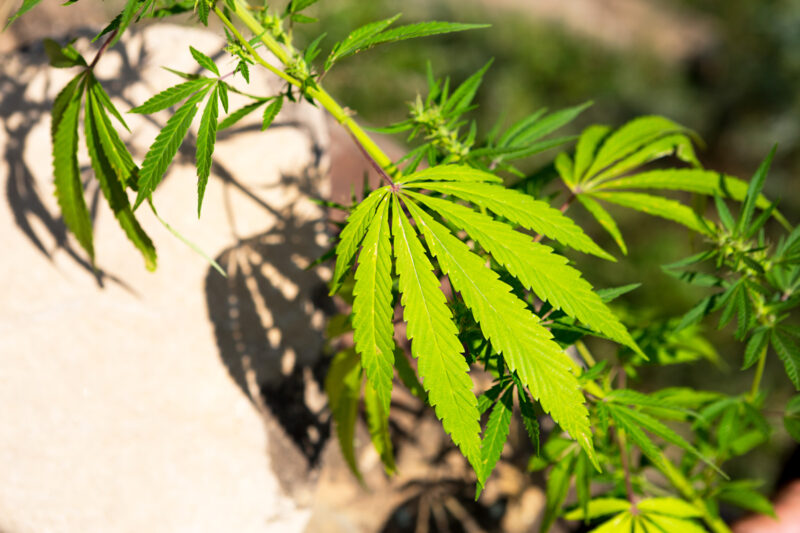
For outdoor planning, record internode spacing, branching pattern, height and stretch, first visible flower, actual finish window, flower density, response to humidity, pest and disease observations, water use, and recovery after wind or training. Those notes become more valuable than a percentage printed beside “indica” or “sativa.”
| Label or observation | What it can tell you | What it cannot guarantee |
|---|---|---|
| Indica / sativa label | The seller’s familiar market category or description. | Genome-wide ancestry, effect, finish date, flower density, or potency. |
| Leaflet shape | A visible morphological trait worth recording. | The harvested chemical profile or consumer response. |
| Documented finish date | A useful starting estimate when trials came from a similar latitude and climate. | Your exact harvest day under different weather, light interruption, or root conditions. |
| Batch laboratory report | The measured profile of the submitted harvested sample. | Every seed, phenotype, site, or future harvest carrying the same name. |
How to Choose an Outdoor Cultivar
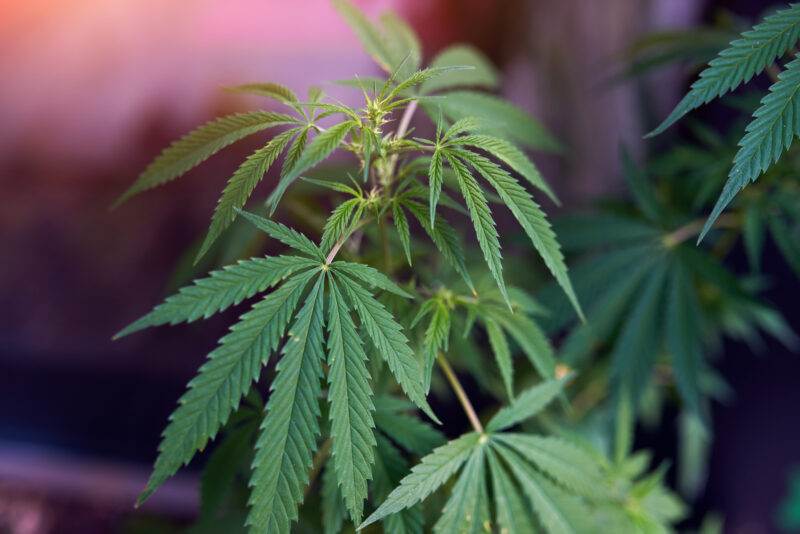
Choose by the conditions the plant must actually complete. Start with a finish window that precedes repeated cold rain or frost. Then compare photoperiod sensitivity or autoflower behavior, expected height and branching, flower architecture, disease observations from comparable climates, documented outdoor trials, seed or clone source, lot identity, and the legal cannabinoid limits that apply where you grow.
Hybrids can combine useful traits, but “hybrid” is not a promise of balance or uniformity. Seeds from the same packet can express different phenotypes. Keep individual records and retain only conclusions that the plants, dates, and measurements support.
Key Term: Use indica and sativa as familiar market language, not as an agronomic specification or a medical promise. For the garden, finish date, architecture, disease response, provenance, and observed performance are more useful.
Differences Between Male, Female, and Hermaphrodite Plants
Cannabis is a dioecious plant, meaning it has distinct male and female individuals, though hermaphroditic plants—those that contain both male and female reproductive organs—can also occur. Identifying the sex of your plants is crucial for cultivation, especially if your goal is to produce potent, resinous buds, as only female plants produce the flowers desired for consumption. Let’s break down the differences between these plant types.
“I bought feminized seeds. Do I still need to inspect for pollen-producing flowers?”
Question sent by: Nina Patel, via email.
Yes. Feminized seed greatly changes the expected sex outcome, but it does not make every plant incapable of expressing male flowers. Genetics and stress can influence expression. Inspect during the transition and throughout flowering, especially after severe stress. Confirm suspicious structures with magnification before removing the whole plant.
Male Plants
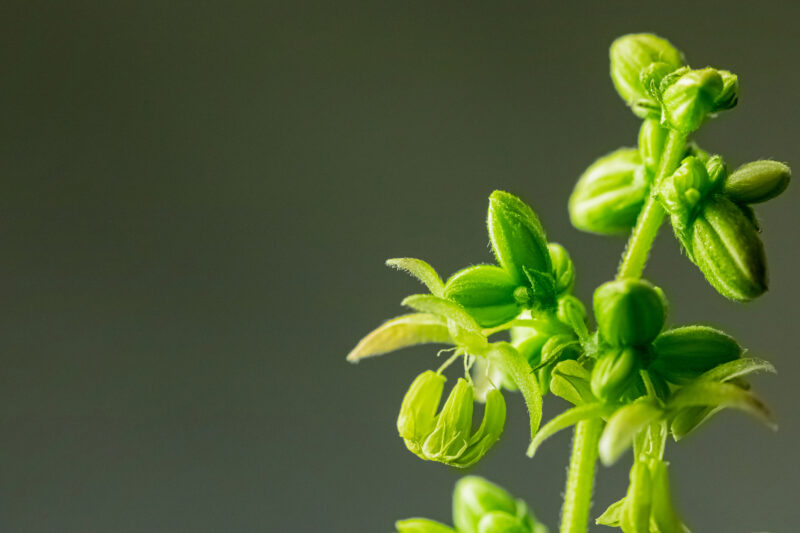
Male cannabis plants are essential for reproduction, but they are not sought after by most growers looking to cultivate cannabis for consumption. Male plants produce pollen sacs that, when mature, open up to release pollen into the air. If pollen reaches a female plant, it will fertilize the buds producing seeds instead of the resin-rich, seedless flowers (known as sinsemilla) that most growers are after. Because of this, male plants are usually removed from the grow area as soon as they’re identified to prevent them from pollinating the females. They are often taller and more sparsely branched than female plants and typically show their sex earlier, with small pollen sacs forming at the nodes between the branches and main stem.
Female Plants
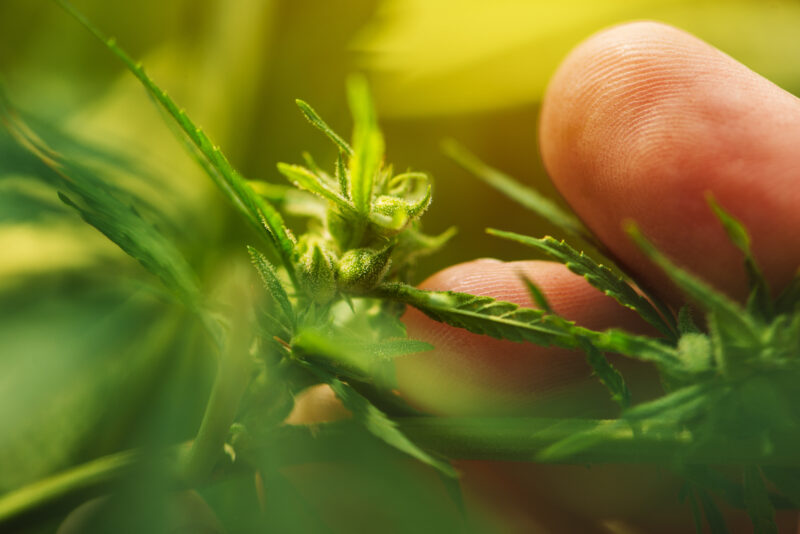
Female cannabis plants are the real stars of the show. They produce the large, resin-covered flowers that are harvested for consumption. The female plant’s flowers contain high concentrations of cannabinoids, like THC and CBD, which are sought after for both recreational and medicinal use.
In an ideal scenario, female plants are kept far away from males to prevent pollination, ensuring they focus their energy on producing resin, not seeds. If left unpollinated, the female plant will continue producing large, seedless buds rich in cannabinoids—this is the highly desired sinsemilla.
Female plants are typically shorter and bushier than their male counterparts, with dense foliage and the formation of calyxes, which grow into the buds we harvest. You can identify female plants by the appearance of white, hair-like pistils at the nodes. These pistils will eventually turn red or brown as the plant matures.
Hermaphrodite Plants
Hermaphrodite cannabis plants contain both male and female reproductive organs. This can occur naturally, but it is more commonly the result of environmental stressors like extreme temperature changes, inconsistent light cycles, or physical damage to the plant. When a plant becomes hermaphroditic, it can self-pollinate, which leads to the production of seeds in your otherwise resinous buds.
There are two types of hermaphrodites:
- True Hermaphrodites develop both male and female sex organs simultaneously, producing pollen sacs alongside pistils.
- Nanners produce small, banana-shaped pollen sacs within their flowers late in the flowering cycle.
Hermaphrodites are undesirable in most cultivation environments because they can pollinate themselves and neighboring female plants, ruining your harvest. The best action is to remove any hermaphroditic plants immediately to prevent pollination.
Important: One late anther is not the same management problem as a plant covered in developing pollen sacs. Confirm what you see, consider the pollen window, and act before opening structures spread the issue.
When choosing a strain, start by understanding your climate. Each climate type presents unique challenges and advantages for cannabis growers:
Choosing Strains Based on Climate
Cannabis plants come in various strains, each with unique characteristics influenced by their genetic lineage. Broadly, cannabis is divided into three types: Indica, Sativa, and Hybrid strains. Each type has adapted to different climates, allowing growers to select strains suited to their local environment. Here’s a breakdown of each type and how they perform outdoors:
Indica: Indicas are typically shorter, bushier plants with broad leaves. Originally from cooler, mountainous regions like the Hindu Kush mountains, Indicas are well-suited to shorter growing seasons and can tolerate lower temperatures. They tend to mature faster than Sativas, making them ideal for cooler climates where frost may set in earlier.
Sativa: Sativa strains come from warmer, equatorial regions, including parts of Africa, Southeast Asia, and Central America. These plants grow tall with narrow leaves and tend to take longer to mature, often requiring a full season to reach peak harvest. Sativas thrive in warm to hot climates with long summers, where they have ample time to grow to their full potential.
Hybrid: Hybrids are crossbreeds of Indica and Sativa strains, designed to capture desirable traits from both types. Hybrids can vary widely in their resilience, growth patterns, and climate adaptability, depending on their specific genetics. Some hybrids are created to be more mold-resistant, drought-tolerant, or pest-resistant, making them suitable for a broader range of environments.
“Can I use the breeder’s flowering weeks to predict my outdoor harvest date?”
Question sent by: CoastlineCam, via Instagram.
Only as a rough clue. Many listed week counts describe controlled indoor flowering from a light-cycle change. Outdoors, the start is gradual and depends on genotype, latitude, twilight, and weather. Look for actual outdoor finish reports from a comparable region and record your own first-flower and harvest dates.
Cooler Regions
In cooler climates, outdoor growing requires strains that can handle lower temperatures and shorter growing seasons. The best strains for these areas are typically Indica-dominant or fast-maturing hybrids, which can complete their life cycle before the first frost.
- Characteristics to Look For:
- Early finishing times to avoid frost
- High resistance to mold, as cooler climates often come with increased humidity
- Tolerance to fluctuating temperatures, especially if nights are significantly cooler than days
- Examples of Strains for Cooler Regions:
- Northern Lights: Known for its high resilience, Northern Lights is a classic strain that finishes early and is very mold-resistant. It’s a popular choice among growers in cooler regions.
- Hindu Kush: An Indica strain with origins in the mountainous Hindu Kush region, it’s accustomed to cooler conditions and has a quick flowering period.
- Durban Poison: A Sativa with a unique ability to finish early, making it suitable for climates with shorter summers. It’s also quite mold-resistant.
Hot Climates
Choosing a strain that can handle prolonged heat and abundant sunshine is key for growers in warmer climates. Sativa-dominant strains tend to excel in hot climates, as they are adapted to long seasons and ample light.
- Characteristics to Look For:
- Heat tolerance and high sunlight requirements
- Long flowering periods to take advantage of extended growing seasons
- Ability to handle low humidity without drying out too quickly
- Examples of Strains for Hot Climates:
- Amnesia Haze: This Sativa-heavy hybrid thrives in hot climates and has a long flowering period that benefits from extended seasons.
- Super Silver Haze: Another Sativa-leaning strain that performs well in warm climates. It’s resilient to high light intensity and can reach impressive heights outdoors.
- Acapulco Gold: Originating from the warm climates of Central America, this Sativa is well-suited for hot environments and can handle strong sunlight.
Specialized Strains for Challenging Conditions
In addition to temperature and sunlight requirements, it’s also important to consider strains that resist common outdoor challenges like mold, drought, and pests. These specialized strains are often hybrid varieties bred to combine desirable traits from both Indica and Sativa genetics, making them well-equipped to handle various environmental stresses.
“A seed listing says mold resistant. Which mold does that mean?”
Question sent by: Élodie, via contact form.
It should say. Powdery mildew, Botrytis flower rot, Sclerotinia, and root pathogens are different problems. Ask what disease was observed, under what conditions, and how many plants were evaluated. If the seller cannot explain, treat “mold resistant” as an unverified general claim and rely on structure, finish time, and your own prevention.
Mold-Resistant Strains
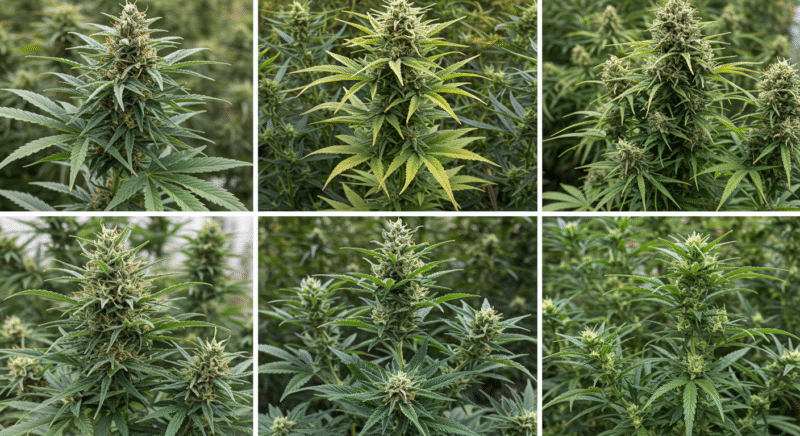
Mold can be one of the biggest threats to outdoor cannabis, particularly in humid climates or during rainy periods. Strains that are naturally mold-resistant have been bred to withstand these conditions, minimizing the risk of bud rot and powdery mildew.
- Characteristics of Mold-Resistant Strains:
- Dense buds with good airflow to discourage mold growth
- Fast flowering times to avoid prolonged exposure to damp conditions
- Genetic resilience to common molds like botrytis
- Examples of Mold-Resistant Strains:
- Gorilla Glue #4: This popular hybrid is known for its resilience and mold-resistant qualities, making it a good choice for humid climates.
- Pineapple Express: With dense but airy buds, Pineapple Express is naturally resistant to mold and performs well in both warm and cool climates.
- Blue Dream: A versatile hybrid that’s both mold and mildew-resistant, ideal for regions with unpredictable weather.
Drought-Tolerant Strains
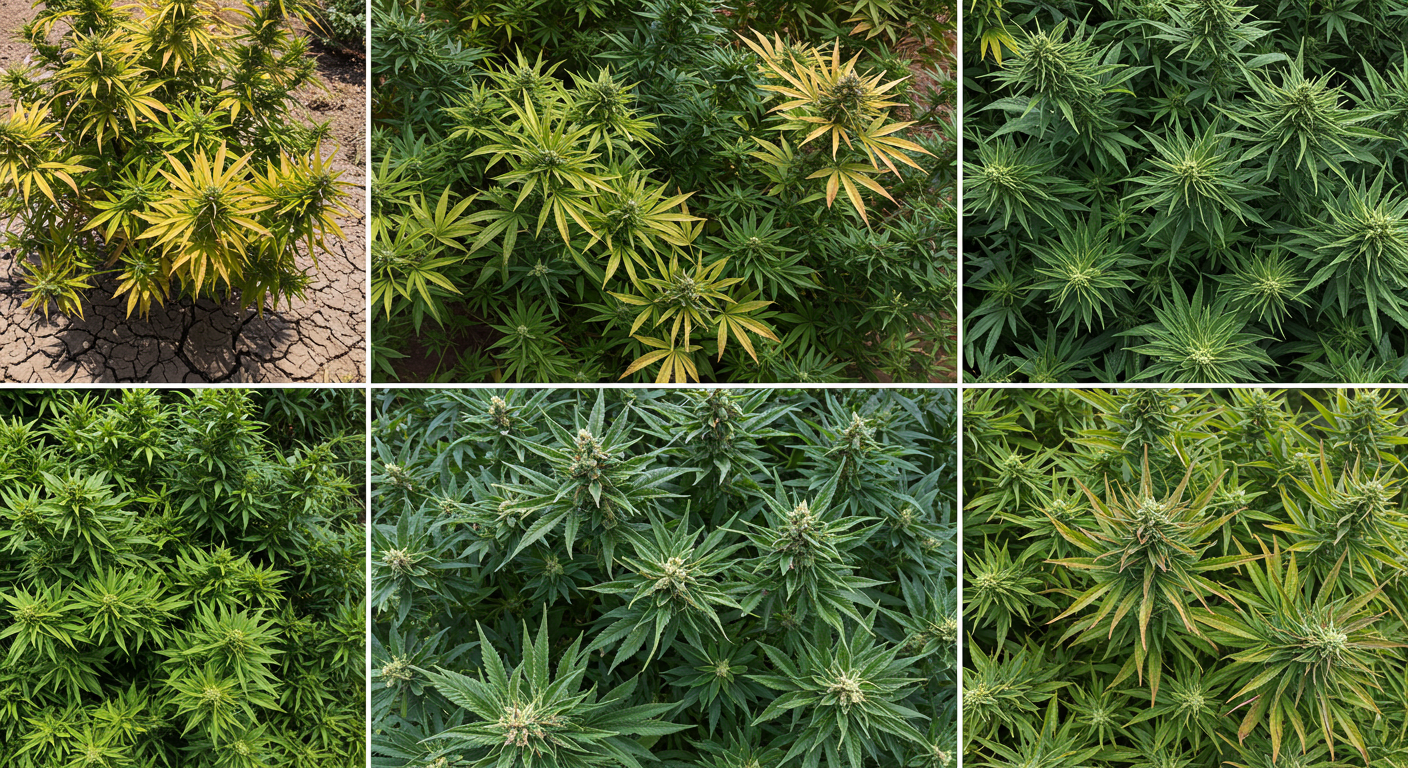
In arid climates, drought tolerance is essential. Drought-tolerant strains require less frequent watering and are better adapted to retain moisture, which is beneficial in areas with limited water access or during dry spells.
- Characteristics of Drought-Tolerant Strains:
- Deep root systems that can access lower water levels in the soil
- Efficient water retention capabilities to survive with minimal hydration
- Leaves with thicker cuticles to reduce water loss through transpiration
- Examples of Drought-Tolerant Strains:
- Afghan Kush: This strain has deep roots and can withstand dry conditions. Its origins in arid regions make it a natural choice for drought-prone areas.
- Durban Poison: Known for its resilience, this strain handles dry conditions well and can grow vigorously even in low-humidity environments.
- Critical Mass: A high-yielding strain that performs well with limited water, Critical Mass is a solid choice for arid climates.
Pest-Resistant Strains
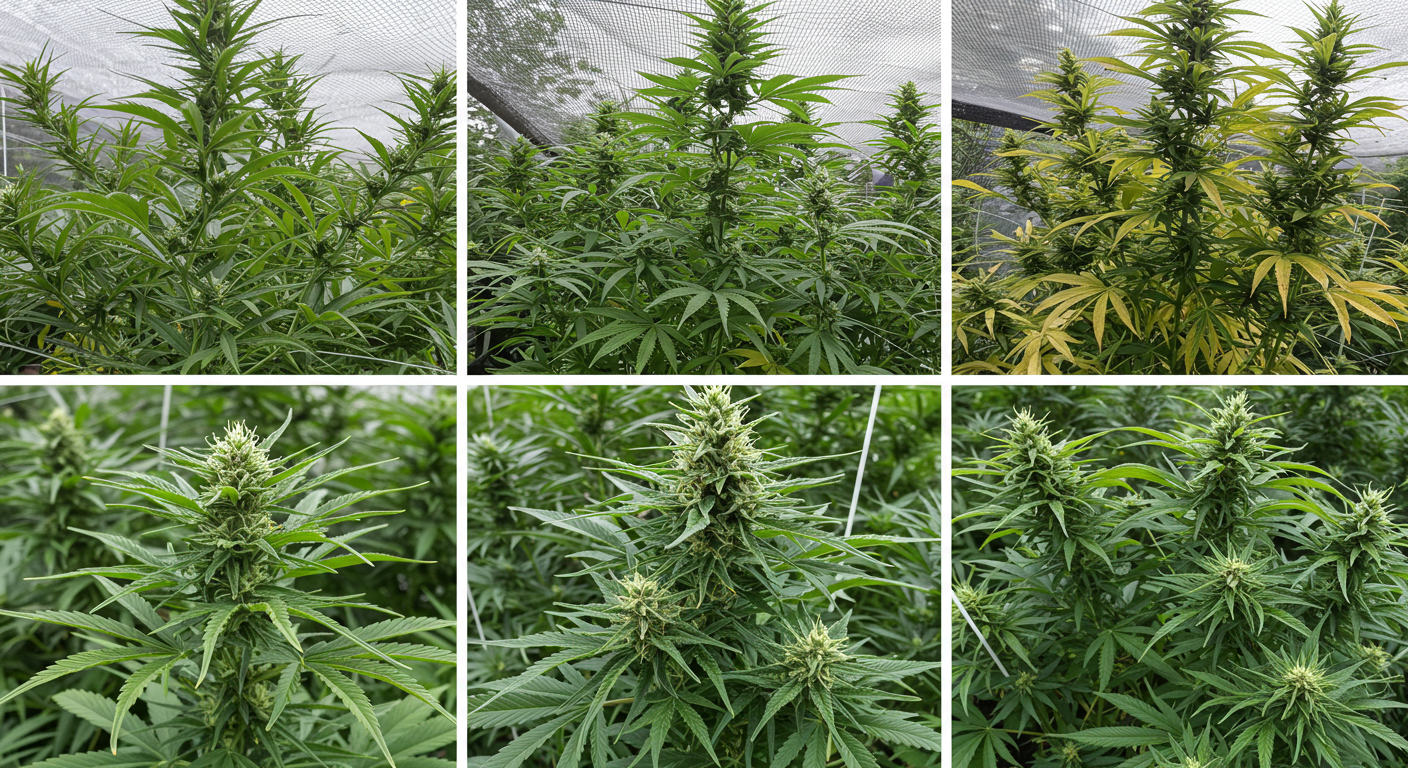
Pests are an inevitable part of outdoor growing, and certain strains are naturally more resistant to insects and pathogens. Pest-resistant strains are usually hardier and less susceptible to damage, which can save you time and effort in pest management.
- Characteristics of Pest-Resistant Strains:
- Thicker stalks and stems to withstand insect bites
- Strong aromas that naturally repel insects and herbivores
- Enhanced resilience against common pests like aphids and spider mites
- Examples of Pest-Resistant Strains:
- Jack Herer: This Sativa-dominant hybrid is known for its pest resilience and is a great option for regions where insects are a concern.
- White Widow: White Widow has strong aromatic qualities that deter pests, and it is a good choice for areas with heavy insect activity.
- Sour Diesel: Its pungent odor and tough foliage make it naturally resistant to many types of pests, making it a reliable outdoor strain.
Tips for Selecting the Right Strain for Your Garden
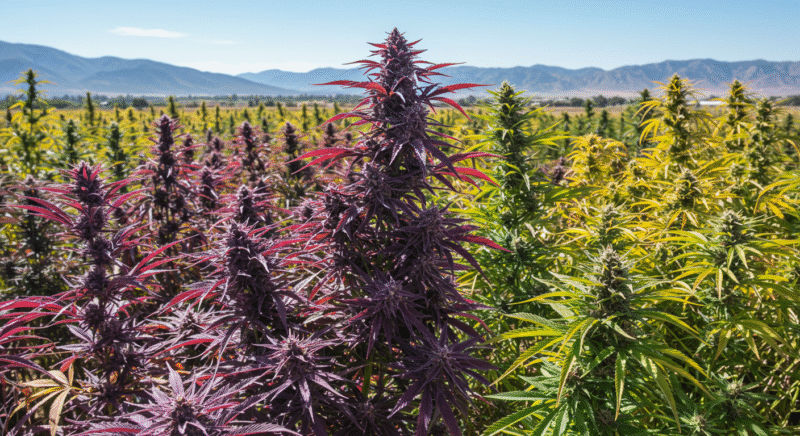
- Understand Your Local Climate: Research your region’s growing season, average temperature range, and humidity levels to choose strains that will thrive in those conditions.
- Consider Harvest Timing: If you live in a region with an early frost, prioritize strains with shorter flowering periods. If you’re in a warm climate with a long season, you can take advantage of longer-flowering Sativas.
- Match Strain Characteristics to Environment: Look for traits that align with your growing challenges. For example, if you’re in a humid area, focus on mold-resistant strains. In dry areas, drought tolerance is key.
- Source Seeds from Reputable Breeders: Quality genetics make all the difference in outdoor growing. Purchase seeds from breeders known for their environmental specialization, so you’re more likely to get strains that genuinely match your climate needs.
- Experiment with Different Strains: If you’re new to outdoor growing, try a few different strains to see which ones perform best in your specific environment. Taking notes on each strain’s growth and resistance characteristics can help refine your choices for future grows.
THC and CBD: What the Grower Can Actually Know
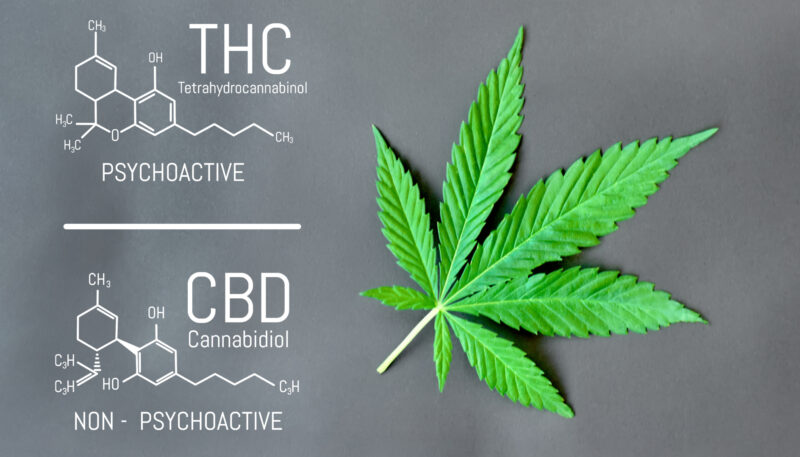
THC and CBD are cannabinoids associated with cannabis flowers, but a grower should separate genetic potential from a measured harvest. A seed listing may describe a breeding target or results from previous trials. It is not a laboratory certificate for every seed, every phenotype, or the flower you will eventually harvest.
Remember: A seed carries potential. The harvested sample has the measurable chemical profile. Do not describe a seedling as if it already contains the exact percentage printed in a catalog.
Chemotype Targets, Not Treatment Promises
Cultivars are often discussed as THC-dominant, mixed THC/CBD, or CBD-dominant chemotypes. These categories are useful breeding and testing shorthand, but legal definitions and cannabinoid limits vary by jurisdiction. They do not predict how every person will respond, and they should not be turned into claims that a cultivar treats a disease.
| Common chemotype shorthand | General target | What confirms the harvest |
|---|---|---|
| Type I | THC-dominant profile | A compliant laboratory report for the harvested batch |
| Type II | Mixed THC and CBD profile | A compliant laboratory report for the harvested batch |
| Type III | CBD-dominant profile | A compliant laboratory report for the harvested batch |
Three Layers of Evidence
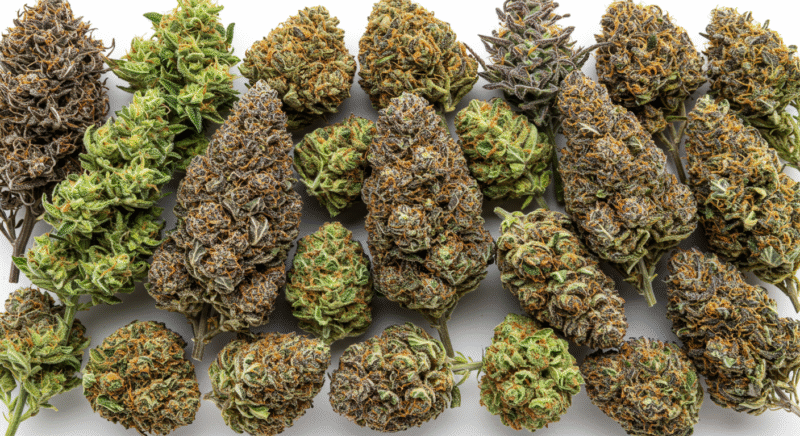
- Source description: the breeder or seller’s target, parentage, previous trial data, seed type, and lot information.
- Plant record: the phenotype’s structure, first flower, finish date, health, aroma, and harvest weight in your environment.
- Harvest test: the measured cannabinoid and contaminant results for the submitted batch, where licensed testing is available or required.
These layers should not be collapsed into one claim. A famous name does not make two phenotypes chemically identical, and a laboratory result from one harvest does not certify the next harvest grown under different conditions.
Environment Changes Expression
Genetics strongly shape cannabinoid ratios, while environment and management can change total biomass and the quantity expressed in harvested tissue. Root-zone conditions, light, nutrition, stress, pollination, harvest timing, drying, storage, and sample handling can all change what reaches the jar and what a laboratory measures.
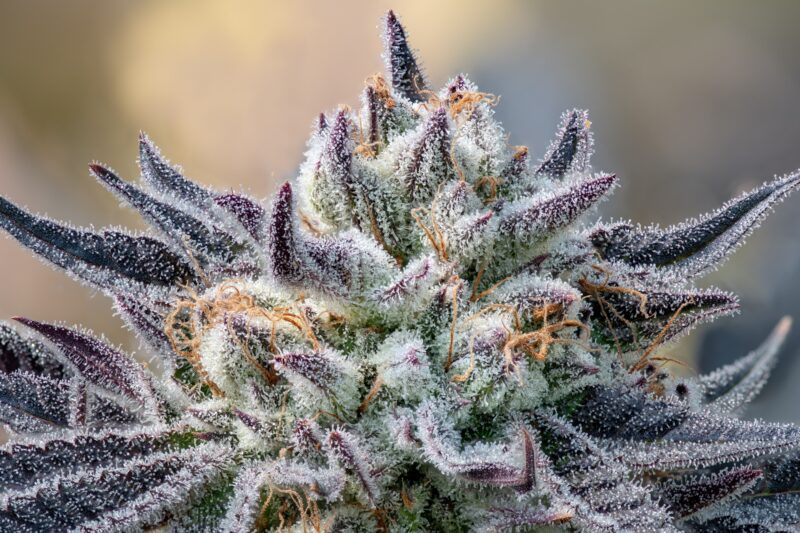
Choose outdoor genetics first for a lawful finish: photoperiod response, expected harvest window, plant architecture, disease response, provenance, and trial performance in a comparable climate. Then use the source’s chemotype target to plan compliance and testing. Do not use an indica/sativa label, a flower photograph, or a catalog percentage as a medical conclusion.
Keep medical decisions outside cultivation advice
This guide does not recommend a cultivar for Alzheimer’s disease, Parkinson’s disease, anxiety, pain, sleep, or any other condition. Cannabinoids can cause adverse effects and interact with medicines. Medical decisions belong with a qualified, licensed healthcare professional and the rules that apply where the reader lives.
Germination and Seedling Care
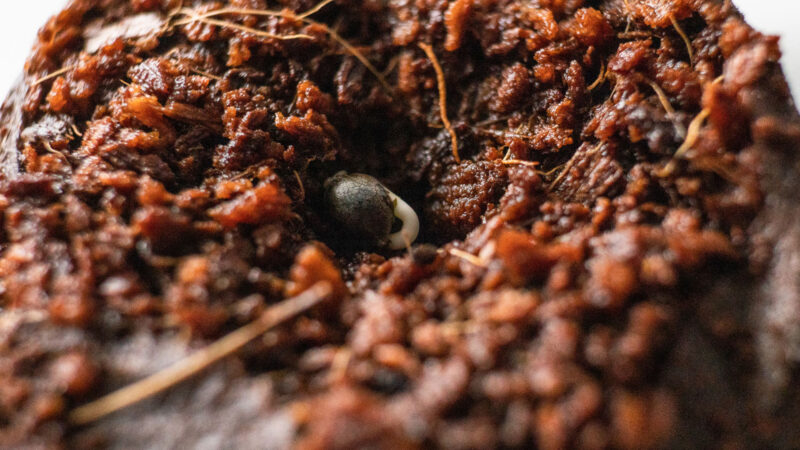
Germination and early seedling care are foundational steps, where each choice impacts the plant’s overall health, structure, and potential yield. Successful germination leads to a vigorous start, and proper care ensures seedlings develop the strength to thrive in outdoor conditions.
“The seed cracked but stopped after I planted it. Was it planted upside down?”
Question sent by: Ben Carter, via Facebook page.
Orientation is less often the main issue than moisture, oxygen, temperature, depth, or handling. A young root can redirect, but it cannot recover easily from saturation, drying, or physical damage. Keep the medium warm and evenly moist, avoid digging it up repeatedly, and give emergence time before declaring failure.
Understanding Germination
Germination is the initial phase where life awakens from within the seed. This process typically begins when the seed is exposed to moisture and warmth, activating enzymes that break down stored energy and allow the embryo to emerge. Germination is not just the first step but a defining moment in cannabis cultivation, as it sets the tone for the plant’s health and growth trajectory. Poor germination can lead to weak plants, while a robust germination phase produces seedlings with strong, resilient structures.
Starting Indoors

Never plant your cannabis seeds directly into outdoor soil. Instead, germinate your seeds indoors and transplant the seedlings once they’re strong enough. One favored method is to use small plastic pots to start your seeds inside. Once the seedlings have developed enough, carefully cut the bottoms off the pots and replace them with a small piece of cardboard or a shoebox bottom. When you’re ready to transplant them outdoors, dig a small hole at your grow site, remove the cardboard, and carefully place the plant into the hole. This method ensures the seedlings are well-established before going into the ground, greatly increasing their chances of survival.
Cloning is another excellent option for those who want to guarantee all-female plants outdoors. You can clone your females indoors and then transplant the clones using the same method described above. This way, you avoid the hassle of weeding out males later in the season—plus, all of your plants will be guaranteed to produce buds.
Note: Using a commercially available transplant chemical can help your plants overcome the initial shock of being moved outdoors, giving them a smoother transition and a better chance of thriving.
Seed Germination Techniques
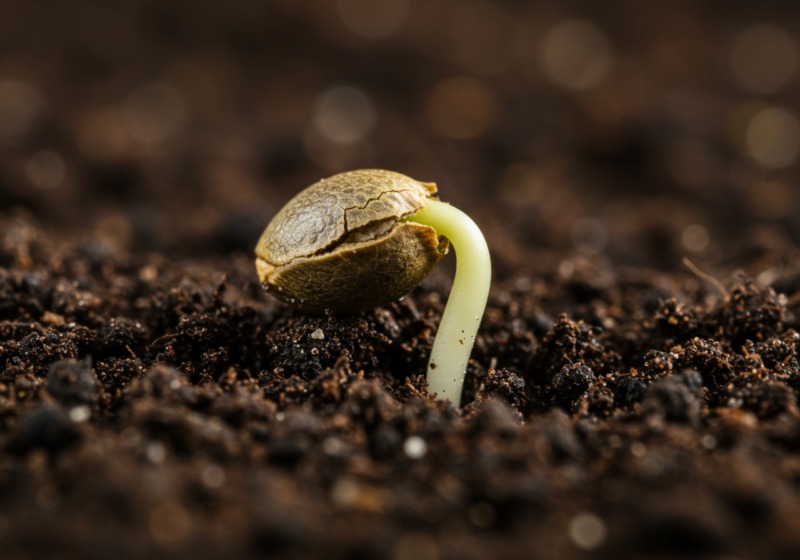
Germination is the initial phase of a seed’s life, where it begins to sprout roots and shoot growth. It’s a delicate period requiring the right mix of moisture, warmth, and air.
Two primary germination techniques dominate: the paper towel method and direct sowing into the soil. Each has its own benefits and best-use cases, depending on the grower’s objectives, environmental factors, and resources. While both techniques aim to produce a healthy seedling, understanding each method’s nuances can help growers make informed decisions.
Paper Towel Method
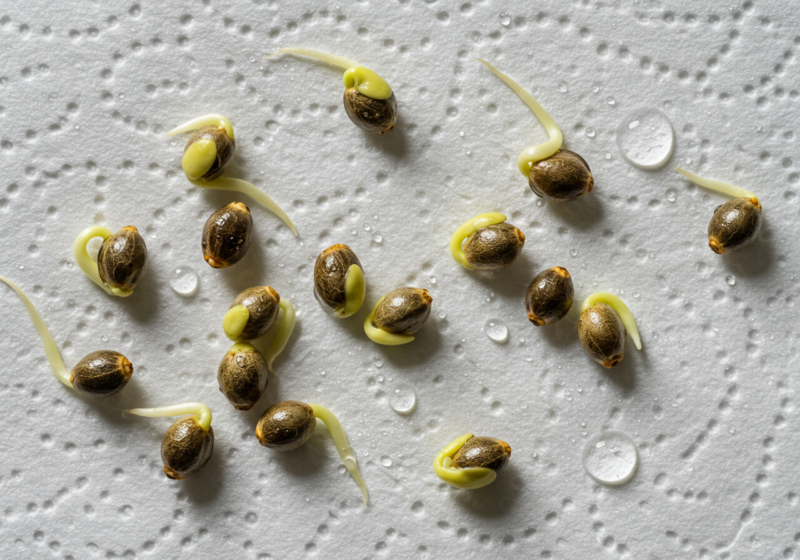
The paper towel method is a simple, effective way to germinate seeds with minimal equipment. This technique allows growers to monitor the progress closely and ensures that only viable seeds are planted.
- Materials: You’ll need a few paper towels, a plate, water, and a plastic cover or ziplock bag.
- Steps:
- Moisten two sheets of paper towel with distilled water, making sure they are damp but not soaking.
- Place the seeds on one of the moist towels and cover with the second towel.
- Place the setup on a plate and cover with another plate or inside a plastic bag to maintain moisture.
- Store in a warm, dark place—ideally, between 70°F and 85°F (21°C - 29°C). Check daily for moisture, adding water if needed.
- Germination Timeline: Cannabis seeds usually sprout within 2-7 days. The seed is ready for transplanting once the root emerges and reaches around ¼ inch (0.6 cm) long.
- Transplanting: The seeds can be carefully transferred to their growing medium once sprouted. Handle gently to avoid damaging the delicate root.
Direct Sowing in Soil
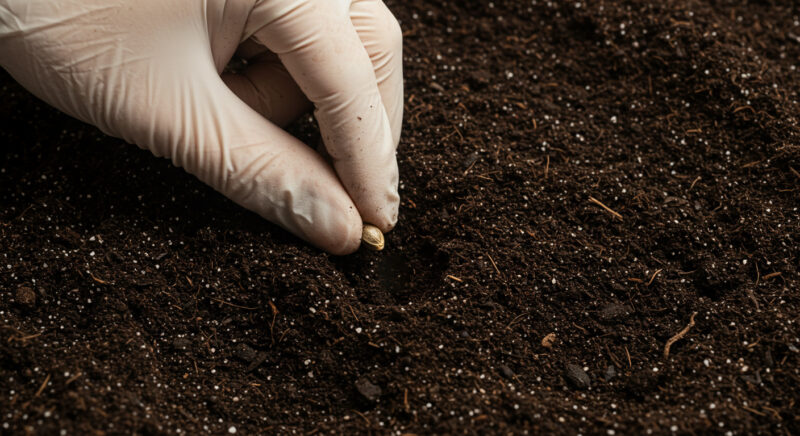
Directly planting seeds in soil is another viable option, especially for growers who want to avoid the risk of damaging roots during transplanting. However, this method can have a slower germination rate than the paper towel technique.
- Choose a Suitable Soil: Use a light, airy soil blend with good drainage. Adding perlite or vermiculite can improve aeration and water retention.
- Planting the Seeds:
- Make a small hole about ¼ inch (0.6 cm) deep in the soil.
- Place the seed root-side down (pointed end facing down) and cover it lightly with soil.
- Moisten the soil gently using a spray bottle, ensuring it’s damp but not saturated.
- Environment: Keep the soil warm, ideally between 70°F and 80°F (21°C - 27°C), and provide indirect sunlight or grow lights. For outdoor setups, wait until the soil temperature is stable above 60°F (15°C) to avoid cold shock.
- Germination Timeline: Seeds will generally sprout within 7-10 days. Maintain consistent moisture and avoid disturbing the soil during this period.
Transitioning Your Seedlings
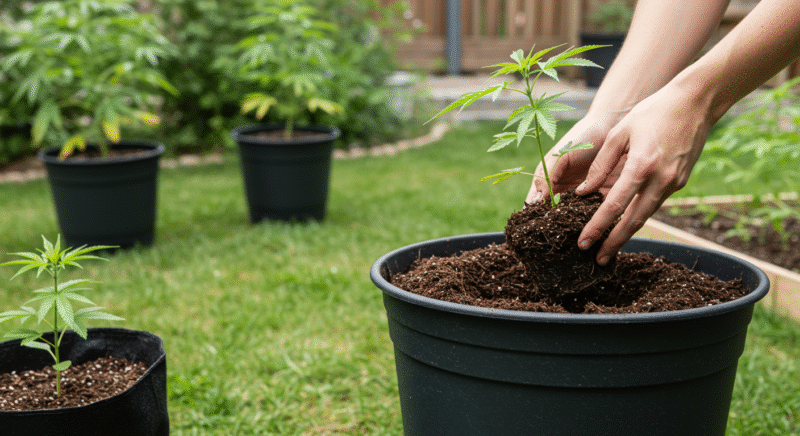
Moving vegetative starts to your outdoor grow area can be one of the trickiest parts of outdoor cultivation. Germinating seeds directly in the soil outdoors is not recommended because they’re vulnerable to pests, weather, and poor conditions. Instead, germinate your seeds at home and keep the seedlings indoors or in your garden until they are strong enough for transport. It’s also a good idea to wait until the seedlings are showing their sex before you transplant them outdoors so you don’t waste time and effort on male plants that won’t produce buds.
Since you can’t tell the difference between male and female seeds just by looking at them, you’ll have to wait for the seedlings to develop before you can identify their sex. Once you’ve separated the males from the females, you can transport only the female plants to your grow site.
Another efficient method for transporting seedlings is to start them in 3-inch rockwool cubes. You can place up to 20 cubes in a litter pan, cover it with another pan for protection, and transport them to your outdoor grow area. Once at the grow site, the rock wool cubes can be planted directly into the soil, providing an easy and efficient method for transplantation.
Starting your plants indoors and ensuring they’re well-established before moving them outdoors, you set yourself up for a successful outdoor grow. Plan ahead and take care during the transplant process, and your marijuana plants will reward you with a plentiful harvest.
A quiet transition is usually a good transition
Before moving a seedling outdoors, let’s check whether it is already fighting saturated roots, a tight container, weak stretched growth, or an unresolved nutrition problem. Correct the basic stress first and wait for clear active growth.
I trust a hardening transition when very little drama happens: the root ball stays firm, exposure increases gradually, conditions remain mild, and transplant day is not combined with heavy feeding or aggressive training.
“My seedling drooped the evening after transplant. Should I feed it?”
Question sent by: Kara M., via email.
Not automatically. Mild temporary droop can follow root disturbance, sun, wind, or a change in water balance. Check that the root zone is evenly moist but not saturated and protect it from extreme conditions. Feeding a stressed, wet seedling can increase salt pressure. Watch the new growth and next cool period before making another change.
Setting the Depth and Planting the Seedling
Transplanting depth and spacing are crucial for the cannabis plant’s development, affecting root spread, nutrient uptake, and ultimately plant size and yield.
Depth: Finding the Right Planting Depth
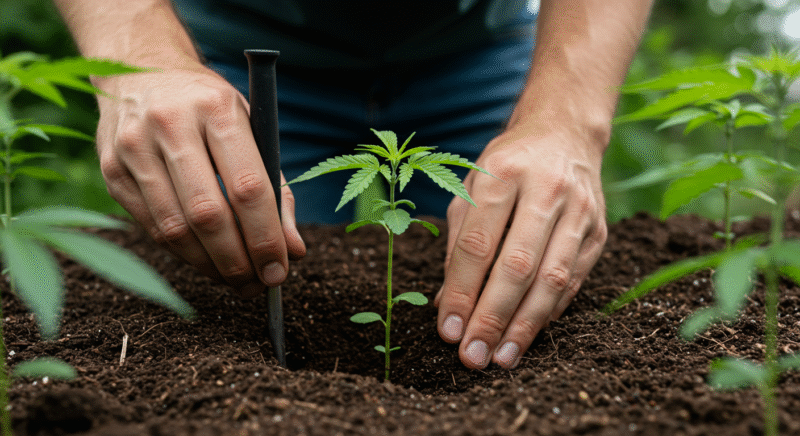
Proper planting depth gives the roots access to moisture and nutrients and stabilizes the plant against wind and other elements.
- Plant Level with Ground Surface: Place the seedling in the hole so that the soil line on the seedling’s stem aligns with the soil surface in the planting site.
- Avoid Burying the Stem: Planting too deep can encourage stem rot. Cover only the root ball and leave the stem exposed to prevent moisture buildup around the base.
Spacing for Optimal Growth
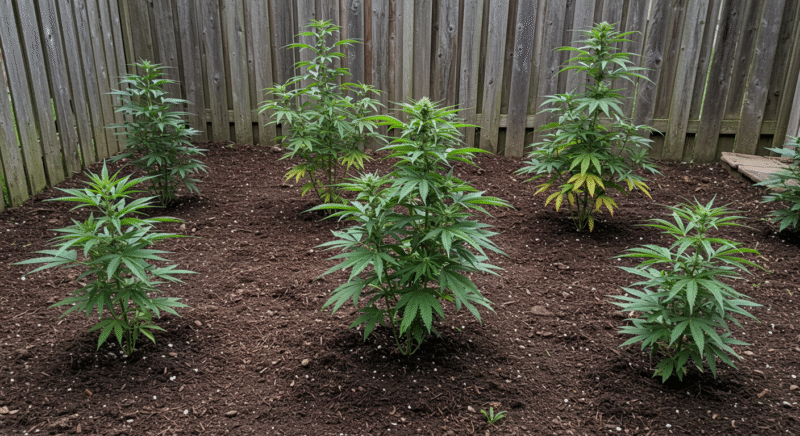
Space each plant to give the root system ample room to expand. Crowding plants restricts airflow, limits sunlight access, and can increase the risk of pests and diseases.
Outdoor Plants: For outdoor grows, spacing can range from 3 to 6 feet between plants, depending on the strain. Indica strains typically grow shorter and bushier, so 3-4 feet might suffice. Sativa strains, on the other hand, can grow taller and may require up to 6 feet of space.
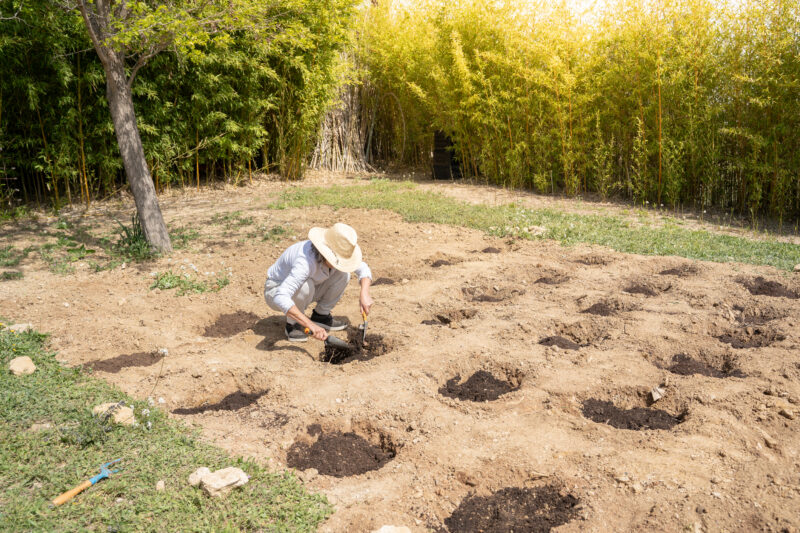
Container Grows: For container-grown plants, use pots large enough to accommodate the plant’s full growth potential. A minimum of 5 gallons is recommended, but for larger outdoor plants, 10-gallon or larger containers will yield better results.
“Can I plant closer and prune harder to save space?”
Question sent by: YardMath, via contact form.
You can control some shape, but pruning cannot remove the need for light, airflow, root volume, support, and working access. Closely packed plants may become a single wet canopy just as flowers are most vulnerable. Plan from expected mature width and leave room to inspect every side without pushing through the plant.
Common Mistakes to Avoid
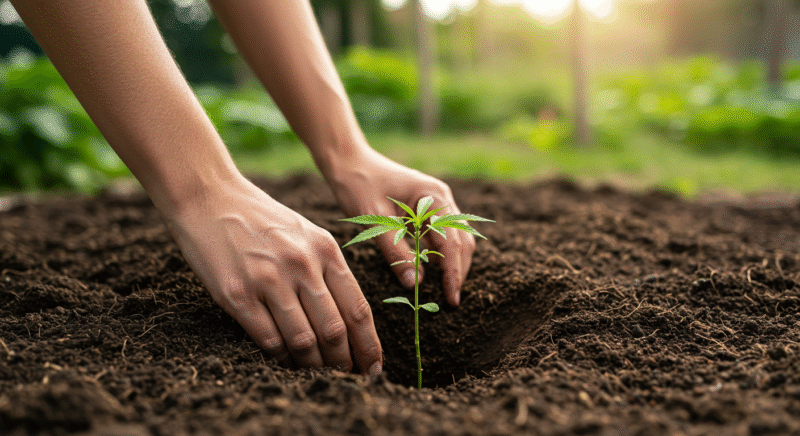
Transplanting is straightforward, but a few common mistakes can set back your plants. Avoid these pitfalls for a successful transplant:
- Transplanting Too Early or Late: Seedlings need a stable root system before transplanting. Avoid moving them too early, as they might not have the strength to adapt to new conditions.
- Inadequate Spacing: Crowding can cause problems later, especially outdoors. Make sure to space plants according to their growth habits to prevent overlapping and shading issues.
- Overwatering: Newly transplanted seedlings require careful watering, but overdoing it can suffocate roots. Watering should be thorough but not excessive.
The Vegetative Stage of Outdoor Grow
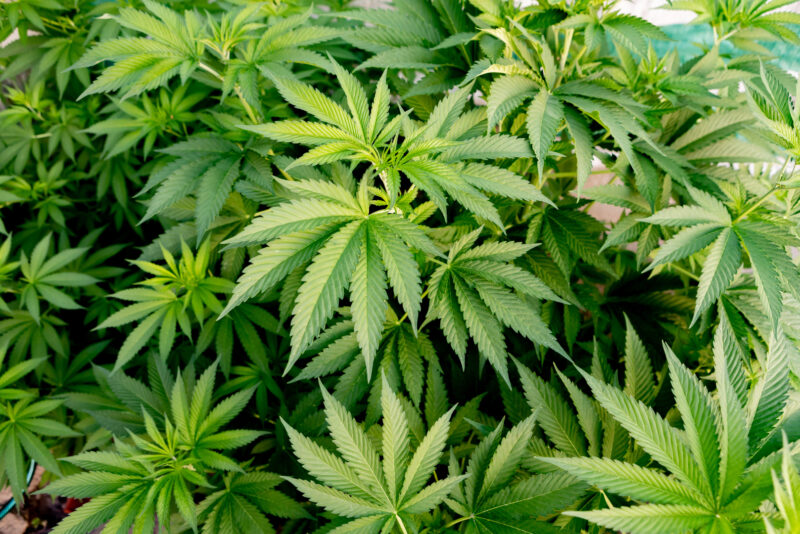
The vegetative stage is a pivotal period in the life cycle of a cannabis plant, where it undergoes vigorous growth and prepares for the flowering phase. This stage begins after the plant has established itself as a sturdy seedling and is the building block for a successful outdoor grow. During this phase, the plant concentrates on developing robust structures—strong roots, thick stems, and abundant leaves—all of which contribute to supporting heavy flowers later in its cycle. For outdoor growers, understanding the vegetative stage and recognizing its signs is essential for fostering healthy, productive plants.
“My outdoor plant is growing slowly even though the days are long. What should I check first?”
Question sent by: Logan Price, via Facebook page.
Start below the canopy. Check root-zone temperature, moisture, drainage, container volume, pH method, and recent feeding. Then examine actual direct light and pest signs. Long days do not compensate for cold saturated roots or heavy shade. Compare the newest growth over several days instead of judging height from one afternoon.
Transition to the Vegetative Stage
The vegetative stage officially begins when the seedling phase ends, typically a few weeks after germination. At this point, the plant has developed its first few sets of true leaves and has established a foundational root system. During this stage, the plant shifts from establishing itself to intensifying its growth in preparation for flowering.
In outdoor environments, cannabis plants transition naturally to the vegetative stage as they respond to increasing daylight hours in spring and early summer. This period of rapid growth can span several months, depending on the local climate and day length, making it a crucial time to closely monitor the plant’s development.
Importance of the Vegetative Stage
The vegetative stage lays the groundwork for a productive flowering phase. During this time, the plant’s main focus is to build strong, resilient structures that will support heavy, resinous buds later on. This stage is essential for:
- Establishing Root Depth: Healthy root systems developed during the vegetative stage provide the plant with stability and ensure optimal nutrient and water absorption throughout its lifecycle.
- Developing Foliage: Leaf growth during this stage maximizes the plant’s photosynthetic ability, enabling it to capture more sunlight and produce energy required for the rest of its growth.
- Building Stalks and Branches: Sturdy stalks and well-developed branches will be essential for holding the weight of the plant’s flowers during the flowering phase, especially in outdoor settings where wind and weather can be factors.
- Increasing Plant Size: The larger a plant becomes in the vegetative stage, the greater its potential yield in the flowering stage. Outdoor plants often have a longer vegetative period than indoor plants, allowing them to grow much larger.
In short, a successful vegetative stage is the foundation of a high-yielding outdoor cannabis plant, making it an essential phase to monitor and support carefully.
During the vegetative stage, cannabis plants exhibit specific growth patterns and physical signs that distinguish this period from other stages of development. Knowing what to look for can help growers confirm that their plants are on the right track.
Key Signs of the Vegetative Stage:
- Rapid Growth: In the vegetative stage, cannabis plants grow rapidly, often doubling in size over a few weeks. Stems elongate, new nodes form, and the plant expands both vertically and horizontally.
- Larger Leaf Formation: During this period, the plant produces large, fan-like leaves with multiple “fingers” characteristic of mature cannabis foliage. The leaves are crucial for photosynthesis and help the plant absorb more sunlight.
- Development of Branches and Nodes: Nodes, the points on the stem where leaves and branches grow, become more numerous and closely spaced. As the plant grows, these nodes prepare to support future bud sites.
- Absence of Preflowers: While the vegetative stage is a time of intense growth, it’s also a non-reproductive period. No signs of flowering (pistils or pollen sacs) should be visible at this stage.
Signs of a Healthy Vegetative Stage
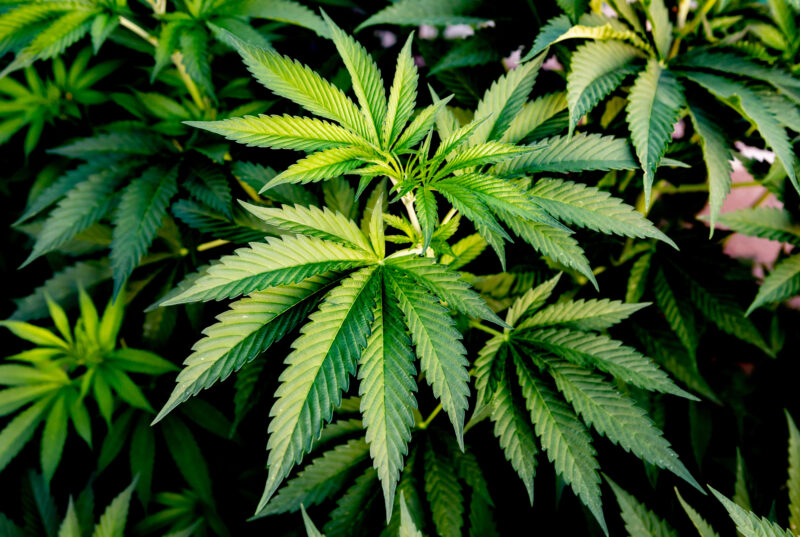
Several visual cues and overall plant vitality characterize a healthy vegetative stage. Growers should regularly inspect their plants to ensure they’re thriving and free of signs of stress or disease. Here are some indicators of a vigorous vegetative phase:
Weedth Grower Note: Healthy does not mean visually perfect. An old damaged leaf will not repair itself. Judge the direction of new growth and whether the original cause has stopped spreading.
“Do dark green leaves always mean the plant is healthy?”
Question sent by: Lena Hoffmann, via email.
No. Healthy color varies by cultivar and leaf age. Very dark leaves combined with clawed tips, slow drying, and soft growth can indicate excessive nitrogen or root-zone stress. Use color with posture, growth rate, moisture use, and new-leaf development. Chasing the darkest green often leads to overfeeding.
Vibrant Green Foliage: Healthy cannabis plants display a rich, vibrant green color. Pale or yellowing leaves can signal issues that need addressing, such as nutrient imbalances or environmental stress.
Thick, Strong Stems: The main stalk and branches should be firm and sturdy, capable of supporting the plant as it continues to grow. Weak, thin stems may suggest a lack of sunlight or other issues.
Symmetrical Growth: In a well-balanced vegetative stage, branches grow symmetrically from the main stem. This symmetry indicates that the plant is receiving even light distribution and is experiencing optimal growth.
Rapid Leaf Production: Healthy plants will continue producing large fan leaves throughout the vegetative stage. The more foliage a plant has, the more energy it can create for itself through photosynthesis.
Uniform Node Development: Nodes should be spaced evenly along the main stem, supporting balanced branching and setting up a well-structured plant for future flowering.
What to Monitor During the Vegetative Stage
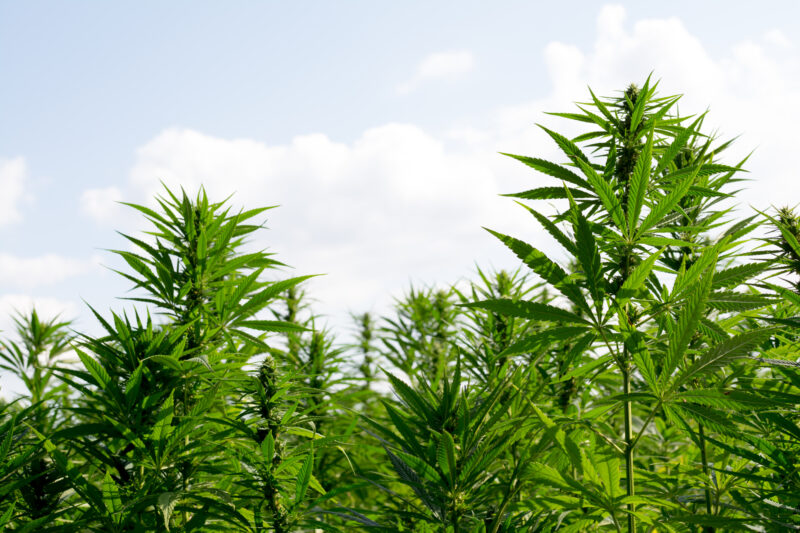
Keeping an eye on specific aspects of plant health will help you identify potential problems early and ensure your plants continue growing vigorously throughout the vegetative stage. Here’s what to look out for:
“These tiny green insects are clustered under the new leaves. Should I spray the whole garden?”
Question sent by: Mason Lee, via Facebook page.
Confirm that they are aphids and check how widely the colony has spread. A small early colony may be removed or washed from a limited area while predators are protected. Spraying every plant can kill beneficial insects and still miss the sheltered colony. Recheck the same tips in a few days and escalate only when the population is growing or damage is spreading.
- Leaf Health: Leaves should be consistently green and free from discoloration or spots. Any yellowing, curling, or spotting on the leaves could indicate issues such as pest infestations, nutrient deficiencies, or environmental stress.
- Stem and Branch Strength: The stems and branches should feel solid, not flimsy. If the stems are weak, it might signal a need for better support or adjustments in the growing environment.
- Growth Rate: Healthy cannabis plants in the vegetative stage grow noticeably day by day. A slowdown in growth could indicate a lack of water, nutrients, or sunlight.
- Environmental Stress Signs: Outdoor plants may be subjected to weather fluctuations, wind, and pests. Regularly inspect for signs of damage caused by these external factors to address any potential issues early.
“One lower leaf has spots. Should I remove it and start treatment?”
Question sent by: June W., via Facebook page.
Photograph it first and inspect the whole plant. One old leaf may show splash damage, natural aging, feeding, or a past stress that has stopped. Removing it can erase evidence. Check whether the pattern repeats, whether new growth is affected, and whether pests are present before choosing a treatment.
Mark the leaf; memory is not a record
Tie a loose label near the first symptom and photograph it with the date. Then return to the same point after the next irrigation, feeding, or weather change.
When we compare the same tissue, we can tell whether the damage is active, stable, or only becoming more visible as an old leaf ages. Without a marker, another old spot can easily look like new spread.
Maintaining Plant Health in the Vegetative Stage
Ensuring your plants stay healthy throughout the vegetative phase involves consistent observation and preventive care. By paying attention to details and responding to your plants’ needs, you set the stage for a productive flowering period. Here are a few key practices:
- Regular Inspections: Check your plants at least a few times weekly to monitor their progress and promptly address any emerging issues.
- Protection Against Pests: As your plants grow, they may attract various pests. Look for signs of insect damage on leaves and stems, and consider organic pest management options if necessary.
- Physical Support: As plants grow larger, they may require extra support to handle their increasing height and weight. Consider tying branches gently or using stakes if necessary to keep them upright.
- Encouraging Structural Strength: Lightly brushing or gently bending branches can help strengthen the plant’s structure, preparing it to support heavier flowers in the future. However, avoid overly aggressive training techniques in the early vegetative stage to prevent stress.
“The new growth is twisted, but I cannot see any bugs. What am I missing?”
Question sent by: Klara, via email.
Very small mites are one possibility, but herbicide drift, root stress, heat, and nutrient imbalance can also distort new growth. Use strong magnification on the meristems, compare affected and unaffected plants, and review every recent spray or soil change. Do not apply a miticide until the pest is confirmed, because the wrong treatment can add injury and delay the real diagnosis.
Nutrient Requirements for Vegetative Plants
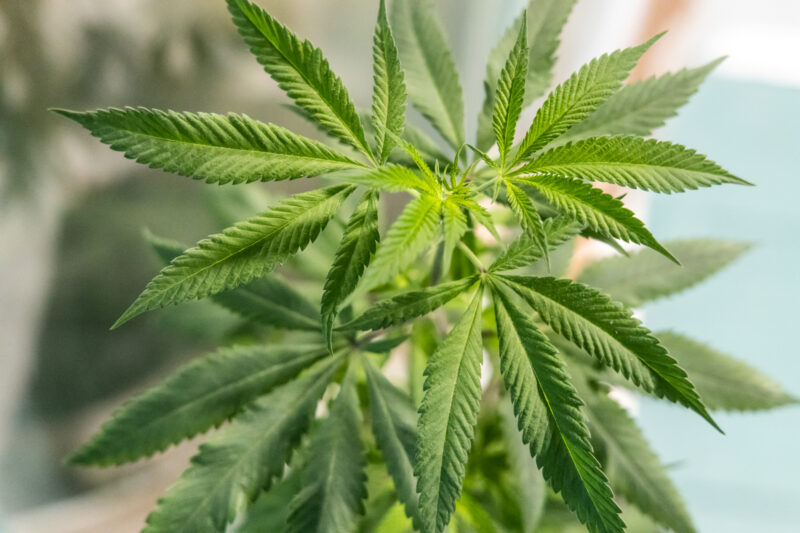
Cannabis plants have specific nutrient needs at each growth stage, and the vegetative stage is no exception. During vegetative growth, cannabis focuses on developing a robust root system, thick stems, and large, broad leaves, which together enable the plant to photosynthesize efficiently and store the energy needed for the flowering stage. This vigorous growth requires a balanced mix of macronutrients—primarily nitrogen (N), phosphorus (P), and potassium (K)—as well as micronutrients like calcium, magnesium, and iron. However, nitrogen is the most critical nutrient during the vegetative phase, playing a vital role in leaf and stem production.
“Can I diagnose a deficiency from a color chart online?”
Question sent by: RootCauseRay, via Instagram.
A chart can organize possibilities, but many stresses create similar colors. Location on the plant, rate of spread, pH, moisture, roots, salts, weather, and pests matter. Use the chart to form a short list, then confirm the root-zone conditions. Do not add several nutrients just because one photo looks familiar.
Nitrogen: The Key Nutrient for Vegetative Growth
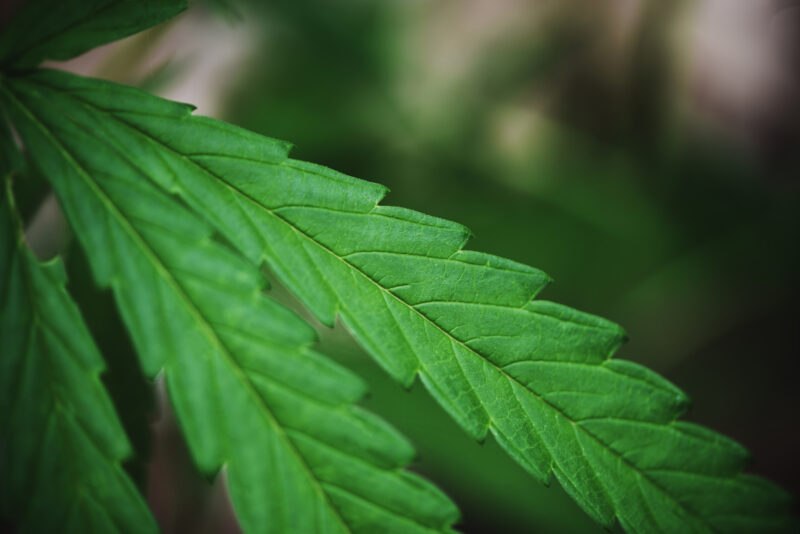
Nitrogen is the primary building block of chlorophyll, the molecule responsible for photosynthesis, as well as amino acids and proteins. During vegetative growth, cannabis plants need a continuous supply of nitrogen to fuel the production of new leaves and stems. The more nitrogen available, the more effectively the plant can carry out photosynthesis, producing the energy needed to grow strong and resilient.
When cannabis plants receive adequate nitrogen, they exhibit rapid growth and develop lush, dark green foliage. Nitrogen deficiencies, on the other hand, are quickly visible in the form of yellowing leaves (a condition known as chlorosis), stunted growth, and weak stems. In outdoor grows, nitrogen is particularly important because plants are exposed to environmental stressors, including temperature fluctuations, wind, and pest pressure, all of which require a strong, resilient structure to withstand.
While nitrogen is critical, it’s essential to monitor the amount carefully, as overfeeding can lead to nutrient toxicity. Signs of nitrogen toxicity include dark green, claw-like leaves and slowed root development, which can negatively impact the plant’s ability to support heavy buds in the flowering stage. Moderation and balance are key to successful nitrogen management.
Role of Phosphorus and Potassium in Vegetative Growth
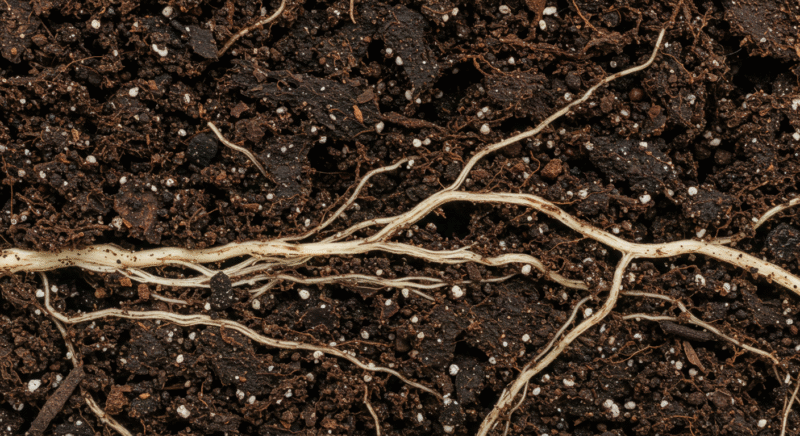
While nitrogen takes center stage during vegetative growth, phosphorus and potassium play important supporting roles. Phosphorus aids in root development and energy transfer within the plant. Healthy root systems allow the plant to absorb nutrients and water more efficiently, enabling it to sustain faster growth rates. Phosphorus also contributes to energy transfer through ATP (adenosine triphosphate) production, a molecule crucial for cell division and overall vitality.
Potassium, on the other hand, supports stem strength and disease resistance. This nutrient helps plants regulate water usage, withstand drought conditions, and handle environmental stressors. In outdoor environments where conditions are less controlled, potassium is especially valuable, as it enhances the plant’s natural defenses against diseases and pests, creating a sturdier, more resilient structure.
Summarize, while nitrogen is the primary nutrient in vegetative growth, the ideal macronutrient balance for cannabis in this phase is typically a higher nitrogen level, with moderate amounts of phosphorus and potassium to support root strength and structural resilience.
Nitrogen-Heavy Feeding Schedules
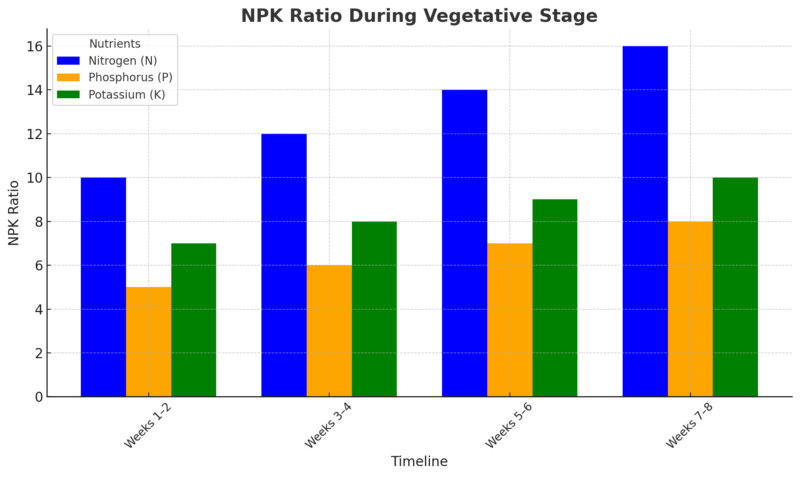
Creating a nitrogen-heavy feeding schedule is essential for optimizing growth during the vegetative stage. Outdoor cannabis plants can benefit from a feeding schedule that gradually increases nitrogen levels as the plants grow, particularly in environments with rich, organic soil. A well-timed nutrient regimen will provide a consistent supply of nitrogen without overloading the plant, which can lead to nutrient toxicity.
Early Vegetative Feeding Schedule
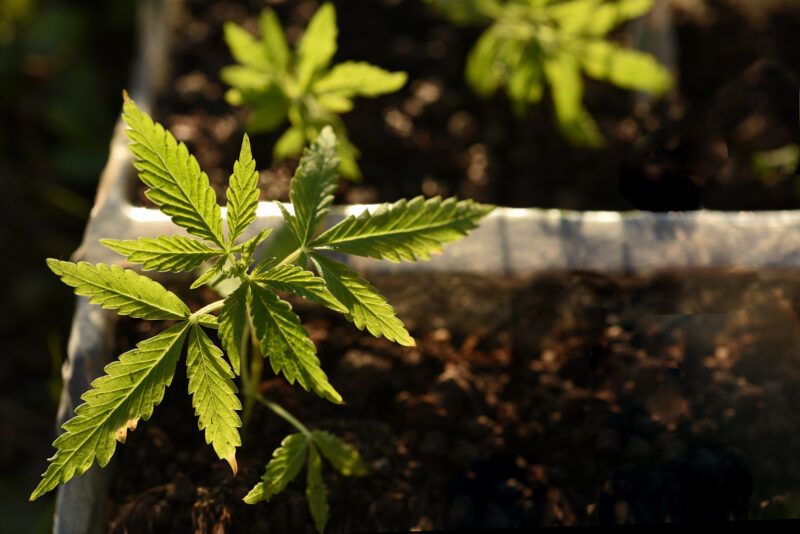
In the early vegetative stage, plants are establishing their root systems and beginning to develop their first sets of true leaves. At this point, they don’t need a heavy dose of nutrients, but a balanced feeding schedule with a nitrogen-forward approach will set them on the right path. Many growers start with a 3-1-2 N-P-K ratio at this stage, which gives the plant a strong dose of nitrogen while still providing the phosphorus needed for root expansion and potassium for overall strength.
At this stage, incorporating organic matter such as compost or worm castings into the soil can provide a slow, natural release of nitrogen and other nutrients, reducing the need for frequent feeding and promoting healthy soil microbial life.
Mid to Late Vegetative Feeding Schedule
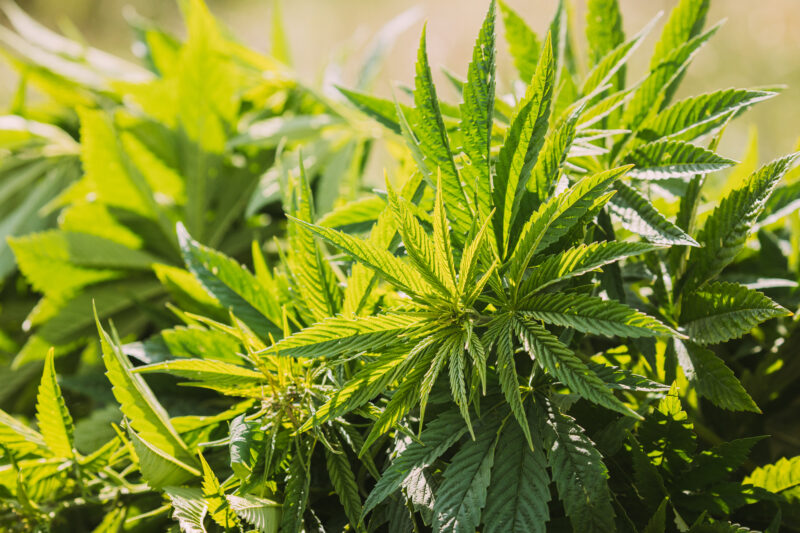
As plants mature and the vegetative stage progresses, they’ll enter a phase of rapid growth. This period typically lasts from four to eight weeks for outdoor plants, depending on the strain and growing conditions. During this stage, cannabis plants will need a higher concentration of nitrogen to support the development of large, healthy fan leaves, which are essential for photosynthesis. Many growers increase the N-P-K ratio to 5-1-3 or even 7-1-3 during the mid-vegetative phase to sustain this vigorous growth.
In the later stages of vegetative growth, as the plants prepare to enter flowering, it’s beneficial to start gradually reducing nitrogen levels and increasing phosphorus and potassium. This shift allows the plant to prepare for flowering, focusing energy on producing bud sites and improving structural integrity. Reducing nitrogen helps to prevent nutrient burn or toxicity, which can hinder bud production in the flowering stage.
Monitoring and Adjusting the Feeding Schedule
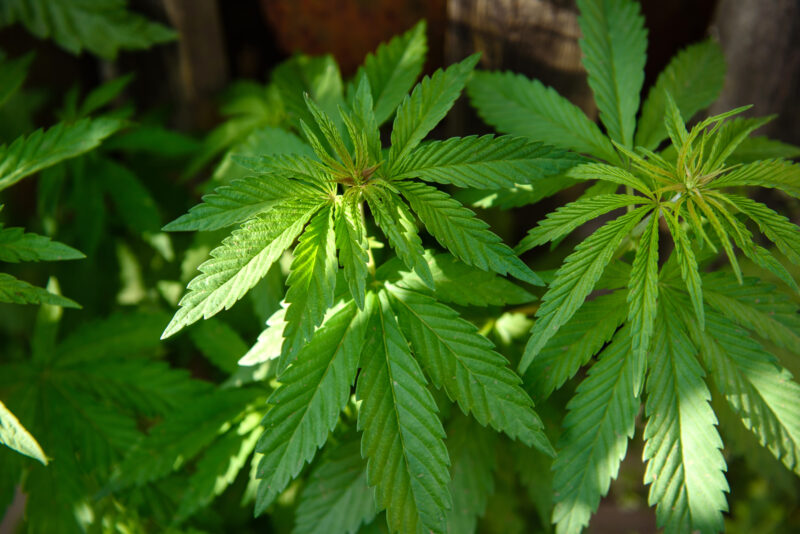
Outdoor conditions vary widely based on climate, soil quality, and weather, so it’s essential to monitor plant health closely and adjust the feeding schedule as needed. If you notice yellowing or stunted growth, your plants may be lacking nitrogen, while dark green leaves and claw-like shapes indicate excess nitrogen. Adjusting the nutrient ratio as you observe these signs will help maintain optimal health.
Additionally, soil testing can be invaluable for outdoor growers, as it reveals the current nutrient levels and pH, allowing for more precise adjustments. Outdoor soil can vary significantly in nutrient content depending on previous use, soil type, and organic matter content. Regular testing can guide your feeding approach, ensuring you’re not overloading or underfeeding your plants.
Diagnose the root zone and the pattern
Check moisture, drainage, pH method, recent inputs, weather, pest signs, and which leaves changed first. Make one measured correction.
Stack several remedies at once
A fertilizer, pH correction, pesticide, and extra watering applied together can hide the cause and create a second problem.
“How long should I wait after changing the feed?”
Question sent by: Sven, via email.
Long enough to see the direction of new growth and water use, which may take several days depending on conditions. Old burned or yellow tissue may not turn normal again. If symptoms are rapidly advancing, investigate urgently, but avoid daily formula changes. Record the dose, irrigation, and weather so the response can be interpreted.
Organic and Mineral Fertility: Compare the System, Not the Label
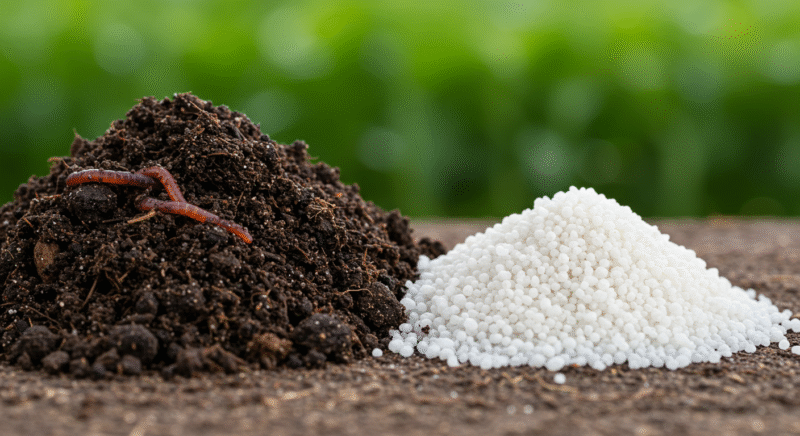
Organic and mineral fertilizers can both support a healthy outdoor plant. “Natural” does not automatically mean safe, sustainable, contaminant-free, or legal, and “synthetic” does not automatically mean harmful. The useful comparison is how clearly the nutrient supply can be measured, how it behaves in the root zone, and how the grower prevents salts, pathogens, excess nutrients, and runoff from leaving the site.
Organic and Bio-Based Inputs
Compost, castings, plant meals, and other bio-based inputs can add organic matter and support slow nutrient cycling. Their analysis and release rate can vary with source, maturity, temperature, moisture, and microbial activity. Poorly finished compost or manure may also carry excess salts, weed seeds, pathogens, persistent residues, or metals. Use reputable inputs, request an analysis when the risk justifies it, and do not assume that more organic matter always improves drainage or fertility.
Mineral and Salt-Based Inputs
Mineral fertilizers usually provide a more predictable analysis and can correct a verified shortage quickly. They also make it easy to overconcentrate a solution, raise root-zone EC, create nutrient antagonism, or send soluble nutrients into runoff. Measure the water and final solution, follow the product label, and change one variable at a time.
| Decision point | Organic / bio-based system | Mineral / salt-based system |
|---|---|---|
| Nutrient release | Often slower and more dependent on biology and temperature | Usually faster and more directly measurable in solution |
| Best verification | Input analysis, maturity, soil test, plant response | Label analysis, mixing accuracy, EC/pH, root-zone test |
| Common risk | Variability, immature material, salts, pathogens, contaminants | Overconcentration, salt accumulation, pH shift, runoff |
| Environmental control | Apply only what the crop and root zone can use; protect drains, wells, streams, ponds, and neighboring land. | |
Important: Use only products permitted and labeled for the crop and jurisdiction. Residue, contamination, worker safety, and environmental risk apply to every input system. Measure the material and the root zone instead of trusting the word “organic” or “synthetic” as a safety verdict.
Pruning and Training Techniques
Novice and experienced growers can benefit from understanding these methods, as they allow you to shape your plants, increase light exposure, and enhance airflow—all of which lead to healthier, more productive plants.
“Do I have to top an outdoor plant to get a good harvest?”
Question sent by: Morgan Ellis, via Facebook page.
No. Topping is one structural option. An untopped plant can perform well when its natural shape fits the site and support. Top when you need height control or more lateral structure and the plant has time to recover. Do not cut simply because a schedule says every cannabis plant must be topped.
Why Pruning and Training Are Important
Cannabis like many plants has a natural growth pattern that typically produces one central main stem with a dominant cola (the main bud site at the top of the plant). This main stem gets most of the light, often shading lower branches and bud sites, resulting in an uneven distribution of resources. Pruning and training help you manipulate your plants to:
- Enhance light exposure: By adjusting the shape of your plant, you allow light to penetrate deeper, reaching more bud sites.
- Improve airflow: Pruning helps increase airflow within the canopy, reducing the risk of mold and pests.
- Encourage more bud sites: Topping and training stimulate side growth, allowing more branches to develop, which translates to more buds.
- Increase yield and potency: A more even canopy and better resource distribution allow the plant to focus energy on multiple large buds rather than just one main cola.
Topping
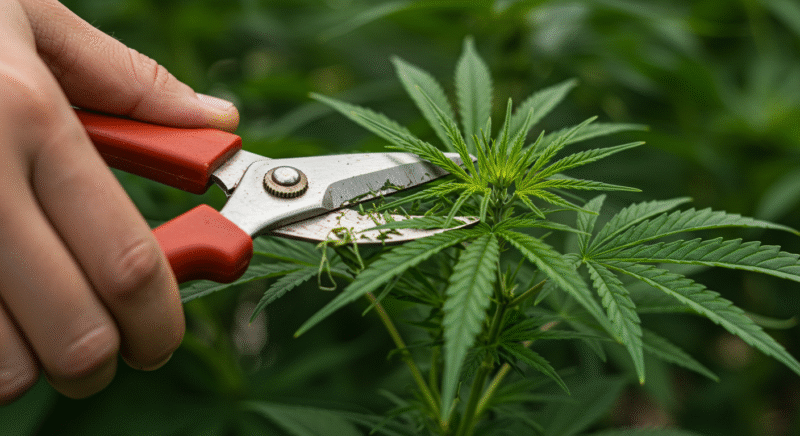
Topping is one of the most common techniques used by cannabis growers to encourage bushier, fuller plants with multiple main colas. The method involves cutting off the top of the main stem, redirecting growth hormones to side branches and encouraging them to grow more vigorously.
How to Top a Cannabis Plant
- When to Start: Topping should be done early in the vegetative stage, ideally when the plant has developed at least 4-6 nodes (sets of leaves on the main stem). Waiting until this point ensures the plant is strong enough to handle the stress.
- Finding the Right Spot: Locate the highest node on the main stem. The ideal point to cut is right above the fourth or fifth node, leaving the lower branches intact.
- Making the Cut: Use sterilized scissors or pruning shears to make a clean cut just above a node. This cut stops the upward growth of the main stem and diverts energy to the side branches.
What Happens After Topping?
After topping, two new growth tips will develop just below the cut, leading to two new main colas rather than one. This encourages the plant to grow outward rather than upward, creating a more even canopy that allows for better light distribution across the plant. Topping can be repeated multiple times throughout the vegetative stage, each time doubling the number of main colas.
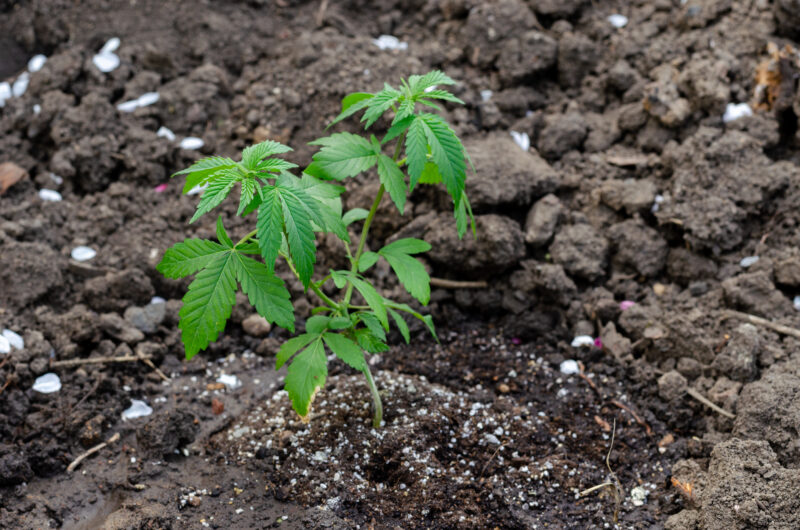
Benefits and Drawbacks of Topping
Benefits: Increases the number of main colas, improves light distribution, and creates a bushier structure. Topping is especially effective for plants with strong apical dominance (tendency to grow a central main cola).
Drawbacks: Topping is a high-stress technique and can slow growth temporarily. It’s not recommended late in the vegetative stage or during flowering, as it can reduce final yields if done too close to harvest.
FIMing (F**uck I Missed)
FIMing is similar to topping but involves removing a smaller portion of the top growth, often resulting in four main colas instead of two. The term “FIM” stands for “F**uck I Missed,” referring to a grower’s accidental cut that led to multiple colas—a happy accident that has since become a popular technique.
How to FIM a Cannabis Plant
- When to Start: Like topping, FIMing is best done early in the vegetative stage after the plant has developed 4-6 nodes.
- Making the Cut: Instead of cutting cleanly above a node, FIMing involves cutting about 75% of the new growth at the top of the plant. This often creates a jagged cut rather than a straight one.
- Post-FIM Growth: After FIMing, you may see four or more new shoots develop from the cut site.
Benefits and Drawbacks of FIMing
Benefits: FIMing creates multiple colas without as severe an impact on upward growth, allowing plants to keep a somewhat taller profile than topping.
Drawbacks: The cut is less precise than topping, and results can be inconsistent. Some plants may produce two, three, or four new colas, and the cut can sometimes cause slight asymmetry.
Low-Stress Training (LST)
Low-stress training (LST) involves bending and tying down branches to create a more horizontal growth pattern. Unlike topping and FIMing, LST does not involve cutting the plant, making it a gentle technique that minimizes stress and allows for continual growth without interruption.
“How tight should low-stress training ties be?”
Question sent by: LowArc, via contact form.
Tight enough to hold the branch in a gradual position, never tight enough to bite into expanding tissue. Use soft ties, wide contact points, and stable anchors. Recheck frequently because stems thicken quickly. Bend in stages and support the base so force is not transferred into the root ball.
How to Perform Low-Stress Training
Begin when the plant is established, actively growing, and still flexible. Calendar age alone is a poor trigger: a compact plant with a firm root ball may be ready before a stretched or recently transplanted plant of the same age.
- Choose the purpose: Decide whether you are reducing height, opening the center, separating crowded shoots, or building a flatter canopy. Do not bend branches simply because the technique is popular.
- Stabilize the base: Support the stem near the root ball or use a counter-tie so the bend does not lever the whole plant sideways in the soil.
- Bend in stages: Guide a flexible main stem or dominant branch gradually. Stop when resistance rises sharply; the final shape does not need to be perfectly flat.
- Use soft, wide ties: Fasten the branch to a stable anchor with room for expansion. Avoid bare wire, narrow cord, and adhesive tape touching living tissue.
- Recheck and adjust: Inspect ties after wind, rapid growth, and irrigation. Move the contact point before it begins to constrict the stem, and release training that no longer serves the canopy.
Pro Tip: Make one modest bend, photograph the canopy, and inspect the plant the next day. A branch that keeps its leaf posture and resumes tip growth is giving you better information than a calendar-based instruction.
Benefits and Drawbacks of LST
Benefits: LST can reduce height, separate crowded branches, improve access for inspection, and distribute direct light across more of the canopy without removing the shoot tip. In a supported outdoor plant, it may also help prevent one tall leader from carrying the entire wind load.
Drawbacks: The method needs regular adjustment. Ties can girdle expanding stems, anchors can loosen, and a very flat canopy can hold rain or become difficult to support if spacing is poor. Better light distribution can support productive growth, but LST does not guarantee a larger harvest.
Train for access, light, and support
Leave inspection lanes, keep ties visible, and build a shape that can still be supported when rain and flower weight arrive.
Force every plant into the same shape
Architecture, stem flexibility, vigor, container stability, wind exposure, and remaining recovery time matter more than a strain stereotype.
Supercropping
Supercropping is a high-stress technique in which a mature but still workable stem is softened and redirected without intentionally severing the outer tissue. The plant must repair internal injury while continuing to support the branch, so the method carries more recovery and breakage risk than ordinary tying.
It is an optional canopy-management tool, not a requirement for strong outdoor plants. LST, selective pruning, wider spacing, or earlier structural support may solve the same height or crowding problem with less risk.
Recovery window
The period of healthy vegetative growth and suitable weather available after training. A plant needs time to restore posture, vascular function, and new growth before flowering or another major stress arrives.
How to Supercrop a Cannabis Plant
- Select conservatively: Choose a vigorous, accessible branch whose position creates a real canopy problem. Avoid woody stems, weak plants, active pest or disease pressure, and branches already carrying flower weight.
- Support both sides: Hold the branch above and below the intended bend so the force is not transferred to the main union or root ball.
- Soften gradually: With clean hands, apply gentle, controlled pressure and roll only until the inner tissue becomes pliable. Do not crush a long section or chase a precise angle.
- Redirect without tearing: Bend only as far as the stem allows. If the surface cracks, the branch collapses, or resistance feels abrupt, stop and support the injury rather than bending farther.
- Secure and monitor: Use a soft tie or stake to prevent wind from reopening the bend. Inspect leaf posture, tissue color, and the wound daily until stable growth resumes.
Do not turn a split into repeated handling
If the outer skin opens or the branch loses support, stabilize it immediately with clean materials. Repeatedly opening the injury to check it can enlarge the wound and introduce contamination. Remove tissue that becomes necrotic, foul-smelling, or impossible to support safely.
What to Expect After Supercropping
A successful branch should maintain functional leaves and gradually reorient its tip toward the light. The bend may thicken as repair tissue develops, but a large knuckle is not the goal and it does not prove that yield improved. Persistent wilt, darkening tissue, a widening split, or loss of the branch above the bend signals that recovery is failing.
Benefits and Drawbacks of Supercropping
Possible benefits: A carefully redirected branch can lower an over-tall section, open light and inspection access, and make a canopy easier to support. The useful result is better structure for that particular plant, not a guaranteed increase in flower density, trichomes, potency, or final yield.
Drawbacks: The branch can split, wilt, become infected, or lose productive time while it repairs. Wind and rain can reopen a partially healed bend, and late treatment can interfere with the transition to flowering.
Important: Judge recovery by stable tissue and resumed growth above the bend. A dramatic-looking repair swelling is not a performance target.
Combining Techniques for Maximum Yield
Techniques can be combined, but the useful question is whether each step solves a remaining structural problem. Stacking topping, FIMing, LST, and supercropping on a fixed schedule can create more recovery work than canopy benefit.
- Begin with architecture: Topping or selective pruning can divide dominance when the plant is vigorous and enough vegetative time remains.
- Use LST for placement: Soft ties can spread the resulting branches, preserve access, and keep the canopy inside its support area.
- Reserve high-stress work: Consider supercropping only for a healthy branch that still presents a height or placement problem and has a genuine recovery window.
- Pause between interventions: Wait for active growth and normal leaf posture before deciding whether another step is needed.
Genetics influence branching, internode length, flexibility, flowering stretch, and finish time, but labels such as indica and sativa do not predict a safe training response on their own. Read the individual plant and the remaining season.
Remember: Training redistributes growth; it does not create free energy. Sun exposure, healthy roots, leaf area, recovery time, irrigation, nutrition, and weather still set the limits.
When to Avoid Pruning and Training
Delay or avoid pruning and high-stress training whenever the plant cannot afford a predictable recovery period:
- Flowering is close or underway: Avoid topping, FIMing, and planned stem injury once the plant is committing to flowers. Minor positioning or emergency support is different from beginning a new training program.
- The plant is weak or actively stressed: Root saturation, drought, nutrient injury, pests, disease, transplant shock, and heat or cold stress should be stabilized first.
- Severe weather is approaching: Do not create fresh cuts or bends just before wind, heavy rain, hail, or a sharp temperature change.
- Stems are woody or the structure is already loaded: Rigid branches and flower-bearing limbs are more likely to split than redirect.
- The purpose is unclear: If the canopy already has good light, airflow, access, and support, leaving it alone may be the better decision.
Tips for Success with Pruning and Training
- Use clean tools: Clean and disinfect cutting tools between plants and after suspect tissue. LST normally needs no cut, but every accidental wound still deserves clean handling.
- Read the plant, not the label: Base the method on actual vigor, branch flexibility, node spacing, health, weather, and remaining vegetative time rather than broad indica or sativa assumptions.
- Keep a simple record: Photograph the canopy, note the date and technique, and compare recovery before making another change.
Know when the training window is closing
The training window changes as stems stiffen and the transition to flowering begins. A bend that felt easy a week earlier may now split, while the canopy may already fill the available light and support area.
When the next manipulation adds more recovery time and breakage risk than structural benefit, stop. From that point forward, support, spacing, and inspection matter more than forcing another shape.
The Flowering Stage
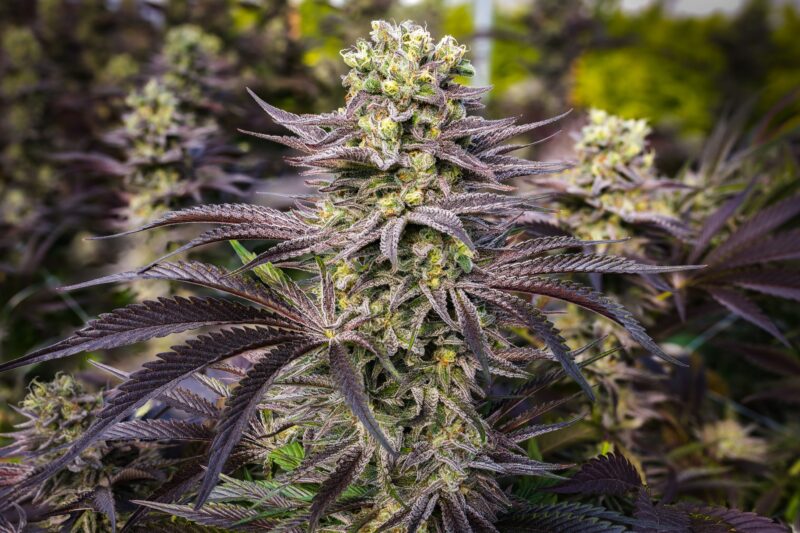
Understanding the signs of this stage is crucial for producing healthy, resinous flowers with optimal potency and yield. Outdoor flowering is influenced by natural cues, primarily the change in sunlight hours, which signals to the plant that it’s time to reproduce. This stage varies based on strain, climate, and geographical location, so tailoring care to your unique environment will enhance your chances of a bountiful harvest.
Critical photoperiod
The day length or night length at which a particular genotype changes its flowering response. It varies among cannabis cultivars, which is why plants in the same garden may begin flowering on different dates.
“My neighbor’s plant started flowering before mine. Is mine getting light at night?”
Question sent by: Chloe Bennett, via Facebook page.
Possible, but genetics are often the simpler explanation. Cannabis cultivars have different critical photoperiods and finish timing. Check for strong repeated night light, but also compare seed source, plant age, and growth pattern. Do not cover the plant or make a dramatic change until you know whether the timing is actually abnormal for that cultivar.
Recognizing the Start of the Flowering Stage
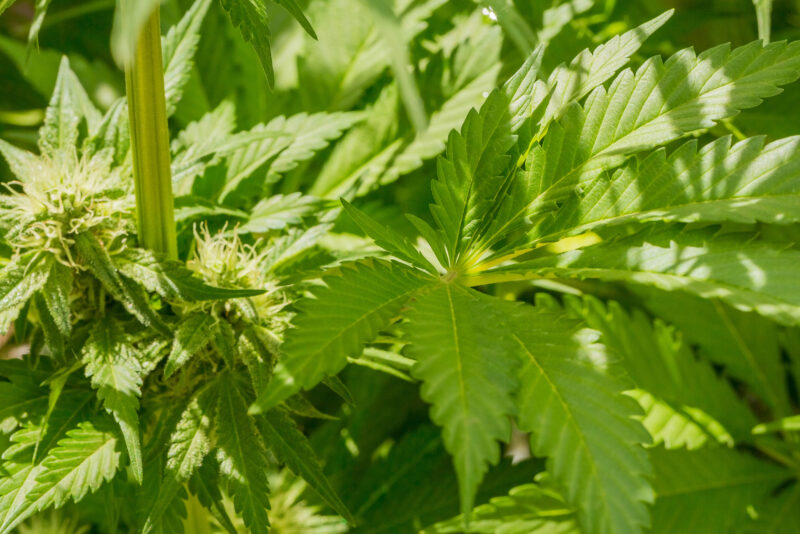
The flowering phase typically begins when the plant experiences a reduction in daylight hours as summer transitions to fall. Outdoor growers should pay close attention to the seasonal sunlight patterns, as well as any visible signs on the plant itself:
- Pre-Flowers and Pistils: The first signs of flowering appear at the plant’s nodes, where pre-flowers form. Female plants display white, hair-like pistils that emerge from small, pear-shaped calyxes, while male plants develop small pollen sacs. For those aiming to produce sinsemilla (seedless) buds, it’s essential to identify and remove any male plants from the grow site at this stage.
- Growth Pattern Change: The plant’s growth pattern changes significantly. It stretches upwards and outwards as it prepares to support budding sites. This ‘flowering stretch’ can increase the plant’s height by up to double its vegetative size, depending on the strain and conditions.
Phases of Flower Development
Cannabis, as a photoperiod-sensitive plant, relies on changes in daylight duration to enter the flowering stage. In nature, this shift usually aligns with the end of summer, when days start to shorten and nights grow longer. For growers in the Northern Hemisphere, this typically means plants start to flower around mid-to-late August, while in the Southern Hemisphere, flowering usually begins in late February to early March.
Cannabis goes through two primary stages: vegetative growth and flowering. During the vegetative stage when days are longer, the plant focuses on developing foliage and structure. However, as the days shorten, cannabis senses these changes through its internal photoreceptors, which help trigger the flowering stage. Let’s break down the timeline and processes involved in outdoor flowering:
Early Flowering (Weeks 1–3)
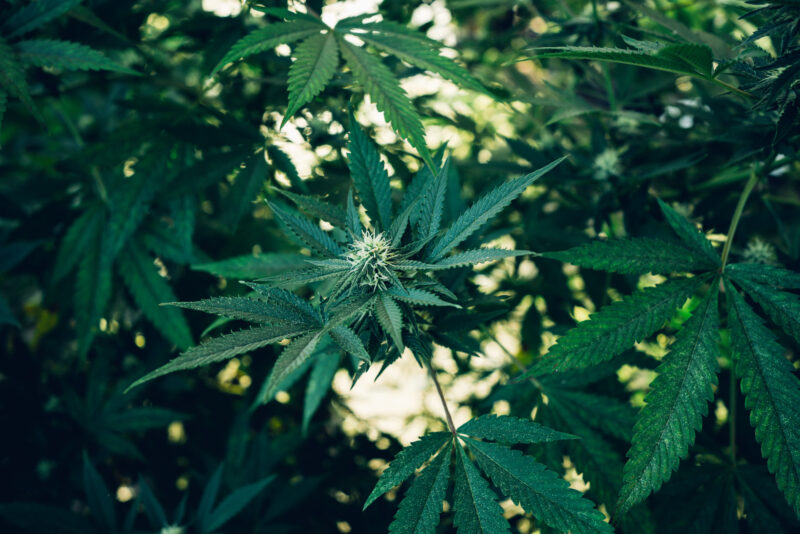
During early flowering, the plant focuses on developing bud sites while still undergoing some stretching. Pistils become more visible, and the plant starts forming tiny, dense clusters at each bud site.
- Stretching: Cannabis plants can experience rapid growth in the first few weeks, seeking additional space and light as they prepare for flower production.
- Formation of Bud Sites: This phase is marked by the development of small white pistils that will eventually become buds. You’ll notice these growing at the tops of branches and main colas, with additional pistils forming along each branch.
Mid-Flowering (Weeks 4–6)
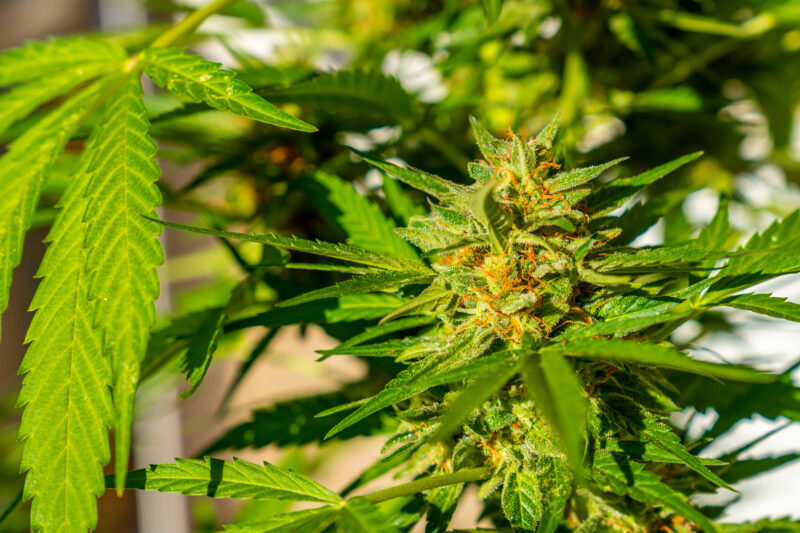
The mid-flowering stage is when the plant begins shifting its energy entirely toward bud production, and the stretching slows. Buds start gaining weight and density as resin glands, known as trichomes, develop to protect the flowers and store cannabinoids and terpenes.
- Pistil and Trichome Production: This is when the pistils become more pronounced, forming dense clusters. Trichomes appear as small, glistening crystals that cover the buds and surrounding leaves.
- Aroma Development: As resin production increases, the plant’s scent becomes more distinct. This aroma is a combination of terpenes, which contribute to each strain’s unique scent and potential effects.
- Color Changes: Pistils remain white at this stage, but you may notice some coloration on the leaves, especially with strains that express vibrant pigments like purples and reds.
Late Flowering (Weeks 7–9 and beyond)
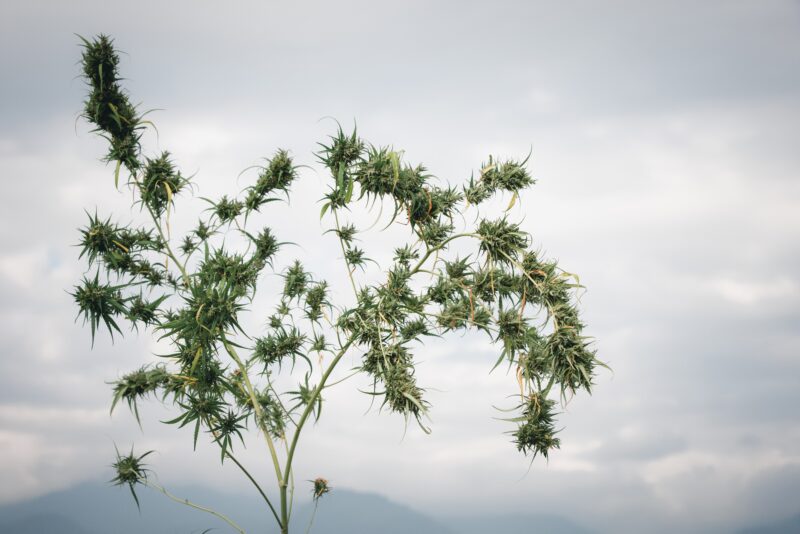
In the final phase, the plant focuses on maturing and ripening the buds, as well as maximizing resin production. The pistils start changing color, typically turning from white to a deeper orange or brown, signaling the plant’s nearing readiness for harvest.
“Something is eating into the flowers and leaving black crumbs. What should I look for?”
Question sent by: GeorgiaSun, via Facebook page.
The crumbs may be caterpillar frass. Open the damaged area carefully and look for a larva, silk, entry holes, and dead tissue around the feeding site. Remove both the insect and contaminated flower material. Continue checking adjacent flowers because one moth can leave more than one egg, and damaged tissue can become a starting point for rot.
- Pistil Color Change: By late flowering, you’ll notice that the pistils darken, often curling inwards. This shift indicates that the buds are maturing.
- Increased Resin Production: Trichomes become more visible and develop a milky or cloudy appearance. These trichomes contain the cannabinoids including THC and CBD that contribute to the plant’s effects.
- End of Stretching: Growth focuses purely on the buds, as the plant stops vertical stretching and dedicates its energy to fattening and ripening the flowers.
“I found one brown spot inside a flower after rain. Can I cut around it?”
Question sent by: RainLedger, via contact form.
Treat internal brown, soft, or gray tissue as a potential flower rot. Bag and remove the affected flower with a clean margin, sanitize tools, and inspect nearby flowers from the inside. Do not consume visibly moldy material. One spot does not prove the whole crop is lost, but it does mean the weather, flower density, and inspection frequency now require a faster response.
Factors Influencing the Flowering Process Outdoors
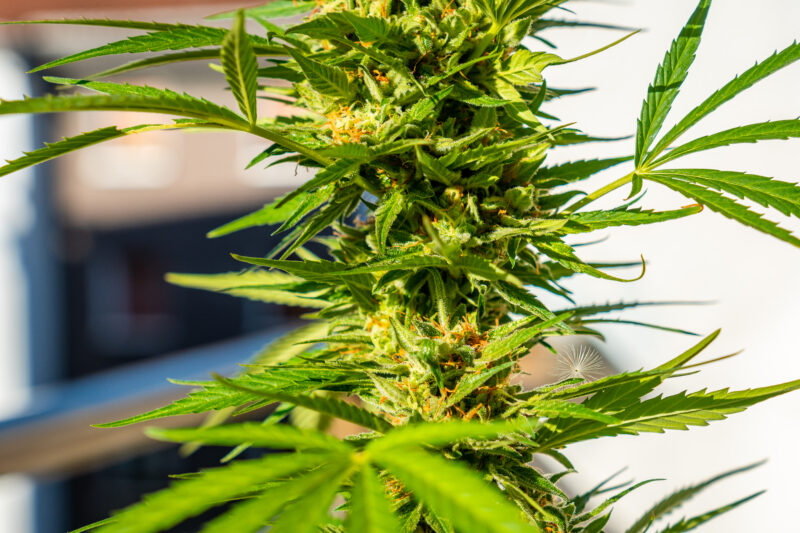
Several environmental factors can impact the flowering process of cannabis outdoors. While photoperiod remains the primary influence, other elements play a supporting role:
- Latitude and Geographic Location
- The closer the growing location is to the equator, the less variation there is in photoperiod across seasons. This can influence the timing and intensity of flowering.
- For growers in northern latitudes, the longer daylight hours in summer lead to a pronounced flowering trigger as days shorten. However, in equatorial regions, where day length remains nearly the same, cannabis may require slight artificial intervention or be grown in shorter daylight cycles to ensure flowering.
- Climate and Weather Patterns
- Temperature shifts can support or hinder flowering, as cannabis thrives in moderate warmth during this stage.
- Cool nights, particularly in early autumn, can help the plant focus on bud development, while sudden frost or extreme temperatures can disrupt flowering altogether.
- Genetics and Photoperiod-Sensitive Strains
- Photoperiod-sensitive strains are naturally inclined to flower based on changes in light duration. However, some strains have been developed to resist early flowering in regions with unpredictable day lengths. Choosing strains suitable for the local climate and daylight cycle is essential for outdoor growers to ensure a smooth flowering period.
“The plant began flowering, then made strange single leaves. Is it revegetating?”
Question sent by: NightGate, via email.
Single-bladed or unusual leaves can be consistent with a return toward vegetative growth, but stress and genetics can also alter leaf form. Review night lighting, planting date, photoperiod history, and whether the plant was moved from an indoor schedule. Keep the dark period consistent and avoid repeated changes while you observe new nodes.
Feeding Cannabis During the Flowering Stage Outdoors
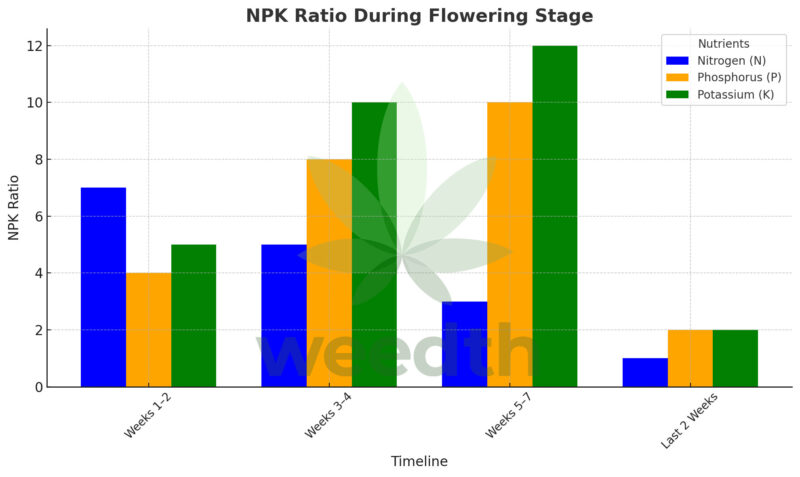
Flowering changes the plant’s allocation and demand, but it does not create one universal NPK ratio. Nitrogen, phosphorus, potassium, calcium, magnesium, sulfur, and micronutrients remain part of a functioning plant. The goal is adequate, balanced supply based on the soil or substrate, source water, product label, weather, cultivar response, and the evidence visible in new growth—not a calendar slogan.
“Should I switch to zero nitrogen as soon as I see pistils?”
Question sent by: Caleb Stone, via Facebook page.
No. Flowering plants continue to use nitrogen. The goal is balanced supply, not an abrupt elimination. Review what the soil or medium and irrigation water already contain, follow the product label, reduce a genuinely excessive program gradually, and watch new growth and root-zone measurements before changing the dose again.
The Nutrient Transition
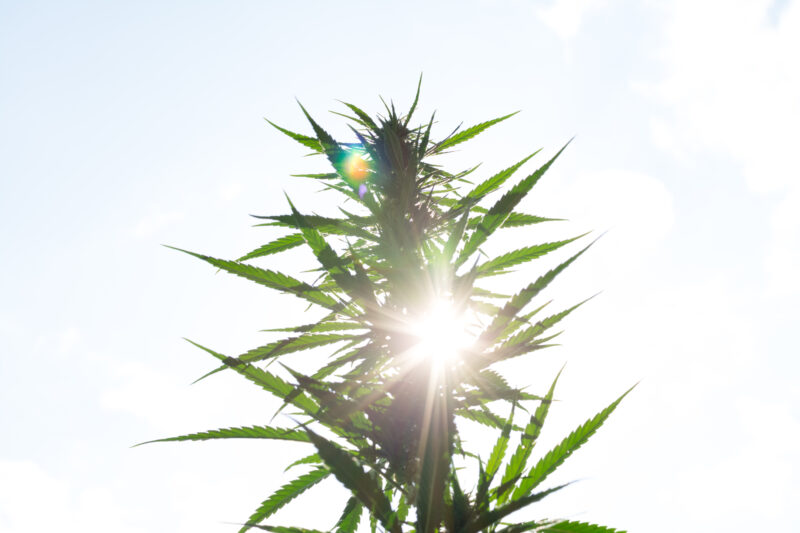
Nitrogen supports proteins, chlorophyll, enzymes, and living green tissue throughout flowering. Too much can create excessive vegetative growth and an imbalanced program; too little can remove productive leaf area before the plant has finished.
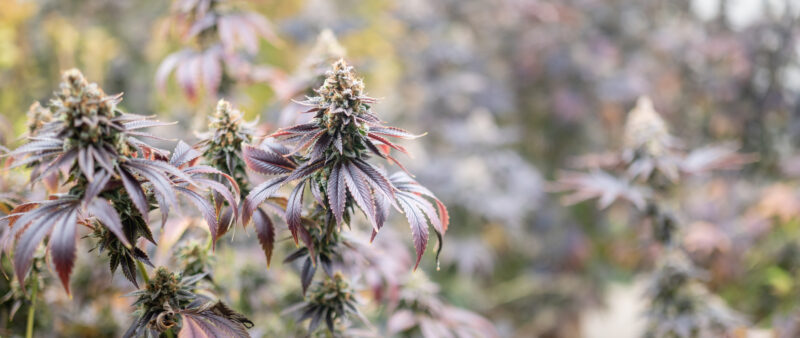
Phosphorus participates in energy transfer, membranes, and genetic material. Adequacy matters, but excess phosphorus does not automatically build larger or more potent flowers. Controlled cannabis research has found elevated root-zone phosphorus increasing phosphorus loss in leachate without improving yield or quality.
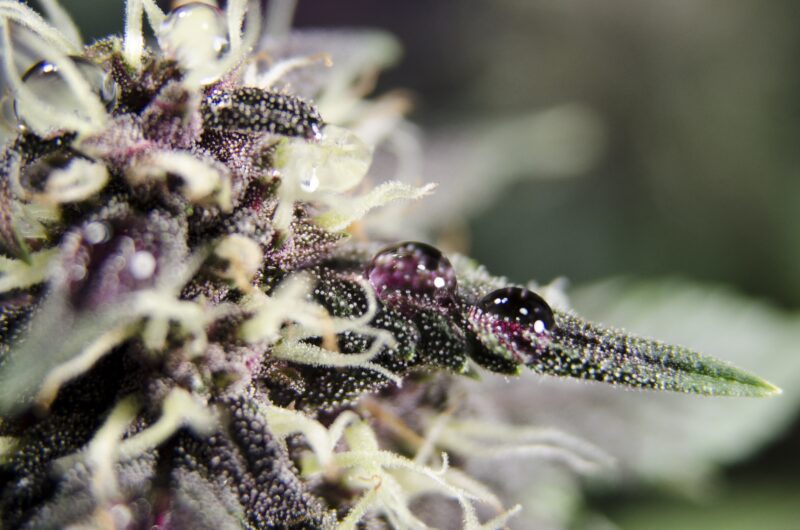
Potassium contributes to osmoregulation, enzyme activity, and transport. It supports water relations and plant function, but excessive potassium can interfere with the uptake of other ions. “More bloom booster” is not a substitute for a balanced root zone.
Timing the Shift
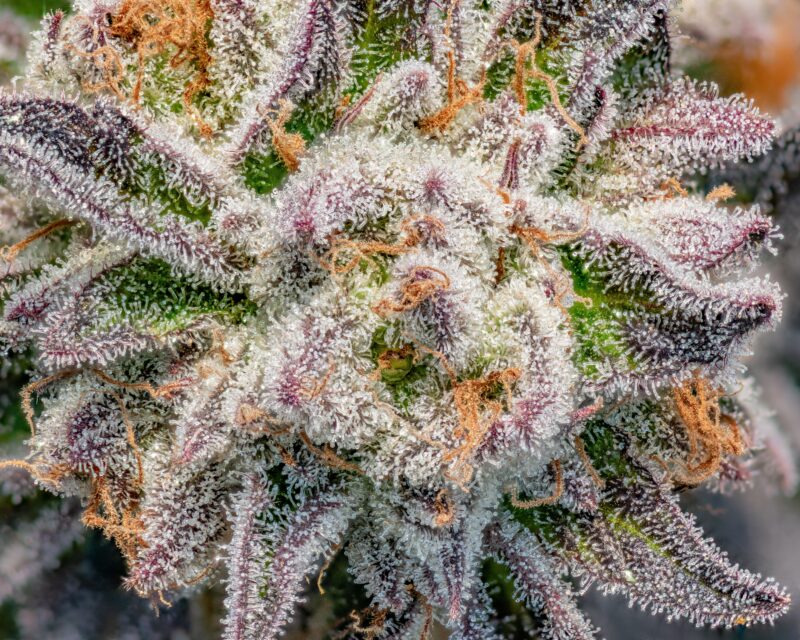
Start with the existing soil or substrate test, the water analysis, and the label rate for the actual product. Reassess when flowering begins, weather changes irrigation demand, containers dry at a different pace, or tissue symptoms appear. In a biologically active soil, nutrients may already be mineralizing; in an inert medium, the solution carries more of the burden. These systems should not be fed from the same memorized chart.
Pro Tip: Change one variable, record the dose and irrigation volume, and give the root zone enough time to respond. Several simultaneous corrections turn the plant into a guessing game.
Managing Nitrogen Late in Flowering
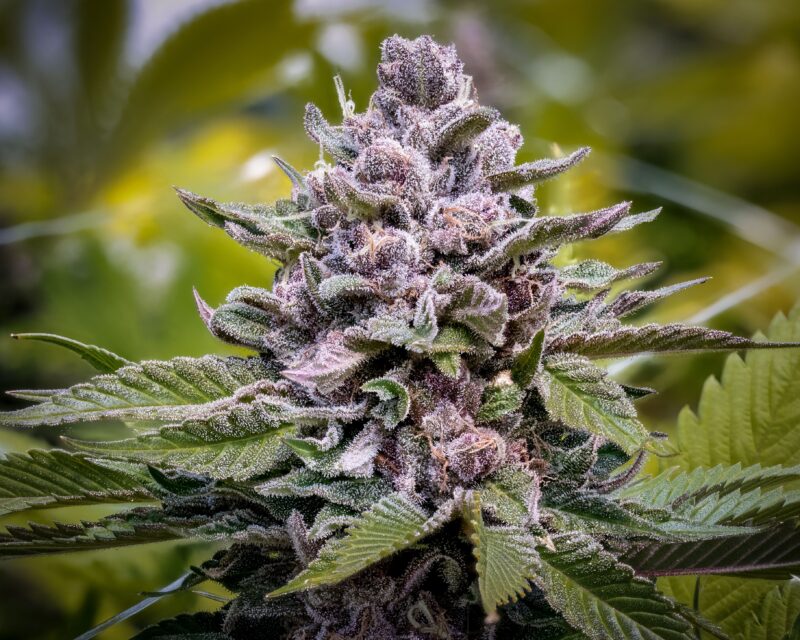
Do not force a fade by starving a healthy plant. Normal senescence can appear as harvest approaches, but yellowing can also come from saturated roots, restricted uptake, an incorrect pH range, disease, or a shortage. Diagnose the root zone before removing nitrogen. A plant still building and supporting flowers needs functioning leaves.
Flushing: What It Can and Cannot Do
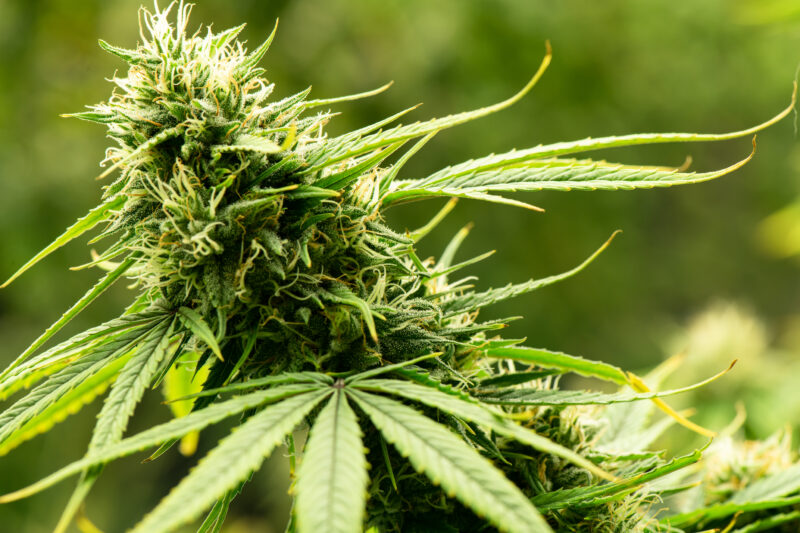
Leaching can be a corrective tool when a measured root zone contains excessive soluble salts and the medium drains safely. It is different from a routine preharvest water-only ritual. Research has not shown a reliable improvement in cannabinoid or terpenoid production from preharvest flushing, and water alone cannot remove compounds already built into the flower.
If EC is excessive, identify the cause, protect the receiving environment, use appropriate-quality water, and measure the root zone again. Do not send concentrated fertilizer runoff into soil drains, streams, ponds, or neighboring property.
Build a Flowering Feed Plan Without a Universal Ratio
| Step | What to record | Why it matters |
|---|---|---|
| 1. Establish the baseline | Soil/substrate test, water pH, EC/TDS, alkalinity, product analysis | Shows what is already entering or stored in the root zone |
| 2. Follow the label | Exact product, legal use, dose, mixing order, irrigation volume | Prevents invented NPK recipes and mixing errors |
| 3. Read the plant | New growth, leaf color and position, flower progress, water use | Separates continuing response from an old damaged leaf |
| 4. Read the root zone | Moisture, aeration, drainage, pH/EC trend where applicable | Many “deficiencies” are uptake problems |
| 5. Adjust once | One change, date, reason, follow-up result | Makes the outcome interpretable |
Master Advice: Feed the measured system in front of you. Flowering cannabis still needs balanced nutrition; adequacy supports the crop, while excess raises cost, antagonism, and environmental loss.
Supporting Heavy Buds in Outdoor Cannabis Cultivation
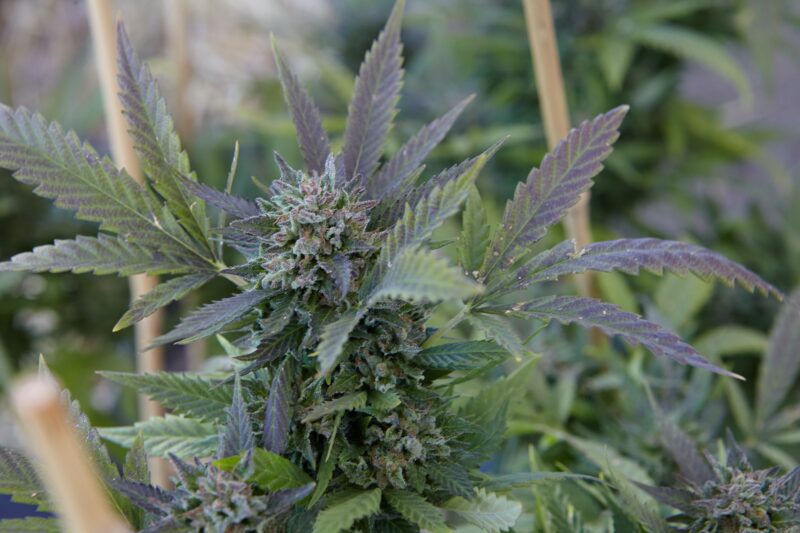
Heavy buds can significantly strain the branches, especially when grown outdoors where plants are exposed to natural elements like wind and rain. Without proper support, branches can snap under the weight, potentially damaging or losing valuable buds. To prevent this, outdoor growers often employ techniques like staking and trellising, which provide essential support and stability throughout the flowering phase.
Why Support Is Essential During Flowering
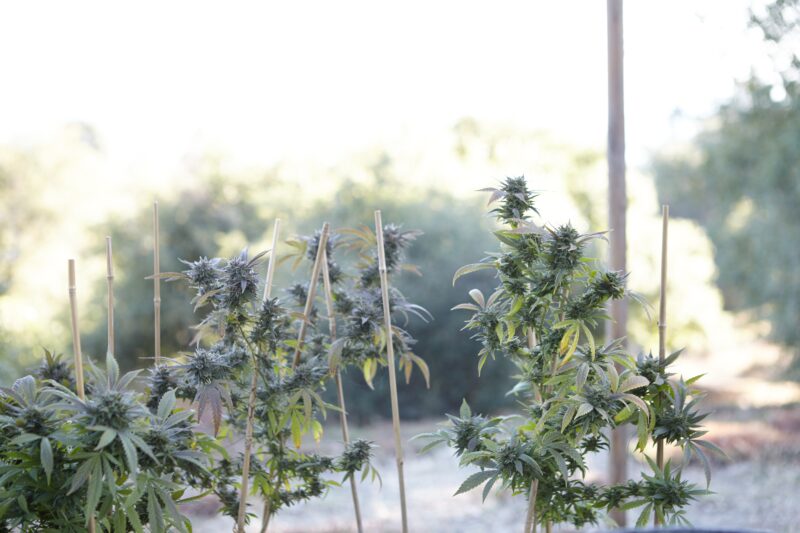
As cannabis plants transition from vegetative growth to flowering, they undergo a period of accelerated bud production, leading to increased weight on each branch. Outdoor plants, which tend to grow taller and larger due to natural light cycles and open space, are particularly susceptible to heavy buds pulling down branches. This can lead to several issues if not managed properly:
- Branch Breakage: Heavy buds can cause branches to bend or break, especially if they’re exposed to strong winds or heavy rain. Broken branches may result in lost buds and leave the plant vulnerable to infections or pests.
- Bud Rot Prevention: Buds resting on the ground or densely packed together can trap moisture, creating a breeding ground for mold and bud rot. By supporting the branches, growers can improve airflow around the buds, reducing the risk of mold.
- Maximizing Light Exposure: Properly supported branches maintain a more open structure, allowing sunlight to penetrate deeper into the plant. This benefits overall bud development and ensures that all parts of the plant receive ample light.
Techniques for Supporting Heavy Buds
Supporting heavy buds is all about reinforcing the plant’s structure to withstand the increased weight and natural elements. The two most common methods for outdoor growers are staking and trellising.
Staking: Individual Branch Support
Staking involves inserting stakes into the ground and tying branches to these stakes to keep them upright and stable. This technique provides targeted support to specific branches, making it ideal for plants with a few large, heavy colas.
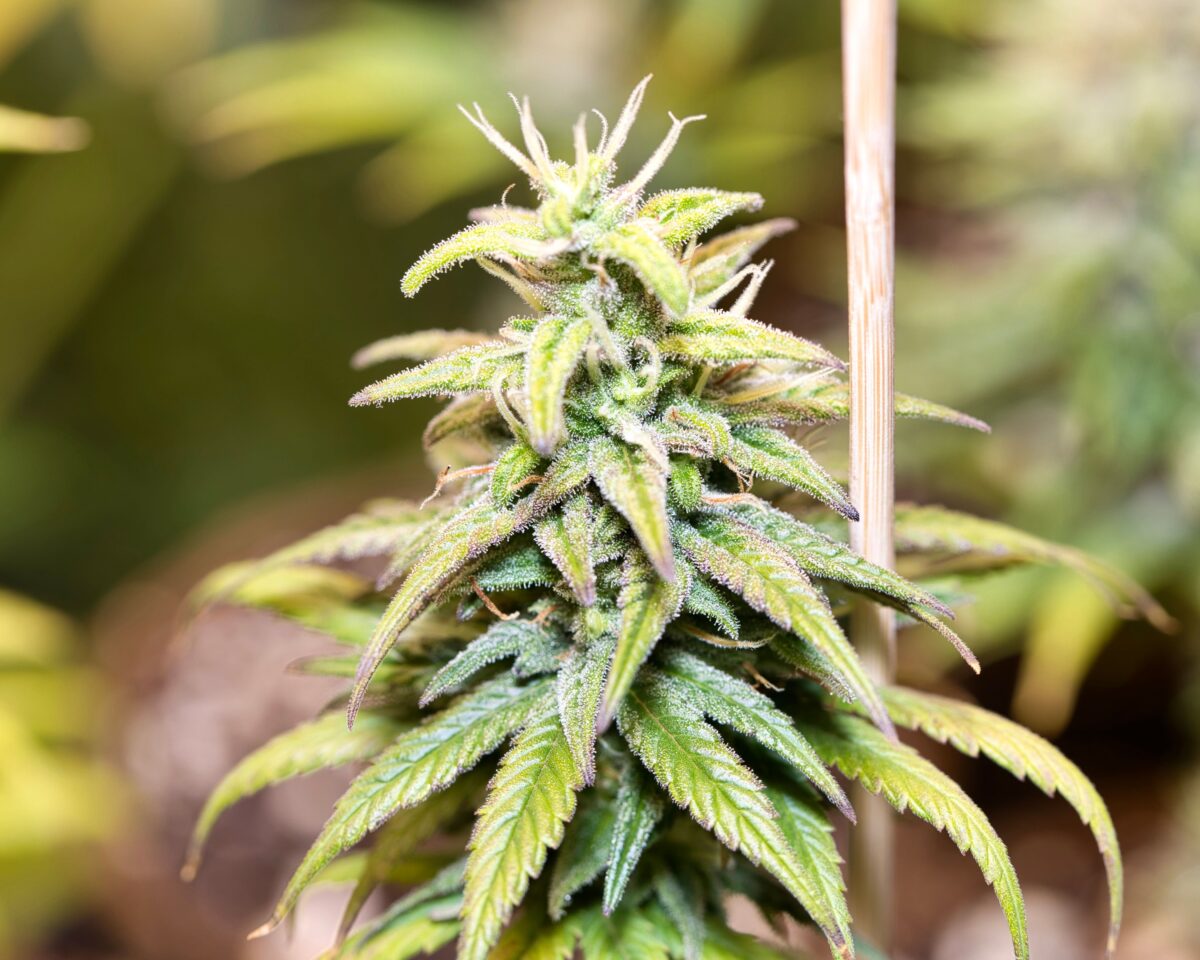
- Materials Needed: Bamboo stakes, metal stakes, or wooden poles are commonly used, as they are sturdy and easy to insert into the ground. Twine or garden tape is used to gently secure branches to the stakes.
- How to Stake:
- Insert a stake into the soil approximately 6–12 inches away from the branch to avoid disturbing the roots.
- Choose a stake height that matches or slightly exceeds the plant’s height to allow for growth.
- Using twine or soft garden tape, loosely tie the branch to the stake, allowing some flexibility. Tying too tightly can restrict growth or damage the branch.
- Place stakes around the plant at different angles for plants with multiple heavy branches, creating a supportive structure.
- Advantages: Staking is straightforward, inexpensive, and effective for plants that don’t require extensive support. It allows individual branches to be supported without obstructing airflow, reducing the chance of mold and bud rot.
- Considerations: While staking is effective for smaller plants or those with a few heavy colas, it may become cumbersome with larger plants that require support for many branches.
Trellising: Comprehensive Plant Support
Trellising is a more extensive support method that involves setting up a frame or net around the entire plant to hold multiple branches in place. This approach distributes the weight of the buds evenly across the entire plant, making it suitable for larger outdoor cannabis plants with many heavy buds.
- Materials Needed: Trellis netting, wire mesh, or other durable, flexible material that can create a supportive frame. Stakes or wooden poles are also required to create the structure.
- How to Trellis:
- Set up a framework around the plant using stakes or wooden poles, positioning them around the plant to create a rectangular or square structure.
- Attach the trellis netting or wire mesh to the framework, ensuring it’s taut and secure.
- As the plant grows, weave branches gently through the trellis netting or place the netting over the top of the plant, allowing the buds to rest on the structure.
- Adjust the netting and position of branches as the buds grow, ensuring that each branch has adequate support and room to expand.
- Advantages: Trellising provides comprehensive support for large plants with multiple heavy branches. By evenly distributing the weight of the buds, trellising prevents branches from snapping and helps maintain an open, airy plant structure.
- Considerations: Trellising requires more setup and is best suited for large outdoor plants that need substantial support. Additionally, once the trellis is in place, adjusting plant positioning can be challenging, so it’s essential to monitor growth regularly to avoid overcrowding.
Harvesting Cannabis
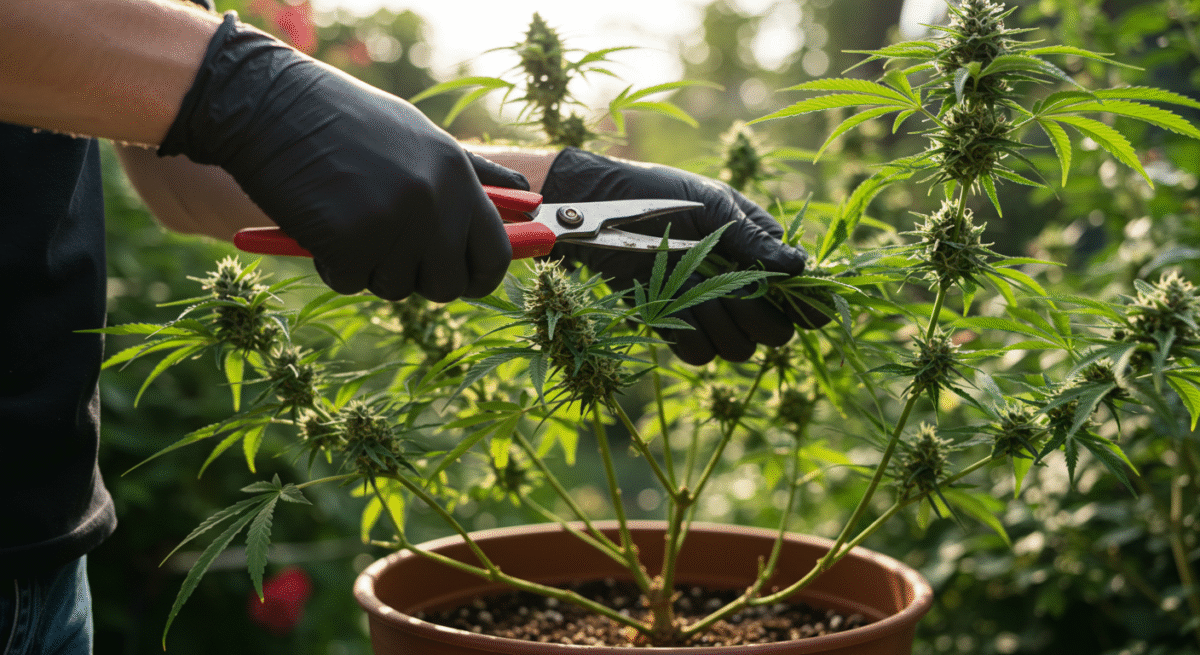
The culmination of months of care and attention, harvesting cannabis is a crucial stage in the cultivation process. Harvesting at the right moment, using the best methods, and handling your plants with care are all essential for maximizing the potency, flavor, and overall quality of your final product. We’ll cover how to recognize the optimal time to harvest by observing trichome color, pistil condition, and the development of cannabinoids and terpenes. We’ll also delve into various harvesting methods, including whole-plant and branch-by-branch techniques, and consider the best time of day for harvesting to preserve terpenes.
“Rain is forecast for the ideal harvest week. Should I cut early?”
Question sent by: Anika, via email.
Balance maturity against real crop risk. Consider rain duration, temperature, flower density, current disease, shelter, and drying readiness. A brief shower on a healthy open plant is different from a cold wet week on dense flowers already showing rot. Inspect closely and harvest in stages if that protects clean material without overwhelming the drying room.
When to Harvest
Knowing when to harvest cannabis is an art and a science. Harvesting too early can result in lower potency, while harvesting too late can affect flavor and cannabinoid profiles. For outdoor growers, the timing of harvest is influenced by both the plant’s lifecycle and the surrounding environment, such as temperature changes or the onset of frost.
Trichome Color and Pistil Condition
One of the most reliable ways to determine when a cannabis plant is ready to harvest is by examining the trichomes—the resin glands that produce cannabinoids and terpenes—and the pistils, the hair-like structures that grow from the buds.
Trichome Color: Under a magnifying glass or jeweler’s loupe, trichomes appear as tiny, stalked glands on the buds and leaves. During ripening, trichomes change color, which can indicate the best harvest time:
-
- Clear trichomes: The plant is still developing, and harvesting at this stage will yield lower potency.
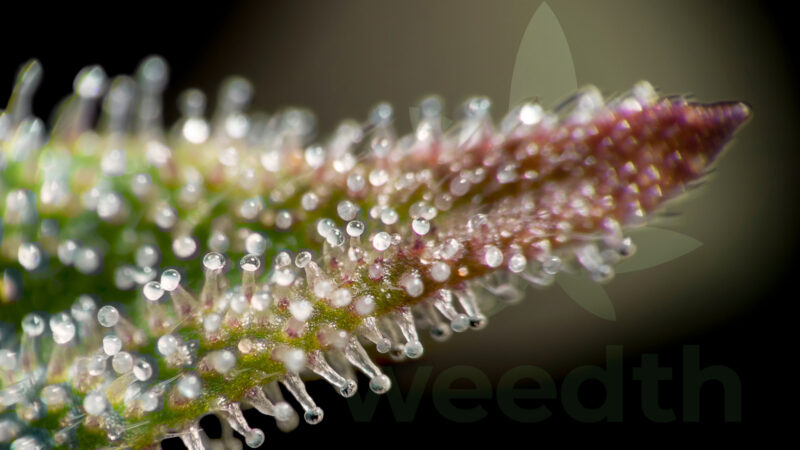
-
- Cloudy or milky trichomes: Peak potency; THC levels are at their highest, producing a strong, cerebral effect.
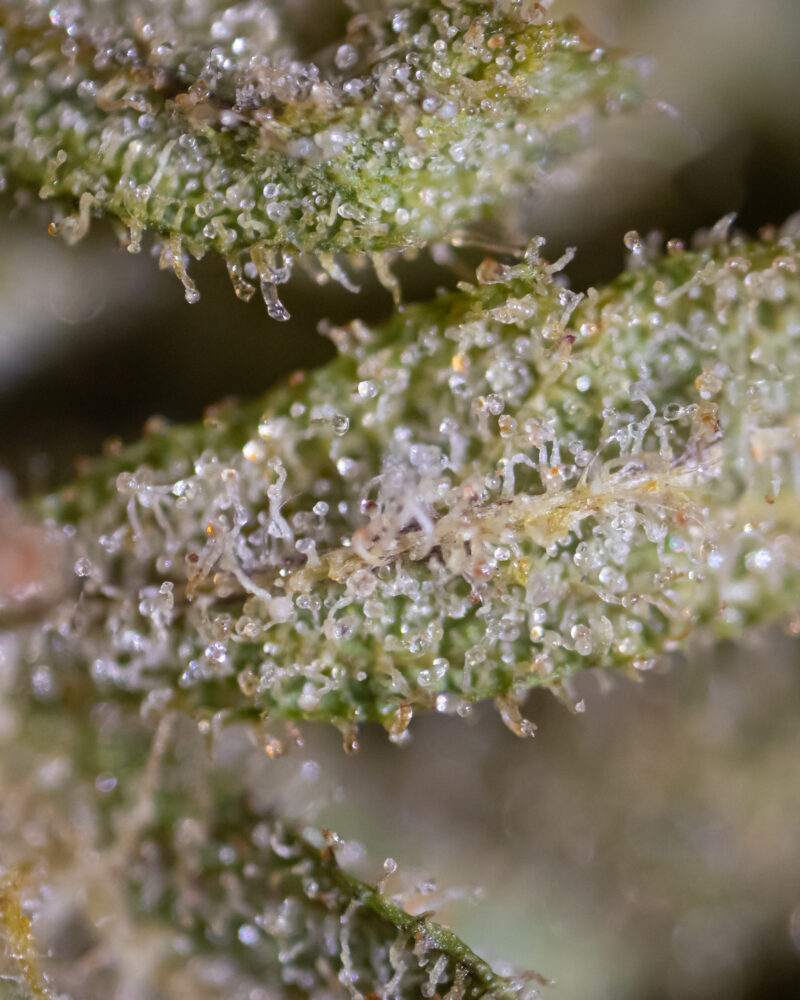
-
- Amber trichomes: Cannabinoids are starting to degrade, resulting in a more relaxed, sedative effect. A small percentage of amber trichomes (10-30%) is ideal for a balanced high, particularly in indica strains.
Pistil Condition: Pistils transition in color and texture as the plant matures:
-
- White pistils indicate that the plant is still developing and not yet ready for harvest.
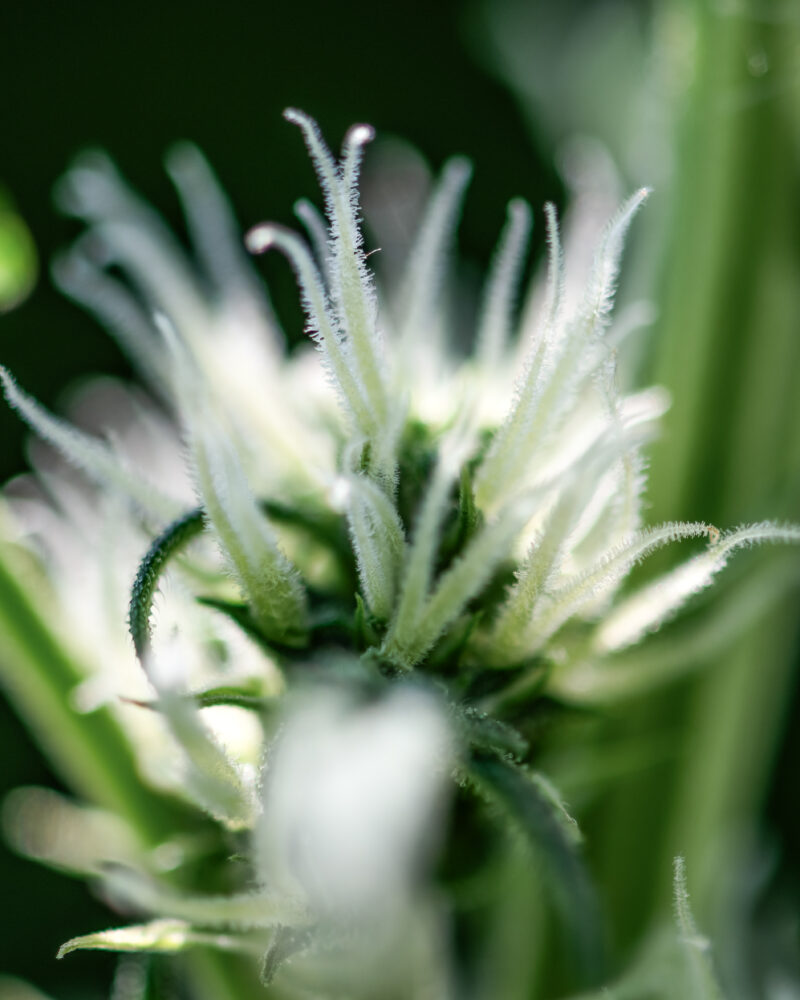
-
- Orange or brown pistils (around 70-90%) show that the plant is reaching full maturity and is nearly ready to be harvested.
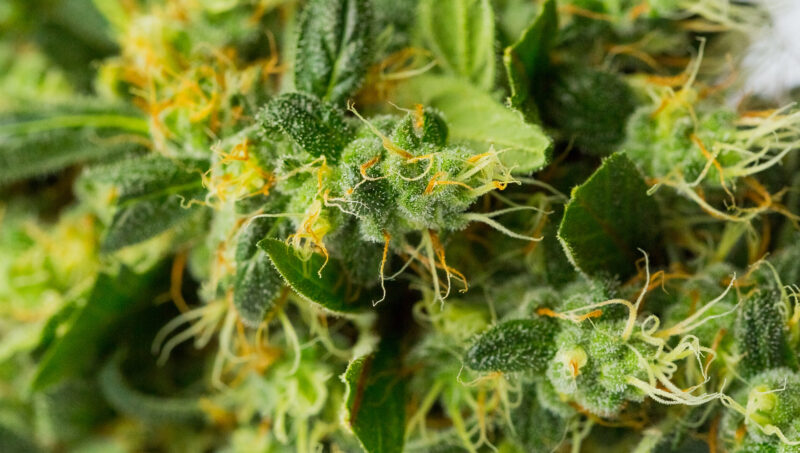
A combination of cloudy trichomes and orange-brown pistils is generally the sweet spot for harvesting cannabis. While trichome inspection is more accurate, observing pistil color can be a useful secondary indicator for those without magnification tools.
Pro Tip: Take magnified photos under the same light every few days. Consistent comparison is more useful than one dramatic macro image from a leaf tip.
One magnified flower cannot choose harvest day
Top flowers, shaded lower flowers, and sugar leaves can show different trichome appearances on the same day. Lighting, viewing angle, and phone processing can also change the color we think we see.
Let’s sample several actual flower surfaces with the same magnifier and light, then compare them with weather risk and overall flower development. One dramatic image is evidence from one spot, not a complete harvest decision.
Understanding Cannabinoid and Terpene Development During Harvest Time
Timing your harvest carefully allows for optimized cannabinoid and terpene profiles. Cannabinoids like THC and CBD reach their peak potency when trichomes are cloudy, while terpenes—responsible for aroma and flavor—are most abundant right before they start to degrade. Terpenes are volatile compounds and can degrade due to light, heat, and time. Harvesting at peak ripeness preserves these delicate compounds, enhancing the final product's medicinal and recreational qualities.
Harvesting Methods
There are two primary methods for harvesting cannabis: cutting whole plants or harvesting branch-by-branch. The choice depends on plant size, climate, and drying preferences, but each method has unique benefits.
Cutting Whole Plants
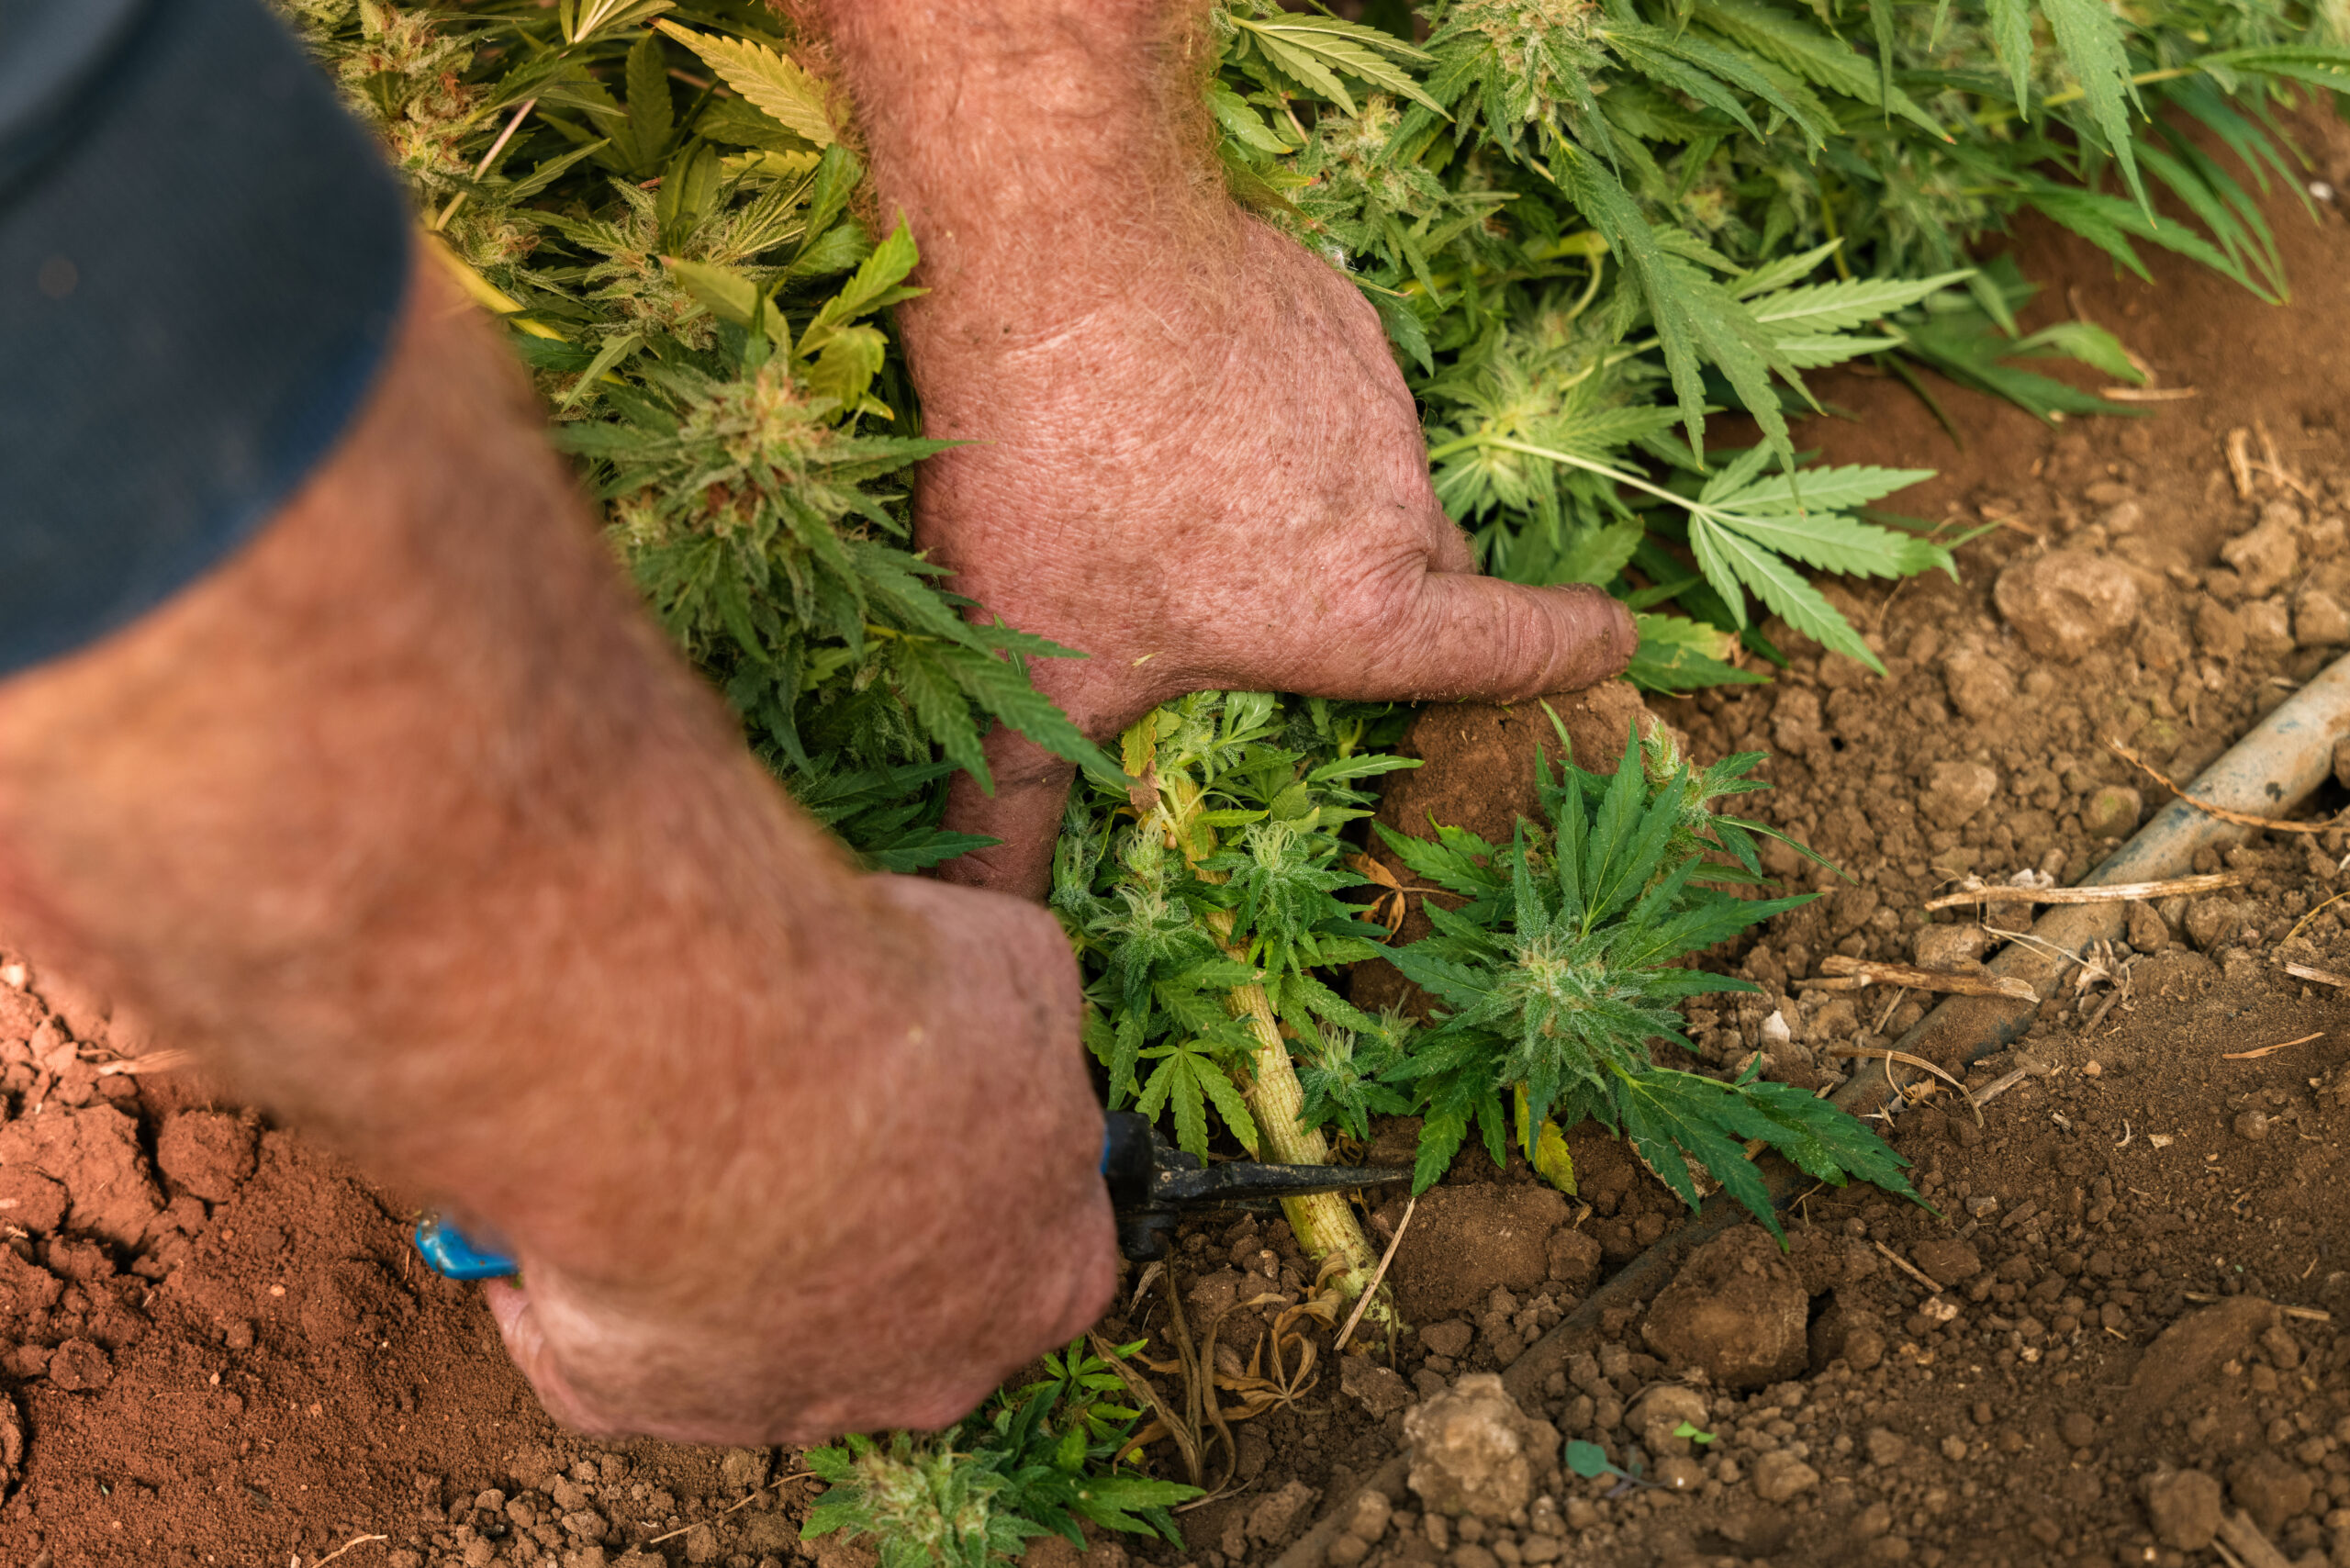
The whole-plant harvest method involves cutting the plant at the base and hanging it upside down to dry. This method is particularly beneficial in humid environments or for plants with dense foliage, as it slows down the drying process, enhancing flavor and preventing overdrying.
Advantages: By drying as a whole plant, moisture is distributed more evenly throughout the plant, which reduces the risk of overdrying the buds. Additionally, this method can preserve terpenes as the drying process is more gradual.
Best for: Cooler, humid climates where a slower drying process helps prevent mold while maintaining potency.
Branch-by-Branch Harvest
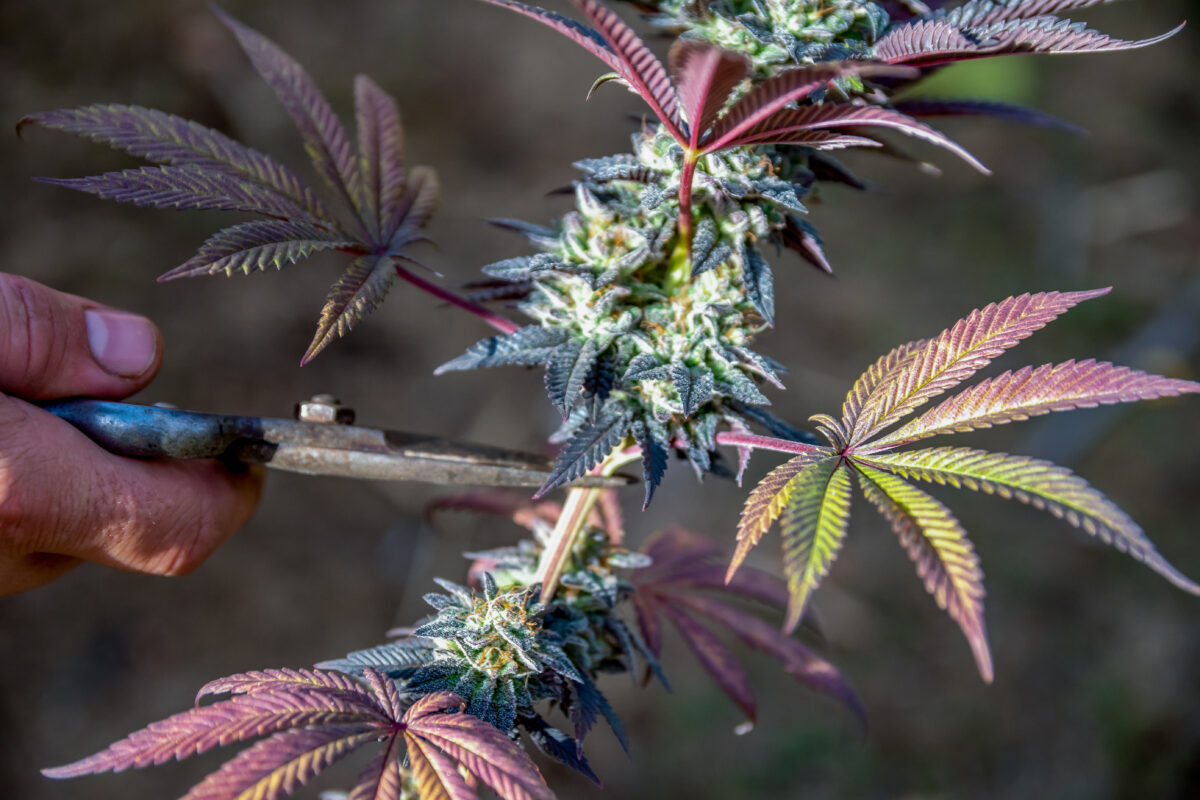
In branch-by-branch harvesting, individual branches or colas are cut and hung separately. This method allows for greater control over drying and can be helpful in warmer or dryer environments where plants are prone to drying too quickly.
- Advantages: Branch-by-branch harvesting allows for easier handling, more even drying, and simpler inspection for mold or pests on each individual branch. This method is also useful if only certain branches are fully ripe while others need more time.
- Best for: Warmer, dryer climates where slower drying can risk overdrying or terpene loss.
Best Time of Day to Harvest: Terpene Preservation
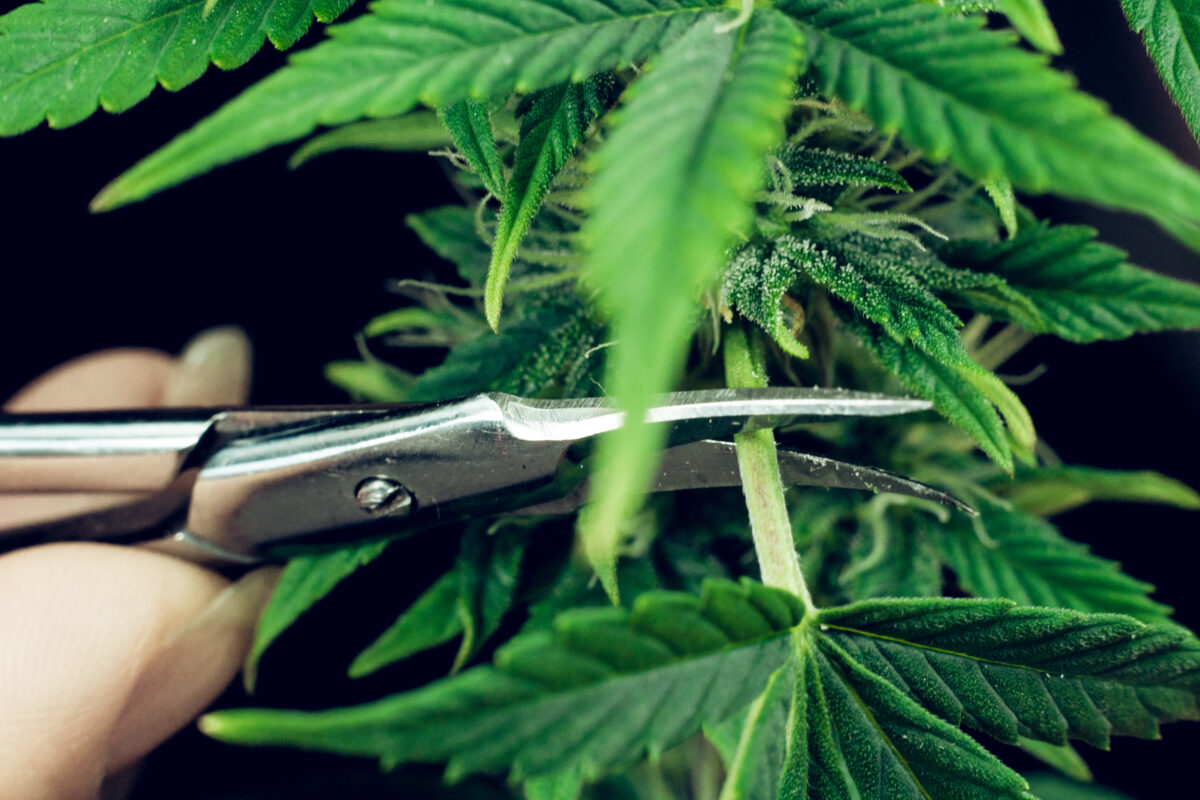
The ideal time of day to harvest cannabis is early morning, just after the dew has dried. At night, plants store sugars and moisture within their root systems, leaving lower concentrations in the foliage. Harvesting in the early morning helps preserve terpenes, as they are less likely to evaporate in cooler temperatures. Midday heat can accelerate terpene degradation, so harvesting early is particularly beneficial for outdoor growers who want to maximize aroma and flavor.
Drying and Curing Cannabis
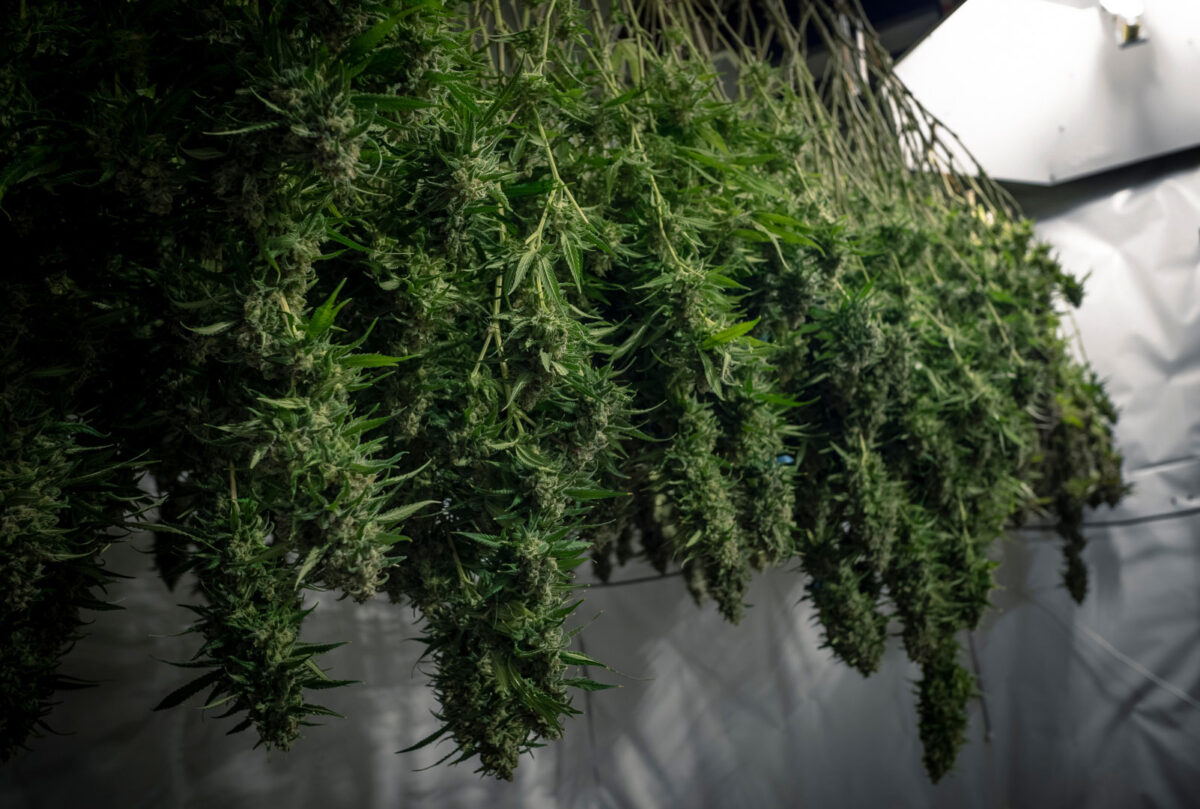
Drying is a safety and quality-control stage, not a waiting room before the jar. The crop must lose moisture evenly enough to limit microbial growth without being cooked, crowded, or blasted by direct airflow. Curing begins only after the material is dry and stable enough for closed storage. Neither step should be described as a guaranteed way to increase potency.
“Can I dry a whole outdoor plant in a small tent?”
Question sent by: GarageNorth, via contact form.
Only if the tent can hold the material without crowding and exchange humid air safely. A whole large plant releases a great deal of moisture. Measure conditions at flower height, leave space between branches, use indirect airflow, and be ready to divide the plant. Drying capacity should determine how much you cut at one time.
Drying Techniques
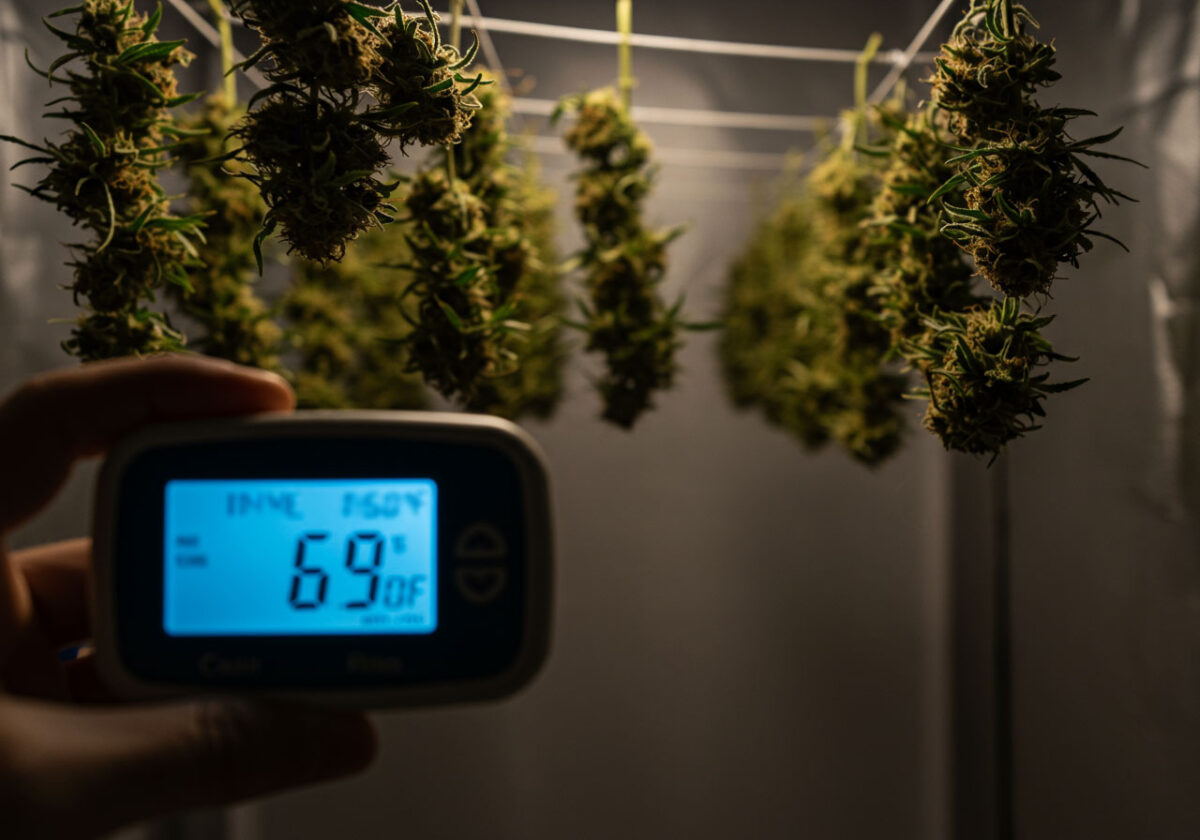
Hang branches or place separated material on clean racks in a dark, controlled space. Keep flowers away from walls and each other, move room air gently rather than pointing a fan at the crop, and measure temperature and relative humidity at several positions. Large outdoor colas and whole branches release moisture slowly and can hide wet interiors, so inspect representative thick and thin pieces.
Water Activity and Storage Readiness
Room relative humidity describes the air around the crop. Water activity describes how much water in the material is available to support chemical change and microbial growth. A flower can feel dry outside while moisture remains concentrated inside. Where regulated production or higher-risk batches justify it, a calibrated water-activity meter or a validated equilibrium-relative-humidity method is more informative than a stem snap alone.
Important: Curing cannot rescue flower that was sealed while unsafe or visibly moldy. If a closed test container shows rapid moisture rebound, remove the material and return it to a controlled drying space. If mold is visible or the batch has an abnormal musty odor, isolate it and follow local disposal and safety guidance.
What Curing Actually Does
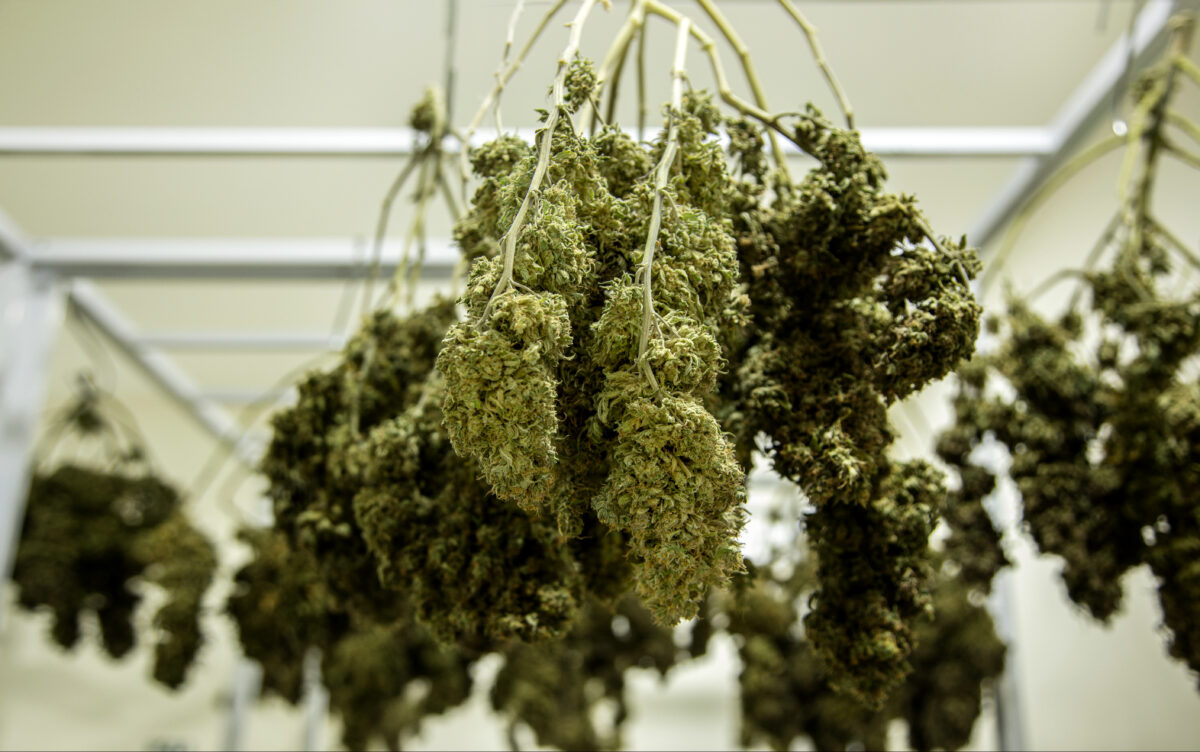
In properly dried material, closed storage can redistribute remaining moisture and allow the batch to stabilize. It may help protect aroma and handling quality when temperature, oxygen, light, and moisture are controlled. A 2025 controlled hemp study found no significant change in total cannabinoid content from its drying and curing treatments; curing increased moisture in the tested packages, which is exactly why monitoring remains necessary.
Do not describe curing as beneficial microbial activity or a process that creates THC. Do not rely on daily “burping” as mold prevention. Opening a container exchanges air and can release excess humidity, but it cannot make an unsafe wet batch safe or remove established contamination.
A Measured Jar or Container Routine
- Use clean, dry, food-compatible containers and keep batches small enough to inspect.
- Seal only material that has completed controlled drying and passed your storage-readiness check.
- Observe moisture rebound, temperature, odor, and representative flower interiors during the early storage period.
- If humidity rebounds beyond the validated range for the process, remove the material and correct it in the drying room rather than repeatedly hiding the problem with brief openings.
- Store cool, dark, and secure, and follow local testing, packaging, labeling, and possession rules.
The jar cannot finish the drying room’s job
A closed-sample test checks stability; it does not begin a ritual. A fast humidity rebound tells us that the interior still holds more moisture than the surface suggested.
Return that material to controlled drying and investigate the room. Repeatedly opening and closing the same wet batch until the numbers look convenient does not correct an unsafe moisture problem.
Troubleshooting Drying and Curing
- Dry outside, wet inside: separate thick pieces, improve spacing, and continue controlled drying.
- Uneven room readings: move calibrated sensors to different heights and corners, then correct dead zones with indirect air exchange.
- Rapid moisture rebound after sealing: unseal and return the batch to the drying space; do not assume burping has solved it.
- Overdrying: reduce excessive heat or direct airflow on the next batch. Adding uncontrolled moisture later introduces a new contamination risk.
- Visible mold or persistent musty odor: isolate the material. Do not trim around contamination and do not consume it.
What to Remember: Drying establishes safety and storage readiness. Curing is monitored stabilization of already dry material. The goal is consistency, aroma protection, and safe storage—not an unsupported promise of increased potency.
Water
Natural water can be an excellent resource for an outdoor garden. A clean, lawful source may arrive without the disinfectant residual and treatment profile of municipal water, and its mineral balance may suit the root zone well. But “stream,” “lake,” “pond,” “rain,” “well,” and “tap” are source names, not quality certificates. Geology, season, drought, storms, wildlife, septic systems, roads, agriculture, roofs, tanks, and plumbing can all change what the water carries.
“The top of the pot is dry every day. Does that mean I should water every day?”
Question sent by: Aiden Foster, via Facebook page.
Not necessarily. The surface can dry while the lower root zone remains wet. Check deeper with pot weight, a probe, or careful observation, and note how quickly the plant is using water. Irrigate the active root zone evenly when needed, then allow air to return. Daily surface splashes can keep roots shallow and the lower pot saturated.
Identify and Test the Source
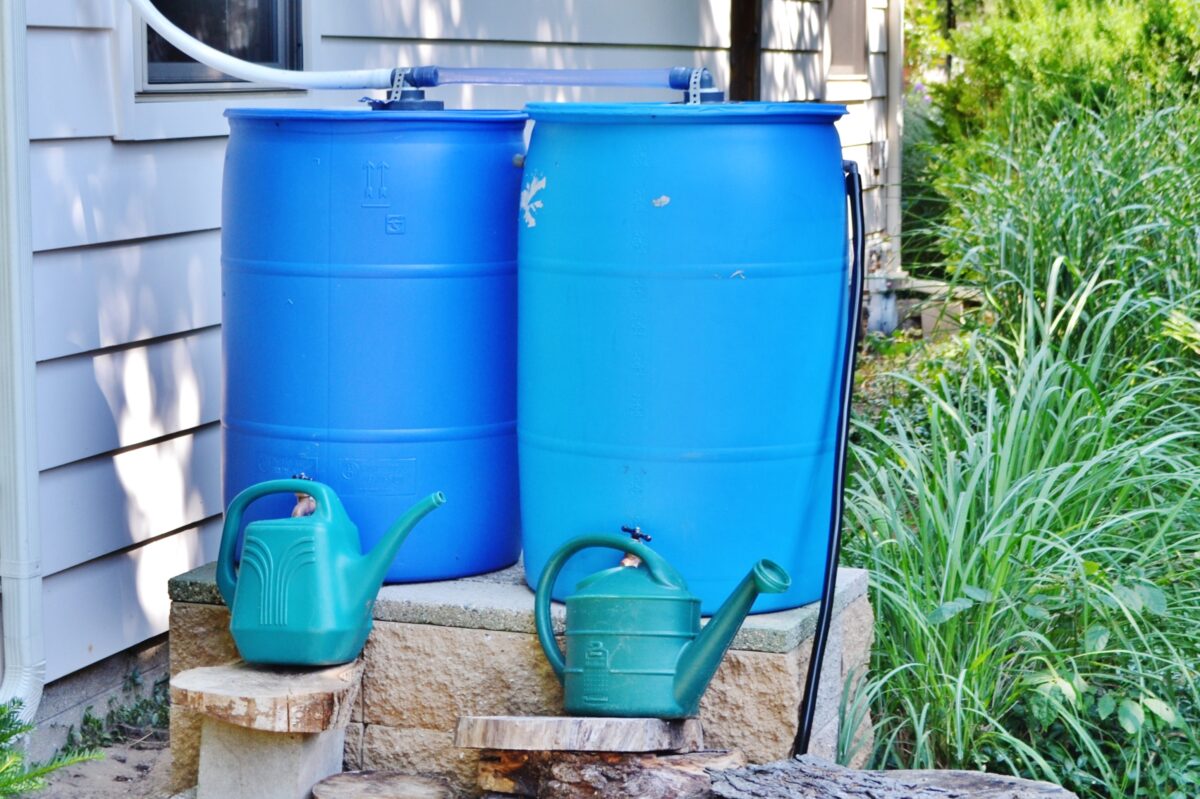
Begin with pH because it is fast, affordable, and immediately useful—but do not stop there. A sensible baseline can include electrical conductivity or TDS, alkalinity or bicarbonate, sodium, chloride, calcium, magnesium, and nutrients already present. Depending on the watershed, well, storage system, land use, and legal standard, laboratory testing for metals and microbial contamination may also be appropriate.
Test again when the source changes color or odor, after major storms, during drought or low-flow periods, when a reservoir has been stored for a long time, or when the plant response no longer matches the feed record. Surface water can change faster than a single spring result suggests.
| Source | Possible strength | Verify before relying on it |
|---|---|---|
| Stream, lake, or pond | Local, naturally mineralized, potentially low treatment residue | Withdrawal permission, seasonal flow, pH, EC/TDS, alkalinity, sodium/chloride, metals or pathogens where risk indicates |
| Rainwater | Often low in dissolved salts and useful for blending | Roof and gutter contamination, first-flush handling, tank cleanliness, pH, very low alkalinity, microbial risk |
| Well water | Consistent access and temperature | Hardness/alkalinity, iron or manganese, sodium/chloride, salinity, metals or local groundwater concerns |
| Municipal tap water | Treated, documented, and usually consistent | Utility report, pH/alkalinity, EC, sodium, disinfectant type, premise plumbing |
| Transported or stored water | Useful backup for a remote lawful garden | Food-compatible container, clean lid and hose, heat exposure, biofilm, volume and ergonomic handling |
Weedth Advice: We respect natural water and often value it highly. We also test it because protecting the plant and protecting the source are the same job. pH tells us one important part of the story; mineral load, alkalinity, salts, contaminants, and seasonal change tell the rest.
Mix Nutrients, Then Confirm the Final Water
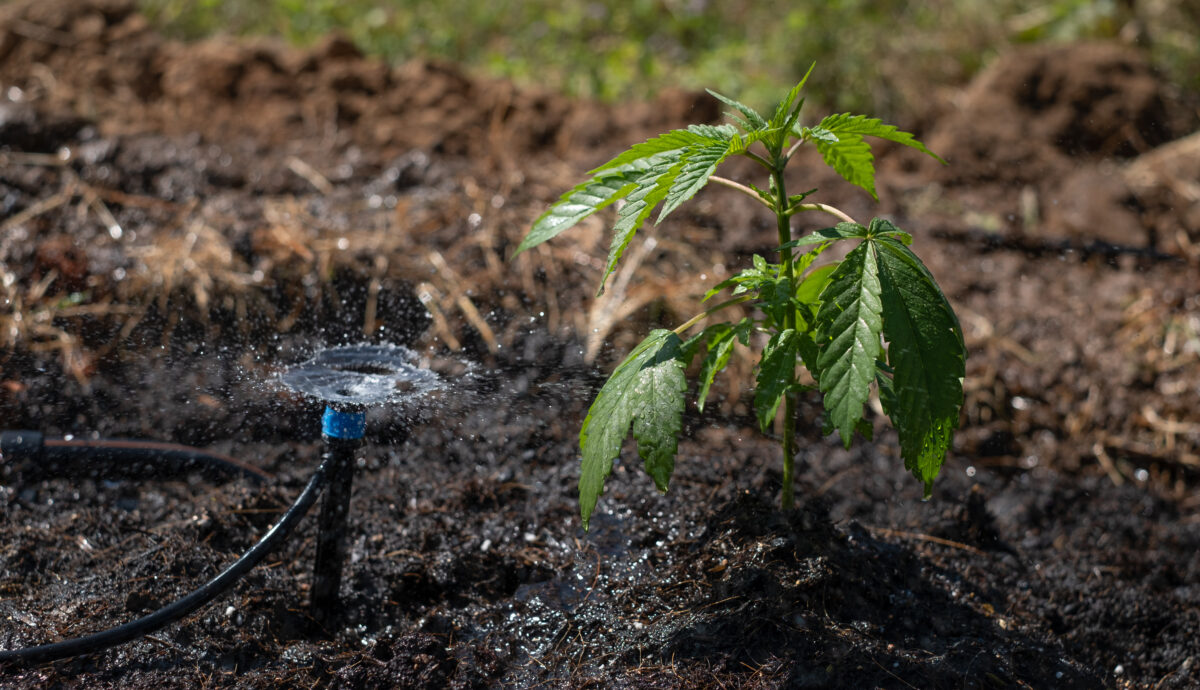
Measure and record the source water first. Add only the nutrients or amendments justified by the program and product label, following the manufacturer’s mixing order. Mix thoroughly, allow the solution to stabilize as directed, then measure the final pH and EC before irrigation. Nutrients can change both readings, so adjusting pH before mixing and never checking again can miss the solution the roots actually receive.
Use pH correction only when the measured system needs it. The appropriate range depends on soil, substrate, irrigation method, alkalinity, and product program. A pH meter should be calibrated and stored according to its instructions; an unmaintained meter can create more confidence than accuracy.
Keep Clean Water Clean
Confirm that collection or withdrawal is legal, publicly accessible where applicable, and sustainable at the volume you need. Do not dam, divert, or bury equipment in a stream without authorization. Do not wash fertilizer containers, sprayers, hands, or tools in natural water. Keep dirty hoses out of the source, prevent backflow, use clean covered containers, and maintain a buffer that keeps nutrient runoff and eroded soil away from banks and drains.
Stored water needs the same respect. Cover tanks against debris and animals, screen openings safely, label the contents, and inspect for algae, sediment, odor, damaged fittings, and mosquito access where relevant. Use a legal overflow route that does not erode soil or carry nutrients into neighboring land or waterways.
Never Forget: A natural source can be excellent without being automatically suitable every day of the year. Take only what you are allowed to use, return no contamination, and let current measurements—not appearance alone—decide how the water enters the nutrient plan.
Remote Rural Growing: Caring for a Legal Garden Away from Home
A remote rural garden can make sense when the home site has poor sun, limited space, persistent wildlife or pest pressure, disruptive nearby activity, or a lawful rural property that better fits the season. Here, “remote” means land you own or land for which you have explicit permission, with cultivation, access, water use, and harvest transport all allowed by local rules. It never means planting on public land or someone else’s property and trying not to be discovered.
“How can I reduce visits to a legal remote garden without neglecting it?”
Question sent by: CedarRoute, via Facebook page.
Reduce failure points: use adequate root volume, mulch that fits the site, a covered lawful water reserve, filtered and pressure-regulated drip, redundant emitters, strong supports, humane barriers, and remote monitoring where permitted. Even then, do not remove physical inspections. A camera cannot feel a blocked emitter, smell rot, examine the inside of a flower, or notice that a root ball has shifted after wind.
Permission, Access, and an Emergency Plan
Keep the owner’s permission and the applicable cultivation, plant-count, visibility, access, fire, water, and transport rules in the site record. Use legal parking and established access. Tell a trusted person where you will be when working alone, check weather and fire conditions, carry communication and first-aid supplies appropriate to the area, and set a return time. A remote garden should have a safety plan, not a cover story.
Choose the Site by Sun and Finish Window
A forest edge can look protected while providing too little usable light and too much competition from roots. Map the sun path before planting and repeat the check after trees leaf out. Several angled hours may keep a plant alive, but survival is not the same as maximum yield. More usable canopy light generally means more flower potential when water, roots, temperature, and health allow the plant to use it.
Also inspect cold-air pockets, flood marks, dead branches overhead, animal trails, unstable slopes, fire exposure, drainage, soil depth, phone coverage, and the distance required to carry tools or harvested material lawfully and safely.
Build for Days Between Visits
A remote plant needs a root zone large enough to buffer heat and moisture, not a tiny container that demands daily rescue. Mulch can slow evaporation when it does not trap excessive stem moisture. A covered reservoir, filter, pressure regulator, redundant emitters, shutoff valve, and visible leak check can make irrigation more reliable. Size the reserve from measured plant use and expected weather, then keep an emergency backup that does not depend on the same pump or line.
| Visit trigger | What to inspect first | What to record |
|---|---|---|
| After transplant | Root-zone moisture, wind movement, animal disturbance | Establishment, irrigation volume, support adjustment |
| Heat or dry forecast | Reservoir volume, emitters, mulch, leaf temperature signs | Water use and reserve duration |
| After storm | Safe access, shifted roots, split unions, saturated flowers | Damage, repair, drainage, disease follow-up |
| Early flowering | Light interruption, support, flower pests, airflow | First flower and projected finish window |
| Dense flowering | Flower interiors, rain retention, caterpillar frass, rot | Hotspots and next inspection date |
Water Without Damaging the Source
Bring water in clean, food-compatible containers, collect rain lawfully, or use an authorized well or surface-water withdrawal. Do not bury a fuel can or improvised intake in a stream, secretly divert water, or leave a hose that can back-siphon fertilizer. Test the source, protect it from dirty equipment, and prevent irrigation runoff from returning nutrients or sediment to the waterway.
Humane Wildlife and Pest Protection
Use lawful fencing, tree guards, properly tensioned mesh, and other barriers designed not to entangle non-target animals. Check them at every visit. Avoid poison grain and improvised traps that can harm wildlife, pets, or scavengers. If rodent or large-animal pressure cannot be managed humanely and legally, change the site or cultivation method.
Neighbors, Odor, Fire, and Security
Distance does not erase neighbors or ecology. Keep plants within lawful property and visibility limits, manage odor and noise respectfully, maintain emergency access, obey fire restrictions, and use only lawful deterrents. Security should make the permitted property harder to enter; it should never create hidden injury hazards.
Harvest and Transport
Harvest when the crop and drying capacity are ready, then transport during a safe, lawful time in clean, labeled, closed containers. Follow possession and transport limits. Do not schedule movement before sunrise merely to avoid being seen; plan safe access, enough help, weather protection, and a documented route between permitted locations.
Make a remote plant easier to read
When daily observation is impossible, remove fragile assumptions before planting. Test the sun, water, access, and root zone, then build one realistic backup for each failure that could seriously harm the plant before the next visit.
No timer, tank, or barrier replaces a physical inspection. Each lawful visit should have a purpose: read the plant, verify the system, correct the smallest problem early, and leave the land, water, animals, and neighbors no worse for the crop being there.
Remote does not mean unclaimed
Do not cultivate on public land, protected land, or another person’s property without explicit permission. Do not hide routes, evidence, irrigation equipment, or harvested material. Confirm the law before planting and leave the site cleaner than you found it.