Indoor Basics
Indoor Cannabis Growing Basics: From Empty Space to Healthy Plants
Before You Start
Is This Guide Right for You?
This guide is the bridge between wanting to grow indoors and understanding what the room must actually control: light, air, temperature, humidity, roots, water, and nutrition.
If you are completely new to cultivation or still deciding between indoor and outdoor growing, begin with Grow Basics. If you have chosen indoors and want the full seed-to-drying workflow, continue with the Complete Indoor Growing Guide.
Indoor growing can look complicated because every natural service has an indoor equivalent: the sun becomes a fixture, wind becomes circulation, changing weather becomes climate control, and open ground becomes a containerized root zone. You do not need to master every device before you begin. You need a space you can measure, a system you can maintain, and enough time to notice small changes before they become large problems.
The most useful starting point is not a shopping list. It is a clear picture of the room after the light has been running for several hours, after the plants have been watered, and after the canopy has filled the footprint. That future room determines the fixture, exhaust path, container size, drainage plan, and daily workload.
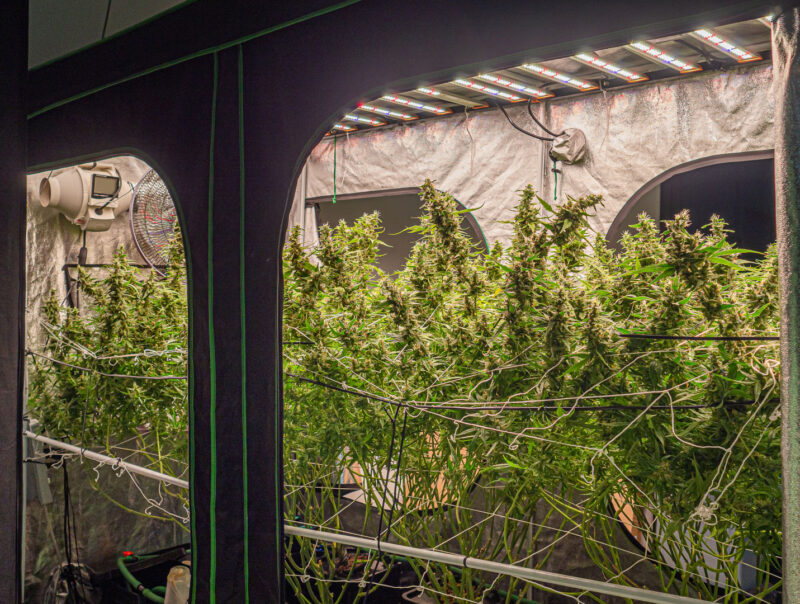
Keep the project lawful and compatible with property rules, building requirements, electrical capacity, fire safety, and the people who share the home. Indoor cultivation concentrates electricity, water, heat, humidity, and plant material in one place. A calm setup accounts for those loads before a seed or clone enters the room.

Remember
The plant is only one part of the indoor garden. The room, equipment, root zone, and your routine form one connected system.
What Indoor Growing Actually Asks You to Control
An indoor garden is a chain of connected loads. The light adds photons and heat. The leaves use light, water, minerals, and carbon dioxide, then release water vapor. The root zone stores or drains irrigation. Fans move the resulting heat and humidity, while the surrounding room supplies the air that replaces what is exhausted. If one link is ignored, another device has to work harder.
| System | The practical question to answer |
|---|---|
| Space | Is there enough footprint, height, access, darkness, drainage, and safe separation from living areas? |
| Light | Can the fixture cover the mature canopy evenly without exceeding circuit or cooling capacity? |
| Air | Where does replacement air come from, and where can warm humid exhaust go? |
| Root zone | Will the medium, container, and irrigation frequency remain aerated and evenly moist? |
| Climate | What happens during the hottest light-on hour and the most humid hour after lights-off? |
| Safety | Are electrical loads, cords, water, heat, access, pets, children, and fire detection accounted for? |
| Routine | Can you inspect the garden, water it, clean it, and respond to failures on the schedule it requires? |
“Do I need to buy every possible device before I start?”
Question sent by: Brooke Taylor, via email.
No. Start with what keeps the space safe and the environment measurable: a suitable enclosure, adequate light, air movement and exchange, a stable root zone, drainage, a timer, and temperature-humidity monitoring. Add dehumidification, air conditioning, automation, odor control, or backup equipment when your measured room and local obligations show that they are needed.
Required, Useful, and Optional Are Not the Same
A shopping list becomes easier when each item has a job. The light and safe power supply are required for a productive indoor crop. A circulation fan, ventilation route, container or root system, water, nutrition plan, and basic monitoring are also foundational. A carbon filter may be required by odor, privacy, or local rules, but it does not cool the room by itself. A humidifier, dehumidifier, heater, or air conditioner should answer a measured climate problem rather than a fear.
Separate purchase cost from operating cost. To estimate a device's monthly electricity use, multiply its input watts by daily operating hours and the number of days, then divide by 1,000 to obtain kilowatt-hours. Multiply that number by your local electricity rate. Repeat the calculation for the fixture, exhaust, circulation fans, dehumidifier, heater, air conditioner, pumps, and controllers. Climate equipment can consume more than expected because it cycles according to weather and plant transpiration.
Pro Tip
Spend first on the equipment that defines the environment: safe electrical capacity, a correctly sized fixture, dependable air movement, and a root zone you can manage. Decorative accessories and advanced additives cannot correct a weak foundation.
Start Small Enough to Read the Room
A smaller canopy is easier to light evenly, inspect from every side, and water without hidden runoff. It also produces less moisture and heat. “Small” does not mean improvised or unsafe. A compact tent, cabinet, closet, or sectioned room still needs headroom for the container, mature plant, fixture, hangers, safe light distance, and ventilation hardware.
Plant count is a poor way to size the system. One wide, trained plant can fill the same canopy as several smaller plants. Measure the planned canopy area, then make sure every device supports that area through flowering.
Choose Plant Material That Fits the Room
Photoperiod plants allow you to decide when flowering begins by changing the light schedule, so vegetative time can be shortened in a low room or extended to fill a wider canopy. They require a reliable, uninterrupted dark period during flowering. Autoflowering plants begin flowering mainly with age. That removes the need to trigger bloom with a 12-hour schedule, but it also gives less recovery time after transplant, root, or training stress.
Seeds provide a clean starting opportunity and genetic variation, while clones preserve the traits of the source plant and arrive with a known biological history. That history can include pests, powdery mildew, root disease, viruses, viroids, pesticide residues, or an unsuitable growth pattern. Keep incoming clones separate, inspect the newest growth and root zone, and do not place them directly into the main room simply because they look green.
Advice
Choose the plant for the room you can provide. Compact architecture, predictable flowering time, documented disease resistance, and a finish that fits the available height are more useful than a fashionable name.
Water and electricity must have separate paths
Keep plugs, drivers, ballasts, power strips, and controllers above the highest possible water level. Use drip loops, grounded and locally approved protection such as GFCI or RCD where required, and circuits with verified capacity. Extension cords are temporary equipment, not a substitute for permanent wiring.
Run the Empty Space Before Plants Arrive
Assemble the room and operate the fixture, exhaust, circulation fans, controllers, and climate equipment for at least one complete light and dark cycle. Add containers and a tray or reservoir so the test reflects the real space. Record temperature and humidity at canopy height, check noise and odor pathways, inspect every connection for heat, and simulate a small spill.
The dry run reveals problems while they are still easy to solve: a door that cannot open around the tent, a filter blocking light adjustment, an intake pulling dusty air, a timer losing its program, or exhaust air returning to the same room. This is one of the few indoor-growing steps that can prevent plant stress, property damage, and wasted purchases at the same time.
Plan the Environment Before You Buy Equipment
First, get the area ready where your indoor plants will grow. This could be a whole room, a closet, a special grow tent, or a sectioned-off area in your basement or garage. Think of this space as your plants' home thus it's important to set it up carefully to help them grow and to make your growing efforts successful.
Here are the basic and essential supplies you need to begin growing cannabis indoors:
- A prepared space to grow in, such as a grow room or tent
- Grow lights
- Fans for air circulation
- An odor-control system, typically with carbon filters
- Air intake and exhaust system
- Thermometer to monitor temperature
- Hygrometer to measure humidity levels
- Pots or containers for your plants
- Soil or a soilless growing medium
- Soil amendments to improve growth
- Cannabis seeds, cuttings, clones, or seedlings
Grow Room, Tent, Closet, or Cabinet?
Most indoor growers start with a single grow room, this is a practical choice until you decide if indoor growing is right for you. Experienced growers often use two grow rooms: one for the vegetative stage and another for the flowering stage. This method allows for continuous cycling and harvesting of cannabis. If you want to increase production, using two grow rooms is an effective strategy.
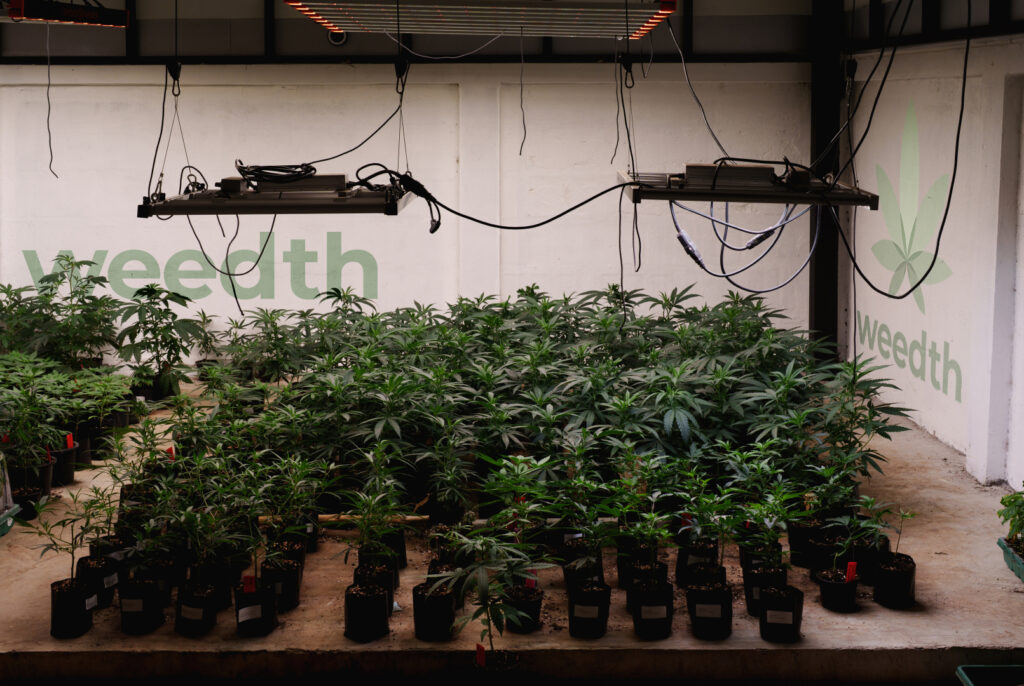
Make sure the grow area has access to electrical outlets that are in good working condition. Growing indoors uses a lot of electricity and places a significant power load on the electrical system, and many setups have caught fire due to poor or cheap electrical work. Remember, this is also where you live, so a fire could result in the loss of far more than just your plants.
It would be ideal to locate your grow rooms in a basement. There are several advantages to this: basements are usually separate from the main living area and less likely to attract visitors' curiosity. The temperature in a basement is generally very stable, making it easier to manage climate control and block light leakage. Additionally, basements provide better security, making it more difficult for thieves to access your grow space than other areas of your home.
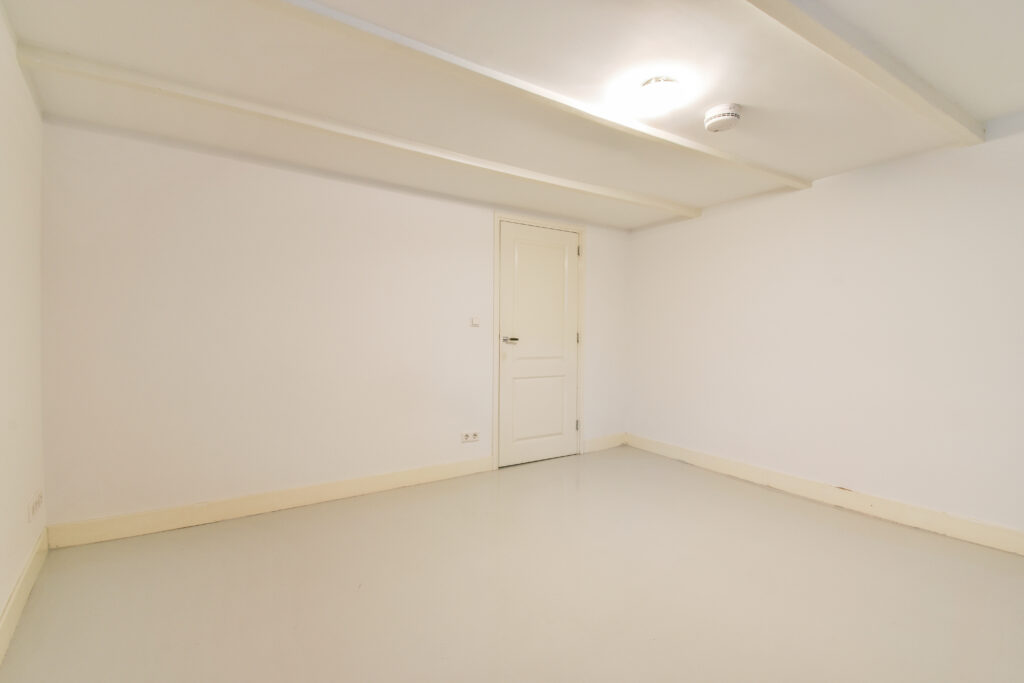
Grow tents and closets are great for those with limited space or who want a more discreet option. Grow tents are designed for indoor growing, allowing you to easily control an environment that manages light, temperature, and humidity. They can be set up in any room, which makes them flexible and convenient. Closets can be converted into grow spaces with the right lighting and ventilation. They use existing space efficiently, perfect for growers who don't want to dedicate an entire room to cannabis grow. Both options provide a contained environment, minimizing odors and keeping light confined to the growing area, which enhances safety and control.

Grow tents or closets are especially useful for growers in apartments or shared living spaces. They offer a compact and efficient way to grow cannabis without taking over living areas. These setups keep your activities private.
Wherever you choose to set up your growing space,whether it's a specific room, a basement, a grow tent, a closet, a computer case, or a space bucket,you can create the ideal environment for growing high-quality cannabis indoors.
Indoor Lighting: Start with Canopy Coverage
Lights are important for growing cannabis indoors and you must know how to choose the right type of light system that best suits your budget and your growing goals. You must know the different types of lights, such as LED, HID, CFL, and fluorescent lights while learning how light systems will impact plant health, yield rate, and bud quality. Lights are available in different shapes, sizes, wattages, and types, giving growers the option to choose what works best for them. A complete indoor grow light kit should include a bulb, reflector, ballast, timer, and electrical inputs/outputs.
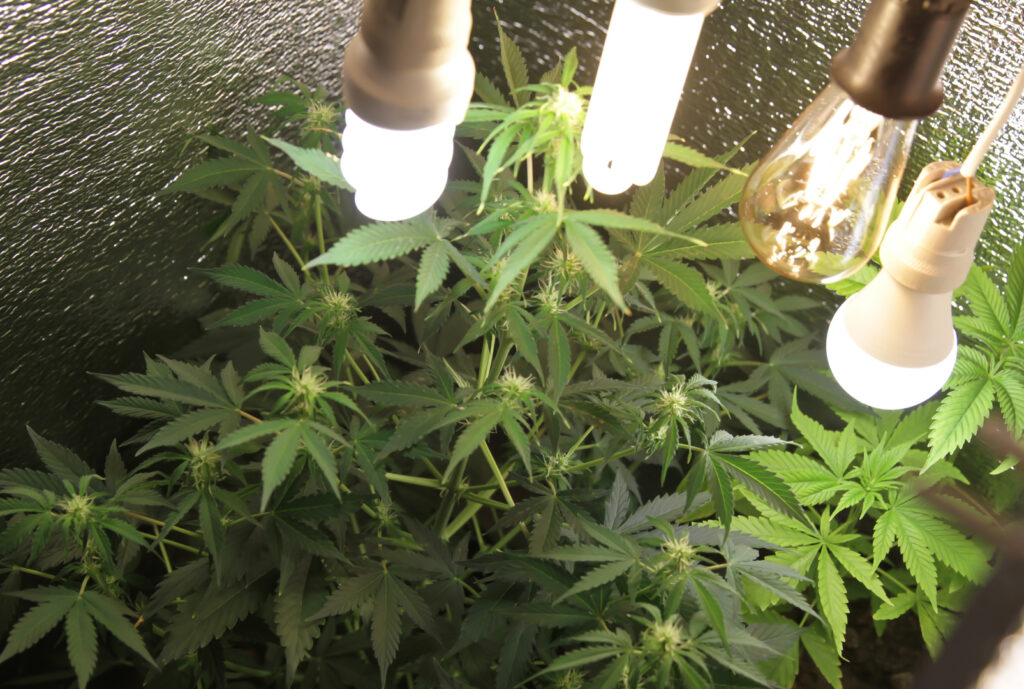
Most light kits are open, meaning the bulb hangs directly under the reflector without a hood or glass cover. The bulb is fixed into a socket inside the reflector, which is connected to the ballast. The ballast can be internal or external. If it's external, a cord will lead from the bulb's socket to the ballast. The ballast plugs into a standard household light socket. Some ballasts even have built-in timers.
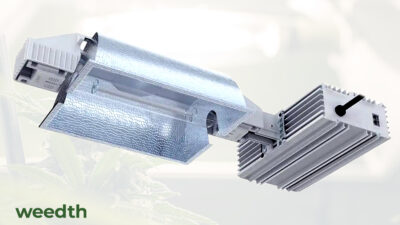
When you are buying a light system, it is recommended to purchase a complete system and an extra bulb. Make sure that the light system meets safety regulations and comes with a guarantee. This helps to avoid any safety issues and ensures the system's reliability and performance. Additionally, choosing a system with a warranty provides legal safeguards to protect your investment.
Light Spectrum Without the Color Myths
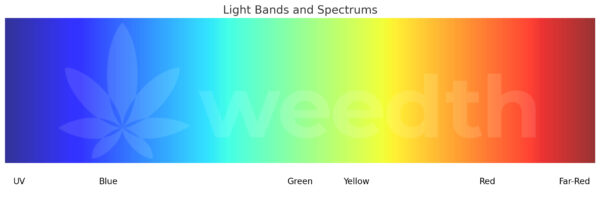
Plants do not see color exactly as people do. For cultivation, the more useful question is how many photosynthetically active photons reach the canopy and how evenly they are distributed. PAR normally describes radiation from 400 to 700 nanometers, while spectrum describes how those photons are divided among violet, blue, green, yellow, orange, and red wavelengths.
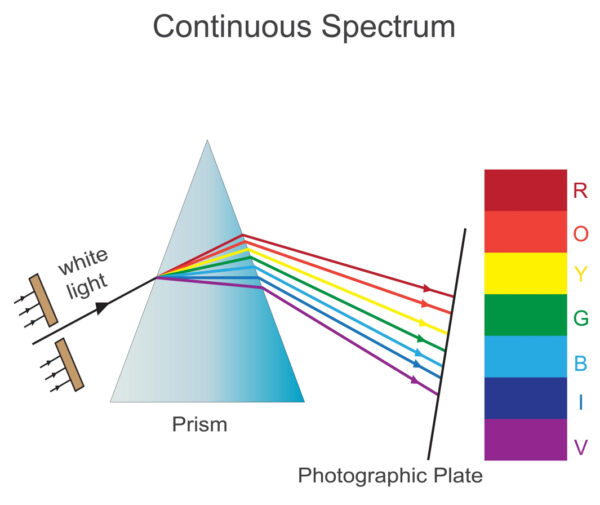
Blue-rich light often encourages compact morphology and influences leaf development. Red photons drive photosynthesis efficiently and interact strongly with photoperiod responses. Green light is not wasted; some of it penetrates deeper into leaves and canopies than red or blue light. The plant responds to the combined spectrum, intensity, duration, temperature, nutrition, genetics, and stage, so “blue for growth and red for flowers” is a useful simplification, not a complete lighting strategy.

A broad white or full-cycle horticultural fixture is usually easier to work with than a collection of narrow-color lamps. It allows you to keep one fixture through vegetative growth and flowering while changing intensity, height, or photoperiod. HID systems can also support a full cycle when the lamp and ballast combination is appropriate, although their spectrum, radiant heat, and maintenance profile differ from modern LEDs.
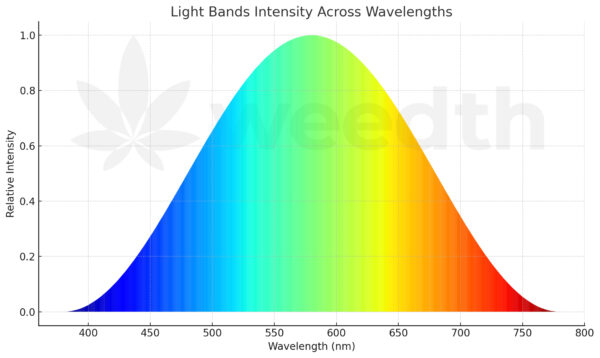
Ultraviolet and far-red channels are optional tools, not missing pieces that every indoor garden needs. Controlled cannabis studies have produced mixed, spectrum-specific results, and additional UV has not consistently increased flower yield or cannabinoid concentration. Build a stable base spectrum and uniform canopy first.
Advice
Choose a fixture from a measured coverage map and electrical specification. Marketing names such as “sunlike,” “full spectrum,” or “equivalent wattage” do not tell you how much useful light reaches the leaves.
Watts, Lumens, PAR, PPFD, and DLI
Watts describe electrical input. They help estimate circuit load, heat added to the room, and running cost, but they do not tell you how much plant-usable light reaches the canopy. Two fixtures drawing the same wattage can differ greatly in photon output, distribution, driver quality, and usable coverage.
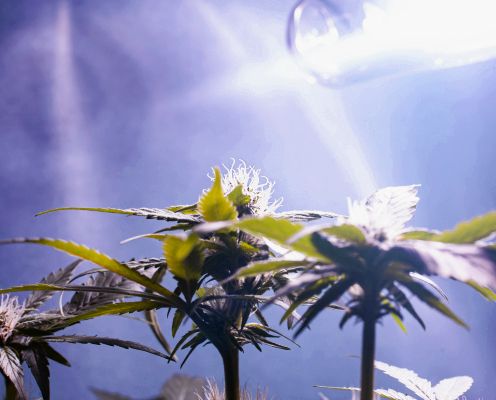
Lumens weight visible light according to human vision. They are useful when choosing a lamp for a living room, but plants do not share the sensitivity curve of the human eye. A lumen number cannot compare a red-heavy HPS lamp fairly with a broad-spectrum LED, and there is no universal “lumens per square foot” rule for cannabis.
PAR, PPF, PPFD, and DLI
PAR describes the main photosynthetic waveband. PPF is the fixture's total photon output. PPFD is the photon density arriving at a surface each second. DLI adds those photons across the entire light period. For the grower, PPFD maps and DLI are much more informative than lumens.
Photon efficacy, usually expressed as micromoles per joule, shows how efficiently a fixture converts electrical energy into photons. PPFD shows what arrives at the canopy, and a coverage map shows whether the center and edges receive comparable intensity. DLI then accounts for the number of hours the light is on. A moderate PPFD used for a longer photoperiod can produce a different daily total than the same PPFD under a 12-hour flowering schedule.
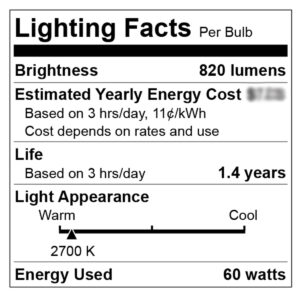
Start below the fixture's maximum intensity, let the plant acclimate, and use plant response with measured canopy light. Bleached upper growth, upward-cupped leaf edges, or stalled tops can indicate excessive light or heat. Long internodes and a canopy leaning toward the center can indicate insufficient or uneven coverage. Distance alone is not a universal setting because optics and fixture power differ.
Compare Fixtures by Plant Light, Not Human Brightness
Compare complete systems rather than lamp labels. Modern horticultural LEDs often deliver more photons per unit of electricity and spread light across a broad fixture, while HPS and other HID systems remain capable of productive crops when their heat and reflector requirements are managed. CFL and T5 fixtures can still serve propagation, seedlings, mothers, or very small gardens, but their lower photon density becomes limiting as the canopy and flower mass increase.
| Decision | LED fixture | HID or fluorescent system |
|---|---|---|
| Measure first | Input wattage, photon efficacy, PPFD map, dimming range, driver position | Lamp wattage, reflector footprint, ballast compatibility, lamp age, cooling demand |
| Room effect | Usually lower radiant heat at the canopy, but nearly all input power still becomes room heat | More concentrated radiant and convective heat; HID often needs dedicated extraction or an air-cooled hood |
| Maintenance | Clean the fixture, inspect connections, and plan for driver or board service | Replace aging lamps, inspect reflector surfaces, match ballast and socket, manage hot components |
| Best fit | Low ceilings, energy-conscious rooms, dimmable full-cycle layouts | Existing compatible equipment, heat-tolerant rooms, propagation shelves, or carefully planned budget builds |
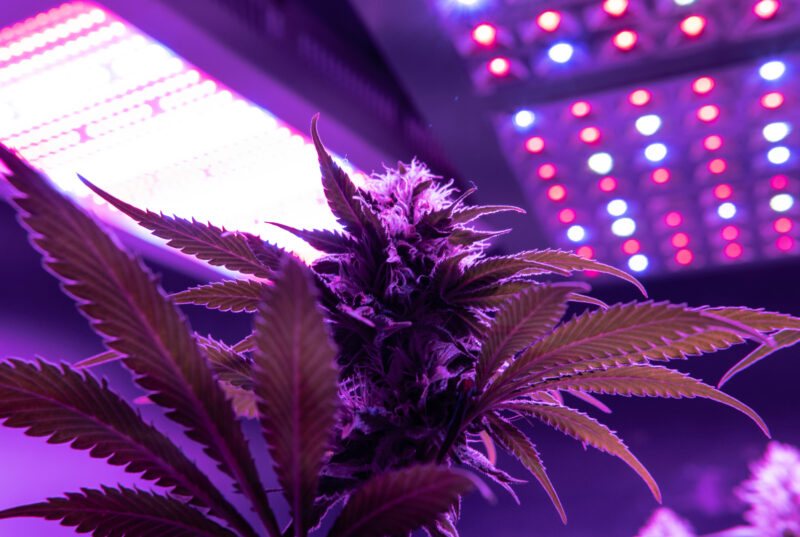
Fixture quality matters more than technology tribalism. A well-designed HPS room can outperform a poorly distributed LED room, and a good LED cannot compensate for a weak circuit, saturated root zone, failing exhaust fan, or canopy that has grown outside its footprint.
“Should I buy the highest-wattage light I can afford?”
Question sent by: Evan Hughes, via email.
Buy the fixture that covers the usable canopy at an intensity your room can cool and your circuit can supply. Unused dimming capacity can be helpful, but oversizing the light while ignoring extraction, headroom, and electrical load usually creates a harder room rather than a better one.
HID Lighting: MH, HPS, Dual Spectrum, and CMH
High-intensity discharge lighting remains part of indoor cultivation because it is proven, widely available, and capable of producing strong canopy intensity. An HID system is more than a bulb. It includes a compatible ballast, rated socket, reflector, safe suspension, timer or controller, and a heat-removal plan.
Metal Halide (MH)
MH lamps generally produce a blue-enriched spectrum that supports compact vegetative growth. They can run an entire crop, but many growers use them mainly for vegetative rooms because lamp efficacy and flowering performance depend on the specific design.
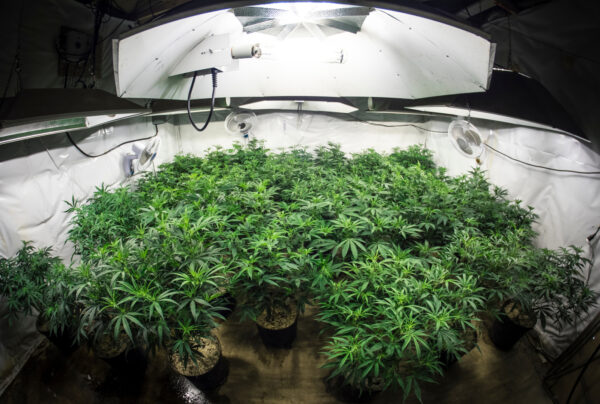

High-Pressure Sodium (HPS)
HPS lamps produce an amber and red-enriched spectrum and remain effective for flowering. Their concentrated radiant heat, reflector hot spots, lamp aging, and ballast load must be included in the room design.
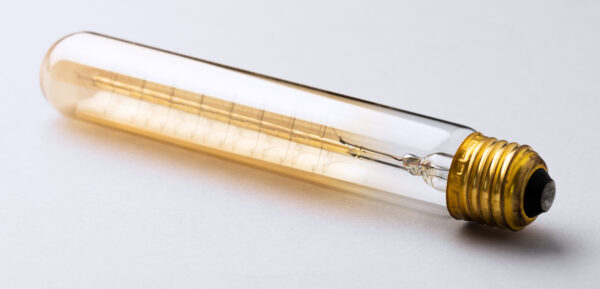
Dual-Spectrum HPS
Dual-spectrum lamps broaden the output so one HID lamp can remain in place for vegetative growth and flowering. They simplify hardware, although “dual spectrum” does not guarantee a uniform canopy or a particular photon efficacy.

Ceramic Metal Halide (CMH or LEC)
CMH systems typically offer a broader spectrum and good color rendering. They still require compatible ballasts and sockets, and they remain hot, high-intensity equipment. Never mix lamp and ballast types because the bases appear to fit.

Hot lamps require clearance and compatible hardware
HID lamps, ballasts, sockets, reflectors, ducting, and timers must be rated for one another and installed with safe clearances. Keep irrigation lines and reservoirs below electrical connections, and use a qualified electrician when the circuit capacity or wiring condition is uncertain.
LED, CFL, and Fluorescent Lighting
LED fixtures dominate many new indoor rooms because they can provide high photon efficacy, broad distribution, dimming, and a lower radiant heat load at the canopy than HID. They do not make heat disappear. The electrical power that enters the fixture eventually becomes heat in the room, and remote drivers only move part of that load.

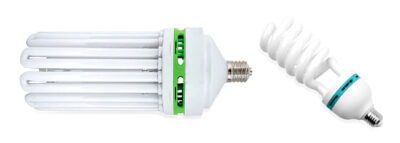
CFL lamps are inexpensive and easy to source. Their small form factor can be useful for clones, seedlings, mother plants, side projects, or a very compact canopy. Multiple bulbs, sockets, splitters, and cords can become awkward, however, and flowering a large canopy requires much more hardware than the low purchase price first suggests.
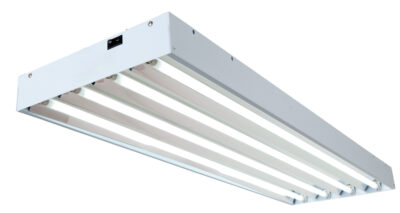
T5 and other fluorescent fixtures spread gentle light over shelves and propagation trays. They are easy to understand and produce less concentrated heat than HID, but their lower photon efficacy and limited penetration make them less attractive for dense flowering canopies.

Tip
If a low-cost fixture keeps the project safe and manageable, it can be a sensible starting point. Judge it by the canopy it can support, not by whether it is the newest technology.
Light Sources That Rarely Make Sense for Flowering
Household lamps are designed to make rooms comfortable for people, not to produce a uniform high-light crop. A cluster of efficient household LEDs can keep a seedling, clone, or small vegetative plant alive, but coverage, thermal management, sockets, and mounting quickly become complicated as the plant expands.
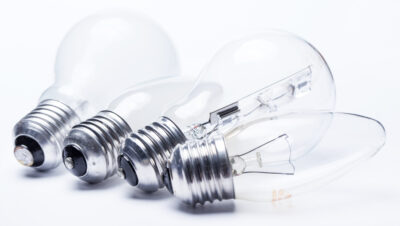
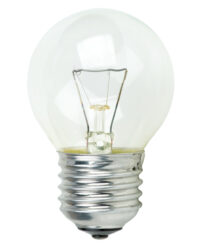
Incandescent and halogen lamps convert much of their input into heat and provide poor photon efficacy for cultivation. Mercury-vapor lamps are outdated for this use and introduce hot, high-voltage hardware without offering a practical advantage over purpose-built horticultural systems.
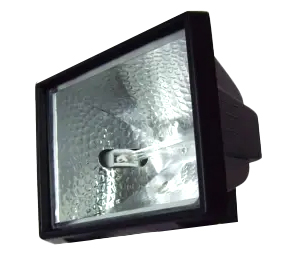
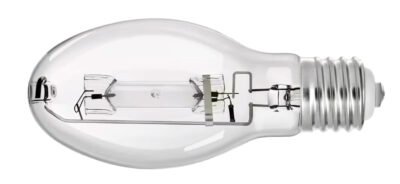
The useful distinction is not “household” versus “professional.” It is whether the complete system provides measured, even canopy light with safe electrical hardware and controllable heat. Avoid improvised socket chains, exposed conductors, unstable hangers, and adapters that exceed their rating.
When HID Still Makes Sense
HID lighting is still a rational choice when you already own compatible equipment, the room can remove the heat, replacement lamps are available, and the reflector matches the canopy. HPS in particular has a long record of productive flowering, and its performance is supported by controlled cannabis research as well as commercial history.
That history does not mean HID perfectly copies sunlight or automatically produces better flowers. Sunlight changes in direction, intensity, spectrum, and duration, while every electric lamp has a fixed spectral power distribution. Judge the system by measured canopy light, energy cost, heat, uniformity, maintenance, and the response of the cultivar.
What to Remember
A proven technology can remain useful without being the best choice for every room. Existing safe HID equipment may be economical; buying a new hot system for a low ceiling may not be.
When LED Makes More Sense

LED lights are a popular choice for indoor growers for several good reasons:
- Energy Efficiency: LEDs use energy more efficiently than HID lights. They convert more electricity into light instead of heat. This results in lower energy bills and a smaller impact on the environment.
- Long Lifespan: LED lights generally last far longer than HID lights. While HID bulbs might need replacing every year. LEDs can keep going for years, reducing the frequency and cost of replacements.
- Customizable Spectrum: LEDs can be designed to emit specific wavelengths that best support different stages of plant growth. This means growers can customize the light to boost photosynthesis, which can lead to healthier plants and better yields.
- Lower Heat Output: LEDs generate significantly less heat than HID lights, reducing the risk of heat stress on plants. This lower heat output also means less reliance on cooling systems, further reducing energy costs and simplifying environmental control.
When CFL or Fluorescent Lighting Can Be Useful
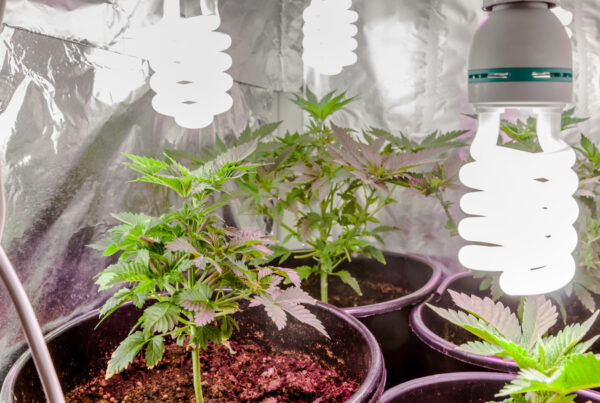
Compact Fluorescent Lamps (CFLs) offer benefits that make them a practical choice for some indoor growers:
- Affordability: CFLs are usually cheaper than many other types of grow lights, such as LEDs and HIDs. This makes them a great option for compact or low-budget setups who have a limited budget.
- Low Heat Output: CFLs produce less heat compared to HID lights. This lower heat output reduces the risk of heat stress on plants and minimizes the need for extensive cooling systems, making temperature management easier.
- Ease of Use: CFLs are straightforward to set up, easy to set up and use. They typically come in standard socket sizes and do not require specialized fixtures or ballasts. This makes installation simple for new growers.
- Energy Efficiency: While not as energy-efficient as LEDs, CFLs are more efficient than traditional incandescent bulbs, converting more electricity into light and less into wasted heat.
- Flexibility in Placement: CFL bulbs are available in various shapes and sizes, allowing for flexible placement and positioning. Growers can place them close to plants without risking burns, which is ideal for small or compact grow spaces where light coverage matters.
- Suitable for Small Spaces: CFLs are a good fit for small grow tents, closets, or other confined areas. Their low heat output and compact design mean they won’t overheat tight spaces where larger lights may be impractical.
- Full Spectrum Options: CFLs are available in different color temperatures, including daylight (5000-6500K) for vegetative growth and soft white (2700-3000K) for flowering stages. This variety allows growers to choose the right spectrum for each growth stage using CFLs.
- Low Initial Investment: The affordability of CFLs makes them a great for hobbyists or growers starting small. They allow new growers to try indoor cultivation without a big upfront cost.
- Availability: You can easily find CFLs in most hardware stores. This makes them a convenient choice if you need to quickly add or replace lights in your grow setup.
The Components Around the Fixture
For a complete and effective grow light setup, you'll need:
- Ballasts for HID lights.
- Lamp Holders to securely house and connect bulbs to the power source
- Reflectors to maximize light efficiency.
- Bulbs/Lamps appropriate for your grow stage (HPS, MH, or LED).
- Drivers for LED systems.
- Timers to automate light cycles.
- Light Hangers to adjust light height.
- Cooling and Ventilation Systems to manage heat.
Ballasts
Ballasts are a key component in many grow light systems, especially for High-Intensity Discharge (HID) and fluorescent lights. The ballast is crucial for regulating the current to the bulbs. Ballasts can be either magnetic or digital. Digital ballasts are more efficient, produce less heat, and often include features like dimming and compatibility with multiple bulb types. Magnetic ballasts are cheaper but bulkier and less efficient. A digital ballast can also adjust to different bulb wattages, making it more versatile.
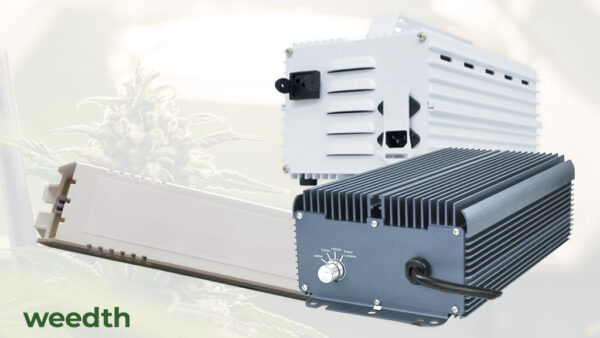
Note for Safety: Keep electrical outlets away from plants and water to avoid accidents. Safety is crucial to prevent electrical hazards and ensure a safe growing environment.
Lamp Holders and Sockets
Lamp holders (commonly called "sockets") are essential for securely housing grow light bulbs. They ensure a proper electrical connection between the power source and the bulb. Lamp holders come in various types to accommodate different bulb bases, such as E27 or E40 for HID bulbs or specialized fittings for LED systems. High-quality lamp holders are built to resist heat and wear, especially in setups like HID systems where bulbs can reach high operating temperatures. Choosing the right lamp holder is critical for ensuring safety, as poor-quality or incompatible holders may lead to electrical issues, overheating, or even bulb failure. Additionally, regular inspection and maintenance of lamp holders are recommended to check for signs of corrosion, damage, or loose connections, which could compromise the efficiency and safety of the grow light system.
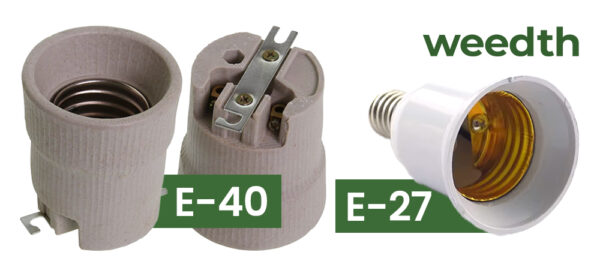
Reflectors
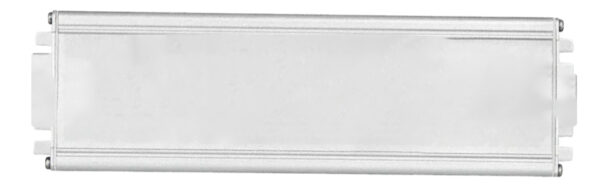
Reflectors are essential components in indoor grow light systems designed to maximize the efficiency and effectiveness of light distribution. Reflectors come in various designs, such as wing reflectors, air-cooled reflectors, and tube reflectors. Wing reflectors are the most basic and cost-effective but offer less control over light spread. Air-cooled reflectors help manage heat by allowing air to flow over the bulb, keeping the grow area cooler. Tube reflectors or cool tubes encase the bulb in glass with ducting on either end to allow for efficient air cooling. Reflectors with a polished or hammered finish can enhance light distribution by minimizing hot spots and providing an even spread of light. Choosing the right reflector can significantly impact light distribution and efficiency.

Note: Ensure your reflectors are white or polished metal, not colored or shiny. White reflects light best. Reflectors help direct light toward the plants to increase efficiency.

LED Drivers
Drivers are necessary components in ensuring that LEDs function optimally. Essentially, the driver regulates the power to the LED and provides a constant flow of electricity despite variations in voltage or current from the power source. This is important because LEDs are sensitive to changes in power supply. Without a stable driver, the lights will flicker, change in brightness, or degrade prematurely. A good driver not only extends the lifespan of an LED and also enhances its performance by maintaining consistent brightness and color quality. For anyone using LED grow lights, a reliable driver is essential to achieving efficient and effective lighting that supports healthy plant growth.
Timers and Controllers
Timers are an indispensable tool for managing the light cycles in an indoor growing environment, especially for cannabis plants that need precise photoperiods to grow. Timers automate light scheduling and ensure a consistent light schedule that is crucial for both the vegetative and flowering stages. This ensures plants get the right light for photosynthesis and saves energy by avoiding unnecessary light usage. Additionally, using timers reduces manual effort and allowing growers to focus on other aspects of plant care while ensuring perfectly synchronized lighting with the plant's growth requirements. For any serious indoor gardener, integrating timers into the lighting system is a simple and effective way to improve plant health and streamline garden management.
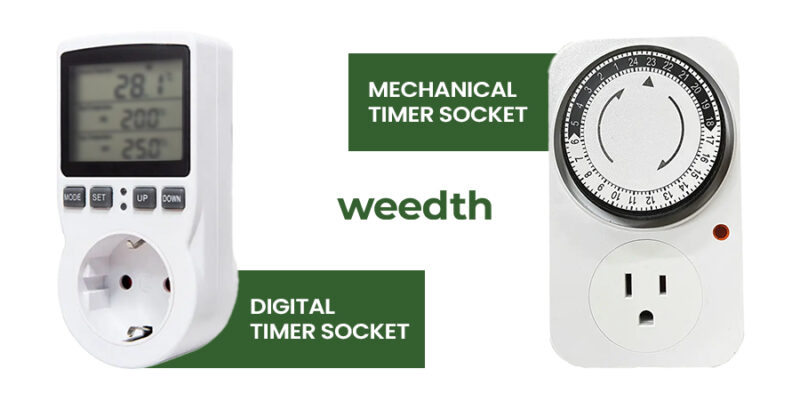
Note: You have to get a timer!

Light Hangers
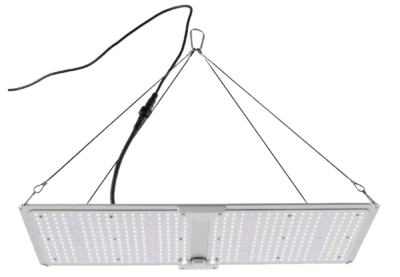
Light hangers are super handy for indoor cannabis growers because they make it simple to adjust the height and placement of grow lights. These hangers keep the lights at the right distance from the plants, which is really important as the plants get taller. Light hangers allow growers can easily raise or lower the lights, ensuring plants get the right amount of light intensity.
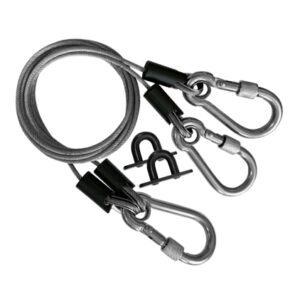
Remember: If grow lights are too close to plants, they can cause heat damage. On the other hand, lights placed too far away may not provide enough intensity, potentially slowing growth. Light hangers allow growers to fine-tune light placement throughout different growth stages, from seedlings to mature plants.
Cooling the Lighting System
Some grow lights like HID (High-Intensity Discharge) and some high-wattage LEDs can generate a lot of heat. If this heat isn't controlled, it can lead to an overly hot environment that hinders plant growth, potentially stressing plants and diminishing yields. Air-cooled reflectors can be used to directly channel heat away from the grow lights and out of the grow area using ducting systems. Additionally, oscillating fans and proper room ventilation play a key role in dispersing heat evenly and providing fresh air, which helps to prevent hotspots and maintain a consistent climate.
The most common cooling method for HID lights is air-cooled reflectors. These reflectors have an enclosure around the bulb that includes a glass shield and ducting ports. Cool air is drawn through the reflector by an inline fan connected to ducting, which passes over the bulb and carries away excess heat before it can raise the temperature in the grow area. This system effectively removes the heat directly at the source and vents it outside the grow room or tent, maintaining a cooler environment conducive to plant growth.
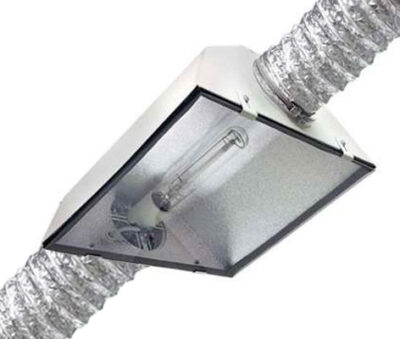
Some HID setups may use water-cooled systems, although these are less common due to their complexity and cost. In water-cooled systems, water circulates around the bulbs or the fixture to absorb heat, which is then carried away and cooled externally.
Some LED grow lights are designed with built-in cooling systems to manage heat more effectively. These systems usually feature heat sinks and fans. Heat sinks are components attached to the LED fixtures that draw heat away from the bulbs by increasing the surface area exposed to air, which enhances heat dissipation through convection. Additionally, fans may be integrated into the fixtures to actively cool the heat sinks by directing airflow over them, helping to keep temperatures down even more effectively.
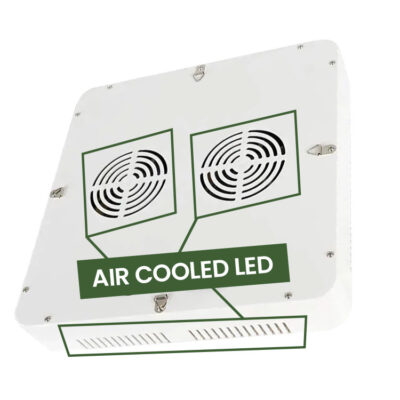
Note: Keeping grow lights cooler helps them last longer and work better, so they give off the best light for a longer time. Using these systems regulates the temperature and boosts light effectiveness in the grow room.
A Practical Grow Light Buying Checklist
- Type: Consider the type that best matches the growth stages of your plants. MH is for vegetative stage and HPS is for flowering. If you can only afford one, choose a dual-spectrum HPS or full-spectrum LED light providing the necessary wavelengths for vegetative and flowering stages in a single fixture.
- Certification and Condition: Ensure the light is safety certified (UL, ETL, CE) and in good shape.
- Cooling: Air-cooled lights last longer and keep your grow area cooler. If your light isn't air-cooled, you'll need to install ventilation.
- Support: Check if the light requires a stand or needs to be hung from the ceiling.
- Electrical Compatibility: Ensure the electrical fittings suit your needs. You might need an adapter or extension cord.
- Wattage and Lumens: Aim for lights that provide high lumens. Your choice depends on your budget and space.
- Spectral Adjustability: Some advanced LED systems allow you to adjust the spectrum settings to tailor the light to different growth stages or specific cannabis strains.
- Electrical Compatibility: Ensure that the light’s power requirements are compatible with your setup. You might also want to check if any adapters or extension cords are needed.
- Brand Reputation and Support: It’s a good idea to buy from well-known brands that offer reliable customer support and easy access to spare parts and services.
- User Reviews and Feedback: Take a look at reviews from other growers who have used the lights. This can give you insight into their experiences and any potential issues to watch out for.
- Spare Light: Always keep a spare light on hand to ensure it continues to grow in case of unexpected failures or during routine maintenance.
Ventilation and Climate Control
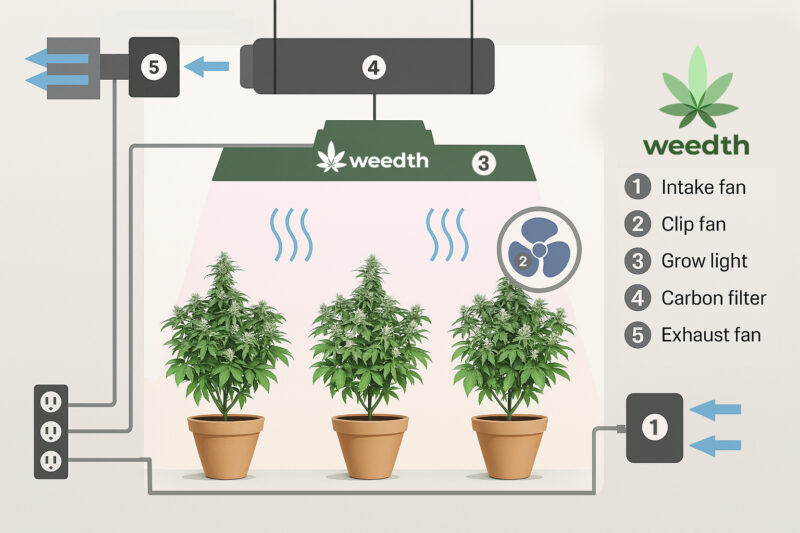
Air Circulation
Oscillating fans and other circulation devices ensure air moves evenly throughout the grow room. Airflow from fans mimics the natural wind, causing plants to develop stronger stems and branches. This is essential for supporting the weight of heavy buds during the flowering stage. Think of airflow like a mini gym session for your plants.
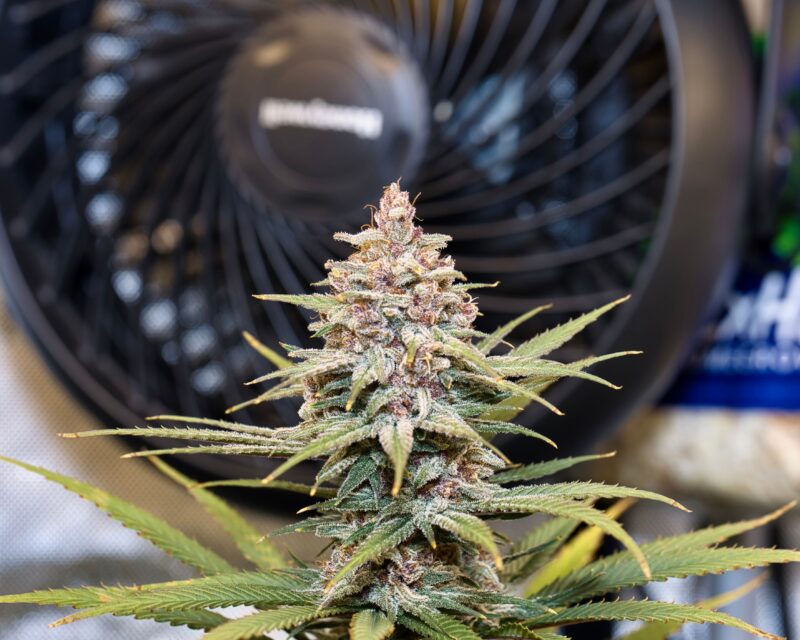
Good airflow makes it difficult for pests and diseases to take hold in a grow room. Many pests thrive in still, warm, and humid conditions, so keeping the air moving helps to break up these favorable conditions. Plus, good air circulation helps avoid hot or cold areas, keeping the temperature and humidity pretty consistent all around.
Air Exchange Is a Load Problem, Not a Timer Rule
Air exchange removes heat, humidity, odors, and depleted air while bringing in replacement air. There is no universal rule that every grow space must exchange its entire volume once per minute or once every three minutes. A small empty tent and a full flowering room may have the same volume but very different heat and moisture loads.
Start with the enclosure volume, then account for the fixture, plant transpiration, carbon filter resistance, duct length, bends, silencer, intake restriction, outdoor climate, and the temperature of the room feeding the tent. Fan ratings are measured under test conditions; real airflow falls as resistance increases.
Lung Room
The room surrounding a tent or smaller enclosure. Its temperature, humidity, and available fresh air set the starting conditions for the garden. An exhaust fan cannot create cool, dry intake air if the lung room is already hot and humid.
Passive intake can work when the intake openings are large and unobstructed. An active intake becomes useful when the enclosure is large, the duct route is restrictive, or negative pressure is excessive. A slight inward pull on tent walls is useful for odor control, but a tent collapsing tightly around the frame signals unnecessary restriction.
Temperature: Measure the Canopy, Not Only the Room
Cannabis can grow across a useful temperature range, but the correct setting depends on light intensity, cultivar, growth stage, humidity, airflow, root-zone temperature, and whether CO2 is enriched. A practical starting band for many non-enriched rooms is roughly 21–28°C (70–82°F) with lights on, followed by a modest drop during darkness. Treat that as a starting range, not a universal recipe.
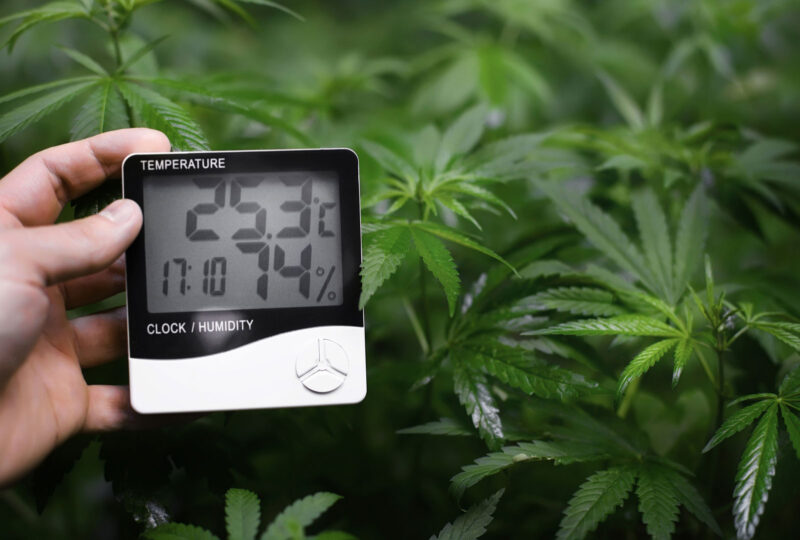
Measure at canopy height in the plant zone, away from direct radiant heating and humidifier mist. Leaf temperature can differ from room-air temperature, especially under HID lamps or strong airflow. Large day-to-night swings slow the room's stability and can push surfaces toward the dew point when the lights switch off.
Before adding air conditioning, check the easier causes: fixture power, driver location, exhaust restriction, intake temperature, duct bends, dirty filters, and the time of day the lights operate. Cooling equipment also adds electrical load and produces heat that must be rejected somewhere.
Humidity, Dew Point, and the Dark Period
Relative humidity changes with temperature, so a room can show a sharp RH rise after lights-out even when no extra water enters the air. Young plants with small root systems often tolerate a gentler drying demand, while dense flowering canopies need stronger moisture control because flowers create sheltered pockets that do not match the wall-mounted sensor.
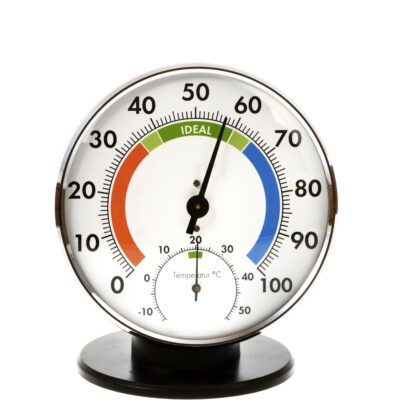
Broad starting ranges such as 55–70% RH for young plants, 50–65% during vegetative growth, and about 40–55% during flowering can help you begin, but temperature, cultivar density, disease pressure, and leaf response decide where within those bands the room should operate. The late-flowering target often moves toward the drier end when flowers are dense or the room has a history of Botrytis.
Use a sensor that records minimum and maximum values, and compare lights-on, lights-off, and the hour after irrigation. A single midday reading can miss the most humid part of the cycle. Keep sensors clean, verify them periodically, and place at least one within the canopy rather than only near the exhaust.
“Why does humidity jump as soon as the light turns off?”
Question sent by: Laura Bennett, via email.
The air cools, so the same amount of water vapor becomes a higher relative humidity. Plants and wet media may also continue releasing moisture. Keep air movement and extraction active into the dark period, watch dew point, and size dehumidification for the wettest hour rather than the driest reading.
Odor control
Flowering cannabis can produce a strong, persistent odor. A correctly sized activated-carbon filter connected to the exhaust fan removes much of that odor before air leaves the enclosure. Keep the filtered enclosure under slight negative pressure, seal obvious bypasses, and replace carbon when odor begins to pass through despite correct airflow and humidity.

CO2 enrichment
Supplemental carbon dioxide is an advanced environmental tool. It only makes sense when light, temperature, irrigation, nutrition, air distribution, and room sealing are already controlled. Continuously exhausting an enriched room wastes the gas, and a sealed room needs dedicated cooling and dehumidification.
CO2 is also an occupant-safety issue. Use purpose-built equipment, reliable monitoring, alarms, correct cylinder restraint, and local code compliance. Never improvise combustion, fermentation, or unmonitored gas release in a living space.
“Do I need bottled CO2 to get good indoor flowers?”
Question sent by: NorthShelf, via Facebook page.
No. Fresh-air exchange supplies ambient CO2 and is sufficient for a well-run home garden. Improve canopy light, roots, watering, temperature, humidity, and airflow first. Enrichment belongs in a sealed, measured room whose other limits have already been removed.
What a Ventilation System Actually Needs
- Inline Fans: They move air in and out of your grow area.
- Oscillating Fans: These help with air circulation within the grow area.
- Carbon Filters: These filters clean the air of strong cannabis odors.
- Ducting: This connects your inline fans and helps direct air where it needs to go.
- Vent Openings: Vents allow for passive intake of fresh air and exhaust of hot air.
- Exhaust Fans: Crucial for removing stale, hot, and humid air from the grow room.
- Intake Fans: Draw fresh air into the grow room, ensuring a constant supply of CO2.
- Duct Clamps: Secure ducting to fans and filters, ensuring airtight connections.
- Duct Silencers: Reduce noise generated by air moving through the ducting system.
- Fan Controllers: Regulate the speed and operation of fans for optimal airflow.
- Backdraft Dampers: Prevent air from flowing backward into the grow room.
Circulation and Air Exchange Do Different Jobs
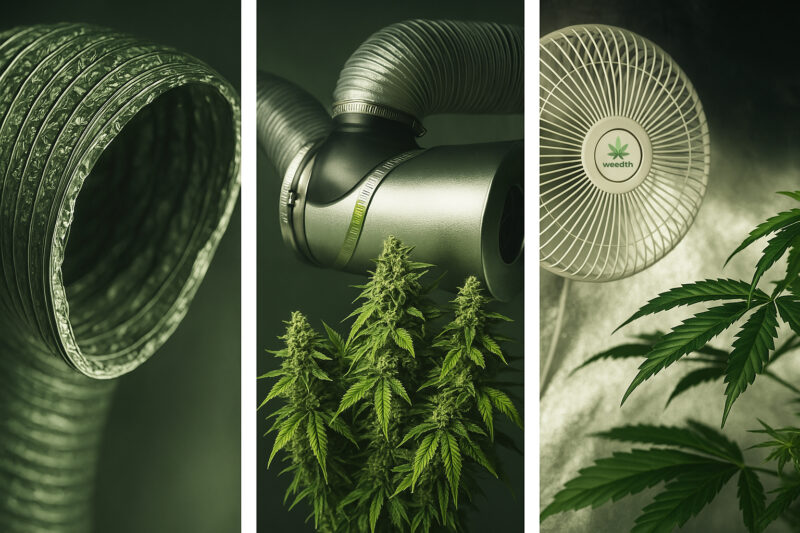
Good air circulation mimics the natural breezes found outdoors. Slight and consistent movement helps to strengthen the plants' stems and leaves. Stronger stems and branches can better support heavy buds without breaking.
Fans are integral to this setup, and oscillating fans distribute air evenly within the space. These fans mimic the natural movements of wind, prevent the formation of temperature differences, and encourage stronger plant development. Inline fans are also needed to pull stale air out and draw fresh air in. This helps to bring in fresh air for plants to use in making food(photosynthesis).
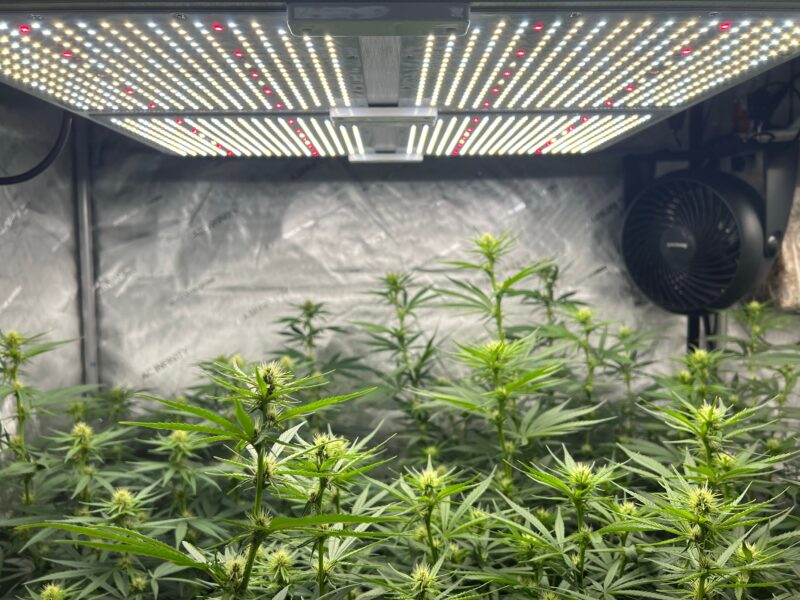
Exhaust systems typically include a powerful inline fan designed to expel used air and excess humidity from a room. Keeping the air circulation helps to control the temperature and reduces the risk of mold and pests from thriving in stagnant, moist conditions. Ducting helps these fans by efficiently directing airflow and making sure the entire room benefits from the circulation system.
Air conditioners and dehumidifiers may also be necessary in environments where climate control is difficult. These units help maintain the ideal temperature and humidity levels, which can otherwise vary significantly and negatively impact plant health.
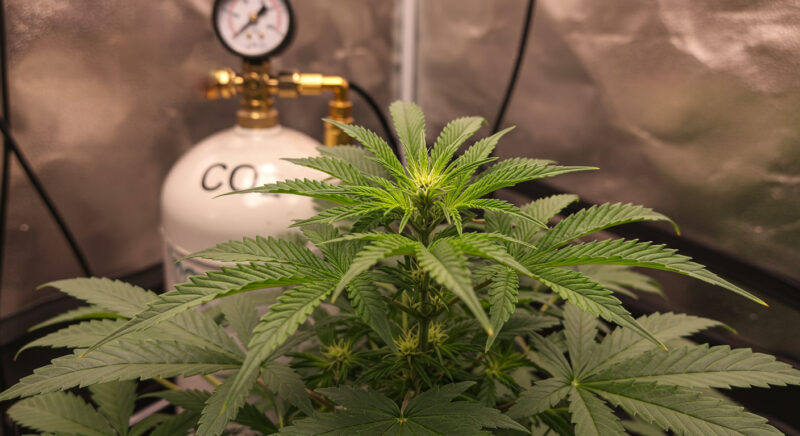
Advanced grow operations might include CO2 systems to stimulate plant growth and increase yield. These systems are managed carefully to maintain the correct concentration of CO2 and balance it with adequate ventilation.
Carbon filters are often incorporated into the exhaust system to control odors before the air is expelled outside. This feature is particularly important in cannabis cultivation because the plants can produce strong odors, especially during the flowering stage. Controlling these odors ensures compliance with local regulations and prevents attracting unwanted attention.
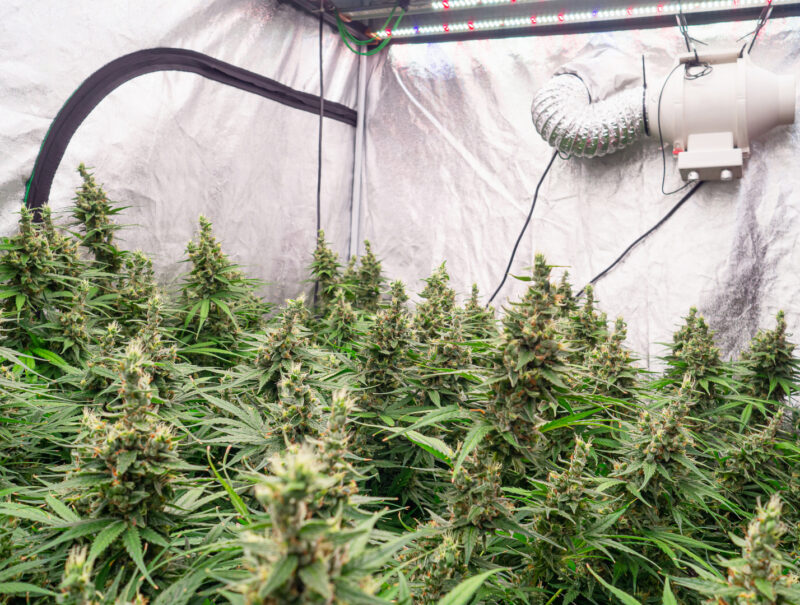
Cannabis plants are sensitive to their environments and stagnant air can lead to many problems. If there is no air circulation, the growing area can easily become a place where mold and pests flourish, especially in humid conditions. Also, these plants take in carbon dioxide and release oxygen while they grow. If the carbon dioxide runs out quickly, it can slow down their growth and hurt their ability to produce energy.
Ventilation Components in Practical Order
Inline Fans
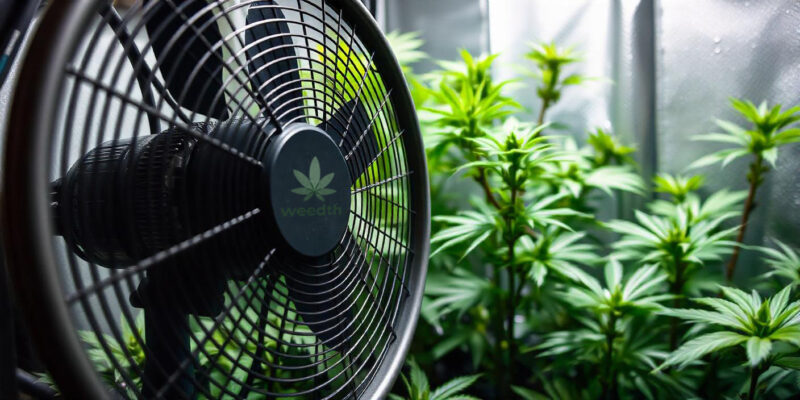
Inline fans move air through ducting systems, either bringing fresh air in or expelling stale air out. They are typically installed within the ducting network, positioned for efficient airflow throughout the grow space. These fans maintain a consistent air exchange, helping regulate temperature and humidity levels.
Oscillating Fans
Oscillating fans help to circulate air within the grow room, preventing the formation of hot or cold spots. They are usually placed at the canopy level to ensure even air distribution around the plants. This constant movement strengthens plant stems and promotes healthy growth by mimicking natural wind conditions.

Exhaust Fans
Exhaust fans remove stale, hot, and humid air from the grow room. They are typically installed near the top of the grow room where warm air accumulates. Removing this air helps prevent overheating and moisture buildup, thus maintaining a stable growth environment.
Intake Fans
These fans draw fresh, cooler air from outside into the grow room, replacing the air expelled by exhaust fans. They are usually installed near the bottom of the grow space to pull in cooler air from outside. Proper placement ensures the plants' continuous supply of fresh air rich in carbon dioxide.
Ducting
Ducting facilitates the channeling of air in and out of the grow room, linking inline, exhaust, and intake fans to various ventilation outlets. It is typically routed through walls or ceilings to direct airflow efficiently. Sealed and insulated ducting increases efficiency, lowers your energy bills, and can often pay for itself in energy savings.

Carbon Filters
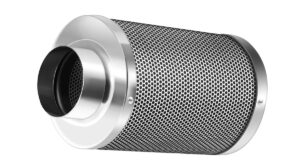
Carbon filters neutralize odors by filtering air before it is expelled outside. They are usually connected to exhaust fans or placed within the ducting system. Carbon filters trap odor molecules and purify the air.
Ventilation Ports
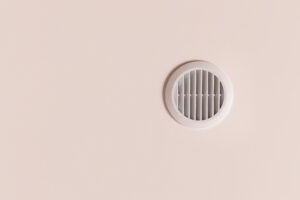
Ventilation ports are openings in the grow room walls or ceiling designed to attach ducting and fans. They facilitate the movement of air in and out of the space and are crucial for efficient ventilation and air exchange.
Passive Intake Vents
Passive intake vents allow fresh air to enter the grow room without mechanical fans. They are usually positioned low on the walls to pull in cooler air from the outside. These vents work with exhaust fans to maintain a balanced airflow.
Fan Controllers
Fan controllers regulate the speed and operation of fans within the grow room. They can be placed anywhere that is easily accessible for monitoring and adjustments. These controllers help maintain optimal airflow and environmental conditions by automatically adjusting fan speeds based on temperature and humidity levels.
Duct Clamps
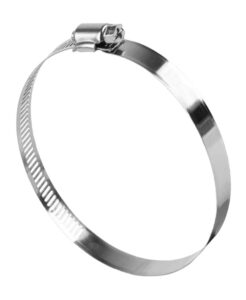
These clamps secure ducting to fans, filters, and ventilation ports, ensuring airtight connections that prevent air leaks and maintain efficient airflow.
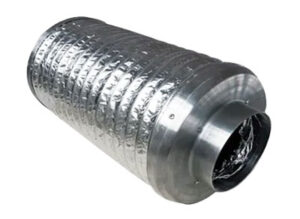
Duct Silencers
Duct silencers reduce noise generated by air moving through the ducting system. They are typically installed along the ducting path where noise is a concern. By dampening the sound, they create a quieter grow environment.
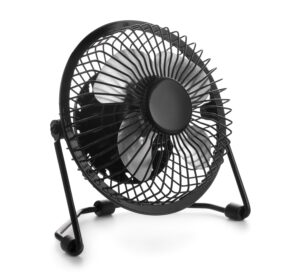
Air Circulators
Similar to oscillating fans, air circulators enhance air movement within the grow room, ensuring thorough air distribution and preventing stagnant air pockets that could hinder plant growth.
Backdraft Dampers
These dampers prevent air from flowing backward through the ventilation system, ensuring that air only moves in the desired direction, thus maintaining effective airflow.
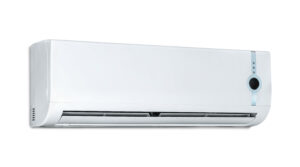
Heaters and Air Conditioners (for Climate Control)
These devices regulate the temperature within the grow room. They are placed based on the grow room layout and ensure that the environment remains within the optimal temperature range for plant growth.
Humidity Controllers
Humidity controllers monitor and adjust the humidity levels in the grow room. They can be integrated with humidifiers and dehumidifiers to maintain ideal humidity conditions, which is crucial for preventing mold and promoting healthy plant development.
Temperature Controllers
These controllers manage heating and cooling equipment to maintain the desired temperature range. They are placed within easy reach for adjustments and ensure the grow room stays within the optimal temperature conditions.
Air Purifiers
Air purifiers remove contaminants and allergens from the air, improving overall air quality. They are placed in areas with good air circulation to maximize their air filtering effectiveness.
Filters (HEPA, Pre-Filters)
These filters capture dust, mold spores, and other particulates to protect plants and the ventilation system. They are installed in line with the air intake or within air purifiers and ensure clean air circulation.
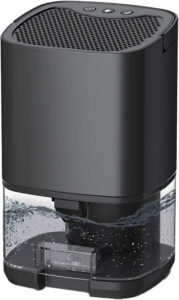
Dehumidifiers
Dehumidifiers reduce excess humidity in the grow room, preventing mold and mildew. Positioned where humidity accumulates, they help maintain a dry and healthy environment for the plants.
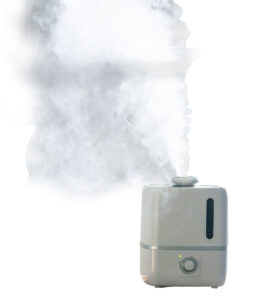
Humidifiers
Humidifiers are necessary in dry conditions to maintain optimal humidity levels. Placed in areas with good air circulation and they ensure even moisture distribution.
Air Diffusers
Air diffusers distribute air evenly throughout the grow room, enhancing the effectiveness of the ventilation system. They are placed at air entry points to ensure uniform airflow.
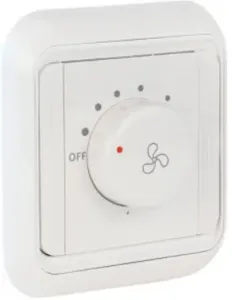
Fan Speed Controllers
Fan speed controllers adjust the operating speed of fans, helping to fine-tune airflow and ventilation. They are installed where fans are located, allowing for easy access and adjustments.
Cooling Tubes
Cooling tubes are used to cool high-intensity grow lights, preventing heat buildup. They are integrated with the lighting system and ducting to direct heat away from the grow space.
Filter Boxes
Filter boxes house carbon filters and are connected to the ventilation system. Positioned within the ducting, they help manage odors and purify the air before it is expelled outside.
Transition Pieces (Duct Connectors, Reducers)
Transition pieces connect different sections of ducting or adapt ducting to fit fans and filters. They are placed at junctions within the ducting system to ensure seamless airflow transitions.
Choosing an Indoor Growing Medium
A growing medium is the material or root-zone system that holds the plant upright and manages water, oxygen, nutrients, and biological activity around the roots. Soil, peat-based mixes, coco coir, rockwool, expanded clay, nutrient solution, and aeroponic chambers behave differently even when the plant above them looks similar.
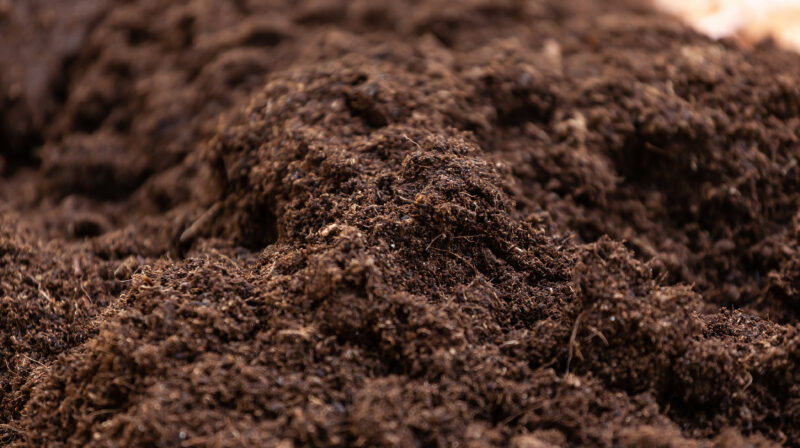
The word “soil” is often used for every brown bagged substrate, but many indoor potting mixes are technically soilless. That distinction matters because pH targets, buffering, fertilization, irrigation frequency, and reuse practices change with the medium. The best option is not the most advanced one. It is the root zone you can keep evenly moist, aerated, clean, and nutritionally stable.
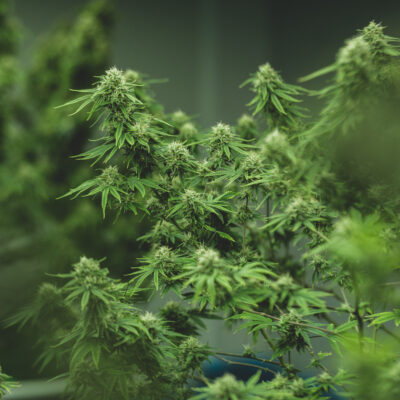
Growing Medium
The root-zone material or system that supports the plant and regulates water, air, and nutrient access. A medium may contain soil, but coco, peat mixes, rockwool, clay pebbles, and nutrient solution are not soil.
Choose the Medium Around the Routine You Can Maintain
The medium determines how often you must irrigate, how quickly a mistake appears, and how much equipment sits between you and the roots. A pre-amended soil mix can provide buffering and a slower response. Coco and rockwool allow frequent measured fertigation but depend on a reliable nutrient solution. Recirculating hydroponics can be efficient, yet reservoir temperature, oxygen, sanitation, pumps, and EC must remain stable.
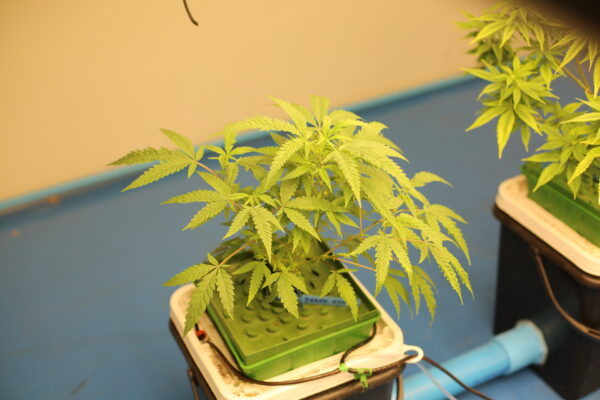
Start with your real routine. If you can inspect the garden once a day, a large, well-aerated container mix may fit better than a small coco pot that needs several irrigations. If you enjoy measuring and can provide backup for pumps, a hydroponic system may offer the control you want. Neither choice is automatically superior.
| Routine question | Why it changes the medium choice |
|---|---|
| How often can you inspect? | Small, fast-draining root zones may require multiple checks or automated irrigations; larger buffered mixes change more slowly. |
| Can you measure pH and EC? | Coco, rockwool, and nutrient-solution systems depend more directly on measured fertigation. |
| What happens during a power failure? | Aeroponic roots and some hydro systems can lose water or oxygen quickly; container mixes usually provide more response time. |
| Where does drainage go? | Frequent runoff requires a lawful, clean, accessible collection and disposal plan. |
What a Useful Root Zone Must Do
A useful root zone must do several jobs at once: support the plant, accept water evenly, drain excess solution, retain enough moisture and nutrients between irrigations, and preserve air-filled pores after watering. No single ingredient creates that balance on its own. Particle size, compaction, container shape, root density, temperature, and irrigation method all change how the same bag of medium behaves.
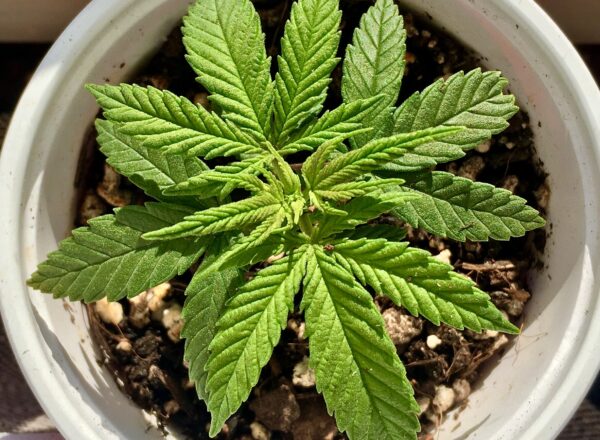
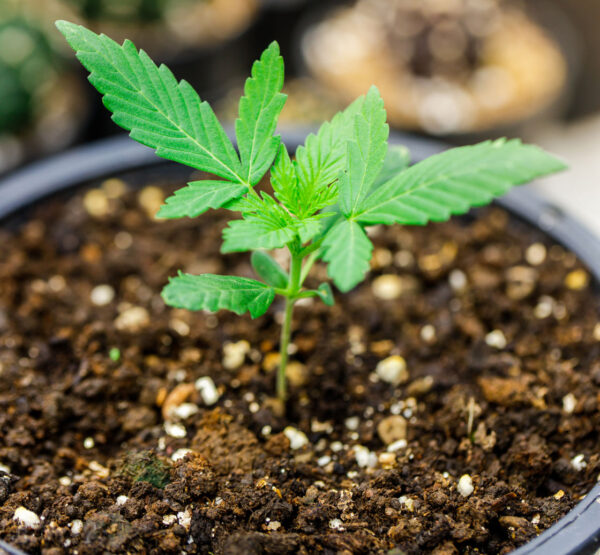
Young plants need a small, evenly moist volume without a saturated center. As the canopy and root mass expand, water use accelerates and the container must wet evenly rather than forming dry pockets or channels. During flowering, the medium must support higher demand without remaining waterlogged through the dark period. The goal is not constant wetness. It is a repeatable wet-to-dry rhythm that keeps water and oxygen available together.
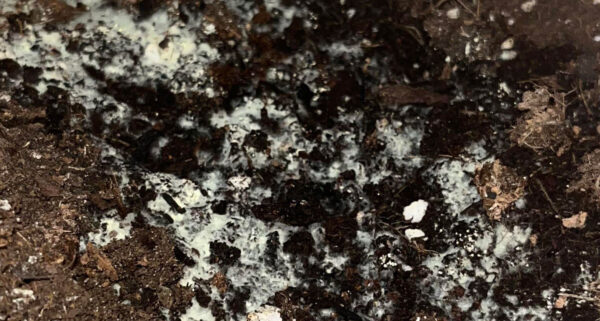
Salt accumulation can change that rhythm by pulling water away from roots even when the pot looks moist. Watch source-water quality, fertilizer concentration, dry-back, and root-zone EC as one system. A plant that appears hungry in a heavy, wet pot may need oxygen and diagnosis before it needs another feed.
Water Retention and Drainage Must Stay in Balance
Water retention and drainage are not opposites. A productive medium holds usable water inside its pore network while allowing gravity drainage to leave enough air for root respiration. A mix that drains instantly but dries in hours may demand constant irrigation. A mix that stays saturated for days can restrict oxygen and favor root disease.
Judge the whole container, not only the top centimeter. Lift the pot, check moisture deeper in the profile, inspect how quickly water enters, and note whether drainage begins evenly or rushes through one channel. Pot weight is especially useful because it turns an invisible root zone into a repeatable comparison.
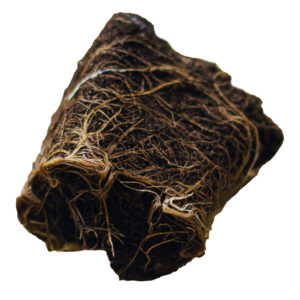
Persistent wetness, sour odor, weak pale roots, slow growth, or wilting in a heavy pot deserve investigation. Stop automatic irrigation, remove standing drainage, confirm temperature and airflow, and inspect the root zone before adding fertilizer.
What to Remember
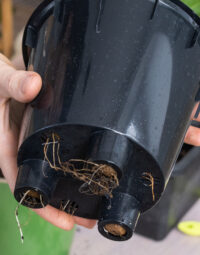
Drain holes are necessary, but they cannot repair a compacted mix, an oversized container watered in small circles, or a saucer that never gets emptied.
Aeration: Roots Need Water and Oxygen at the Same Time
Roots use oxygen to respire, maintain membranes, and support active nutrient uptake. The useful question is not whether a dry ingredient looks airy. It is whether the planted, watered medium still contains connected air spaces after roots, fine particles, and repeated irrigations have changed its structure.
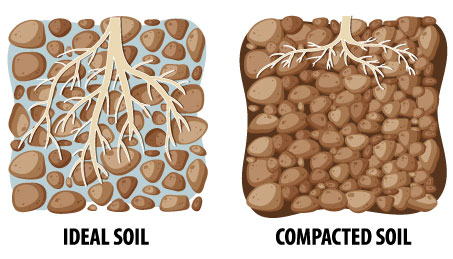
Perlite, pumice, rice hulls, bark, coco chips, and similar coarse materials can improve structure when they suit the rest of the mix. More amendment is not always better. A very coarse mix may dry too quickly for hand watering, while fine peat or compost can settle and reduce air-filled porosity over time.
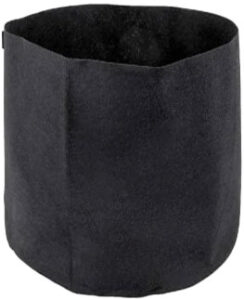
Fabric containers can increase evaporation and air pruning around the sidewall, but they also dry unevenly in strong airflow and may need a larger irrigation volume or frequency. Match the container to the medium and routine rather than expecting the container material to solve overwatering by itself.
pH Is a Nutrient-Availability Signal
pH influences the chemical forms and availability of mineral nutrients. It does not measure how much nutrient is present, and correcting pH will not repair a saturated, cold, salty, or diseased root zone. Read pH beside EC, water alkalinity, irrigation behavior, and the condition of new growth.

Many soil-based container systems operate comfortably around pH 6.0–7.0, while coco, rockwool, and hydroponic nutrient solutions are commonly managed in a more acidic band, often around pH 5.5–6.5. These are broad operating ranges. Product chemistry, source-water alkalinity, cultivar response, and the pH inside the root zone can shift the useful target.
Mix nutrients according to the label, allow the solution to settle, measure EC, and adjust pH last. Calibrate meters with fresh standards and do not chase every small decimal change. A stable trend and healthy new growth are more useful than repeated correction of a drifting cup of solution.
Nutrient Availability Depends on the Whole Root Zone
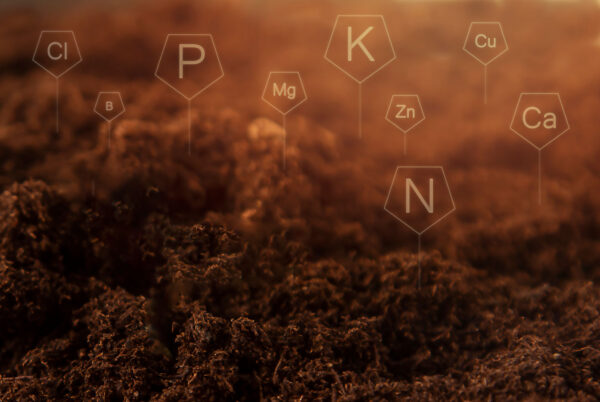
Nutrient availability depends on solution chemistry, root health, temperature, moisture, oxygen, microbial activity, and the medium's exchange capacity. A bottle can contain the correct elements while the plant still cannot use them because the root zone is saturated, too saline, outside a useful pH range, or physically damaged.
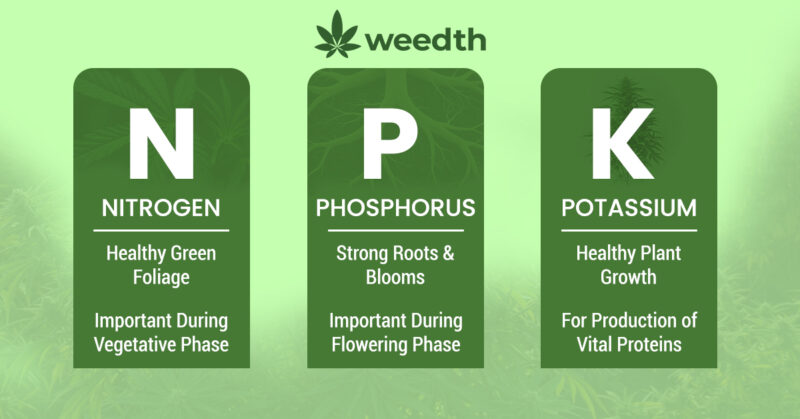
The three numbers on a fertilizer label describe nitrogen, available phosphate, and soluble potash under the labeling system used in that market. They do not describe the complete program. Calcium, magnesium, sulfur, iron, manganese, zinc, copper, boron, molybdenum, water alkalinity, and the interactions among them still matter.
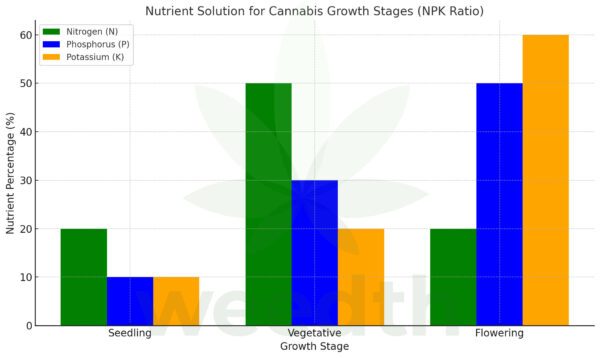
Use the feed chart as a starting framework, not a command to reach the highest dose. Measure the mixed solution, record what changed, and read healthy new growth alongside root-zone behavior. When EC rises while the pot remains wet and the plant slows, increasing concentration usually adds pressure rather than solving the cause.

Advice
Change one variable at a time. If pH, fertilizer strength, watering frequency, light intensity, and temperature all change together, even a successful recovery will not tell you what worked.
Structure, Cleanliness, and Biological Risk
A mature indoor plant becomes top-heavy, especially after irrigation and late in flowering. The root zone must resist slumping, expose no unsupported roots, and accept stakes, ties, or a trellis without damaging irrigation lines. Container stability and a clear access path matter just as much as the medium itself.
Clean does not mean biologically empty. A healthy living soil contains microorganisms, while an inert hydroponic system is managed with a different sanitation strategy. The practical goal is to prevent unwanted pests, pathogens, algae, plant debris, and contaminated tools from entering or spreading through the room.

Inspect bags for damage, store media dry and sealed where appropriate, clean reusable containers, and quarantine incoming clones. Fungus gnats, root aphids, mites, and disease can arrive with plant material, wet media, tools, or reused equipment. Treat every new input as something to inspect, not something to fear.
Do not sterilize a living system by habit
Heat, disinfectants, and aggressive chemical treatments can destroy the biology a living soil was designed to support. Use a sanitation method that matches the medium, the crop history, and the actual risk. Discard material after a serious or unidentified root disease unless a reliable remediation protocol says it can be reused safely.
Reusing a Medium Requires a Reason and a Reset Plan
Reuse can reduce waste and cost, but each medium needs a different reset plan. Durable inert media may be washed and disinfected when the manufacturer supports that method. Coco can sometimes be reused after roots, salts, and physical breakdown are evaluated. Living soil is usually renewed by preserving structure and biology, replacing lost volume, and adding amendments from a soil test or a known recipe rather than sterilizing it.

Before reusing anything, review the previous crop. Unexplained wilt, root rot, pests, herbicide exposure, severe salt accumulation, or a collapsed structure can make replacement cheaper than diagnosis. Also compare the labor, water, disinfectant, drying space, and disposal required for the reset.
If reuse makes sense, remove old roots according to the system, correct salts gradually, verify drainage, and test a small batch before filling the entire room. Label each batch and record how many cycles it has completed.

Master Advice
Reuse a medium because you understand how to restore it, not simply because it still looks like soil.
Cost, Cation Exchange, and the Hidden Labor Bill
The cheapest bag can become the most expensive root zone if it requires frequent irrigation, extra amendments, pest treatment, or replacement halfway through the cycle. Compare the full cost: medium, container, nutrients, meters, pumps, drainage, water, disposal, storage, and the time needed to maintain it.
Cation Exchange Capacity (CEC)
A measure of how strongly a medium can hold and exchange positively charged ions such as calcium, magnesium, potassium, and ammonium. Higher CEC can add buffering, but it does not automatically mean better drainage, correct nutrition, or a healthier root zone.
Peat, humus, clay, and coco each interact with nutrients differently. Coco, for example, requires attention to calcium, magnesium, potassium, and its initial buffering. Inert media such as rockwool provide less chemical buffering, so the irrigation solution has a more immediate effect. Choose the amount of control you can measure and maintain.
Comparing Indoor Growing Media
There is no universal indoor medium. Soil-based mixes trade some precision for buffering. Coco offers a soil-like container with hydroponic fertigation behavior. Rockwool and clay pebbles make irrigation chemistry and hardware more visible. Deep-water and recirculating systems remove most solid media but add reservoirs, pumps, oxygen, temperature control, and failure planning.
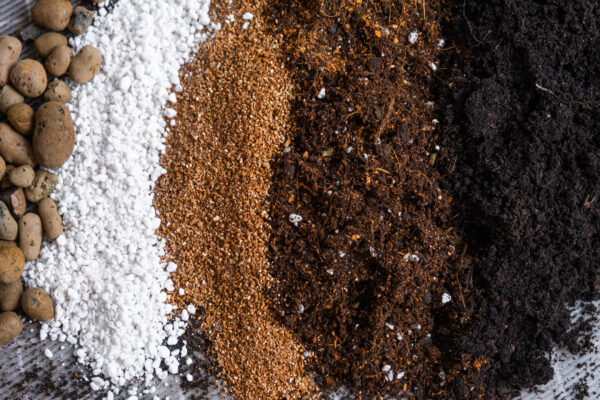
As you compare them, ask four questions: How often must I irrigate? How quickly will a mistake reach the roots? What will I measure? What happens if power, a pump, or my schedule fails? The answer usually reveals the better fit more clearly than a claim about which medium grows fastest.
Soil and Soil-Based Container Mixes
Soil-based container growing is familiar, flexible, and comparatively buffered. Indoors, the most reliable starting material is usually a clean, structured potting mix designed for containers rather than dense garden soil dug from outdoors. Container mixes may contain peat or coco, compost, bark, aeration particles, lime, and mineral or organic fertilizers even when the bag is casually called soil.
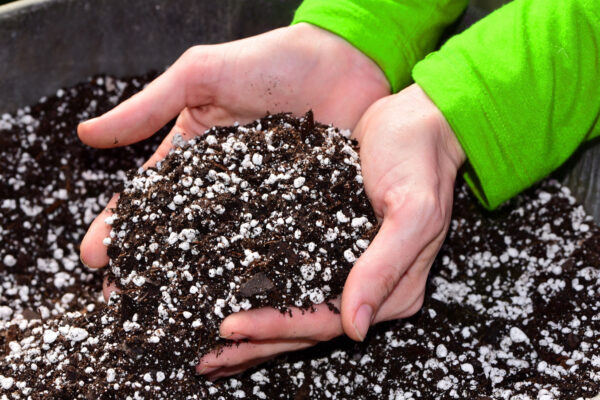
Check the ingredient list, initial nutrient charge, drainage, and whether the product is intended for seedlings or established plants. A heavily amended mix can be too strong for young roots, while a light mix may need feeding soon after transplant.

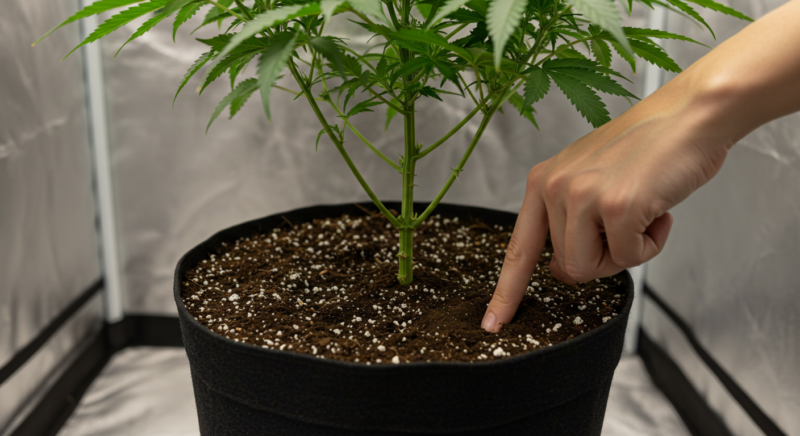
Water the entire intended root zone
Apply water slowly enough for the surface to accept it, pause if needed, and cover the container evenly. Repeatedly watering only beside the stem can leave dry pockets. Repeated small sips can also keep the upper layer wet while the lower profile receives little oxygen.
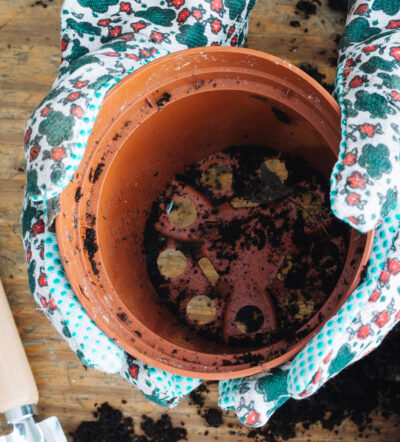
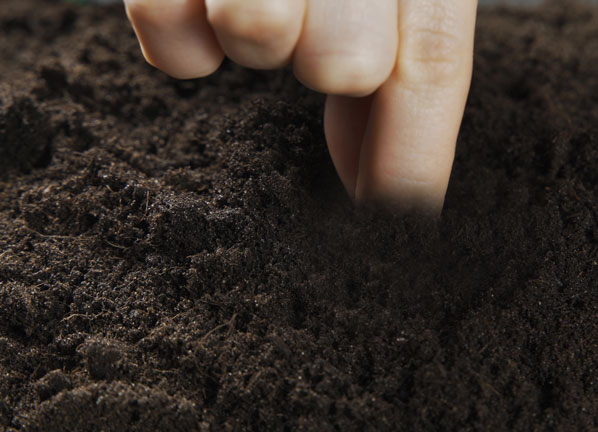
Use pot weight and deeper moisture as the main signals. A finger test describes only the surface. Empty drainage trays and keep the container raised when the base would otherwise sit in runoff.
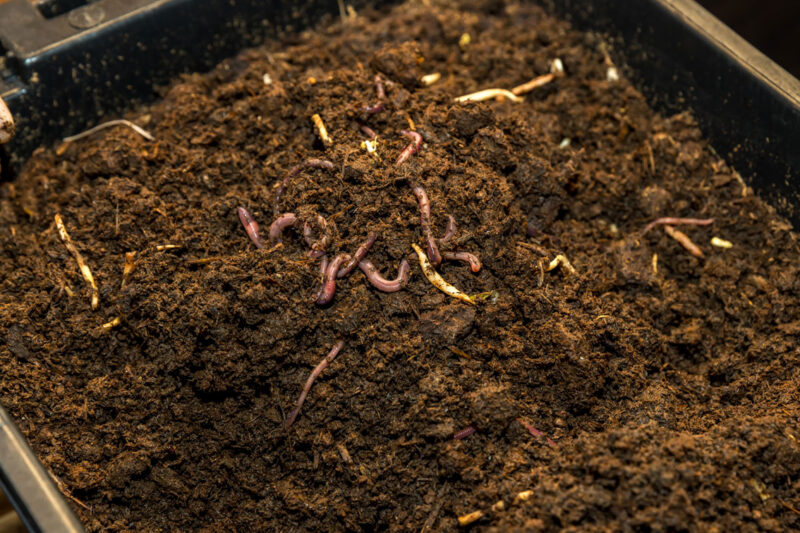
Earthworms and active biology belong in systems designed to support them, not every small pot. In compact indoor containers, excessive mulch or continuously wet organic matter can also shelter fungus gnats. Build the biology, container size, irrigation, and pest-monitoring plan together.
Organic and Mineral-Fed Soil Mixes
Organic and mineral-fed systems are not opposites between natural and artificial plant nutrition. Roots absorb mineral ions in either case. The difference is how those ions become available and how the grower manages the root zone.
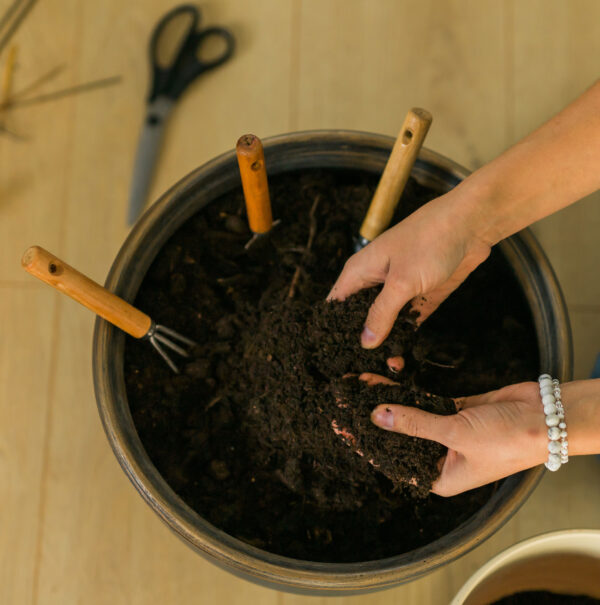
Living and biologically active mixes rely on decomposition, microbial activity, organic matter, moisture, and time. Mineral programs deliver measured soluble nutrients more directly and can respond quickly, but concentration and salt balance require attention. Many successful gardens combine approaches. Choose one coherent program and avoid stacking several complete fertilizer systems simply because each label sounds beneficial.
Remember
A feeding philosophy does not replace observation. Healthy roots, balanced moisture, appropriate pH, and enough oxygen remain necessary in every system.
Hydroponics: More Control and Less Buffer
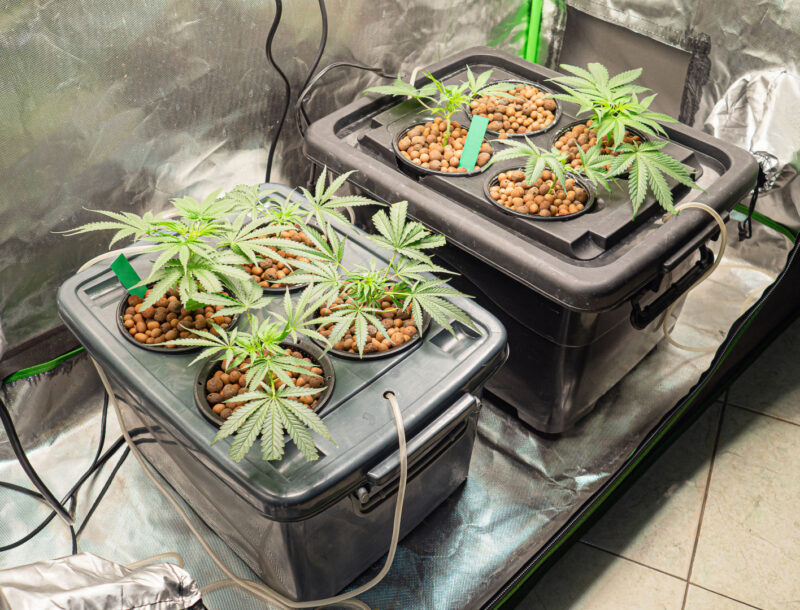
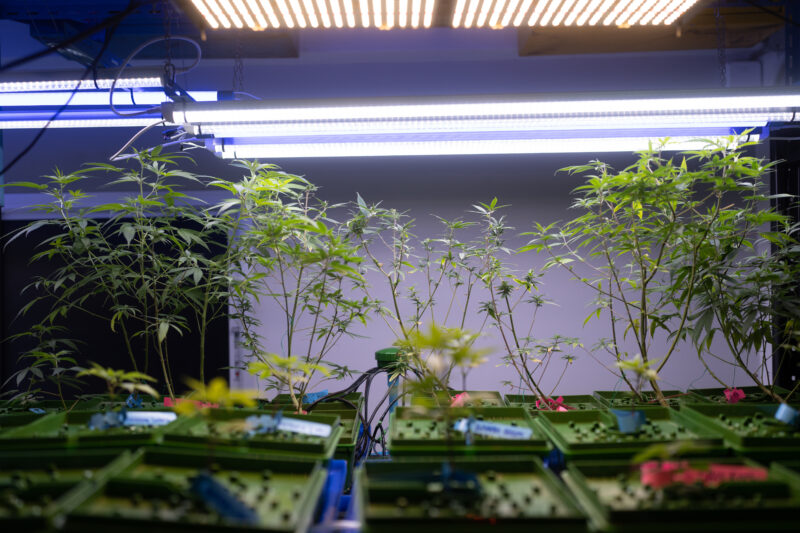
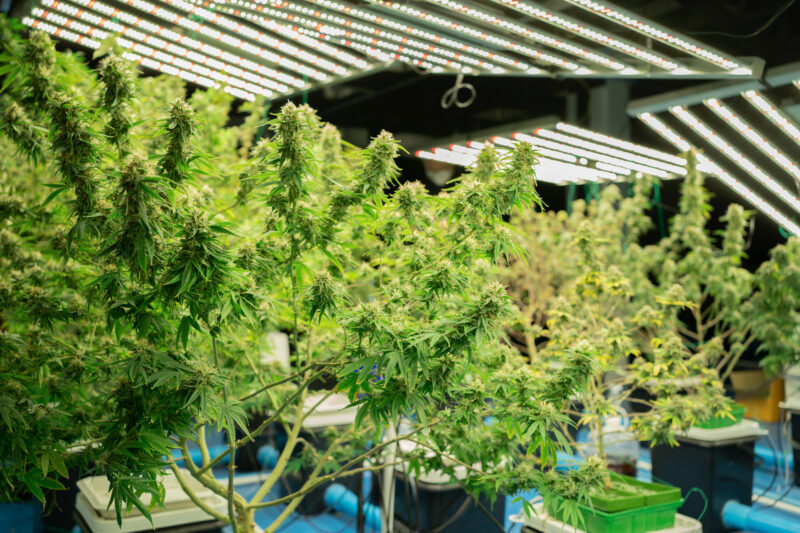
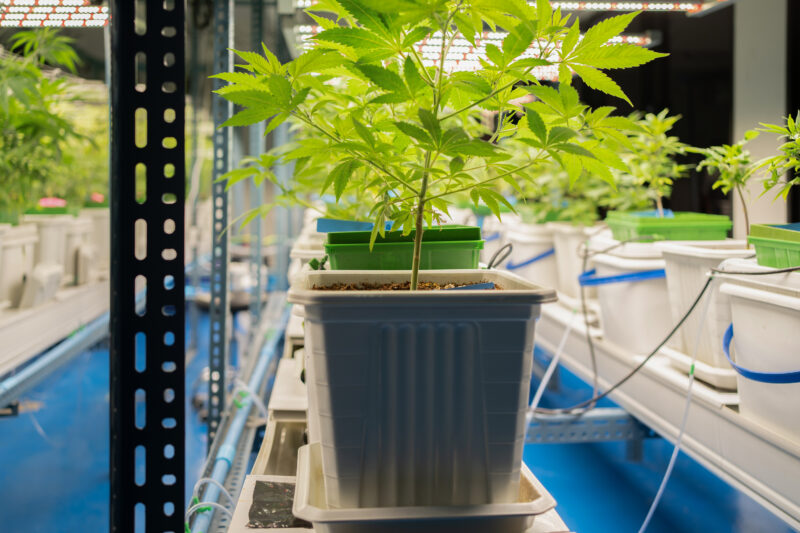
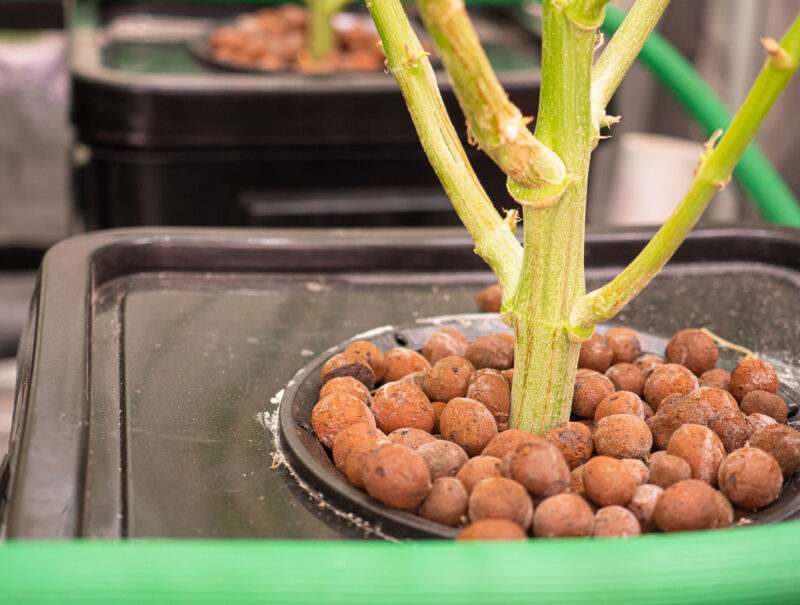
Hydroponics supplies mineral nutrients through water without field soil. The roots may sit in rockwool, clay pebbles, or another inert support, or they may contact an aerated solution directly. Common designs include deep-water culture, drip irrigation, ebb and flow, and recirculating systems.
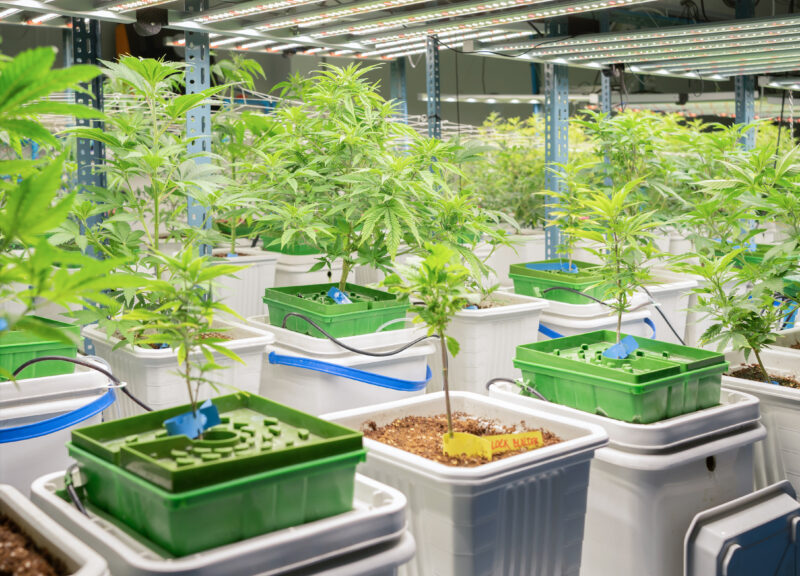
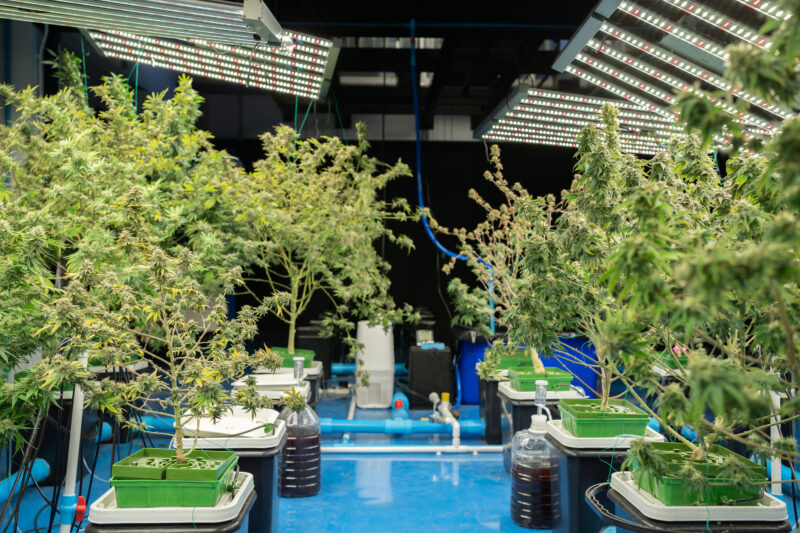
The attraction is direct measurement and rapid adjustment. The tradeoff is a smaller buffer. Reservoir pH, EC, temperature, oxygen, water level, sanitation, and pump operation can change quickly, and a shared reservoir can move one problem to every plant.
What makes hydroponics dependable
- An opaque, accessible reservoir with enough volume to resist sudden swings.
- Aeration or circulation appropriate to the system.
- Filtration, clean plumbing, leak containment, and a lawful drainage plan.
- Calibrated pH and EC meters, plus a way to verify water temperature.
- Spare air stones, pumps, tubing, emitters, or a manual rescue plan where failure time is short.
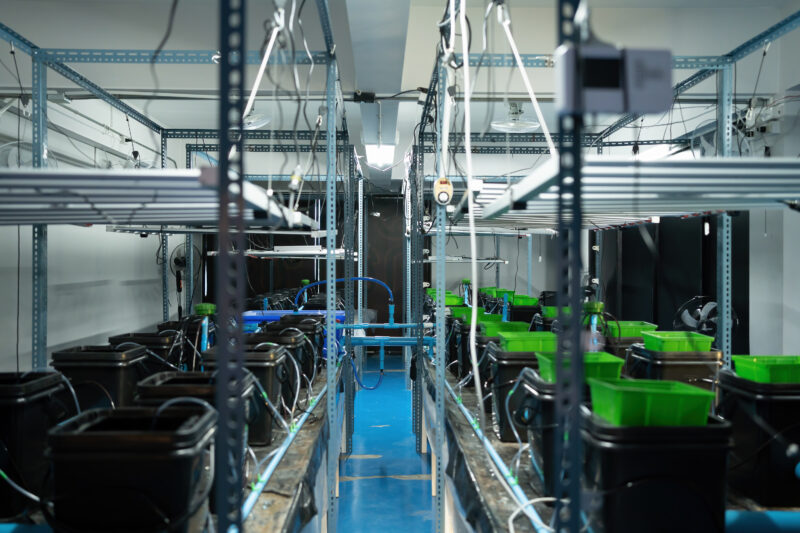
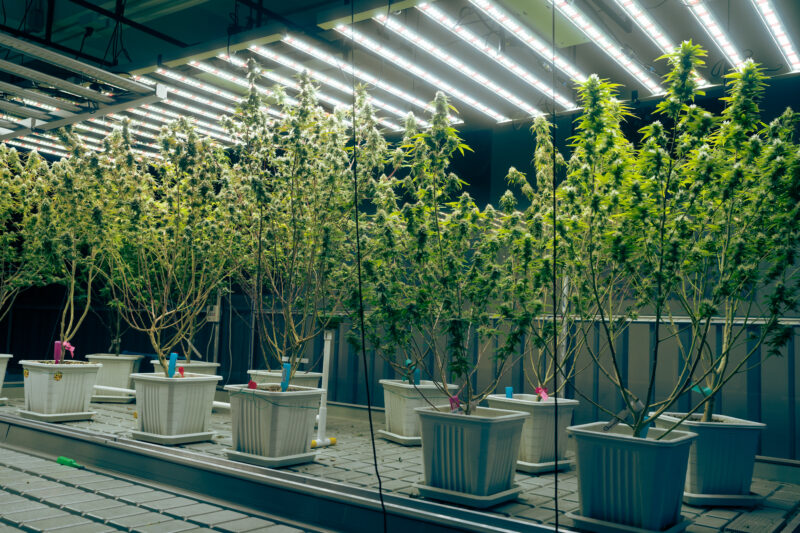
Hydroponics can produce fast, uniform growth when the room and root zone are stable. It does not guarantee larger yields, use zero water, or eliminate pests and disease. It simply gives the grower a different set of controls and responsibilities.
Coco Coir: A Soilless Medium with Hydroponic Behavior
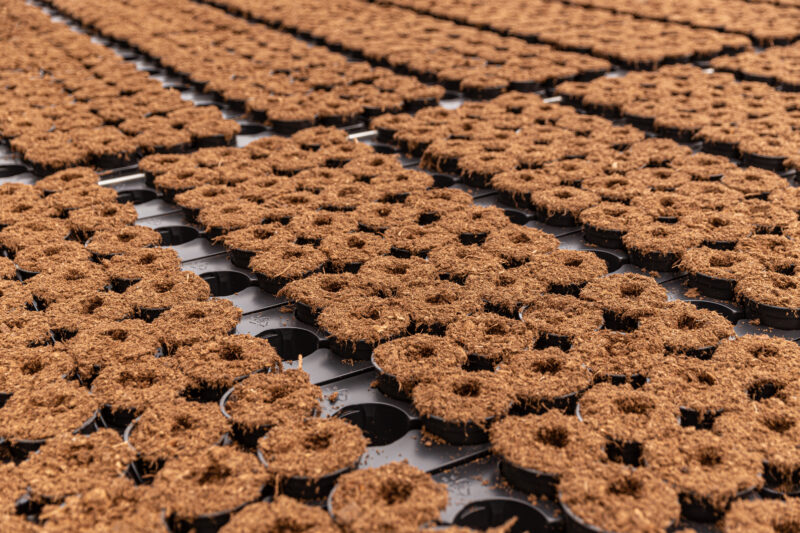
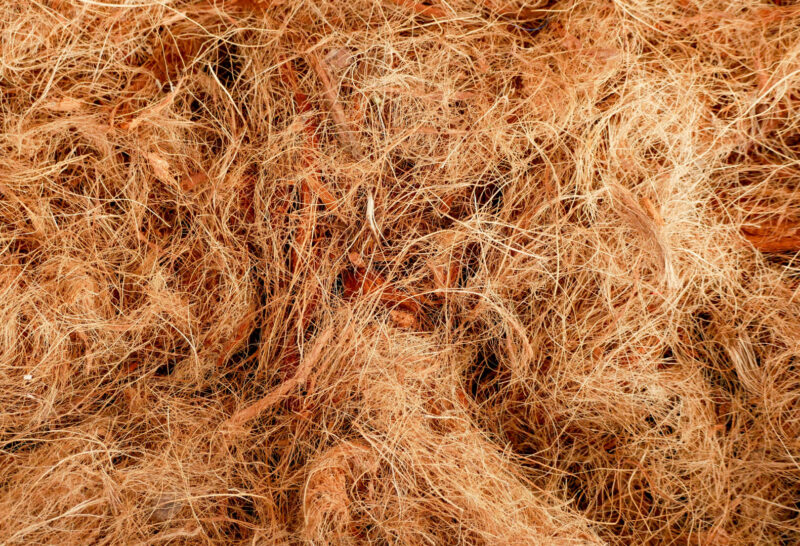
Coco coir is made from processed coconut husk and is usually managed as a soilless hydroponic medium. It holds substantial water while retaining useful air space, which makes it adaptable to hand watering, drip irrigation, and drain-to-waste systems.
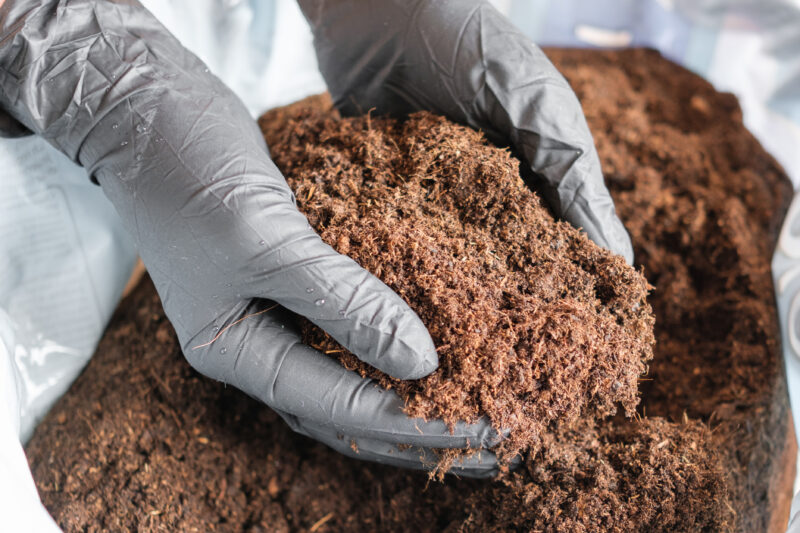
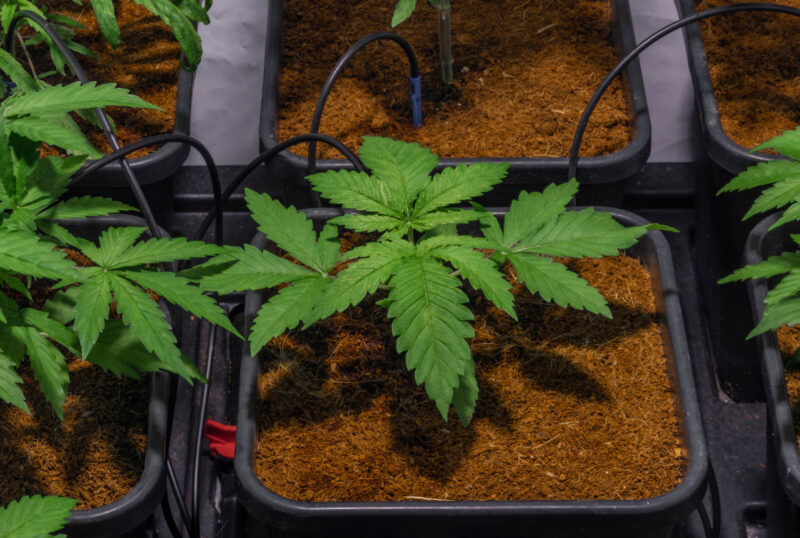
Quality varies. Rinsing removes loose salts, while buffering prepares exchange sites so calcium and magnesium are not pulled unpredictably from the nutrient solution. Buy a horticultural product with clear processing and analysis information when possible.
Coco generally works best with a complete coco or hydroponic nutrient program at an appropriate pH and EC. It should not be treated as pre-fertilized soil or repeatedly allowed to become bone dry. Frequent, even fertigation can keep root-zone chemistry stable, but the correct frequency depends on container size, plant demand, climate, and water-holding characteristics.
Before choosing coco
- Confirm you can measure and mix nutrient solution consistently.
- Plan where drainage will go and how emitters will be checked.
- Allow enough container volume for the irrigation frequency you can maintain.
- Track input and root-zone trends instead of chasing one runoff reading.
Pro Tip
Coco is forgiving about air around the roots, not about neglect. Its best feature is repeatable fertigation, so choose it when that routine fits your schedule.
Aeroponics: High Oxygen with Very Little Failure Time
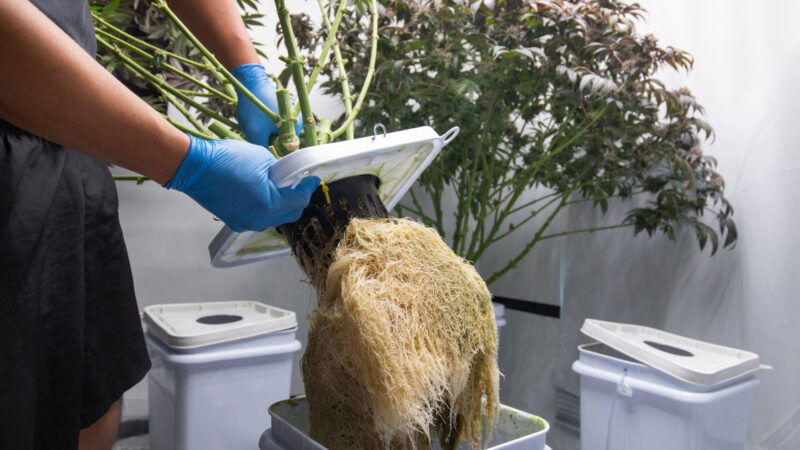
Aeroponics suspends roots in a dark chamber and delivers nutrient solution as a mist or fine spray. The root zone can receive abundant oxygen, and the system gives precise control over irrigation chemistry. Those advantages come with very little buffer when a nozzle clogs, a pump stops, a timer fails, or the root chamber warms.
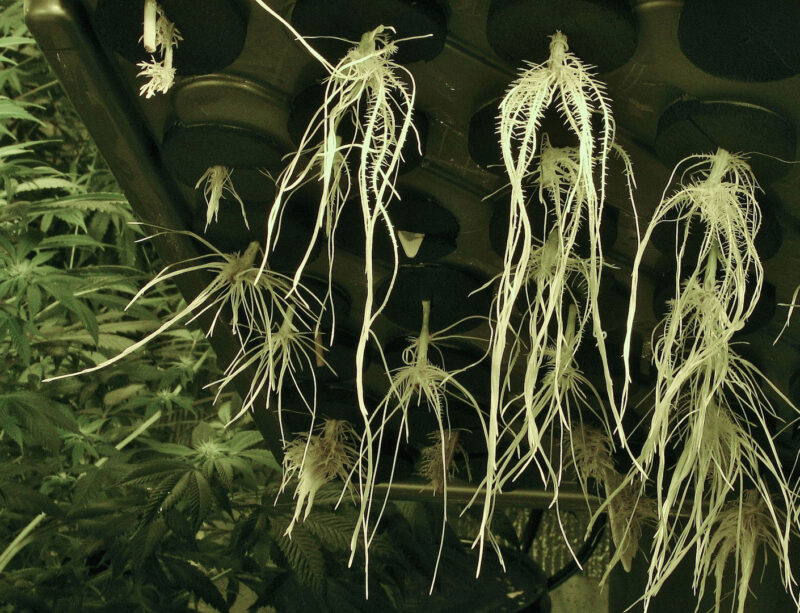
Low-pressure systems use larger droplets and simpler pumps. High-pressure aeroponics uses finer droplets, pressure-rated plumbing, filtration, and carefully timed cycles. The terms are often used loosely in marketing, so judge the design by droplet delivery, pump duty, access, filtration, drainage, and the time roots remain safely moist after failure.
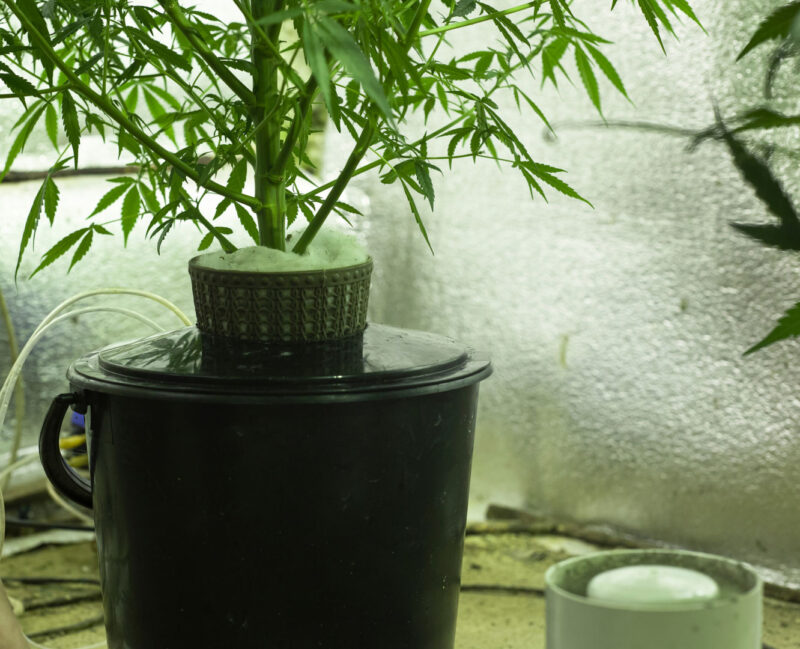
What the system needs
- An opaque, clean root chamber with accessible drains.
- A pump and timer rated for the intended duty cycle.
- Filtration and nozzles that can be inspected without damaging roots.
- Stable reservoir temperature, pH, EC, and dissolved oxygen.
- Leak containment, electrical protection, and a failure alarm or backup plan.
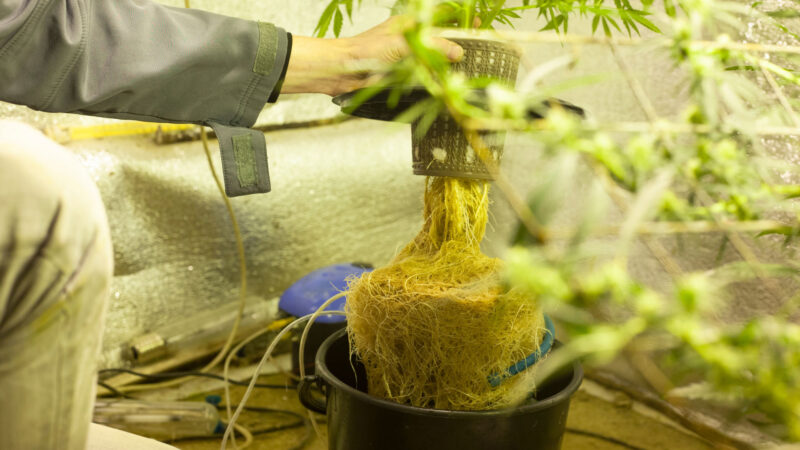
Aeroponics is attractive when precise root-zone control is the goal and daily technical maintenance fits the grower. It is a poor choice when the room is unattended for long periods or when one failed component could remain unnoticed. A simpler container or drip-fed coco system often provides more learning time after a mistake.
Master Advice
Complexity should solve a problem you actually have. If a simpler root zone can meet the crop and schedule, reliability is usually worth more than novelty.
Plan Water, Nutrients, and the Medium Together
The medium determines how irrigation should behave. Soil-based mixes often benefit from a thorough wetting followed by an appropriate dry-back. Coco is usually managed as a soilless hydroponic medium and should not be treated like soil or allowed to become repeatedly bone dry. Recirculating hydroponics depends on reservoir chemistry, temperature, oxygen, sanitation, and pump reliability.
Start by learning the source water. pH matters, but alkalinity explains how strongly the water resists pH change. EC gives a broad indication of dissolved ions, while sodium, chloride, calcium, magnesium, and hardness influence the nutrient program. Do not assume expensive filtration is necessary until a water test shows what needs to be corrected.
“Should I water every two days so the schedule stays consistent?”
Question sent by: Caleb Martin, via contact form.
Keep the inspection consistent, not the watering interval. Pot weight, moisture deeper in the root zone, plant size, medium, container, temperature, humidity, and light intensity change the drying rate. Water when the root zone needs it, then record how long that took.
Use the fertilizer program designed for the medium and water source. Begin conservatively, change one variable at a time, and compare new growth rather than expecting old damaged leaves to become perfect again. More fertilizer does not create more light, and more light increases water and nutrient demand only when the roots and climate can support the additional growth.
A Simple Stage-by-Stage Indoor Roadmap
The exact calendar changes with genetics and goals, but the room's job changes in a predictable sequence. Use the table as a planning map rather than a promise of dates or yield.
| Stage | Main plant need | Room priority | What to verify |
|---|---|---|---|
| Seedling or rooted clone | Gentle light, stable moisture, clean air, warm root zone | Avoid overwatering and excessive intensity | New growth is compact, roots are expanding, and the medium does not stay saturated |
| Vegetative growth | Increasing light, root volume, balanced nutrition, structure | Shape a canopy that fits the fixture and future stretch | Edges receive useful light, ties are not cutting stems, and airflow reaches between plants |
| Transition to flowering | Consistent photoperiod, room for stretch, stable irrigation | Confirm uninterrupted darkness for photoperiod plants and reset equipment positions | Timer accuracy, light leaks, final container size, support, and drainage capacity |
| Flower development | Even canopy light, moisture removal, support, clean inspection | Control night humidity and inspect dense flowers without damaging them | No odor bypass, dead air pockets, pests, mildew, soft brown tissue, or overheated tops |
| Harvest preparation | Stable health until maturity and a clean handling plan | Prepare a lawful, clean, dark drying environment before cutting | Drying space, sanitation, tools, labels, and environmental monitoring are ready |
Remember
The flowering room is not simply the vegetative room with a 12-hour timer. The canopy is larger, irrigation demand is higher, flowers trap moisture, odor increases, and the dark period exposes weaknesses that were easy to miss earlier.
Prevent Problems Before You Have to Diagnose Them
An indoor room gives you control, but it also gives pests and disease a protected environment. Warm temperatures, dense leaves, shared tools, and no natural rain can allow a small introduction to spread quietly. Prevention starts at the door: decide what may enter, where it will be inspected, and how it will be cleaned.
Quarantine New Plants and Unfamiliar Material
A clone can carry mites, aphids, thrips, powdery mildew, root disease, viruses, or viroids before obvious symptoms appear. Keep new plants in a separate airspace when possible, inspect leaf undersides and growing tips with magnification, and check the roots, medium, and drainage. A few days of observation is better than none, but a meaningful quarantine must be long enough to include repeated inspections and the life cycle of the likely pest.
Seeds usually carry fewer visible hitchhikers than rooted clones, yet seed trays, domes, tools, bags, and hands can still introduce contamination. Do not bring outdoor plants, garden tools, or used equipment directly into the room. Clean and inspect them first, and use a dedicated set of small tools when the garden is active.
“The clone looks healthy. Can I put it straight into the tent?”
Question sent by: Daniel Harper, via email.
A green top does not prove that the plant is clean. Keep it separate, inspect new growth and leaf undersides with magnification, examine the root zone, and watch for symptoms before it shares air and tools with the main garden. Quarantine feels slow only until one hidden pest reaches every plant.
Clean in a Direction That Does Not Spread the Problem
Begin with the cleanest area and finish with the suspect area. Remove dead leaves into a bag instead of carrying loose material across the room. Wipe accessible surfaces, clean fan guards and intake screens, and keep algae from establishing in wet trays or exposed reservoirs. Use cleaning products only as labeled and never mix chemicals because two separate products appear mild.
Sanitation should not erase useful biology inside a living medium. It should control the surfaces, water paths, tools, debris, and equipment that connect plants. In hydroponics, the reservoir and plumbing are part of the crop environment and need a system-specific cleaning routine between cycles.
Know What Fails First
Every system has a shortest failure time. In a fabric pot of soil, a missed irrigation may take time to become serious. In a warm aeroponic chamber, a stopped pump can threaten roots quickly. A failed exhaust fan under a powerful light can overheat a compact enclosure, while a failed dehumidifier may reveal itself during the dark period rather than when you are standing in the room.
Write down the response to the most likely failures: power loss, stuck timer, stopped fan, blocked filter, pump failure, leak, heater malfunction, empty reservoir, and an unexpected absence. Keep appropriate spare parts, a manual watering option, emergency contact instructions, and alerts where the consequence justifies them. Never enter a flooded area or handle wet electrical equipment until power is safely isolated.
“What spare part matters most in a small indoor room?”
Question sent by: Maya Collins, via contact form.
Start with the component whose failure gives you the least time to react. That may be an air pump in deep-water culture, a misting pump in aeroponics, an exhaust fan in a hot tent, or a timer controlling the photoperiod. A universal shopping list is less useful than a failure-time map of your own system.
Control the Room Around the Grow Space
A tent or cabinet does not create cold, dry, fresh replacement air. It borrows conditions from the surrounding room, sometimes called the lung room. If exhaust returns to that same closed space, heat and humidity can circle back into the intake. Measure both spaces and decide where moisture and heat finally leave the building.
Watch for condensation on windows, pipes, exterior walls, and cold floors. The enclosure can look stable while hidden building surfaces remain wet. Keep exits, electrical panels, combustion equipment, drains, and service access unobstructed. Indoor growing should not trade plant control for damage elsewhere in the home.
A Daily and Weekly Routine That Prevents Guessing
Daily care does not need to become constant interference. Look, smell, listen, and compare before touching anything. Check whether the fixture, exhaust, fans, irrigation, and timers are operating. Read the canopy from the newest growth down, inspect leaf undersides, and compare plant posture with the same time on previous days.
Daily checks
- Temperature and humidity during the current cycle, plus recorded minimum and maximum values.
- Pot weight, root-zone moisture, runoff or reservoir behavior, and any standing water.
- New growth color and shape, leaf posture, pests, webbing, residue, spotting, or unusual odor.
- Fan sound, filter pressure, duct movement, hot plugs, loose hangers, leaks, and blocked intakes.
Weekly checks
- Clean accessible surfaces and remove dead plant material without shaking it through the canopy.
- Inspect filters, fan guards, drains, trays, irrigation emitters, timers, cords, and suspension points.
- Calibrate or verify meters on the schedule recommended by the manufacturer.
- Review notes for trends rather than reacting to one reading.
- Photograph the same canopy positions under neutral light so color and progression can be compared.
Keep Records That Help You Make the Next Decision
A useful log is short enough to maintain. Record the date, plant or zone, light schedule and setting, temperature and humidity minimums and maximums, irrigation volume, nutrient concentration, pH when relevant, and one clear observation. Note exactly what changed. Photographs are most comparable when the camera position, distance, and neutral lighting remain consistent.
Review the log as a sequence. A single yellow leaf is weak evidence. A pattern that began after a stronger feed, longer dry-back, hotter day, fixture adjustment, or transplant gives us a real direction to investigate. Records also prevent the same correction from being repeated simply because the first attempt was forgotten.
“How do I know whether a problem is getting worse?”
Question sent by: QuietCircuit, via X.
Mark the affected leaf or branch, take a dated photo, and compare the edge of the damage and the newest growth after the environment is corrected. Old tissue may remain scarred. Improvement usually appears as stable damage and healthier new growth, not a damaged leaf turning green again.
Read the System Before Reaching for a Bottle
Many indoor symptoms share the same appearance. Yellowing can follow low nutrition, excess salts, poor root oxygen, incorrect pH, aging leaves, pests, or light stress. Diagnose by location, progression, recent changes, and root-zone condition before adding fertilizer.
| Symptom | Possible cause | How to confirm | First action | Prevention |
|---|---|---|---|---|
| Leaves droop while the pot stays heavy | Low root-zone oxygen, poor drainage, cold medium, or root disease | Check deeper moisture, pot weight, drainage, root odor and color, and irrigation distribution | Stop automatic watering, remove standing drainage, restore appropriate air and warmth, then diagnose before feeding | Match container, medium, and irrigation frequency; record dry-back |
| Upper leaves bleach or curl upward | Excess PPFD, radiant heat, hot dry air, or rapid intensity increase | Measure canopy light and leaf-zone temperature; compare tops with shaded growth | Reduce or raise the fixture within its instructions and stabilize climate | Map the canopy and increase intensity gradually |
| Plants stretch toward the center | Low or uneven light, excessive spacing, or unsuitable spectrum | Compare PPFD at the center, corners, and canopy edges | Improve distribution or reduce the active canopy before adding more power | Plan canopy footprint from the fixture map |
| White coating appears on leaves | Powdery mildew, dried spray residue, dust, or mineral deposit | Inspect with magnification, review sprays and humidity, isolate the plant, and seek a plant clinic when uncertain | Avoid shaking material through the room; remove affected tissue according to a crop-legal management plan | Clean incoming plants, control canopy humidity, and scout early |
| Leaf tips burn after a feed change | Excess EC, concentrated dry pockets, sodium or chloride, or root damage | Review the exact mix, source water, root-zone EC trend, runoff, and recent dry-back | Return to the last stable program and correct the root zone gradually | Measure, mix in order, and change one variable at a time |
Questions That Make Indoor Planning Easier
Can a sunny window replace a grow light?
A window can support seedlings, houseplants, or supplemental growth when it receives strong direct light, but glass, angle, season, obstructions, and limited daily duration reduce the useful light reaching the canopy. A plant may remain alive while producing a thin, uneven flowering structure. Measure the result rather than judging brightness with your eyes.
How many plants should fit in the tent?
Size the canopy, not the plant count. The legal limit, cultivar architecture, training method, container, vegetative duration, and access path determine how many plants fit. Leave enough room to inspect every plant and remove one without damaging the others.
Does the room have to be completely dark?
Photoperiod plants need a consistent, uninterrupted dark period during flowering. Check seams, vents, cable ports, indicator lights, door gaps, and timer behavior from inside the closed room after your eyes adjust. Autoflowering plants do not depend on a 12-hour dark signal to begin flowering, but they still benefit from a stable schedule.
Should the exhaust fan run all night?
The dark period often produces the highest RH, so ventilation and circulation usually remain necessary. The correct speed depends on temperature, humidity, noise, odor control, and the surrounding room. A controller may reduce speed when conditions allow, but shutting all air movement off by habit can create a wet, stagnant canopy.
What should receive the largest share of the budget?
Protect safety first. Then prioritize the fixture and environmental capacity that define the canopy. A dependable enclosure, ventilation path, root zone, and monitoring come next. Buy dehumidification, cooling, odor control, automation, or backup equipment according to the measured room rather than copying someone else's shopping list.
Before a Seed or Clone Enters the Space
- Confirm cultivation, electrical work, ventilation, drainage, and odor control comply with local rules.
- Measure the usable footprint and height after containers, canopy, fixture, hangers, filter, and ducting are included.
- Verify the circuit and every timer, cord, socket, driver, ballast, fan, and controller is correctly rated.
- Keep water below electrical equipment and provide leak containment and a clear drain plan.
- Run a complete light and dark cycle with the empty room assembled.
- Record canopy temperature and humidity during the hottest and wettest hours.
- Confirm the fixture's measured coverage matches the planned canopy.
- Test exhaust direction, replacement air, circulation, noise, negative pressure, and odor bypass.
- Choose a medium and container around the irrigation frequency you can maintain.
- Test source water and prepare a simple nutrient and meter-calibration routine.
- Quarantine and inspect incoming clones, tools, media, and reused equipment.
- Prepare a clean drying space before flowering is close to harvest.
Build a Room You Can Understand
A dependable indoor garden does not begin with maximum intensity or maximum automation. It begins with a room whose changes make sense. When the light rises, you know what happens to heat and water use. When the canopy fills, you know what happens to humidity and airflow. When a pot dries faster, you can connect it to plant size, climate, and root activity rather than guessing.
Keep the first version simple enough to observe and safe enough to trust. Once the room is stable, upgrades become easier to judge because each one has a measured purpose. That is how an indoor setup becomes more productive without becoming harder to manage.