Complete Indoor Cannabis Growing Guide: From Seed to Smoke
Before You Start
Is This Guide Right for You?
This guide covers the complete indoor growing process, from preparing your setup and choosing seeds through germination, vegetative growth, flowering, harvest, and drying.
If you already plan to grow indoors but are not comfortable with the fundamentals, start with Indoor Growing Basics. If you are completely new to growing or have not yet decided between indoor and outdoor cultivation, begin with Grow Basics.
Indoor cannabis growing puts the power directly in your hands. You control everything lighting, temperature, humidity, and nutrients. Done right, it gives you the ability to grow high-quality, potent buds year-round, regardless of the weather outside. The best part? No pests, no unpredictable outdoor conditions, and no need for large outdoor space. Just a controlled environment that you can perfect for maximum yields and potency.
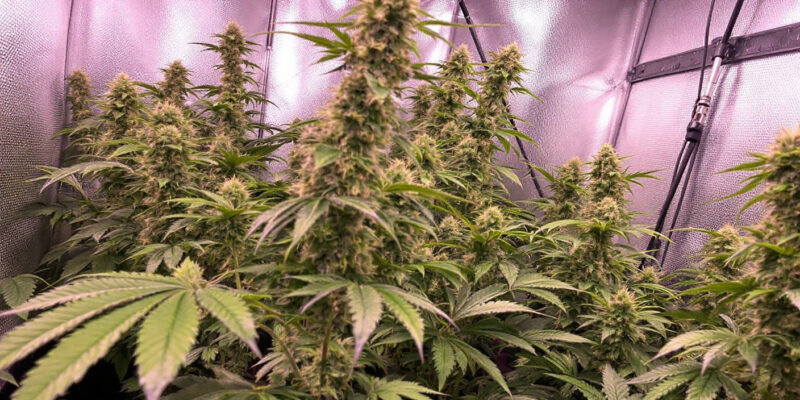
This guide is designed to walk you through the entire indoor growing process, from selecting the right seeds to lighting techniques, and all the way to harvesting and curing those sticky, resinous buds. Whether you’re just getting started or looking to sharpen your skills, you’ll find the tips, techniques, and advice you need to produce a successful crop.
Growing indoors isn’t just about throwing some seeds in dirt and hoping for the best, it’s about mastering an environment that mimics nature but with your own tweaks to boost performance. From germination and plant training to controlling the flowering phase, every stage is important. When you control your grow, you’re not just growing cannabis you’re perfecting your smoke quality.
In this guide, you’ll learn what works and what doesn’t. You’ll find out how to avoid rookie mistakes and maximize your yields. Most importantly, you’ll discover how to get from seed to smoke, with a grow room full of heavy, crystal-covered buds that pack a punch.
Let’s get started.
What You Need Before You Start
Growing cannabis indoors is simple when you follow the basics: secure a space, plant quality seeds or clones, and create the right environment with proper air circulation, lighting, water, nutrients, drainage, and a suitable growing medium. Seeds sprout into seedlings, move through vegetative growth, and eventually show pre-flowers—remove males to focus on potent female plants. Flowering is triggered by a 12-hour light cycle, and within two months, your plants will be ready for harvest. Proper temperature (75°F) and humidity (50–70%) are critical, along with good ventilation to maintain fresh air. Lighting options include CFLs, HID lights, and increasingly popular LEDs. Regular tap water usually works, but hydroponic systems may require more attention. Soil is a clear choice, while hydroponics offers faster growth. Controlling light and the environment allows you to grow multiple crops a year. Using clones allows for faster growth, while keeping a mother plant ensures a steady supply of rooted cuttings ready to flower.
“Do I need every piece of equipment before I germinate my first seeds?”
Question sent by: Nathan Miller, via email.
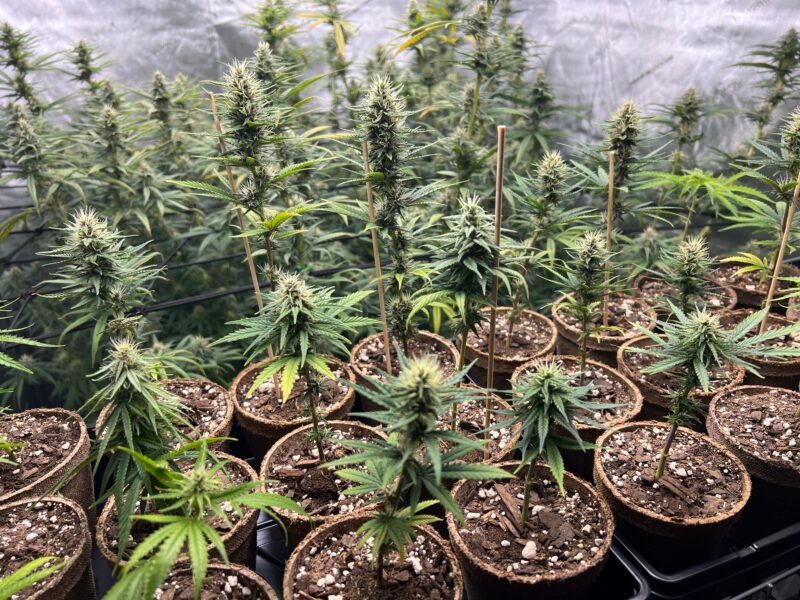
You do not need luxury gear, but you do need the basics ready before the seedling appears. Light, airflow, safe electricity, a container, medium, water, and a stable place to grow should be prepared first.
| Need | Why It Matters | Beginner Mistake |
|---|---|---|
| Light | Drives growth and flowering response | Buying a light before measuring the grow area |
| Airflow | Controls heat, humidity, and odor | Running a tent with no exhaust plan |
| Medium | Holds roots, oxygen, and moisture | Using dense soil that stays wet too long |
| Water/pH tools | Keeps nutrients available | Feeding before checking pH or runoff clues |
| Privacy | Reduces risk and stress | Talking about the grow too freely |
Before popping seeds, confirm these basics:
- A clean, private grow space
- Reliable light schedule and safe electrical setup
- Fresh air intake, exhaust, and odor control plan
- Water source, drainage plan, and basic pH tools
- A realistic schedule for daily checks
Note: If you don’t know the cannabis basics or you haven’t decided between outdoor or indoor growing, I advise you to start by reading the beginner’s guide.
Remember: Indoor growing is controlled gardening. The more stable the room is before germination, the fewer emergencies you create later.
Security Checklist

Lastly, your security is important. Check it:
- Keep your grow operation private; don’t tell or show anyone.
- Dispose of any grow-related materials discreetly.
- Avoid having seeds or grow products delivered to your home.
- Limit visits to grow stores and avoid risky associations.
- Never steal electricity; ensure all outlets are grounded and inspected regularly.
- Manage electricity use and maintain a clean air environment.
- Use carbon filters or ozone generators to neutralize odors.
- Muffle noise from equipment using insulated ducting and noise-reducing bases.
- Maintain a simple, low-profile lifestyle with a regular job and reason for increased electricity use.
- Be a good neighbor by keeping your property clean and paying bills on time.
Keep the grow boring and private
Limit access, manage odor, keep waste discreet, and make the room look like normal household use.
Let curiosity become exposure
Photos, visitors, loud equipment, and casual conversations can create problems faster than plant mistakes.
“My tent is small. Do I still need a carbon filter?”
Question sent by: Ryan Cooper, via Facebook page.
If smell matters where you live, yes. Even small flowering plants can become obvious. A carbon filter and proper exhaust are easier to set up early than after odor is already escaping.
Now, Let’s dive into detailed sections;
Important: Security is not only about secrecy. It is also about odor, noise, electricity, waste, visitors, and predictable behavior around the grow space.
Never solve grow problems by stealing electricity
Unsafe wiring and stolen power create fire risk, legal risk, and obvious attention. A clean electrical setup is part of responsible indoor growing.
Seeds and Germination
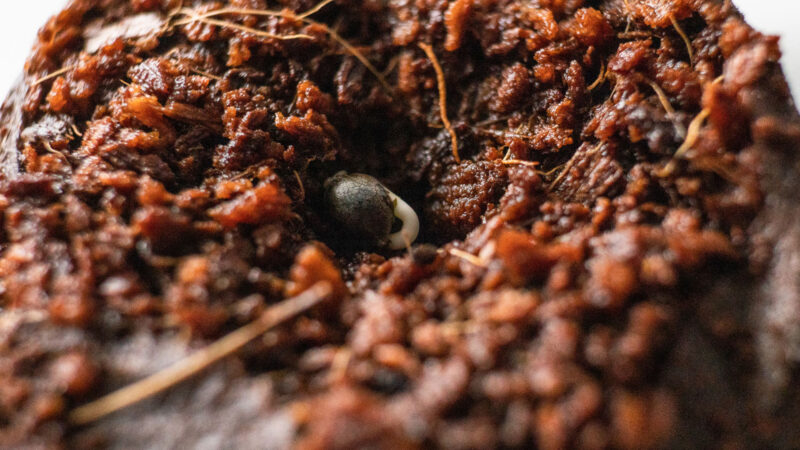
Strong, healthy cannabis plants start with strong seeds and the right growing conditions. Each seed contains the genetic composition of a plant, carrying traits from both the male and female parents. These genetics determine the plant’s size, resistance to diseases and pests, root strength, leaf production, flower yield, and cannabinoid levels. The seed quality is the most important factor influencing how well the plant will grow and produce under either natural sunlight or artificial light.
Master Advice: Seed choice is the first yield decision. Genetics set the ceiling; your environment decides how close you get to it.
Seeds for Indoor Cannabis Grow
When it comes to growing cannabis indoors, your success starts with the right seeds. The seeds you choose will determine your plants’ size, health, and yield. Each seed contains the complete genetic makeup of the plant, influencing everything from resistance to pests and diseases to the amount of cannabinoids it will produce. And since growing indoors is all about controlling the environment, selecting the best seeds for indoor cultivation is essential.
Indoor Seeds
Indoor seeds are selected for traits that work well under artificial light and controlled rooms: manageable size, predictable flowering, stress tolerance, and efficient bud production.
Understanding Indoor Seeds
Indoor seeds are bred to thrive under controlled conditions like those you’ll find in an indoor grow room or tent. These seeds come from strains that perform well under artificial light, and they’re typically more compact than outdoor strains, which is ideal for smaller grow spaces. Most indoor seeds are from strains that can handle temperature and humidity fluctuations and are generally more resistant to pests—both factors that are easier to manage indoors. Plus, indoor seeds tend to have shorter flowering times, which means more harvests each year.
“Can good equipment make weak genetics perform like premium seeds?”
Question sent by: Logan Harris, via email.
Good equipment helps, but it cannot fully replace genetics. Weak or unstable seeds may still show poor vigor, odd structure, hermaphrodite traits, or low yield even in a well-built room.
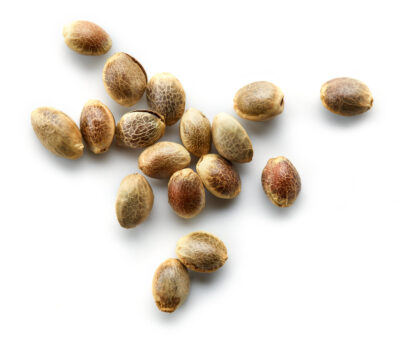
It’s all about choosing the right seeds for the setup you have. Think about your lighting (LEDs, HID, or fluorescent), your space (a grow tent, a closet, or a dedicated room), and your experience level when picking your seeds. You want seeds that match your grow environment.
Tip: For a first indoor run, predictable structure usually matters more than exotic flavor. Compact, stable genetics make every later decision easier.
Why You Need to Choose Carefully
Not all cannabis strains are built for indoor growing. Many strains grow tall and wide or require tons of sunlight, which isn’t always easy to replicate indoors. If you choose the wrong seeds, you might end up with plants that outgrow your space or don’t develop properly under artificial light.
A bad seed choice can waste the whole cycle
Indoor space is limited. A plant that stretches too much, flowers too long, or reacts badly to stress can dominate the room and reduce the quality of the entire grow.
Indoor growing also comes with its own set of challenges. You control everything, the light, the temperature, the humidity, and the airflow. This means you need seeds that will work within these parameters. Some strains are too finicky for indoor setups, and if they need a lot of room or take too long to flower, you could run into issues. The right seeds, however, will flower faster, stay manageable in size, and give you high yields even in small spaces.
Types of Cannabis Seeds
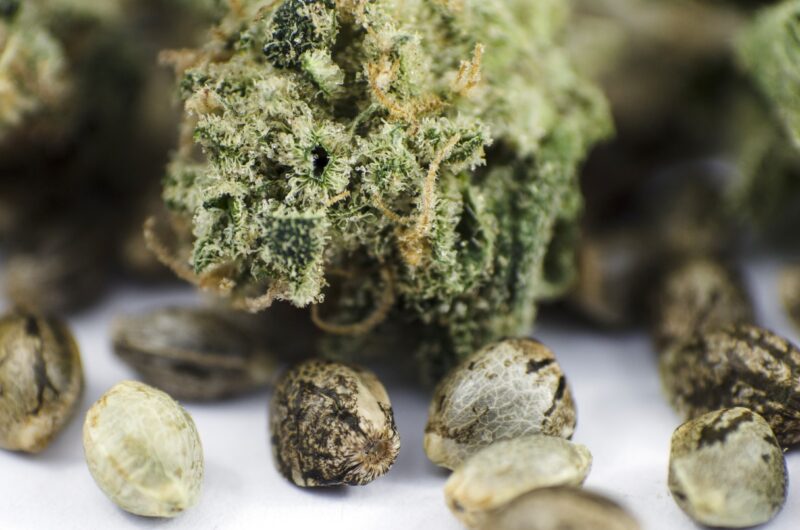
When planning an indoor grow, it’s essential to understand the different types of cannabis seeds available. Each type comes with its own advantages and considerations, depending on the grower’s goals, experience level, and the specific conditions of the grow environment.
Regular Seeds
Regular cannabis seeds are produced through the natural pollination process between male and female cannabis plants. These seeds have a roughly 50/50 chance of growing into either male or female plants. For indoor growers, regular seeds will require extra attention during the early stages of growth to identify and remove male plants, which are not useful for bud production and can pollinate females, leading to lower-quality harvests.
Feminized Seeds
Feminized cannabis seeds have been specially bred to produce only female plants, which are responsible for producing the highly sought-after cannabinoid-rich flowers. Feminized seeds simplify the growing process and maximize bud production by eliminating the need to identify and remove male plants. This makes them an ideal choice for indoor growers, especially those with limited space or focused on maximizing yields.
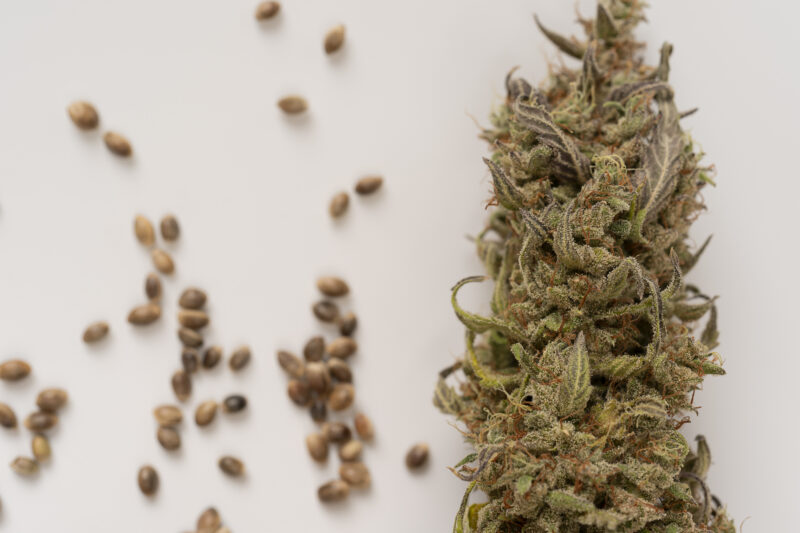
Blue Dream Feminized
“Should my first indoor grow be autoflower or photoperiod?”
Question sent by: Ethan Brooks, via Facebook page.
Photoperiods give more control and recovery time. Autoflowers can be fast and simple, but early mistakes are harder to fix because the plant keeps moving on its own timeline.
– A sativa-dominant hybrid loved for ease of growth, high yield, and balanced effects, making it a great option for both new and experienced indoor growers.
Autoflowering Seeds
Autoflowering cannabis seeds are popular because they don’t rely on a change in light cycles to start flowering. Instead, they flower based on age. Typically, they begin to flower just 2 to 4 weeks after sprouting, making them a good choice for growers who want fast results. These seeds are smaller and easier to manage, making them ideal for limited indoor space. However, autoflowers don’t always produce the biggest yields, but they’re a great option if you want a quick and hassle-free grow.
Northern Lights Autoflower – A compact indica-dominant strain with fast flowering times and a relaxing, body-heavy high, perfect for small indoor setups.
| Seed Type | Best For | Main Watchout |
|---|---|---|
| Regular | Breeding projects and traditional selection | Males must be identified and removed |
| Feminized | Growers focused on bud production | Stress can still cause hermaphrodite traits |
| Autoflower | Fast runs and simple light schedules | Less time to recover from mistakes |
| Photoperiod | Training, cloning, and schedule control | Requires light cycle discipline |
Fast Version Seeds
Fast version seeds, also known as “fast-flowering” seeds, are designed to shorten the flowering time of cannabis plants. These seeds are created by crossing photoperiod strains with autoflowering strains, resulting in plants that retain the high yields and potency of traditional photoperiod plants but have a shorter flowering period.
Fast version seeds are beneficial for indoor growers who want to speed up the growing process without sacrificing the quality or quantity of their harvest.
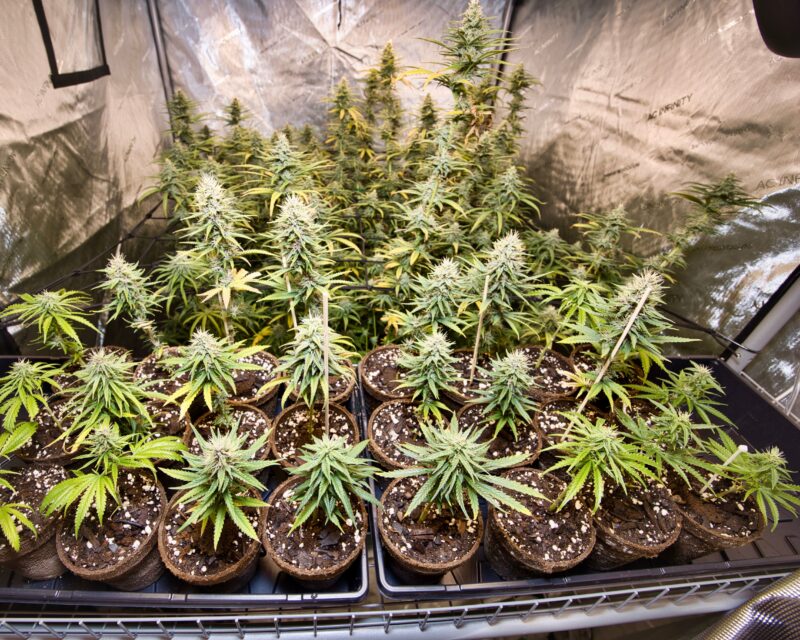
Critical Fast Version – Known for its quick flowering time and high THC content, this strain is perfect for indoor growers looking for a faster turnaround without compromising on potency.
How to Choose the Right Seeds
When it comes to picking the right seeds, you want to match the strain to your grow room. Here’s what to look for:
Choose seeds by matching:
- Available vertical space
- Expected flowering time
- Odor and terpene profile
- Resistance to stress or disease
- Your comfort with training and feeding
“I only have a short tent. Should I avoid sativa-dominant strains?”
Question sent by: Caleb Johnson, via email.
Usually, yes for a first run. Some sativa-leaning hybrids can work, but tall stretch and longer flowering make height control harder. Compact indica or balanced hybrid genetics are easier indoors.
- Genetics: Genetics is everything. Choose seeds from breeders who are known for producing strains that do well indoors. Indica-dominant strains tend to be more compact, making them easier to manage in small spaces. Sativa strains, on the other hand, can grow taller, so if space is an issue, look for indica or indica-dominant hybrids.
- Flowering Time: In an indoor setup, you want strains with shorter flowering times. Anything between 7 and 9 weeks is a good bet for maximizing harvests.
- Size and Structure: If you’re growing in a smaller tent or room, stick with compact strains that don’t stretch too much during flowering. Indica strains are naturally shorter and bushier, while sativa strains can get tall. You can also train your plants using methods like topping or low-stress training (LST) to control their height.
- Cannabinoid Profile: Know what kind of effect you’re after. If you want a high-THC strain for a strong psychoactive effect, choose seeds bred for high THC content. If you prefer something more balanced with CBD for medical purposes, pick a strain with a higher CBD-to-THC ratio.
- Indoor Suitability: Not all strains are bred for indoor conditions. Look for strains that are labeled as suitable for indoor growing. These strains are usually more resilient and better adapted to artificial light and smaller spaces.
Finding Cannabis Seeds
Buying seeds can be tricky, especially with so many unreliable sources floating around. If you’ve got a trusted friend who can hook you up with some quality seeds, that’s your best bet. But let’s be real—not everyone has that option. So, your next best move is to buy seeds online. Now, this is where it gets a little dicey.
There are a lot of sketchy companies out there these days. I’ve heard more horror stories than I can count—people paying top dollar for seeds that never arrive, websites disappearing overnight, phone lines disconnected. Poof! There goes your $250. Buying seeds is not something you want to gamble on. You need to be extremely careful. Don’t just order from anyone. Stick to a reputable, reliable company. You can find good seed banks online, in certain magazines, or even local coffee shops (depending on where you live).
If you’re buying online, make sure you do your homework. Search the seed bank on Google, check reviews, and ask other growers. You want to be absolutely sure they’re legit before sending any money. Only order from seed banks that have a proven track record and take every precaution to ensure your seeds arrive discreetly and securely.
Do not ignore local rules around seeds
Seed purchasing, possession, and germination rules vary by location. Check the laws where you live before ordering or starting seeds.
A good rule of thumb? Buy more seeds than you think you’ll need. Even with the best seeds, you might have some germination failures—it happens. And always, always use a safe shipping address. Never, under any circumstances, have the seeds sent directly to your grow site. This is still illegal in many parts of the world, including the U.S., so make sure you know the laws in your area before ordering.
Advice: Use seed descriptions as clues, not promises. Compare flowering time, stretch, grow difficulty, and breeder reputation before choosing.
You can find cannabis seeds from a variety of sources, but make sure you’re getting them from a reputable supplier. Here are your options:
- Seed Banks: These are your best bet for finding high-quality seeds. A good seed bank will have a wide variety of strains, including indoor-specific, feminized, and autoflowering seeds. Look for one that provides detailed information about each strain, including flowering times and yield potential.
- Online Seed Shops: Many seed shops operate online, making it easy to browse and buy seeds from the comfort of your home. Always check reviews and feedback from other growers to make sure the seed shop is legitimate.
- Cannabis Dispensaries: In places where cannabis is legal, dispensaries often sell seeds. You can get good recommendations and find seeds that are suited to your specific climate and grow setup.
- Find Seeds in a Bag of Buds: If you’ve ever bought a bag of weed and found a few seeds in there, you’ve got what are known as “bag seeds.” While these seeds can sometimes grow into great plants, they’re a bit of a gamble. You won’t know what you’re getting until you grow them, and the plants may not be stable or as potent as you’d like.
Seed Quantities and Pricing
Most seed banks and shops sell seeds in packs of 5, 10, or 15. Pricing varies based on the strain and whether the seeds are feminized or autoflowering. You can expect to pay anywhere from $3 to $30 per seed. Lower-priced seeds can still produce good plants, but the higher-priced seeds are usually more stable, producing consistent results with better yields and potency.
Tip: Buy a little more than the exact plant count you want. Germination issues, weak seedlings, and selection decisions are normal parts of a grow.
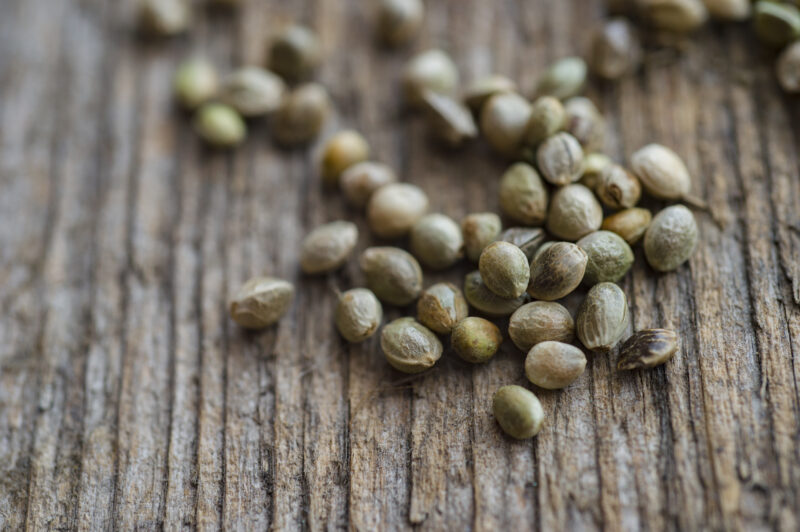
A pack of 5 to 10 seeds is usually enough for personal grows. If you’re growing on a larger scale or for commercial purposes, buying seeds in bulk is more cost-effective.
Receiving Seeds
When your seeds arrive, check them for damage right away. If any are crushed or broken, contact the seller to arrange a replacement. Always store your seeds properly to keep them viable if you’re not planting them immediately.
“Should I germinate every seed as soon as the package arrives?”
Question sent by: Mason Clark, via email.
Not unless the room is ready. Seeds store better than seedlings wait. If your environment is not prepared, store the seeds correctly and germinate when you can give them stable care.
Storing Seeds
Proper storage is for keeping your seeds viable for future grows. Cannabis seeds are living organisms, and if you don’t store them right, they’ll lose their ability to germinate. Here’s how to store your seeds:
“How long can I keep cannabis seeds before they become useless?”
Question sent by: Owen Fraser, via Facebook page.
Viability depends on storage. Cool, dry, dark storage can preserve seeds for years, but germination rates usually decline with age. Label dates and avoid repeated temperature swings.
- Temperature: Keep your seeds in a cool place. A temperature range of 35–41°F (2–5°C) is ideal. Many growers store seeds in the refrigerator to maintain a consistent temperature.
- Humidity: Seeds need to stay dry. Humidity can cause them to sprout prematurely or grow mold. Store them in an airtight container with a desiccant (like silica gel) to keep the moisture levels low.
- Light: Light can trigger the germination process, so keep your seeds in a dark place. Use opaque containers or store them in a closet or drawer to protect them from light.
- Labeling: Always label your seeds. Write down the seed names, strain information, and the date you stored them on each container or packet. This way, you can easily keep track of different strains and know how long the seeds have been stored.
If stored correctly, cannabis seeds could last for years. However, the longer you store them, the lower the germination rate, so try to use them within a year or two for the best results.
Important: Seed storage is about stability: cool, dark, dry, and protected from moisture swings. Heat and humidity shorten viability.
What Are Strains?
Cannabis strains are the genetic variations within the species, each bred for its unique traits. Think of strains as the DNA for your plants—they determine everything from growth patterns, size, and flowering time to flavor, potency, and effects. Whether you’re growing for medicinal purposes, recreational use, or just looking to maximize your indoor yields, selecting the right strain is a critical step. Choose carefully, because the strain you pick will dictate how well your plants perform in your indoor environment.
Strain
A strain is a genetic line selected for traits like size, flowering time, aroma, cannabinoid profile, structure, and stress response.
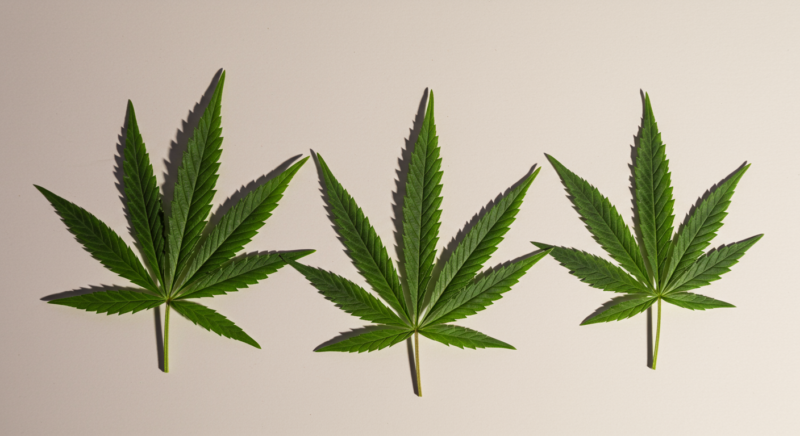
Strains come in three primary types: indica, sativa, and hybrids. Indicas are known for their short, bushy growth, quick flowering times, and deeply relaxing effects. Sativas, on the other hand, are tall and thin, often taking longer to flower but delivering a more energizing, cerebral high. Hybrids combine the characteristics of both, offering a mix of effects and growth traits. Understanding these differences will help you select the right strain for your setup and goals.
Types of Cannabis Strains
Indica strains are typically the excellent for indoor growers. They’re short and stocky, making them ideal for small grow spaces. Indicas originated in harsh, mountainous regions, so they’re naturally hardy and fast-flowering, usually finishing up in 7–9 weeks. They tend to produce dense, resinous buds that pack a powerful, body-heavy high. Indica plants are generally easier to manage indoors because of their compact size, making them perfect for grow tents or closets.
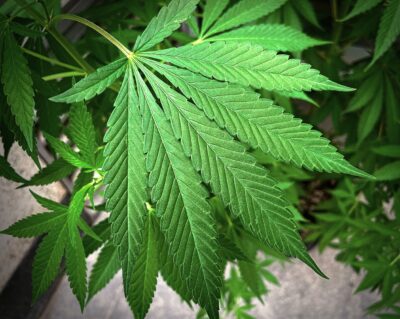
“Are indica strains always easier indoors?”
Question sent by: Jacob Peterson, via email.
Not always, but they often fit indoor spaces better because they tend to stay shorter and flower faster. Individual genetics still matter, so read strain-specific grow notes.
Sativa strains, can be more of a challenge indoors. They’re tall and lanky, sometimes stretching significantly during the flowering stage. Sativas typically take longer to flower—anywhere from 10 to 14 weeks—but their high delivery is worth the wait. Their effects are uplifting, energizing, and more cerebral. Sativa-dominant strains are ideal for daytime use, creativity, and social situations, but you’ll need plenty of vertical space and a bit more patience to grow them indoors.
Advice: For indoor growing, plant shape matters as much as effect. A strain that fits your tent is easier to keep healthy and productive.
Hybrids offer the best of both genetics. Hybrid cannabis plants are created by combining different types of strains. These hybrids can have a mix of the effects and characteristics of both indica and sativa plants. This means you can get a balanced combination of the different effects and growing qualities.Indoor growers often prefer hybrid strains for their adaptability to different indoor growing environments. You’ll find indica-dominant hybrids that flower quickly and stay manageable in size or sativa-dominant hybrids that deliver a more uplifting high but without the excessive height of a pure sativa.
Recommended Strains for Indoor Growing
The strain you choose for your indoor grow will depend on your space, experience, and the kind of effects you want from your plants. Here are some solid choices for indoor cultivation:
- Northern Lights: This indica-dominant strain is a tried-and-true indoor performer. It’s fast-flowering, stays compact, and produces dense, resin-covered buds. Its strong, relaxing effects make it perfect for nighttime use or stress relief.
- White Widow: A well-balanced hybrid that produces high yields of potent, frosty buds. White Widow is easy to grow indoors and offers a balanced high that’s both uplifting and relaxing, making it a great choice for any time of day.
- Blue Dream: A sativa-dominant hybrid that’s forgiving to grow and yields large, flavorful buds. Its balanced high makes it popular among both medical and recreational users, and it thrives in an indoor environment with proper care.
- Critical Mass: Known for its massive yields, Critical Mass is an indica-dominant strain that flowers quickly and produces heavy buds. It’s ideal for growers looking to maximize their harvest in a short time frame.
- Amnesia Haze: A long-flowering sativa strain that rewards experienced growers with high yields and a potent, energizing high. If you’re willing to invest the time and have the vertical space, this strain can produce impressive results indoors.
| Grow Situation | Better Strain Trait | Why |
|---|---|---|
| Short tent | Compact structure and low stretch | Easier canopy control |
| Beginner grow | Stable feminized photoperiod | More recovery time and predictability |
| Fast harvest goal | Short flowering or autoflower genetics | Less total cycle time |
| Humidity-prone room | Airy buds and mold resistance | Lower late-flower disease risk |
| Flavor priority | Known terpene profile | Better match to final-use preference |
When selecting a strain for indoor growing, it’s all about balancing flowering time, plant size, and the kind of high you’re after. You want a fast, body-heavy indica or a longer-flowering sativa, the right strain can make all the difference in your grow room.

Pro Tip: Choose one or two strains per run until you know your room. Too many genetics in one tent can create uneven height, feeding, and harvest timing.
Warning: Make sure the seeds you’re buying match your indoor grow conditions. The last thing you want is a strain that stretches to 10 feet when you’re working with limited space like a grow tent or cabinet. Choose wisely, and stick to strains that stay compact and manageable. Selecting seeds suited to your setup, you’ll avoid a lot of headaches and ensure smooth, potent, and rewarding growth from start to finish.
Germination
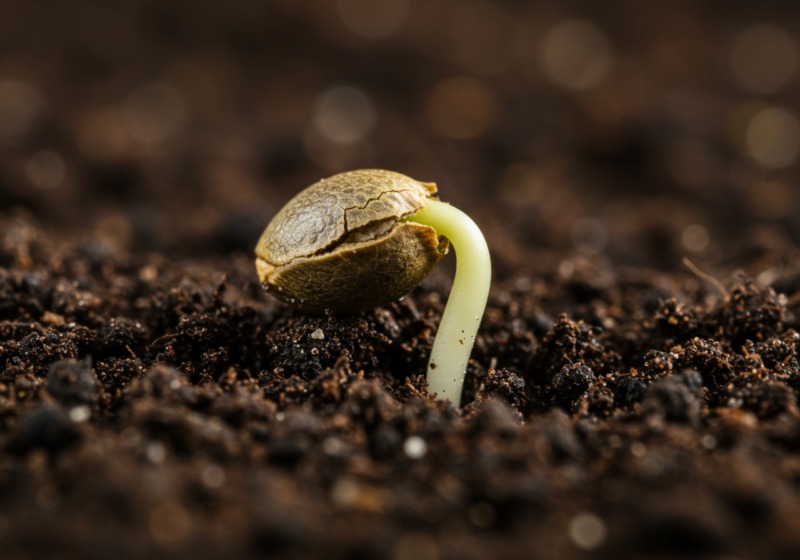
Germination is where it all starts. It’s the most critical phase of your cannabis grow because if you don’t get your seeds to sprout, you’ve got nothing to work with. When you germinate seeds, you wake them up—kickstarting the plant’s life cycle. This process needs the right combination of warmth, moisture, and air. The purpose is to create an environment that mimics the natural conditions a seed would experience in nature but with a bit more control to ensure success.
The first thing to understand is that not all seeds are created equal. Quality genetics are crucial, so make sure you’re working with mature, viable seeds. Good seeds are hard and dark-colored, often with a slight sheen. Immature seeds, which are pale or green, probably won’t germinate or, if they do, will struggle to develop into strong plants. You have to work with fresh seeds stored properly for the best results.
Temperature plays a huge role in the germination process. Seeds need warmth—ideally between 70-85°F (21-29°C). If it’s too cold, the seeds may not germinate or will take longer. Humidity also helps but don’t overdo it. You want to keep the environment moist but not waterlogged. Too much moisture can drown the seeds, cutting off their oxygen supply.
“My seed cracked but then stopped growing. What usually causes that?”
Question sent by: Lucas Bennett, via email.
The most common causes are drying out after the seed opens, being kept too wet with low oxygen, cold temperatures, or rough handling of the taproot. Stable moisture and warmth matter most.
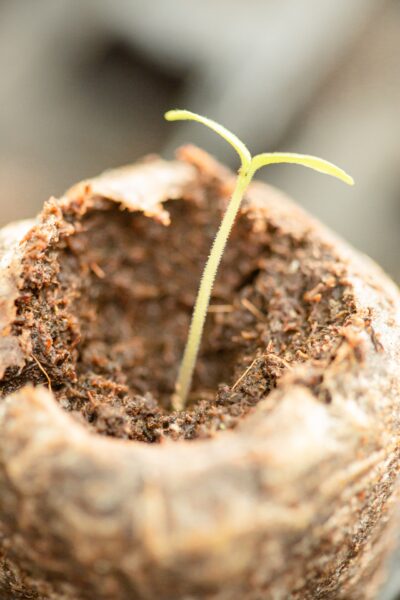
Remember: Germination needs moisture, warmth, and oxygen. Too much water can be just as damaging as too little.
Timing is critical as well. Generally, seeds will sprout within 24-72 hours under the right conditions, but some might take a bit longer, depending on the strain or how old the seeds are. Once the seed cracks and the root emerges, it’s time to transplant it into your growing medium. Handle the seed gently—this is the most delicate stage of the plant’s life, and damaging the taproot will stunt its growth or kill the seedling altogether.
Remember, don’t rush things, be patient. If the seeds are viable, they will sprout. The main focus here is maintaining a stable environment with warmth, moisture, and air. Once the seedling breaks through and starts to develop its first leaves, you’re officially out of the germination stage and on your way to a healthy cannabis grow.
Germination Step by Step
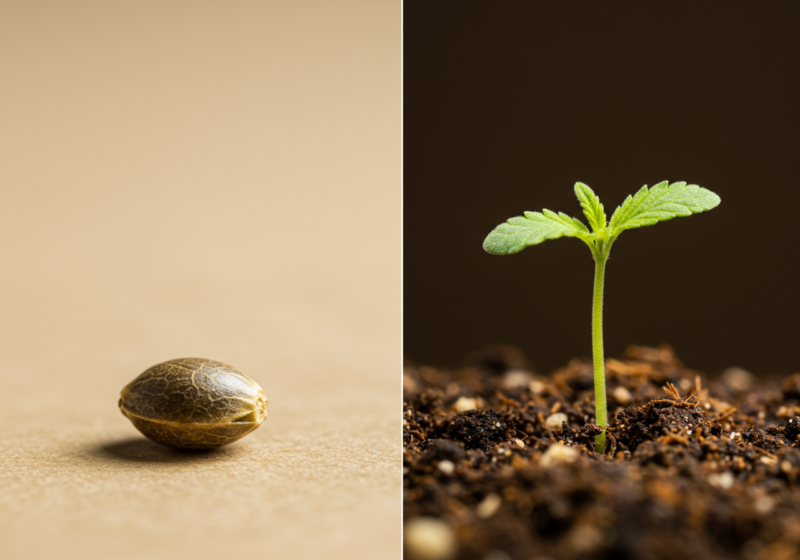
No matter you’re a first-time grower or a seasoned veteran, getting cannabis seeds to sprout is one of the most exciting stage. Proper germination leads to strong, healthy seedlings that form the foundation for a successful grow. Let’s walk through each step of the germination process, along with techniques to maximize your chances of success.
| Method | Strength | Watchout |
|---|---|---|
| Paper towel | Easy to inspect taproot | Can dry out or damage roots during transfer |
| Direct to medium | Less handling stress | Harder to see progress early |
| Starter plug | Stable moisture and easy transplant | Can stay too wet if overwatered |
| Water soak | Softens older seeds | Do not leave seeds submerged too long |
Step 1: Preparing Your Seeds
First things first—make sure you’re starting with quality seeds. Fresh, mature seeds will give you the best results. They should be hard, dark brown with a slight sheen, and free from any cracks or deformities. Green, pale, or soft seeds are likely immature and may not germinate properly. Old seeds may still sprout, but their vigor will be reduced, and you may have lower germination rates.
“Are pale seeds always bad?”
Question sent by: Carter Wilson, via Facebook page.
Not always, but pale, soft, cracked, or green seeds are less promising. Mature seeds are usually darker and firmer. The real test is whether they germinate under stable conditions.
Tip: Handle seeds like living material. Clean hands, clean tools, and gentle movement reduce early contamination and damage.
Step 2: Choosing a Germination Method
There are a few popular methods for germinating cannabis seeds, and each grower may have their preference. Here’s an overview of the most effective techniques.
The Paper Towel Method
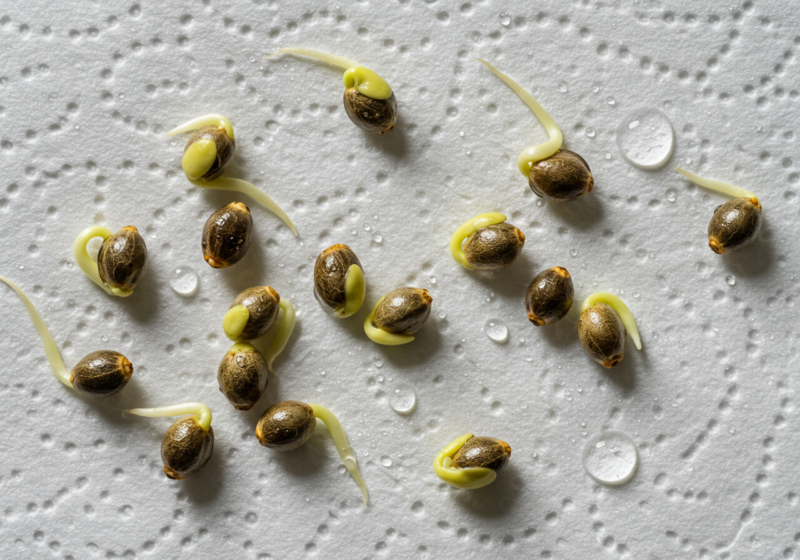
The paper towel method is simple, effective, and widely used. Here’s how it works:
-
- Moisten two clean paper towels with distilled water. You want them damp but not dripping wet.
- Place your seeds between the two moist paper towels.
- Place the paper towels on a plate and cover them with another plate to create a dark, moist environment.
- Keep the plate in a warm place—ideally around 70–85°F (21–29°C). The top of a refrigerator or a cabinet works well.
- Check on the seeds daily, ensuring the towels stay moist. In 24 to 72 hours, you should see the seeds crack open, and a tiny white root (called the radicle) will start to emerge.
“My paper towel dried out overnight. Should I still plant the seed?”
Question sent by: Mia Thompson, via email.
If the seed only dried briefly, it may still survive. Re-moisten carefully and watch for progress, but avoid soaking it aggressively. A cracked seed with a dry taproot is more vulnerable.
Direct-to-Soil Method
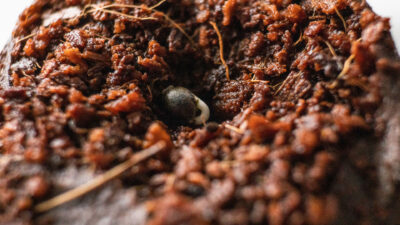
This method mimics nature and is great for growers who prefer to keep things simple. With this method, the seeds germinate directly in the growing medium.
-
- Fill small pots with light, airy soil or a seed-starting mix that drains well.
- Make a small hole about 0.25 inches (6mm) deep and place the seed in it, pointy end down.
- Lightly cover the seed with soil and water it gently with a spray bottle to moisten the area.
- Keep the soil consistently moist (but not waterlogged) and ensure the temperature stays between 70–78°F (21–26°C).
- In about 3 to 7 days, your seed will break through the surface, and a small seedling will appear.
Soaking in Water Method
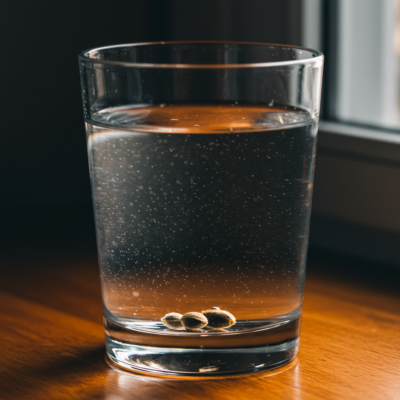
This method helps to speed up the process for older seeds that may have trouble germinating. It softens the outer shell, allowing water to penetrate and activate the seed more easily.
Keep the method simple and stable
Pick one method, maintain warmth and moisture, and check calmly.
Keep changing methods mid-germination
Moving seeds repeatedly can damage the taproot and interrupt the process.
-
- Place your seeds in a glass of room-temperature distilled water.
- Let them soak for 12 to 24 hours. After that time, the viable seeds should sink to the bottom.
- Once you see the seed crack and a small taproot emerge, carefully move the seed to soil, a paper towel, or rock wool.
Rock wool or Peat Pellets
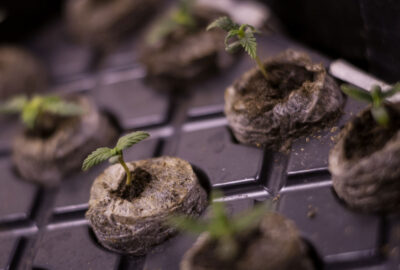
Rockwool cubes or peat pellets are excellent for hydroponic systems or for growers looking for more control over moisture levels.
-
- Soak the cubes in pH-balanced water (about 5.5–6.0 pH) before placing the seed into the hole at the top of the cube.
- Place the cube in a warm, humid environment (you can use a propagator or humidity dome) and keep the temperature steady.
- Within a few days, the seed should sprout, and roots will begin growing through the rock wool or peat pellet.
Step 3: Optimal Conditions for Germination
The key to successful germination lies in maintaining the right environment. Cannabis seeds need warmth, moisture, and darkness to sprout. Here are the optimal conditions for germination:
Important: Warm does not mean hot. Excess heat can cook young tissue before the grow even starts. Keep germination conditions steady, not extreme.
“Is a heat mat safe for germinating seeds?”
Question sent by: Avery Collins, via Facebook page.
It can be helpful if controlled. Use gentle warmth and avoid hot spots. If the medium feels warm to the touch rather than mildly comfortable, it may be too much for seeds.
- Temperature: Keep your seeds in a warm area. The ideal temperature range is 70–85°F (21–29°C). If the temperature drops too low, the germination process will slow down or stop altogether.
- Moisture: Seeds need to stay moist but not soaked. Too much water can drown the seeds and cut off their oxygen supply, while too little water will prevent them from sprouting.
- Humidity: A humidity level of around 70% is ideal. If you’re using a humidity dome or propagator, it will help maintain moisture in the air and keep the seeds from drying out.
- Darkness: Seeds germinate best in the dark, so make sure your growing environment is shaded or covered until the seedlings break through the surface.
Step 4: Advanced Techniques: Scarification for Faster Germination

Scarification is an excellent technique for those looking to speed up the germination process or dealing with older, tougher seeds. Scarification is lightly sanding or scratching the seed’s outer shell to make it easier for water to penetrate and activate the seed.
However,
“Should I scarify every seed to make germination faster?”
Question sent by: Noah Reed, via email.
No. Fresh, healthy seeds usually do not need it. Scarification is better reserved for older or unusually hard seeds when normal germination methods are not working.
if you’re a beginner, avoid this technique—it requires a careful touch, and it’s easy to damage the seed if you’re not experienced. Stick to the more simple methods for now.
Here’s how to scarify your seeds:
Scarification is not a beginner default
Scratching or weakening the seed shell can help old or stubborn seeds, but too much pressure can ruin viable seeds. Use it only when there is a clear reason.
- Lightly Sand the Seeds: Take a small piece of fine sandpaper (around 120–150 grit) and gently rub the seed on it, just enough to roughen the surface. You don’t want to damage the seed, only to thin out the hard outer shell slightly.
- Use the Matchbox Trick: Some growers use a matchbox lined with sandpaper for scarification. Simply place your seeds in the matchbox and give it a gentle shake for about 10–15 seconds. This will scar the seeds enough to improve water absorption without risking too much damage.
- Soak After Scarifying: After scarifying the seeds, soak them in water for 12 to 24 hours to kickstart the germination process. The scarification will help the seed absorb water more effectively, allowing the taproot to break through faster.
Scarification can improve germination rates, especially for older seeds or seeds with particularly tough shells. However, this technique should be done carefully to avoid damaging the embryo inside the seed.
Step 5: Transplanting Your Seedlings
Once the seeds sprout and the taproot appears, it’s time to transplant them into their growing medium if you haven’t already planted them directly in soil. Handle the seeds gently, as the taproot is extremely delicate.
If you used the paper towel method, use clean tweezers to move the sprouted seed into its final growing medium. The taproot should point downward, and the seed should be covered lightly with soil.
“How deep should I plant a seed after the taproot appears?”
Question sent by: Emma Sullivan, via Facebook page.
Keep it shallow. Plant the seed root-down with the shell just below the surface, then cover lightly. Deep planting can make the seedling spend too much energy reaching the light.
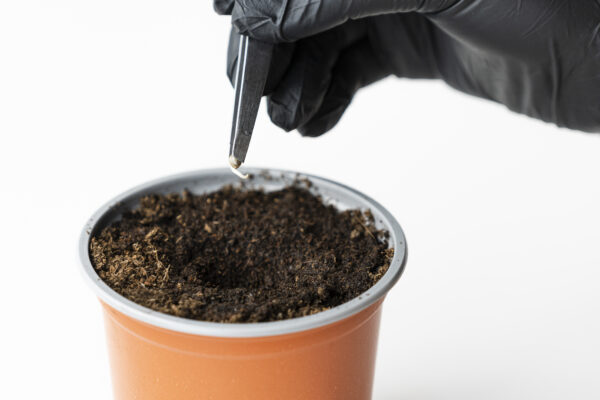
For those using
The taproot is fragile
Avoid touching or bending the white root. Damage at this stage can slow the plant or kill the seedling before it establishes.
rock wool cubes or peat pellets, you can move the entire cube or pellet into the soil or hydroponic system once the roots begin to poke through.

Step 6: Early Seedling Care
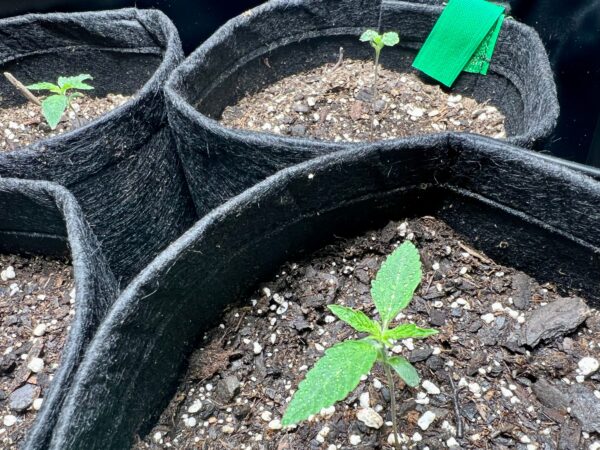
Now that your seeds have sprouted, they will enter the seedling stage. This is when the plant focuses on developing its root system and initial leaves (called cotyledons). Here’s what you need to do to support healthy growth:
Tip: Seedlings like gentle consistency: mild light, light airflow, careful moisture, and no aggressive feeding.
“Why is my seedling stretching tall and thin?”
Question sent by: Liam Walker, via email.
Stretching usually means the light is too weak or too far away. Move the light closer gradually or increase intensity carefully, while keeping heat under control.
- Light: Seedlings need a light source, but not too intense at first. A CFL or LED light placed about 12–18 inches above the seedlings is ideal. Keep the lights on for 16–18 hours per day.
- Watering: Keep the growing medium moist, but don’t overwater. Seedlings are fragile, and too much water can easily damage their roots. Water them lightly with a spray bottle or drip system to avoid disturbing the roots.
- Air Circulation: Ensure there’s good airflow around your seedlings. A small oscillating fan can help strengthen the seedlings and prevent mold or damping-off, a disease that can kill young plants.
- Temperature and Humidity: Keep the temperature between 70–78°F (21–26°C) and humidity around 60–70%. You can gradually lower the humidity as the plant grows.
Troubleshooting Common Germination Problems
Even with the best preparation, problems can arise during germination and early seedling growth. Knowing what to look for and how to fix issues quickly is critical for giving your plants the best chance to thrive. Here are some of the most common problems you might face and how to solve them:
Seeds Won’t Germinate
This is often caused by old or damaged seeds. Seeds that are too old may have lost their viability, and damaged seeds might not sprout at all. Always store seeds in a cool, dry place and use fresh, healthy seeds for the best germination results.
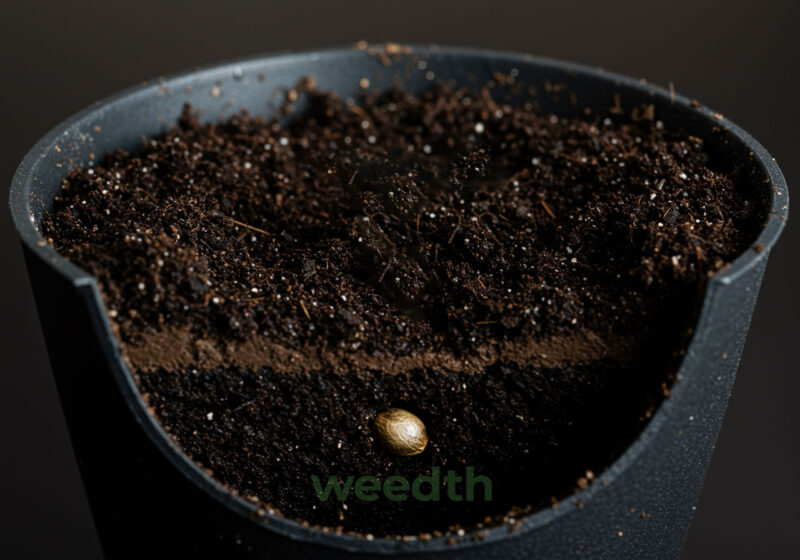
Solution: If you’re having trouble, try soaking your seeds in water for 12 to 24 hours to soften the outer shell and encourage germination. If they still don’t sprout, the seeds may be beyond saving.
Damping-Off
Damping-off is a fungal disease that affects seedlings, causing them to wilt and die quickly, often within hours. It usually happens when seedlings are kept too moist or too warm, creating the perfect environment for fungi to grow.
Solution: Avoid overwatering and keep the growing area well-ventilated. Use sterile soil or growing medium and maintain proper airflow with an oscillating fan. If damping-off occurs, remove and discard affected seedlings immediately to prevent the spread of the fungus.
Weak Seedlings (Stretching)
If your seedlings are growing tall, thin, and spindly, Insufficient lighting is often the cause of this issue. They stretch upward in search of a stronger light source, which weakens their structure and leaves them vulnerable to tipping over.
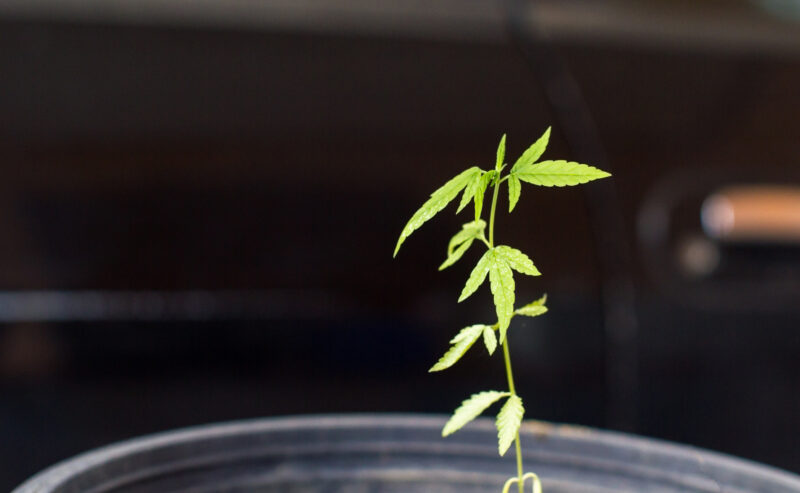
“My seedling fell over at soil level. Can it recover?”
Question sent by: Sophie Martin, via email.
If the stem has pinched and collapsed from damping off, recovery is unlikely. For the next seedling, use a cleaner medium, less moisture, and better airflow.
Solution: Move your light source closer to the seedlings. Ideally, keep CFL or LED lights about 12–18 inches above the seedlings. Ensure they get at least 16–18 hours of light daily. You can also use a small fan to gently blow on the seedlings, encouraging stronger stem growth.
Overwatering and Underwatering
Overwatering is one of the most common mistakes growers make during germination. Too much water suffocates the seeds and prevents them from accessing oxygen, leading to root rot and slow growth. On the flip side, underwatering causes the seeds and seedlings to dry out, stunting their growth or killing them altogether.
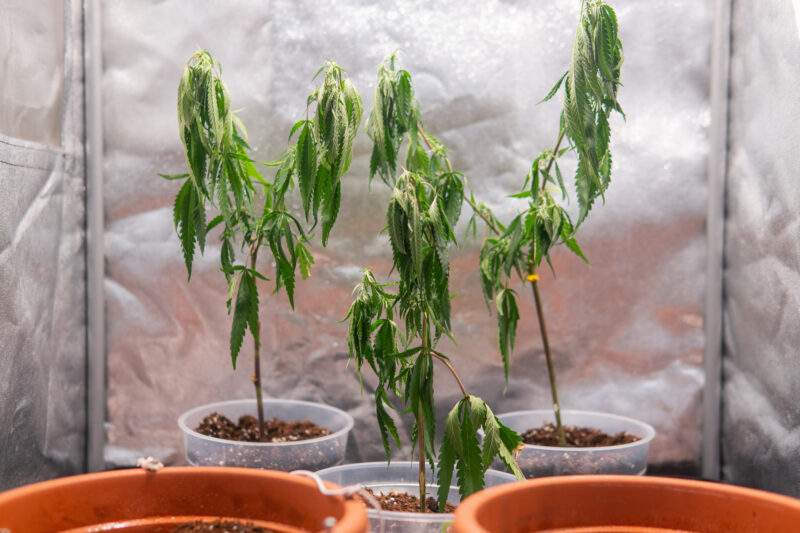
Solution: Keep the growing medium evenly moist but not soaked. A good rule of thumb is to check the surface of the medium—if it’s dry to about 0.25 inches (6mm) deep, it’s time to water. If you’re using rockwool cubes or peat pellets, make sure they are not sitting in standing water. Allow for proper drainage, and adjust your watering schedule based on the depth of the container—shallow trays may need daily watering, while deeper pots can go for three or more days between waterings.
Light Intensity Issues
Too much light can burn delicate seedlings, while too little light leads to poor growth. Cannabis seedlings are sensitive to light intensity, so it’s important to get it right.
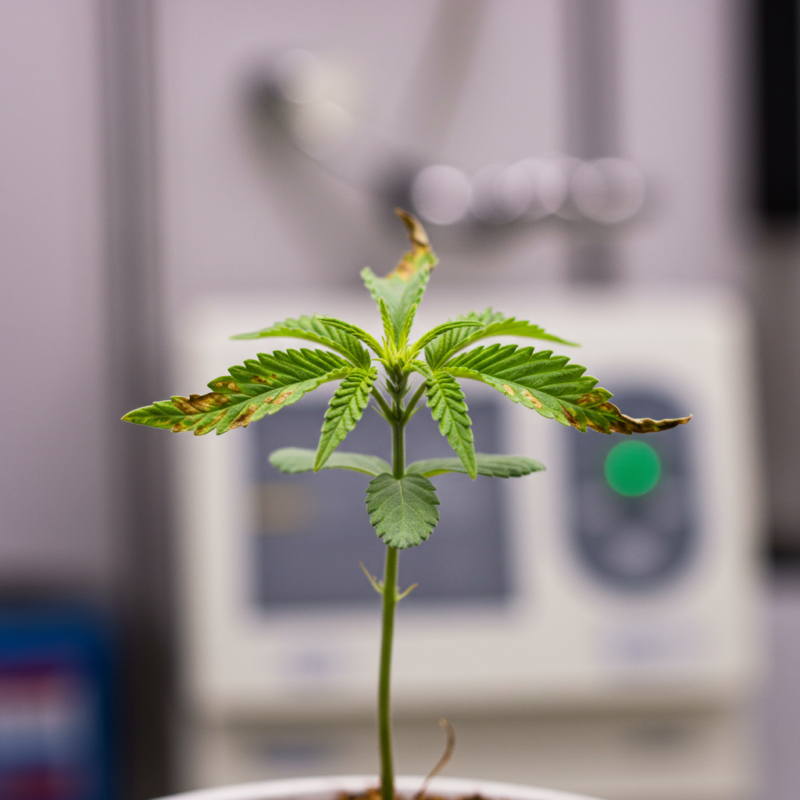
Solution: If you notice leaf burn or curling, move your lights further away (at least 12 inches for CFLs or LEDs). If the seedlings are stretching too much, you may need to move the lights closer or increase the light intensity. Aim for a balanced light environment that supports healthy, strong growth.
Genetic Issues
Sometimes, poor seedling growth can be traced back to genetics. You might encounter “freak” seedlings that grow abnormally due to unstable or poor-quality genetics. These seedlings may show stunted growth, unusual leaf patterns, or mutations like trifoliate leaves (three sets of leaves instead of the usual two).
| Problem | Likely Cause | First Fix |
|---|---|---|
| Seed will not crack | Old seed, cold conditions, or poor moisture | Stabilize warmth and consider a short soak |
| Taproot appears then stalls | Drying, overwatering, or low oxygen | Keep medium evenly moist, not soaked |
| Seedling helmet head | Shell stuck from shallow moisture issues | Mist gently and avoid pulling hard |
| Damping off | Wet medium and poor airflow | Reduce moisture and improve air movement |
| Weak pale seedling | Poor light or root stress | Improve light and avoid feeding too early |
Solution: Unfortunately, there’s not much you can do about bad genetics. If you notice weak or mutated seedlings, it’s best to remove them and focus your energy on the stronger plants. Always source your seeds from reputable breeders to ensure you’re getting stable, high-quality genetics.
Nutrient Overload
New growers often make the mistake of feeding seedlings too soon. Seeds contain all the nutrients they need for the first few weeks of life, and adding fertilizers or nutrients too early can disrupt the internal chemistry of the seedlings, leading to nutrient burn or stunted growth.
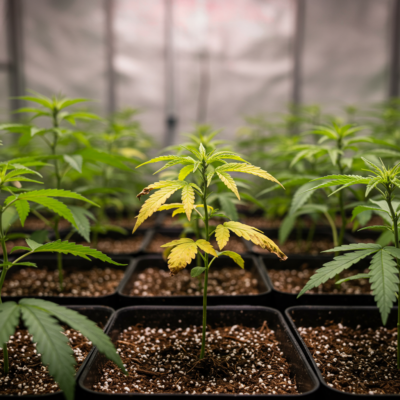
Solution: Avoid giving seedlings any nutrients for the first two to three weeks. Household water contains enough dissolved solids to nourish the seeds during this time. When you do begin feeding, start with a very dilute solution to prevent overloading the young plants with nutrients.
Poor Drainage
If your growing medium doesn’t drain well, excess water can build up, leading to waterlogged roots and poor oxygen absorption. This can cause slow growth or root rot.
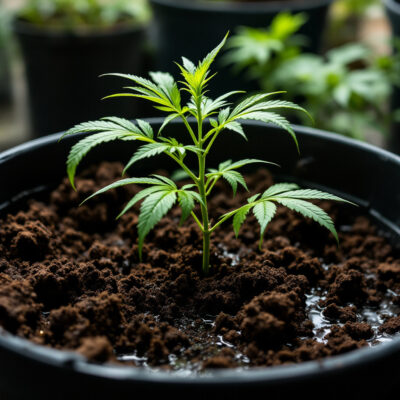
Solution: Always use a well-draining soil mix or growing medium. If you’re using containers, make sure they have drainage holes. Setting your planting flats or rockwool cubes on a grate will help improve air circulation and drainage.
Transplanting Seedlings
Once your seedlings have sprouted and developed a strong enough root system, it’s time to transplant them. This is a critical step in the growing process. If done correctly, your plants will thrive in their new environment and continue growing healthy and strong. But if you rush it or mishandle the delicate seedlings, you risk stunting their growth or, worse, killing them.
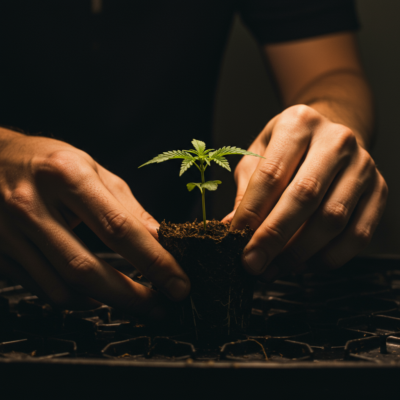
First, you must know when your seedlings are ready to be transplanted. A good rule of thumb is to wait until they have at least two to three sets of true leaves (those first round cotyledon leaves don’t count). At this point, the roots should be well-established but not yet root-bound. You’ll want to handle the seedlings gently, especially the roots, which are fragile at this stage.
“Should I transplant a seedling as soon as I see roots at the bottom?”
Question sent by: Grace Anderson, via Facebook page.
Visible roots are a sign to pay attention, but look at the whole plant. If it has healthy true leaves, steady growth, and the root ball holds together, transplanting is safer.
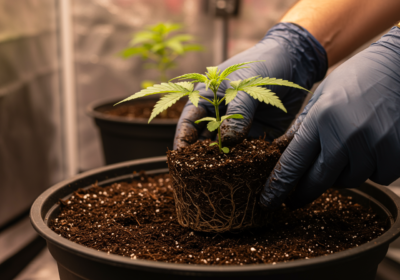
Before you start transplanting, make sure your new containers are prepped. Choose pots that allow the roots to expand and develop. Typically, moving seedlings into 1 to 2-gallon pots is a safe bet, but if you’re working with a faster-growing strain or aiming for larger plants, you might go bigger. Fill the pots with your growing medium—soil, coco coir, or another substrate—and ensure it’s well-aerated and drains properly.
Here’s how you do it:
| Signal | Ready To Transplant | Wait Longer If |
|---|---|---|
| Leaves | Several true leaves and steady growth | Only cotyledons are present |
| Roots | Roots hold the plug/medium together | Root system falls apart when moved |
| Watering | Container dries at a normal rhythm | Medium stays wet for too long |
| Plant posture | Seedling stands firm | Stem is weak, stretched, or stressed |
- Water Before Transplanting: Give your seedlings a light watering before you transplant. This helps keep the root ball intact and makes it easier to remove the seedling from its current container without damaging the roots.
- Prepare the New Pot: Make a hole in the center of your new pot that’s big enough to accommodate the seedling’s root ball. You should transplant it into a hole just deep enough so that the plant sits at the same depth it was growing before.
- Gently Remove the Seedling: Be careful here. If your seedling is in a small plastic pot or tray, gently squeeze the sides to loosen the root ball. If it’s in a peat pellet or rockwool cube, you can transplant it directly, but still handle the plant with care. The taproot is sensitive, and rough handling can set your plant back.
- Place and Cover: Place the seedling into the hole in its new container, making sure the roots are spread out slightly. Lightly fill the surrounding area with your growing medium, and gently press it down to eliminate air pockets, but don’t pack it too tightly.
- Water In: After transplanting, give the seedlings a good watering to help them settle into their new environment. Make sure the water penetrates deep enough to reach the roots, but don’t drench them. Keep an eye on your plants for the first few days after transplanting, as this is a sensitive time for them.
Now that your plants are transplanted, they’ll need a bit of time to adjust to their new surroundings. Don’t be surprised if they seem a little droopy for the first day or two—it’s normal for them to experience a bit of transplant shock. Just keep the environment stable, and they’ll bounce back quickly.
Master Advice: Transplant when the plant is ready, not when the calendar says so. Root development and plant vigor matter more than a fixed number of days.
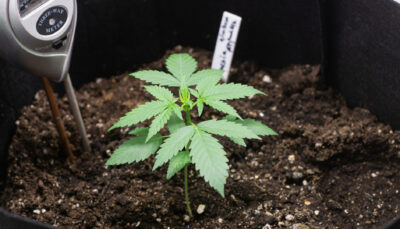
Remember, successful transplanting is all about minimizing stress on the plant. Be gentle, keep the root ball intact, and make sure the new pot offers plenty of room for root growth. Done right, this step will set the stage for strong, vigorous plants that will reward you down the line.
Stages of Cannabis Growth
Understanding the life cycle of cannabis is essential for any successful grow. Like most plants in nature, cannabis goes through several distinct stages of growth. It’s an annual plant that completes its entire life cycle in one growing season. If you plant a seed in the spring, it will grow vigorously through the summer, hit the flowering stage in the fall, and produce seeds before dying off. Those seeds then sprout the following year, continuing the cycle.
Cannabis has three main stages of development: germination/seedling,
“Can I fix a bad seedling stage later in veg?”
Question sent by: Daniel Young, via email.
Sometimes, but early stress can cost time and structure. A healthy seedling makes veg easier, while a weak start often needs extra recovery before training or flowering.
vegetative, and flowering (or budding). You can control these stages in an indoor setup to fit your grow schedule, but the natural process stays the same.
The growth stages follow this order:
Growth Stages
Indoor cannabis is usually managed through seedling, vegetative, pre-flowering, flowering, harvest, drying, curing, and storage phases. Each phase changes what the plant needs most.
Germination -> Seedling -> Vegetative -> Pre-flowering -> Flowering.
Each phase plays a critical role in the plant’s development. During germination, the seed comes to life and becomes a seedling. Then, during the vegetative stage, the plant focuses on building strong roots, stems, and leaves. Finally, once flowering is triggered by a change in light cycles, the plant puts all its energy into producing buds.
Cannabis plant completes its life cycle in one season in nature, but when grown indoors, you can control the environment. This allows you to harvest multiple crops a year if you time everything right. You must understand that each growth stage is important for successful growth—knowing when to transition from one stage to the next will ensure your plants are healthy and productive from seed to harvest.
Vegetative Growth
After four to six weeks of seedling growth, cannabis enters the vegetative growth stage—arguably the most important phase for establishing a healthy plant. During this stage, your plants focus all their energy on building a solid foundation: developing thick stems, sturdy branches, and plenty of lush green leaves. The stronger and healthier the plant is in the vegetative phase, the more potential it has for a heavy harvest when flowering begins.
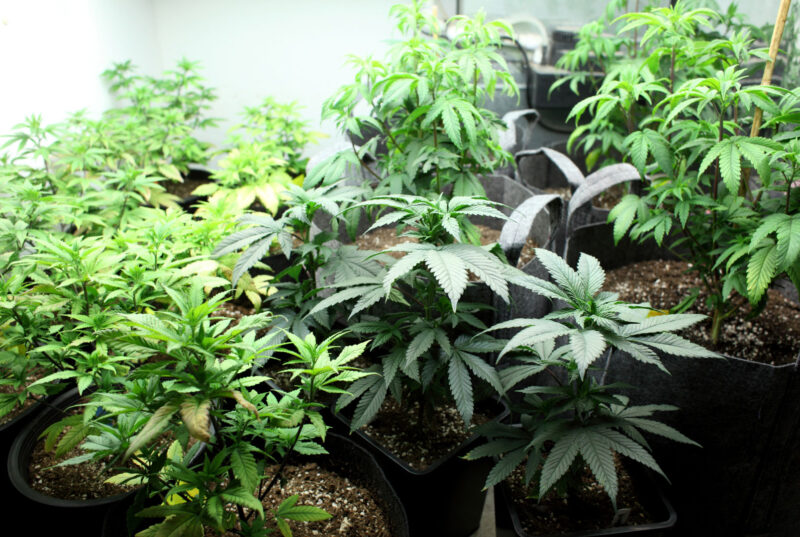
The vegetative stage can last indefinitely indoors, provided your plants receive enough light. Cannabis remains in vegetative growth with 16–24 hours of light per day, and the more light your plants get, the faster they will grow. Some strains can continue vegetative growth for over a year, theoretically forever, as long as they receive consistent light. This is especially useful for mother plants that you want to keep in vegetative growth for cloning.
The Importance of Strong Vegetative Growth
Healthy vegetative growth is crucial for future yields. During this phase, plants can grow
Before heavy training or flipping, look for:
- Steady new growth
- Healthy leaf color
- Strong stems and branch structure
- No active pest or root problems
- Enough room for flowering stretch
1–2 inches per day under optimal conditions, developing thick stems and branching out. The faster your plant grows in the vegetative phase, the more robust it will be during flowering. A plant that’s stunted or weak now will produce much less during flowering, so avoid rushing it into the next stage. If your plants seem weak or small, hold them back and give them time to build strength before inducing flowering.
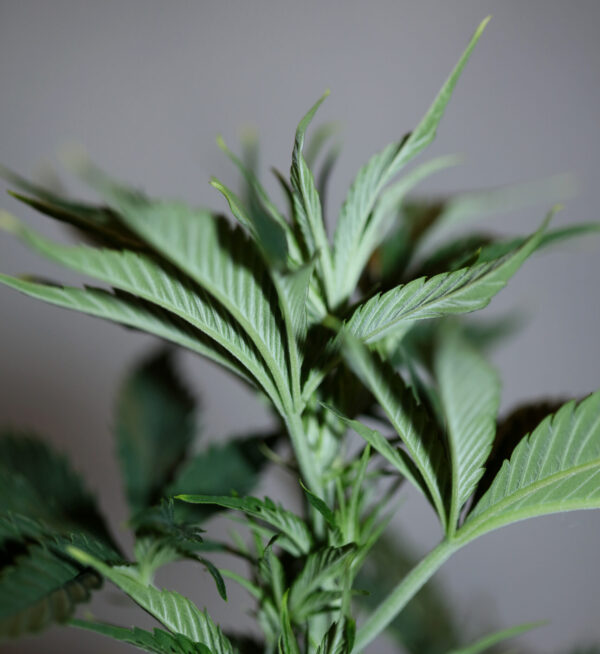
Nutrient uptake is critical in this stage, and plants will use water and nutrients more rapidly as they grow. Nitrogen is particularly important for vegetative growth, as it fuels stem and leaf development. A balanced nutrient solution with trace elements like potassium, phosphorus, sulfur, magnesium, and calcium will help your plants grow strong and healthy. Be sure to follow the manufacturer’s recommended dosage and adjust based on how your plants respond.
Managing Light During Vegetative Growth
Light is one of the most critical factors during the vegetative stage, and getting it right will make a huge difference in how quickly your plants grow. Aim to provide 18–24 hours of light per day to keep your plants in continuous vegetative growth. Some growers prefer to give plants a dark period during vegetative growth, usually with an 18/6 light/dark cycle (18 hours of light and 6 hours of darkness). This approach mimics the natural sunlight cycle and gives the plants time to rest, allowing the stomata (the tiny pores on the leaves) to open fully and improve gas exchange. The dark period also helps to manage temperature and energy use in your grow space.
“My leaves are praying upward. Is that always good?”
Question sent by: Aiden Scott, via email.
Slight upward posture can be normal under good light, but extreme tacoing, bleaching, or dry edges can mean too much intensity, heat, or low humidity. Read the whole plant, not one sign alone.
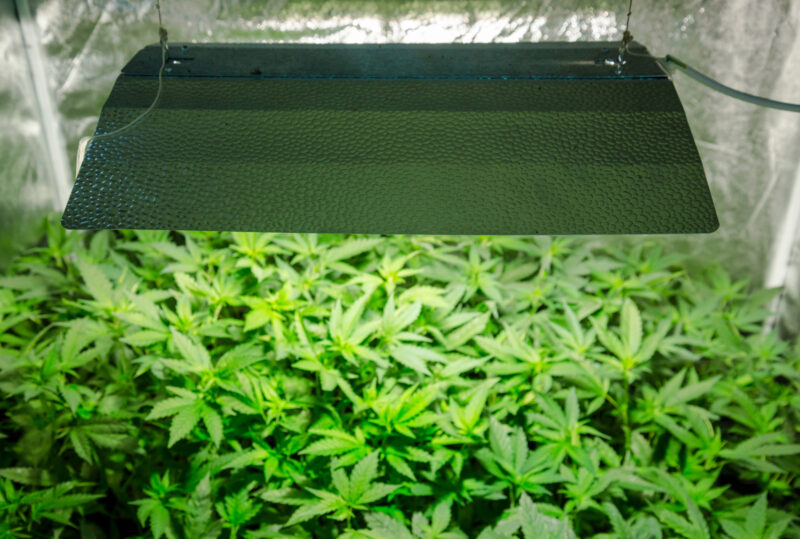
However, many experienced growers prefer to leave the lights on for 24 hours a day during vegetative growth. Cannabis plants do not require a dark period in this stage, and continuous light can speed up growth by about 30%. Without a dark period, plants photosynthesize continuously, which means they’re constantly producing energy for growth. This is particularly effective for fast-growing strains or growers looking to shorten the vegetative stage.
| Factor | Healthy Veg Target | Stress Clue |
|---|---|---|
| Light | Strong enough for compact growth | Stretching or light bleaching |
| Airflow | Leaves move lightly | Stale air or wind-burned edges |
| Watering | Wet/dry rhythm at root depth | Constantly soaked or bone-dry medium |
| Nutrition | Steady green growth | Burnt tips or pale new growth |
| Space | Even canopy development | Crowding before flower |
The choice between 18/6 and 24-hour light cycles is up to you. If you notice your plants thriving with a dark period, keep it. If not, try leaving the lights on continuously. Both methods work, but the key is to remain consistent. Sudden changes in light cycles can stress the plants, so once you pick a schedule, stick to it.
The same principles apply to
Pro Tip: Light intensity should increase with plant size. Young plants need gentle light; established veg plants can use more power if heat and water are managed.
mother plants, which you want to keep in vegetative growth for an extended period. A mother plant needs 18–24 hours of light daily to stay in the vegetative phase and prevent flowering. Most growers stick to 18 hours of light for mother plants, as this helps conserve energy and keeps the plant healthy without pushing unnecessary growth. Since mother plants are primarily used for cloning, the goal is to keep them alive and thriving without overstimulating them.
“How long should I keep plants in veg indoors?”
Question sent by: Evan Mitchell, via Facebook page.
Veg time depends on space, strain stretch, training style, and plant health. Flip when the canopy can fill the area after stretch without overcrowding the tent.
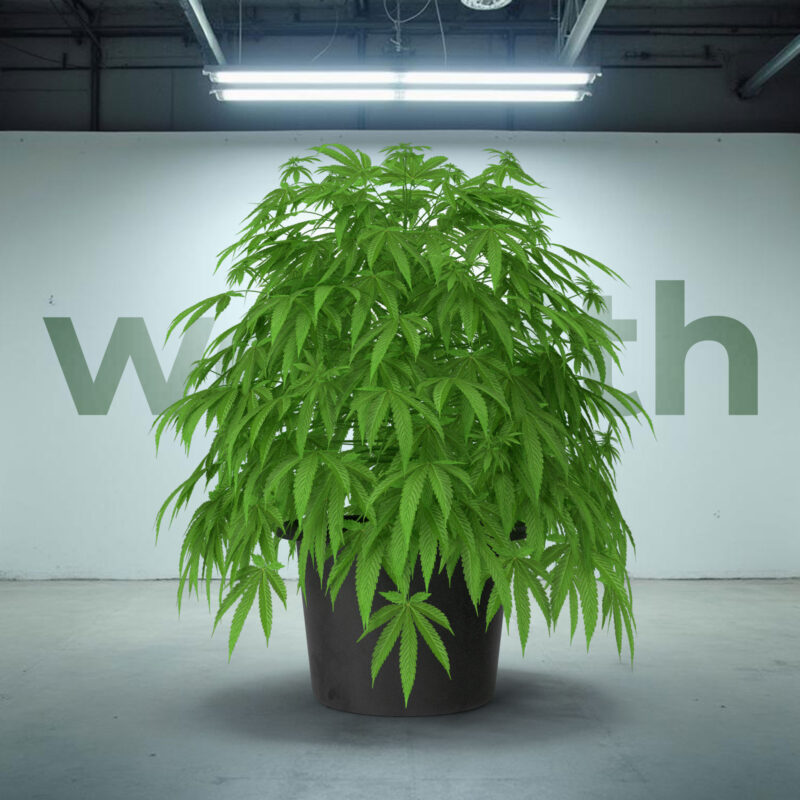
When managing light for mother plants, make sure to focus on keeping the plant healthy and stable. They should be kept in a consistent environment with even lighting to ensure they produce healthy, vigorous clones. Maintaining a steady light cycle for mother plants is crucial—any interruptions or inconsistencies can trigger unwanted flowering, which can reduce the viability of clones.
The intensity of your light source is just as important as the light cycle. There are several lighting options for indoor growers, each with pros and cons depending on your setup. HID lights, particularly metal halide (MH), are a solid choice for vegetative growth due to their strong light intensity, which drives fast, vigorous development. If you’re after rapid stem and leaf growth, this is your go-to, but keep in mind that HID lighting generates a lot of heat, so proper ventilation is critical. CFLs (compact fluorescent lamps) are great for smaller setups or when plants are still young. They’re affordable and don’t run as hot but lack the intensity needed to push larger plants. LED lights are ideal if you’re looking for energy efficiency and versatility. They offer customizable light spectrums, less heat, and are becoming a popular choice for all stages of growth.
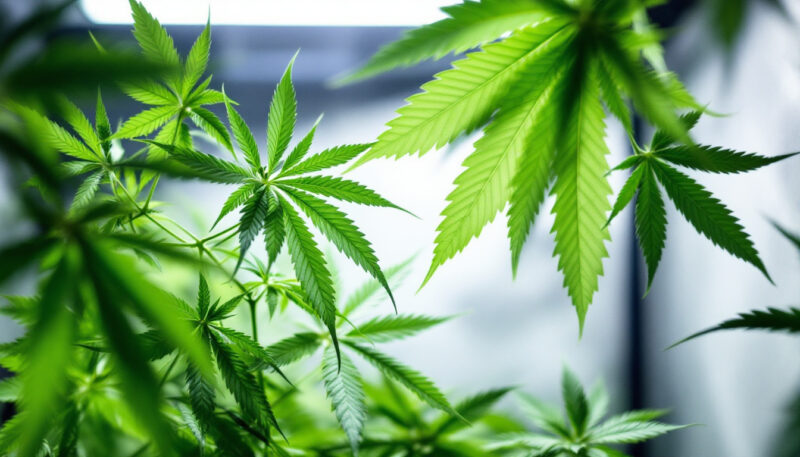
The type of light isn’t everything; spectrum, color temperature, lumens, and wattage are equally important. For vegetative stage, focus on lights with a cooler spectrum, around 4000K to 6500K. These lights emit more blue wavelengths, which help promote strong, bushy growth. Blue light encourages compact, sturdy plants rather than tall, stretched-out ones. Never use orange or red light during the vegetative stage because they are for the flowering stage. You also want to pay attention to lumens, which measure light output. Aim for at least 2,500 lumens per square foot of grow space to support healthy vegetative growth. The higher the lumens, the better the light penetrates the canopy. In terms of wattage, this will depend on your setup. 400–600 watts is common for mid-sized grows, while smaller setups can get away with 250 watts. Keep in mind that higher wattage equals more heat, so adjust your distance between the plants and lights accordingly.
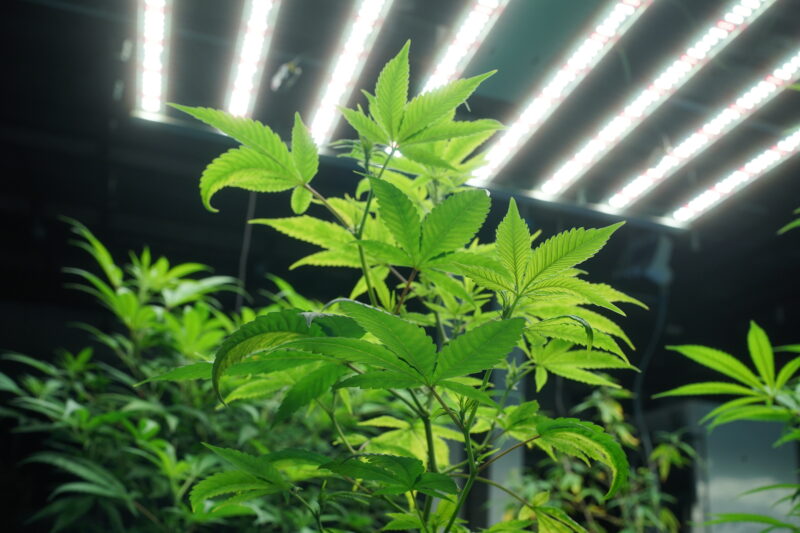
Regarding light height, you’ll want to start around 18–24 inches above the canopy for HID or LED lights, then adjust as the plants grow. You can go closer to 6–12 inches for CFLs because they don’t generate as much heat. Watch your plants closely and adjust the light distance based on their reactions. If the plants stretch too much, the light is too far away. If they show signs of heat stress like curled or burnt leaves, move the lights higher.
Remember: Vegetative growth is where you build the plant that flowering will depend on. Strong roots, structure, and leaves are the foundation of yield.
Managing light properly means constantly monitoring how your plants respond. If you see them stretching, they’re not getting enough light and are trying to reach for it. On the flip side, if the leaves start to curl or show burn marks, the lights are too close and need to be raised. The goal is to find that sweet spot where the light intensity is optimal for growth without causing stress.

Note: Your goal is to provide intense, blue-spectrum light during vegetative growth to maximize photosynthesis and support strong, stocky plants. Whether you go with HID, CFL, or LED, the key is managing intensity, distance, and spectrum to give your plants the best possible start. As your plants grow, keep adjusting the light height and monitor their reaction—this is a process of fine-tuning that ensures healthy development through the vegetative stage.
Nutrients and pH Management During Vegetative Stage
During the vegetative phase, your plants will demand more nutrients, especially nitrogen. Nitrogen drives the development of stems, leaves, and roots—everything green that will support the plant later in flowering. A common nutrient solution for this phase is something balanced like a 20-20-20 fertilizer with trace elements, whether you’re growing in soil or hydroponically. As the plant expands, secondary nutrients like magnesium, calcium, and sulfur will also be needed.These elements are crucial for photosynthesis and overall plant metabolism. Many growers add Epsom salts (for magnesium and sulfur) to their watering routine to prevent deficiencies that can slow growth.
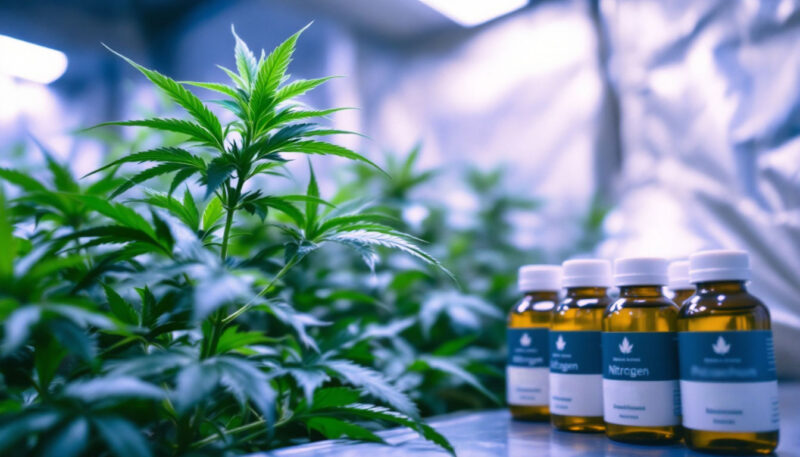
While nutrients are essential, they’re useless if your
“Should I feed every watering during veg?”
Question sent by: Harper Lee, via Facebook page.
Not automatically. It depends on medium, plant size, nutrient strength, and runoff behavior. In rich soil, feeding too often can create excess before the plant needs it.
pH is off. If the pH is too high or too low, your plants won’t be able to absorb the nutrients properly, leading to deficiencies even when everything else seems right. In soil, aim for a pH range of 6.0–7.0, and for hydroponics, keep it tighter at 5.5–6.5. Always test the pH of your water or nutrient solution before feeding your plants. Adjust the pH with “pH up” or “pH down” solutions if it is out of range. An imbalanced pH can lock out nutrients and cripple your plants, stunting their growth or causing yellowing and weak stems.
Important: Many nutrient problems start as pH or watering problems. Check the root zone before adding more fertilizer.
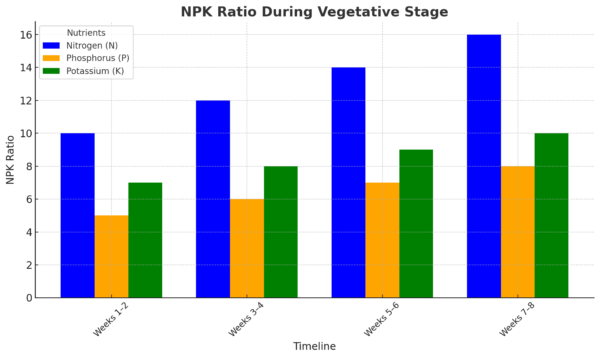
Nutrient requirements can vary between strains, so keep an eye on how your plants react. Sativa-dominant strains tend to need less fertilizer compared to their indica counterparts. Indicas, being more robust, can often tolerate higher nutrient levels, but even they can suffer from overfertilization if you’re not careful. Learn your strain’s nutrient tolerance by starting with lower doses and increasing as needed.
Photosynthesis and Plant Development
During vegetative growth, photosynthesis works overtime to drive your plant’s rapid expansion. The leaves take in
Photosynthesis
Photosynthesis is how the plant turns light, water, and carbon dioxide into usable energy. Indoor growers influence it through light, airflow, temperature, water, and leaf health.
CO2 from the air, water, and light, converting it into carbohydrate energy and oxygen through the chlorophyll in the leaves. For this process to be efficient, you need to keep the leaves clean and free of dust or buildup that could block the stomata—the tiny pores on the underside of the leaves. These stomata regulate moisture levels and allow oxygen and water vapor to flow out of the plant. Proper airflow around your plants also helps keep these pores functioning properly, ensuring maximum photosynthesis and growth.
In this phase, the plant’s root system also strengthens and expands. A healthy root system is very important to absorb nutrients and water efficiently, which in turn supports strong stem and branch growth. This is when your plants really start to look like cannabis plants—thicker stems, broader leaves, and more branching.
Pre-Flowering
Cannabis is a dioecious plant, meaning it’s either male (producing pollen) or female (producing seeds and buds). However, hermaphrodites can develop both male and female flowers, often due to stress or genetics. This is something you avoid because hermaphrodites can pollinate your female plants, leading to seed production and reducing bud quality. Our main goal is to grow sinsemilla buds, which are seedless female flowers. These buds are highly valued because the plant channels all its energy into producing THC-rich, resinous flowers instead of seeds, producing more potent, high-quality buds. This enhances potency and improves the smoke quality, making a smoother, more enjoyable experience.
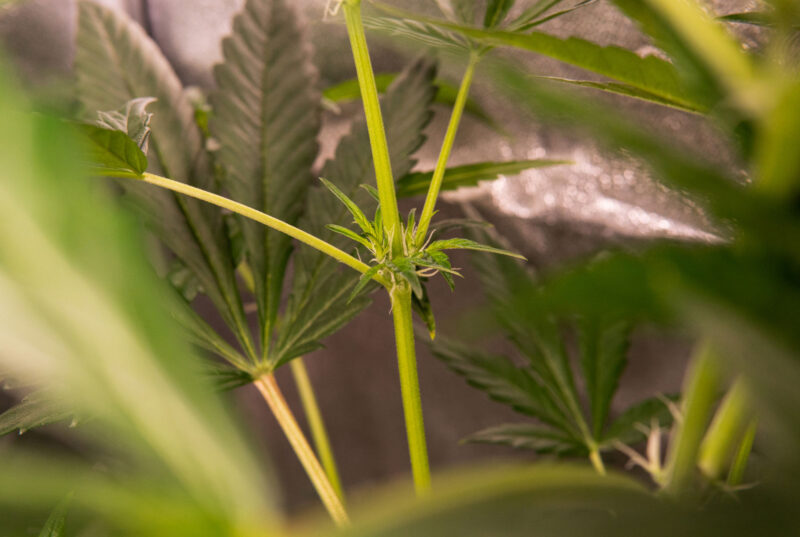
During the pre-flowering stage, your plant will begin to show its sex, and this is the critical time to spot and remove males or hermaphrodites to ensure an all-female crop of sinsemilla. Pre-flowers emerge at the branch internodes, where the branch meets the main stem, usually about six to eight weeks into vegetative growth, around the fourth to fifth internode. This is a crucial point in the plant’s life cycle because identifying the plant’s sex now allows you to either keep your females or remove males and any hermaphrodites before they can pollinate the crop.
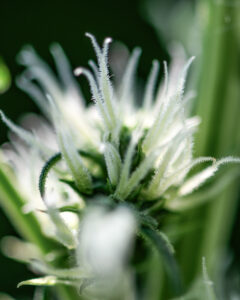
| Sign | Likely Meaning | Action |
|---|---|---|
| Small sacs without hairs | Male flowers | Remove or isolate if seedless buds are the goal |
| White pistils at nodes | Female pre-flowers | Continue monitoring and prepare for flower |
| Both pollen sacs and pistils | Hermaphrodite/intersex expression | Inspect stress causes and decide whether to remove |
| No clear signs yet | Plant may need more maturity | Wait and recheck with magnification |
While pre-flowers are often visible to the naked eye, using a 10x to 30x magnifier will help you see them more clearly and determine the plant’s sex. Pre-flowers typically appear earlier in plants grown under an 18/6 day/night light cycle than those under a 24-hour light cycle. Once you’ve identified the sex, you’re ready to move forward with flowering, which requires switching to a 12/12 light cycle—12 hours of uninterrupted darkness and 12 hours of light.
Male Pre-Flowering
Male plants usually reveal themselves around six to eight weeks into growth, with pre-flowers appearing at the fourth or fifth internode. These male pre-flowers look like small ball-shaped structures, which will eventually turn into pollen sacs. If not removed early, these sacs will burst and pollinate any nearby females, ruining your sinsemilla crop. Remove male plants as soon as you confirm their sex to prevent accidental pollination.
“How fast should I remove a male plant once I identify it?”
Question sent by: Benjamin Carter, via email.
If you want seedless buds, remove it as soon as you are confident. Do not wait for pollen sacs to open. Move carefully so you do not shake pollen around the room.

Female Pre-Flowering
Female pre-flowers appear as tiny calyxes with white pistils sticking out. These pistils are the key indicators that you have a female plant, and this is the plant you want to keep. Female pre-flowers typically show up after
“Are the first white hairs enough proof that the plant is female?”
Question sent by: Olivia Sanders, via Facebook page.
White pistils are a strong sign of female growth, but keep inspecting through early flower. Stress or unstable genetics can still produce intersex traits later.
Important: Pre-flower inspection protects the whole crop. One unnoticed male or stressed hermaphrodite can seed a room quickly.
six to eight weeks of growth and are a clear sign that the plant is ready to transition into the flowering phase.
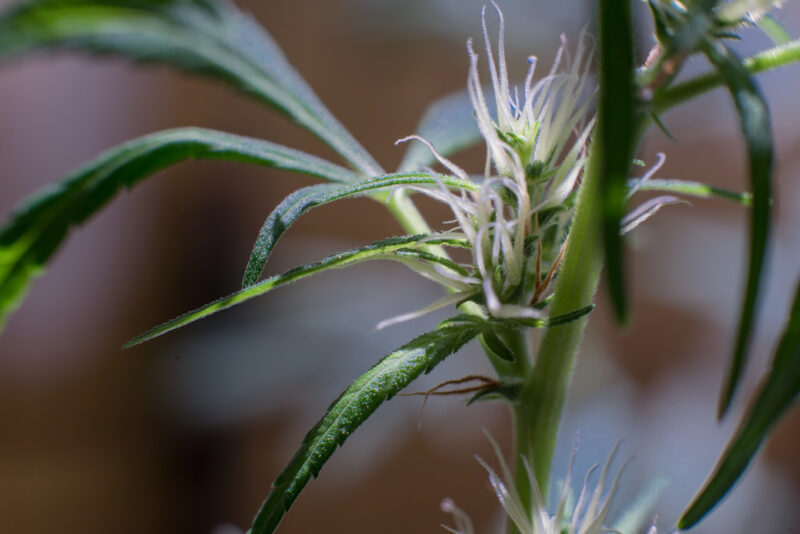
Pre-flowering occurs regardless of the light cycle—it’s a natural sign of sexual maturity. However, once you’ve confirmed that your plant is female, you can switch to a 12/12 light cycle to initiate full flowering.
Intersex or Hermaphrodite Flowers
Intersex or hermaphrodite plants are a major concern during the pre-flowering and flowering stages. These plants develop both male and female reproductive organs, often due to environmental stressors like light leaks during the dark cycle, nutrient issues, or irregular watering. When a hermaphrodite forms male pollen sacs alongside female flowers, it can pollinate itself or other females in the grow room. This leads to seed production, which detracts from the quality and potency of your buds.
“Can I keep a plant if I find only one pollen sac?”
Question sent by: Jackson Moore, via email.
It is risky. Some growers remove a single isolated sac and monitor daily, but if more appear, the plant can seed the room. Beginners are usually safer removing unstable plants.
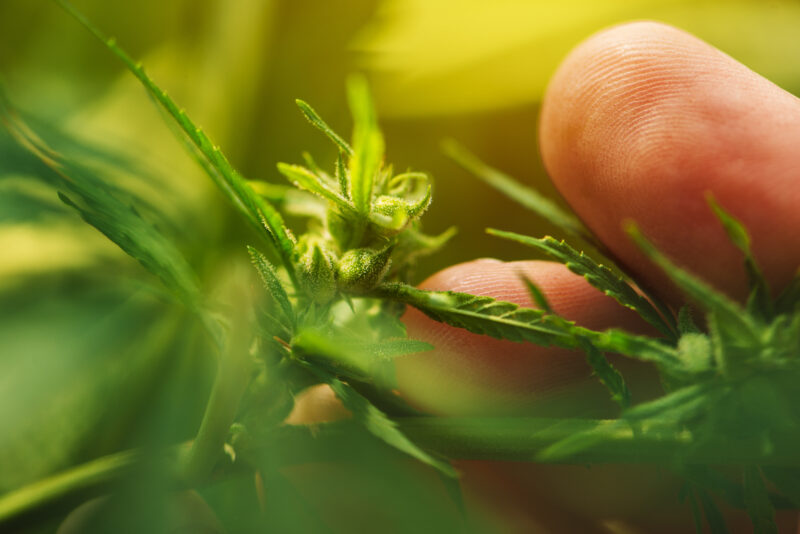
To avoid this, monitor your plants closely for any signs of intersex traits, especially if they’ve been stressed. Hermaphrodites should be removed immediately to protect the rest of your crop. Identifying and eliminating these plants early will prevent seed formation and keep your buds focused on resin production.
Hermaphrodite traits can spread seeds through the crop
Light leaks, stress, genetics, and late-flower instability can trigger pollen-producing flowers. Inspect carefully before and after switching to 12/12.
Time to Start Flowering?
After your plants have shown pre-flowers, the big decision comes: Should you begin flowering now or let the plant keep growing in the vegetative stage? It’s a critical choice, as the timing of flowering directly impacts the size and yield of your plants. However, it’s important to note that the amount of bud your plants produce isn’t necessarily tied to how big they are at the time of flowering. The number of nodes, the growing environment, and the strain’s genetic potential all play bigger roles in determining bud production.
Master Advice: Flip based on final canopy size, not current excitement. Most plants stretch after 12/12, so leave room for the plant you are about to create.
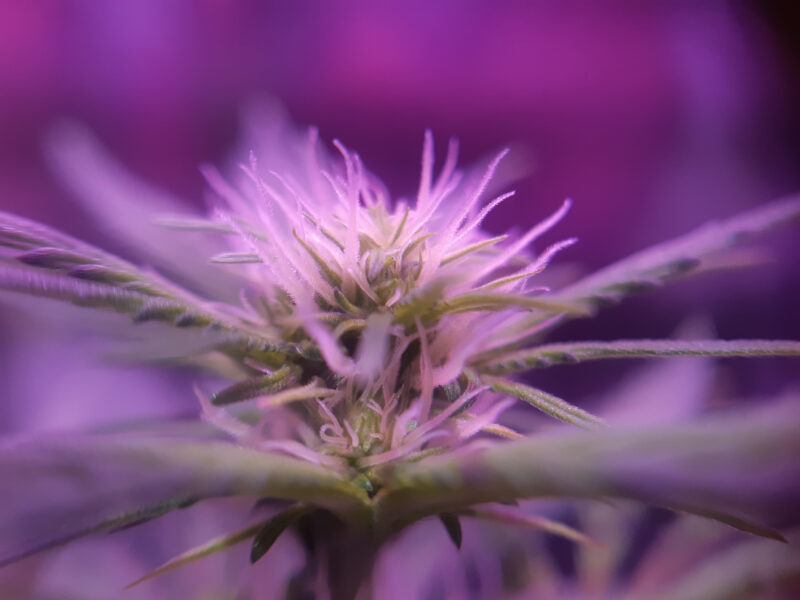
You can successfully get good yields from smaller plants if they’re healthy and well-cared for. Bud quality won’t suffer just because the plant is shorter. On the other hand, bigger plants don’t automatically translate to better buds. The key is how well the plant was grown and the conditions it’s in during flowering.
If you choose to flower early, remember that sativa-dominant strains can double or even triple in size during the flowering stage. This stretch needs to be considered, especially if you’re working with limited space. Flowering smaller plants can help keep them more manageable indoors, allowing for faster turnover of crops and potentially more harvests per year.
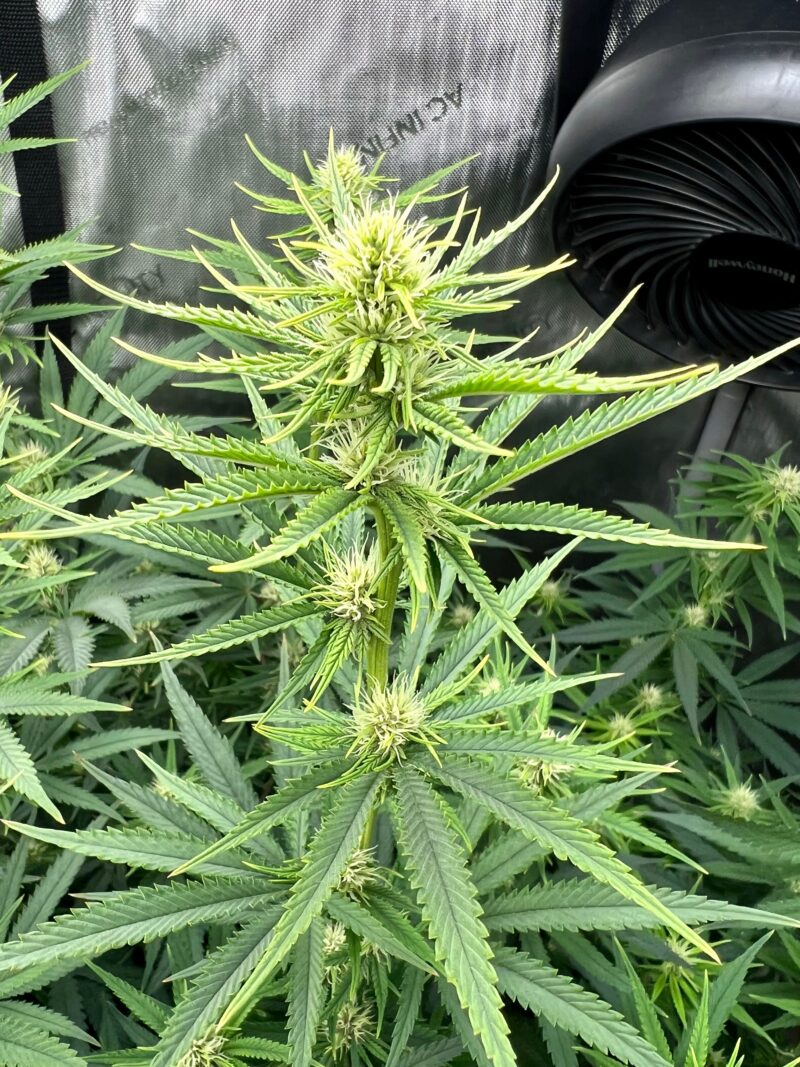
Alternatively, if you’re aiming for a larger yield, you can keep your plants in the vegetative stage until they reach your desired height. A good sign that a plant is ready for flowering is when it begins to develop alternating nodes—this indicates that it’s fully mature. This usually happens for plants grown from seed after several weeks of vegetative growth, while clones taken from mature plants can be flowered as soon as they’ve rooted.
Making the Decision
Finally, deciding to switch to flowering depends on how large you want your plant to be at harvest. If space is an issue, you can start flowering when your plants are as small as
“My plant looks healthy but small. Should I flip now or veg longer?”
Question sent by: William Adams, via Facebook page.
If space allows and the plant is healthy, more veg can help fill the canopy. If the strain stretches heavily or your tent is short, flipping smaller may be smarter.
six inches tall with at least four sets of leaves. This typically takes two to four weeks in most hydroponic setups.
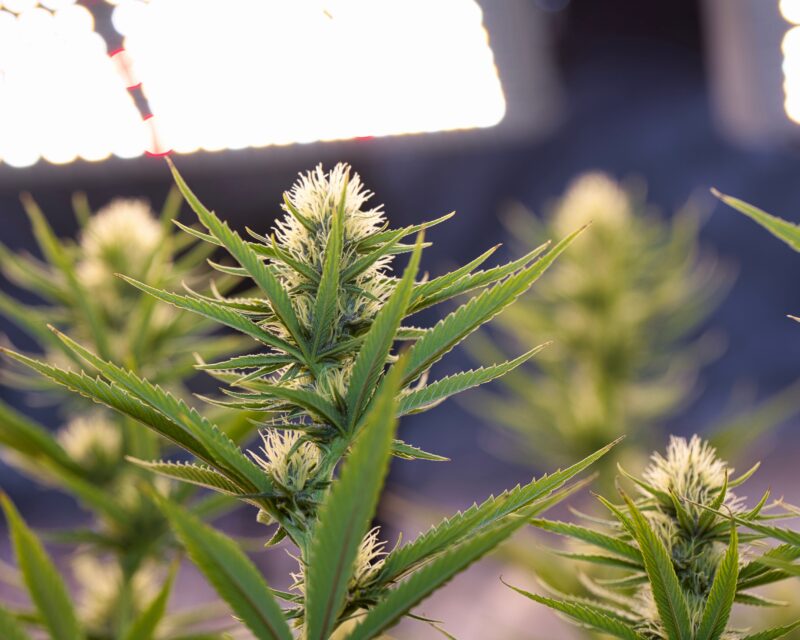
For growers who want to maximize yields, extending the vegetative phase allows the plant to grow larger and develop more bud sites. However, keep in mind that sativa-dominant strains will stretch significantly, sometimes growing two to three times their vegetative height, so you’ll need to make sure your grow space can accommodate their full size.
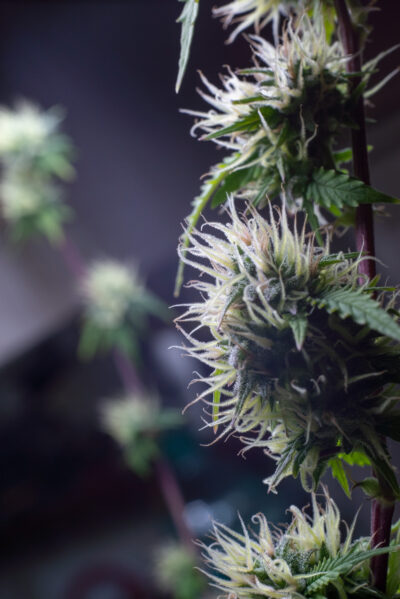
Once you decide, remember that during the flowering phase, the plant shifts its energy to bud production, and the faster you manage this transition, the sooner you’ll be harvesting. Healthy pre-flowering management sets the stage for a successful harvest.
Flowering: The Final Stage
The flowering stage is where cannabis transitions from vegetative growth into full bud production. During this phase, the plant redirects its energy from height and leaf production to bud formation. You’ll notice a significant reduction in vertical growth as the plant focuses on developing THC-rich buds. This is normal—your plant is now concentrating on producing the potent, resin-covered buds you’ve been working toward.
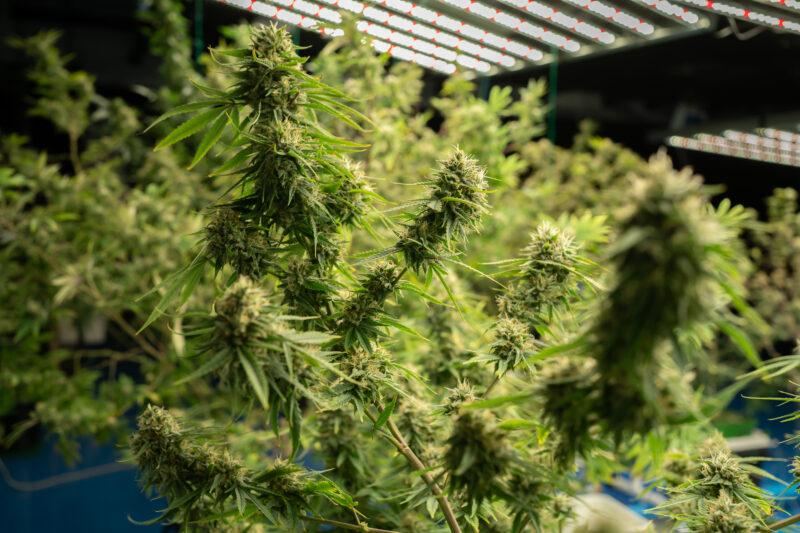
In the first two to four weeks of flowering, plants may continue to stretch, especially if they are sativa-dominant. After this period, the plant’s energy shifts entirely to flower production.
“Why did my plant stretch so much after I switched to 12/12?”
Question sent by: Tyler Richardson, via email.
Flowering stretch is normal, especially in sativa-leaning genetics. The plant is repositioning itself for bud production. Plan height, training, and light distance before the flip.
Indica-dominant strains typically flower faster and produce dense, compact buds, while sativas take longer but reward growers with larger colas. As flowering progresses, the growth of new shoots and leaves slows, and the plant redirects everything toward bud development and resin production.
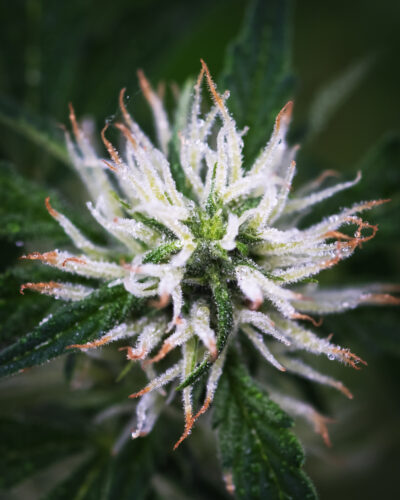
As your plant flowers, the pistils (white hairs) will begin to change color, transitioning from white to orange, red, or brown, depending on the strain. This is a clear sign that your plant is nearing maturity. While each strain has its own flowering time,
Remember: Flowering rewards consistency. Sudden changes in light, feed strength, humidity, or pruning can create stress when the plant has less recovery time.
indicas usually take around 6–8 weeks, and sativas may take up to 10–12 weeks or more. Keep a close eye on your plants, as flowering times can vary even within the same strain.
What is Sinsemilla?
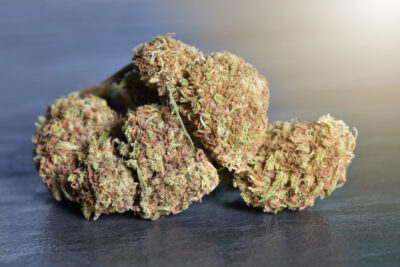
The goal during flowering is to produce sinsemilla buds—unpollinated female flowers that remain seedless. The term sinsemilla comes from the Spanish words “sin” (without) and “semilla” (seed). Unpollinated female plants will continue to flower longer and concentrate their energy on producing THC-rich, resin-coated buds rather than seeds.
“If I find a few seeds in one bud, is the whole harvest ruined?”
Question sent by: Rachel Evans, via Facebook page.
Not always. A few seeds may come from isolated pollen exposure or late intersex flowers. Quality can still be usable, but inspect the room and genetics before repeating the run.
Sinsemilla buds are highly valued for their potency and smooth smoke. Because the plant isn’t focused on seed production, it puts all its energy into producing more resin and cannabinoids, resulting in superior-quality buds. Sinsemilla buds are also richer in terpenes, which enhance the flavor and aroma. To ensure your crop remains sinsemilla, remove all male plants early in the pre-flowering stage and stay vigilant for hermaphrodites, which can release pollen and compromise your seedless harvest.
Sinsemilla
Sinsemilla means seedless female cannabis flowers. The goal is to keep female plants unpollinated so energy goes into resinous buds instead of seed production.
Growing sinsemilla offers one of the most significant advantages: improved smoke quality. Seeded buds tend to produce a harsher smoke, while sinsemilla buds offer a smoother, more flavorful experience. Maintaining a sinsemilla crop also results in higher THC content, making the buds ideal for both recreational and medicinal use.
Feeding During Flowering
As your plants enter the flowering stage, their nutrient needs shift considerably. During the vegetative stage, cannabis relies on high levels of nitrogen to support leafy growth, but in the flowering phase, the plant’s focus turns to phosphorus (P) and potassium (K) to develop buds. It’s essential to switch to a bloom fertilizer with a lower nitrogen ratio and higher phosphorus and potassium content. A common ratio for flowering is 5-50-17 or 10-20-10.
“My leaf tips burned after bloom nutrients. Should I add more Cal/Mag?”
Question sent by: Chloe Bennett, via email.
Burnt tips usually suggest excess strength before deficiency. First review dose, runoff, pH, and watering rhythm. Adding more products can make imbalance worse.
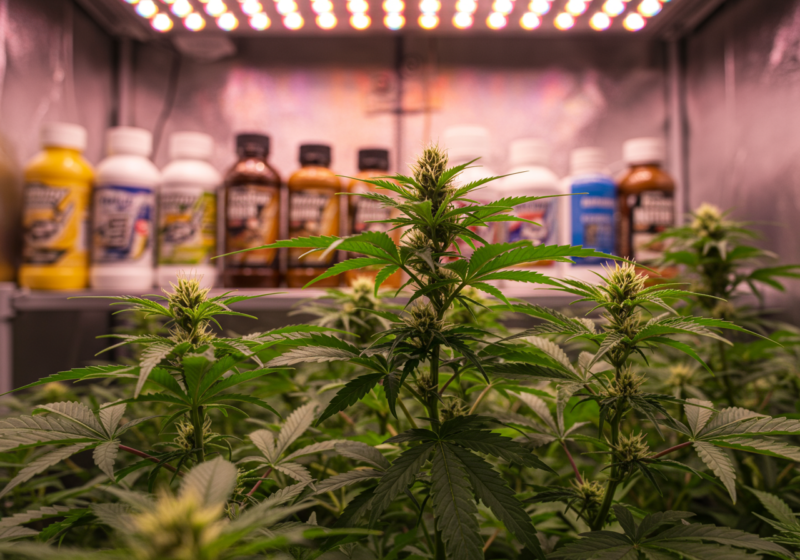
During the early weeks of flowering, continue feeding your plants with every watering to ensure they have enough nutrients to support bud formation. However, as your plants approach the final weeks of flowering, gradually reduce nutrient strength to prevent nutrient lockout or burn. Overfeeding in the later stages can lead to salt buildup, which negatively affects both the health of the plant and the taste of the buds. Reducing the nutrients to quarter strength toward the end of flowering will help your plants finish strong without stress.
| Flower Phase | Plant Focus | Feeding Note |
|---|---|---|
| Weeks 1-2 | Stretch and transition | Avoid sudden overfeeding while the plant shifts |
| Weeks 3-5 | Bud formation | Support phosphorus and potassium without burning tips |
| Weeks 6-8+ | Ripening and swelling | Watch salt buildup, leaf fade, and harvest timing |
| Final period | Flavor and finish | Reduce excess inputs according to your medium and method |
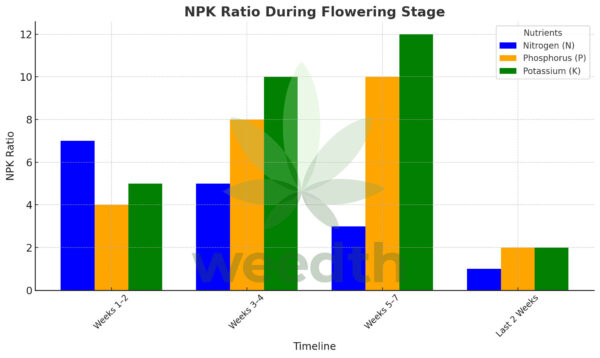
Phosphorus is crucial for flower formation, helping the buds grow larger and denser, while potassium ensures the plant has the strength to support the heavy buds as they develop. Keep an eye out for signs of deficiency—if the older leaves begin to turn yellow or purple, this is often a sign that the plant is naturally redirecting nutrients from the lower foliage to support the developing buds. However, if newer leaves begin to yellow or curl, this could indicate a nutrient imbalance.
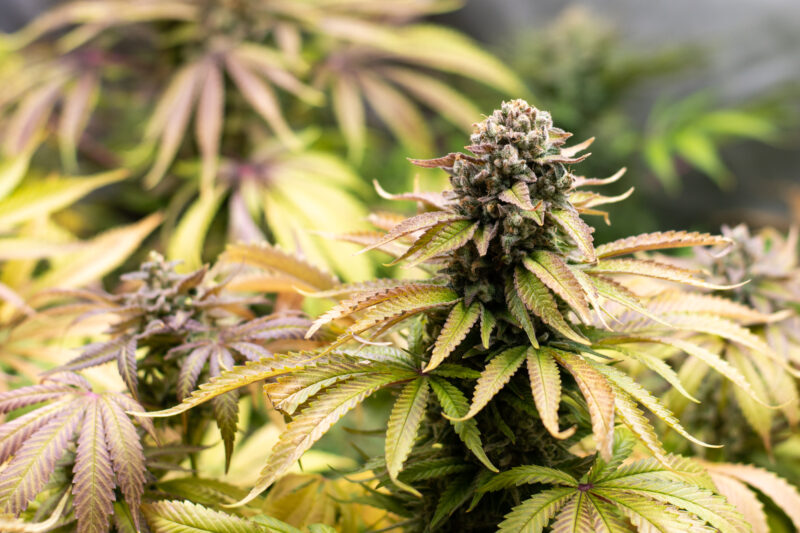
Tip: Do not remove nitrogen too abruptly. Flowering plants need less nitrogen than veg, but they still need enough to keep leaves functioning while buds build.
Warning: Never spray your plants with bug spray during flowering. If you do, harmful chemicals will end up in your buds, and when smoked, they can seriously poison you. The residue from pesticides can make the buds toxic, leading to severe health risks. Always avoid spraying anything on your plants during this crucial phase.
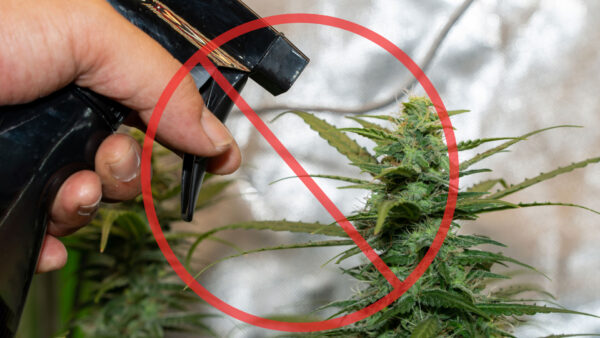
Supplement Advice for Flowering
To enhance both yield and bud quality, many growers use additional supplements during the flowering phase. Here are a few supplements to consider for boosting the health of your plants and improving bud production:
Supplements do not fix an unstable room
Bloom boosters, sugars, and additives work best when light, roots, pH, and humidity are already under control. They are not a shortcut around basics.
“Do I need bloom boosters for dense buds?”
Question sent by: Isaac Turner, via Facebook page.
Not necessarily. Dense buds come mostly from genetics, light, healthy roots, good environment, and correct feeding. Supplements can help in some systems, but basics matter more.
- Sugar Supplements: Additives like molasses feed beneficial microbes in the soil, promoting healthier roots and better nutrient absorption. Sugar-based supplements improve the microbial life in organic soils but should be stopped during the final flush period to avoid affecting the taste of the buds.
- Calcium and Magnesium (Cal/Mag) Supplements: Cal/Mag is crucial during flowering to prevent deficiencies that can hinder bud development. Calcium strengthens cell walls, while magnesium is essential for chlorophyll production and energy transfer within the plant. Cal/Mag should be used throughout flowering to maintain healthy plant growth and dense bud formation.
- Amino Acids and Enzyme Supplements: These supplements aid nutrient uptake and improve the plant’s overall health. They help break down organic material in the soil, making it easier for the plant to absorb the nutrients it needs during flowering.
- Terpene Enhancers: Terpene-boosting supplements encourage the plant to produce higher levels of terpenes, the compounds responsible for the aroma and flavor of your buds. This results in more aromatic and flavorful buds essential for producing top-quality cannabis.
- Hormone Supplements: Products containing natural plant hormones, such as kelp or algae extracts, can stimulate more flowering sites, increasing overall bud production. These supplements can be particularly beneficial for larger grows where maximizing yield is important.
- Bud Boosters: Specialized bud boosters are designed to increase bud density and resin production. These supplements are typically used in the later stages of flowering to help bulk up the buds and improve resin content. Use them carefully to avoid overfeeding your plants.
Bud Taste
Bud flavor affects the quality of your cannabis. Whether your buds are smoked, vaped, or used in edibles, improving the taste enhances the entire experience. Here are some strategies to improve bud taste during the flowering phase:
“Will flushing always make buds taste better?”
Question sent by: Madison Brooks, via email.
Flushing practices depend on medium and feeding style. What matters most is avoiding excess salts, harvesting healthy plants, and drying/curing properly. Poor drying can ruin good flavor even after a careful finish.
- Flush Before Harvest: Flushing your plants with clean water during the last 1–2 weeks of flowering is crucial for improving flavor. Flushing removes excess nutrients and salts from the growing medium, ensuring they don’t leave a harsh, chemical taste in the final product. If you skip flushing, your buds may have a less desirable flavor when consumed.
- Organic Nutrients: Using organic fertilizers like bat guano, compost tea, or fish emulsion during flowering can improve the natural flavors of your buds. Organic nutrients encourage the production of terpenes, which contribute to the aroma and flavor of cannabis. More terpenes mean more flavorful buds.
- Temperature Control: Keeping the grow room temperature in check, especially during the last few weeks of flowering, helps preserve terpenes, which degrade at higher temperatures. Aim for daytime temperatures of 70–75°F (21–24°C) and slightly cooler temperatures at night to enhance flavor.
By paying attention to these details, you’ll not only increase the quality of your buds but also enhance their flavor for smoking or consumption in edibles.
Pro Tip: Bud taste is built long before the jar. Genetics, nutrient balance, drying speed, and curing discipline all shape the final smoke.
Lighting for Flowering: 12/12 Light Cycle
In nature, cannabis flowers when the days grow shorter and the nights become longer. Indoors, we simulate this by switching the light cycle to 12 hours of uninterrupted darkness and 12 hours of light. This shorter day length signals the plant to begin flowering and producing buds.
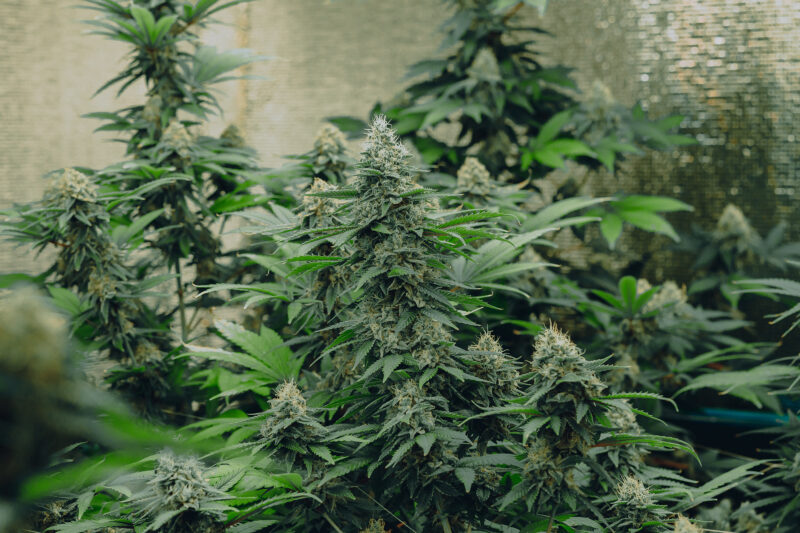
The
“Can I open the tent quickly during the dark period?”
Question sent by: Andrew Bell, via Facebook page.
Avoid it unless necessary. Even brief interruptions can matter if repeated. Schedule work during lights-on and fix leaks so the dark cycle stays dependable.
12/12 light cycle is essential for triggering flowering. Any interruptions during the dark period can cause the plant to revert to vegetative growth or develop hermaphroditism. Maintaining a completely lightproof grow room is critical during this phase. Even small light leaks from LEDs, cracks, or nearby light sources can disrupt the plant’s hormonal balance and delay flowering. If you need to enter the grow room during the dark cycle, use a green light, as cannabis plants do not react to this wavelength.
| Stage | Common Light Schedule | Main Goal |
|---|---|---|
| Seedling | Gentle long-day light | Establish roots without stress |
| Vegetative | 16-24 hours light | Build structure and canopy |
| Flowering | 12 hours light / 12 hours dark | Trigger and maintain flowering |
| Late flower adjustments | Use with caution | Do not sacrifice quality for speed without reason |
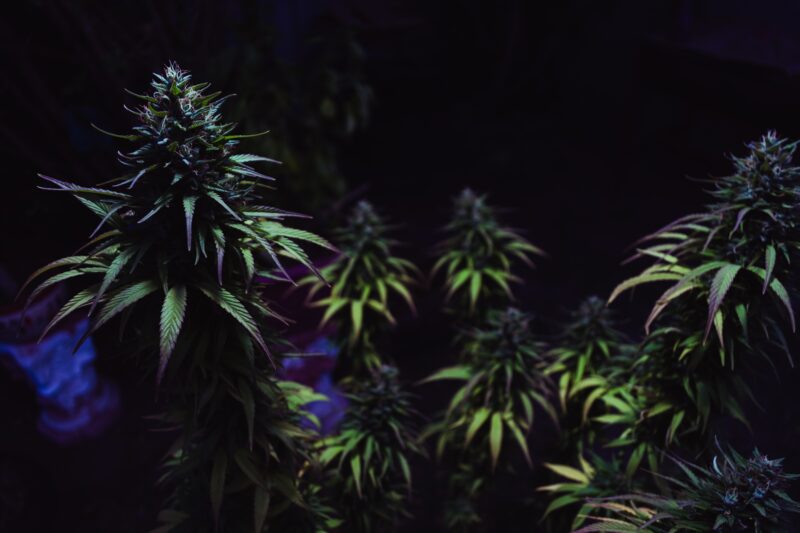
Some growers experiment with adjusting the light cycle, such as using
Important: The dark period must be uninterrupted. Light leaks can delay flowering, stress plants, or contribute to intersex traits.
13 hours of light and 11 hours of darkness to increase flower size. However, this can interfere with the plant’s flowering process if not done carefully. In the final weeks of flowering, some growers extend the dark period to 14–18 hours to speed up ripening, but this can reduce overall yield if done for too long.
Spectrum and Light Color for Flowering
The spectrum and color temperature of your lights are critical for flowering. During the vegetative stage, plants thrive in the blue spectrum, but during flowering, they need more of the red spectrum (around 2700K to 3000K) to encourage bud production.
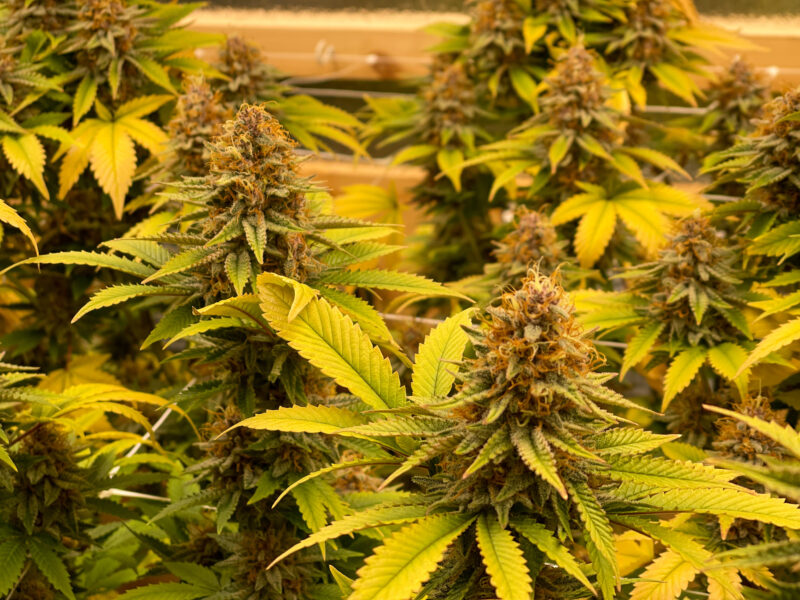
If you’re using HID lights, it’s important to switch from metal halide (MH), which is used for vegetative growth, to
“Do I have to switch bulbs when flowering starts?”
Question sent by: Kevin Murphy, via email.
It depends on your light. HID growers often switch from MH to HPS. Many modern LEDs can flower well without a bulb swap, especially if they provide enough intensity and proper spectrum.
high-pressure sodium (HPS) lights during flowering. HPS lights emit more red light, which promotes flowering and helps plants produce larger, resinous buds.
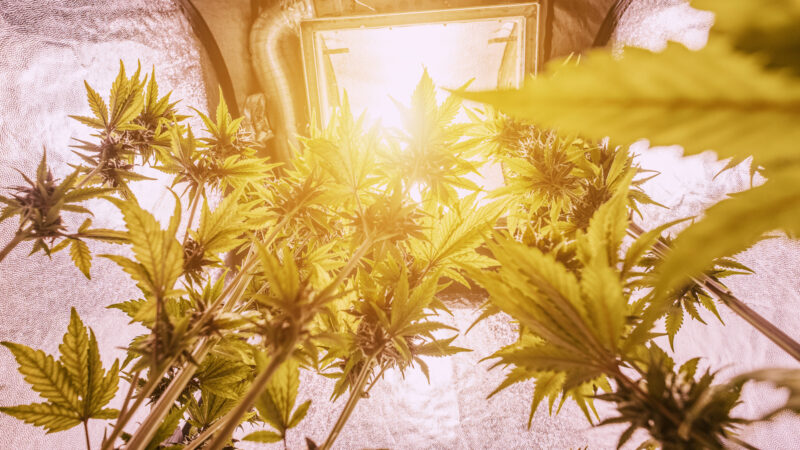
LED or CFL growers, if you’re using white or blue daylight lights from the vegetative stage, now is the time to switch to
Advice: Spectrum helps flowering, but intensity, coverage, heat, and distance still matter. A red-heavy light in a bad setup will not outperform a balanced, well-managed canopy.
red or orange lights in the 2700K–3000K color temperature range to promote flowering. If your LED grow light has a vegetative and flowering mode, don’t forget to switch to the flowering mode at this stage to ensure the plant receives the correct spectrum for bud development.
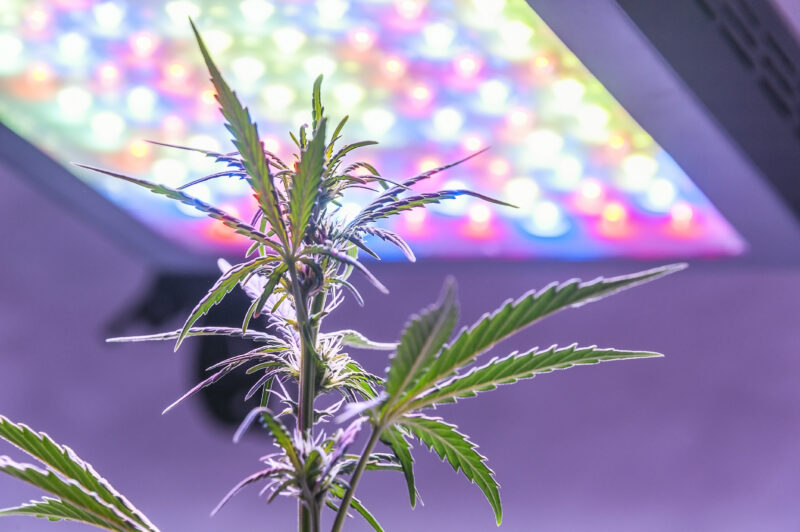
Light intensity is also crucial. Keep your lights at the correct distance from the canopy to avoid light burn while ensuring that all bud sites receive adequate light. As your plants grow, adjust the lights accordingly to maximize bud development without causing stress.
Importance of Complete Darkness
Complete darkness during the 12-hour dark cycle is critical in the flowering stage. Cannabis plants rely on the dark period to produce florigen, the hormone responsible for triggering and maintaining flowering. Exposure to light during the dark cycle disrupts this process and triggers the production of antiflorigen, which can cause the plant to revert to vegetative growth or develop hermaphroditic traits.
“Is green light safe during flowering darkness?”
Question sent by: Sarah Campbell, via Facebook page.
Green light is less disruptive than white light, but it should still be used sparingly. The safest habit is to avoid entering during the dark period unless there is an urgent reason.
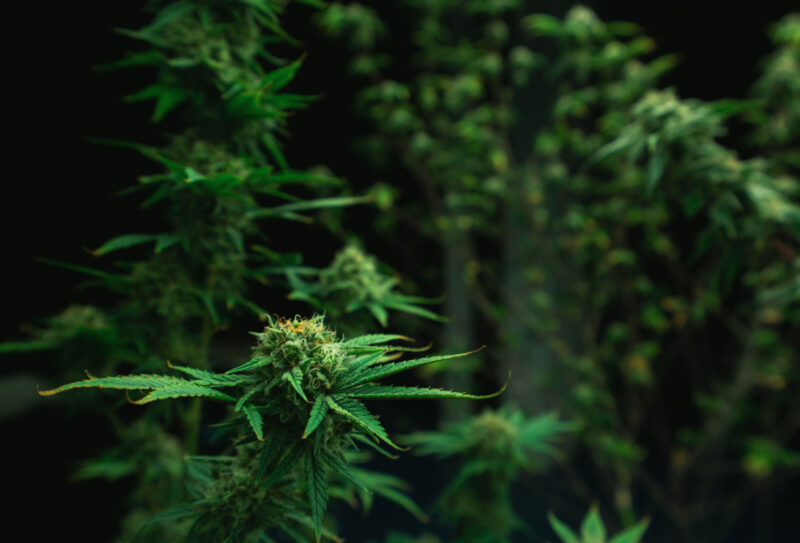
Make sure your grow room is completely sealed and lightproof to avoid this. Even minor light leaks from LEDs or small gaps can interfere with the plant’s flowering cycle.
Note: If you must enter the grow room during the dark period, use a
!WarningSmall leaks can become big flowering problems
Timer lights, power strips, tent seams, and room light under doors can all disrupt the dark cycle. Check the room from inside during lights-off if possible.
green light, which won’t disrupt the plant’s photoreceptors. However, it’s best to avoid disturbing your plants during the dark cycle unless absolutely necessary.

Quick Flowering
If you need to speed up the flowering process, there are ways to shorten the cycle, though they come with some trade-offs. Reducing the light cycle to
Rushing flower has tradeoffs
More darkness or altered schedules may speed ripening, but yield, density, and quality can suffer. Use shortcuts only when the tradeoff is worth it.
14 hours of light and 10 hours of darkness can help your plants flower more quickly, but it may reduce the overall size of the buds, as the plant has less time to develop.
Another option is to increase the dark period to 18 hours of darkness and 6 hours of light during the final weeks of flowering. This can push the plant to ripen faster but may result in lower yields. Use these techniques carefully, as rushing the flowering phase can impact both the size and quality of your final harvest.
Flowering Timeline
Each strain has a unique flowering timeline, but the general process remains the same. Here’s what to expect:
“Is yellowing in week six always normal?”
Question sent by: Victoria Hall, via email.
Some fading can be normal as plants ripen, but sudden yellowing can also come from pH issues, root stress, underfeeding, or overfeeding. Look at timing, pattern, and overall plant health.
- Weeks 1–2: The plant will stretch significantly as it transitions into flowering. You’ll see the first signs of flower formation at the internodes.
- Weeks 3–4: Buds begin to develop more noticeably, though they may appear light and airy at first. The plant continues to stretch while focusing on creating new flower sites.
- Weeks 5–7: The plant shifts all its energy to bud production, and the buds will swell significantly. You may notice yellowing leaves as the plant pulls nutrients from older foliage to support flower development. This is normal—there’s no need to remove leaves unless they turn brown and die.
- Last 2 Weeks: In the final two weeks, stop feeding nutrients and flush your plants with clean water to remove any residual fertilizer salts. This will enhance the flavor and smoothness of your final product.
- Final 72 Hours: Many growers choose to turn off the lights completely for the last 24–48 hours before harvest. Since THC is light-sensitive, keeping the plants in darkness helps preserve potency and improve flavor. The plant also uses up any remaining sugars during this period, resulting in a cleaner smoke.
Improving Bud Quality
If you want to produce quality buds, you’ll need to pay close attention to several key factors, including nutrient management, lighting, and environmental control. Here are a few tips to ensure your buds develop to their full potential:
During flower, protect:
- Stable dark cycle
- Strong but controlled light intensity
- Lower humidity as buds thicken
- Airflow through and around the canopy
- Clean feed and watering rhythm
“What matters more for bud quality: nutrients or humidity?”
Question sent by: Jasmine Price, via Facebook page.
Both matter, but humidity becomes critical as buds get dense. Great feeding cannot save flowers that mold because the room stayed too humid with poor airflow.
- Lower Humidity: Reduce the humidity in the grow room to around 40–50% during the flowering stage. High humidity can promote mold and mildew, especially as buds grow denser. A dehumidifier can help maintain the right moisture levels, ensuring your buds remain healthy and free from rot.
- Increase Airflow: Proper airflow is essential during flowering. It helps prevent mold and strengthens the branches to support the weight of the growing buds. Oscillating fans are ideal for keeping air moving evenly around the plants.
- Boost Light Intensity: Ensure your plants are receiving adequate light to support bud development. Whether you’re using HID, LED, or CFL lights, make sure the intensity is strong enough to penetrate the canopy and reach all bud sites. The better the light distribution, the denser and more resinous your buds will be.
Harvesting
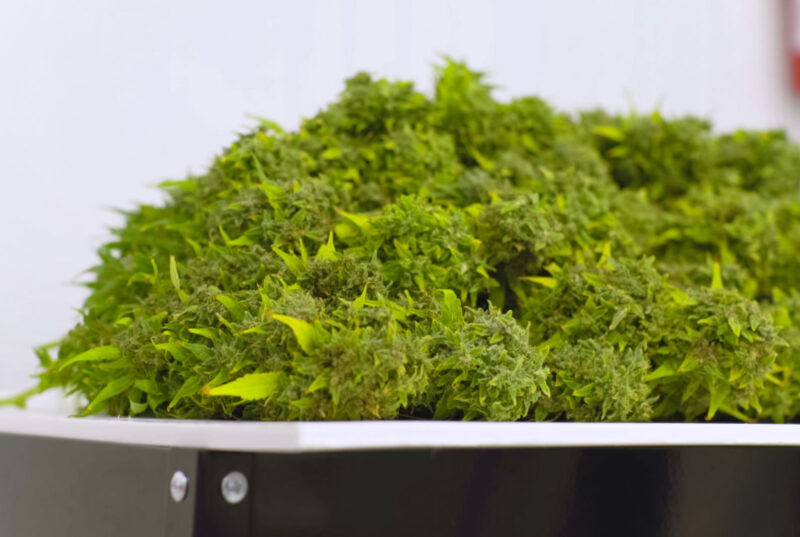
We did it! A big harvest is the best reward for all the hard work, research, and risks you took while growing your garden—not to mention the long and patient wait. A well-executed harvest is crucial to ensuring the best quality cannabis.
Remember: Harvest is not the finish line; it is the start of preservation. Cutting at the right time only matters if drying and curing protect the quality afterward.
When to Harvest
Timing is everything. Harvesting at just the right moment will maximize bud growth and THC production. After a certain point, THC begins to degrade, which means lost potency and diminished quality.
Several factors come into play when deciding the perfect time to harvest your crop. These include differences between indoor and outdoor plants, the unique flowering times of Sativas and Indicas, and whether you prefer an early or late harvest depending on the desired effects—whether a head high or body high. Additionally, the ripeness of the plant is determined by its chemical state at harvest, directly impacting the final product.
| Harvest Signal | What It Tells You | Risk If Used Alone |
|---|---|---|
| Breeder timeline | Approximate expected window | Environment can shift timing |
| Pistil color | General flower maturity clue | Can be affected by stress or handling |
| Trichome color | Most direct maturity indicator | Needs magnification and patience |
| Bud swelling | Ripening progress | Some strains stay airy by genetics |
| Leaf fade | Late-stage nutrient movement | Can also signal stress or deficiency |
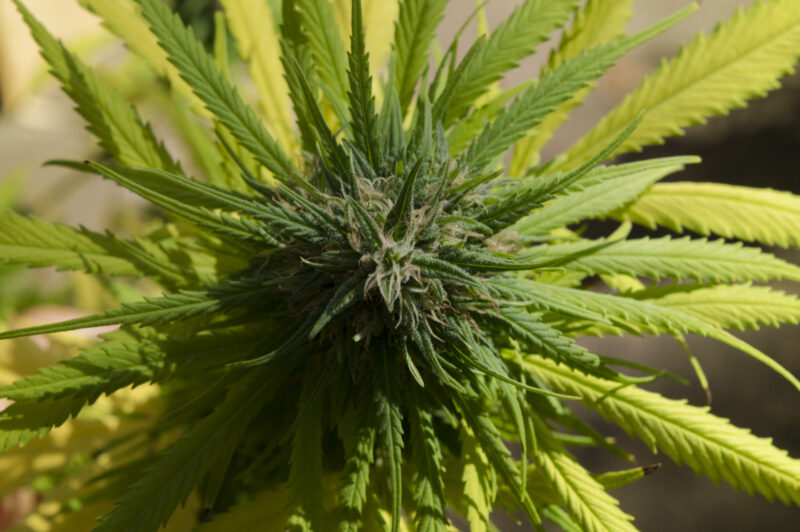
Many growers believe harvest timing can be a matter of personal preference. When the glandular trichomes are clear with minimal coloration, THC levels are at their peak, while CBD and CBN are still low, minimizing their sedative effects. On the other hand, some growers prefer a more sedative effect, allowing the resin glands to turn cloudy and even amber, which enhances the overall cannabinoid content. The maturation of trichomes doesn’t happen all at once; they develop and mature at different times. Finding the right balance for harvesting depends on the grower’s preference for effect and overall flavor profile.
Knowing when to harvest your indoor cannabis plants is crucial for achieving the best potency and yield. For most Indica strains grown indoors, it takes about eight weeks from switching to a 12/12 light cycle for the plants to fully mature. During this time, your plants will reach their peak THC levels, and waiting too long can lead to a breakdown in potency.
“Should I harvest when the breeder says the strain is ready?”
Question sent by: Jason Roberts, via email.
Use breeder timing as a rough guide, not a command. Real harvest timing depends on plant maturity, trichomes, pistils, environment, and the effect you want.
Sativas generally take longer to mature, sometimes up to thirteen weeks indoors. By paying close attention to your plants’ development and understanding the timing for each strain, you can ensure a successful and potent harvest.
Choosing Your High: Head or Body?
One of the key decisions when harvesting cannabis is the type of high you’re aiming for—whether it’s a cerebral, head-focused high or a deep, relaxing body high. A head high often creates an uplifting, sometimes psychedelic experience, influencing mood and creativity. On the other hand, a body high leans more toward a sedative, “couch-lock” effect, often used for relaxation or pain relief.
Tip: The harvest window influences effect, but genetics still set the main personality of the flower. Do not expect harvest timing to completely change a strain.

In general, Sativa strains and early harvests will deliver more of that energetic, mind-bending head high, perfect for those looking to boost their mental state. Indicas, especially when harvested later, tend to provide a heavier body high, ideal for those who want deep relaxation.
For those who want a blend of both effects, experimenting with late-harvested Sativas or early-to-mid harvested Indicas is a great way to find that sweet spot—a balanced high that offers both mental clarity and physical calm.
Trichomes: The Key to Timing Your Harvest
When it comes to the quality of your cannabis and the type of high it produces, the trichomes play a significant role. These tiny, resin-filled glands are where the magic happens. Found along the surfaces of the flowers (calyxes), bracts, leaves, and stems, trichomes begin developing around the fourth week of flowering. As your plant matures, more trichomes appear, and their density directly affects the potency of your final product.
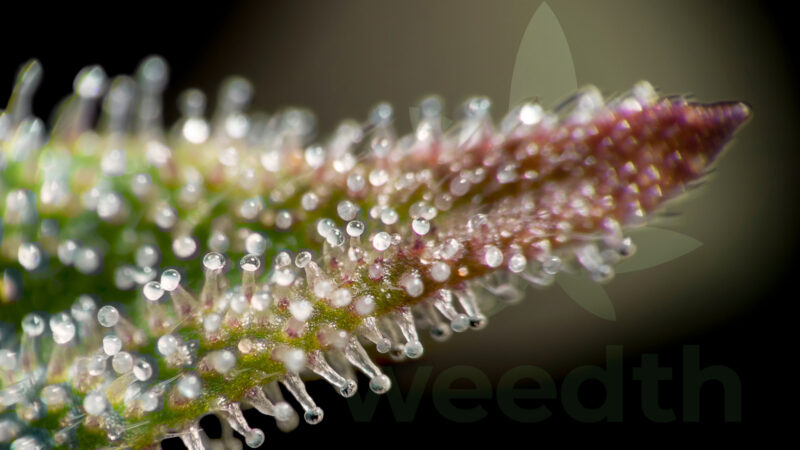
Monitoring the maturity of the trichomes is the most reliable way to determine the right time to harvest. These stalked trichomes have a bulbous head at the Tip, and this part reveals the plant’s maturity. In the early stages, the trichome heads will be clear, indicating that THC levels are still developing. Over time, the heads will turn cloudy, and eventually amber. The ratio of cloudy to amber trichomes gives you an idea of the kind of high you can expect.
Cloudy trichomes tend to produce a more uplifting, mental high, while amber trichomes deliver a heavier, body-focused stone. Professional growers often recommend harvesting when about 30-50% of the trichomes have turned amber, but it’s generally agreed not to go beyond 75% amber.
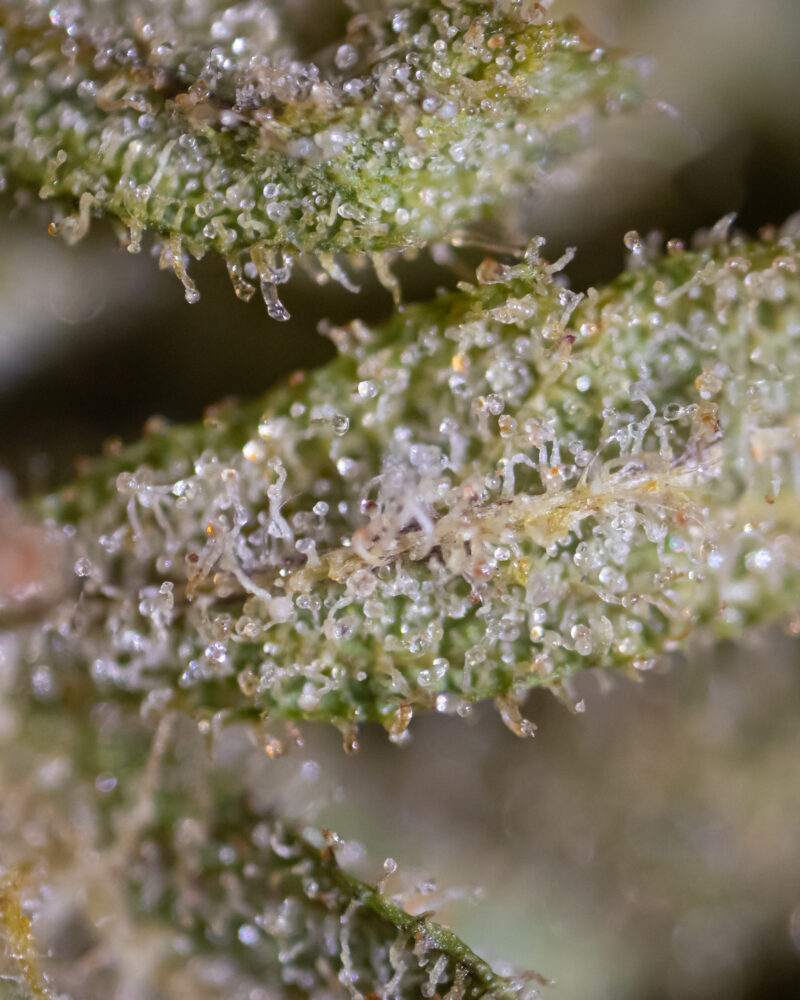
Initially, trichomes start out clear, then turn milky, and finally amber or light brown. This amber stage is what gives mature buds that “red hair” appearance, as the gland holding the THC swells, making the trichome look like a tiny mushroom.
“Should I check trichomes on sugar leaves or buds?”
Question sent by: Lauren Mitchell, via Facebook page.
Check the buds/calyxes when possible. Sugar leaf trichomes can mature earlier, which may make the plant look more ready than the actual buds are.
For first-time growers unsure of when to harvest, a general guideline is to wait until 50-80% of the white pistils (hairs) have turned dark—usually brown or red—and around 50% of the trichomes have started to turn amber.
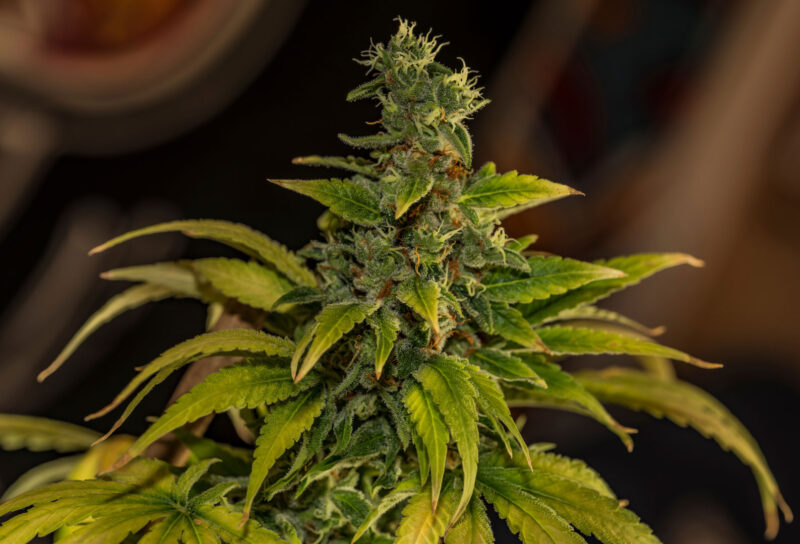
Warning: Almost all cannabis strains will show trichomes that change color, but some growers report encountering strains where the trichomes do not follow this pattern. Keep an eye on your plant’s overall health and condition to gauge readiness.
Trichome Development Stages:
- A few weeks in: Trichomes begin turning a milky color.
- A couple more weeks: Most trichomes will be fully milky.
- Later stages of flowering: Trichomes turn amber or light brown.
The amount of time required to reach these stages depends on the strain and growing conditions.
Trichomes
Trichomes are tiny resin glands that hold much of the plant’s cannabinoids and terpenes. Their color and maturity help growers judge harvest timing.
Other Signs of Harvest Readiness:
- Your plant stops producing new crystals.
- Resin production ceases.
- Fan leaves and lower leaves turn yellow and begin to drop off.
- The smell reaches its peak.
- Bud mass stops increasing.
Indoor Harvest Timeline:
For indoor growers, most cannabis strains will be ready for harvest within 7-12 weeks after starting the 12/12 light cycle (12 hours of light, 12 hours of darkness). Indica-dominant strains usually mature within 7-9 weeks, while Sativa-dominant strains can take up to 12 weeks to reach full maturity.
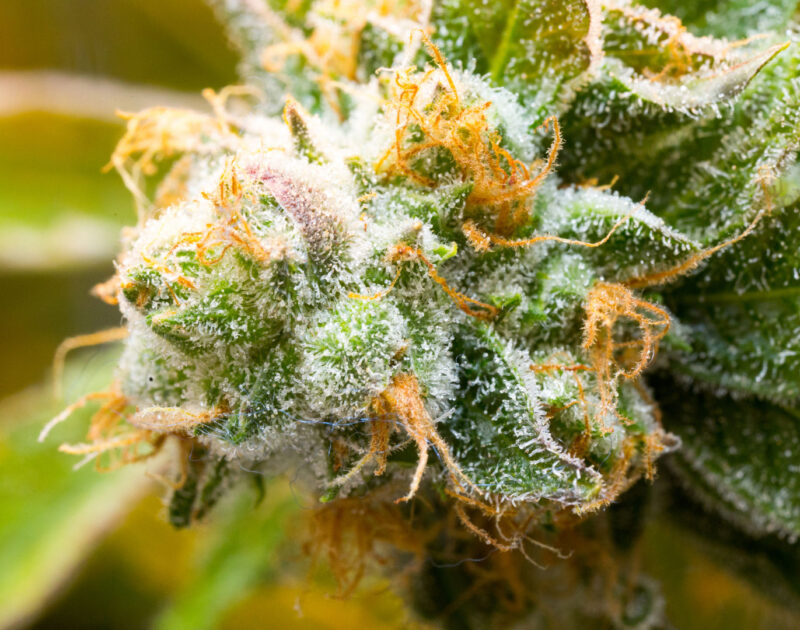
By the third stage of floral maturity, with fully formed trichomes, you can assume most strains have reached their final weight.
Guidelines for Trichome Harvesting:
- Clear Trichomes: These give a cleaner, more energetic high with less sedative effect. This window is best for heavy Indica strains.
- Cloudy or Milky Trichomes: This is typically the ideal time to harvest most hybrid strains. The high is balanced, offering both mental and physical effects.
- Amber Trichomes: When 30% or more of the trichomes have turned amber, this is ideal for late-maturing Sativa strains. This is also the best window if you plan on using the plant for hash production.
| Trichome Look | Common Interpretation | Best Use |
|---|---|---|
| Mostly clear | Not fully mature yet | Usually wait longer |
| Mostly cloudy | Peak potency window for many growers | Balanced harvest target |
| Cloudy with some amber | More developed effect | Common full-maturity target |
| Heavy amber | More degraded THC and heavier effect | Useful for specific preferences or hash goals |
Viewing Trichomes
Examine trichomes accurately then you’ll need a magnifying tool. A handheld illuminated magnifier or pocket microscope with at least 60x magnification is ideal. These tools allow you to closely monitor trichome development, helping you time your harvest perfectly.
“What magnification do I need to see trichomes clearly?”
Question sent by: Brandon Hayes, via email.
A jeweler’s loupe or digital microscope is usually enough. The key is stable focus and checking multiple buds, not making a decision from one tiny spot.
A magnification tool like this gives you a detailed view of how trichomes transition from clear to cloudy to amber. This visual detail is essential for harvesting at the right time.
If you want an even closer look, a 100x magnifier will offer incredible detail of the trichomes, providing enhanced insight into the resin gland condition and development.
Tip: Harvesting early, before the trichomes turn too amber can prevent THC from degrading into more sedative cannabinoids, which is key if you prefer a more energetic high.
Harvesting Based on Pistils
Some growers also use the pistils’ color (hairs) as a guide for harvest timing. When about three-quarters of the pistils have turned from white to brown or red, your plant is likely ready for harvest. Clear pistils indicate that the resin hasn’t reached its full potency yet, while brown pistils suggest the resin has peaked and will soon begin to degrade.
“Most pistils turned brown but trichomes are still clear. Should I cut?”
Question sent by: Emily Parker, via Facebook page.
Usually wait. Brown pistils can happen before resin maturity. If trichomes are still mostly clear on the buds, the plant may need more time.
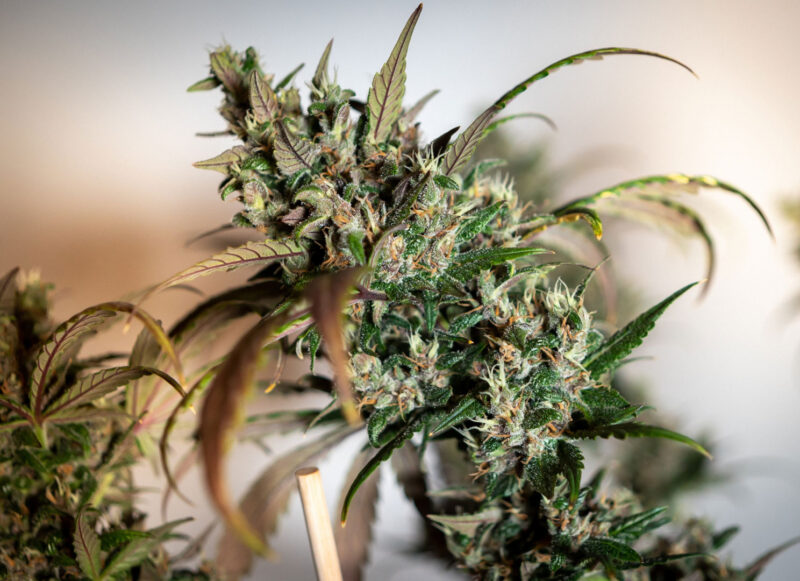
Warning: Handle your buds carefully. Avoid touching the buds directly, as this can damage the delicate THC crystals. If you need to inspect your plant, try only touching the larger fan leaves to preserve potency.
!WarningPistils can mislead you
Heat, touch, pollination, and stress can darken pistils early. Use pistils as one clue, but confirm with trichomes before harvesting.
Maturity and Frosty Buds: Timing for Peak Harvest
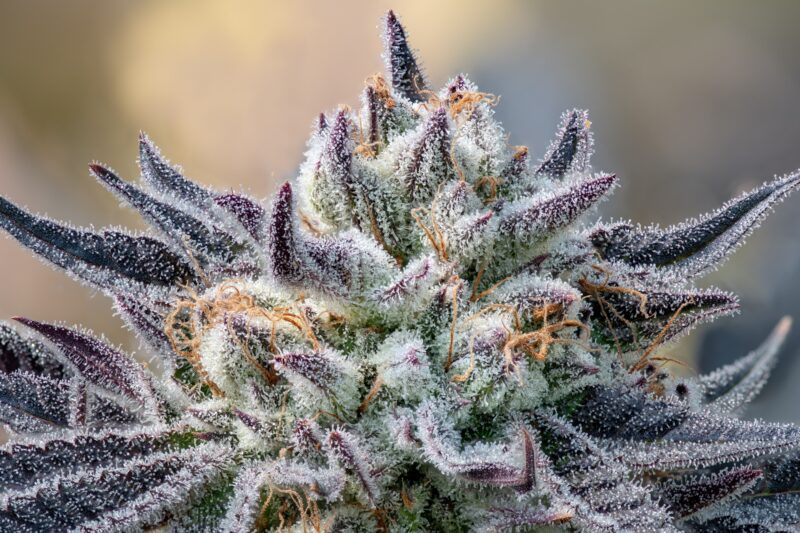
Around the third or fourth week of the flowering cycle, you’ll start to see those beautiful, glandular stalked trichomes forming along the surfaces of your leaves, flowers, bracts, and stems. This is when the magic happens, as more and more trichomes develop, signaling the potency that’s building up. As your plant progresses, you’ll notice the flowers—also known as calyxes—begin to cluster together, creating those dense buds that we all aim for.
“My buds look very frosty. Does that mean they are ready?”
Question sent by: Connor White, via email.
Frost shows resin production, not final maturity by itself. A frosty plant can still be early. Use magnification to judge trichome color before cutting.
In the early stages, the pistils of these young flowers will be bright white, eventually transitioning to a reddish-brown hue as they mature. These flowers typically ripen from the bottom of the bud to the top, with the lower pistils being the first to darken. For most Indica strains, this process usually begins by the sixth week of flowering.
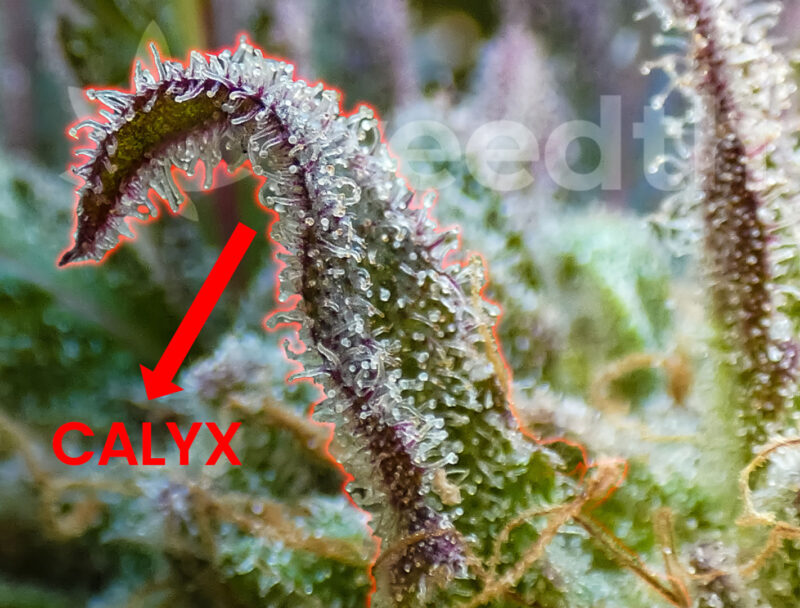
One of the best indicators of maturity is the swelling of the calyxes. When you see this swelling happening, it’s a clear sign that your buds are reaching their peak. The oldest calyxes at the bottom of the plant will swell first, with the swelling working its way up to the younger flowers at the top. By the time your Indica is in full bloom, around 90% of the calyxes will look so plump they almost appear seeded. This happens around the seventh week of flowering for basic Indica strains, and about three-quarters to 90% of the pistils will have turned that signature reddish-brown color.
By the eighth week, the majority of the calyxes will have fully swollen, and you’ll see a surge in trichome development. These last stages are crucial, and patience is key to ensure your buds reach their maximum potential.
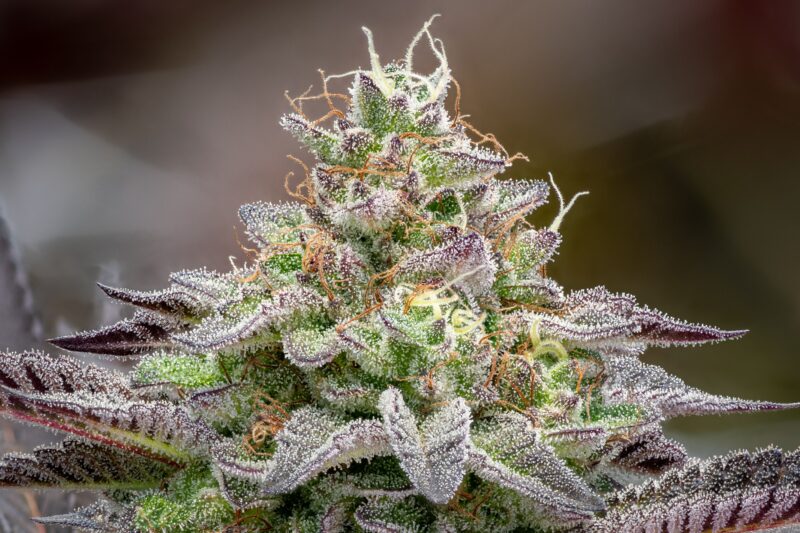
For Sativa strains, the ripening process is quite similar but often extended over a longer period. Some Sativa plants will have windows of peak harvest that can open and close, meaning that they may show signs of full maturity one week and then enter a growth spurt the next. These growth spurts can sometimes lower the trichome-to-fiber ratio, temporarily affecting potency. However, these spurts are often followed by an increase in trichome production. Again, experience and timing are everything when it comes to harvesting at the perfect moment.
Mastering these subtle ripening cues will allow you to harvest frosty, potent buds that are coated in resin, packed with flavor, and brimming with cannabinoids. Time and experience are your best guides through this process, and learning to watch for these signs will ensure that your buds are harvested at their absolute best.
Chemical Changes During Maturation
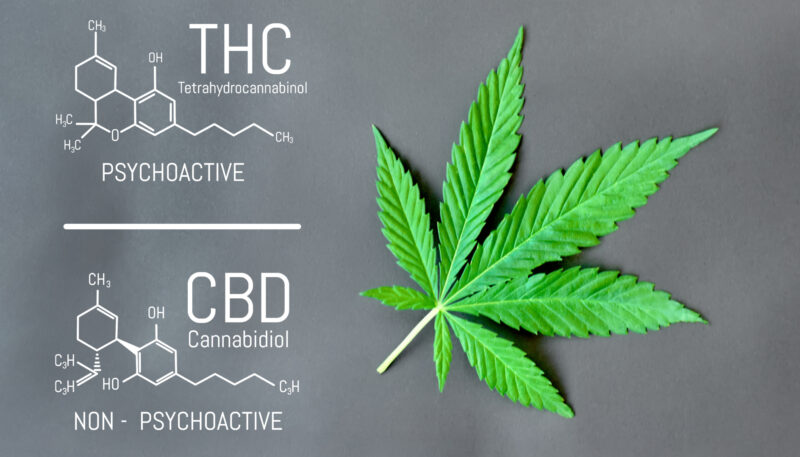
As your cannabis plant gets closer to harvest, its chemical composition changes, especially in the final growth stages. Cannabinoid transformation is start to this process, with THC gradually breaking down into CBN and CBD. This shift directly influences the effects your cannabis will produce, making harvest timing crucial to achieving the high or relief you’re looking for.
Harvest timing ultimately comes down to your preferences and desired effects. If you harvest early when THC levels are at their peak, You’ll experience a more thoughtful and uplifting feeling that’s great for socializing, sparking creativity, or enjoying during the day.On the other hand, allowing your plants to mature longer creates a more narcotic, body-relaxing effect, which is particularly strong in Indica strains. This is ideal for evening use or for those seeking medicinal relief from stress or pain.
As the plant matures, THC starts to degrade and the nature of the high evolves. What was once a euphoric, energetic high shifts towards a calming, sedative experience as CBN levels increase. This natural breakdown can be managed to match your desired effects. For growers, this means observing and understanding these subtle changes so that you can harvest at the right time to achieve your preferred outcome.
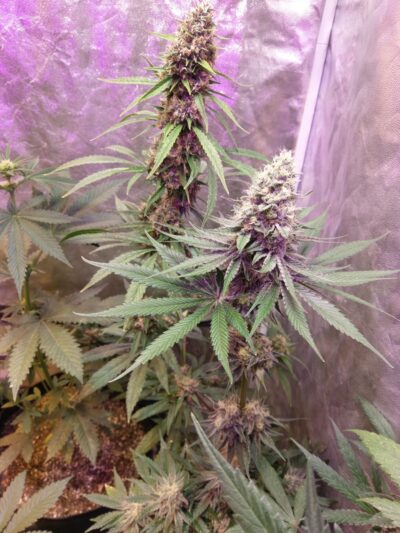
There’s no “right” time to harvest for everyone—it’s a personal choice, influenced by what kind of experience you want from your cannabis. The key is keeping a close eye on the plant’s trichomes and pistils to monitor maturity. Through observation and experience, you’ll find what works best for your individual needs.
The final touch comes with proper curing. After harvesting, careful drying and curing ensure the full development of terpenes and cannabinoids. This post-harvest process locks in the aroma, flavor, and potency, enhancing the chemical profile of your buds and delivering a product that’s not only potent but also flavorful. By paying attention to the details during curing, you can preserve and even boost your harvest’s quality, making the result truly exceptional.
The Best Time to Harvest
Finally, the moment every grower waits for harvesting time. After months of nurturing your plants, the reward for all the effort is about to be realized. Harvesting cannabis at the perfect time can be a hard, especially for new growers but experience and observation are your greatest teachers. With time, you’ll hone your ability to determine when your buds are at their peak potency.
Maturity and THC
A common misconception is that bigger plants equal mature plants. But when it comes to cannabis, the true measure of maturity lies in the THC levels. Most growers aim to harvest their plants when THC is at its peak, but measuring THC precisely requires lab equipment that most growers don’t have access to. Instead, growers use visual cues and observation to gauge the plant’s maturity.
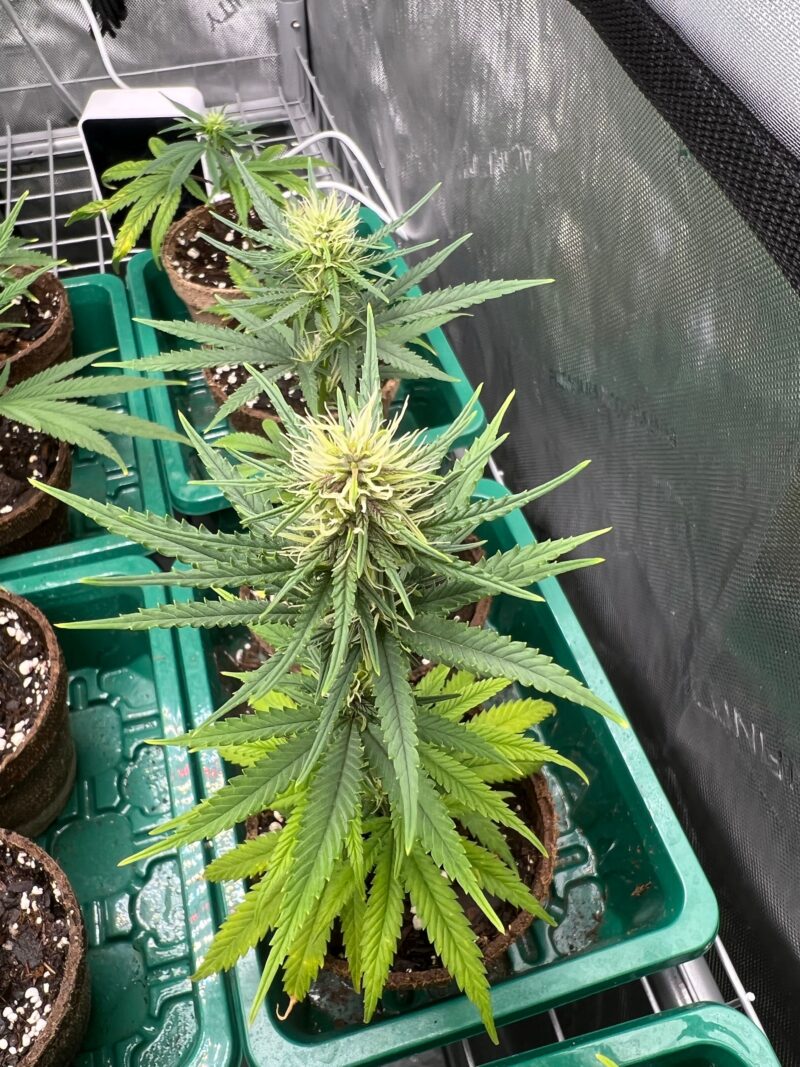
As a cannabis plant grows, each new pair of leaves contains more THC than the last. The highest concentration of THC will always be found at the budding tips. Both male and female plants contain THC, but females are prized for their resinous buds. Some growers like to take samples of shoots before peak THC is reached to gauge the plant’s development.
Plant Size
Mature cannabis plant doesn’t need to be tall to produce potent buds. Some indoor plants can be under 18 inches (0.5m) and still be ready to harvest. Don’t let the size fool you—size is not an indicator of maturity, especially when growing indoors where space is limited.
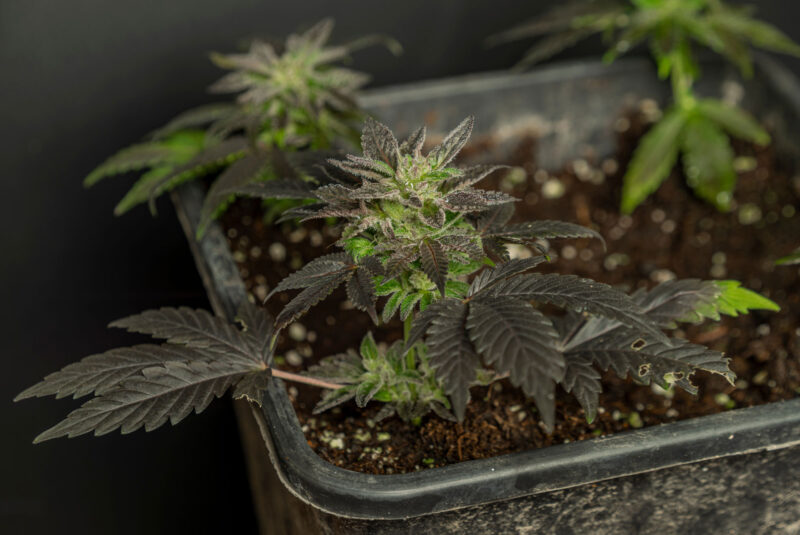
Photoperiod and Maturity
Maturity in cannabis plants is not determined by age alone but by the photoperiod the amount of light they receive each day. The plant will transition from vegetative growth to the flowering stage when the light cycle is reduced to less than 12 hours a day. As a rule of thumb, plants need to be at least 60 days old before they’re mature enough to respond to the light cycle change. Some growers report that clones can bloom earlier because they are taken from mature plants.
“Can I harvest the top buds first and leave lowers longer?”
Question sent by: Alex Morgan, via Facebook page.
Yes, staged harvesting can work when upper buds mature earlier than lower buds. Cut carefully and keep the remaining plant healthy while the lower sites finish.
For indoor growers, when to change the photoperiod often depends on the available space and the desired size of the plant. Some growers force their plants to flower earlier, while others let them grow larger before inducing flowering.
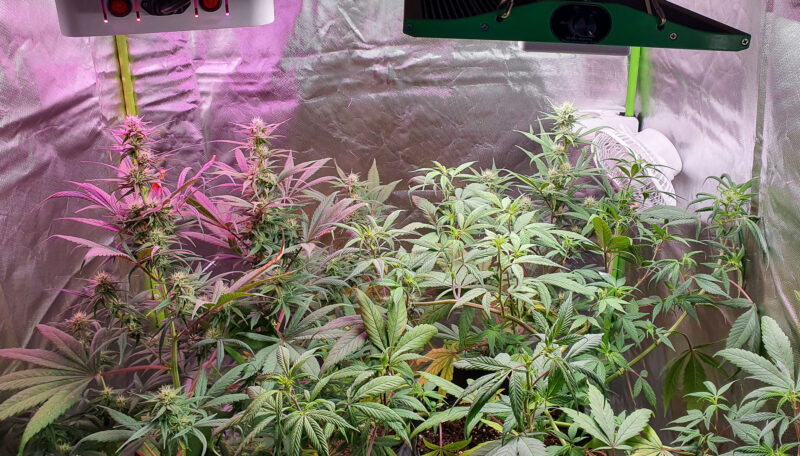
Male vs. Female
One important observation, male flowers tend to show before female buds. As soon as you spot the males in your garden, you’ll know that female buds are just around the corner, usually within 1-2 weeks.
Variety and Maturity
Different cannabis varieties mature at different rates. Narrow-leafed Sativas, for example, tend to take longer to finish flowering compared to wide-leafed Indicas. Under some conditions, Sativas can require an additional month or more to mature fully, whereas many Indicas are ready in 7-9 weeks. Knowing your strain and its average maturation time will help you plan your harvest more accurately.
Monitoring Buds
The best way to tell if your plant is ready for harvest is by carefully observing the buds. Look at the pistils and stigmas—the white hairs in the center of the female bud—and the calyx, the pod that would surround a seed if fertilized. Experienced growers often harvest individual buds as they reach peak maturity rather than harvesting the entire plant at once.
Master Advice: Harvest timing is a decision, not a single perfect minute. Aim for the window that matches the plant’s maturity and your preferred effect.
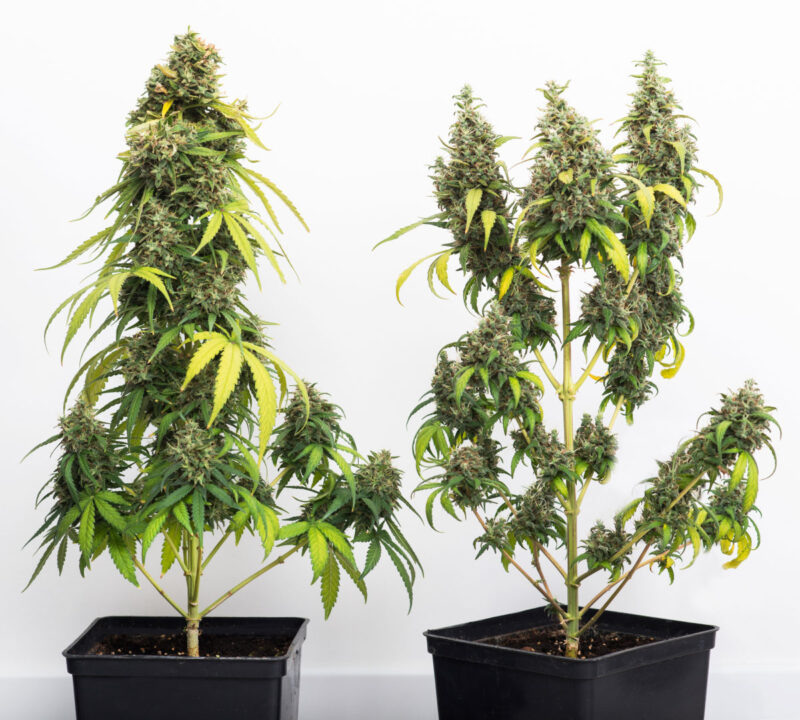
A common guideline is to harvest your plants when about half of the pistils have withered. As the resinous qualities of the plant become more apparent, the bracts and small leaves may swell. However, if left in the ground too long, the buds may become harsher to smoke.
Pistils and Glands
As the pistils turn from white to red or brown, and the glands begin to swell, the bud is nearing readiness. Some growers prefer to harvest at this stage for a clear, cerebral high, while others wait longer for a more sedative effect.
Harvesting Indoor Buds
When growing indoors, buds usually mature from the top down, especially under artificial light. To ensure maximum quality, it’s best to harvest buds as they mature, starting from the top of the plant. The flowering cycle lasts for a specific period, and after it ends, the plant will not continue to produce new buds at the same rate. While it is technically possible to return the plant to a vegetative light cycle for regrowth (a process known as “re-vegging“), this method is not commonly practiced due to the significant stress it places on the plant, the time required, and the likelihood of reduced yields in subsequent harvests. Most growers prefer to start with new seeds or clones after harvesting to ensure optimal plant health and productivity.
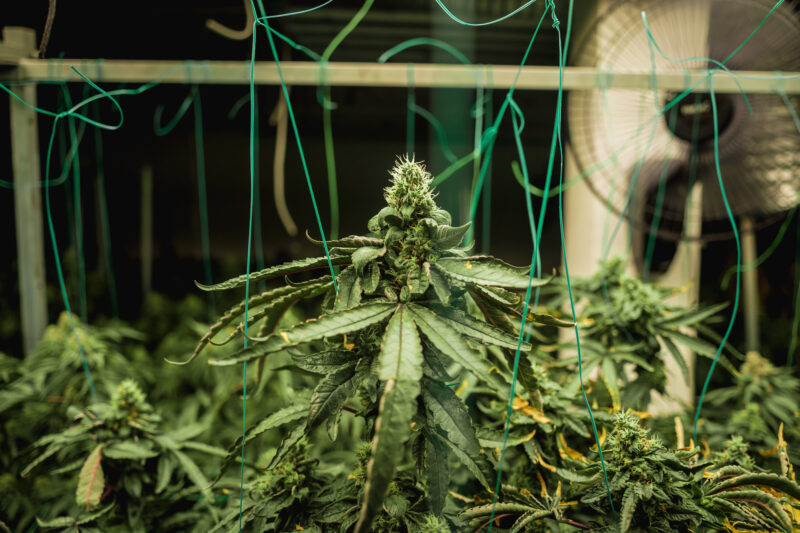
Experience
If you’re new to harvesting cannabis, don’t worry. Over time, you’ll develop an instinct for when your plants are ready. Keep an eye on the pistils, trichomes, and the general health of the plant. With each harvest, you’ll gain experience and improve your ability to determine the perfect time to cut your crop. And remember, you can always ask about the average harvest time for your particular strain when you get your seeds. Experience is the best teacher and each grow means you’ll get better at perfecting your harvest timing.
Harvesting Your Buds
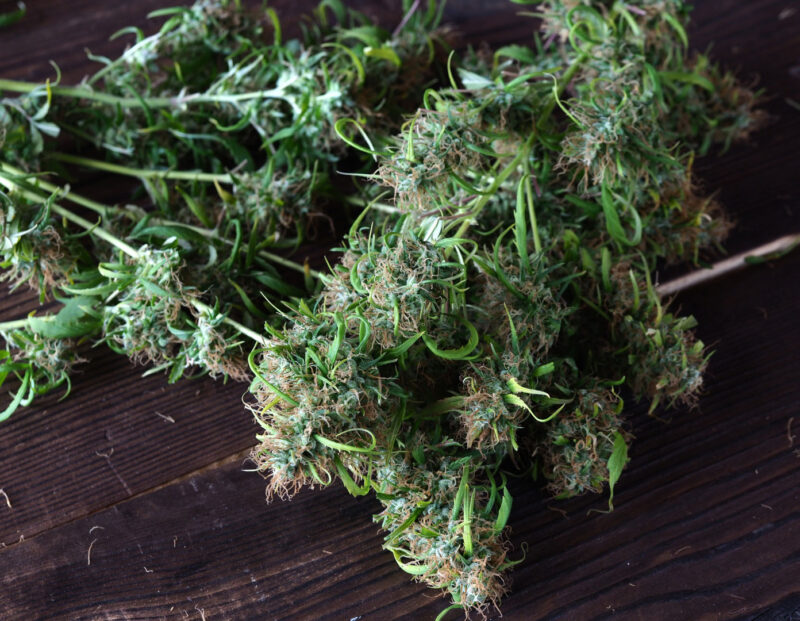
Welcome to the most exciting part of the cannabis growing process harvesting! This is the moment when you finally get to see the results of your hard work. Harvesting is about carefully cutting down your plants and preparing them for the drying and curing stages, ensuring you get the highest quality buds possible. But, before we dive into the process, be prepared: harvesting can release a strong, pungent odor that will spread quickly, so if discretion is important, plan ahead.
When it’s time to harvest, don’t just rush in and start cutting. You’ll need to carefully cut the plants at their stems, just below the lower leaves, using a sharp, clean knife or hacksaw. This ensures a clean cut and prevents unnecessary damage to the plant.
For smaller gardens (with fewer than 15 plants), expect the harvesting, trimming, and hanging process to take several hours. It’s a time-consuming task but you can’t cut corners here. Set aside a steady 6 hours for your first small harvest or plan for a full day if you have a larger garden (more than 50 plants). Remember, this is a key moment in producing top-quality buds, so take your time and be methodical.
Flushing
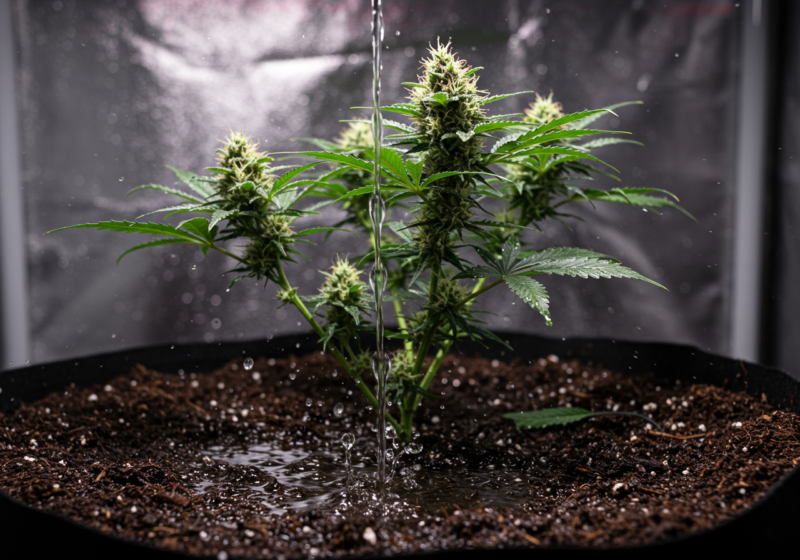
Before you get to cutting your plants down, there’s an essential step is flushing. Flushing is the process of feeding your plants plain water with no nutrients to clear out any excess fertilizer or nutrient buildup in the plants and the growing medium. This step is critical to ensure your buds are clean, smooth-smoking, and free from harsh or chemical tastes.
“How do I know if flushing is hurting more than helping?”
Question sent by: Hannah Carter, via Facebook page.
If the plant fades too fast, stalls early, or shows stress before the harvest window, the finish may be too aggressive. Flushing should match your medium, feeding style, and plant condition.
- Hydroponic Growing: In hydroponic systems, start flushing your plants about 7 days before harvest. To do this, simply change the nutrient solution and use only distilled water or water treated with reverse osmosis. Many growers even change the water multiple times during this period to ensure that all nutrients are fully flushed from the medium. This step helps prevent the buds from tasting harsh or chemically after drying and curing.
- Soil Growing: For soil-grown cannabis, begin flushing 14 days before harvest. Just like with hydro, use only pure water to feed the plants—no nutrients. Avoid slow-release fertilizers, as they can be difficult to remove. If you’ve been using slow-release fertilizers, switch to regular nutrients for the last month before flushing begins.
Master Advice: If you’re growing in soil, stop watering the plants 2 days before harvest. This helps to speed up the drying process once the plants are harvested.
WARNING: Never stop watering hydroponic plants before harvest. If you cut off their water supply, they will wilt and begin to die within hours, severely impacting the quality of your harvest.
Keeping as many leaves green as possible until weeks 5 or 6 of flowering is also a good practice. During the final 2 to 3 weeks, allow the plants to metabolize their remaining minerals. This helps improve the flavor, smell, and burn quality of your buds. In hydroponics, maintain the total dissolved solids (TDS) in the flushing solution between 400-500ppm. Going lower than this can shock the plants and affect their final quality. The plants will use their stored nutrients to finish photosynthesis during the flush, resulting in smoother, cleaner buds when harvested.
To ensure the best flushing results, make sure to use high-quality water.
Note: Tap water tends to have lots of chemicals like antibiotics, anti-convulsants, mood stabilizers, and sex hormones. It is best to use distilled/purified water or water treated with reverse osmosis for this purpose.
This will help prevent the plants from absorbing any unwanted chemicals or impurities as they flush.
Flushing is a crucial step for producing smooth, flavorful cannabis, so take the time to do it right. Whether you’re growing in soil or hydro, proper flushing ensures that your buds will taste clean, burn evenly, and provide the best possible experience once dried and cured.
Where to Start Cutting?
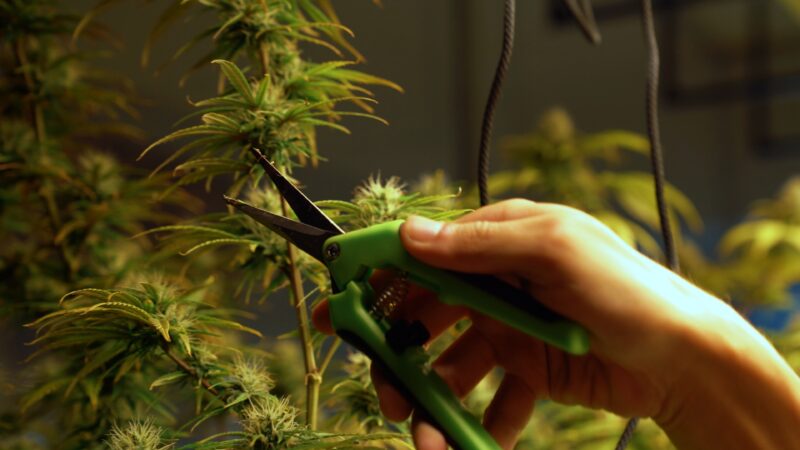
Well, it’s finally harvest time! But you might be wondering, “Where do I start?” Don’t worry—this part of the process is largely based on personal preference. The most important thing to keep in mind is to handle the flowers as little as possible to avoid damaging those delicate trichomes. You’re potentially reducing their potency every time you touch the buds, so minimal handling is important.
Tip: Cut with a plan. Label plants or branches if needed, keep tools clean, and avoid handling flowers more than necessary.
One safe way to manage the plants during trimming is to leave them in their pots (keeping them more or less intact) and spread out a couple of newspapers for easy cleanup. Toss the large sun leaves onto one sheet, and do your small bud trimming over the other.
Start by trimming off the large sun leaves first, and then move on to the smaller ones. By removing the bigger leaves first, you’ll have less clutter in the way as you work your way toward the buds. Leave the buds on their stems for now—this will make handling easier during drying.
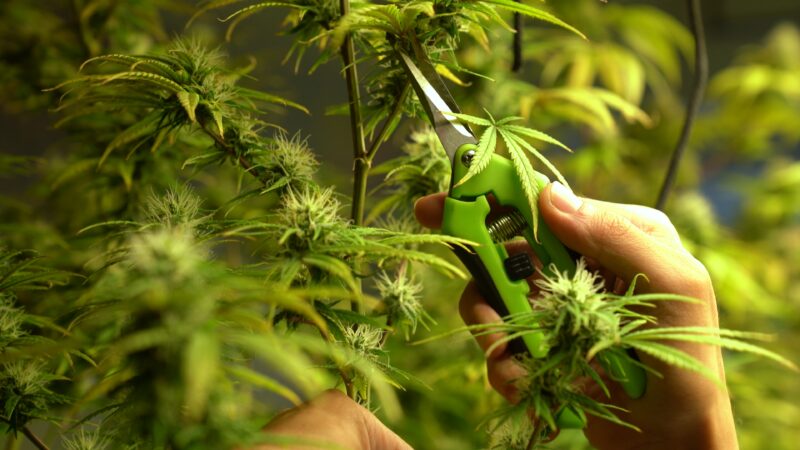
When trimming the buds, begin with the tiny “popcorn” buds at the lower part of the plant. These lower buds usually aren’t as developed as the top colas but don’t throw them away. Set these aside where you’ll store your trim; they’ll still have plenty of resin and can be used to make hash, oil, or butter.
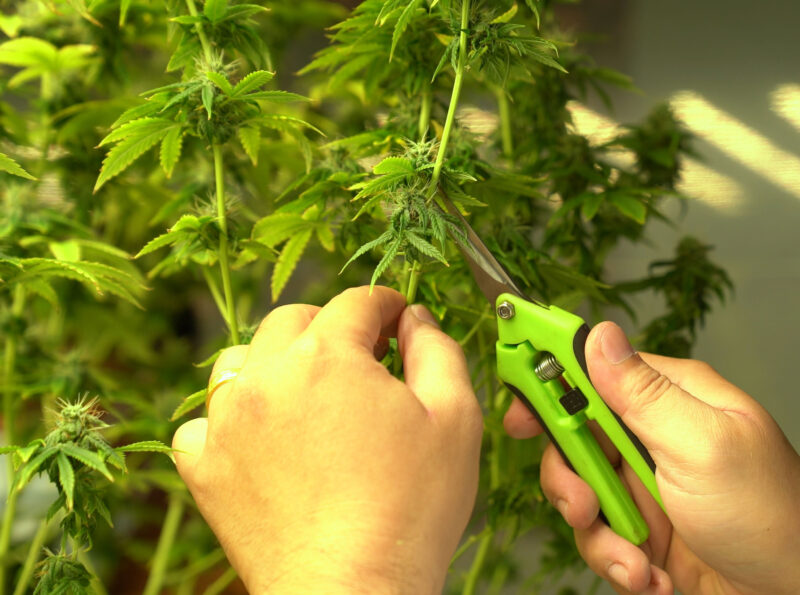
Next, start working on the leaves that are actually on the buds. These leaves are often coated with trichomes and should also be saved for later use. Clip off the stem part of the leaf, and then trim in a circular motion around the bud until you reach the sugary coating. Trimming beyond that point is unnecessary and wasteful. Don’t worry if the buds look a little fluffy or leafy at this stage if you’ve done everything right, they’ll dry and cure into those dense, sticky buds everyone loves.
Once you’ve trimmed all the bud leaves, you should be left with your buds attached to a nice, thick stem network. This setup is perfect for most drying and curing processes. Some growers choose to clip at the main stem and hang the entire plant upside down to dry, while others prefer to break the plant down into smaller sections for drying. It’s all about what works best for you.
“Should I harvest in the dark before lights turn on?”
Question sent by: Derek Wilson, via email.
Some growers prefer harvesting before lights-on, but consistency and readiness matter more. Make sure tools, drying space, odor control, and timing are prepared before the cut.
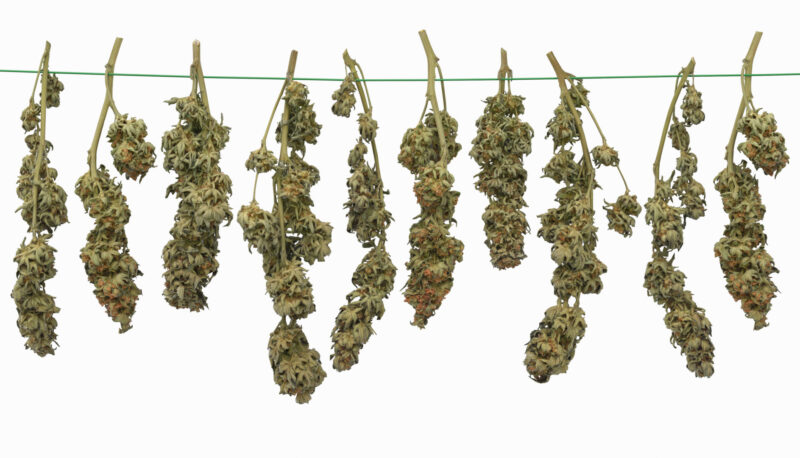
When cutting, be sure to leave enough stem on the buds to easily handle them during the drying process. While you’ll likely trim the stems down further once they’ve dried, having that extra bit of stem now will make things much easier. And remember, dried stems don’t weigh much, so they won’t affect your final yield in any significant way.
It’s often best to leave the large top buds in one solid piece if you can. You can always trim them down one node at a time once the drying process is complete.
At this point, your plants are in their most vulnerable condition when it comes to mold. Mold can be disastrous, spreading from the inside of the buds and often remaining invisible until it’s too late. Mold can destroy your entire crop overnight, so be sure to maintain low humidity levels during the final weeks of maturity to reduce the risk of a mold invasion.
Cutting
Harvesting via Cutting
You’ll need to gather a few key tools before you start, sharp pruning shears, sturdy scissors, and something to hang the plants on, like a clothesline setup. You’ll also need a cool, dry, smell-proof room for drying. Those tiny trichomes are pure gold, so don’t let them go to waste!
“Is it better to cut the whole plant or branch by branch?”
Question sent by: Mark Reynolds, via email.
Both work. Whole-plant drying can slow the dry in some rooms, while branch drying gives more control and airflow. Choose based on humidity, plant size, and drying space.
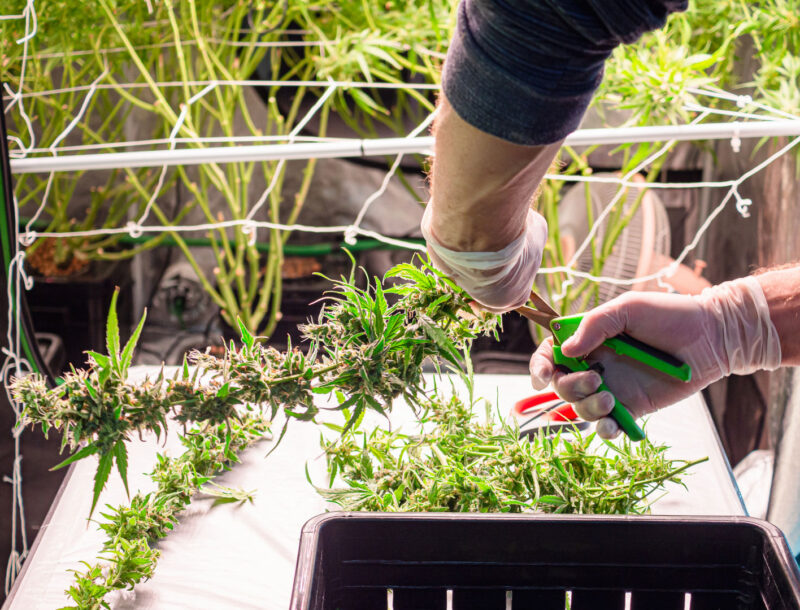
Let’s begin, you can harvest the entire plant at once by cutting it down at the base of the stem, just above where it meets the soil or hydroponic medium. You can use a clean, sharp pair of scissors, a knife, or even a hacksaw—whatever tool gets the job done efficiently. If you prefer, you can also harvest each branch individually as it matures. This method allows you to get the absolute most out of your plant if different parts are maturing at different times.
Helpful Tip: Leave a few inches of stem at the base of each bud. This extra stem will make it much easier to hang the buds for drying later on.
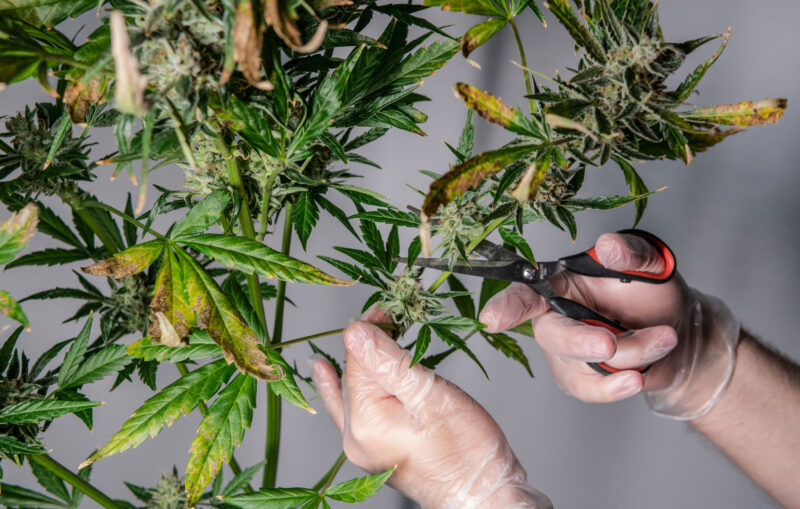
The methods for harvesting Indica and Sativa plants are a bit different, so we’ll go over the specifics for each in the next steps.
Harvesting Indica: Step-by-Step
Step 1: Start by cutting your 1-4 foot plant at the base. Once cut, turn it upside down and hang it in a cool, dark room with plenty of fresh air circulating. Light exposure at this stage can degrade THC, so complete darkness is key.
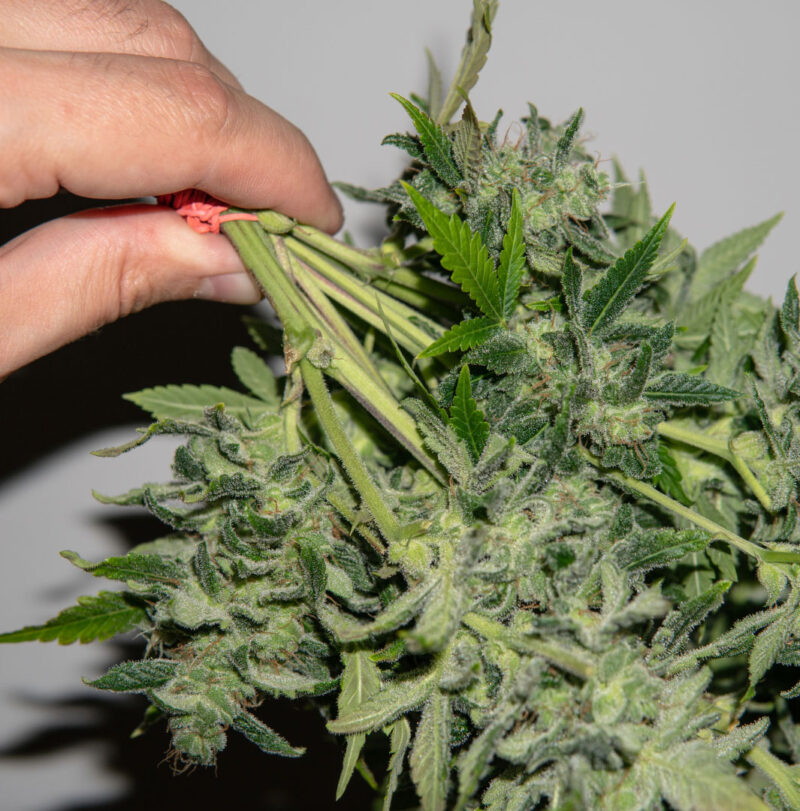
Step 2: Use a pair of clippers to remove as many fan leaves as possible. If you prefer, you can strip the larger leaves by hand—just be gentle to avoid damaging the trichomes.
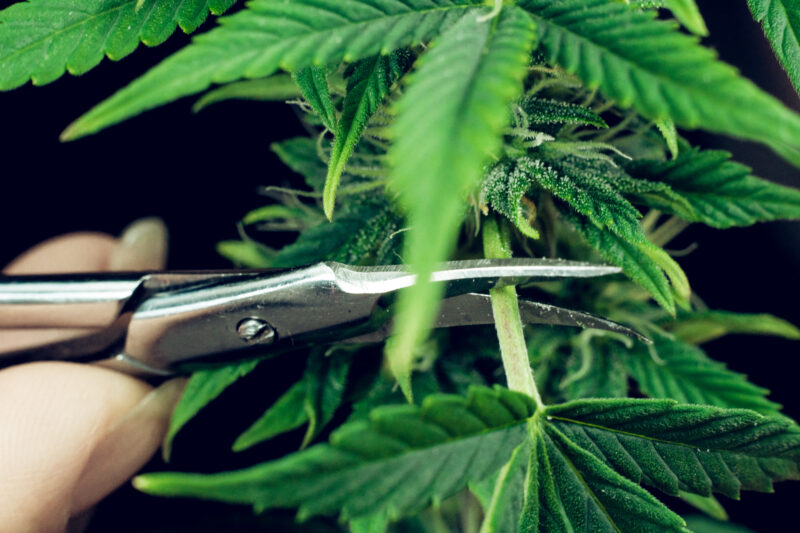
Step 3: After removing the fan leaves, move on to the smaller secondary leaves around the tops of the plant. Set these aside in a separate pile for later use, as they contain resin.
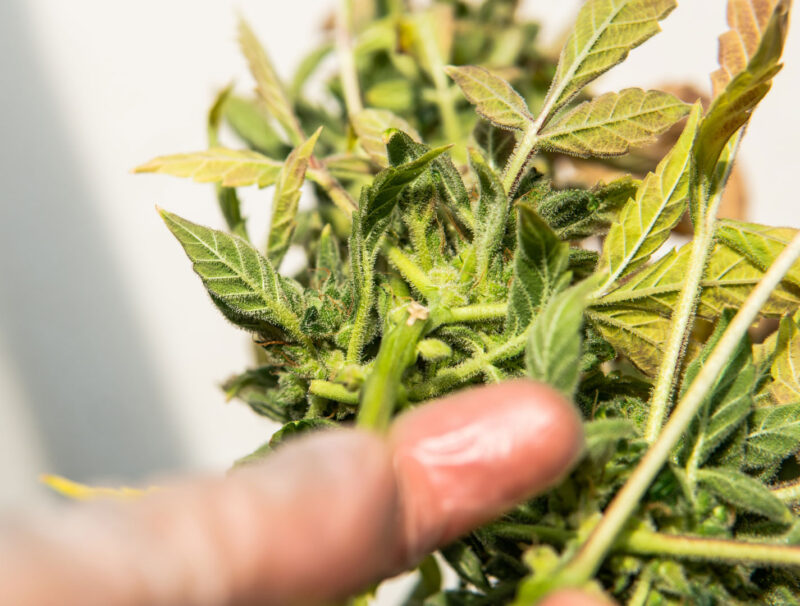
Step 4: Now it’s time to trim the leaves directly surrounding the buds—often called “trim”—which are covered in resin. These tiny leaves are valuable for making hash or edibles, so don’t toss them out!
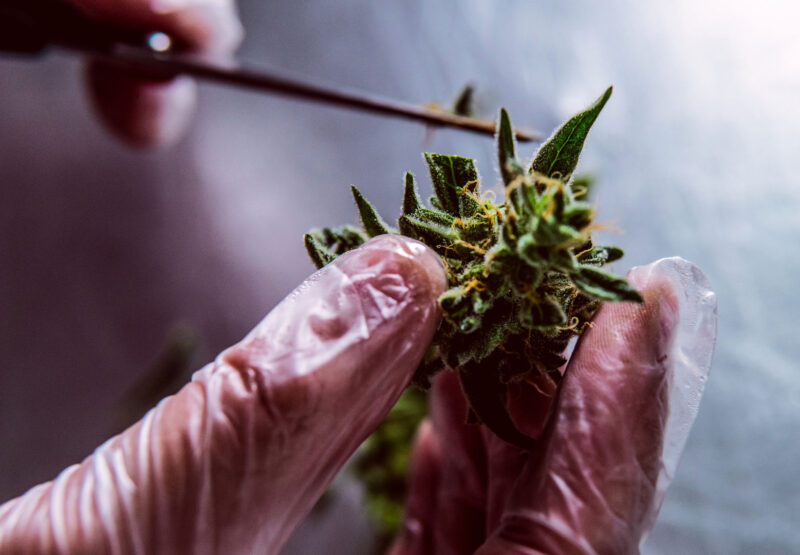
That’s it! Once you’ve trimmed the plant, it’s ready to dry and cure.
Harvesting Sativa: Step-by-Step
Harvesting Sativa plants is similar to Indica, but it can be a little trickier due to their bushier nature and longer flowering time. However, the extra effort pays off!
Step 1: Just like with Indica, start by cutting the plant at base. Hang the entire plant upside down in a cool, dark room with good airflow. Keeping the room dark is especially important here, as exposure to light can quickly degrade the THC levels in Sativa strains.
Harvest can release a lot of odor fast
Plan odor control before cutting. Trimming, moving branches, and opening the tent can make smell much stronger than normal flowering.
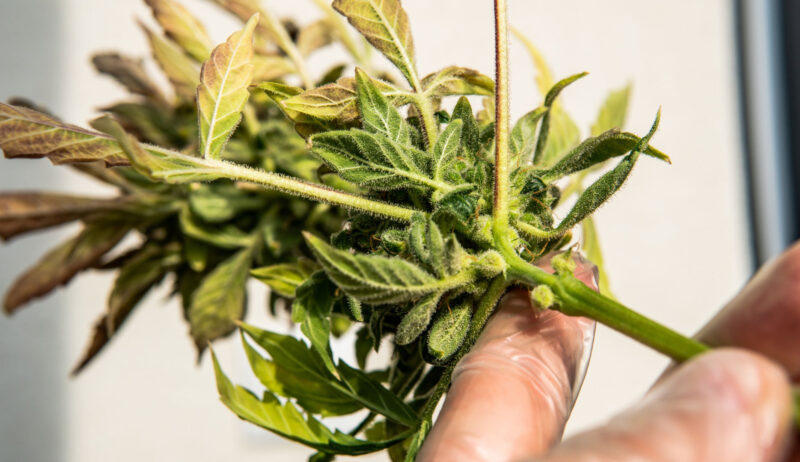
Step 2: Grab your clippers and start removing the leaves. You can also remove the larger leaves by hand if you prefer. Sativa plants are typically bushier than Indicas, so this step may take a bit longer. You may also need to cut branches separately to hang them for drying.
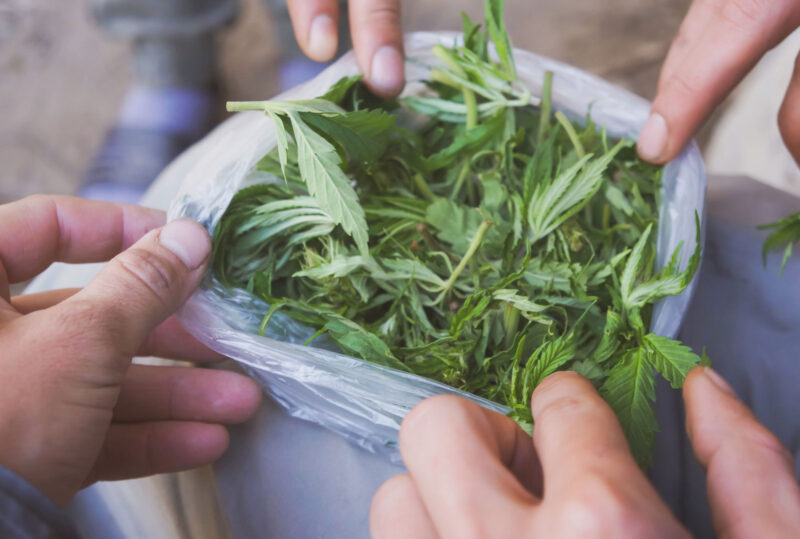
Note: Be careful to avoid exposing your harvest to direct light, as it can degrade THC and impact the potency of your buds.
After harvesting, the next steps in the process are manicuring and drying. Leave the plant as is until you can easily snap a branch between your fingers—once you can do that, the buds are ready for curing.
Manicuring Marijuana Buds
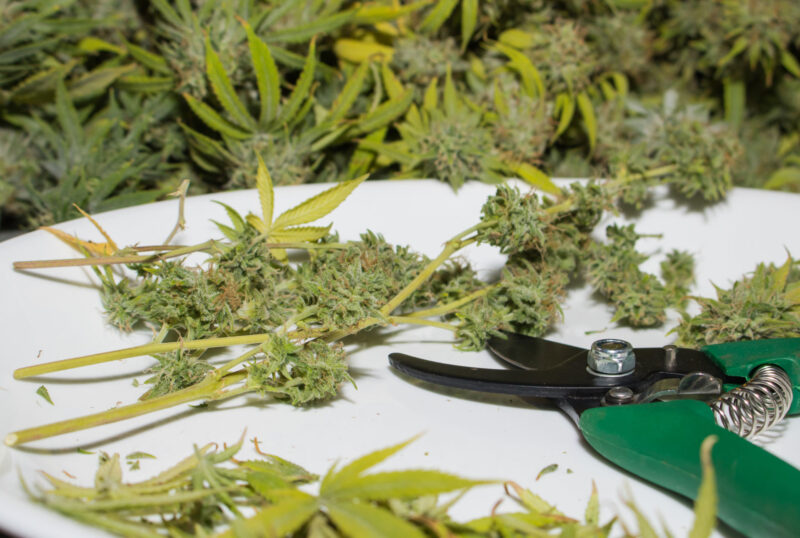
Once you’ve harvested your cannabis plants, the next crucial step is manicuring—trimming away excess leaf material from your buds. This process involves removing the leaves that surround the buds, leaving behind just the resin-rich flowers. Manicuring should be done right after harvest when the leaves are still soft and easy to trim. Doing this while the plant is fresh makes the job a lot smoother, especially compared to trying to trim dry, brittle leaves later on.
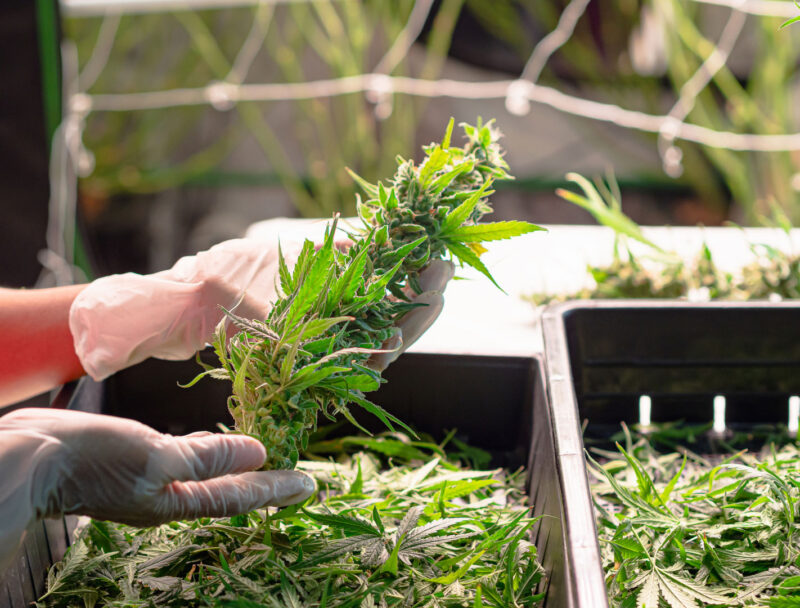
Trimming right after harvest can also help speed up drying times. When we talk about manicuring, it’s all about removing the large fan leaves that don’t contain much THC. These leaves are what you want to trim away before you hang your buds to dry. It’s a time-consuming process, but if done properly and with care, you’ll have more potent, less leafy, and much better-looking buds. You can choose to manicure either before or after drying, but you’ll find it’s much easier to do before the drying stage.
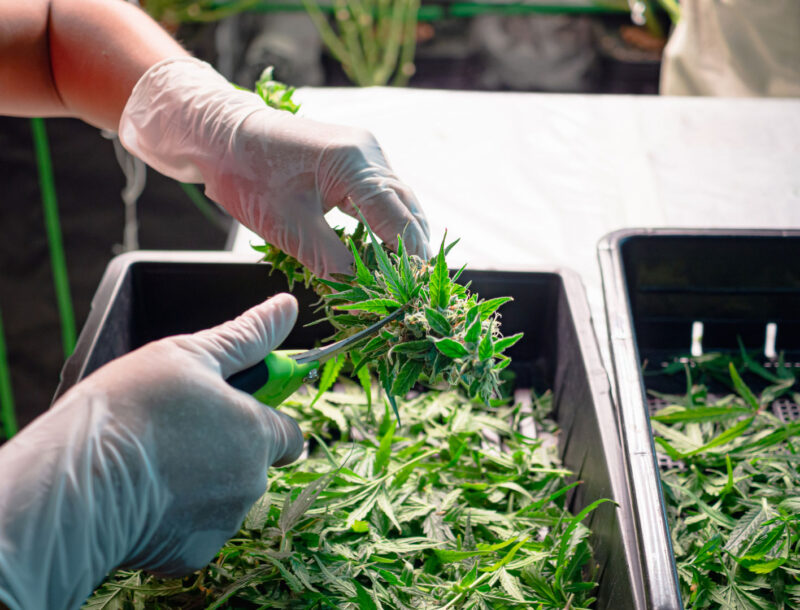
WARNING: Make sure to remove the entire leaf stem. If you leave the stem intact, it can trap moisture and encourage mold to form, which is the last thing you want at this stage.
When trimming, avoid touching the buds too much. Trichomes, which contain most of the plant’s cannabinoids, can easily break off when handled excessively. A great selling point could be “buds never touched by human hands,” so keep contact to a minimum! Continue trimming away any leaf tips protruding from the buds. The level of trimming is really a personal choice, but the key is to leave a smooth, clean bud with no unnecessary foliage.
“Should I wet trim or dry trim?”
Question sent by: Ashley Brown, via Facebook page.
Wet trimming is faster and can help in humid rooms. Dry trimming can protect aroma and slow the dry. The better choice depends on your drying conditions and mold risk.
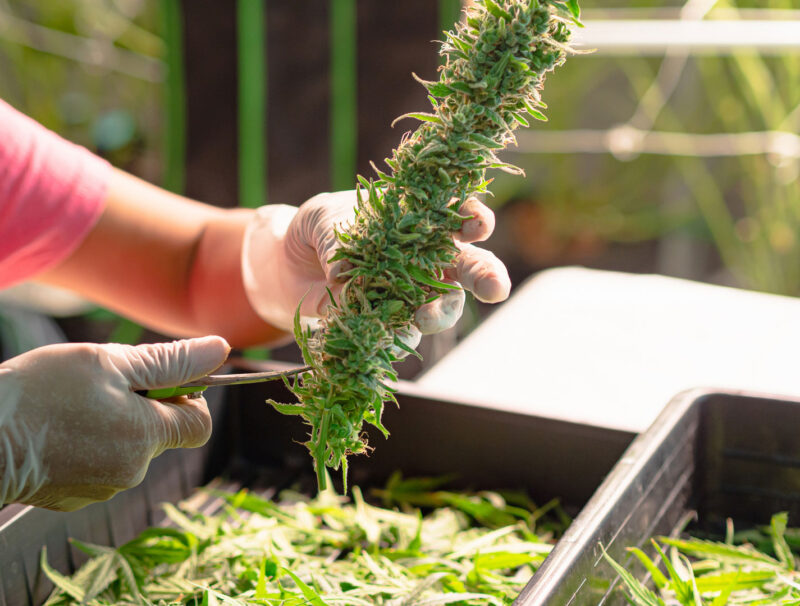
A good rule of thumb is to start manicuring when the plants are almost dry, but not completely. When the plants are too dry, many of the valuable resin glands will fall off during handling. When there’s still a bit of moisture left, those glands are more likely to stay intact.
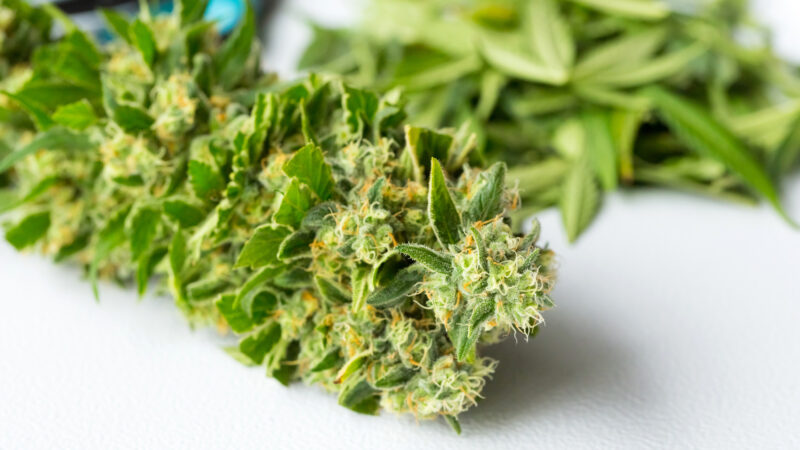
Work on a smooth surface, like a glass table, so you can easily collect any material that gets trimmed away. While the trim doesn’t have as much THC as the buds, don’t throw it away! You can use it to make hash oil, edibles, or other cannabis products.
The Right Tools for Manicuring
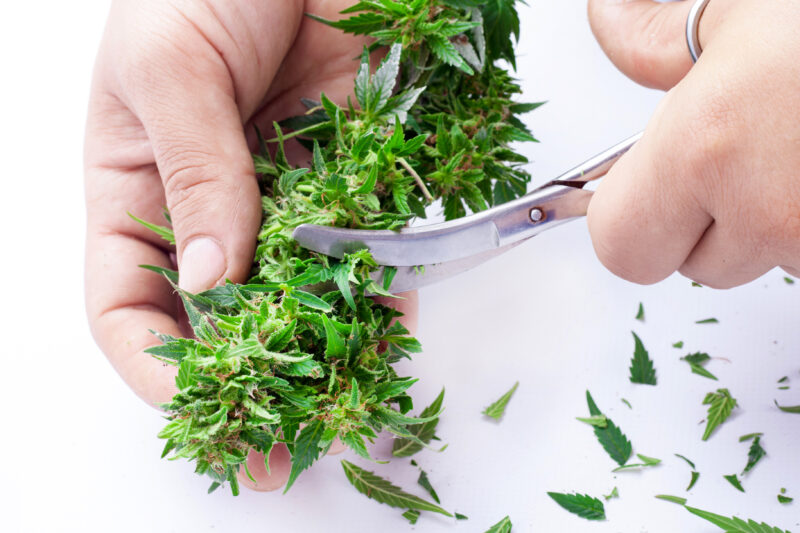
Make sure you’re using scissors with small, sharp blades so you can reach the hard-to-get leaves tucked within the buds. If you’re dealing with a small crop, you can trim by hand, but for larger gardens, it’s a good idea to wear powder-free latex gloves to keep your hands clean and to avoid damaging the buds.
Tip: Sharp scissors make cleaner cuts and less bruising. Keep a second pair ready so trimming does not turn into a sticky struggle.
Trim gently and keep resin intact
Use clean tools, handle branches instead of flowers, and take breaks when scissors get sticky.
Over-handle every bud
Too much touching can knock off trichomes and reduce final quality.
Bonus Tip: After trimming, if you want to collect the resin, pop those latex gloves into a bag and freeze them for a couple of hours. Once they’re cold, you can peel off the trichome resin and enjoy it like hashish!
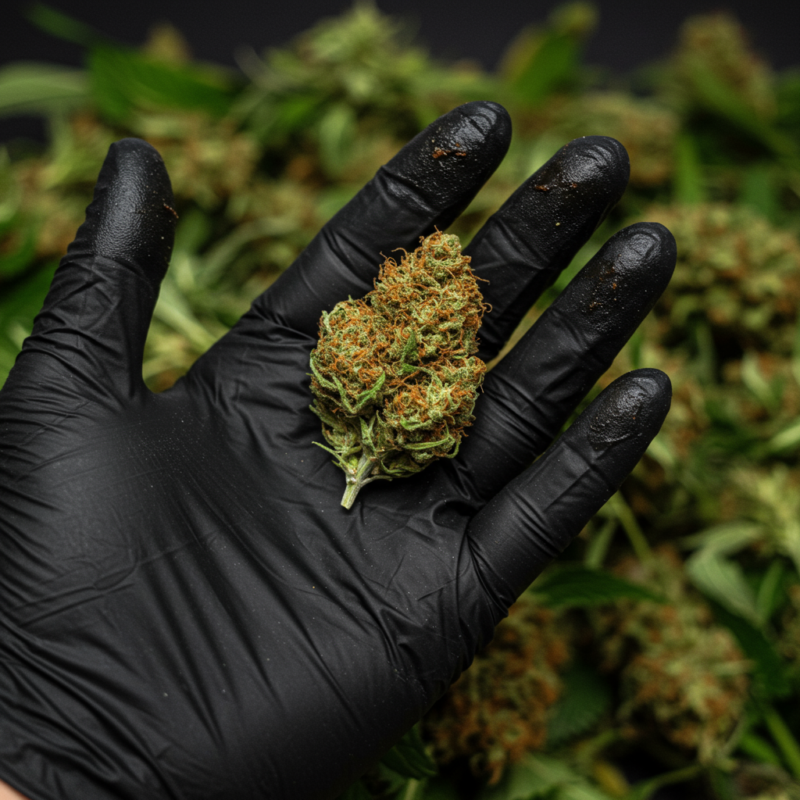
If you absolutely must, you can postpone manicuring but keep in mind that it will take even longer if you choose to wait. Manicuring right after harvest also has the added benefit of speeding up the drying process considerably.
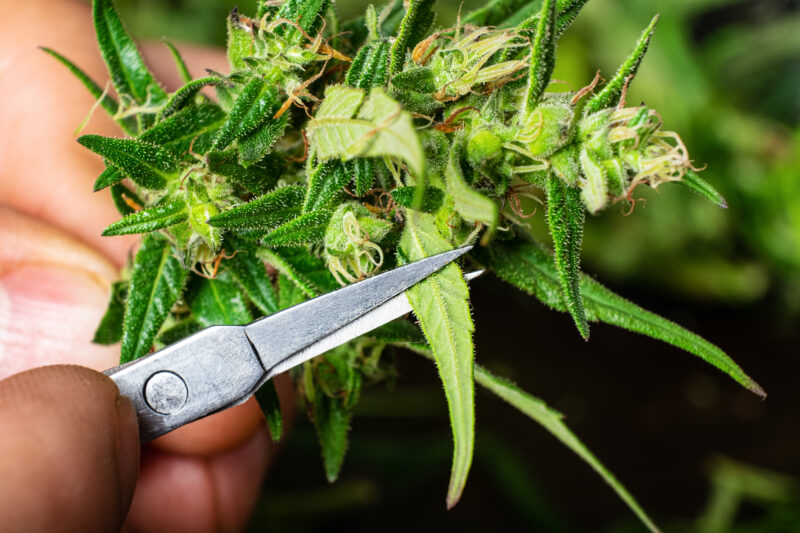
Your buds should still be slightly moist, especially on the inside. While you may be tempted to start smoking them right away, resist the urge! Drying and curing will enhance the aroma and flavor, and the buds will burn much smoother. Many novice growers rush this step, but trust me, it’s worth the wait. And whatever you do, don’t even think about throwing your freshly harvested buds in the microwave to speed up drying—that’s a surefire way to ruin all your hard work!
Dry and cure your buds properly for the best possible taste and potency. Patience is key!
Drying Your Buds
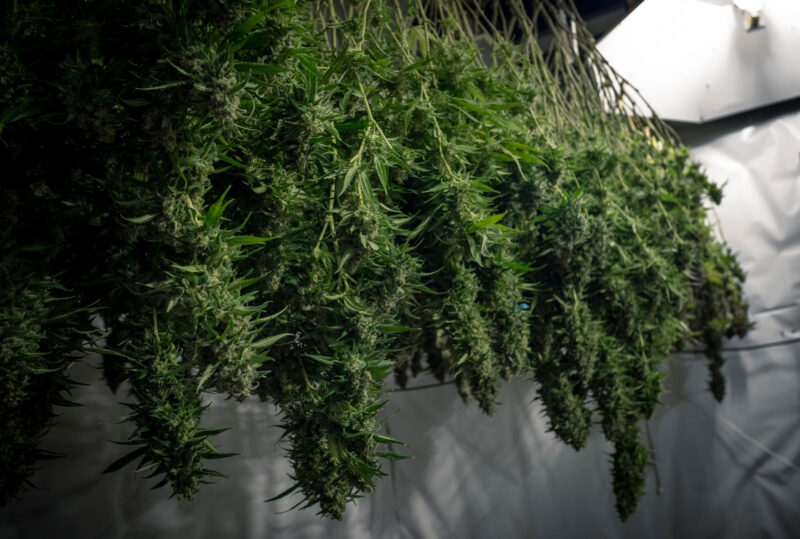
Now that trimming is done, it’s time to move on to the all-important drying phase. Drying and curing marijuana properly is critical—this stage is where you can make or break the flavor, aroma, and potency of your final product. If you rush or mishandle it, you’ll end up with harsh, weak-tasting buds. But if you do it right, you’ll preserve (or even enhance) all the things that make your cannabis truly special.
The drying and curing process allows the plant to purge sugars and, if desired, get rid of that grassy chlorophyll taste. However, some people actually enjoy the taste of chlorophyll, so that’s a matter of personal preference. The key point is improperly dried or cured marijuana can lose nearly all of its potency and believe me, once you’ve messed this up, there’s no turning back.
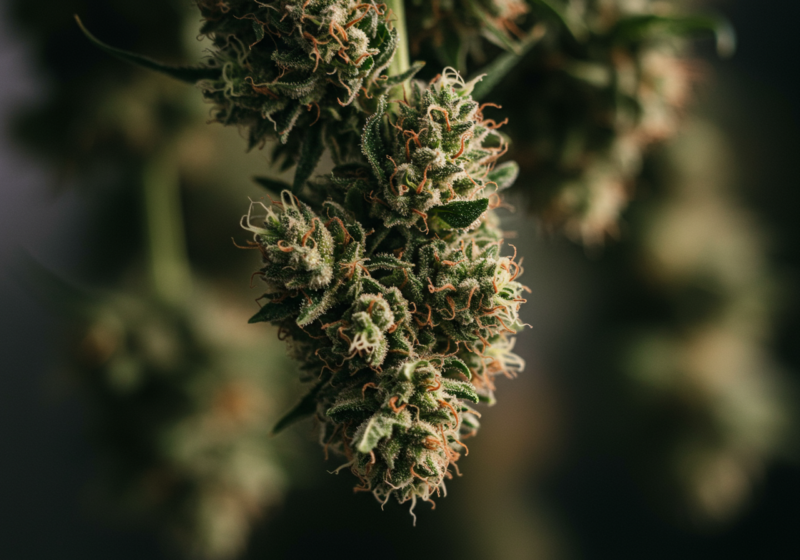
There are four key enemies during drying; light, heat, air, and rough handling. Too much of any of these, and your precious trichomes degrade into less potent compounds. Marijuana that hasn’t been properly dried or stored can also retain too much moisture, leading to mold—a disaster for any grower. The trick is patience. Rushing things will only dry the outer part of the bud while locking in moisture in the middle. That’s why slow, even curing is essential to draw out moisture from deep inside the buds.
How to Dry Your Buds:
Drying can be done a few ways, but the most common is to hang your trimmed branches upside down. Let the fan leaves droop and cover the buds—this slows down the drying process and helps protect the flowers. Make sure you hang them in a
“My buds dried crispy outside in three days. Did I ruin them?”
Question sent by: Samantha Lewis, via email.
They may still be usable, but fast drying often hurts aroma and smoothness. The inside may still hold moisture, so cure carefully and avoid sealing wet centers in jars.
cool, dark place that’s well-ventilated. And don’t forget—humidity is your enemy. If your drying space is too humid, mold can creep in and ruin everything. It’s also important that this space is totally dark—light will degrade your THC quickly.
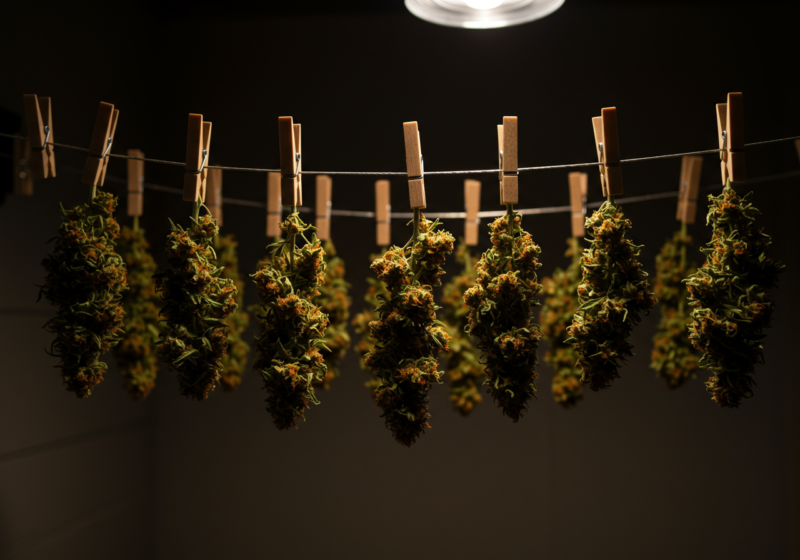
A good drying area should maintain a temperature around 65-75°F (18-24°C), but never let it rise above 80°F (26°C), or you’ll risk losing potency. Proper airflow is also essential—fans can help circulate air, but don’t point them directly at the buds.
If you dry your buds too fast, they’ll taste like pine needles or hay—not exactly the flavor you want after months of hard work. Patience is key here. Letting them dry slowly ensures that all the flavor, aroma, and potency stays intact. Proper drying and curing will also convert non-psychoactive THC-A into the potent THC we all love.
Important: Drying too fast can lock in harshness; drying too wet can invite mold. The goal is slow, controlled moisture loss.
When you hang your marijuana upside down in the dark, gravity will pull all that remaining THC down into the buds, maximizing potency. Keep in mind that your freshly harvested buds aren’t as potent right after cutting—they still contain THC in its acidic form, which doesn’t give the psychoactive effects until it’s properly dried and cured. So, drying your buds the right way is absolutely crucial to high quality of your harvest.
Conditions for Drying:
Keep your drying space completely dark—any light exposure will start breaking down THC immediately, reducing potency. And as for temperature, anything higher than 80°F (26°C) will degrade THC as well. Humidity should stay between 45-55% for optimal results. The slower the drying, the smoother and tastier your buds will be.