How to Grow Cannabis: From First Decision to Harvest
Before You Start
Is This Guide Right for You?
Never touched soil? Maybe you have even managed to make a houseplant dramatic just by watering it. You are still in the right place. This guide turns a first grow into a series of small, understandable decisions rather than one intimidating project.
When you are ready to choose a direction, continue with Indoor Growing Basics for a controlled room or Outdoor Growing Basics for a garden shaped by sun, weather, and season.
Before You Start
Is This Guide Right for You?
Never touched soil? Maybe you have even managed to make a houseplant dramatic just by watering it. You are still in the right place. This guide turns a first grow into a series of small, understandable decisions rather than one intimidating project.
When you are ready to choose a direction, continue with Indoor Growing Basics for a controlled room or Outdoor Growing Basics for a garden shaped by sun, weather, and season.
A Calm Place to Begin
You do not need to know every cannabis term before you grow your first plant. You need a lawful place, a manageable plan, healthy starting material, and enough time to notice what the plant is telling you. Everything else can be learned in useful pieces.
Cannabis is an annual flowering plant. Like other container and garden crops, it needs light, water, air around its leaves and roots, suitable temperatures, mineral nutrition, and protection from pests and severe weather. Indoor growers provide most of that environment with equipment. Outdoor growers borrow more from the season. Neither method is automatically easy or superior; the better choice is the one you can maintain safely and consistently.
This guide is designed for the moment before your first seed, clone, tent, pot, or nutrient bottle. It will help you decide whether growing fits your situation, choose a simple starting route, understand the plant's life cycle, and recognize the few decisions that deserve your attention first. You are not expected to build a professional room or chase a perfect harvest. The first goal is a healthy plant and a process you can understand.
Remember
Your first grow is not an exam. It is a season of observation. Start small enough that you can look closely, change one thing at a time, and learn why the plant responds.
Before You Decide to Grow
The most useful first question is not which light, nutrient, or cultivar to buy. It is whether your location, schedule, and local rules can support the project. A plant may live for several months, produce a noticeable aroma, need attention during hot weather, and require a secure place for drying after harvest. Thinking through those realities now prevents expensive changes later.
Confirm That Cultivation Is Lawful
Cannabis laws vary between countries, states, provinces, municipalities, leases, housing providers, and medical programs. Rules may control age, plant numbers, seed sources, registration, visibility, locked access, outdoor locations, electrical work, possession after harvest, and how unused plant material is discarded. Check the current rules that apply to your exact address before obtaining seeds or plants. A law that applies elsewhere, or a rule remembered from last year, is not enough.
Legal permission comes before the grow plan
This page is educational and does not establish that home cultivation is permitted where you live. Use lawful genetics and locations, follow plant and possession limits, and obtain any required approval before you begin.
Choose a Place That Can Remain Safe
An indoor garden adds light, electrical load, warmth, moisture, moving air, and water to a building. The space needs safe circuits, dry connections, stable surfaces, ventilation, spill control, and access for inspection. Do not block an exit, cover existing dampness, overload extension leads, or place electrical connections where irrigation can reach them. Permanent electrical, plumbing, or structural work belongs with qualified professionals and local code requirements.
Outdoor plants need lawful placement, enough useful sun, practical water access, and protection appropriate to the site. Security does not have to mean an elaborate structure, but the plants should not be accessible to children, pets, visitors, or anyone not legally permitted to enter the area. Consider visibility, odor, neighbors, wildlife, wind, and the route you will use when carrying water or supplies.
Be Honest About Time and Attention
A small soil grow may need only a short inspection on quiet days, but plants do not follow your calendar. Hot weather, a rapidly filling root zone, flowering stretch, irrigation failure, pests, or harvest can require extra attention. If you travel frequently, work long shifts, or cannot inspect the space every day, design around that reality before planting. A trusted lawful caretaker or a tested irrigation system is a plan; hoping the pot stays wet is not.
You also need patience. Some autoflowering cultivars complete their life cycle relatively quickly, while photoperiod plants may remain in vegetative growth for as long as the indoor grower chooses before flowering is induced. Outdoor timing depends on latitude, planting date, cultivar, and season. Drying and stabilization after harvest add more time. A realistic first project often spans several months rather than a fixed number of weeks.
Set a Learning Goal, Not a Yield Promise
Yield is affected by genetics, usable light, canopy area, root volume, plant density, vegetative duration, flowering duration, nutrition, climate, health, and grower decisions. That is why a seed packet, lamp wattage, plant count, or pot size cannot guarantee a particular harvest. For a first grow, success is better defined by a safe setup, a plant that completes its cycle, clean flowers, and records that make the next grow easier.
Master Advice
One healthy plant teaches more than a crowded room of plants you cannot inspect. Start with the smallest lawful number that still makes the project worthwhile.
The Seven Things Cannabis Needs
Product lists make growing look complicated because every basic need can be sold in several forms. The plant itself is simpler. If you can explain how your setup will provide the seven needs below, you already have the outline of a grow.
| Need | What it means and what to check |
|---|---|
| Light | Energy for photosynthesis plus a day-length signal for photoperiod plants. Check that the canopy receives useful, even light without bleaching, burning, or severe shade. |
| Air | Carbon dioxide at the leaves, oxygen at the roots, and movement that limits stagnant pockets. Fresh air should enter, warm humid air should leave, and the leaves should move gently. |
| Root zone | A medium or solution that holds water while leaving enough oxygen for roots. The container should drain, and the medium should dry at a predictable rate. |
| Water | Water of known quality delivered when the root zone needs it. You should be able to wet the active root zone without leaving the pot permanently saturated. |
| Mineral nutrition | Required elements supplied by the soil, amendments, or a measured nutrient solution. Understand what is already in the medium before adding more. |
| Suitable climate | Temperature and humidity that support the current stage without persistent stress. Measure conditions during both the light and dark periods. |
| Time and observation | Consistent care, early problem detection, and recovery time after changes. Make sure you can inspect the plant and equipment regularly and keep simple notes. |
Light Is a Resource, Not a Competition
More usable light can support more photosynthesis and flower production when the canopy, roots, water, nutrients, temperature, humidity, and carbon dioxide can support that demand. Beyond the plant's capacity, extra intensity becomes heat and light stress rather than extra yield. The useful goal is sufficient, even canopy light, not the largest fixture or the shortest hanging distance.
Indoors, modern white LEDs are popular because they can provide useful horticultural light with relatively high electrical efficiency and manageable radiant heat. HID systems, including high-pressure sodium and metal halide, can still grow excellent plants but usually add more heat and often need stronger ventilation. Fluorescent or compact fluorescent lighting can support seedlings, clones, and very small gardens, although it is less practical for a large flowering canopy. Use the manufacturer's tested coverage and dimming guidance as a starting point, then read the plant.
Pro Tip
Your eyes adapt to brightness and cannot judge plant-usable light reliably. Begin with the fixture maker's real coverage data, maintain a safe distance, and watch the entire canopy for stretching, bleaching, curling, or hot spots.
Roots Need Both Water and Oxygen
Roots do not eat soil, and they do not drink continuously. They absorb water and dissolved mineral ions while respiring in the pore spaces around them. A medium can contain plenty of fertilizer and still produce a hungry-looking plant if it remains saturated and oxygen-poor. This is why drainage, container size, medium structure, and irrigation timing belong to the same decision.
Root zone
The root zone is the part of the pot, bed, or hydroponic system occupied by active roots. Its moisture, oxygen, temperature, salinity, and biology determine what the plant can actually take up.
Nutrients Are Ingredients, Not a Growth Accelerator
Cannabis requires nitrogen, phosphorus, potassium, calcium, magnesium, sulfur, and smaller quantities of other elements. The correct supply changes with the medium, water, cultivar, stage, and rate of growth. Adding more than the plant can use can raise root-zone salinity, damage roots, create imbalances, and waste money. Begin with a complete program designed for your medium, understand the starting charge already in the mix, and make changes gradually.
The familiar advice to feed heavy phosphorus and potassium in flower is too simple. Flowering plants still need nitrogen and the rest of the essential elements. A balanced, stage-appropriate program is safer than removing one nutrient or aggressively boosting another because a label promises larger flowers.
pH Helps Explain Availability, but It Is Not the Whole Grow
pH describes how acidic or alkaline a solution is. It influences nutrient chemistry and root-zone availability, but the correct management depends on the system. Mineral soil, buffered potting mix, living soil, coco, rockwool, and recirculating hydroponics do not behave identically. A single universal pH number cannot replace knowledge of the medium, source-water alkalinity, nutrient formula, and meter calibration.
EC, electrical conductivity
EC is an indirect measure of dissolved ions in water or nutrient solution. It helps you compare solution strength, but it cannot identify which elements are present or prove that the recipe is balanced.
Choose the Growing Environment That Fits Your Life
Indoor and outdoor cultivation use the same plant biology. The difference is who supplies and controls the environment. Indoors, you pay for control. Outdoors, sunlight is free but the weather writes more of the schedule. A greenhouse or protected balcony sits somewhere between those two ends.
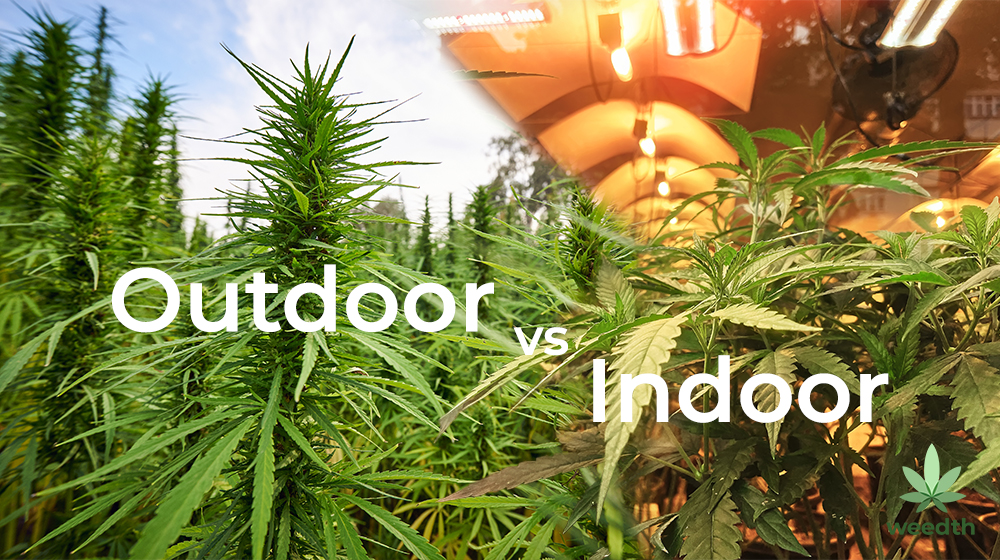
| Decision | Indoor grow | Outdoor grow |
|---|---|---|
| Light | Purchased and scheduled; intensity and coverage can be adjusted | Provided by the sun; shade, latitude, season, and weather set the limit |
| Climate | More control, with equipment and operating cost | Less control; cultivar choice and timing become more important |
| Up-front needs | Enclosure or room, suitable light, timer, air movement, exhaust as needed, measuring tools, safe power | Lawful sunny site, suitable root zone or pots, water access, supports and site-specific protection |
| Daily risk | Equipment failure, heat, humidity, leaks, electrical load, odor | Weather, animals, pests, theft, visibility, pollen, seasonal limits |
| Best fit | Growers who need scheduling and environmental control and can manage equipment | Growers with a lawful suitable season who prefer sunlight and lower energy use |
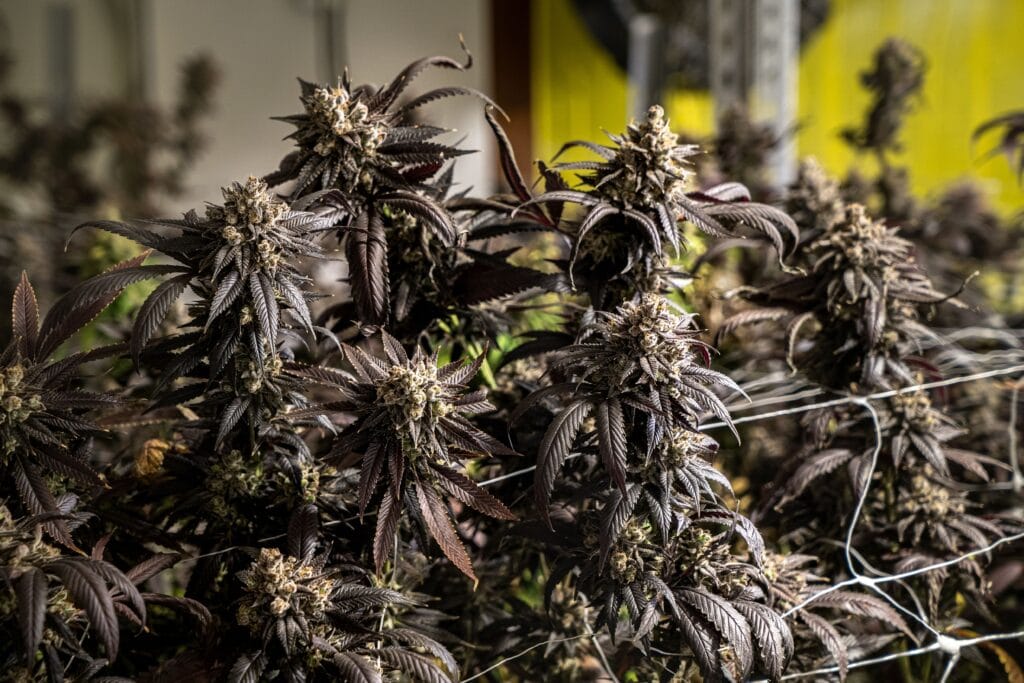
Indoor Growing: Control in a Small Footprint
A small grow tent is often the clearest indoor starting point because it defines the canopy, contains reflective surfaces, provides duct openings, and can be removed later. A cupboard, cabinet, spare room, or basement area may also work if it can be made light-tight, washable, ventilated, electrically safe, and large enough for the mature plant and equipment. The room outside the enclosure still matters because that is usually where intake air comes from and heat is released.
For a simple soil or potting-mix start, the basic categories are a lawful enclosed space, an appropriately sized horticultural light, a reliable timer, gentle circulation, a way to exchange stale humid air, a container with drainage, a suitable medium, a complete nutrient plan if the medium needs it, a thermometer-hygrometer, water, and a safe method for collecting drainage. Odor control, automatic irrigation, environmental controllers, and monitoring systems can be useful, but they are not all mandatory on day one.
Outdoor Growing: Let the Site Do Some of the Work
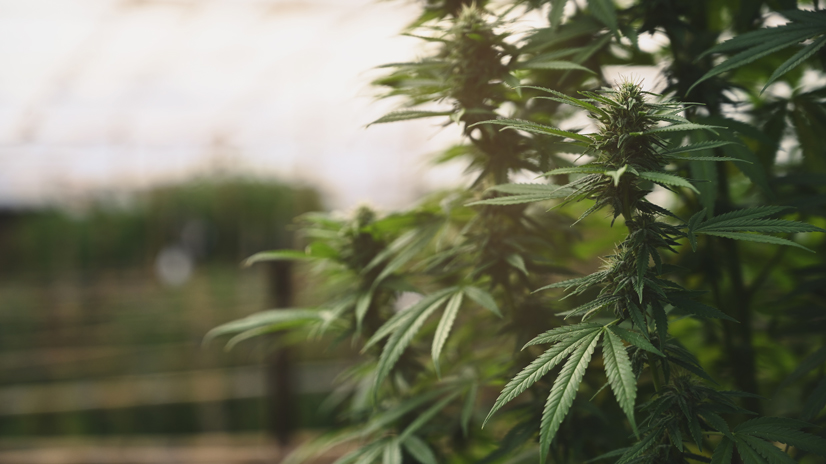
An outdoor container is an approachable option because you control the medium while retaining access to sunlight. The container can be moved while the plant is small, isolated if a problem appears, and elevated above standing water. The tradeoff is that containers dry faster than the ground, can overheat in intense sun, and may require frequent irrigation when the plant becomes large.
Growing in native ground can provide a much larger root volume and more stable moisture, but only when the soil drains, the site is lawful, and contamination or flooding is not a concern. Do not assume dark soil is suitable. Observe drainage after rain, soil structure, previous land use, access to clean water, hours of direct sun, wind exposure, wildlife pressure, and the likely finish date of the cultivar.
Greenhouses, Balconies, and Mixed Starts
A greenhouse can extend the season and reduce direct rain, but it can also trap heat and humidity quickly. A balcony may offer useful sun and easy access, yet wind, visibility, reflected heat, weight limits, drainage, and building rules can make it unsuitable. Many outdoor growers start plants indoors under modest light and move them outside after the risk of cold weather has passed. That transition must be gradual because leaves raised under gentle indoor light can scorch when suddenly exposed to full sun.
What to Remember
Do not choose indoor or outdoor from a list of theoretical advantages. Walk through one normal week in your life and ask which environment you can inspect, water, secure, and correct when conditions change.
Choose Seeds or Clones Without Getting Lost in Labels
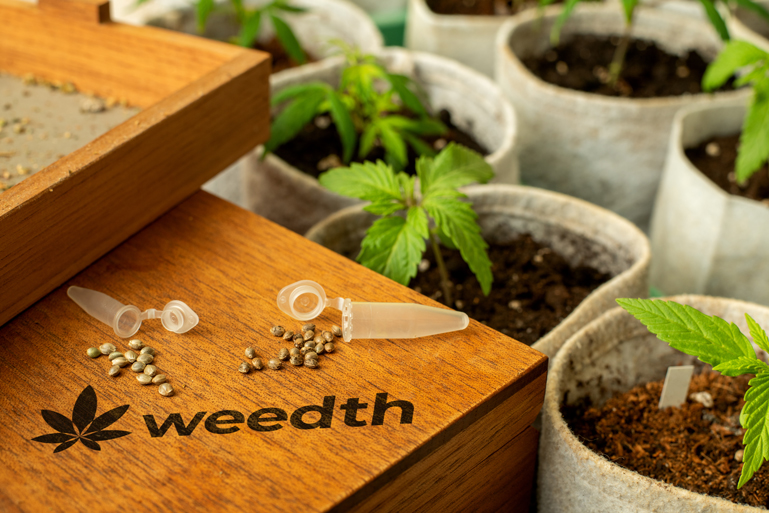
Starting material shapes the whole project. Seeds are easy to transport and store where lawful, can develop strong seedling roots, and provide genetic variation. Clones are rooted cuttings from a parent plant, so plants from the same mother are genetically very similar. That consistency is useful, but clones can also bring pests, pathogens, root problems, or pesticide residues into a clean space.
| Starting option | Benefits and points to check |
|---|---|
| Regular photoperiod seed | Offers genetic variation and the possibility of male and female plants for lawful breeding. Sex must be identified, and pollen-producing plants require a separate plan. |
| Feminized photoperiod seed | Offers a high likelihood of female plants and control over vegetative duration indoors. Plants are not identical, so inspect reproductive growth rather than assuming every plant is female. |
| Feminized autoflower seed | Flowering begins mainly with age, and the total cycle can be shorter. The plant has limited time to recover from early stress, while final size and the training window are less flexible. |
| Clone | Provides known sex and more predictable traits when the source is verified. Quarantine and inspect every clone for pests, disease, poor roots, and unknown treatments. |
Photoperiod and autoflower
A photoperiod cultivar uses day length and uninterrupted darkness as a major flowering signal. An autoflowering cultivar begins flowering mainly according to age, so changing the timer is not required to initiate bloom.
Is an Autoflower Always the Easier Choice?
Autoflowers remove the decision of when to change an indoor light schedule and may finish sooner, which can be helpful in small spaces or short outdoor seasons. They are not automatically forgiving. Because the internal clock keeps moving, severe overwatering, transplant shock, nutrient burn, or light stress during the first weeks can reduce final size without allowing a long recovery period.
Photoperiod plants require a reliable light schedule indoors, but the grower can keep them vegetative while correcting a problem or filling the available canopy. That flexibility can be valuable for a first grow. The better choice depends on whether you value a shorter fixed cycle or more control over timing.
Do Not Let Indica and Sativa Decide Everything
Retail labels often describe plants as indica, sativa, or hybrid, then attach assumptions about height, flowering time, aroma, or effect. Modern cultivars have complex breeding histories, and a broad label cannot reliably predict the exact structure or chemical profile of an individual seed. Use documented traits that matter to your garden: expected stretch, flowering window, mold tolerance, climate fit, odor, cannabinoid profile, and breeder or nursery consistency.
Advice
For a first grow, choose lawful genetics for the environment you actually have. A fashionable cultivar that outgrows the tent or cannot finish before autumn rain is not an approachable choice for that setup.
Build the First Plan Before Germination
Germination is exciting, which is exactly why it tempts people to begin before the space is ready. A seedling can emerge while the light, pot, medium, drainage tray, timer, or outdoor site is still being debated. Build and test the environment first. Then the plant enters a stable home rather than becoming the reason for hurried purchases.
A Simple Indoor Soil Route
- Measure the mature space. Include plant height, pot, drainage tray, light, hangers, safe light distance, fan, filter, and access for your hands.
- Choose an appropriately sized light. Use reliable coverage information for the intended canopy instead of shopping by a product name alone.
- Test ventilation and climate. Run the empty space through a full light and dark cycle. Record the warmest, coolest, driest, and most humid conditions.
- Select a forgiving root zone. A quality cannabis-suitable or general container mix with good structure and drainage is often easier than an improvised heavy soil.
- Plan water and drainage. Know where water will be mixed, how the pot will be watered evenly, and where drainage can be collected without contacting electrical equipment.
- Choose one nutrient approach. Use the medium's starting charge and product instructions to decide when feeding begins. Do not combine several complete programs.
- Automate only what you understand. A timer for the light is basic. Irrigation automation should be tested with water before it is trusted with a plant.
A Simple Outdoor Container Route
- Confirm the lawful location and season. Work backward from the likely finish window, frost, rain, and day length.
- Map the sun. Observe the site across the day rather than assuming a bright garden receives direct light for long enough.
- Choose a stable container. It must drain freely, resist tipping, and hold enough medium that you can keep up with irrigation in hot weather.
- Use clean container media. Do not fill an indoor-style pot with unknown roadside, forest, or yard soil that may compact or introduce pests and contaminants.
- Plan support early. Stakes, a cage, or a trellis are easier to install before branches become heavy.
- Prepare for site-specific pressure. Wind, animals, caterpillars, heavy rain, heat, and theft do not require the same solution.
- Make a watering backup. Decide who can lawfully care for the plant during travel or extreme weather.
Test the empty setup
Run lights, fans, timers, drainage, and environmental monitoring before a living plant depends on them.
Buying from panic
Do not germinate first and then purchase unrelated products to solve problems created by an unfinished environment.
The Cannabis Life Cycle in Plain Language
The life cycle gives your decisions an order. The plant first establishes a root and small leaf area, then builds stems, roots, and branches, then produces reproductive growth, and finally matures. Indoor photoperiod growers can control the length of vegetative growth. Outdoor growers and autoflower growers have less control over that calendar.

| Stage | Plant status | Main task | Risk or check |
|---|---|---|---|
| Germination | The seed absorbs water and the first root emerges | Provide clean moisture, warmth, and gentle handling | Waterlogging, drying, damage to the emerging root |
| Seedling | First leaves open while the root system remains small | Balance gentle light with an airy, lightly moist root zone | Overwatering, stretching, excessive fertilizer |
| Vegetative growth | Roots, leaves, stems, and branches expand rapidly | Build a healthy structure that fits the final space | Crowding, root restriction, uneven canopy, pests |
| Transition and flowering | Reproductive structures develop and flowers gain mass | Maintain stable light, climate, nutrition, support, and airflow | Pollen, light interruption, humidity, mold, branch failure |
| Harvest and drying | Mature flowers are cut and moisture is removed under control | Protect cleanliness, trichomes, aroma, and microbial safety | Harvesting by one sign, drying too fast or slowly, sealing wet flowers |
| Curing and storage | Dried flower moisture becomes more uniform and the product stabilizes | Store cool, dark, clean, and protected from excess moisture | Mold, heat, light, crushing, unauthorized access |
The ranges you see online are planning ranges, not promises. Seed age and quality affect germination. Genetics and grower choice affect vegetative duration. Flowering can vary by cultivar, and outdoor weather can accelerate or delay visible development. Drying depends on flower size, trimming, air conditions, and equipment. Build spare time into the plan.
Germination: The Seed Wakes Up
During germination, the seed takes up water, metabolic activity resumes, the shell opens, and the radicle becomes the first root. Clean moisture and a suitable temperature matter more than complicated additives. Common methods include sowing directly into a lightly moist propagation medium or beginning in a clean moist material and transferring carefully once the root appears. Whichever lawful method you use, avoid drowning the seed, letting it dry after it opens, or repeatedly touching the new root.
A seed that has not opened immediately is not automatically dead. Genetics, storage, moisture, and temperature affect timing. Give the method a reasonable, stable window before digging through the medium. If several seeds fail under the same conditions, review seed storage and method rather than adding fertilizer.
Seedling: Small Leaves, Smaller Roots
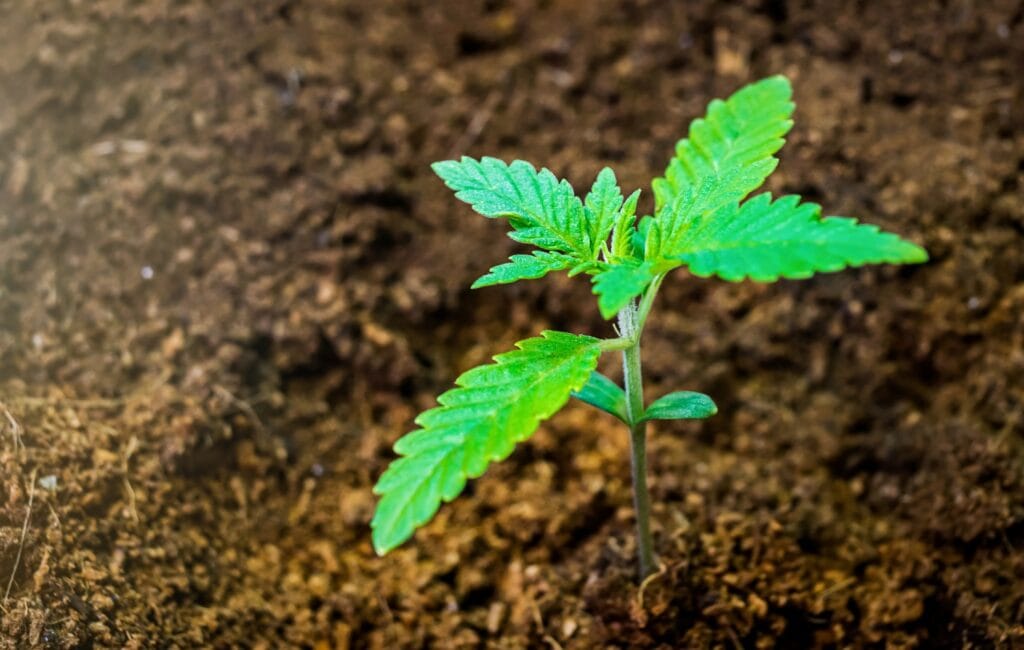
The cotyledons, the first rounded seed leaves, help support the seedling while the first serrated true leaves expand. Above the surface the plant looks delicate; below it, roots are exploring only a small part of the container. Water that small active zone rather than saturating a large pot repeatedly. As the canopy and roots grow, widen the watered area.
Seedlings stretch when light is inadequate or poorly placed, but lowering a fixture without checking intensity can create the opposite problem. Adjust gradually. A gentle breeze can encourage sturdier growth, but the fan should not fold the stem or keep the small pot drying on one side.
Tip
A young seedling usually needs fewer interventions than people expect. Stable moisture, modest nutrition, suitable light, and time are more useful than a shelf of boosters.
Vegetative Growth: Build the Plant You Can Finish
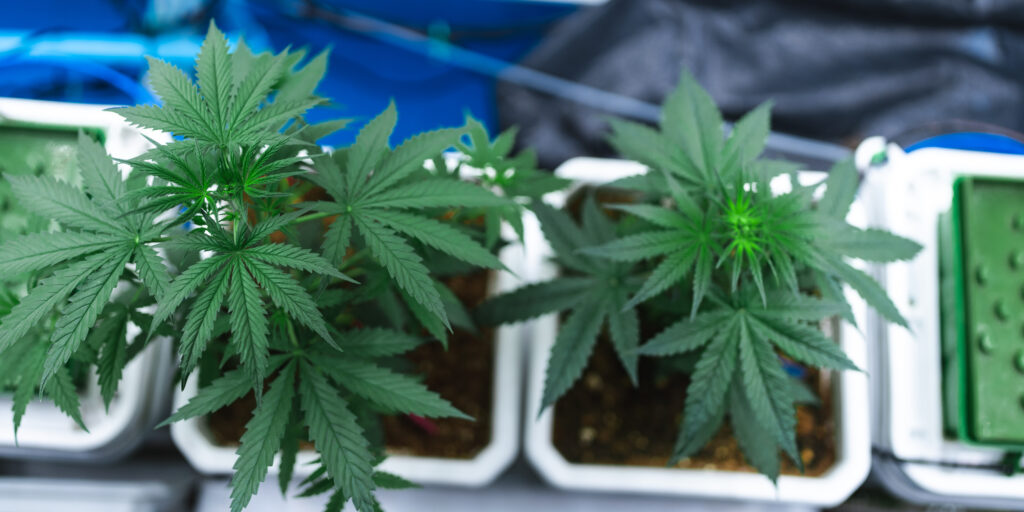
Vegetative growth is when the plant expands its root system, stem, branches, and leaf area. Indoor photoperiod plants are commonly kept under long days during this phase, while outdoor plants respond to the natural season. The exact schedule should match the cultivar and production plan; a dark rest period is a practical standard for many home gardens, and continuous light is not required for healthy vegetative growth.
The plant's speed is not a fixed number of centimeters or inches per day. Growth changes with genetics, root establishment, canopy light, temperature, humidity, water, mineral supply, and recent stress. Look for consistent new growth, strengthening branches, and a root zone that begins using water predictably.
Training is optional. Low-stress bending can spread branches into available light. Topping can divide dominant growth and help control height, but it removes tissue and requires recovery. A first grow does not need every technique. Learn the natural structure first, then use the least intervention needed to make the plant fit safely.
Pre-Flower and Sex: Know What the Plant Is Producing
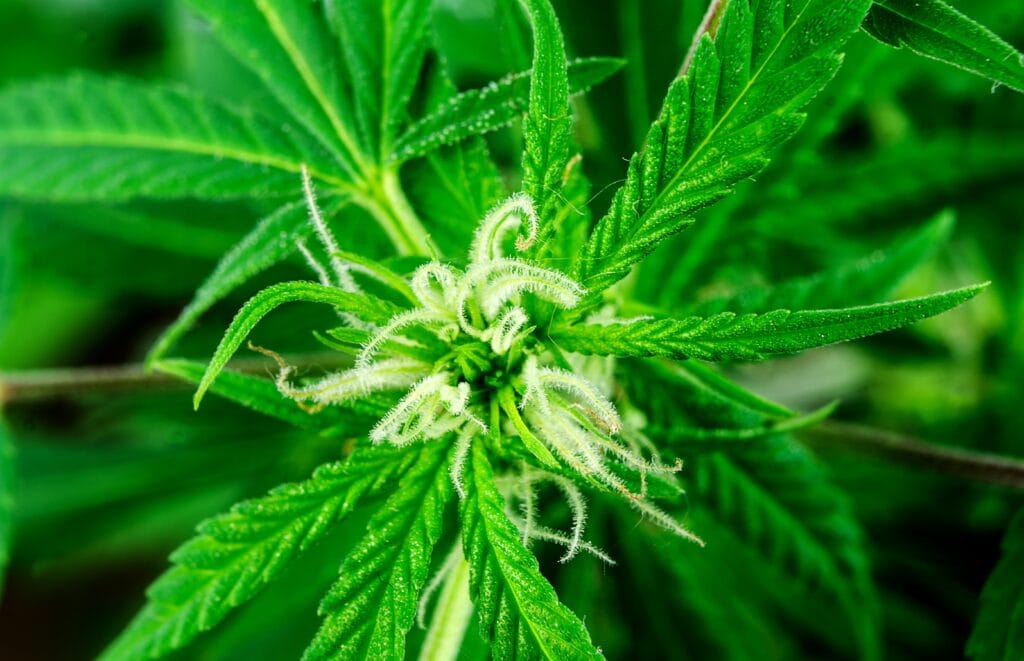
Pre-flowers appear near nodes as the plant becomes sexually mature. Female reproductive growth usually shows a bract with emerging stigmas, often described as white hairs. Male growth forms pollen-bearing structures without those stigmas. Plants can also produce mixed reproductive structures, so inspection should continue into flowering rather than stopping after one early identification.
If the goal is unseeded female flower, pollen-producing plants or branches need a lawful plan before pollen is released. Do not shake or carry a mature pollen source through the flowering area. If breeding is the goal, isolation, records, and pollen control become part of the project.
Flowering: Stability Matters More Than Constant Adjustment
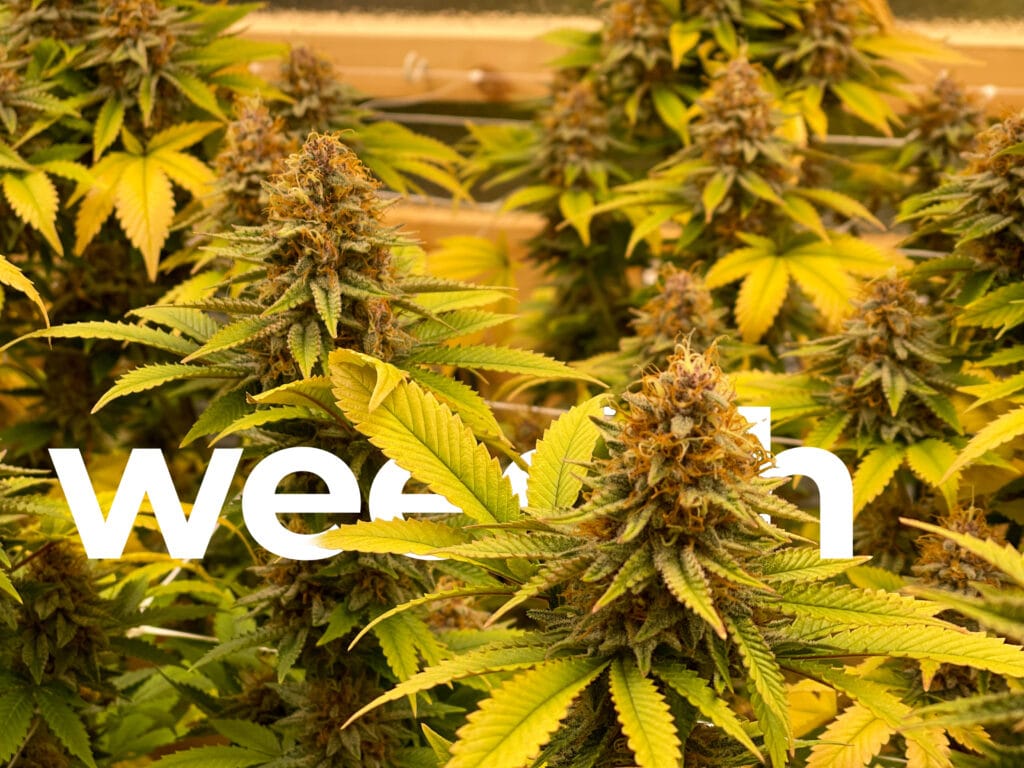
Indoor photoperiod plants are commonly induced to flower with a consistent schedule that provides roughly equal light and uninterrupted darkness. Cultivars differ in their exact response, but a reliable timer and a genuinely dark night period remove avoidable confusion. Autoflowers do not require this schedule change to initiate flowering, although they still benefit from a consistent daily rhythm.
Many plants stretch during early flowering. Plan for that increase before changing the schedule, including the space required between the canopy and light. As flowers develop, branches may need support and the canopy may hold humid air in places the room sensor cannot see. Gentle circulation, appropriate plant spacing, and removal of dead material reduce risk without blasting flowers with a fan.
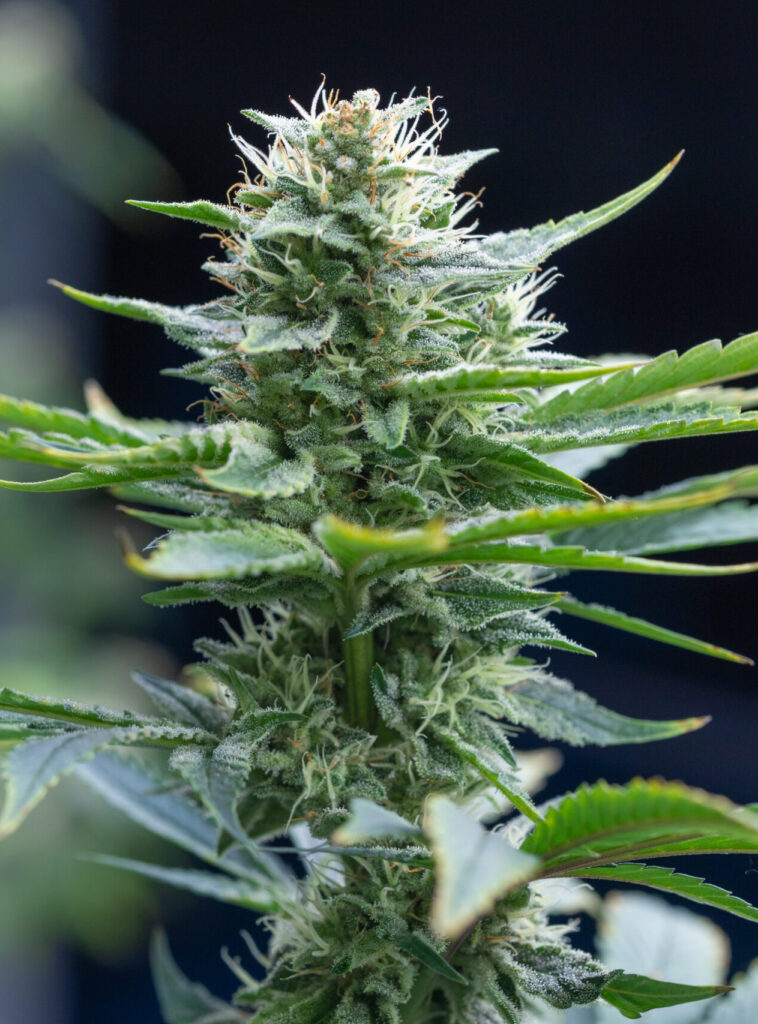
Water use may rise as the canopy expands and later slow as the plant approaches maturity or conditions change. Follow actual root-zone use rather than increasing or reducing water by calendar. Keep feeding balanced and stage-appropriate. Dramatic late-flower drought, ice, darkness, or starvation rituals can add stress without reliably improving quality.
Do not consume visibly moldy flower
Brown, soft, gray, dusty, or musty tissue inside a flower requires careful isolation and disposal. Cutting away the visible patch does not prove the surrounding material is safe. Correct the moisture and airflow conditions and inspect nearby flowers.
Watering, Feeding, and Climate Without Chasing Perfection
Water the Root Zone, Not the Calendar
A plant may need water sooner under strong light, warm dry air, a large canopy, a small fabric pot, or a coarse medium. It may need water later after transplanting, pruning, cool weather, high humidity, root injury, or low light. That is why “water every two days” is not a universal instruction.
Learn the weight of a fully watered and drained container. Recheck it at a similar time each day and combine the change with deeper moisture, leaf posture, plant stage, and recent conditions. Water slowly enough to wet the active root zone evenly. Remove standing drainage and let the medium regain air according to the needs of that system.
Use several clues
Combine pot weight, deeper moisture, plant demand, and drainage behavior before deciding to irrigate.
Following a fixed weekday
A calendar cannot see a cooler room, a small root system, a larger canopy, or a blocked drainage hole.
Feed According to the Medium
A pre-fertilized potting mix may support a young plant for a period before liquid feeding is needed. Coco and inert substrates usually depend on regular nutrient solution from early growth. Living soil relies on sufficient volume, biological activity, organic inputs, and moisture management rather than being treated like an inert hydroponic medium. Identify which system you are using before following a feeding chart.
When a complete nutrient product is needed, begin conservatively within its instructions, mix in the labeled order, and observe new growth. Leaf-tip burn, rising root-zone salinity, or stalled water use can signal excess, but similar symptoms have other causes. Do not add a separate remedy for every yellow or spotted leaf before checking irrigation, roots, pH method, pests, temperature, and the full recipe.
Use Climate Measurements as a Conversation With the Plant
Temperature and humidity affect transpiration, water use, nutrient movement, growth, and disease pressure. Young plants can tolerate and often prefer a different moisture environment from dense late flowers. The useful target therefore changes with stage, light, cultivar, airflow, and leaf temperature. Measure both day and night conditions, then look for patterns rather than reacting to a single brief reading.
Vapor pressure deficit, or VPD, combines temperature and relative humidity into a description of the drying demand around the leaf. It can help with advanced climate management, but you do not need to chase a perfect decimal when you are getting started. Stable reasonable conditions, healthy roots, and direct plant observation come first.
Dry-back
Dry-back is the reduction in root-zone water content between irrigations. It is not the same as forcing a plant to wilt. A useful dry-back restores air while leaving enough water for continued growth.
A Simple Inspection Routine
Most problems are easier to solve when they are small. You do not need a laboratory round every morning. Follow the same short route so changes become obvious.
Daily: Look, Feel, Listen, and Smell
- Look at new growth, overall leaf posture, color changes, damaged edges, webbing, spots, and flowers.
- Check the root zone at depth or compare container weight before watering.
- Confirm that lights, timers, fans, pumps, drains, and sensors are operating normally.
- Listen for a failing fan, dry pump, vibration, or water where it should not be.
- Notice sour root-zone odors, stagnant water, overheated wiring, or musty air.
Weekly: Inspect the Places Problems Hide
- Examine leaf undersides and growing tips with a hand lens.
- Check ties, stakes, trellis points, branches, and the space between canopy and light.
- Clean standing drainage, dead leaves, spills, filters, intake screens, and tools.
- Review water use and environmental records for change rather than isolated numbers.
- Photograph one representative plant from the same angle and distance.
Important
Old damaged leaves rarely become perfect again. Judge a correction by whether the problem stops spreading and new growth improves, not by waiting for every mark to disappear.
Common Early Mistakes and the Better Next Move
| Mistake or symptom | Possible cause | How to confirm | Corrective action | Prevention |
|---|---|---|---|---|
| Watering again because the surface looks dry | The deeper root zone may still be wet | Compare pot weight and moisture below the surface | Wait if the active root zone remains wet and restore drainage or airflow if drying is unusually slow | Learn wet and trigger weights for a representative pot |
| Pale stretched seedling | Insufficient usable light, excessive distance, or warm low-light conditions | Review fixture coverage, distance, timing, and stem response | Increase useful light gradually and support the stem if needed | Test seedling light before germination |
| Brown leaf tips after feeding | Excess solution strength or salt accumulation, among other causes | Review recipe, source water, EC trend, medium, and root condition | Stop adding unplanned products and correct the verified cause gradually | Use one complete program conservatively and record every dose |
| Drooping while the pot is wet | Low root-zone oxygen, poor drainage, root disease, or stem injury | Check pot weight, drainage, root odor and color, temperature, and stem base | Do not add more water or fertilizer until the cause is clear | Match pot, medium, and watering volume to the root system |
| One corner grows differently | Uneven light, airflow, temperature, watering, or emitter output | Compare measurements and pot behavior by position | Correct the environmental or irrigation pattern, not the plant label | Map the empty space and audit uniformity regularly |
| Several remedies applied at once | Panic after an uncertain diagnosis | The log shows multiple changes without time to observe | Return to stable basics and change one verified variable at a time | Keep dated notes and photographs |
Starting Too Many Plants
Seedlings look small, which makes a crowded plan feel reasonable. Mature plants occupy three dimensions and require access for watering, inspection, airflow, and support. Plant count also interacts with legal limits. A smaller number of well-spaced plants is usually easier to learn from than a canopy that cannot be reached.
Buying Upgrades Before Solving the Limiting Factor
A new additive cannot repair unsafe wiring, inadequate light, stagnant air, saturated roots, poor genetics, or an unsuitable season. Spend first on the factor that limits the plant and the factor that protects the home. In a basic indoor setup, safe power, suitable light, ventilation, measurement, drainage, and a dependable root zone usually deserve priority over supplements and cosmetic accessories.
Confusing Stress With a Nutrient Deficiency
Yellowing, spots, curling, and slow growth are symptoms, not diagnoses. Watering errors, root disease, high salinity, pH problems, heat, cold, light stress, pests, spray damage, and nutrient imbalance can overlap. Begin with what changed, where symptoms started, whether the pot is wet or dry, and whether one plant or the whole group is affected.
Diagnose from a pattern
Use new versus old growth, symptom location, root-zone condition, environment, recent changes, and magnification.
Treating the first photograph
A dramatic leaf can be old damage or a secondary symptom. Do not build a nutrient recipe from one image.
Harvest, Drying, and Curing Are Part of the Grow
Harvest is not a single date printed on a seed description. The listed flowering period tells you when to begin closer observation, not when to cut automatically. Evaluate the whole plant, cultivar window, flower development, trichomes on the flowers rather than sugar leaves alone, pest or mold risk, weather for outdoor plants, and the requirements of the intended lawful use.
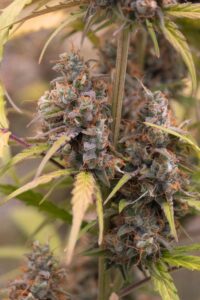
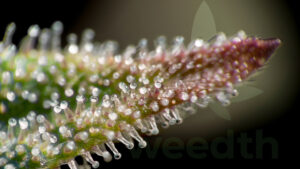
Pistils commonly darken and recede as flowers mature, but heat, pollination, physical contact, or spraying can also change them. Trichomes develop from clear toward cloudy and amber appearances, yet their timing differs across the plant and visual interpretation varies with lighting and magnification. Use several representative flower sites and repeat observations over time. No universal trichome percentage can guarantee a specific effect.
Do You Need to Flush Before Harvest?
The claim that every cannabis crop must receive only plain water for one or two weeks to remove fertilizer from the flowers is not a universal scientific rule. Nutrient management before harvest depends on the medium, fertigation strategy, plant status, runoff or recirculation plan, and product requirements. Severe late starvation can damage the canopy without washing stored elements out of formed tissue. Follow the system's evidence-based finish plan and avoid unnecessary excess throughout the cycle.
Drying Protects Safety and Quality
Fresh flowers contain substantial moisture and cannot be sealed safely. Drying must remove moisture evenly while limiting contamination, light, excess heat, direct fan blast, and rough handling. Large dense flowers dry differently from small open flowers, and room readings do not always describe moisture inside the flower. Inspect the material as well as the room.
Drying too slowly in stagnant humid air increases microbial risk. Drying too quickly can leave the outside brittle while moisture remains inside, and high heat can accelerate changes to volatile aroma compounds. Controlled research confirms that postharvest conditions affect microbial levels, color, moisture, cannabinoids, and terpenes, but it does not support one perfect schedule for every cultivar and flower structure.
Curing and Storage
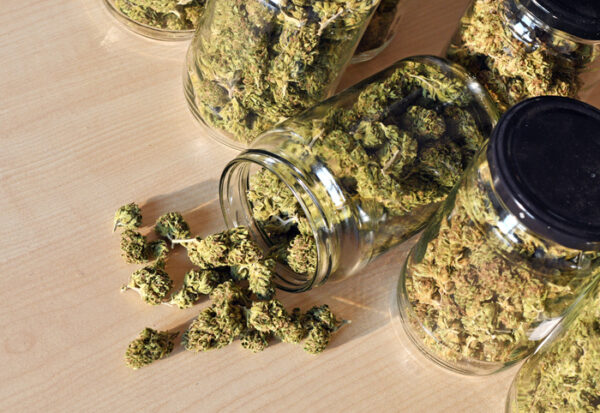
Curing is the controlled period after initial drying in which moisture becomes more uniform within the flower and the product stabilizes. It cannot rescue moldy, contaminated, or badly overdried material. Before sealing a batch, confirm that it is dry enough for safe storage and continue checking for rising moisture, condensation, ammonia-like or musty odors, and soft wet centers.
Store lawful finished flower in clean, suitable containers in a cool, dark, dry place protected from crushing, children, pets, and unauthorized access. Heat and light accelerate chemical change, while repeated grinding exposes more surface area. Label containers with cultivar, harvest date, and batch so observations remain attached to the plant that produced them.
Common Growing Questions, Answered Clearly
Can I grow cannabis if I have never grown any plant?
Yes, if cultivation is lawful and you are willing to observe consistently. A background with vegetables or houseplants helps, but cannabis-specific experience is not required. Choose a small, simple system and learn watering, light, and root-zone behavior before adding advanced techniques.
What is the easiest first growing method?
For many people starting out, one or two plants in a well-structured container mix are easier to read than a complex recirculating hydroponic system. A lawful outdoor container can be very simple in a suitable season. A small indoor tent provides more control but requires safe lighting and ventilation. The easiest method is the one whose daily needs match your location and schedule.
How long does a first grow take?
Plan in months, not days. Autoflowers may finish relatively quickly, while photoperiod plants add a grower-selected vegetative period before a cultivar-dependent flowering period. Outdoor plants follow the season. Germination, seedling establishment, drying, and stabilization after harvest all add time. Published guides commonly show a broad span of roughly ten to thirty-two weeks from seed to harvest, but individual grows can fall outside it.
How much cannabis will one plant produce?
There is no honest universal number. A small plant under modest light and a large outdoor plant with a long season do not share the same potential. Genetics, rooted volume, usable light, canopy size, stage duration, health, climate, and training interact. Plan your setup around safe coverage and lawful limits rather than a promised yield per plant.
Should I start with an autoflower or a photoperiod plant?
Choose an autoflower when a shorter, age-driven cycle suits the season or space and you can protect the early weeks from stress. Choose a photoperiod plant when you want control over vegetative duration and time to recover before flowering. Feminized versions of either type can reduce, but not eliminate, uncertainty about sex.
Do I need expensive nutrients?
No. You need a complete, appropriate nutrient strategy for the medium and source water. A pre-fertilized mix, dry amendment program, liquid mineral program, or managed living soil can all work when used correctly. Price and bottle count do not prove completeness or suitability.
Do I need a pH meter?
It depends on the system and water. Coco, rockwool, and hydroponic nutrient solutions usually require closer pH and EC management. A buffered potting mix or large living-soil bed may be more forgiving, but unusual source water can still create problems. If a meter will guide decisions, buy one you can calibrate and store correctly rather than relying on an unverified number.
Can I use ordinary garden soil in an indoor pot?
Unknown outdoor soil can compact in a container and may introduce insects, weed seeds, pathogens, salts, heavy metals, or chemical residues. Use a clean, structured container medium with known ingredients. Native soil belongs in a separate outdoor site assessment, not automatically inside the grow room.
Does the room need to be completely dark during flowering?
Photoperiod plants need a reliable uninterrupted dark period to maintain a clear flowering signal. Inspect the closed space for direct leaks from windows, indicator lights, and frequently opened doors. Autoflowers do not depend on darkness to initiate bloom in the same way, but they still benefit from a stable schedule.
Can I leave the plant alone for a week?
That can be risky, especially in late vegetative growth, flowering, hot weather, or a small container. A tested automatic system and a lawful informed caretaker can reduce risk, but both should be proven before the trip. Do not install automation for the first time on departure day.
When should I ask for help?
Ask early when the plant continues to decline, several plants change at once, roots smell unhealthy, flowers show possible mold, pests spread, equipment becomes unsafe, or you cannot identify the cause after checking basic conditions. Useful help begins with clear photographs and records of genetics, stage, medium, pot, light, climate, water, feed, pH or EC method, recent changes, and irrigation timing.
Your First Grow Decision Checklist
Before a Seed or Clone Enters the Space
- Confirm cultivation, seed or clone source, location, plant count, storage, and disposal are lawful.
- Choose indoor, outdoor, greenhouse, balcony, or a mixed start based on the real site.
- Measure mature plant, container, light, support, and working space.
- Select starting material whose timing and growth habit fit the environment.
- Choose one root-zone and nutrient system you can explain in plain language.
- Plan safe electricity, ventilation, drainage, water access, and spill control.
- Run the empty indoor setup through a full day and night, or observe the outdoor site across the day.
- Prepare a daily inspection routine and a lawful travel backup.
- Keep children, pets, visitors, and unauthorized people away from plants and finished material.
- Start with a manageable plant number and keep dated notes.
Start Small Enough to Keep Learning
A good first grow does not begin with perfect numbers. It begins with a setup that makes cause and effect visible. When the plant uses water faster, you can connect that change to new roots, a larger canopy, warmer air, or stronger light. When growth slows, you can inspect the environment before reaching for another bottle.
Choose the environment you can maintain, the genetics that can finish there, and the root zone you can water correctly. Give the plant time to respond. If you can keep the project lawful, safe, clean, and observable, you are ready to begin learning from the plant itself.
Scientific and Official References
- Health Canada: Growing cannabis at home safely
- New York Office of Cannabis Management: Medical Home Cultivation Guide
- Utah State University Extension: Ten Frequently Asked Questions About Growing Cannabis
- Backer et al. (2019): Closing the Yield Gap for Cannabis
- Jin et al. (2019): Plant Photobiology and Implications for Cannabis Production
- Baek, Grab, and Chen (2025): Postharvest Drying and Curing