Ventilation Systems
Cannabis Grow Room Ventilation: Air Exchange, Circulation, Humidity, CO2, and Odor Control
Before You Start
Is This Guide Right for You?
This guide is for growers who need to move, exchange, filter, and condition air instead of merely buying a larger fan. It connects temperature, humidity, odor, noise, and safety as parts of one system.
If the enclosure and equipment layout are not settled yet, begin with Grow Room Setups. If air exchange, circulation, humidity, and climate control are still new concepts, start one step earlier with Indoor Growing Basics.
A grow room can have a powerful fan and still suffer from heat pockets, wet flowers, weak odor control, or stale air. The reason is simple: one fan is often expected to perform several different jobs. Air exchange replaces room air. Circulation mixes the air already inside. Cooling removes heat. Dehumidification removes water vapor. Filtration captures selected contaminants or odor compounds. These jobs support one another, but they are not interchangeable.
This guide will help you build the whole air system as one connected path. We will size the exhaust from room volume, then check it against heat, moisture, duct resistance, filter limits, intake area, and the conditions of the air entering the room. We will also decide when ventilation is enough, when a dehumidifier or air conditioner becomes necessary, and when a sealed room with supplemental CO2 is a separate engineering project rather than a simple upgrade.
Follow local cultivation, electrical, mechanical, building, tenancy, and odor-control rules. Exhausting air through a wall, roof, window, shared shaft, chimney, attic, or rental property may require permission or professional work. A safe indoor garden should protect the building and everyone who uses it, not only the crop.
Important: Plan the discharge and replacement-air route before purchasing the fan. A powerful extractor without safe makeup air can affect the building, combustion appliances, neighboring rooms, and the reliability of the garden.
Air exchange is not the same as air circulation
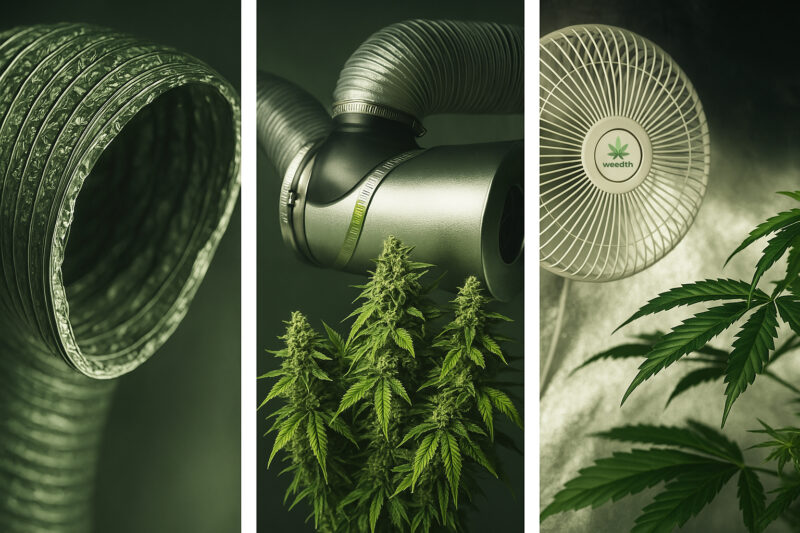
Air exchange moves air into and out of the enclosure. Air circulation moves air around the canopy without necessarily replacing it. An exhaust fan cannot guarantee movement through a dense canopy, and an oscillating fan cannot remove the moisture or heat that remains trapped in the room.
Choose the Ventilation Architecture Before You Choose the Fan
The right equipment list depends on where the replacement air comes from and where the used air goes. Start with the air path, not a fan diameter. This prevents a common and expensive mistake: buying a large extractor before discovering that the room has no safe discharge route or no practical source of replacement air.
“Do I need a sealed room if I want precise control?”
Question sent by: Cameron Price, via email.
Not necessarily. A vented tent supplied by a stable host room can be very predictable and is usually easier to diagnose. A sealed room becomes useful only when cooling, dehumidification, air mixing, CO2 control, alarms, and failure planning are designed as one closed-loop system.
Vented Tent or Cabinet
A vented tent is the most familiar home arrangement. An exhaust fan draws filtered air from the upper part of the tent, while replacement air enters through lower passive openings or a smaller controlled intake. The room surrounding the tent becomes the source of its climate. If that surrounding room is hot or humid, the tent will keep receiving hot or humid air no matter how quickly it is exchanged.
This arrangement is affordable, reversible, and easy to inspect. It is also dependent on the host room. A tent does not create cooling or dehumidification by itself; it borrows those conditions from the room around it.
“Can I exhaust the tent back into the same bedroom?”
Question sent by: Maya Ellison, via email.
You can only do that if the bedroom can remove the returned heat and moisture and still provide clean replacement air. Otherwise the tent keeps breathing the same warmer, wetter air. Treat the room as a lung room and measure it, rather than assuming its larger volume will solve the load.
Tent With a Conditioned Lung Room
A lung room is the room from which one or more tents draw their intake air. Instead of placing a small appliance inside every tent, the grower conditions the larger room and lets the tents exchange air with it. This can make sensors, dehumidifiers, air conditioners, and maintenance easier to manage, especially when several enclosures share the same space.
The lung room must still release or process the heat and moisture it receives. Exhausting a tent back into the same closed room forms a recirculating loop. That loop may work only if the host room has enough cooling, moisture removal, fresh-air provision, and odor control for the combined load.
“What exactly makes a room a lung room?”
Question sent by: Dylan Mercer, via Facebook page.
It is the shared air reservoir that supplies one or more enclosures. The name does not mean the room is automatically conditioned. It must have enough cooling, dehumidification, fresh-air provision, circulation, and odor management for every connected tent.
Vented Spare Room
A dedicated room gives more canopy and service space than a tent, but it also increases the building consequences of a mistake. The room needs a planned intake, a code-compliant discharge, protected electrical equipment, washable surfaces, water containment, and enough access to inspect ducts and filters. Random cracks under doors should not be treated as an engineered intake once airflow becomes substantial.
Master Advice: Treat every permanent opening as a building decision, not a gardening shortcut. If the route crosses a wall, roof, fire separation, rental structure, or shared service, confirm permission and use qualified help.
Sealed or Closed-Loop Room
A genuinely sealed room does not rely on continuous exhaust to control its normal temperature and humidity. Cooling, dehumidification, air mixing, filtration, and usually CO2 control are handled inside the room. A purge or emergency exhaust may still be part of the design, but it is not the main climate-control method.
This is an advanced system. The cooling and dehumidification equipment must carry the entire sensible and latent load, including lighting, fan motors, plant transpiration, wet media, irrigation, people, and air leakage. Calling a tent “sealed” because its vents are closed does not make it a safe closed-loop room.
“Does a sealed room still need circulation fans?”
Question sent by: Alyssa Grant, via email.
Yes. Sealed means the normal climate is managed without continuous outdoor-air exchange; it does not mean the air should stand still. Circulation is still needed to mix temperature, humidity, and CO2 through the canopy and to prevent isolated wet or hot pockets.
| System | How It Manages Air |
|---|---|
| Vented tent or cabinet | Exchanges enclosure air with the host room or outdoors. Simple and economical, but limited by the temperature, humidity, cleanliness, and CO2 level of the incoming air. |
| Tent with lung room | Uses a conditioned host room as a shared reservoir. Useful for several tents, but the lung room must handle their combined heat and moisture. |
| Vented grow room | Moves replacement air through a dedicated room and discharges used air safely. Offers working space but requires more building planning and makeup air. |
| Sealed room | Recirculates and conditions air internally. Supports controlled CO2 enrichment, but requires correctly sized HVAC, dehumidification, monitoring, alarms, and emergency planning. |
Advice: If you are building your first indoor garden, a vented enclosure supplied by a stable host room is usually easier to diagnose than a sealed CO2-enriched room. Spend the early budget on a predictable light, a measurable air path, safe electrical capacity, and reliable climate control.
Read the Room Before Buying Equipment
Ventilation design begins with measurements and constraints. Record the enclosure width, length, and height, but do not stop at volume. Two rooms with the same volume can have completely different loads if one contains a low-power LED and the other contains several high-intensity discharge fixtures, or if one is in a dry basement and the other is in a humid attic.
Walk the proposed air route from beginning to end. Where will intake air come from? What are its hottest, coldest, and most humid seasonal conditions? Can the exhaust reach an approved outdoor termination without crossing a combustion flue, shared duct, attic, crawlspace, or another occupied room? Will a strong extractor depressurize the house or interfere with a gas water heater, furnace, fireplace, or other natural-draft appliance? If any of these questions are uncertain, involve a qualified HVAC or building professional before cutting an opening.
“Should I size everything while the room is empty?”
Question sent by: Gavin Cole, via Facebook page.
Use the empty-room test as the first commissioning step, not the final proof. Plants add water vapor, block air paths, and change the room as the canopy develops. Test again after irrigation, during lights-out, and as flower density increases.
Record the Loads That Change the Answer
- Enclosure volume: length x width x height, including the real internal height.
- Lighting heat: actual fixture input power and whether the driver or ballast is inside the room.
- Plant and water load: canopy size, container surface, irrigation volume, runoff, standing water, and growth stage.
- Incoming air: seasonal temperature, dew point or humidity, dust, pollen, smoke, pests, and outdoor pollution.
- System resistance: carbon filter, intake screen, duct length, duct type, bends, reducers, dampers, silencers, and termination hood.
- Building interaction: makeup air, shared HVAC, combustion appliances, neighbors, tenancy rules, noise, and approved discharge locations.
- Failure consequence: what happens during a power cut, fan failure, full condensate tank, blocked filter, or unusually hot day.
Ventilation planning checklist
- Measure length, width, and usable height.
- Write down actual lighting watts and every heat-producing device.
- Identify a clean intake source and a lawful exhaust destination.
- Check whether the building contains natural-draft combustion appliances.
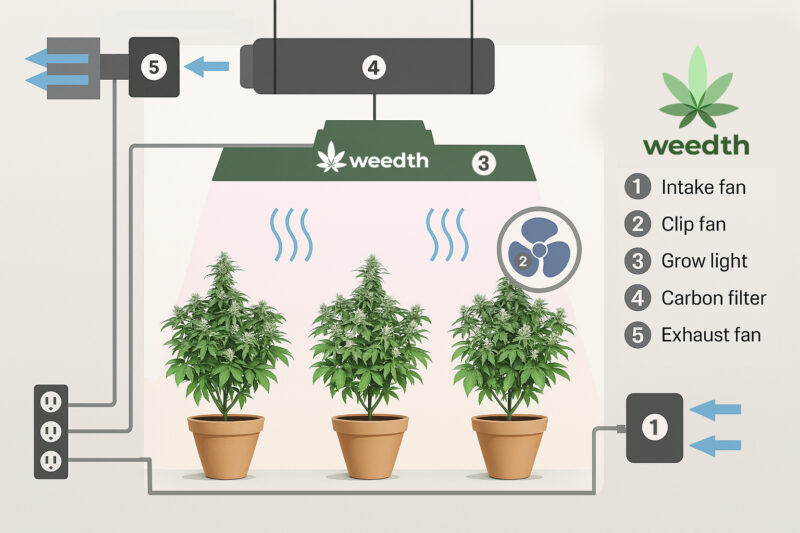
- Sketch the filter, fan, duct, bends, and termination in order.
- Decide where condensate and irrigation spills can drain safely.
- Choose locations for canopy, intake, and room-reference sensors.
- Plan how you will test the completed system before plants depend on it.
How to Size an Exhaust Fan Without Guessing
Room volume gives a useful starting airflow, not a finished fan specification. The calculation tells us how much air would move if the fan delivered its rated flow in the installed system. Filters and ducts create resistance, so the free-air number printed on a fan box may be very different from the airflow available after installation.
Static pressure
Static pressure is the resistance the fan must overcome as air passes through the intake, filter, duct, bends, damper, silencer, and outlet. A fan curve shows how delivered airflow changes as this resistance rises, usually in pascals or inches of water gauge.
Step 1: Calculate the Enclosure Volume
For imperial measurements:
Volume in cubic feet = length (ft) x width (ft) x height (ft)
For metric measurements:
Volume in cubic metres = length (m) x width (m) x height (m)
A 4 x 4 x 6.5 ft tent contains 104 cubic feet. A 1.2 x 1.2 x 2 m tent contains 2.88 cubic metres. The height matters. A table based only on floor dimensions cannot size ventilation honestly.
“Do I include the room outside the tent in the CFM calculation?”
Question sent by: Brooke Sanderson, via email.
Calculate the tent and lung room separately because they perform different jobs. The tent calculation begins the enclosure-airflow plan; the lung room calculation determines how its climate and fresh-air systems handle the combined tent exhaust, heat, and moisture.
Step 2: Choose a Starting Air-Exchange Interval
Small vented enclosures are often commissioned with a starting target of roughly one complete calculated air volume every one to three minutes. This is a practical setup range, not a biological law. The right final rate depends on heat, moisture, odor control, incoming air, crop density, and the resistance of the installed system.
“Is one air change per minute always the safest target?”
Question sent by: Ethan Blake, via email.
No. It is a commissioning reference, not a universal requirement. A room may need more delivered airflow for heat or odor, or less exchange when the supply air is poor and mechanical conditioning is doing the work. Verify the finished environment instead of chasing one turnover number.
Use the interval to establish a baseline:
Base CFM = room volume in cubic feet / desired exchange time in minutes
Base m3/h = room volume in cubic metres x desired air changes per hour
Our 104 ft3 tent would have a base requirement of about 104 CFM for a one-minute theoretical exchange, or 52 CFM for a two-minute exchange. That does not mean a 104 CFM free-air fan will deliver 104 CFM through a carbon bed, flexible duct, and two bends. The next step determines whether the fan can overcome that resistance.
Free-air rating and installed airflow
A free-air rating describes a fan operating with little or no external resistance. Installed airflow is what the fan moves through the real filter, duct, bends, intake, and outlet. Compare products at a stated static pressure on a manufacturer fan curve whenever possible. A larger free-air number alone does not prove better installed performance.
Step 3: Build the Resistance Into the Selection
Do not add a universal percentage for every bend and assume the answer is exact. A long-radius bend is not the same as a crushed flexible elbow, and filters with the same duct diameter can have different pressure drops. Use the filter's rated airflow range, the fan's performance curve, and the manufacturer's pressure-loss data for other components. Select an operating point that still provides the required flow at the estimated resistance.
If reliable curves are unavailable, leave meaningful capacity for the filter and duct, choose a compatible speed controller, then verify the finished system. A simple vane anemometer, airflow hood, or professional balancing measurement is better than trusting a percentage multiplier. For a small tent, stable temperature and humidity logs, slight inward wall movement, and an odor check at the discharge also reveal whether the installed path is performing.
“Can I just add ten percent for every bend?”
Question sent by: Sierra Vaughn, via Facebook page.
That shortcut can hide large errors. A smooth long-radius elbow, a crushed flexible bend, a reducer, and a loaded carbon filter do not create the same pressure loss. Use component data and the fan curve when available, then measure the installed result.
Step 4: Check Heat and Moisture Separately
The volume calculation may produce a rate that exchanges CO2 adequately but cannot control a high lighting load. It may also produce a rate that removes heat on a cool day but imports moisture during humid weather. Run the room under its real light load and compare intake conditions with canopy conditions. If temperature or dew point remains high even with adequate exchange, the solution may be cooler or drier supply air, an air conditioner, a dehumidifier, a lower heat load, or a different operating schedule.
“Why does the temperature look fine while humidity keeps climbing?”
Question sent by: Noah Fraser, via email.
Heat and water vapor are separate loads. Cool incoming air may remove heat but still carry too much moisture, especially during humid weather or after lights-out. Compare dew points and calculate whether ventilation is actually removing water from the room.
| Check | What It Tells You |
|---|---|
| Volume calculation | Provides a baseline exchange rate and lets you compare enclosure scales. It does not include heat, humidity, or duct resistance. |
| Fan curve at static pressure | Estimates whether the selected fan can deliver the baseline airflow through the real system. |
| Lights-on temperature test | Shows whether airflow and incoming air can carry the heat load during the warmest operating period. |
| Lights-off dew-point test | Shows whether cooling after lights-out will push surfaces toward condensation even when the RH looked acceptable earlier. |
| Filter and odor check | Confirms whether air is passing through the carbon at an appropriate rate and whether leaks or filter breakthrough remain. |
| Canopy smoke-pencil or tissue test | Reveals dead zones, short-circuit paths, and excessive direct drafts. Use a noncombustion test method, not an open flame. |
Master Tip: Buy controllable capacity rather than a barely adequate fixed speed. A correctly matched larger fan running more slowly can be quieter and leave adjustment room as the filter loads, but it must remain within the carbon filter's permitted airflow range.
Negative Pressure: Useful Feedback, Not a Competition
Negative pressure means the exhaust removes slightly more air than the active intake supplies, so replacement air enters through intended openings instead of odor escaping through random gaps. In a tent, the fabric should pull inward gently when the door is closed. In a room, pressure should be measured or balanced with the building in mind rather than judged by how hard the door is to open.
The old claim that exhaust airflow should be four times the intake airflow is not a dependable rule. A 400 CFM exhaust paired with a 100 CFM intake could create excessive restriction, collapse tent walls, reduce the exhaust fan's own delivery, increase noise, and pull unconditioned air through leaks. The correct difference is the smallest one that maintains the intended flow direction without starving the fan or depressurizing the surrounding building.
“My tent walls pull inward very hard. Is that better for odor control?”
Question sent by: Kendra Walsh, via Facebook page.
Hard collapse usually means the intake is too restricted, not that filtration is stronger. Excessive negative pressure can reduce the exhaust fan's own delivery, increase noise, and strain the enclosure. Open more clean intake area while keeping a gentle inward pull.
Passive Intake
A passive intake has no supply fan. The extractor pulls replacement air through screened openings. This is often enough for a small tent when the available intake area is generous and the duct path is short. Open more intake area if the tent walls draw in sharply, the fan tone becomes strained, or airflow improves noticeably when the door is unzipped.
“How large should a passive intake be?”
Question sent by: Levi Dawson, via email.
There is no reliable one-size ratio because screens, light traps, louvers, and duct length change resistance. Start with generous clean intake area, then watch tent tension, fan sound, temperature, and delivered airflow. If opening the door improves everything, the intake path is too restrictive.
Active Intake
An active intake becomes useful when the supply route is long, screened heavily, filtered, split between rooms, or connected to conditioned outdoor air. Its delivered airflow should remain below the exhaust system's delivered airflow if negative pressure is needed for odor containment. Use compatible controllers or a pressure controller so the two fans do not fight each other as filters load.
A powerful exhaust can affect the whole home
Large exhaust flow without planned makeup air can depressurize a building and contribute to backdrafting from natural-draft furnaces, fireplaces, boilers, or water heaters. It can also pull pollutants from garages, crawlspaces, or wall cavities. Have the installation assessed when combustion appliances or substantial exhaust rates are involved.
Choose a Fan for the Air Path, Not the Duct Diameter
Fans with the same nominal diameter can behave very differently under resistance. A lightweight axial booster may move plenty of air in free space and very little through a deep carbon bed. A mixed-flow or centrifugal inline fan generally maintains flow better as static pressure rises. The correct choice depends on the curve, noise, controller compatibility, continuous-duty rating, environmental suitability, and service access.
“Can a bathroom fan or computer fan ventilate a small grow?”
Question sent by: Parker Hughes, via email.
It may work only on a short, low-resistance path that matches its continuous-duty and environmental rating. Many small axial fans lose most of their useful flow against a deep carbon filter. Check pressure performance before treating a spinning fan as an effective extractor.
| Fan Type | Best For | Strength | Limitation | Buying Check |
|---|---|---|---|---|
| Axial or booster fan | Short, low-resistance air paths and supplemental transfer | Compact and inexpensive | Flow may fall quickly against filters and long ducts | Look for a pressure curve, not only a free-air CFM number |
| Mixed-flow inline fan | Home tents, cabinets, and moderate duct systems | Useful balance of pressure, efficiency, and noise | Performance varies widely between models | Confirm controller type and airflow at expected pressure |
| Centrifugal inline or blower | Carbon filters, long ducts, silencers, and higher resistance | Maintains airflow better under pressure | May be larger, heavier, or louder | Check mounting, service access, sound data, and curve |
| EC variable-speed fan | Systems needing quiet adjustment and automated control | Efficient speed control and useful capacity range | Higher initial cost and controller compatibility requirements | Use the approved controller and verify minimum stable speed |
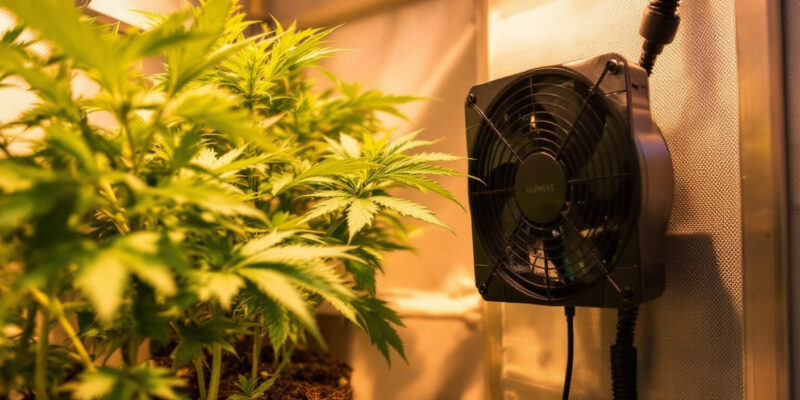
| Circulation fan | Mixing air above, through, and below the canopy | Reduces stagnant zones without exhausting conditioned air | Cannot remove room heat, moisture, or depleted CO2 | Choose guarded, securely mountable equipment rated for the environment |
Do not connect an ordinary rheostat or lamp dimmer to a fan unless the fan manufacturer specifically approves that control method. Some motors overheat, hum, stall, or lose protection when controlled incorrectly. An approved controller, transformer controller, variable-frequency drive, or EC control signal must match the motor design.
Remember: A fan should be selected at the expected operating pressure, then adjusted after the complete system is installed. Free-air CFM is a comparison number, not a promise of airflow through a filter.
Build Air Circulation Around the Canopy
Once fresh air reaches the enclosure, circulation fans distribute temperature, humidity, and CO2 while thinning the still boundary layer around leaves. The goal is a slow, connected movement through the room. Leaves may move gently, but they should not remain bent, shiver continuously, or develop dry margins on the fan-facing side.
“The leaves are moving, so why is the room still humid?”
Question sent by: Jamie Sinclair, via Facebook page.
Movement redistributes water vapor but does not remove it from a closed space. Circulation helps prevent local wet pockets, while exhaust with drier air or a dehumidifier must carry the moisture away. We need both jobs when the canopy is dense.
Use More Than One Air Level
A single fan above the canopy can leave humid air beneath leaves and between containers. In a taller or denser garden, use a gentle upper path to mix warm air, a canopy-level path that moves across rather than directly into plants, and a lower path that prevents still pockets around pots and floor trays. Fans do not need to blast every leaf. They need to create a connected room-scale pattern.
“Do I really need airflow below the canopy?”
Question sent by: Riley Thompson, via email.
A small open plant may not need a separate lower fan, but a mature canopy can isolate the container and floor zone. Measure between plants and below leaves. Add gentle lower movement when humidity, temperature, or odor differs noticeably from the upper room.
Adjust Airflow as Plants Fill the Space
An empty tent is easy to mix. A mature canopy becomes a porous wall that redirects airflow. Recheck the pattern after training, trellising, leaf growth, irrigation changes, and flower expansion. A fan that was safe for young plants may be too direct later, while a once-open lower canopy may become stagnant.
Protect Seedlings, Cuttings, and Recently Transplanted Plants
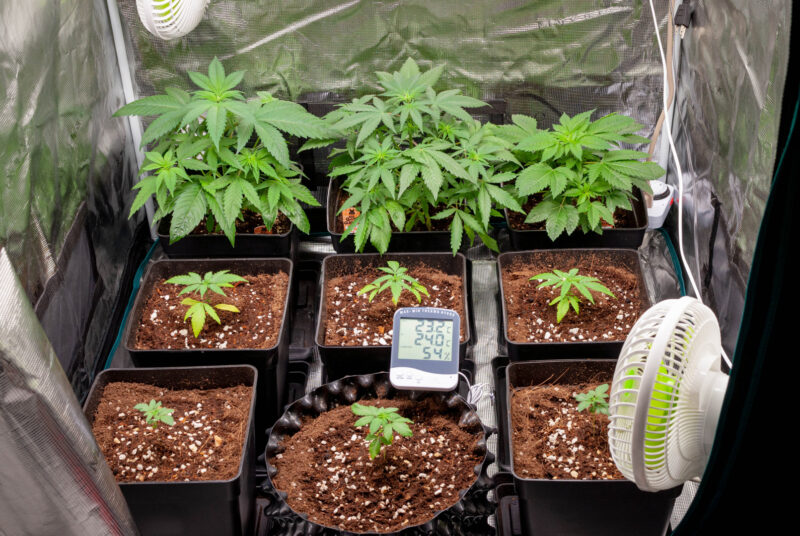
Young plants have limited root systems and can lose water faster than they replace it. Begin with indirect movement that prevents stale air without drying tender leaves or media. Watch the plant response over several hours, not only the visible fan speed. Curling edges, papery patches, persistent leaning, and a dry windward side indicate that the airflow is too concentrated or the VPD is too high.
“Why are only the leaves facing the fan curling?”
Question sent by: Morgan Lee, via Facebook page.
That pattern often points to concentrated airflow or excessive local VPD before it points to feeding. Redirect the fan so the air mixes around the plant instead of striking one side continuously, then compare the protected and exposed leaves over the next day.
Keep Guards, Mounts, and Cords Intact
Do not remove the protective shroud or blade guard from a portable fan. The guard protects people, leaves, trellis netting, cables, and the motor from contact with moving blades. Use equipment rated for continuous operation, mount it to a load-bearing point, keep the cord away from oscillating joints and wet floors, and inspect it for heat, noise, wobble, damaged insulation, or a stalled motor.
Never modify a fan to reduce motor resistance
Removing a guard does not create a safe continuous-duty fan. Replace equipment that overheats, stalls, smells hot, has damaged wiring, or is not approved for the intended environment. Keep fan blades, cords, and plugs protected from water and plant contact.
| Observation | Possible Cause | How to Confirm | Corrective Action | Prevention |
|---|---|---|---|---|
| Leaves curl or dry on one side | Direct fan exposure, high VPD, or heat at that position | Compare the windward and sheltered sides and measure canopy conditions at both points | Redirect or slow the fan, widen the air path, and correct temperature or humidity | Use indirect oscillation and retest as the canopy expands |
| Humidity remains high inside flowers | Dense canopy, weak lower circulation, or inadequate moisture removal | Measure between plants and inspect after lights-out or irrigation | Open the air path, add gentle mixing, remove standing water, and increase dehumidification when needed | Plan spacing, pruning access, and lights-off moisture control before late flower |
| Upper room is hot while roots stay cold | Thermal stratification and weak vertical mixing | Compare sensors near the ceiling, canopy, and root zone | Mix upper and lower air without directing a hard draft at plants | Use several low-speed circulation paths and log vertical differences |
| Fan is loud but air movement is weak | Blocked guard, failing motor, poor mounting, or airflow obstruction | Inspect power off, compare sound and delivery, and check the mount and blade path | Clean or replace the fan and correct the obstruction; do not remove safety guards | Inspect equipment routinely and keep trellis, leaves, and cords clear |
| One corner smells stronger | Stagnant zone, exhaust short-circuit, or local flower density | Trace airflow with tissue or a smoke pencil and compare odor along the room | Redirect circulation and separate the intake and exhaust paths | Commission the room empty and repeat the test with a full canopy |
Design the Intake, Filter, Duct, and Exhaust as One Route
Air follows the easiest path. If the intake is placed beside the exhaust, fresh air can cross the top of the room and leave before it reaches the plants. If the intake is hidden behind dense containers, the extractor may pull air through one narrow channel while the opposite side of the canopy remains still. The route should sweep through the occupied growing zone before reaching the filter and exhaust.
“Why can I smell the room near one duct joint?”
Question sent by: Renee Lambert, via email.
Untreated air may be escaping from a positive-pressure section or bypassing the carbon bed. Check airflow direction, clamps, seals, filter orientation, and room pressure. Increasing fan speed before finding the leak can make the escape worse.
Place Intake and Exhaust Apart
In most vented tents, lower intake openings and an upper exhaust work well because lighting and equipment warm the upper air. Position them on different sides when possible. Internal circulation fans then mix the room so the design does not depend on warm air rising by itself.
Keep Duct Diameter Consistent
A sudden reducer increases velocity and pressure loss and can add noise. Use the largest practical common diameter through the filter, fan, silencer, and main duct. Avoid crushed flex duct and tight kinks. Smooth rigid or semi-rigid duct generally offers less resistance and is easier to clean, while flexible duct is easier to route and isolate from vibration. The right choice depends on building code, fire rating, condensation risk, and access.
“Can I use a reducer so the duct fits through a smaller opening?”
Question sent by: Miles Carter, via email.
You can, but the restriction may raise velocity, noise, and pressure loss while reducing delivered airflow. A short smooth transition is better than an abrupt reduction. Recheck the fan operating point and never force a high-flow system through an unsafe building opening.
Treat Bends as System Effects
There is no honest rule that every bend above a particular angle removes the same percentage of airflow. Radius, diameter, surface, velocity, and the distance from the fan all matter. Use broad-radius bends, allow straight duct near the fan where the manufacturer recommends it, and avoid mounting an elbow directly against the inlet or outlet when a straighter connection is possible.
System effect
System effect is the performance loss created by the real installation around a fan, such as an elbow too close to the inlet, an abrupt transition, uneven incoming air, or a blocked discharge. It explains why good equipment can underperform in a poor layout.
Prevent Condensation Inside the Duct
Warm humid exhaust can reach a cold attic, wall, window, or outdoor section and cool below its dew point. Water may then collect inside the duct, run back toward the fan or filter, stain the building, or support microbial growth. Insulate cold runs where appropriate, slope and drain approved systems correctly, seal joints with suitable materials, and inspect low points. Do not route moist air into an attic, crawlspace, wall cavity, or another closed room.
“Why does my exhaust duct drip in winter?”
Question sent by: Tessa Morgan, via Facebook page.
Warm humid exhaust can cool below its dew point against a cold duct wall. Check low points, slope, insulation, leaks, and where condensate can travel. Do not let water drain toward the fan, electrical equipment, or concealed building cavities.
Choose a Safe Discharge Location
Discharge should comply with local rules and should not be drawn back into windows, doors, soffits, HVAC intakes, or the grow room's own intake. Do not improvise a connection to a chimney, combustion flue, bathroom duct, kitchen hood, or dryer duct. Shared ducts can move odor and moisture into other rooms, interfere with appliances, and violate fire or mechanical codes.
“Can I vent into the attic if the air is filtered?”
Question sent by: Cole Bennett, via email.
No. Carbon filtration does not remove the heat or water vapor carried by the exhaust. Releasing moist air into an attic can create condensation and building damage. Use an approved independent termination that sends the air outside without interfering with other systems.
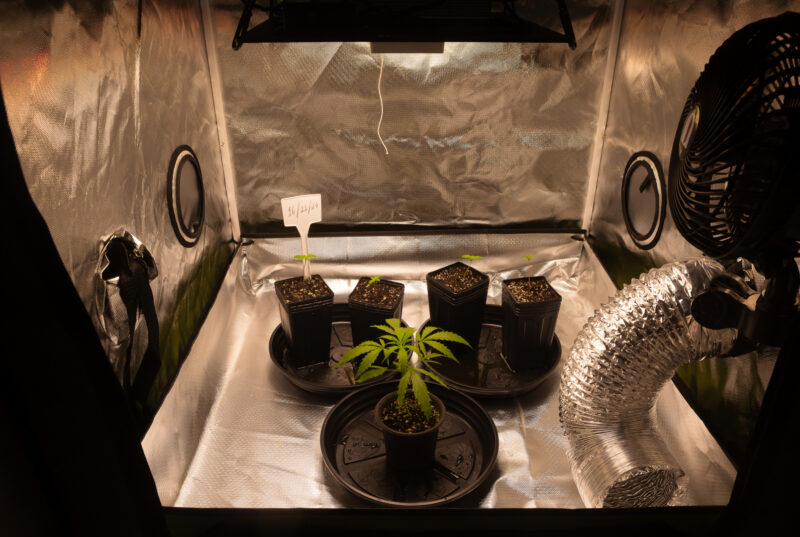
Plan the full route before hanging equipment
Confirm intake source, filter orientation, fan curve, duct diameter, service access, condensate risk, makeup air, and approved termination before drilling or cutting.
Do not use another appliance duct as a shortcut
Chimneys, dryer ducts, bathroom exhausts, shared shafts, attics, and crawlspaces are not casual grow-room outlets. Use a lawful, independent, correctly terminated path.
Control Temperature, Relative Humidity, Dew Point, and VPD Together
A thermometer and hygrometer report two parts of one physical condition. Relative humidity changes when air temperature changes, even if the amount of water vapor remains the same. This is why the RH can rise sharply after the lights turn off: the room cools, the air can hold less vapor, and surfaces may approach the dew point.
Ventilation helps only when the replacement air can accept the room's heat or moisture. Bringing 28°C air into a room that needs to be cooler cannot create cooling. Pulling humid outdoor air into a late-flower garden may increase the moisture burden even if the exhaust fan is powerful. Compare intake dew point with room dew point and watch how the values change through the light cycle.
“Why does RH jump as soon as the lights turn off?”
Question sent by: Blake Hudson, via Facebook page.
The room cools quickly, so the same water vapor produces a higher relative humidity. Plants and wet media may keep releasing moisture while the air conditioner runs less. Track the full transition and stage circulation or dehumidification before the peak arrives.
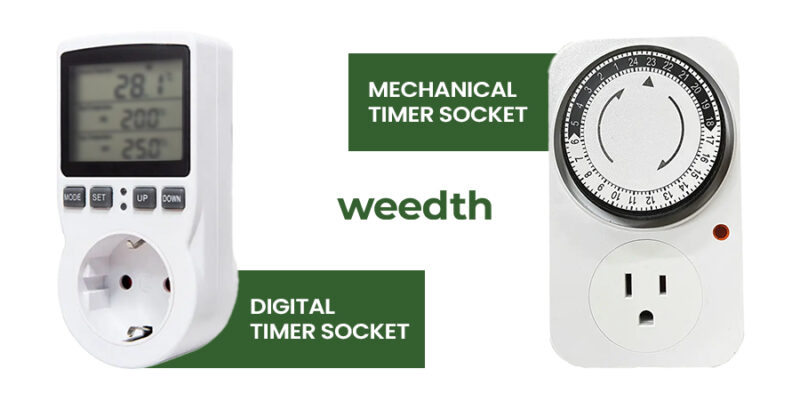
Temperature
Air temperature affects photosynthesis, respiration, transpiration, root-zone behavior, vapor pressure, and equipment load. Leaf temperature may differ from air temperature because of light radiation, airflow, and transpiration. A sensor shaded at canopy height is more useful than one resting on a light fixture, floor, wall, or exhaust outlet.
Do not force every cultivar and stage into one exact number. A practical starting band for many indoor gardens is roughly 22-28°C (72-82°F) with lights on, followed by a controlled and not excessively cold dark period. Young plants, high-light rooms, CO2-enriched rooms, and late dense flowers may need different conditions. Judge the range by leaf temperature, plant response, disease pressure, root-zone temperature, and the equipment's ability to hold the dark transition without condensation.
What to Remember: The sensor reports air temperature, but the leaf experiences radiation, transpiration, and airflow too. When the plant response and room number disagree, measure leaf temperature and inspect the sensor position before chasing a new setpoint.
Relative Humidity
Young plants often tolerate or benefit from higher humidity than dense late flowers. As canopy mass and flower density increase, moisture production and disease consequences also increase. Rather than chasing a single universal RH, use a stage-appropriate range and keep enough safety margin above the room's coldest surface temperature.
Remember: The safest humidity plan becomes narrower as flowers become denser and cold surfaces become more likely. Use the cultivar, canopy structure, disease history, and lights-off dew-point margin to refine the broad stage range.
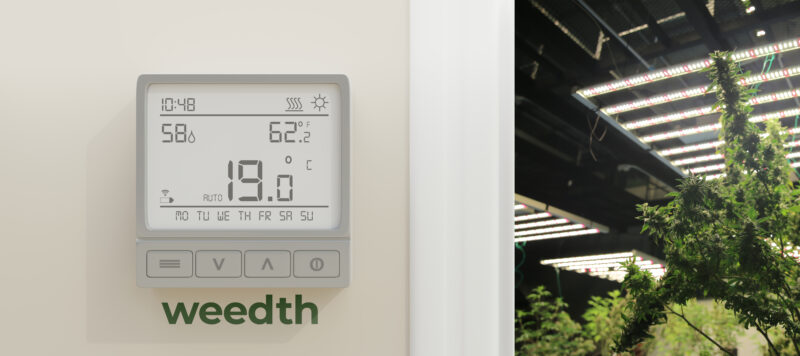
Dew Point
Dew point is the temperature at which the current air reaches saturation. If a wall, duct, pipe, leaf, or flower surface cools below that temperature, condensation can form even when the centre-of-room RH reading looked acceptable. This makes dew point especially useful in basements, winter exhaust runs, air-conditioned rooms, and the first hour after lights-out.
Vapor pressure deficit
VPD describes the difference between the vapor pressure at saturation and the vapor pressure of the surrounding air. It is a better expression of atmospheric drying demand than RH alone, but it is not a magic target. Leaf temperature, cultivar, stage, root water supply, light, airflow, and sensor accuracy all change how the plant responds.
Use VPD as a Diagnostic Context
High VPD can accelerate water loss until stomata close or roots fail to keep up. Low VPD reduces atmospheric drying demand and can leave dense tissue wet for longer, particularly when circulation is weak. A chart is useful only when its leaf-temperature assumption matches the room. If your chart assumes leaves are 2°C cooler than air while strong lighting makes them warmer, the displayed target can be misleading.
“The VPD chart says the room is perfect. Why are the plants still drooping?”
Question sent by: Kira Adams, via email.
A chart cannot see root oxygen, irrigation timing, leaf temperature, sensor error, or a direct fan jet. Confirm those factors before changing the room to match another number. VPD provides context; the plant and measured leaf environment still decide the diagnosis.
| Growth Stage | Common Light Cycle | Starting Temperature | Starting RH | Main Airflow Goal | Adjustment Logic |
|---|---|---|---|---|---|
| Rooted young plants | Varies by cultivation plan | About 22-26°C (72-79°F) | About 60-70% | Gentle indirect mixing with no dry jet | Lower humidity gradually as roots and leaf area develop; avoid using this band for unrooted cuttings without a propagation plan |
| Vegetative growth | Usually a long light period | About 22-28°C (72-82°F) | About 50-65% | Even movement through expanding canopy | Use leaf response and measured VPD; stronger light and larger plants increase water and cooling demand |
| Early flowering | Usually 12 hours light for photoperiod plants | About 21-27°C (70-81°F) | About 45-60% | Prevent humid pockets as flowers begin to stack | Watch lights-off RH and irrigation timing; cultivar density may justify a lower upper limit |
| Dense or late flowering | Usually 12 hours light for photoperiod plants | About 20-26°C (68-79°F) | About 40-55% | Mix gently through and below flowers without wind damage | Prioritize dew-point margin, disease history, and flower structure; avoid sudden cold dark periods |
These are broad commissioning ranges, not guaranteed prescriptions. A dry room at the lower edge can still create excessive VPD under hot leaves, while a cool room at the upper RH edge may approach condensation. Measure the actual plant environment and tighten the plan when dense flowers, susceptible genetics, or a history of Botrytis or powdery mildew increases risk.
What to Remember: RH is not a moisture-removal capacity. A room may show the same RH on two days while containing different amounts of water vapor because the temperatures differ. Use dew point, condensate collection, and trend logs when diagnosing the moisture load.
Know When Ventilation Cannot Fix Humidity
Plants release much of the irrigation water they absorb back into the air through transpiration. Moist media, runoff, reservoirs, humidifiers, and standing water add more. If the incoming air is already humid, increasing exhaust can replace wet room air with equally wet air and waste heating or cooling at the same time.
The moisture balance becomes clearer when we count water. Record daily irrigation input, runoff removed, reservoir change, and condensate collected by air-conditioning or dehumidification equipment. The difference is not a laboratory measurement, but it reveals the scale of water entering the room air and helps identify whether a dehumidifier is realistically sized.
“Should I buy a bigger exhaust fan or a dehumidifier?”
Question sent by: Wyatt Cooper, via email.
Compare intake and room dew points first. More installed airflow can help when the incoming air is genuinely drier and the route is restricted. When the supply air is already moisture-heavy, a dehumidifier or conditioned lung room addresses the real load.

Exhaust More Air When the Supply Air Is Better
Ventilation is an efficient moisture-control tool when the incoming air has a lower moisture content and acceptable temperature. Cool outdoor air can contain little water even when its RH is high, then become relatively dry after heating indoors. Hot tropical air may arrive with a high dew point and add moisture. Compare actual conditions instead of assuming that outside air is always dry or always fresh.
Tip: Compare intake and room dew points before increasing fan speed for humidity. The exhaust can only remove water efficiently when the replacement air can accept that moisture after it enters and warms or cools.
Use an Air Conditioner for Sensible Cooling
Air conditioners remove heat and may remove moisture when their coil operates below the air's dew point. Their latent performance varies with run time, coil condition, airflow, and control strategy. A unit that quickly satisfies the thermostat may stop before removing enough water, especially after lights-out when the heat load falls but plant and media moisture remain.
Sensible heat load
A sensible load changes the measured air temperature without directly describing water-vapor removal. Lighting, drivers, fan motors, pumps, people, and warm building surfaces all add sensible heat that the cooling system must carry.
Use a Dehumidifier for a Persistent Latent Load
A dehumidifier is designed to condense water vapor, but it also releases heat into the space. Check capacity at conditions close to your room, not only the largest marketing rating. Colder rooms reduce the performance of many refrigerant units. Plan a safe drain or reservoir alarm so a full tank cannot silently stop moisture removal.
Latent moisture load
A latent load is the water vapor that must be condensed or exhausted without being visible as a temperature change. Plant transpiration, wet media, runoff, reservoirs, and humid intake air all contribute to it.
Condition the Lung Room When the Tent Is Too Small
Small dehumidifiers inside a tent often add heat, occupy canopy space, and short-cycle because their sensor sits in their own dry discharge. Conditioning the surrounding lung room can provide a larger air reservoir and easier drainage. This works only when the tent exchanges enough air with that room and the appliance is sized for both spaces and the plant moisture load.
“Is it better to put the dehumidifier inside the tent?”
Question sent by: Hailey Chen, via Facebook page.
Usually the lung room offers better service space and keeps the appliance's heat away from a crowded canopy. A unit inside the tent can disrupt airflow and occupy valuable floor area. Whichever location you choose, verify that dry air reaches the tent and condensate leaves safely.
Manage the Lights-Off Transition
Do not wait for a high-RH alarm after the room has cooled. Stage the system so circulation continues, dehumidification remains available, and temperature falls gradually. Irrigating heavily just before lights-out can add a large moisture pulse when the room has the least sensible heat to carry it. Irrigation timing should still follow root-zone need, but the environmental consequence belongs in the plan.
Size moisture control from a water budget
Track irrigation, runoff, reservoir change, and collected condensate across several representative days, then include seasonal and late-flower margin.
Do not assume a stronger exhaust always lowers RH
If replacement air has an equal or higher dew point, more exchange may import moisture while increasing cooling or heating cost.
Place Sensors Where the Plants Experience the Air
A single sensor on the wall can hide the differences that matter. Use at least one shaded sensor at canopy height and a second reference sensor in the lung room or intake air. Larger rooms benefit from additional points above the lights, below the canopy, near the exhaust, and in known cold or stagnant areas.
“Two hygrometers disagree. Which one should I trust?”
Question sent by: Felix Braun, via email.
Do not automatically average them. Place the sensors together in a stable location, allow them to settle, and compare them with a reliable reference or salt-check method appropriate to the instrument. Record any repeatable offset, then return each probe to its intended position.
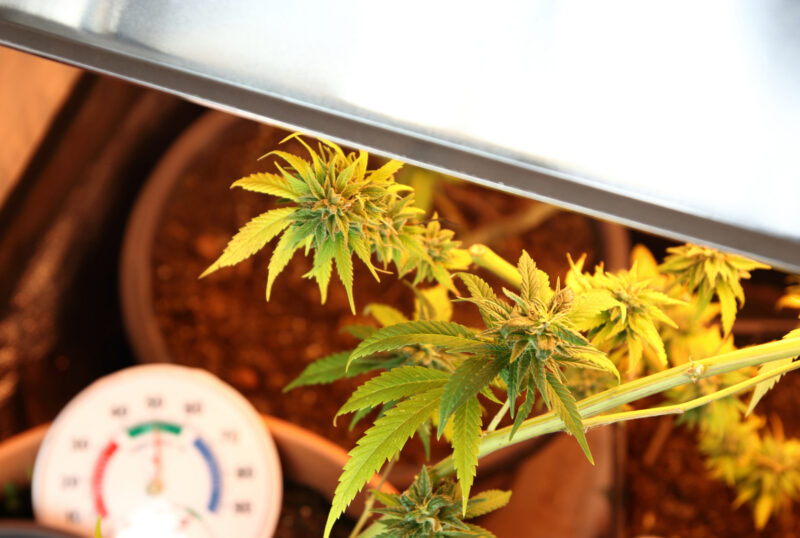
Avoid False Readings
Keep probes out of direct light, humidifier mist, dehumidifier discharge, air-conditioner supply, exhaust suction, and a fan's concentrated jet. Do not rest them on a cold wall or wet media. If two sensors disagree, swap their positions. The error may follow the sensor, revealing calibration drift, or remain with the location, revealing a real microclimate.
Pro Tip: When two sensors disagree, place them side by side in a stable location before replacing either one. If the difference follows the device, investigate calibration; if it remains with the location, you have probably found a real microclimate.
Log the Transition, Not Only the Average
Minimum and maximum values are useful, but time-stamped data reveals when the change begins. Log the hour before lights-out, the first two dark hours, the coldest part of the night, lights-on warm-up, irrigation, and the hottest point of the cycle. A ten-minute spike and a six-hour plateau require different corrections.
Controller differential and hysteresis
The differential is the gap between the point where equipment turns on and the point where it turns off. Proper hysteresis prevents rapid cycling when a sensor moves back and forth around one threshold.
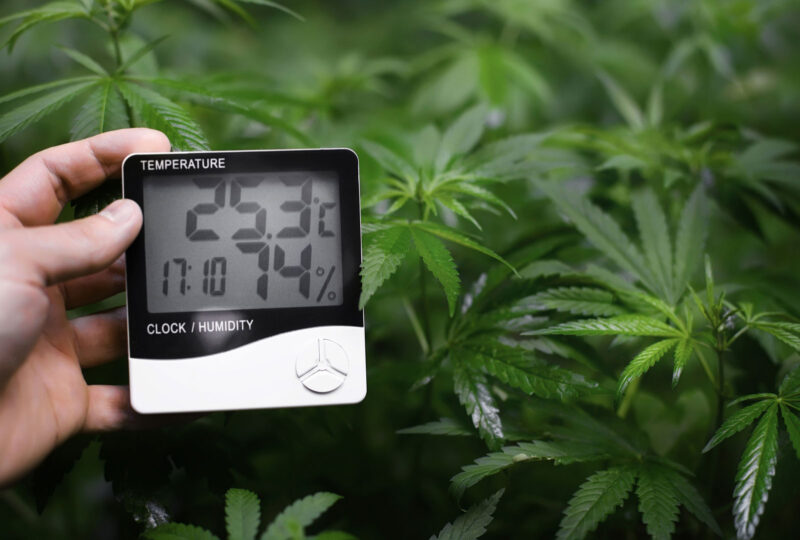
Use a Control Ladder
Controls should respond in a planned order rather than switching every appliance at once. One useful arrangement is minimum background circulation, then variable exhaust as temperature or humidity rises, followed by dehumidification or cooling when supply air cannot hold the target, and finally an alarm when the environment remains outside limits. Add delays and hysteresis approved by the controller manufacturer to prevent rapid cycling.
“Why does my exhaust switch on and off every minute?”
Question sent by: Lena Vogt, via Facebook page.
The controller may have too narrow a differential, a probe in a turbulent location, or two devices fighting each other. Use sensible hysteresis and minimum run times supported by the equipment. A staged response is usually quieter and more stable than constant full-speed cycling.
Remote alerts are a useful upgrade, not a substitute for safe equipment. The system should fail to a protective state if Wi-Fi, a cloud service, or a smart plug stops responding. High-temperature shutdown, condensate overflow protection, and CO2 alarms should not depend solely on a phone notification.
Pro Tip: Keep a simple climate log beside the garden. Record equipment changes, filter cleaning, irrigation timing, canopy work, and unusual weather. When a trend shifts, the first useful question is often “What changed?” rather than “Which product should I buy?”
CO2 Enrichment Belongs to a Controlled System
Fresh-air ventilation normally supplies carbon dioxide close to the surrounding ambient concentration. Supplemental CO2 can increase photosynthetic rate under suitable light, temperature, nutrition, water, and canopy conditions, but it does not correct weak lighting, root stress, poor irrigation, disease, or an unstable room. In a continuously vented tent, injected gas may leave through the exhaust before the plants use much of it.
Research has shown that cannabis photosynthesis responds to CO2, light, and temperature together. That does not make one study concentration a universal room target. Cultivar, leaf age, PPFD, leaf temperature, nutrient supply, acclimation, and economic return all matter. Treat enrichment as an advanced optimization after the base environment is stable and measured.
“Will a CO2 bag help in a tent that exhausts continuously?”
Question sent by: Tobias Kern, via email.
Most of the added gas will leave with the exhaust before a meaningful and stable concentration develops. Improve light, temperature, humidity, irrigation, and airflow first. Serious enrichment belongs in a measured system with appropriate safety controls and enough cooling and dehumidification.
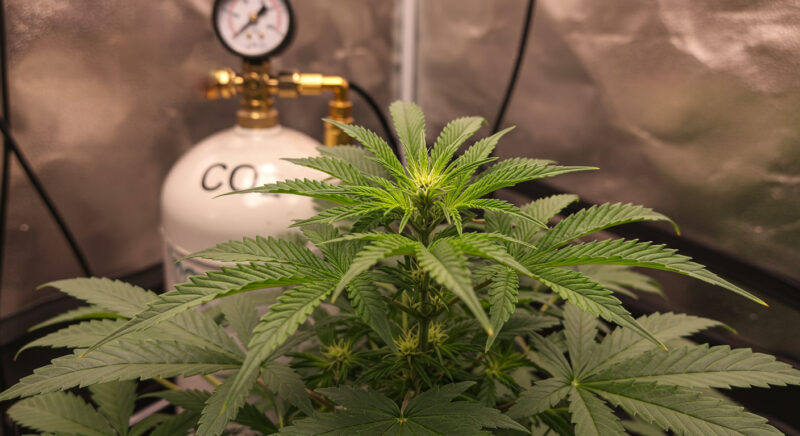
When Supplemental CO2 Is Unlikely to Pay
- The exhaust must run continuously to control heat or humidity.
- Light intensity is modest and does not support a higher photosynthetic demand.
- The room cannot maintain stable temperature, water supply, or root-zone health.
- CO2 concentration cannot be measured with a suitable sensor.
- The space shares air freely with bedrooms, living rooms, offices, or animal areas.
- Cooling and dehumidification cannot carry the sealed-room load.
- The budget would produce a larger benefit by correcting lighting coverage, airflow, drainage, or environmental reliability.
Compressed CO2 Emitter Systems
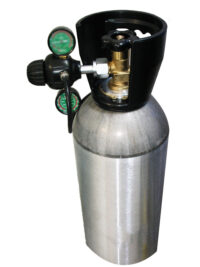
A compressed-gas arrangement uses a secured cylinder, regulator, solenoid, distribution line, and controller to meter CO2. It adds little room heat or water vapor, but a leak can create a serious asphyxiation hazard. The cylinder must be secured upright against falling, protected from heat and impact, transported and stored according to local rules, and serviced by qualified suppliers. Use approved fittings and leak-checking procedures; never improvise pressure components.
Master Advice: CO2 equipment must be designed around human safety first. Secure the cylinder, use approved pressure components, monitor with a suitable sensor, provide alarms and interlocks, and never enter an alarmed room to protect plants.
CO2 Generators and Combustion
Fuel-burning generators create CO2 by combustion, but they also add heat and water vapor and can produce dangerous carbon monoxide, nitrogen dioxide, or unburned fuel if installation or combustion is imperfect. They consume oxygen and introduce ignition and fuel-storage risks. For a home grow, a combustion generator is not a casual money-saving alternative to a cylinder.
Commercial or permitted facilities considering combustion equipment need professional design, listed equipment, combustion and gas detection, fire protection, ventilation, interlocks, fuel handling, and compliance with local codes. Do not build a DIY burner or use an unvented household heater as a CO2 source.
Plant targets are not human exposure limits
CO2 is colorless and odorless. NIOSH lists 5,000 ppm as an eight-hour recommended exposure limit, 30,000 ppm as a short-term limit, and 40,000 ppm as immediately dangerous to life or health. A cultivation system should use calibrated monitoring, alarms, controlled access, emergency ventilation, and local professional requirements long before hazardous concentrations are reached.
Measure, Mix, and Interlock
Use an appropriate NDIR controller and place the sensing point where it represents the occupied canopy, away from the injection stream and direct fan discharge. CO2 has a higher molecular weight than air, and cold gas released from a cylinder can initially descend, but a working room is mixed by heat, convection, fans, and air leakage. Do not assume the floor receives all of the gas. Verify distribution at several positions during commissioning.
Inject during the light period when photosynthesis can use it, and interlock dosing with exhaust, doors, alarms, and emergency states. Do not defeat minimum life-safety ventilation or enter an alarmed room to save a crop. CO2 bags, fermentation bottles, and similar passive products may be difficult to control or verify and are easily overwhelmed by normal exhaust flow.
Master Advice: Before buying CO2 equipment, ask whether the same budget would produce more value through better light distribution, a reliable dehumidifier, a safer electrical circuit, or improved climate logging. Enrichment multiplies a controlled system; it does not replace one.
Control Odor at the Air Path, Not With Perfume
Cannabis odor changes with cultivar, canopy size, temperature, humidity, stage, and handling. It often becomes strongest during flowering, but young plants, drying material, waste, runoff, and open doors can also contribute. A lawful grow still has to respect tenancy agreements, shared spaces, neighbors, and local nuisance rules.
The most dependable home strategy is source containment: keep the enclosure under slight negative pressure, route all normal exhaust through a correctly sized activated-carbon filter, seal bypass leaks, and maintain the filter and prefilter. Fragrance products cannot substitute for containment because they add another odor without reliably capturing the original volatile compounds.
How Activated Carbon Filters Work
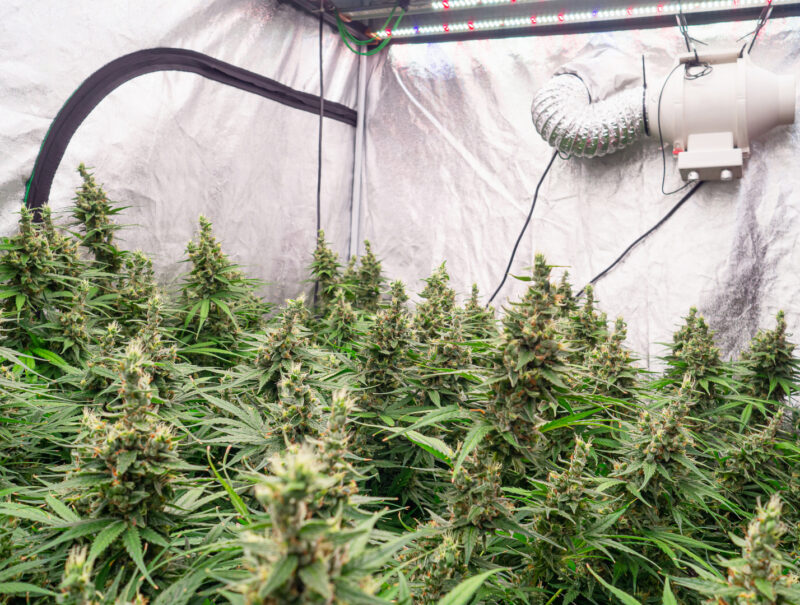
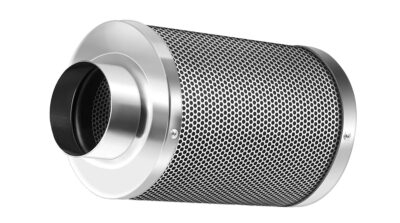
Activated carbon has a highly porous surface that adsorbs many gas-phase compounds. Adsorption holds molecules at the surface; it is not the same as a particulate screen. The amount and type of carbon, bed depth, contact time, air temperature, humidity, compound mixture, and airflow all affect capacity and breakthrough.
Match the Fan and Filter
Check the filter's recommended airflow range and pressure drop, then confirm that the fan can deliver the required system airflow without exceeding the filter's limit. Air moving too quickly can reduce contact time and odor capture. Air moving too slowly may fail to control room conditions. Duct diameter compatibility is useful, but it does not prove performance compatibility.
“Why can I smell the exhaust even though the carbon filter is new?”
Question sent by: Clara Weiss, via email.
A new filter cannot correct reversed airflow, a loose flange, an untreated leak, excessive air speed, or positive room pressure. Trace the path from room to outlet and rule out bypasses first. Only then consider defective or unsuitable carbon.
Pull-Through and Push-Through Layouts
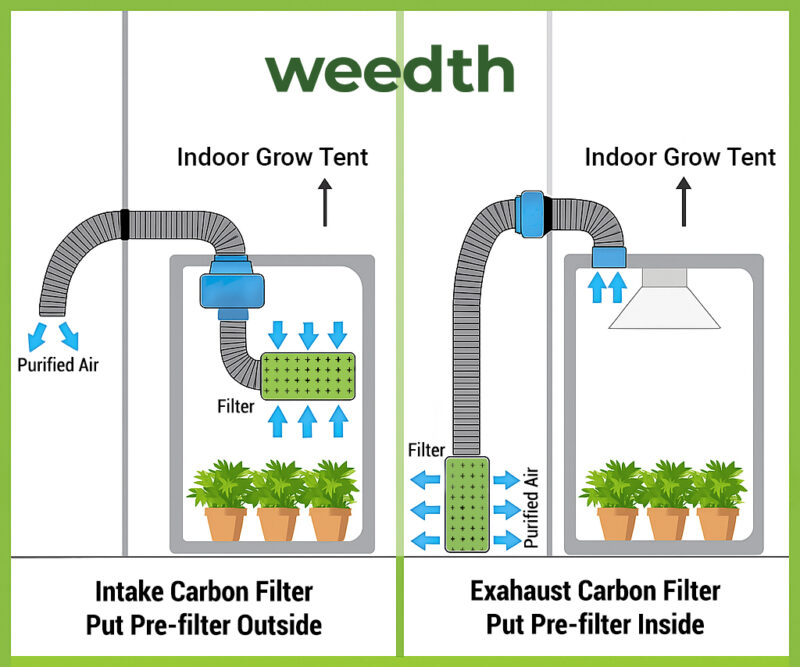
Placing the filter before the fan lets the fan pull cleaned air through the carbon and keeps much of the downstream duct under positive pressure with filtered air. It is common and protects the fan from some dust. Placing the filter after the fan can move heavy equipment outside a small tent, but every joint between enclosure and filter must be sealed because that section is under positive pressure with untreated air. Not every filter is approved for both directions, so follow its airflow marking and installation instructions.
Use and Maintain the Prefilter
A fabric prefilter captures larger dust and debris before it reaches the carbon bed. Inspect it rather than replacing it on an invented sixty-day schedule. Clean or replace it as the manufacturer allows, and shorten the interval in dusty rooms. A blocked sleeve raises system resistance and can mimic an undersized fan.
“How often should I wash or replace the prefilter?”
Question sent by: Sophie van Dijk, via Facebook page.
Inspect it by condition and follow the filter manufacturer's instructions rather than using one universal calendar. Dust level, pets, construction, smoke, and intake location change the loading rate. A rising fan tone or falling airflow can be an early clue that service is due.
Humidity Changes Carbon Performance
Water vapor competes with many volatile compounds for adsorption sites, particularly at high humidity, but there is no universal 55% cutoff that applies to every carbon, odor mixture, temperature, and airflow. Keep the room within a plant-appropriate humidity range, prevent liquid water from reaching the filter, and follow the specific filter's environmental limits. If odor control weakens only during humid periods, test humidity, airflow, and bypass leaks before assuming the carbon is exhausted.
Advice: When odor appears during humid weather, check room pressure, bypass leaks, prefilter loading, airflow, and humidity together. Replacing the carbon immediately may hide the actual fault and leave the odor path unchanged.
Recognize Breakthrough
A filter is approaching the end of useful service when characteristic odor appears at the treated outlet despite correct negative pressure, sealed joints, clean prefilter, and airflow within rating. Life may be months or much longer depending on carbon mass, odor load, humidity, temperature, and run time. A calendar estimate is useful for planning a spare, but the system should be verified by performance.
| Odor Symptom | Check Before Replacing the Filter |
|---|---|
| Odor near the tent door | Confirm the tent remains slightly negative, door seals close, cable ports are controlled, and the exhaust continues during odor-producing periods. |
| Odor along duct joints | Check whether untreated air is under positive pressure in that duct section and reseal approved joints or change the layout. |
| Odor at the exhaust outlet | Verify fan speed against filter rating, prefilter cleanliness, humidity, filter orientation, carbon age, and genuine breakthrough. |
| Odor only when the door opens | The filter cannot capture air that bypasses the enclosure. Reduce open-door time, keep internal circulation controlled, and manage the surrounding room. |
| Odor returns after irrigation or high humidity | Check whether humidity has reduced adsorption performance, whether airflow changed, and whether wet organic material or runoff is adding a second odor source. |
Masking and Neutralizing Products
Odor gels and sprays may make a hallway smell different for a short period, but claims that they alter air “at an atomic level” should not guide a ventilation plan. Strong fragrances can enter the grow space, settle on surfaces, irritate occupants, and interfere with evaluating a carbon filter. Keep them away from plants, flowers, drying material, intake air, and product-handling areas.
“Can I place an odor gel inside the flowering tent?”
Question sent by: Bram de Vries, via email.
Keep strongly scented masking products away from flowers and intake air that reaches them. They add another odor rather than proving containment, and volatile ingredients may contaminate the crop environment. Control odor at the carbon-filtered air path first.

If a masking product is used at all, place it outside the cultivated air path and treat it as a minor building-comfort measure, not the primary control. Never mix household fragrance products into humidifiers or spray them onto plants.
HEPA, Carbon, Ozone, and Ionizers Do Different Jobs
A HEPA filter captures particles such as dust and some spores but does not provide a deep carbon bed for gas-phase odor. Carbon adsorbs many volatile compounds but does not replace particulate filtration or dehumidification. Ozone generators and some ionizing devices can create respiratory hazards and react with indoor compounds. They should not be used in occupied home grow spaces or as a shortcut around containment and carbon filtration.
Important: Never judge odor control from inside the grow room after spending time there. Olfactory fatigue can make a persistent smell seem weaker. Check the treated outlet and surrounding building from fresh air, or ask a trusted adult who is not exposed to the room and who is allowed to know about the lawful garden.
Compare Practical Filter and Fan Layouts
There is no single arrangement that fits every tent. Equipment weight, ceiling height, service access, filter direction, discharge route, and noise all influence the layout. What must remain constant is a sealed path that keeps untreated air from bypassing the carbon and leaves enough access to inspect every joint.
| Layout | Where It Works and What to Watch |
|---|---|
| Filter - fan - duct, all inside | Short and easy to verify, with untreated tent air under suction before the filter. It uses upper tent space and requires secure support for both heavy components. |
| Filter inside, fan outside | Frees some tent space and can reduce heat or service difficulty. Seal the connection through the tent port and support the outside fan so it cannot pull on the fabric or filter. |
| Fan inside, filter outside | Useful when the filter is too heavy or large to hang. The duct between fan and filter carries untreated air under positive pressure, so every joint must be sealed and the filter must be approved for push-through use. |
| Filter and fan outside | Maximizes enclosure space but creates the longest untreated suction path and more potential leak points before the filter. Use rigid support and inspect all connections. |
| Recirculating carbon scrubber | Polishes odor inside a sealed or large room without exhausting conditioned air. It does not supply fresh CO2, remove moisture, or create containment by itself. |
| Shared lung-room filtration | Can manage several enclosures and door-opening odor, but must be sized for the full room and cannot replace source filtration when individual tents leak. |
Reduce Noise Without Sacrificing Airflow or Safety
Air noise and motor noise require different solutions. A vibrating fan may need an isolated mount. A high-pitched rush may need a larger duct, lower air velocity, smoother transitions, fewer restrictions, or an acoustic silencer. Wrapping a motor in improvised insulation can trap heat and block cooling, so follow its clearance and mounting instructions.
Choose a Larger, Controllable Air Path
Moving the same volume through a larger duct usually reduces velocity and turbulence. A larger EC or compatible variable-speed fan operating below maximum can be quieter than a small fan running flat out, provided the operating point stays within the filter's permitted range. Compare sound data at a stated speed and pressure when the manufacturer provides it.
Separate Structure-Borne Vibration
Use rated flexible connectors, rubber isolation mounts, straps, or grommets where appropriate. Do not let the fan rest against a hollow wall, lightweight cabinet, or tent pole that amplifies vibration. Support duct weight independently so it does not twist the fan housing.
Remove Turbulence at the Source
Straighten crushed flexible duct, replace abrupt reducers, open adequate intake area, clean the prefilter, and move tight elbows away from the fan. A silencer cannot recover airflow lost to a blocked intake. Fix the route before adding another accessory.
Tip: Listen for changes, not only absolute loudness. A rising pitch, rattle, periodic scraping, or new hum can reveal a loaded prefilter, loose clamp, damaged bearing, controller mismatch, or fan blade contact before airflow fails.
Plan the Equipment Budget in the Right Order
Ventilation equipment becomes much easier to choose when every purchase solves a clearly defined problem. A small legal grow does not need every controller, silencer, CO2 accessory, or smart sensor on day one. The budget should first create a safe and measurable air path, then improve convenience and resilience.
| Priority | Equipment and Decision |
|---|---|
| Required foundation | A fan capable of the installed pressure, adequate intake area, guarded circulation, safe mounting, compatible ducting, clamps or approved seals, and at least one trustworthy canopy temperature/RH sensor. |
| Strongly recommended | A compatible speed controller, second reference sensor, carbon filter where odor control is needed, washable or replaceable prefilter, safe condensate route, and alarms for damaging temperature or humidity. |
| Useful upgrades | Data logging, EC fan, acoustic silencer, insulated duct, differential-pressure or airflow checks, automated dehumidification, and remote alerts that fail safely. |
| Site-dependent | Active intake, makeup-air equipment, air conditioner, dehumidifier, heater, humidifier, particulate filtration, backdraft damper, and professional duct termination. |
| Advanced system | Dedicated HVACD, multi-zone controls, redundancy, calibrated CO2 controller, secured cylinder system, emergency purge, safety alarms, and professional commissioning. |
Calculate Operating Cost, Not Only Purchase Price
A low-cost fan that draws more power, runs loudly at full speed, or needs early replacement may cost more over several cycles. Use the equipment's measured or rated watts:
Monthly energy use in kWh = watts / 1,000 x operating hours per day x days per month
Multiply that value by your local electricity rate. Add carbon replacement, prefilters, dehumidifier energy, cooling needed to remove dehumidifier heat, condensate pumping, and service time. Prices and electricity rates vary widely, so the reader's own calculation is more useful than a universal cost promise.
Install a Small Tent Ventilation System Step by Step
This sequence works as a starting framework for a legal home tent or cabinet. It does not replace electrical, mechanical, fire, or building requirements. Stop and involve a qualified professional if the route crosses a wall, roof, shared system, combustion area, or permanent building service.
Step 1: Map the Air Path
Mark the lower intake, the route across the plant area, the upper filter position, fan, duct, and final discharge. Confirm that the door opens, lights can be raised, plants can be removed, and the filter can be serviced without dismantling the whole enclosure.
Step 2: Calculate Volume and a Starting Exchange Rate
Calculate the real internal volume and choose a starting exchange interval. Record this baseline instead of treating it as the final fan size.
Step 3: Add the Real Components
List the filter model and airflow range, duct length and diameter, every bend, reducer, damper, screen, silencer, and outlet. Use their pressure data and the fan curve to select an operating point with useful adjustment margin.
Step 4: Secure the Heavy Equipment
Use the enclosure's rated support points and independent safety support where appropriate. Do not hang a heavy carbon filter from a light bar, cable, plastic clip, or unverified ceiling anchor. Keep equipment clear of irrigation and allow the fan to cool as designed.
Step 5: Assemble and Seal the Route
Follow the filter's airflow arrow, keep duct as straight as practical, and use approved clamps, foil tape, gaskets, or fittings. Avoid screws that protrude dangerously into a flexible duct or create an injury point. Confirm that no untreated positive-pressure section leaks.
Step 6: Open Enough Intake Area
Begin with generous lower passive intake. Use clean, insect-screened, light-controlled openings that do not choke the exhaust. Screens add resistance and require cleaning. A light trap should block direct light without becoming a maze that stops air.
Step 7: Add Guarded Circulation
Place fans to create a broad loop above, through, and below the canopy. Keep them securely mounted and indirect. Check that oscillation cannot pull on the power cord or strike plants, trellis, duct, or lighting.
Step 8: Place and Compare Sensors
Put a shaded probe at canopy height and a reference probe in the lung room or intake path. Add a low or cold-surface probe when condensation is possible. Confirm that the readings are plausible before connecting automatic controls.
Step 9: Test Empty Under Full Heat
Run all lighting and normal equipment through at least one complete light and dark transition. Log temperature, RH, dew point, fan speed, noise, and negative pressure. Check every joint and the discharge path.
Step 10: Repeat With a Realistic Moisture Load
An empty tent underestimates transpiration. After plants enter, repeat the test during representative irrigation and again as canopy mass increases. Do not wait until late flower to discover that the dehumidifier or intake air cannot carry the load.
Step 11: Set Alarms and Failure Responses
Choose alert points that leave time to act before plant damage, condensation, or unsafe conditions. Test power-loss behavior, high-temperature shutdown, condensate overflow, and the state of controlled outlets after reconnection. Never assume a smart device returns to the correct mode after an outage.
Step 12: Record the Commissioned Settings
Write down fan speed, filter installation date, sensor offsets, normal day and night ranges, condensate amount, alarm limits, and maintenance checks. This creates a baseline for troubleshooting instead of relying on memory.
Field Advice: Commissioning is finished only when the system has survived the transitions that create problems: lights on, lights off, irrigation, a closed door, a full canopy, and the warmest or most humid supply-air conditions you reasonably expect.
Maintain the System Before Performance Falls
Weekly Checks
- Review day and night temperature, RH, and dew-point trends.
- Look for standing water, wet duct, condensation, dust, loose clamps, and unusual odor.
- Listen for changes in fan sound and verify that every circulation fan moves freely.
- Check that intake screens and light traps remain open and clean.
- Confirm the condensate drain or reservoir is clear and protected from overflow.
Monthly or Cycle-Based Checks
- Inspect and service the prefilter according to its condition and manufacturer instructions.
- Compare sensors and investigate drift rather than averaging two bad readings.
- Inspect hangers, safety supports, duct insulation, seals, cords, plugs, and controllers.
- Test alarms and backup responses.
- Record whether the same fan setting still produces the same temperature, pressure, and odor performance.
Between Crops
Power down and clean accessible fan guards, blades, ducts, screens, trays, and surfaces with methods approved for the equipment. Do not wet motors, carbon beds, or electrical controls. Inspect the entire route while the canopy is absent, then repeat the empty-room heat test after reassembly.
Filter breakthrough
Breakthrough is the point at which a contaminant begins to pass through an adsorbent bed at a meaningful concentration. It depends on carbon capacity, compound mixture, humidity, temperature, airflow, and run time. Odor at the outlet after leaks and airflow are ruled out is a practical sign that the filter may be reaching this point.
Troubleshoot the System in the Right Order
| Problem | Possible Cause | How to Confirm | Corrective Action | Prevention |
|---|---|---|---|---|
| Temperature stays high | Hot intake air, insufficient installed airflow, excessive heat load, or cooling shortfall | Compare intake and canopy temperature, fan curve, duct restriction, and actual equipment watts | Correct restrictions, improve supply-air condition, reduce avoidable heat, or add correctly sized cooling | Heat-test the finished system before plants and again in the warm season |
| RH rises after lights-out | Cooling air, continued moisture release, poor dehumidification, or cold surfaces | Log temperature, RH, and dew point through the transition and measure condensate removal | Maintain circulation, stage dehumidification, moderate the temperature drop, and remove standing water | Design for the dark-period latent load, not only the lights-on heat load |
| Tent collapses inward | Restricted or undersized intake and excessive pressure difference | Open another intake and observe whether fan sound, wall tension, and airflow improve | Increase clean intake area or balance the active intake while retaining slight negative pressure | Size intake as part of the system and keep screens clean |
| Fan moves less air over time | Dirty prefilter, loaded carbon, blocked screen, crushed duct, loose impeller, or motor decline | Inspect each component powered off and compare pressure or airflow with the baseline | Clean or replace the affected component and repair the route; do not compensate indefinitely with speed | Keep a commissioning baseline and maintenance log |
| Odor leaks despite a new filter | Bypass leak, wrong airflow direction, excessive speed, positive room pressure, or open-door escape | Trace the air path and check each joint, pressure direction, and outlet odor | Seal bypasses, correct orientation and speed, restore negative pressure, and manage door opening | Leak-test the installed route before flowering |
| Room is humid although exhaust is strong | Incoming air has a high dew point or plant moisture exceeds ventilation capacity | Compare intake and room dew point and estimate the daily water balance | Condition the intake, dehumidify, reduce standing evaporation, or redesign the air architecture | Use seasonal supply-air data and late-canopy moisture estimates |
| Fan hums or runs hot at low speed | Controller and motor are incompatible or the fan is below stable operating speed | Check the approved control method and compare behavior at rated settings | Stop using the mismatched controller and obtain compatible equipment | Buy the fan and controller as one verified control system |
| Condensation forms in the duct | Warm humid air contacts a cold uninsulated section below dew point | Inspect low points and compare exhaust dew point with duct surface temperature | Correct slope and drainage, insulate approved sections, seal leaks, and change the route if needed | Plan cold-season duct temperatures before installation |
Practical Starting Examples
Micro Cabinet or Space Bucket
The air volume is tiny, but heat and wind risk are concentrated. Use a guarded low-voltage or listed fan arrangement with a real intake path, protected wiring, and no exposed blades. A computer-style fan can move free air, but a deep carbon filter may overwhelm it. If odor control is necessary, select a fan-filter pair designed to work together rather than stacking improvised carbon pads until airflow disappears.
Small 2 x 2 or 3 x 3 ft Tent
A mixed-flow inline exhaust, compatible speed control, generous passive intake, and one or two gentle circulation paths often form the foundation. Condition the host room if the tent is too small for a dehumidifier. The practical test is not the fan diameter; it is stable canopy conditions, slight inward pressure, acceptable noise, and odor-free treated exhaust through the full cycle.
“Should the intake fan have the same CFM as the exhaust?”
Question sent by: Avery McCall, via X.
Not when you need negative pressure for odor containment. Compare delivered airflow after both sides are installed, not the box ratings. The supply should support the extractor without overpowering it, and the balance should remain stable as filters collect dust.
Medium 4 x 4 or 5 x 5 ft Tent
The larger canopy produces more water and blocks more airflow. Leave service room above the light for the filter and duct, mix air below the canopy, and plan dark-period dehumidification before flowers become dense. A larger EC fan run below maximum can provide useful adjustment range, but its curve and the filter's permitted flow remain the deciding data.
Dedicated Spare Room
Separate room air circulation from exhaust exchange and building HVAC. Provide makeup air, water containment, safe electrical distribution, an approved outdoor discharge, and enough sensors to reveal vertical and horizontal differences. If the room uses a carbon scrubber in recirculation, remember that it controls odor but does not remove heat, moisture, or depleted CO2.
Sealed High-Light Room
Engage a qualified designer for sensible and latent load calculations, electrical service, CO2 safety, redundancy, controls, and code compliance. Size dehumidification for lights-off conditions as well as lights-on. Include independent alarms, emergency purge, secured cylinders if used, and a failure plan that protects people before plants.
Ventilation Questions Growers Ask Most Often
Should the exhaust fan run all day and night?
Many vented tents need some continuous exchange or a controlled minimum rate to maintain fresh air, odor containment, and stable conditions. The correct schedule depends on temperature, humidity, odor stage, CO2 strategy, and the host room. Do not switch the exhaust off for long periods simply because the lights are off; that is often when RH rises fastest. Variable control is usually more stable than repeated full-speed on and off cycling.
Do I need an intake fan?
Not always. A small tent with generous passive openings and a short intake path may be supplied by the exhaust fan alone. Add an active intake when resistance, distance, filtration, or multiple rooms prevent adequate makeup air. Keep its delivered flow below exhaust delivery when negative pressure is required.
How much negative pressure should a tent have?
Enough to pull the fabric inward gently and keep air entering through intended openings, but not enough to collapse the walls or strain the fan. There is no universal exhaust-to-intake ratio. Open intake area or balance the supply if the tent is sharply deformed.
Can I exhaust back into the same room?
Only if that room can remove the returned heat and moisture, provide sufficient fresh air, and control odor. Otherwise the tent repeatedly draws in the same worsening air. A conditioned lung room can work, but it is an active climate system rather than free ventilation.
Should the carbon filter be inside or outside the tent?
Either may work when the filter is supported, installed in its approved direction, matched to the fan, and all untreated positive-pressure joints are sealed. Inside pull-through arrangements are common because they capture warm upper air and keep the untreated side under suction. Outside placement preserves tent height but adds route and sealing considerations.
Does a carbon filter remove humidity?
No. Carbon adsorbs many odor compounds but is not a room dehumidifier. High water vapor can compete for adsorption capacity and liquid moisture can damage performance. Use ventilation, cooling, or dehumidification to manage water vapor.
Can a HEPA filter remove cannabis odor?
HEPA filtration targets particles, not the full mixture of gas-phase odor compounds. It can complement dust and spore control, but a substantial activated-carbon bed and containment are the usual tools for odor. A thin carbon-coated particle filter is not equivalent to a deep horticultural carbon filter.
Why is humidity higher at night?
The air cools when lights turn off, which raises RH even before more water is added. Moist media and plants continue releasing water, while the air conditioner may run less because the heat load has fallen. Manage the transition with circulation, staged dehumidification, a controlled temperature drop, and irrigation awareness.
Will more circulation lower the RH reading?
Mixing may change a local reading and reduce wet boundary layers, but it does not remove water from a closed room. If total moisture is too high, ventilation with drier air or mechanical dehumidification must remove it. Circulation makes the condition more uniform and helps those systems reach the whole canopy.
Can I use a bathroom extractor or computer fan?
Only when its rating, pressure performance, environment, and installation fit the task. Many bathroom or computer-style fans are designed for low-resistance service and may deliver little through a carbon filter. Do not assume a spinning fan is an adequate extractor. Compare its fan curve and continuous-duty rating.
How can I tell if airflow is reaching the whole canopy?
Observe gentle leaf movement at several heights, compare temperature and RH at multiple points, and trace the path with tissue or a noncombustion smoke pencil. Repeat the test after the canopy fills. Avoid incense, candles, or open flames in the grow space.
Is CO2 enrichment useful in a vented tent?
Usually not when the exhaust runs often enough to control the room, because the added gas leaves with the exhaust. Stabilize light, temperature, humidity, irrigation, and airflow first. A measurable closed-loop environment with adequate cooling, dehumidification, controls, and safety is the proper context for serious enrichment.
How often should a carbon filter be replaced?
There is no universal interval. Carbon mass, odor load, humidity, temperature, airflow, and operating hours determine service life. Keep a spare based on the manufacturer's estimate, then verify breakthrough only after pressure, leaks, prefilter condition, and fan speed are checked.
Can I vent into the attic, chimney, or dryer duct?
Do not use those routes as casual outlets. Moist exhaust can damage concealed spaces, shared appliance ducts can create fire and pressure hazards, and chimneys or flues serve combustion systems. Use an approved independent termination designed for the building and local code.
What should I buy first: a bigger fan or a dehumidifier?
Compare the intake and room dew points. If incoming air is drier and temperature is acceptable, more installed airflow or fewer restrictions may help. If incoming air is already humid or the plant moisture load exceeds what exchange can remove, a dehumidifier or conditioned lung room is the better direction. Measure before buying.
Build a Stable Air Path Before Chasing Perfect Numbers
A dependable ventilation system is not the loudest fan or the most complicated controller. It is an air path you can explain, measure, maintain, and troubleshoot. Start with volume, then include real pressure resistance, heat, water vapor, intake quality, building makeup air, and odor containment. Keep circulation gentle and complete, and let cooling or dehumidification handle the loads that ventilation cannot remove.
As the canopy changes, repeat the measurements. The room that worked during early vegetative growth may need a different fan speed, circulation pattern, and moisture strategy during late flower. When we treat the environment as a connected system, every adjustment has a reason and every equipment purchase solves a defined problem.
Scientific and Technical References
- Chandra S, Lata H, Khan IA, ElSohly MA. Photosynthetic response of Cannabis sativa L. to variations in PPFD, temperature, and CO2 conditions.
- Chandra S, Lata H, Khan IA, ElSohly MA. Photosynthetic response of Cannabis sativa L. to elevated levels of CO2.
- Punja ZK and colleagues. Integrated management of pathogens and microbes in Cannabis sativa under greenhouse conditions.
- Elevated relative humidity significantly decreases cannabinoid concentrations while delaying flowering development in Cannabis sativa L.
- Cannabis cultivation facilities: a review of air-quality impacts from the occupational to community scale.
- University of Florida IFAS Extension. Fans for greenhouses: fan curves, static pressure, and selection.
- University of Florida IFAS Extension. Greenhouse ventilation, humidity, condensation, and fan ratings.
- University of Connecticut IPM. Horizontal air flow systems and uniform circulation.
- Air Movement and Control Association. Mitigating system effect to improve fan performance and efficiency.
- NIOSH Pocket Guide to Chemical Hazards: carbon dioxide exposure limits and physical properties.
- Occupational Safety and Health Administration. Flexible cords, grounding, and wet-condition electrical hazards.
- US EPA. Makeup air, building depressurization, and combustion-appliance backdrafting.
- Functionalized activated carbon for competing adsorption of volatile organic compounds and water.
- Modeling the effect of relative humidity on VOC adsorption dynamics onto activated carbon.