Watering Indoor Plants
Watering Indoor Cannabis: Build a Root-Zone Routine, Not a Calendar
Before You Start
Is This Guide Right for You?
This guide is for indoor growers who want a repeatable root-zone routine built around water quality, plant demand, medium, container, runoff, pH, EC, and irrigation method.
If you first need to recognize when and how much to water without the meters, begin with Watering Basics. If irrigation is understood and you want to connect it to feeding, continue with Nutrients and Fertilizers.
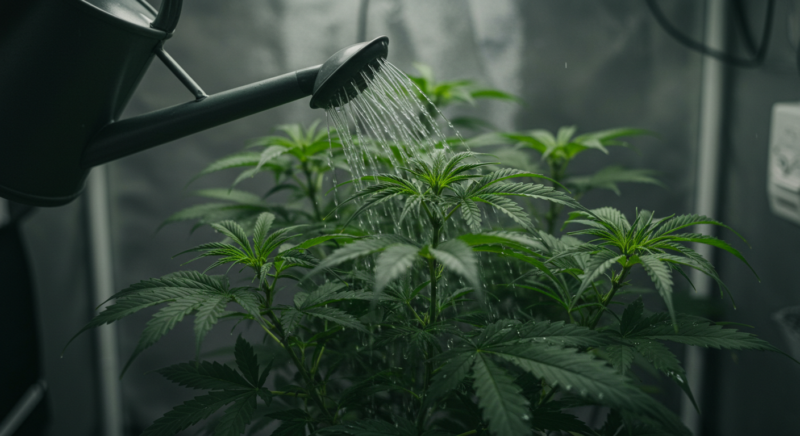
Indoor watering looks simple because the action itself is simple: we carry water to the root zone. The difficult part is deciding when to irrigate, how much to apply, how evenly to distribute it, what belongs in that water, and when drainage is useful. Those decisions change with the medium, container, root mass, light level, temperature, humidity, air movement, plant stage, and irrigation system.
This guide is for lawful indoor cultivation where local rules permit it. It does not give you a rigid “water every two days” formula, because a fixed calendar cannot see the plant or feel the container. Instead, we will build a routine from observable signals. Once you understand those signals, watering stops feeling like guesswork and becomes one of the clearest parts of the garden.
Here is the central idea: overwatering usually describes a root zone that stays too wet for too long, not one generous irrigation event by itself. A well-rooted plant in an aerated medium may use frequent irrigation efficiently. A small plant in a large, dense pot may remain oxygen-limited after a much smaller amount. Volume and frequency must always be read together.
Irrigation, fertigation, and hydration
Irrigation supplies water to the root zone. Fertigation supplies water and dissolved nutrients together. Hydration describes the water status of the plant and medium. A pot can be wet while the plant is poorly hydrated if roots are cold, oxygen-limited, damaged, or surrounded by a solution with excessive salts.
Important
Do not begin with “How many liters does cannabis need?” Begin with “How much water can this rooted container store and how quickly is the plant using it?” The same plant can drink very differently after a transplant, a lighting change, a heat wave, or a pruning session.
The Five Decisions Inside Every Watering Event
| Decision | Question to ask | Useful evidence | Common mistake |
|---|---|---|---|
| Timing | Is enough usable water gone to justify irrigation? | Pot weight, substrate feel, sensor trend, plant demand | Watering because the clock says so |
| Volume | How much restores the intended root-zone moisture? | Measured application, drainage, wet-pot weight | Using the same amount for every pot size |
| Distribution | Did the whole active root zone receive water? | Slow application, multiple points, uniform drainage | Pouring quickly into one channel |
| Solution | Is the water chemically suitable after nutrients are mixed? | Source-water report, EC, pH, alkalinity | Correcting pH before completing the mix |
| Drainage | Should this system produce drainage today? | Medium type, fertilizer strategy, root-zone EC trend | Treating runoff as mandatory in every system |
“Can you just tell me how often to water?”
Question sent by: Jordan Price, via email.
I can give you a method, but not an honest universal interval. Fully wet one representative container, let it drain, record its weight, and check it at the same time each day. Combine that change with the medium, plant size, and leaf posture. Within a few cycles, your room will show its own rhythm—and that rhythm is more useful than someone else’s calendar.
What Actually Makes Indoor Water Demand Rise or Fall?
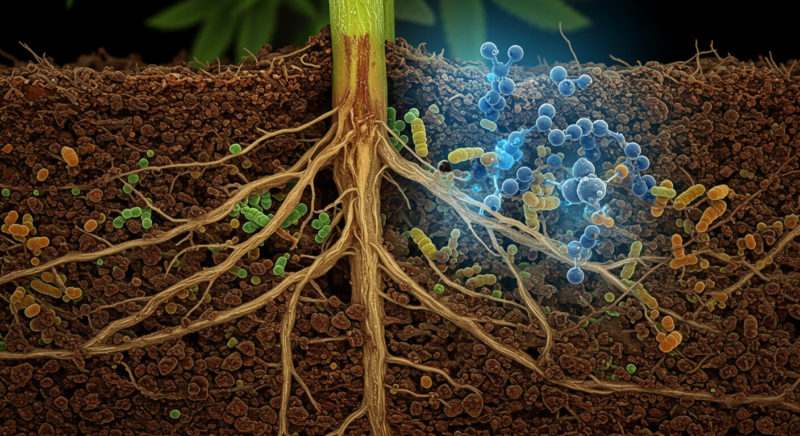
A larger, well-rooted canopy usually uses more water than a seedling, but plant size is only one part of demand. Stronger light can raise photosynthesis and transpiration when temperature, carbon dioxide, nutrition, and root health can support it. Warmer, drier moving air generally pulls more water through the plant. High humidity, cool roots, weak light, recent transplanting, or root injury can slow use dramatically.
The container changes the answer too. Fabric sides increase evaporation and gas exchange. Plastic limits sidewall evaporation. A short, wide container holds a different air–water profile from a taller container filled with the same mix. Coarse coco or rockwool can support frequent small irrigations; a biologically active soil may be managed with a steadier moisture reserve and little routine leaching.
“Do fabric pots prevent overwatering?”
Question sent by: FabricSide, via Facebook page.
They improve sidewall gas exchange and evaporation, but they do not make overwatering impossible. Dense media, oversized pots, cold rooms, standing runoff, or irrigation that is too frequent can still keep the interior wet. Fabric also dries edges faster, so apply water evenly.
Container material changes the moisture map rather than eliminating the need to inspect it. Compare the center and sidewall, especially when strong fans blow across one row.
What to Remember
Light, VPD, airflow, root-zone temperature, canopy size, container geometry, and medium are not separate watering topics. Together they determine how quickly stored water leaves the root zone. Change one of them and recheck the watering rhythm.
A Quick Starting Map
| What you observe | Likely meaning | Next check |
|---|---|---|
| Pot becomes lighter at a predictable rate | Roots are actively using water | Confirm full, even rewetting at the next irrigation |
| Surface looks dry but pot remains heavy | Only the top layer has dried | Check deeper moisture and drainage before watering |
| Pot stays heavy much longer than nearby pots | Low root demand, blocked drainage, or uneven environment | Compare root health, emitter output, temperature, and plant size |
| Water exits immediately down one side | Channeling or hydrophobic dry pockets | Rewet slowly in pulses; do not assume the whole pot is saturated |
| Plant wilts while the pot is still wet | Root-zone function problem is possible | Inspect oxygen, temperature, EC, roots, and stem base before adding water |
“The top inch is dry, but the pot still feels heavy. Which signal wins?”
Question sent by: MapleRoom, via Facebook page.
The whole-root-zone signal wins. A dry surface can sit above a wet lower profile, especially in deep plastic pots or dense mixes. Wait until the pot, deeper medium, and plant demand agree. If the lower zone repeatedly stays wet for too long, correct the medium, container, airflow, or root-zone temperature instead of stretching the interval forever.
Water Quality: Read the Whole Water Report
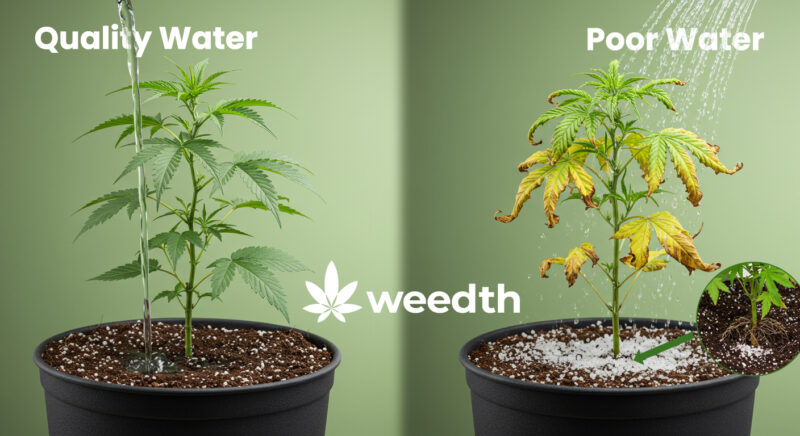
Water quality matters, but “pure” is not automatically better and “tap water” is not automatically bad. Many municipal supplies work well after we understand their chemistry. Reverse-osmosis water offers a low-mineral starting point, but it removes useful buffering and requires deliberate nutrient management. Rainwater can be excellent and still needs clean collection, storage, and testing. The right source is the one that is consistent, testable, biologically safe, and compatible with the chosen medium and fertilizer.
A basic laboratory irrigation-water analysis is more valuable than repeatedly chasing a pH number. Ask for pH, alkalinity, EC, hardness, calcium, magnesium, sodium, chloride, bicarbonate, boron, iron, manganese, sulfur or sulfate, and any local contaminants of concern. Well water can change seasonally; surface water introduces microbial and sediment risk; municipal utilities may change sources or disinfectants. Keep the report with the grow log and repeat testing when the source or plant response changes.
| Parameter | What it tells us | Why it matters indoors | Best response |
|---|---|---|---|
| pH | Current acidity or basicity of the sample | Affects mixing and reactions, but does not show buffering strength | Measure after nutrients are fully mixed |
| Alkalinity | Acid-neutralizing capacity, mainly bicarbonates and carbonates | Drives long-term upward pH pressure in containers | Use the water report to choose fertilizer or treatment |
| Hardness | Mostly calcium and magnesium concentration | Can contribute useful minerals or create scale | Do not confuse hardness with alkalinity or sodium |
| EC | Combined conductivity from dissolved ions | Shows total ionic load, not which ions are present | Use with an ion analysis and nutrient target |
| Sodium and chloride | Specific ions that may accumulate | High levels can create salinity and toxicity risk | Blend, treat, or select another source when analysis requires it |
| Microbial quality | Potential pathogens, algae, and biofilm organisms | Important for reservoirs, recirculation, and surface water | Protect storage and use an appropriate sanitation plan |
pH Is a Snapshot; Alkalinity Shows How Hard the Water Pushes Back

The pH scale is logarithmic, so one whole unit represents a tenfold change in hydrogen-ion activity. That fact makes pH important, but it does not make pH the only water-quality decision. Two water samples can both read pH 8.0 and behave very differently. Low-alkalinity water may move easily after nutrients are added; high-alkalinity water may consume much more acid and steadily raise root-zone pH.
This is one of the biggest gaps in ordinary watering advice. If we correct only the number on the meter, we may treat the symptom for a single bucket while leaving the bicarbonate load unchanged. In soil and peat systems, repeated irrigation gradually interacts with lime, fertilizer acidity, and root activity. In low-buffer systems such as rockwool or water culture, solution changes can appear much faster.
Alkalinity, hardness, and pH
pH is the sample’s current acid–base condition. Alkalinity is its resistance to acidification. Hardness mainly describes calcium and magnesium. They often travel together in groundwater, but they are not interchangeable measurements.
“My tap water reads pH 8.1. Do I automatically need reverse osmosis?”
Question sent by: Ava Thompson, via email.
No. First check alkalinity, EC, sodium, chloride, calcium, and magnesium. Water with a high pH but modest alkalinity may become suitable after fertilizer is mixed. Water with persistent bicarbonates or problematic sodium may need blending or treatment. Buy equipment after the report identifies the actual problem.
Measure the Finished Solution, Not an Unfinished Bucket
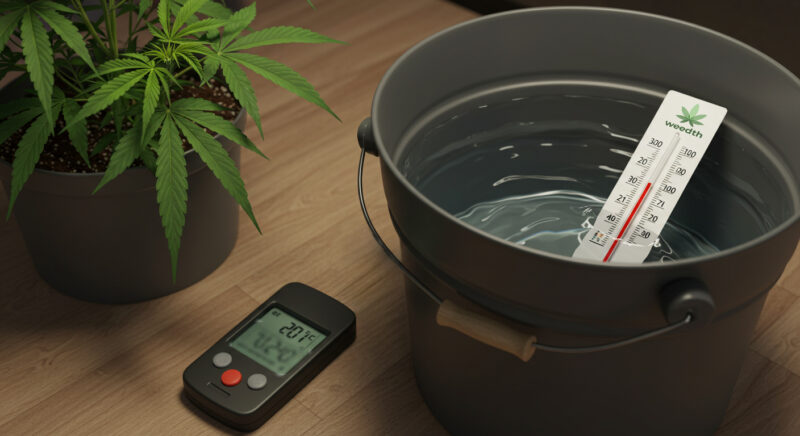
For most mineral nutrient programs, prepare the solution in the product’s specified order, mix thoroughly, verify EC, allow the solution to stabilize when instructed, and adjust pH last. Some additives require a particular sequence, so the manufacturer’s label remains authoritative. Never pour concentrated parts together before dilution; local reactions can form precipitates that the plant cannot use.
Temperature affects meters, dissolved oxygen, chemical reactions, and roots. Use water close to the active root-zone temperature rather than shockingly cold or hot water. Automatic temperature compensation helps a meter interpret its electrode response, but it does not repair a poorly stored probe or replace calibration.
“Can I water with cold water to cool a hot root zone?”
Question sent by: Dylan Hart, via email.
Avoid using temperature shock as climate control. Correct room temperature, airflow, reservoir placement, and insulation. Irrigation water should be compatible with the active root zone and system. Very cold water can slow roots while very warm water carries less dissolved oxygen.
Measure solution temperature at the point of irrigation, not only in the storage tank. Long tubing near a hot fixture or cold floor can change the temperature before water reaches the pot.
Treat concentrated nutrients and pH adjusters as chemicals
Wear appropriate eye and skin protection, add concentrates to water rather than mixing them together, use clearly labeled tools, and keep acids and bases away from children, pets, food, and incompatible materials. Never lean over a reservoir while dosing.
Pro Tip
Write the mixing sequence on the reservoir lid. A repeatable order prevents more mistakes than memorizing a perfect pH decimal. Record source EC, final EC, final pH, water temperature, and the amount of each correction.
Soil pH Is Managed Through the Medium, Not by Pouring in a Magic Number
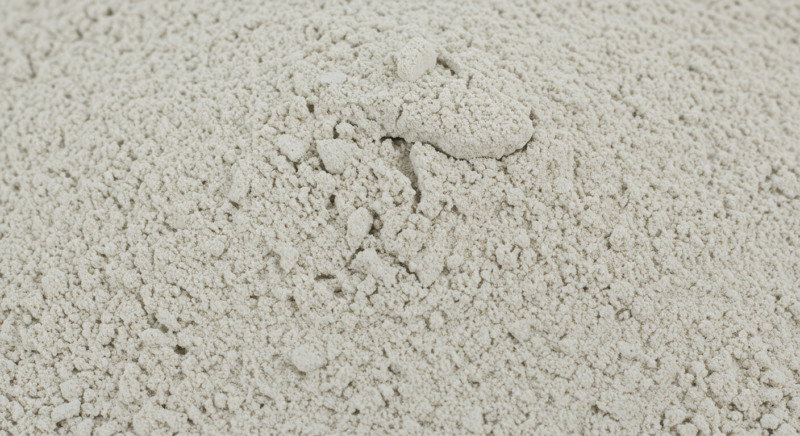
Dolomitic or calcitic limestone can buffer peat-based media and supply calcium; dolomitic material also supplies magnesium. But a blanket rate such as “one cup per cubic foot” ignores the starting medium, particle size, neutralizing value, existing lime, irrigation alkalinity, fertilizer, and desired pH. Use a tested recipe, product rate, or substrate analysis. Once plants occupy the pot, aggressive top-dressing with lime can create uneven chemistry and is harder to reverse.
In a living or soil-style system, the goal is a stable biological and chemical environment. Slight variation in irrigation pH is less important than a root-zone trend that remains suitable. Measure the medium with an appropriate extraction method when symptoms and history justify it. Do not assume that runoff from one random watering is a direct soil-pH test.
“Should I add dolomite every time the soil pH looks low?”
Question sent by: Liam Brooks, via contact form.
No. Confirm the result with a proper media test and review the original recipe, water alkalinity, and fertilizer first. Lime reacts gradually and adds calcium or magnesium, so repeated unmeasured applications can overshoot and distort the nutrient balance. Correct the cause, then choose a measured amendment if the medium actually needs it.
Hydroponic and Inert Media Need Faster Observation
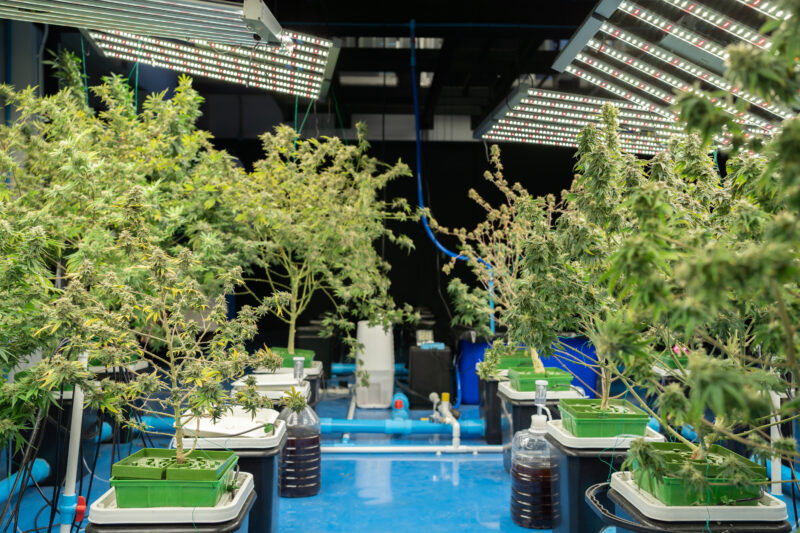
Rockwool, expanded clay, deep-water culture, and other low-buffer systems make changes visible quickly. That is an advantage when measurements are reliable and a disadvantage when a grower reacts to every small fluctuation. Observe the direction and rate of change. A reservoir that drifts slowly while plants grow is different from a sudden pH jump caused by an empty dosing tank, contamination, failing probe, or changing water level.
Hydroponic pH targets depend on the crop, nutrient formula, water, and system. A broad acidic starting window is common in soilless cultivation, but precision does not mean forcing the solution back to one decimal several times a day. Allow a controlled range, verify the meter, and investigate abnormal drift before repeatedly dosing.
Advice
A pH reading is evidence, not a diagnosis. Pair it with EC, water level, root appearance, solution temperature, recent additions, and plant response. One number cannot tell you whether roots are healthy.
Useful pH Starting Windows
These are broad starting windows for a complete, well-mixed irrigation solution—not guarantees that every cultivar, fertilizer, or medium must remain at one exact number. Follow the nutrient and substrate manufacturer’s crop data, then use root-zone testing and plant response.
| Root-zone system | Practical starting window | What matters most |
|---|---|---|
| Soil-style or buffered organic mix | About pH 6.2–6.8 | Medium pH trend, alkalinity, biology, and amendment balance |
| Peat-based mineral program | About pH 5.7–6.3 | Lime charge, fertilizer acidity, and water alkalinity |
| Coco coir | About pH 5.7–6.2 | Consistent fertigation, product quality, and root-zone EC |
| Rockwool or water culture | About pH 5.5–6.2 | Reliable meter, solution drift, oxygen, temperature, and nutrient formula |
Do not swing deliberately across an entire range in every bucket. Stability inside a useful band is generally more valuable than frequent large corrections.
Why Vinegar and Baking Soda Are Weak Routine Tools
Household vinegar can lower pH briefly, but weak organic acids may be consumed or metabolized and the pH can rebound. Baking soda raises pH while adding sodium, an ion we generally do not want to accumulate in a container. Neither should be presented as a stable professional correction simply because it is familiar in the kitchen.
For an emergency, a small grower may temporarily work with what is available, but the long-term answer is a horticultural pH product, a fertilizer compatible with the water’s alkalinity, or source-water treatment based on analysis. “Organic” does not remove the need for measurement, and an acid does not improve plant metabolism merely because it participates somewhere in biochemistry.
“Can I use baking soda because it is safer than pH Up?”
Question sent by: PrairieRoots, via Facebook page.
It is familiar, but routine use adds sodium and offers poor control. A purpose-made horticultural product used according to its label is easier to dose and document. If pH keeps falling, do not keep adding more base—check alkalinity, fertilizer form, reservoir biology, and meter calibration.
Fertilizer Changes Solution Chemistry
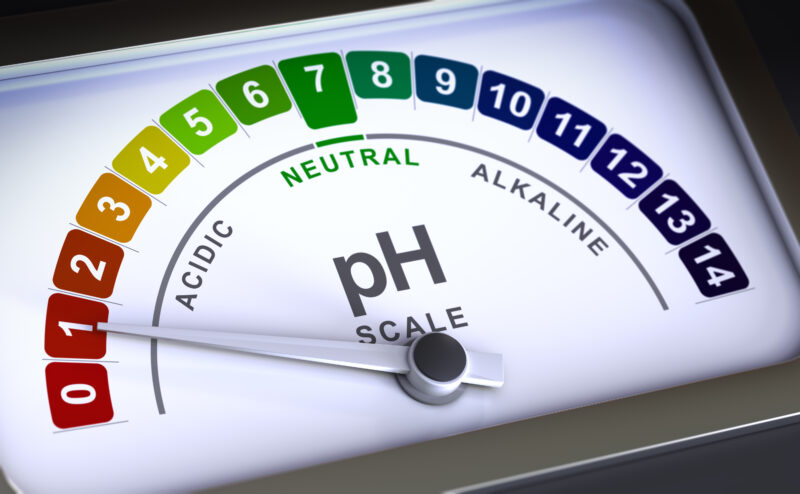
Fertilizers do not all acidify water in the same way. Nitrogen form, phosphate, potassium sources, micronutrient chelates, and the crop’s pattern of ion uptake all influence root-zone pH. A formula designed for high-alkalinity water may behave poorly in reverse-osmosis water, and vice versa. This is why the source-water report belongs beside the nutrient label.
Mix the full nutrient solution before final pH correction unless the product specifically instructs otherwise. Then give it enough mixing time to become uniform. If the pH repeatedly rebounds, calculate or test alkalinity instead of adding progressively larger doses by instinct.
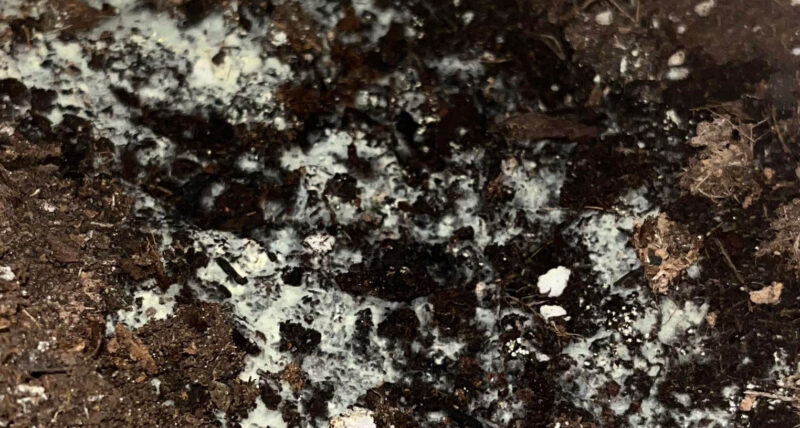
Salt accumulation is not the same as visible table salt, and it is not solved by making leaves wet. As water leaves through transpiration and evaporation, dissolved ions remain behind unless roots absorb them or drainage removes them. In mineral-fed containers, irrigation design and periodic root-zone testing keep that concentration within a useful range.
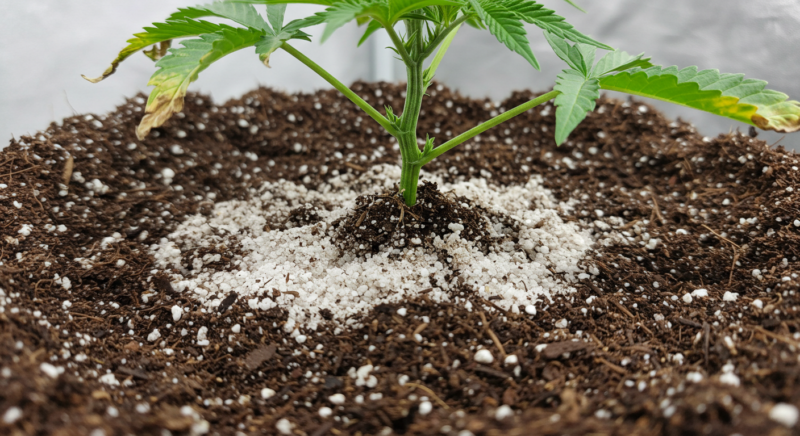
Never Forget
Foliar feeding may address a specific, diagnosed need in an appropriate growth stage, but it does not remove salts from the medium. It also increases leaf-surface moisture and should not be used casually around developing flowers. Fix root-zone accumulation at the root zone.
“If the root-zone EC is high, can I feed through the leaves and stop watering nutrients?”
Question sent by: CedarBench, via Facebook page.
Foliar feeding does not wash ions out of the pot. First verify the EC method, irrigation uniformity, source water, and fertilizer concentration. Then correct the root zone with an appropriate leaching or solution-management plan for that medium. Keep sprays away from flowers unless a legal, specifically justified treatment requires them.
EC, TDS, and PPM: Use the Right Language
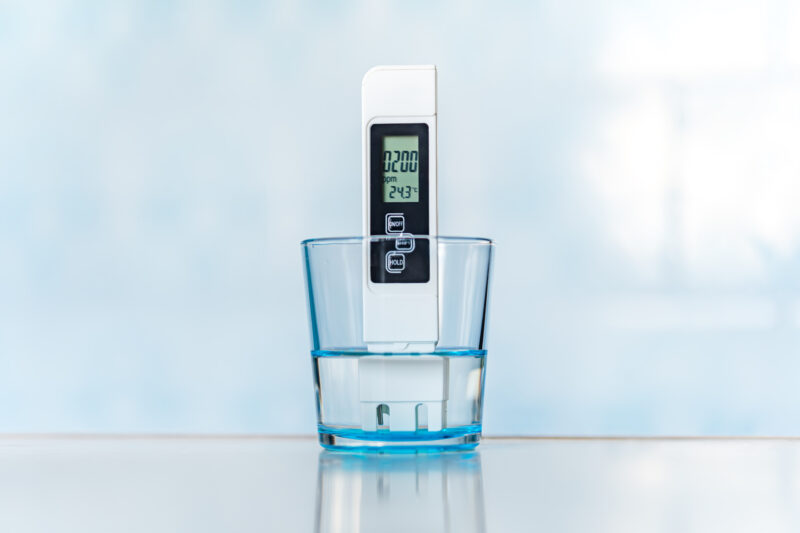
Electrical conductivity measures how readily the solution conducts electricity. It is a practical estimate of total dissolved ionic strength, not a laboratory identification of individual nutrients. A meter cannot tell whether the conductivity comes from useful nitrate and calcium or problematic sodium and chloride.
“PPM” on a handheld meter is usually a mathematical conversion from EC, and different meter scales can display different PPM values for the same solution. This is why EC in mS/cm is the clearest number to exchange between growers.
EC, TDS, and PPM scales
EC is the measured conductivity. Many “TDS” meters convert EC to an estimated PPM. A 500-scale meter and a 700-scale meter will not show the same PPM for the same water. State the scale or use EC.
| EC | Approx. 500 scale | Approx. 700 scale | How to use it |
|---|---|---|---|
| 0.5 mS/cm | 250 ppm | 350 ppm | Example only; not a universal feeding target |
| 1.0 mS/cm | 500 ppm | 700 ppm | Shows why PPM without a scale is ambiguous |
| 1.5 mS/cm | 750 ppm | 1050 ppm | Compare trends using the same calibrated meter |
| 2.0 mS/cm | 1000 ppm | 1400 ppm | Confirm the nutrient program and root-zone response |
Seedlings, mature plants, soil, coco, and water culture do not share one universal EC schedule. Start from the nutrient manufacturer’s crop guidance, source-water chemistry, cultivar response, and medium. Increase only when growth and measurements support it. More EC is not automatically more food; excessive concentration makes water harder for roots to acquire.
Tap Water, Reverse Osmosis, Rainwater, and Other Sources
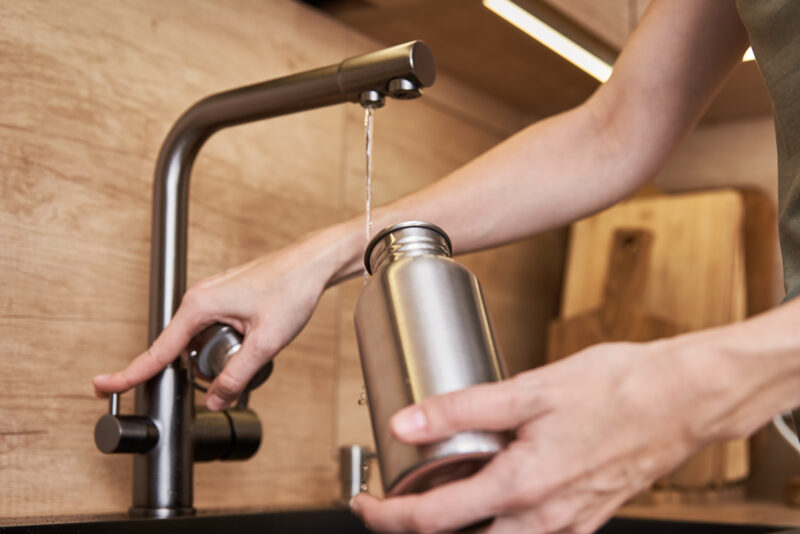
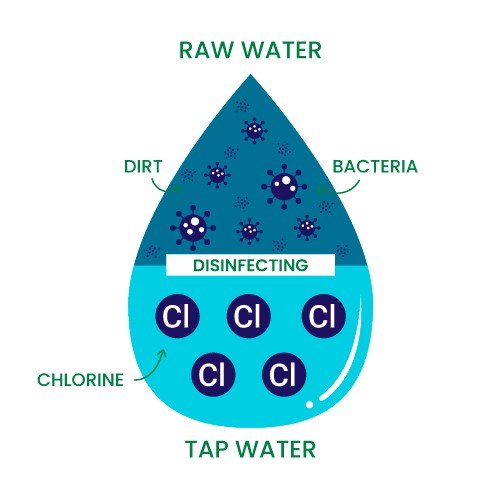
Tap water is convenient, consistent, and microbiologically treated. It may already provide calcium and magnesium. Its weaknesses can include bicarbonates, sodium, chloride, seasonal variability, or scale. Read the utility report and test the water at the grow site rather than assuming that “hard” means unusable.
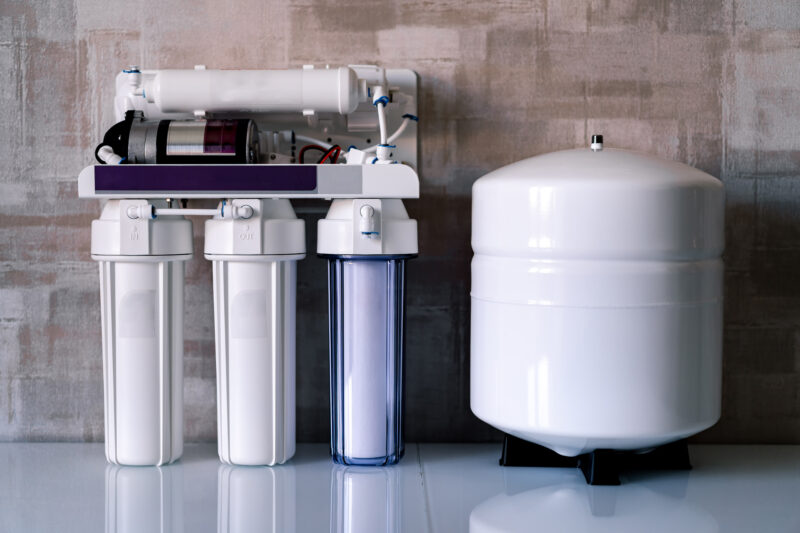
Reverse-osmosis water gives you a low-EC starting point when the source contains ions you cannot manage economically. It also removes buffering and much of the calcium and magnesium, so the nutrient plan must rebuild what the plant requires. Track rejection ratio, membrane condition, prefilters, storage hygiene, and waste-water use. RO is a solution to a measured problem, not a badge of seriousness.
Rainwater, spring water, wells, ponds, and streams can look natural and still contain sediment, salts, metals, pesticide residues, pathogens, or large seasonal changes. Use a clean catchment, opaque covered storage, screened inlets, and a laboratory test. Never contaminate a public or natural water source with nutrients, runoff, cleaning solutions, or equipment washed from the grow.
“Is rainwater always better than tap water because it is natural?”
Question sent by: NorthShoreRoots, via Facebook page.
Rainwater can be an excellent low-mineral source, but roofs, gutters, smoke, dust, bird waste, storage tanks, and microbes change its quality. Use a clean catchment, discard contaminated first flow where appropriate, cover storage, and test it. Natural describes the source, not the analysis.
Source choice also affects the nutrient budget. Low-mineral water gives the fertilizer more control, while calcium-rich water may reduce the need for some supplements. The label and water report should be read together.
“My well water is clear and tastes good. Is that enough testing?”
Question sent by: Tyler Nguyen, via contact form.
No. Taste and clarity do not reveal alkalinity, sodium, chloride, boron, iron, manganese, or microbial risks. Run an irrigation-water panel before building the nutrient program, then retest if the well changes seasonally, the reservoir stains, emitters clog, or root-zone pH drifts.
Chlorine and Chloramine: Do Not Repeat the Same Advice for Both
Municipal chlorine and chloramine protect drinking-water distribution systems. At normal potable-water residuals, their effect on a container crop depends on concentration, organic matter, irrigation practice, and biological goals; the presence of a disinfectant does not automatically make tap water unusable. If you run a biologically active system and want to reduce residual disinfectant, measure it and choose treatment deliberately.
Free chlorine can dissipate with aeration and time, although the rate varies. Chloramine is deliberately more persistent, so leaving a bucket uncovered for a day is not a reliable removal method. Activated carbon, sufficient contact time, and a system rated for chloramine are the practical route when treatment is truly needed. Maintain filters because exhausted media gives false confidence.
“I leave tap water out overnight. Does that remove chloramine too?”
Question sent by: ReservoirNorth, via Facebook page.
Do not assume it does. Chloramine is more stable than free chlorine. Ask the utility which disinfectant it uses, test the residual if it matters to your system, and use appropriately sized activated-carbon treatment when removal is justified. Standing water also needs clean, covered storage and circulation.
Test the source before buying the treatment
The fastest way to stop arguing with the water source is to test it. Once we place pH, alkalinity, EC, calcium, magnesium, sodium, and chloride on one page, the correct nutrient and filtration decisions become much calmer—and usually cheaper.
How to Know When an Indoor Plant Is Ready for Water
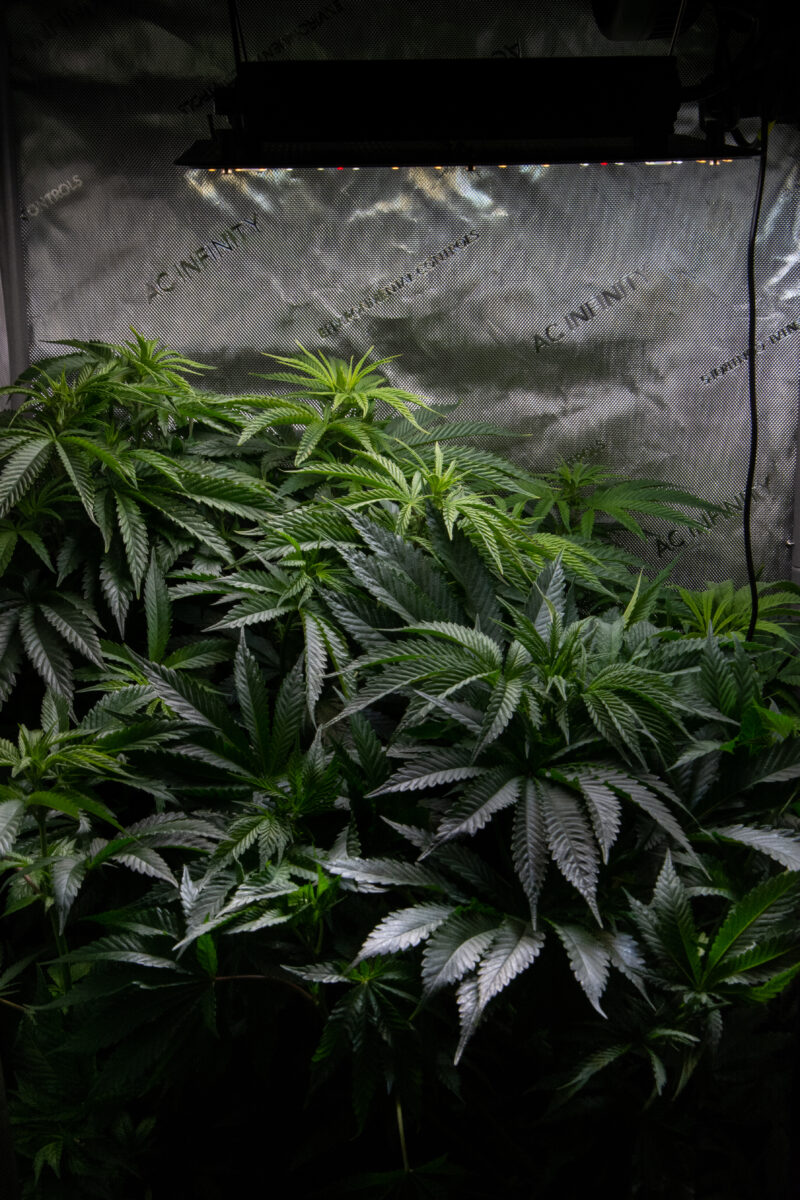
A useful watering trigger combines at least two forms of evidence. For hand-watered containers, pot weight plus deeper medium feel is an excellent beginning. For automated soilless systems, substrate water-content trends, drain data, and timed measurements may be more useful. Leaf posture can support the decision, but waiting for severe wilt makes stress the timer.
Container capacity and dry-back
Container capacity is the water content remaining after a fully wetted container has drained freely. Dry-back is the decrease in water content or weight between irrigation events. It is not the same as forcing a plant to wilt.
Use Pot Weight as a Measurement, Not Just a Feeling
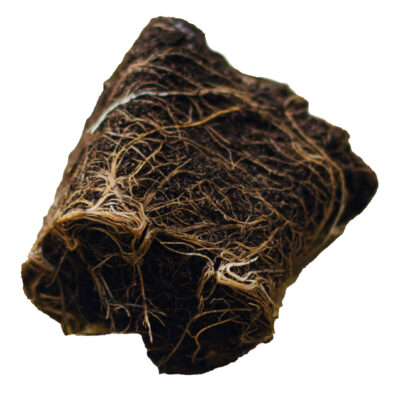
Water a representative pot slowly and evenly until the intended endpoint, let it finish draining, then weigh it or learn its “full” feel. Recheck at a consistent time. One liter of water weighs approximately one kilogram, so weight change gives a practical estimate of combined plant use and evaporation. A pot that loses 700 grams has lost roughly 700 milliliters of water, although drainage and structural changes must be accounted for.
Do not set the dry trigger by deliberately pushing every plant to collapse. Learn from a healthy cycle: observe the weight at which the plant is active, the medium has air returned to it, and irrigation can restore uniform moisture without channeling. Mark that range in the log.
“The pot is wet but the leaves look hungry and limp. Should I feed?”
Question sent by: Cole Fraser, via contact form.
Pause before feeding. A saturated root zone can limit oxygen and nutrient uptake, so the plant may look deficient while nutrients are present. Check pot weight, drainage, temperature, root color and odor, substrate EC, and whether the symptom is isolated to one irrigation zone. More fertilizer raises osmotic pressure and may deepen the problem.

Water, electricity, and hot lamps require a dry working plan
Turn off and cool exposed hot lamps before working beneath them when the fixture instructions require it. Keep reservoirs, hoses, drain lines, and wet hands away from plugs and connections. Use protected circuits, drip loops, leak containment, and electrical work that meets local code. Never direct water toward a hot bulb.
The Lift-the-Pot Method, Step by Step

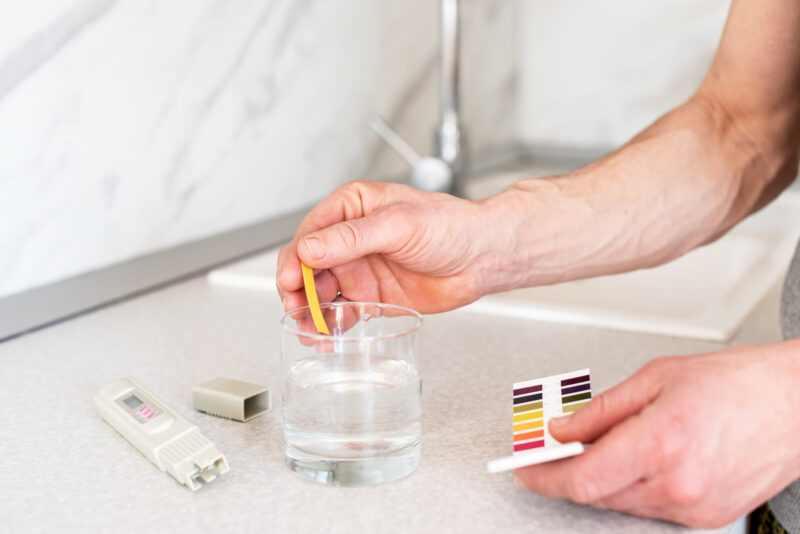
- Choose a representative plant. Use a healthy plant in the same container, medium, and canopy group as its neighbors.
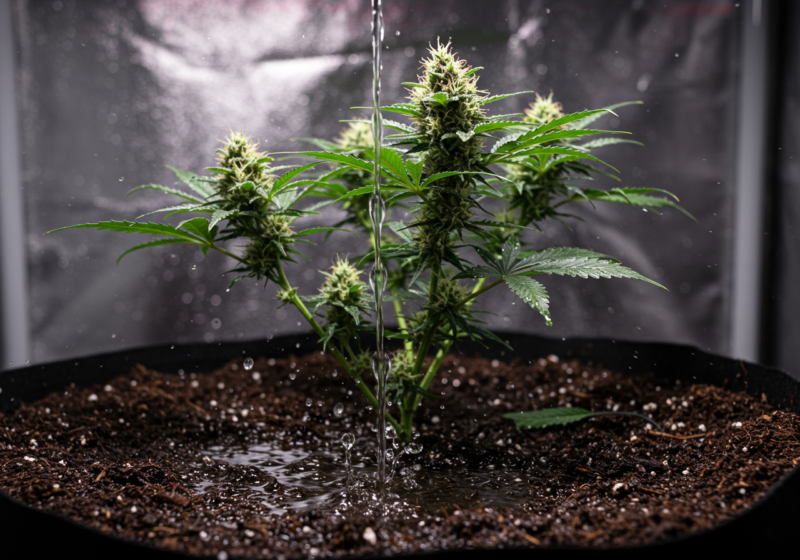
- Wet the root zone evenly. Apply slowly enough to avoid channeling and reach the intended drainage endpoint for that system.
- Let free drainage stop. Record the time, wet weight, solution EC and pH, and applied volume.
- Check at the same time each day. Morning and late-light-cycle readings can differ because demand changes through the day.
- Pair weight with a second signal. Feel deeper medium through a drainage hole, use a clean probe, or compare a moisture-sensor trend.
- Set a safe trigger range. Irrigate before chronic wilt, then observe how the plant and root zone respond.
“I transplanted yesterday. Can I use the same lift-pot trigger as before?”
Question sent by: NorthernLeaf, via Facebook page.
Not immediately. The new container holds water that the small root system cannot yet reach quickly. Water the established root ball and a modest surrounding zone, then expand the wetted area as roots colonize the new medium. Relearn the wet and ready weights for the new container.
Surface Feel, Finger Tests, and Moisture Meters
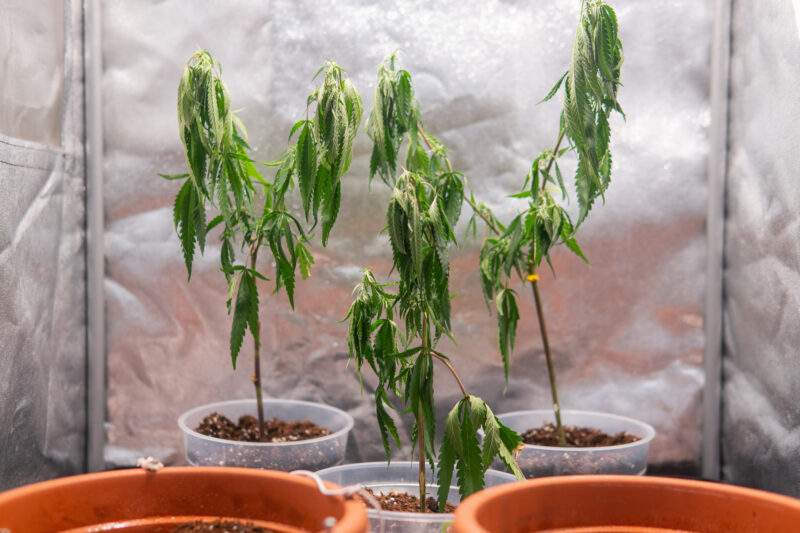
The finger test is useful near the surface but does not reveal the lower root zone. Cheap resistance probes can also misread media with changing EC or composition. Use them as comparisons, not absolute truth. A calibrated capacitance sensor can show valuable VWC trends when installed consistently in the active root zone, but it still samples one small volume.
Place sensors away from the container wall and not directly under a single dripper unless that point is intentionally being measured. Compare at least one wetter and one drier location during setup. The goal is not a decorative dashboard; it is evidence that the root zone is behaving as expected.
Volumetric water content
VWC is the fraction of a substrate volume occupied by water. It describes how much water is present, but availability also depends on the medium’s pore structure and water potential. The same VWC can feel very different to roots in peat, coco, rockwool, and mineral soil.
How Much Water to Apply
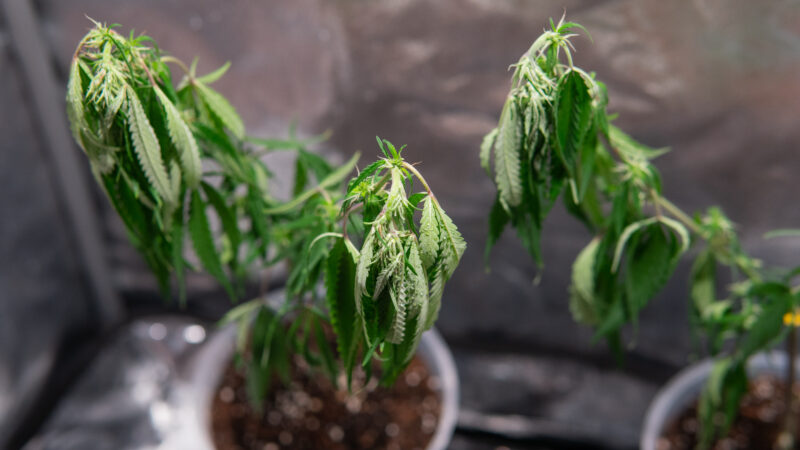
There is no honest fixed percentage of container volume that fits every situation. Application volume should restore the intended moisture profile without leaving the root zone chronically saturated or washing nutrients unnecessarily. A newly transplanted plant may need a smaller, strategically placed zone. A fully rooted plant may need the whole container brought near capacity.
When a dry peat or soil mix repels water, pouring faster does not solve the problem. Apply a small pre-wet, wait several minutes, then return in two or three slow passes. Move around the container or use several emitters. Water appearing at the drain immediately can be a bypass channel, not proof of full saturation.
“Water runs out after a few seconds, but the pot still feels light. Is the drainage excellent?”
Question sent by: Natalia Reyes, via email.
Probably not. The solution may be traveling through a gap beside the pot or a hydrophobic channel. Apply a modest pre-wet, pause, and return slowly from several points. Compare the final pot weight and moisture at the center and edge. Good drainage follows even wetting; it does not replace it.
Deep, Even Irrigation Versus Frequent Pulses
In soil-style hand watering, one even event followed by an appropriate drying interval often makes sense. In small coco or rockwool volumes, several smaller fertigations during the light period can maintain a controlled water and EC profile. The difference is not that one plant “likes wet feet.” The difference is how much air remains at a given water content, how little reserve the medium stores, and how reliably the system can reapply solution.
Pulse irrigation
Pulse irrigation divides a day’s water into smaller timed applications. It can improve distribution and manage root-zone EC in low-buffer media, but only when emitters are uniform, drainage is controlled, and the root zone is not kept at permanent saturation.
Master Advice
Choose irrigation frequency with the medium—not against it. If your life allows one careful visit each day, do not build a tiny, coarse root zone that depends on six perfect pulses. If automation is reliable, a large water-retentive pot may be unnecessary.
Should Every Watering Produce Runoff?
No. Drainage is a tool with different purposes. In mineral-fed coco or rockwool, a controlled leaching fraction can help manage accumulated ions and reveal system performance. In living soil, routine heavy runoff can export soluble nutrients and disturb the moisture strategy. In a small seedling pot, chasing runoff may simply oversaturate uncolonized media.
Leaching fraction
The leaching fraction is drainage volume divided by applied irrigation volume, multiplied by 100. It describes how much applied solution leaves the container. It is a management measurement, not a universal target.
| System | Typical watering style | Drainage role | Primary evidence |
|---|---|---|---|
| Living or biological soil | Even moisture with a breathable dry-back | Usually minimized; use only for a diagnosed correction | Pot weight, soil moisture, plant response |
| Peat-based potting mix | Thorough events with a moderate interval | Occasional measurement may support salt management | Weight, media test, applied volume |
| Coco coir | Frequent fertigation after root establishment | Controlled drainage may manage EC | Input/output EC trend, VWC, uniformity |
| Rockwool | Small repeatable pulses | Drainage is part of steering and salt control | Block water content, EC, drain volume |
| Deep-water culture | Roots remain in aerated solution | No container runoff; manage the reservoir | Water level, dissolved oxygen, temperature, EC, pH |
| Subirrigation or wick system | Water rises from below by capillarity | Little or no discharge during normal operation | Reservoir use, top-zone moisture, periodic media testing |
“Do I need exactly 20 percent runoff every time I water soil?”
Question sent by: Mason Reed, via email.
No. That rule is system-specific advice presented as universal. In mineral-fed containers, measured drainage can help control salts; in living soil, routine heavy leaching may waste nutrients and water. Use applied volume, drain volume, medium testing, and plant response to decide whether leaching is needed.
Why a Gravel Layer Does Not Fix a Wet Pot
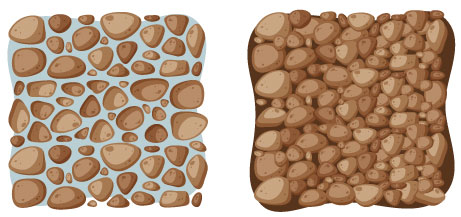
A layer of gravel or pebbles at the bottom reduces the depth of the fine medium and can leave the saturated interface higher in the pot. Water does not necessarily leap from fine pores into coarse pores as soon as it reaches them. This perched-water behavior is why drainage is improved by the entire substrate structure, adequate holes, container height, and an unobstructed surface beneath the pot—not by hiding rocks at the bottom.
Perched water table
In a container, fine substrate can retain a saturated lower layer above a coarse layer or drainage boundary. Container height and pore structure influence that profile. Adding gravel usually shortens the usable medium column instead of eliminating the wet zone.
Remember
If a pot stays wet too long, correct the cause: plant-to-pot ratio, medium particle distribution, compaction, blocked holes, cold roots, weak transpiration, or poor container elevation. Decorative stones are not root-zone engineering.
Watering by Plant Stage
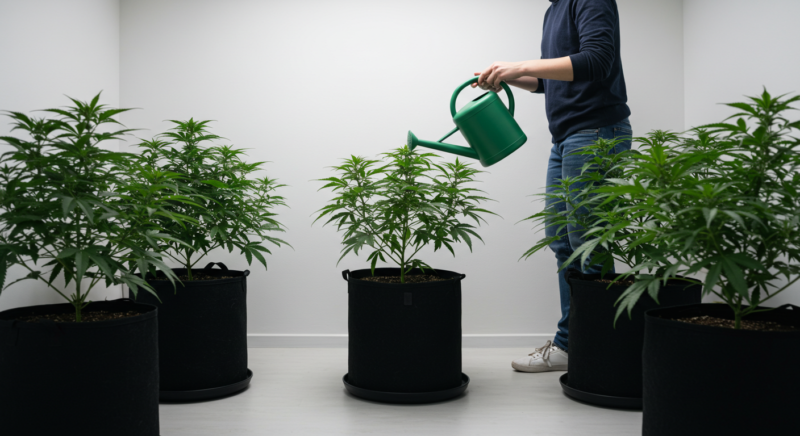
| Stage | Root-zone priority | Practical approach | Watch for |
|---|---|---|---|
| Seedling or fresh clone | Moisture near a small root system with plenty of air | Small measured applications around the plug; expand gradually | Large cold wet pots, damping-off, weak roots |
| Early vegetative | Encourage roots to explore the container | Widen the wetted zone and learn the new pot weight | Dry pockets near the edge, overpotting |
| Established vegetative | Support rapid canopy growth | Restore the active root zone evenly; review demand after training | Sudden changes after topping, pruning, or stronger light |
| Transition and stretch | Follow rapidly increasing demand | Recheck interval, emitter coverage, and support access | Underbuilt irrigation, uneven pots |
| Mid flowering | Keep water and EC consistent around dense demand | Avoid repeated severe wilt and saturated nights | Large day-to-day swings, blocked emitters |
| Late flowering | Maintain root function while demand may slow | Follow actual use; do not force drought or flooding by ritual | Senescence mistaken for a watering problem |
Seedlings and Clones: Wet the Roots You Have
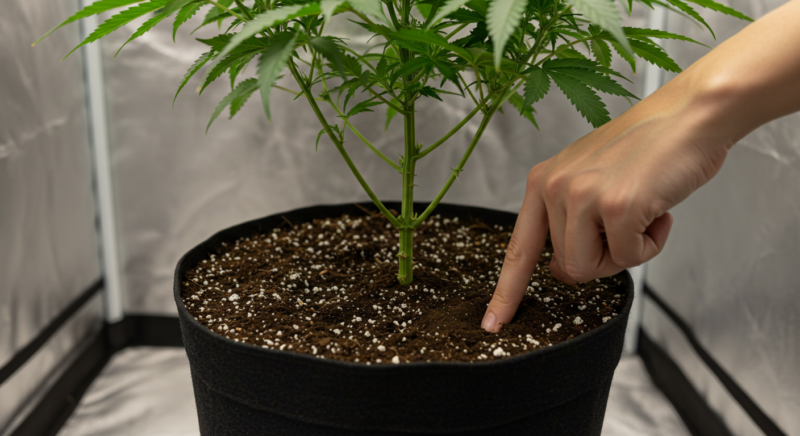
A seedling in a large container cannot use the entire water reserve quickly. Begin around the plug or established root ball with measured volumes, leaving oxygen in the surrounding medium. Expand the ring as growth accelerates. A humidity dome reduces leaf water loss during unrooted propagation, but once roots form, gradual acclimation and root-zone aeration matter.
“Should I mist seedlings instead of watering the medium?”
Question sent by: Kayla Monroe, via email.
A light mist can protect an unrooted cutting’s leaf water status in propagation, but rooted seedlings need water in the root zone. Constant surface misting can encourage shallow moisture, algae, and fungus gnats. Use a small measured application around the developing roots.
Propagation humidity and root-zone irrigation solve different problems. As roots establish, lower the dependency on leaf misting and let the root system become the main water pathway.
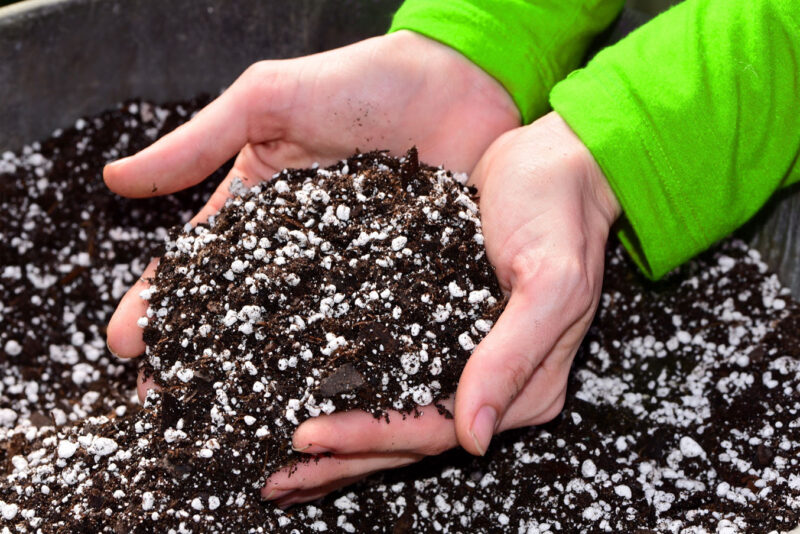
Pre-moisten dry medium evenly before transplanting. It should hold together lightly without releasing a stream of water when squeezed. This prevents the first irrigation from disappearing into channels and lets you seat the root ball without compacting the pot.
“How much should I give a seedling in a five-gallon pot?”
Question sent by: Sadie Reynolds, via email.
Do not try to saturate five gallons for a root system that occupies a few inches. Moisten the initial root zone with a measured amount, check its weight and deeper moisture, and widen the circle as the seedling grows. The long-term lesson is that a smaller intermediate pot is often easier to manage.
Vegetative Growth and Transplanting
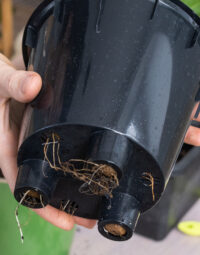
After transplanting, roots and canopy do not increase at the same speed. The pot may stay wet longer for several cycles, then suddenly begin drying faster as roots colonize it. Keep holes open, elevate the pot above standing drainage, and remeasure the interval rather than preserving the old schedule.
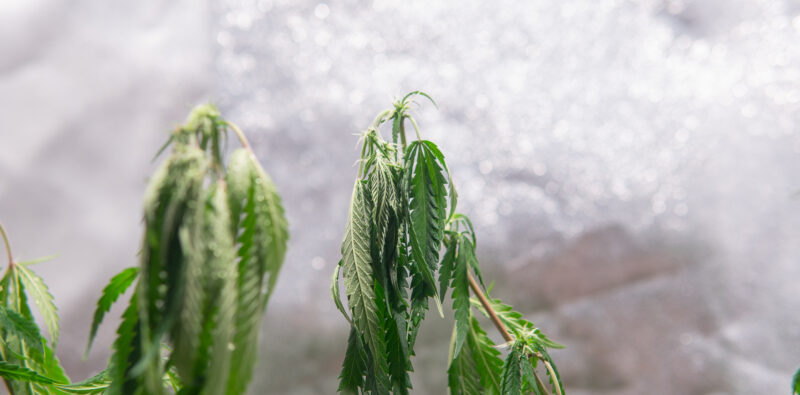
“My plant drinks much less after pruning. Is something wrong?”
Question sent by: Andre Dubois, via contact form.
Reduced leaf area can temporarily reduce transpiration. Recheck pot weight and lengthen the interval rather than forcing the previous volume. If demand stays low while growth stalls, inspect roots, temperature, light, and disease.
Training, topping, defoliation, and pest damage can temporarily reduce leaf area and water use. Stronger light, greater canopy area, lower humidity, or higher airflow can increase it. Any major change deserves a fresh wet weight and a few days of closer observation.
“Should I water right before the lights go off?”
Question sent by: WestWindowGrow, via email.
Water when the root zone needs it, but plan routine irrigation so foliage, floors, and the room do not remain unnecessarily wet during the cooler dark period. In automated soilless systems, the final pulse and overnight dry-back are deliberate design choices. In hand-watered soil, early in the light period gives you time to observe drainage and leaks.
How the Growing Medium Changes the Watering Strategy
The word “overwatering” confuses beginners because roots can live permanently in water culture while a soil plant declines in a wet pot. The difference is oxygen and solution management. In deep-water culture, air pumps and water movement maintain oxygen around roots. In a saturated compact soil, water fills the pores that should carry air. The correct question is not “Are roots touching water?” but “Can roots respire, exchange gases, and access a balanced solution?”
“If hydro roots live in water, why does wet soil cause overwatering?”
Question sent by: Arne Keller, via contact form.
Hydroponic roots live in a managed, oxygenated nutrient solution. In a dense saturated pot, water displaces air from pores and oxygen diffusion slows dramatically. Temperature, dissolved oxygen, root-zone cleanliness, and circulation are actively managed in water culture; a waterlogged soil pot has none of those guarantees.
Soil and Living Soil
Soil-style mixes provide chemical and biological buffering, so they often suit slower, thorough hand watering. Keep the profile evenly moist without making every cycle a drought. In living soil, microbes and fine roots need continuity; allowing the bed to become bone dry damages the system. At the same time, permanent saturation restricts oxygen. Mulch can reduce surface evaporation, so the top may no longer indicate the moisture below.
Large beds may show zones: wetter under an emitter, drier at the edge, and denser where repeated watering has compacted the surface. Use multiple points, slow application, and occasional profile checks. Routine high runoff is generally not the goal.
“My living-soil surface stays moist under mulch. How do I know when to water?”
Question sent by: MosslineJournal, via Facebook page.
Check below the mulch at more than one location, learn the bed’s weight or use consistently placed sensors, and watch the rate of daily water loss. The surface is intentionally protected from evaporation, so it cannot be your only trigger. Aim for a steady moisture range rather than alternating saturation and severe dryness.
Peat-Based Potting Mixes
Peat stores substantial water and can become difficult to rewet after severe drying. A structured blend with coarse components provides air after drainage. Irrigate slowly, allow a useful but not extreme dry-back, and monitor long-term pH because peat, limestone, fertilizer acidity, and water alkalinity interact.
If a peat pot is shrinking away from the wall, do not pour the entire volume at once. Pre-wet, pause, and complete the application in passes. A wetting agent may help when it is approved for the crop and used according to its label.
Coco Coir
Coco can combine strong air-filled porosity with useful water storage, but products differ in particle size, washing, buffering, and salt content. Once roots fill a small coco container, frequent fertigation can keep water and nutrient concentrations stable. Treating coco exactly like heavy soil—waiting for a dramatic dry pot, then applying plain water—can create large EC swings.
Use a complete coco-compatible nutrient plan, account for source-water calcium and magnesium, and observe input and root-zone trends. More runoff is not a substitute for correct concentration and uniform delivery.
“Do coco plants really need water several times a day?”
Question sent by: Lauren McKay, via email.
Not always. Frequency depends on container volume, particle structure, root mass, climate, and emitter design. A large coco pot with a small plant may need far less frequent irrigation; a fully rooted small slab under strong light may benefit from several pulses. Increase frequency only after the roots and daily dry-back justify it.
Rockwool
Rockwool is uniform and measurable, which makes it powerful for precision irrigation. It also gives little chemical forgiveness. Fully saturate and condition propagation blocks according to the product guidance, establish roots before aggressive pulsing, and keep emitters secure. Measure water content and EC at repeatable locations; the top, middle, and bottom of a block can behave differently.
Master Tip
A smaller substrate volume is not automatically more advanced. It trades stored water for tighter control. If a pump, timer, or emitter failure can dry the root zone before you notice, the system needs redundancy or more reserve.
Expanded Clay and Recirculating Aggregate Systems
Expanded clay, coarse perlite, and similar aggregates store little water relative to soil or coco. Irrigation failure becomes urgent, while excessive continuous flooding can still reduce oxygen if the system is poorly aerated. Clean and condition reusable media, shield reservoirs from light, and design recirculation so debris and roots cannot block the return.
Deep-Water Culture and Recirculating Water Culture
Water level, solution temperature, dissolved oxygen, circulation, and sanitation replace the pot-weight routine. Top-feed young roots until they reach the solution, then avoid drowning the crown or propagation plug. Mark the reservoir level, measure how quickly it falls, and top up according to a defined strategy rather than alternating concentrated nutrient and unmeasured water.
As plants remove water and ions at different rates, EC and pH can move in several directions. A falling water level with rising EC suggests water is leaving faster than ions; falling EC can indicate relatively strong nutrient uptake or dilution. Use the full trend, not one isolated reading.
Bottom Watering, Wick Systems, and Subirrigation
Bottom watering can reduce surface algae and use capillary action to wet the medium evenly, but the mix and container must wick reliably. Do not leave ordinary soil pots standing indefinitely in stagnant runoff. Empty and clean saucers, prevent cross-contamination between plants, and periodically evaluate salt distribution because ions can migrate toward the upper profile.
“Is bottom watering safer because the plant only takes what it needs?”
Question sent by: LowShelfNorth, via X.
Capillary systems can be efficient, but the phrase is too simple. A saturated lower zone can remain wet, salts can redistribute, and shared reservoirs can spread root pathogens. Match the medium and pot to subirrigation, control contact time, keep the reservoir clean, and verify moisture through the profile.
Hand Watering: A Repeatable Step-by-Step Method
- Inspect before mixing. Compare pot weight, plant posture, room conditions, and the previous record. Separate plants that are not ready.
- Measure source water. Record source EC and, when relevant, temperature and disinfectant status.
- Add products in the labeled order. Dilute each completely. Never combine concentrates directly.
- Mix and check EC. EC confirms total solution strength, not nutrient balance, so compare it with the recipe and source water.
- Adjust pH last. Use a calibrated meter and small measured additions. Mix thoroughly between corrections.
- Apply slowly and evenly. Circle the pot or use several points. For a dry medium, pre-wet and pause.
- Measure the endpoint. Note applied volume, pot weight, and drainage if the system uses it.
- Remove standing water. Keep roots, floors, and electrical equipment out of stagnant drainage.
- Observe the next hours and day. A good irrigation produces an expected weight curve and stable plant posture.
“Should I adjust pH before or after adding nutrients?”
Question sent by: Hannah Becker, via email.
Usually after the full nutrient solution is mixed and the EC is confirmed, because nutrients change pH. Follow the product’s mixing order, allow uniform mixing, then make small final corrections. If the pH rebounds repeatedly, investigate alkalinity and the formula instead of dosing the same bucket again and again.
Measure the pour before trusting the feeling
The most revealing hand-watering tool is a measuring jug. Once we record what entered each pot and what left it, phrases such as “a little water” disappear. The plants become easier to compare, and an uneven pot stands out before it becomes a sick plant.
Designing Automatic Irrigation That Fails Safely
Automation should repeat a good decision; it should not hide a bad one. Start by hand-measuring the rooted container’s demand. Then size the reservoir, pump, lines, emitters, and drainage around that demand. A timer alone does not create precision.
“Should every plant in one tent receive the same amount?”
Question sent by: Brooke Sullivan, via email.
Only if their root volume, medium, container, canopy, and environment are genuinely similar. Use irrigation groups. A small or recently stressed plant should not be flooded because its larger neighbor is thirsty. Uniformity begins by grouping like plants, then checking the exceptions.
Even within one tent, corner airflow, fixture footprint, and plant height can create separate demand zones. Rotate only when the plant structure and support allow it; measurement is safer than assuming the corner will catch up.
Core Components
- Opaque, cleanable reservoir: large enough for the planned interval without storing solution longer than the nutrient program allows.
- Appropriate pump and pressure: sized for total flow, lift height, filters, and pressure-compensating emitters where needed.
- Filtration: matched to emitter size and water quality, with an accessible cleaning schedule.
- Mainline and distribution lines: routed without kinks, light exposure, or hot surfaces.
- Emitters or rings: enough distribution points to wet the root zone rather than one narrow column.
- Backflow prevention: required wherever a nutrient system could connect with potable plumbing; follow local code.
- Drainage and containment: trays, drains, leak sensors, and enough capacity for the worst credible failure.
- Controls: reliable timers or controllers, but also a way to verify that water actually moved.
Never connect fertilizer to potable water without proper protection
A pressure change can draw nutrient solution backward into household plumbing. Use code-compliant backflow prevention and qualified installation. A simple check valve may not meet local requirements.
Run an Emitter Uniformity Test
- Place an identical measuring cup under every emitter in the test zone.
- Run the system for the normal event length.
- Record each volume and calculate the average.
- Investigate high and low emitters, line length, pressure, clogs, and elevation.
- Repeat after filters are cleaned or plumbing changes.
If the driest pot receives 20% less than the wettest, increasing the timer waters the wettest pot even more. Fix distribution first. Recheck emitters routinely because nutrient precipitates, biofilm, roots, and particles change performance.
“One plant is always lighter even though every dripper runs for the same time. What should I change?”
Question sent by: Luke Adams, via email.
Measure the output of every emitter into cups. Equal run time does not guarantee equal volume. Check clogs, pressure, line length, height, and whether one plant has a larger canopy. Correct plumbing and group plants by demand before adding time to the entire zone.
Reservoir Management
Keep reservoirs opaque, covered, mixed as the nutrient program requires, and accessible for cleaning. Mark a maximum and minimum level. A submerged pump can add heat; vigorous aeration can change pH and temperature; stagnant corners grow biofilm. Inspect the lid, walls, tubing, and pump rather than judging only the clear surface.
“Can I keep the same nutrient solution for weeks if EC and pH still look right?”
Question sent by: OakAndWater, via Facebook page.
EC and pH cannot reveal every change in nutrient ratios, microbes, organic residues, or dissolved oxygen. Follow the nutrient and system guidance, top up with a documented method, and replace or refresh the reservoir when the program requires it. Clean components before biofilm becomes the routine.
Pro Tip
Add a cheap flow confirmation or catch-cup audit to an expensive controller. A screen can say “irrigation complete” even when a pump lost prime or an emitter clogged.
Overwatering, Underwatering, and Look-Alike Problems
Droop is a symptom, not a watering diagnosis. A thirsty plant, an oxygen-limited root zone, heat stress, intense light, cold roots, excessive EC, stem damage, vascular disease, and transplant shock can all change leaf posture. Before taking action, ask four questions: Is the pot heavy or light? Did the symptom appear before or after irrigation? Are all plants affected? What changed first?
| Pattern | More consistent with | How to confirm | First response |
|---|---|---|---|
| Limp leaves, light pot, dry profile | Water deficit | Weight, deeper moisture, rapid response after even irrigation | Rehydrate slowly and evenly; correct the interval |
| Firm or curled-down leaves, heavy pot | Excessive root-zone moisture or high EC | Drainage, root odor/color, sensor trend, EC | Pause irrigation and diagnose oxygen, salts, and roots |
| Only one irrigation zone affected | Distribution or emitter fault | Catch-cup output and pot weights | Repair the line; do not change the whole room |
| Droop during peak light, recovery later | High transpirational demand or root limitation | Canopy temperature, VPD, root-zone moisture | Balance environment and root supply |
| Wilting section on one branch | Stem, vascular, or root-sector injury | Inspect branch, stem base, and corresponding roots | Isolate and diagnose; watering alone may not help |
| Slow growth after transplant, wet pot | Uncolonized medium, cold root zone, or compaction | Root-ball size, temperature, pot structure | Reduce wetted volume and improve conditions |
Underwatering Recovery
Rehydrate in stages if the medium is severely dry. A small pre-wet restores wettability; a pause lets moisture spread; the remaining solution completes the profile. One enormous fast pour may bypass the center. Severely wilted plants can recover posture while still carrying damage, so reduce environmental demand temporarily and avoid immediate heavy feeding.
“My plant stood up two hours after watering. Does that prove it was only thirsty?”
Question sent by: Courtney Bell, via email.
It strongly supports water deficit, but review why the pot dried that far. Check distribution, root volume, canopy demand, and whether the medium became hydrophobic. Recovery does not make repeated severe wilt harmless; use the event to set an earlier trigger.
Overwatering Recovery
Stop automatic irrigation to the affected pot or zone, remove standing drainage, and let the root zone return toward an aerated range. Do not poke random holes through established roots, add fertilizer, or transplant a saturated large plant by reflex. Improve container elevation and room conditions without blasting the pot with heat.
If the problem persists, slide out a small plant only when safe and inspect roots. Healthy young roots are generally pale and firm; diseased tissue may be brown, soft, sloughing, or foul-smelling. Root color also varies with nutrients and organic inputs, so odor, texture, pattern, and laboratory diagnosis matter.
Do not assume every brown root is “root rot”
Stains from nutrients and organic matter can darken roots. Conversely, a serious root disease may begin before a strong odor appears. If losses spread, isolate affected plants, clean shared tools, review water temperature and sanitation, and use a qualified plant diagnostic service.
“Fungus gnats appeared after I overwatered. Will drying the pot once remove them?”
Question sent by: Allison Grant, via email.
Drying the surface can make the habitat less favorable, but it does not erase eggs and larvae throughout the crop. Correct irrigation, remove algae and debris, inspect nearby pots, use monitoring cards, and choose locally legal biological or other crop-appropriate controls. The watering correction prevents the habitat from returning.
High EC Can Look Like Drought
Roots acquire water across an osmotic gradient. When the root-zone solution becomes too concentrated, the plant can struggle to take up water even though the medium is moist. Burned tips, stalled growth, unusually high drain EC, or rapid concentration between irrigations may support the diagnosis. Confirm with a standardized test before leaching aggressively.
“The medium is moist, but leaves look dry and the tips are burned. Is that underwatering?”
Question sent by: AtlanticGrowLog, via email.
It may be osmotic stress from concentrated salts, root damage, or a combination. Compare input and root-zone EC with a consistent sampling method, verify the meter, and review dry-back and fertilizer strength. Plain water is not automatically the answer; choose a correction that fits the medium and nutrient system.
Environmental Demand Can Outrun the Root System
A plant may droop during the hottest, brightest period even when the pot contains water. Strong light, warm leaves, low humidity, and rapid airflow raise transpirational demand. If roots are cold, newly transplanted, diseased, or confined, supply cannot match demand. Correcting only humidity or adding more water can hide the imbalance temporarily while the root problem remains.
Find the first shared change
When a room changes suddenly, I look for the first shared event before inspecting the most damaged leaf. A new light height, failed humidifier, warmer reservoir, blocked drain, or changed nutrient batch often explains ten plants faster than ten separate deficiency charts.
How to Read Runoff Without Chasing It
Runoff can show irrigation distribution, leaching fraction, and a trend in soluble salts, but the result depends on how the sample was produced. Early concentrated drainage, late diluted drainage, a dirty tray, and a pooled sample from several pots are not equivalent. Use the same method, time, and representative plants if you want comparable data.
A Practical Leachate Sampling Routine
- Choose representative plants and clean collection containers.
- Record input volume, EC, pH, and temperature.
- Apply the normal irrigation evenly.
- Collect drainage without mixing old tray residue into it.
- Measure total drainage volume and calculate leaching fraction.
- Measure EC and pH promptly with calibrated tools.
- Compare the trend with previous samples, plant health, and medium tests.
A high runoff EC does not automatically mean you should pour low-pH water until the drain number matches the tank. It may reflect normal concentration, an uneven first fraction, a dry pocket, or genuine accumulation. A very low drain EC can also reflect excessive leaching. Treat the trend and the crop, not a single target.
“My runoff pH is far from the input. Should I keep correcting the input until they match?”
Question sent by: DrainCheck, via Facebook page.
No. Runoff is not a direct mirror of root-zone pH, especially in soil or peat. Standardize the sample, verify the meter, review alkalinity and fertilizer history, and use an appropriate media extraction or laboratory test when the root-zone pH truly needs diagnosis. Chasing the drain can create a new problem.
pH and EC Meters: Buy Accuracy, Then Maintain It
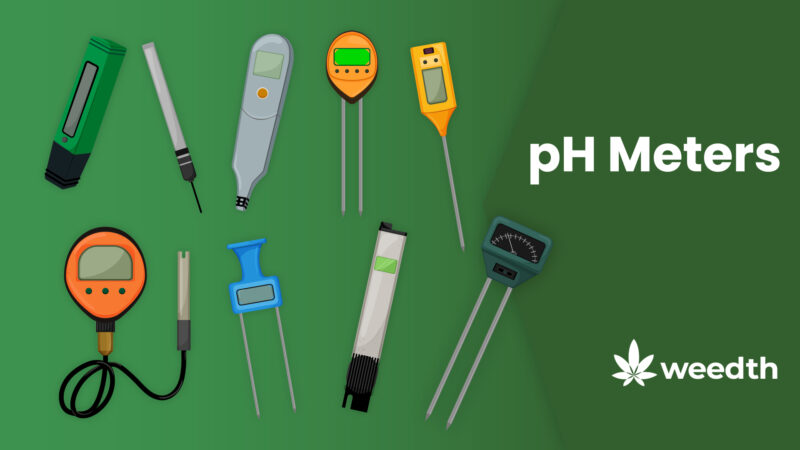
A meter is valuable only when its probe, calibration, storage, and sampling method are reliable. The least expensive tool may be enough for a soil grower who wants a rough check, while a recirculating hydroponic system benefits from a replaceable probe and continuous trend data. Price alone does not guarantee accuracy.
| Tool | Strength | Limitation | Best use |
|---|---|---|---|
| pH paper or strips | Low cost and no fragile electrode | Colored nutrient solutions reduce readability; broad resolution | Backup or rough screening |
| Indicator drops | Simple and inexpensive | Subjective color matching; limited range | Small hand-watered gardens |
| Pen pH meter | Portable digital reading | Needs calibration, wet storage, and cleaning | Routine bucket and drain checks |
| Handheld meter with replaceable probe | Serviceable and usually more stable | Higher cost and maintenance | Frequent testing and larger rooms |
| Continuous monitor | Shows drift over time | Probe can foul; display is not self-verifying | Reservoir systems with manual cross-checks |
| EC meter | Fast ionic-strength measurement | Cannot identify individual ions | Source, nutrient, and runoff trend checks |
Test Strips and Indicator Drops
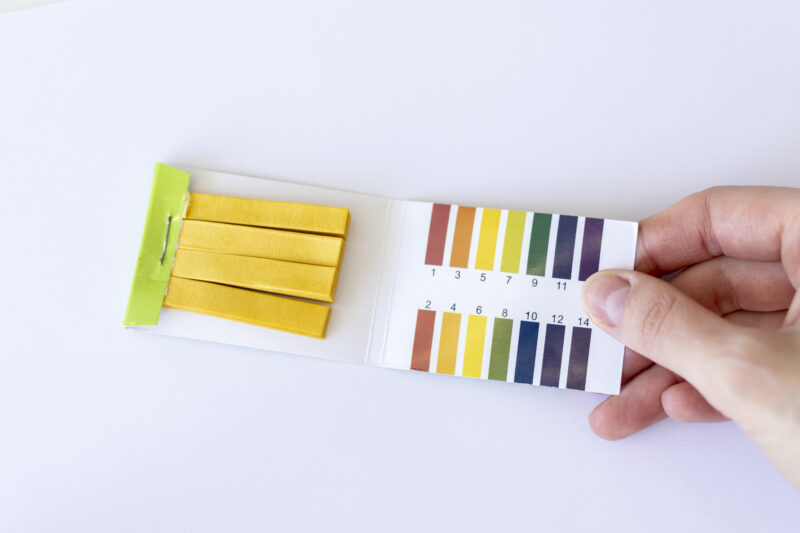
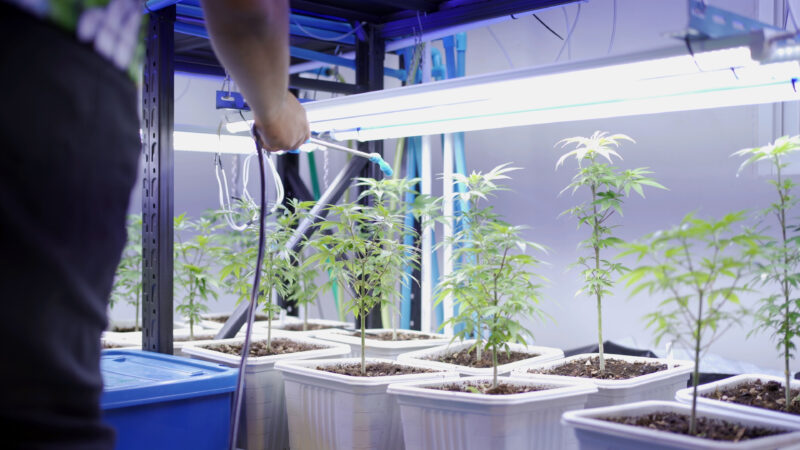
Strips are inexpensive and useful as a backup, but resolution is limited and dark nutrient solutions distort color. Store them dry and do not touch the test area with wet or contaminated fingers.
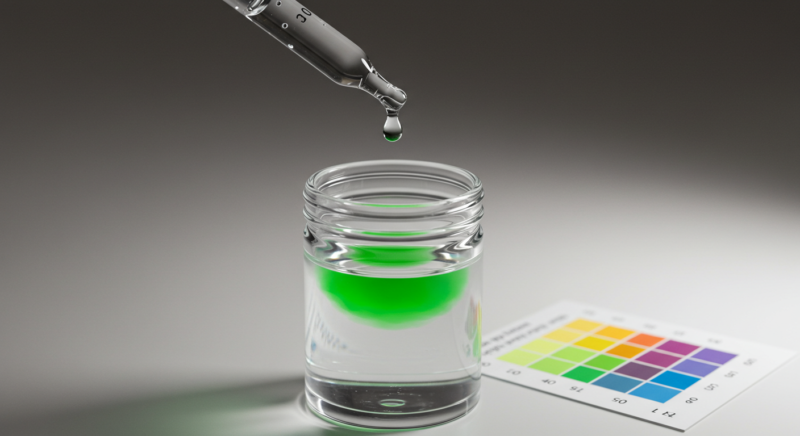
Drop kits can be easier to interpret than strips within a narrow range. Use the specified sample volume and lighting. They cannot replace a calibrated digital meter where a tight hydroponic range is required, but they are excellent for noticing when a digital reading is wildly implausible.
“My digital meter says 5.8, but the drops look near 7. Which one do I trust?”
Question sent by: Robin Ellis, via Facebook page.
Treat disagreement as a reason to stop dosing. Rinse the probe, check its storage condition, test fresh pH 7 and pH 4 buffers, and repeat with clean glassware. A backup method is valuable because it tells you when the precision-looking number may be false.
EC, TDS, and Multiparameter Pens
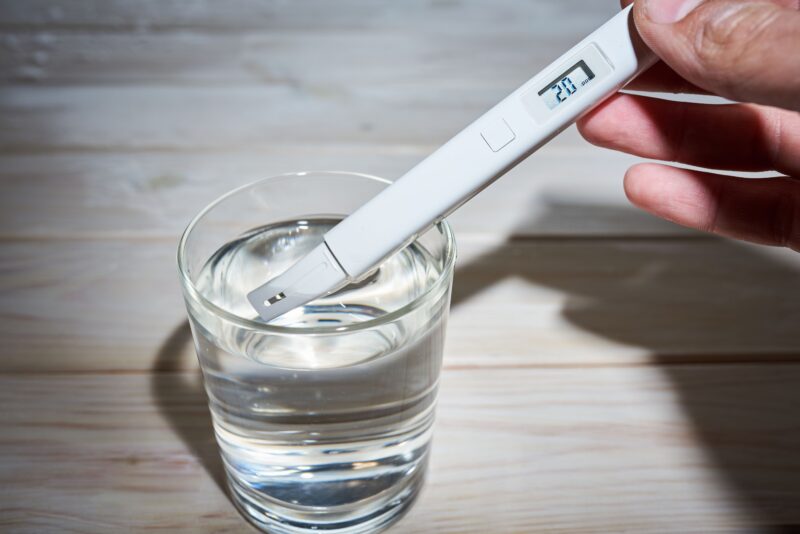
EC electrodes are generally easier to maintain than pH glass bulbs, but they still need clean surfaces and a known conductivity standard. Rinse between samples, calibrate at a standard near the working range, and allow temperature to stabilize. When sharing PPM, state whether the meter uses a 500, 640, or 700 conversion factor.
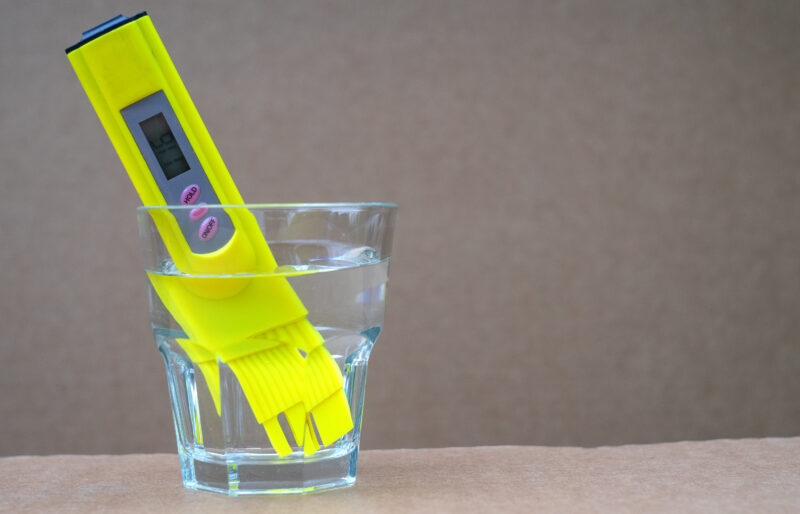
All-in-one pens save space, but a failure in one sensor can be hidden behind the convenience. Compare them periodically with separate standards and record calibration dates. Waterproof does not mean the cap can be left off or the probe stored dry.
Continuous Monitoring Systems
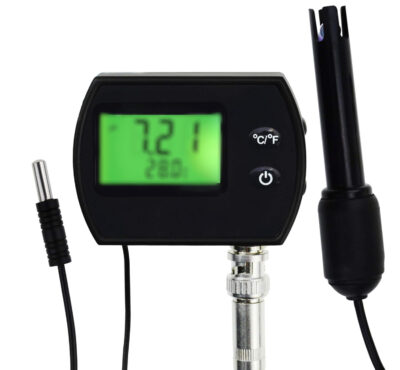
Continuous monitors reveal rate and direction of drift. Place probes where solution is mixed and representative, not beside an undiluted dosing inlet. Clean biofilm, inspect cables, and verify readings with a handheld meter before an automated doser makes a large correction.
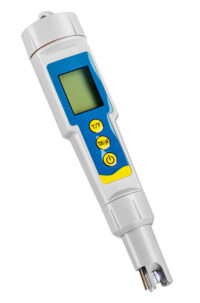
“How often should I calibrate my pH pen?”
Question sent by: Rebecca Sloan, via email.
Follow the manufacturer’s interval and calibrate more often when the probe is new, used daily, exposed to dirty organic solutions, stored incorrectly, or giving suspicious results. Always verify after a drop or extreme reading. Fresh buffer is cheaper than correcting an entire root zone from a false number.
Calibration, Cleaning, and Storage
- Use fresh, uncontaminated calibration buffers within their storage guidance.
- Calibrate pH with at least the buffers recommended for the working range.
- Pour a small amount into a clean cup; do not return used buffer to the bottle.
- Rinse with suitable clean water and blot gently—do not scrub the glass bulb.
- Store the pH electrode in the manufacturer’s storage solution, not dry and usually not in pure RO water.
- Clean deposits with the recommended solution; proteins, oils, and mineral scale need different care.
- Replace an electrode that calibrates slowly, drifts excessively, or cannot hold slope.
Master Advice
Keep calibration buffer, storage solution, a simple drop kit, and a written log beside the meter. The backup is not an admission that the digital tool is bad; it is how we know the tool is still telling the truth.
Flushing: Separate Three Different Practices
“Flushing” is often used for three different actions, and the confusion produces bad advice:
- Corrective leaching: applying enough suitable solution to reduce excessive salts in a container medium.
- Reservoir or system cleaning: draining, cleaning, and replacing solution in a hydroponic system.
- Preharvest nutrient withdrawal: providing water without fertilizer for a chosen period before harvest.
Corrective leaching can be useful when a standardized test confirms excessive root-zone EC and the medium can drain safely. It is not a cure for every yellow leaf. A reservoir change can correct ratio drift or sanitation problems, but running near-zero-EC water through roots for hours can create osmotic shock and nutrient imbalance.
Preharvest nutrient withdrawal is a crop-management and input decision. Peer-reviewed cannabis research has found only limited effects on biomass, mineral accumulation, cannabinoids, and terpenes, and it does not establish the familiar claim that nutrients are “washed out of the flower” to guarantee smoother taste. Another controlled study found that nutrient deprivation did not improve total cannabinoid yield or flower quality. Cultivar, system, duration, and what “quality” means all matter.
“Do I have to flush for two weeks or the flowers will taste like fertilizer?”
Question sent by: CedarLaneLab, via Facebook page.
No universal evidence supports that promise. Distinguish preharvest nutrient withdrawal from correcting excessive root-zone salts. Research suggests that late nutrient withdrawal can reduce fertilizer inputs without large yield changes in some systems, but it does not literally wash stored minerals out of flowers or guarantee smoother smoke. Drying, curing, genetics, nutrition, and plant health all affect the final experience.
Important
Never leach a saturated, oxygen-limited pot simply because a leaf chart says “lockout.” Confirm the medium, drainage, EC method, and root health first. Adding several more container volumes of water can turn a chemical concern into a root emergency.
How to Perform Corrective Leaching Responsibly
- Confirm high root-zone EC with a repeatable sampling method and a calibrated meter.
- Identify the cause: excessive feed, high-source EC, sodium, uneven emitters, severe dry-back, or insufficient drainage.
- Prepare a balanced, pH-appropriate solution recommended for the medium; plain RO water is not always the safest choice.
- Apply slowly in measured passes and collect drainage safely.
- Track EC by fraction rather than chasing an arbitrary near-zero number.
- Stop when the corrective goal is reached and root-zone aeration remains protected.
- Fix the routine that caused accumulation.
Contain and dispose of nutrient runoff responsibly
Do not discharge concentrated fertilizer, acids, bases, sanitizers, or contaminated drain water into storm drains, streams, ponds, or soil where it can reach groundwater. Follow local wastewater and cultivation rules. Reuse only when the solution has been tested and the system is designed for safe recirculation.
Water Reuse and Conservation Indoors
The most sustainable liter is the one applied accurately the first time. Group plants by medium, container, stage, and canopy demand. Repair leaks, measure emitter uniformity, cover reservoirs, and avoid unnecessary leaching. Collect clean condensate only as a potential source—not an automatic one.
Air-conditioner and dehumidifier condensate often begins with low EC, but it can contact metals, dust, microbes, coil cleaners, and biofilm. Test it for metals and microbial quality, clean the collection path, and store it safely before considering reuse. Never use water from equipment treated with incompatible chemicals.
“My dehumidifier makes gallons of clear water. Can I pour it straight into the reservoir?”
Question sent by: Nora Bennett, via email.
Treat it as an unverified source. Condensate can pick up copper, aluminum, lead from components, dust, microbes, and cleaning residues. Test it, keep the collection system clean, and blend or treat only after the results support use. Clear and low-EC do not mean contaminant-free.
Recirculating Drainage
Recirculation can reduce water and fertilizer use, but it also shares every imbalance and root pathogen. Successful reuse needs filtration, disinfection where appropriate, ion and EC monitoring, water-level accounting, and a method for restoring nutrient ratios—not simply returning every drain drop to the tank.

“Is drain-to-waste always safer than recirculating irrigation?”
Question sent by: Evan McLeod, via contact form.
It is simpler to diagnose because each plant receives fresh solution, but it can waste water and nutrients. Recirculation is more efficient when sanitation, filtration, testing, and nutrient correction are designed properly. Choose the system you can monitor and maintain lawfully; neither label guarantees good management.
Build a Watering Log That Answers Questions
A useful log is short enough to complete and detailed enough to reveal change. Record one representative plant from each irrigation group rather than collecting numbers with no decision attached.
| Record | What to write | What the trend reveals |
|---|---|---|
| Environment | Light period, temperature, humidity, major equipment change | Why demand rose or fell |
| Plant and container | Stage, cultivar, pot size, medium, recent training or transplant | Why one group differs from another |
| Input solution | Volume, EC, pH, temperature, recipe, source batch | Whether the delivered solution changed |
| Root-zone response | Wet weight, trigger weight, VWC or deeper feel | Daily use and dry-back |
| Drainage | Volume, EC, pH, sampling method | Uniformity and soluble-salt trend |
| Observation | Leaf posture, roots, odor, pests, recovery time | Whether measurements match plant health |
| Action | What changed and why | Prevents multiple corrections at once |
Seven days reveal what one day hides
A dated photo beside the day’s pot weight is more useful than a perfect memory. When we review seven days together, a slow change in water use appears before the room looks dramatic.
A Final Watering Checklist
- Confirm cultivation is lawful and the irrigation setup meets electrical, plumbing, and wastewater rules.
- Know the source-water pH, alkalinity, EC, hardness, sodium, chloride, calcium, and magnesium.
- Choose the medium and container around the irrigation frequency you can maintain.
- Use pot weight, deeper moisture, or a calibrated sensor trend—not a fixed calendar alone.
- Mix nutrients in the labeled order, verify EC, and adjust pH last.
- Apply slowly and evenly; prevent channels and standing drainage.
- Use runoff only when it serves a defined purpose.
- Audit emitters, filters, pumps, drains, and leak protection.
- Diagnose wet-pot wilting before adding water or fertilizer.
- Calibrate meters and keep a backup check.
- Record changes one at a time and observe the result.
Remember
The best watering routine is not the most complicated one. It is the routine that restores a healthy root zone, matches the medium, survives your real schedule, and produces measurements you can understand.
Scientific References
- Saloner, A., Sade, Y., & Bernstein, N. (2024). To flush or not to flush: Does flushing the growing media affect cannabinoid and terpenoid production in cannabis? Industrial Crops and Products, 218, 119157.
- Caplan, D., Dixon, M., & Zheng, Y. (2019). Increasing inflorescence dry weight and cannabinoid content in medical cannabis using controlled drought stress. HortScience, 54(5), 964–969.
- Tang, K., Fracasso, A., Struik, P. C., Yin, X., & Amaducci, S. (2018). Water- and nitrogen-use efficiencies of hemp based on whole-canopy measurements and modeling. Frontiers in Plant Science, 9, 951.
- Morgan, W., Singh, J., Kesheimer, K., et al. (2024). Identifying physiological traits related with drought tolerance and water-use efficiency in floral hemp. Crop Science, 64, 354–372.
- Büser, S., et al. (2025). Subsurface drip irrigation reduces irrigation water use while increasing inflorescence and cannabinoid yield in a tunnel Cannabis sativa production system. Journal of Cannabis Research, 7, 41.
- University of Arkansas Controlled Environment Agriculture Program. Substrate air–water relations and container geometry.
- Virginia Cooperative Extension. (2026). Measuring nursery plant water use in containers.
- Penn State Extension. (2025). A water quality toolkit for greenhouse and nursery production.
- U.S. Environmental Protection Agency. Basic information about chloramines.
- UMass Amherst Extension. Subirrigation systems for greenhouse crops.