Indoor Grow Mediums
Before You Start
Is This Guide Right for You?
This guide compares soil, coco, peat, rockwool, clay pebbles, and other indoor media by how they hold water, air, and nutrients, as well as how much attention they ask from you.
If you want a deeper soil-first explanation, read the Cannabis Soil Guide. If the medium is chosen but container size and drainage are not, continue with Containers and Pots Basics.
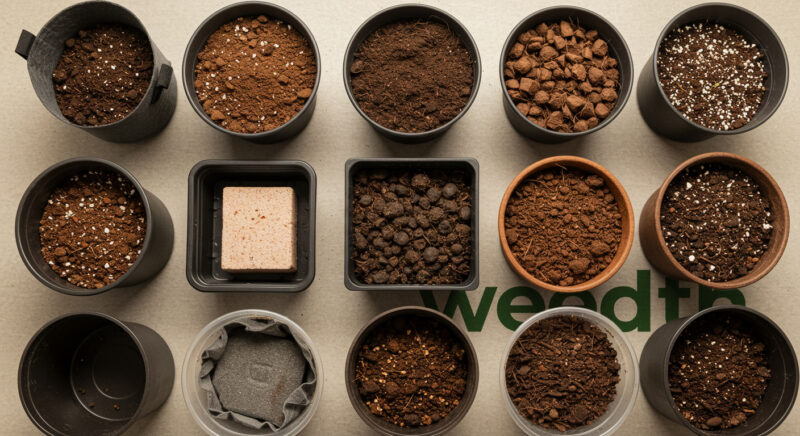
The best indoor medium is not the one with the most impressive label. It is the one whose water, air, and nutrient behavior fits your room, container, irrigation method, budget, and available time. A forgiving potting mix can outperform a highly technical substrate when the grower can only inspect the garden once a day. Coco or rockwool can provide exceptional control, but that control becomes useful only when watering and measurement are equally consistent.
Think of the medium as the operating system of the root zone. It holds the plant upright, stores or releases water, determines how much air remains after irrigation, and influences how nutrients move toward the roots. Some media also buffer pH and charged nutrients. Others intentionally do very little, placing almost every decision in the nutrient solution and irrigation schedule.
Medium, substrate, and growing system
A medium or substrate is the material around the roots. A growing system is the wider method that supplies water, nutrients, and oxygen. Coco is a medium; a drip-to-waste setup is a system. Rockwool is a medium; ebb and flow is a system. Soil in a fabric pot is both a medium choice and part of a hand-watered container system. Keeping these terms separate prevents many purchasing and feeding mistakes.
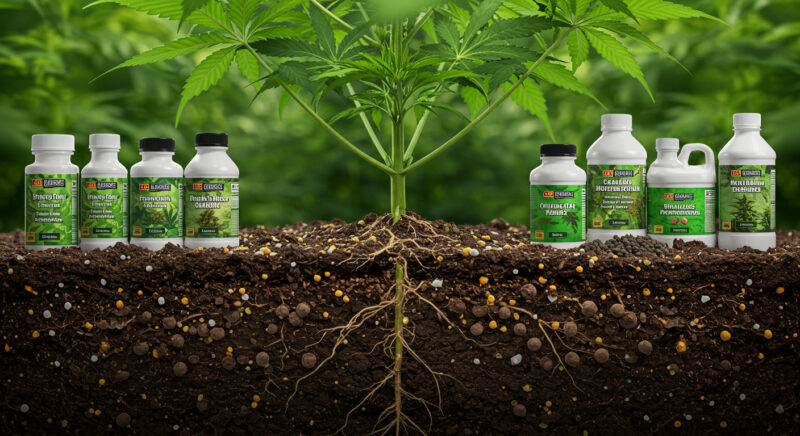
Every healthy root zone must provide four things at the same time: accessible water, oxygen, suitable mineral nutrition, and a physical structure that roots can explore. The difficult part is that improving one property can weaken another. Fine particles hold more water but may leave less air after saturation. Coarse particles drain rapidly but can demand frequent irrigation. A highly buffered mix softens small feeding errors but responds slowly to correction. A low-buffer substrate reacts quickly, which can be an advantage or a liability.
This guide compares soil, living and amended mixes, peat-based substrates, coco coir, mineral wool, perlite, vermiculite, expanded clay, and blended soilless media. More importantly, it explains how to read their behavior. You will be able to judge a bag before committing the whole garden, match irrigation to container geometry, interpret pH and EC without chasing every runoff number, and recognize when a root-zone problem is actually caused by the medium rather than the nutrient bottle.
| Medium family | Best for | Key strength | Main limitation | Management style |
|---|---|---|---|---|
| Potting soil or mineral soil blend | Simple hand watering and growers who want a wider correction window | Useful nutrient and pH buffering when the mix is well built | Batch quality, compaction, pests, and slow diagnosis can vary | Water by root-zone need, not by a fixed calendar |
| Living or biologically active soil | Larger containers or beds with an organic nutrient cycle | Biological nutrient transformation and long-term reuse potential | Small pots and rushed recipes leave little biological buffer | Protect moisture balance, structure, and microbial habitat |
| Peat-based soilless mix | Growers wanting a familiar potting-mix feel with measured feeding | Good water storage and chemical buffering | Can shrink, compact, or become difficult to rewet when allowed to dry severely | Moderate irrigation frequency with pH and EC checks |
| Coco coir blend | Frequent fertigation, drip systems, and rapid correction | Strong air-water balance in a quality, correctly graded product | Salt, particle size, washing, and buffering quality vary by product | Consistent nutrient solution and controlled dry-back |
| Rockwool or propagation foam | Repeatable high-frequency irrigation and tightly monitored rooms | Uniform geometry and low nutrient buffering | Little chemical forgiveness and a difficult disposal profile | Small, repeatable irrigations with root-zone monitoring |
| Expanded clay, perlite, or other coarse aggregate | Recirculating or frequently irrigated systems | High gas exchange and reusable options where sanitation is practical | Low water and nutrient reserve | Reliable irrigation equipment and close observation |
Remember
Choose the routine first, then choose the medium. If the garden cannot receive frequent irrigation, a small rockwool block or coarse aggregate may create unnecessary risk. If you want rapid measurement and correction, a heavily amended biological mix may feel too slow. Neither approach is universally superior.
Indoor cultivation laws differ by location. Apply the technical information only where cultivation is lawful and where the room, water handling, and electrical setup can be operated safely.
What is Grow Medium?
So, what exactly is a grow medium? Essentially, it’s the material that allows your plants to root, grow, and absorb nutrients. Think of it as the soil or substrate where the roots live, grow, and spread out to take in water, nutrients, and oxygen. Depending on what type of grow medium you use, you’ll have different levels of water retention, aeration, and nutrient delivery. Some grow mediums are rich in organic material that naturally feeds your plants, while others are completely inert, offering no nutrients but acting as a carrier for nutrient-rich water in hydroponic systems.
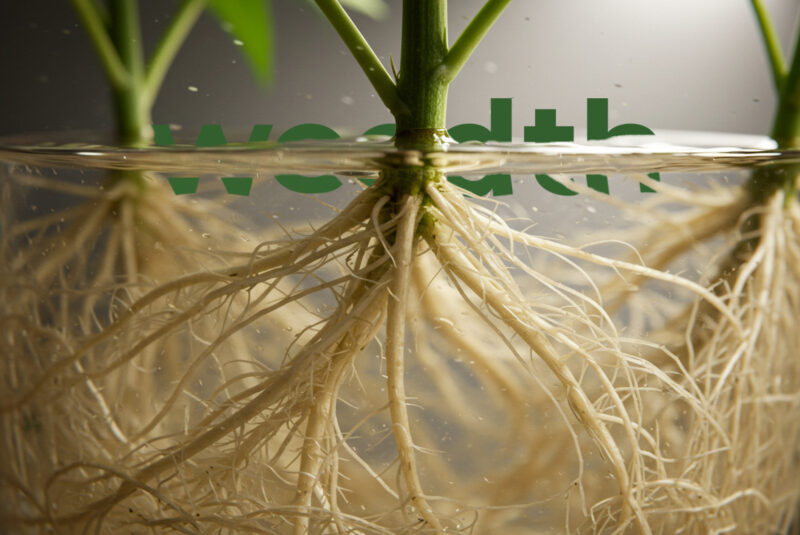
The right grow medium will allow for optimal root development and the efficient uptake of water and nutrients, all while providing enough oxygen to keep those roots healthy. Soil-based grows, you’ll benefit from a medium that can naturally buffer pH levels and provide a home for beneficial microorganisms. In soilless and hydroponic setups, you’ll need to take more control of nutrients, but you’ll often get faster growth and higher yields as a result.
Importance of Choosing the Right Medium
The medium determines the root zone's correction speed. A buffered soil or peat mix can soften a small nutrient or pH error, but it may take longer to show whether a correction worked. A low-buffer substrate reacts quickly, allowing precise control while leaving less time when irrigation or mixing fails.
Water retention: The useful question is not which material holds the most water in isolation. It is how much plant-available water remains after the filled container drains, and how long that reserve lasts under the room's demand.
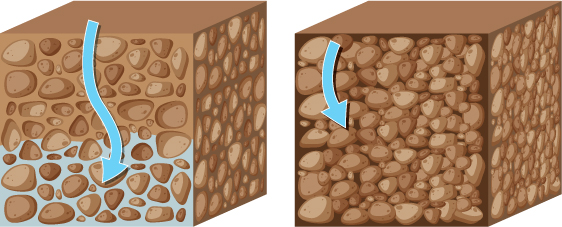
Fine particles and short containers tend to retain a larger saturated zone. Coarse particles and taller profiles usually drain more readily. Roots, however, occupy and restructure the medium over time, so the same pot does not behave identically at transplant and late in the cycle.
Aeration: Roots require oxygen for respiration. A medium must regain air as water is used or drained. Drainage holes matter, but they cannot create internal pore space in a compacted or excessively fine mix.
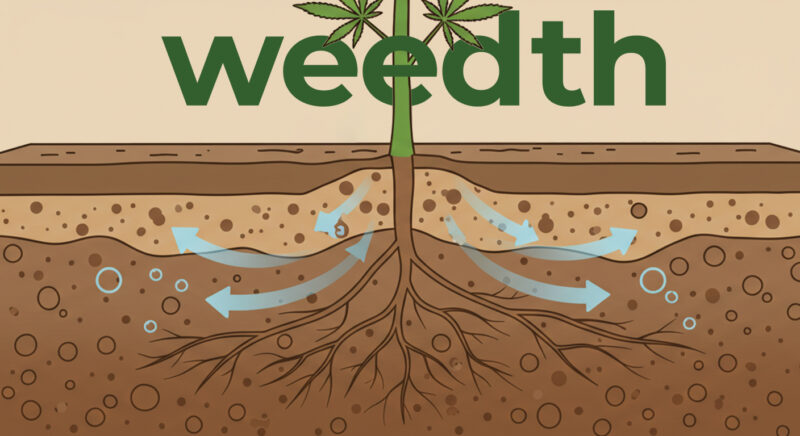
Nutrient behavior: Soil organic matter and exchange surfaces can retain and transform nutrients. Coco and peat are also chemically active even when most nutrition arrives through fertigation. Rockwool and coarse mineral aggregates provide less buffering, so the solution has greater immediate influence.
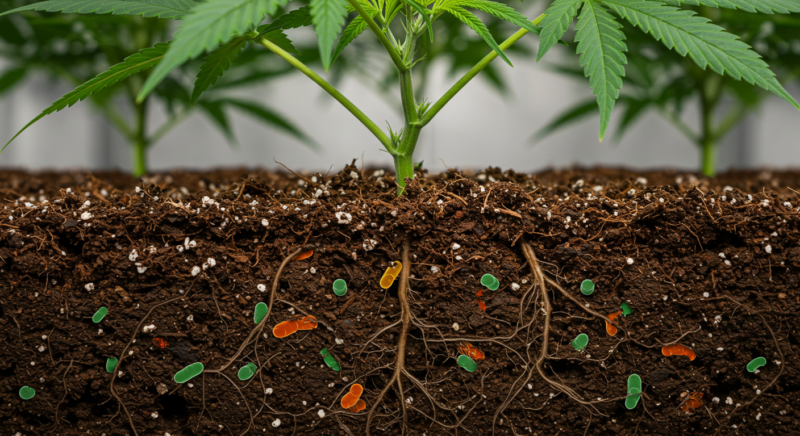
pH behavior: pH targets depend on the crop, medium, fertilizer, water alkalinity, and measurement method. Broad working zones are useful, but do not treat one decimal value as a universal target. Soil-style systems are commonly managed in a mildly acidic range, while soilless fertigation is generally managed somewhat lower. The trend and the plant response matter more than repeatedly forcing every sample to one number.
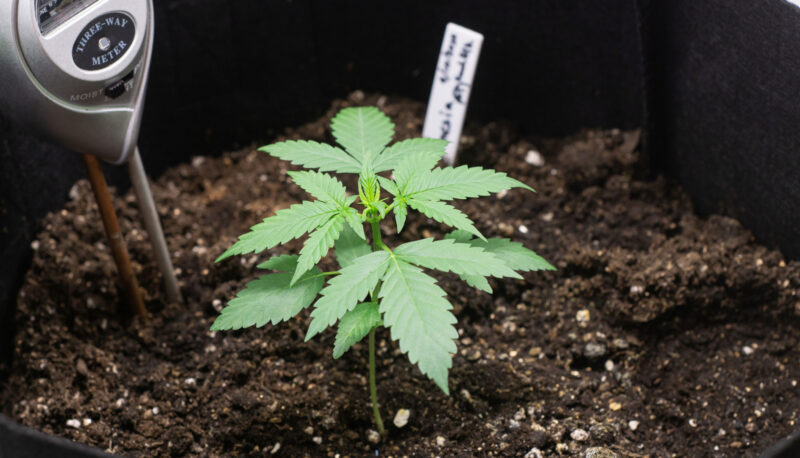
Maintenance: A medium controls how often you must visit, how much equipment you need, and how quickly a missed irrigation becomes damaging. This is where the reader's routine becomes part of the horticulture. If your schedule cannot support frequent fertigation, choose more usable reserve. If you want rapid measurement and correction, choose a substrate and system that expose those changes clearly.
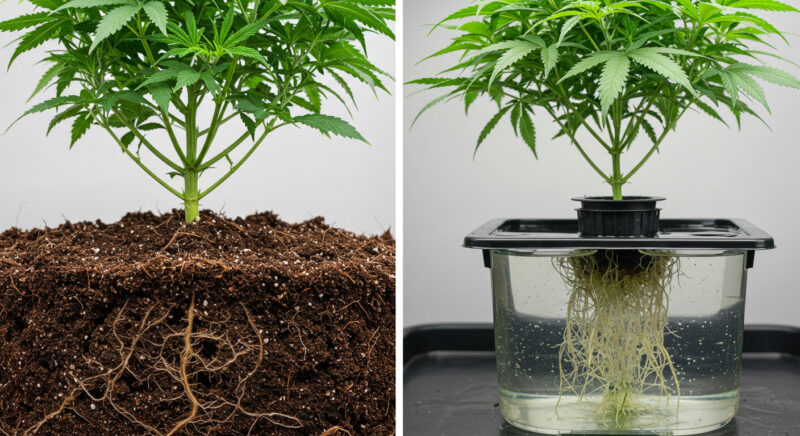
“Is the most aerated medium always the safest choice?”
No. Roots need oxygen, but they also need continuous access to water and dissolved nutrients. An extremely coarse medium can dry too quickly for the available irrigation schedule. Safety comes from matching air-filled porosity and water reserve to container size, plant demand, and how reliably you can irrigate.
The medium is therefore not a background detail. It sets the pace of every root-zone decision that follows.
Common Types of Indoor Grow Mediums
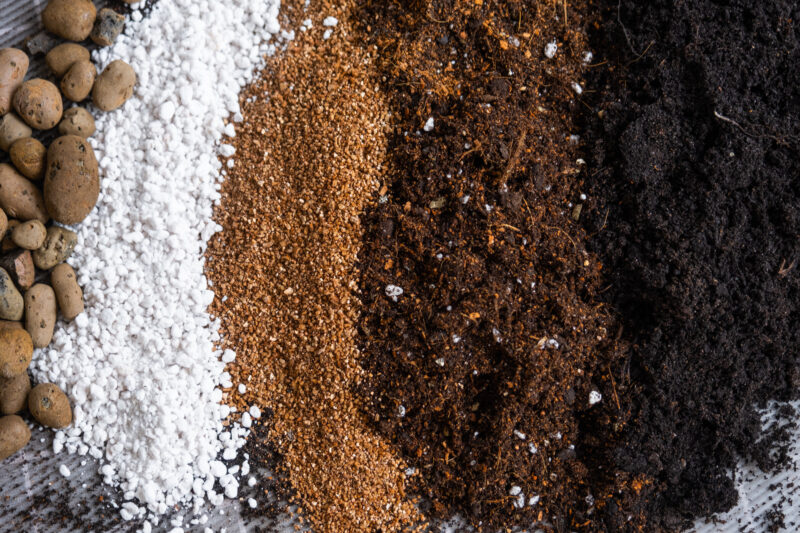
Most indoor root zones belong to one of three management families: soil or biologically active mixes, soilless container substrates, and low-buffer hydroponic media or water culture. The individual ingredients below may serve as a base medium, an amendment, or a support material depending on the system.
Soil and Soil-Based Potting Mixes
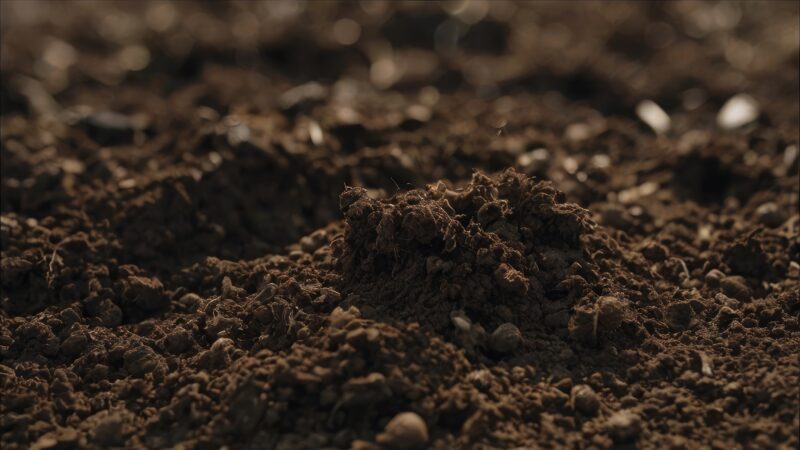
True mineral soil contains sand, silt, clay, organic matter, and living organisms. Indoor “soil” sold in bags is often closer to a soilless potting mix based on peat or coco, with compost, bark, perlite, lime, and a starter charge. Read the ingredient list and nutrient statement so you know whether the product is a biologically active soil, a pre-fertilized potting mix, or a lightly charged substrate that expects liquid feeding.
Coco Coir
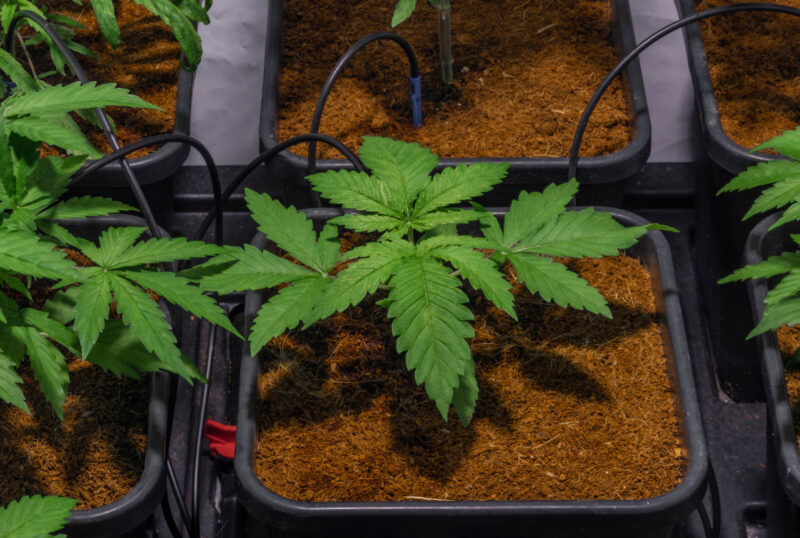
Coco is a fibrous organic substrate available in several particle grades. It can retain water while maintaining substantial aeration, which makes it compatible with frequent fertigation. It is not chemically blank. Washing, buffering, soluble salts, and particle consistency affect how it performs.
Perlite and Vermiculite
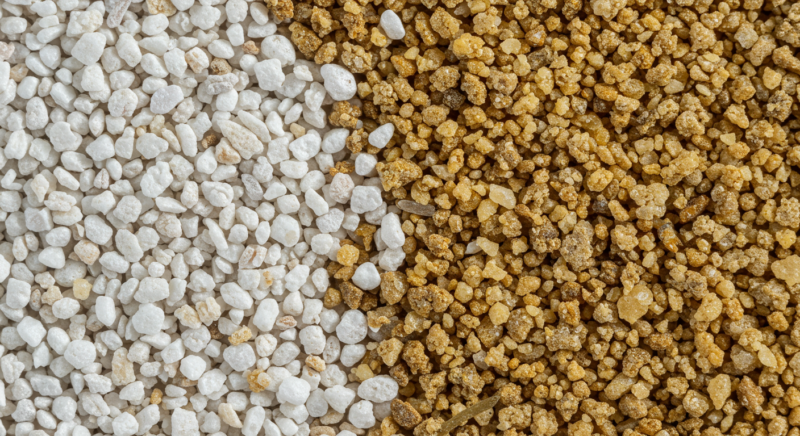
Perlite is an expanded volcanic glass used mainly to increase large-pore space and reduce bulk density. Vermiculite is an expanded mineral with greater water and nutrient retention. They are not interchangeable. A blend that already stays wet usually benefits more from a stable aeration component than from additional fine vermiculite.
Rockwool
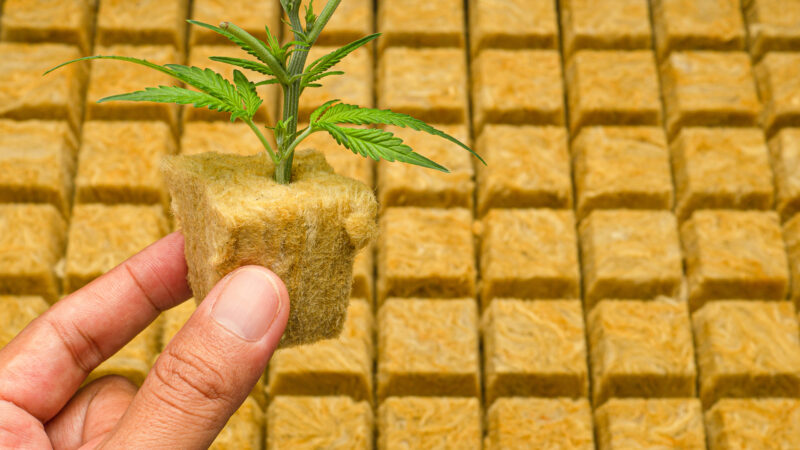
Rockwool is formed mineral fiber with predictable shape and low CEC. It is widely used for propagation and precision fertigation because plugs, blocks, and slabs can be combined into a staged system. Its uniformity does not remove the need to manage block geometry, moisture, pH, EC, algae, sanitation, and disposal.
Expanded Clay Pebbles
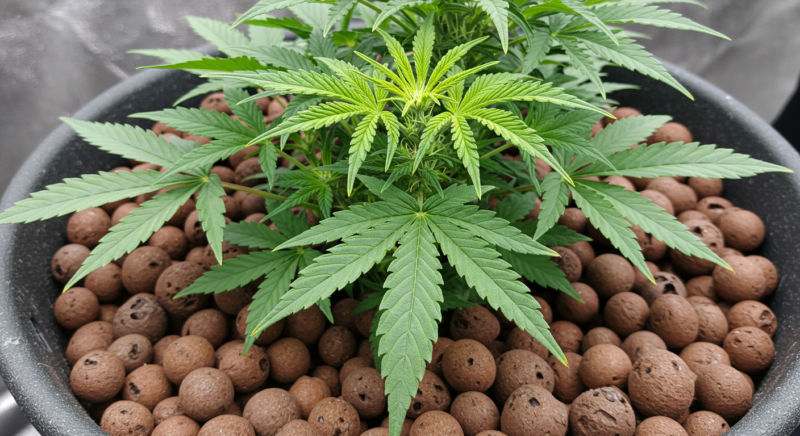
Expanded clay provides coarse support and rapid gas exchange in net pots, flood-and-drain systems, and frequent-irrigation setups. It stores relatively little water compared with fibrous media. It belongs in systems designed around that behavior, not as a thick drainage layer beneath fine potting mix.
Peat-Based Substrates
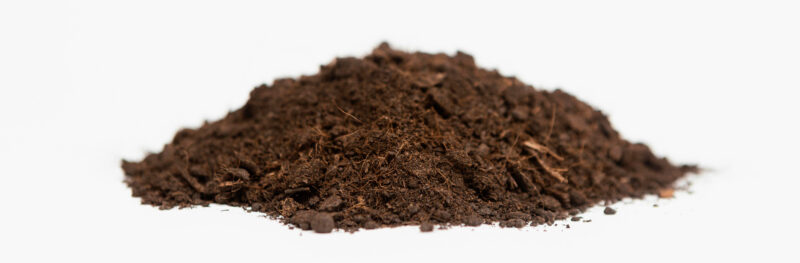
Peat provides high water storage, low bulk density, and useful buffering, but raw peat is acidic and commercial products commonly include lime, wetting agents, perlite, or other components. Severe drying can make peat difficult to rewet, and fine grades can shrink or compact over a long cycle. Peatland impacts also make sourcing and regional alternatives part of the decision.
Water Culture and Aeroponics
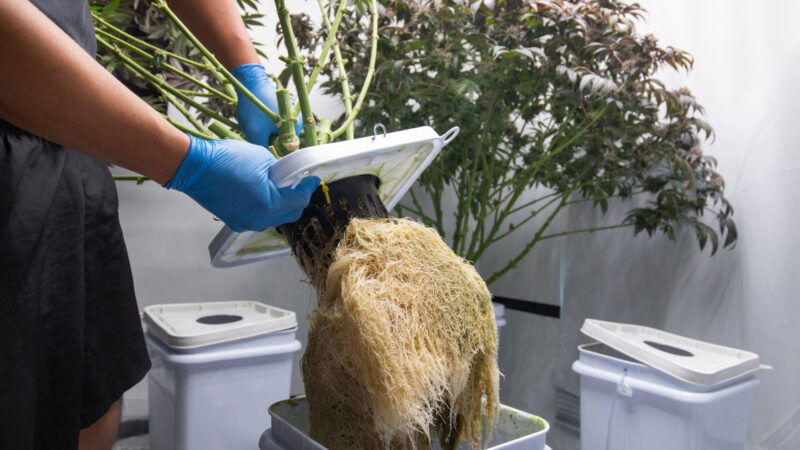
Deep-water culture, nutrient film, and aeroponics reduce or eliminate the solid root medium. They can provide direct oxygenated nutrient delivery, but the reservoir, pump, temperature, dissolved oxygen, sanitation, and backup power replace the buffering that a container substrate would otherwise provide. These are complete systems rather than bagged media.
What to Remember
An ingredient can play different roles. Coco may be the main substrate or a moisture-holding amendment. Perlite may be part of a peat mix or the dominant material in a frequently irrigated system. Always ask what percentage is present and what the irrigation program expects.
The Root-Zone Properties That Actually Matter
Medium names are useful for shopping, but roots respond to physical and chemical properties rather than branding. Two bags both described as coco can behave differently because one contains fine pith and the other contains more chips and fiber. Two peat mixes can hold very different amounts of air after watering because their particle grades, lime charge, wetting agent, age, and degree of compaction are different.
Before comparing recipes, we need a practical language for the root zone. These properties explain why a mix stays wet for five days, why another needs irrigation twice a day, and why a nutrient problem can appear even when the bottle dosage has not changed.
Container Capacity and Available Water
After a saturated container has drained freely, the medium reaches container capacity. It is still holding water, but gravity has removed the easiest portion to drain. The remaining water occupies part of the pore space and the rest contains air. This is the condition that matters more than how wet the loose material looked in the bag.
Not every retained drop is equally available to the plant. Some water is held tightly on very fine particles. Some moves readily toward roots. A medium can therefore have a high total water-holding capacity yet provide a smaller useful irrigation window than expected. Container height also changes the result. In a short, wide container, the saturated zone represents a larger portion of the total depth than it does in a taller container filled with the same mix.
Container capacity
The amount of water a container medium retains after it has been fully wetted and allowed to drain under gravity. It is not the same as field capacity in outdoor soil, and it changes with particle size, compaction, container height, root occupancy, and decomposition.
Container height is easy to overlook because two pots may hold the same advertised volume while presenting different water profiles.
“Why does the same mix stay wet longer in my short pot?”
The mix did not suddenly become more absorbent. Container geometry changed the balance between gravity and capillary forces. A shallow container keeps a larger share of its volume close to the lower saturated zone, so the same material can remain wetter than it does in a taller pot. Root mass, temperature, airflow, and plant size can widen the difference.
Air-Filled Porosity
Roots consume oxygen continuously. After irrigation, the useful question is not simply “Did the pot drain?” It is “How much air-filled pore space remains after drainage?” A container can release water from its holes and still retain too little air around the roots. This is why adding holes cannot rescue a mix whose fine particles have collapsed most of its internal pore structure.
Coarse particles create larger pores that empty more readily and refill with air. Fine particles create smaller pores that retain water more strongly. A stable medium combines pore sizes so the root zone has both a water reserve and a path for gas exchange. Packing pressure matters too. Pressing a loose mix firmly into a pot increases bulk density and can convert a well-designed blend into a slow, air-poor one.
Air-filled porosity
The proportion of a drained medium that remains occupied by air. It is one of the clearest links between substrate structure, irrigation, and root respiration. A medium may have high total porosity while still holding an unsuitable air-to-water balance.
Pro Tip
Judge aeration after watering, not while the mix is dry and fluffy. Many materials look open in the bag but settle after hydration and repeated irrigation. Fill one test pot at normal pressure, saturate it, let it drain, and observe its weight, drainage time, surface behavior, and rewetting before filling the entire room.
Particle Size, Compaction, and Structural Change
Particle size distribution controls more than drainage. It influences hydraulic conductivity, capillary rise, root penetration, and how quickly the medium changes during a crop. Perlite, pumice, bark, rice hulls, coco chips, and coarse peat fibers can increase large-pore space, but they do not behave identically. Perlite is light and may migrate upward. Fresh rice hulls break down. Bark and wood fiber can change nitrogen dynamics as microorganisms decompose them. Mineral aggregates are structurally durable but add different weight and water storage.
Organic substrates age. Peat can shrink and become harder to rewet after severe drying. Fine coco particles can settle. Compost continues decomposing. Reused mixes accumulate roots and broken particles. That does not make reuse impossible, but it means last cycle's irrigation schedule should not be copied without checking how the material now accepts, stores, and releases water.
Cation Exchange Capacity and Nutrient Buffering
Many nutrients exist in solution as electrically charged ions. Surfaces in the medium can temporarily hold positively charged ions such as calcium, magnesium, potassium, and ammonium. This holding ability is described as cation exchange capacity, or CEC. A higher CEC can create useful buffering, but it also means the substrate may initially exchange ions with the nutrient solution rather than behaving like an empty sponge.
Mineral soil, organic matter, peat, compost, and coco have meaningful chemical activity. Rockwool, perlite, and expanded clay are generally managed as much lower-buffer materials, although no real root zone remains chemically untouched forever. Coco is the common point of confusion. It is often called inert because growers supply nearly all plant nutrition through irrigation, but coco has exchange sites and may contain residual potassium, sodium, or chloride depending on processing. Washing reduces soluble salts. Buffering preloads exchange sites, commonly with calcium and magnesium. Those are different operations.
CEC: Cation Exchange Capacity
A measure of how strongly a material can hold and exchange positively charged nutrient ions. High CEC is not automatically better. It provides buffering, but the stored ions, starting charge, and pH must suit the feeding program.
That exchange behavior is the reason a new coco product should be evaluated by its processing and starting chemistry, not only by its appearance.
“If coco is soilless, why can it change my calcium and magnesium balance?”
Soilless does not mean chemically inactive. Coco contains exchange sites that interact with calcium, magnesium, potassium, and sodium. A properly processed product is normally washed and buffered before use, but product quality and batch chemistry still matter. Read the label, check starting EC, and use a nutrient program designed for coco rather than adding supplements automatically to every bottle mix.
pH, Alkalinity, and Electrical Conductivity
pH describes acidity at the moment of measurement. Alkalinity describes the water's acid-neutralizing capacity, which helps determine how strongly irrigation water pushes medium pH over time. A water sample can have a reasonable pH yet contain enough bicarbonate alkalinity to raise substrate pH repeatedly. This is why correcting every tank to the same pH does not solve every root-zone drift problem.
Electrical conductivity, or EC, estimates the total concentration of dissolved ions. It cannot identify which nutrients are present and it does not reveal whether their ratios are appropriate. EC is best used as a trend tool. Compare the prepared solution, the root-zone extract or leachate obtained through a consistent method, plant response, and irrigation history. One isolated runoff reading is rarely a complete diagnosis.
| Property | What it tells you | What it cannot prove | Best practical use |
|---|---|---|---|
| pH | Current acidity of water, solution, or a defined substrate extract | How strongly water will move pH over time | Track nutrient-availability conditions with a consistent sampling method |
| Alkalinity | Acid-neutralizing capacity, commonly driven by bicarbonates | Whether the current tank pH is suitable by itself | Explain persistent upward pH drift and guide water treatment |
| EC | Total dissolved ionic concentration | Which nutrient is high, low, or imbalanced | Compare input and root-zone trends and detect salt accumulation |
| Moisture content | How much water is present at that location and moment | How much is readily available or how evenly the whole pot is wet | Track dry-back when sensor placement and container geometry are consistent |
What to Remember
A meter gives a number, not a diagnosis. Use measurements to test a hypothesis: Is EC rising because irrigations are too small? Is pH drifting because alkalinity is high? Is the center staying wet while edges dry? The plant, the medium, the water source, and the recent timeline must agree before you make a large correction.
Wettability and Rewetting
A useful medium must wet evenly. When peat or some organic mixes become very dry, water may run down the container wall or through a narrow channel while the central root ball remains dry. Compressed coco that was only partly hydrated can contain similar dry pockets. A fast stream from the drainage holes therefore does not prove complete irrigation.
Rewet slowly in several passes when a medium has pulled away from the container or resists water. Allow a short pause between passes so capillary movement can spread moisture. Persistent channeling indicates a structural or wetting problem, not a reason to pour faster.
“Water comes out of the pot immediately. Does that mean the drainage is excellent?”
Sometimes it means the opposite of what it appears to mean. Water may be bypassing a dry or compacted root ball through gaps and channels. Compare pot weight, probe more than one location, and inspect whether the surface accepts water evenly. Good drainage follows even wetting; it is not simply the fastest possible runoff.
Biological Activity, Cleanliness, and Consistency
Living soil deliberately supports a food web. A sterile propagation block begins with a different goal. Both can grow healthy plants, but combining their management rules creates confusion. A biologically active medium needs organic matter, suitable moisture, gas exchange, and enough volume for nutrient cycling. A low-buffer fertigation substrate needs consistent solution chemistry and irrigation. Adding random compost to rockwool or treating living soil like an inert slab weakens the advantages of both systems.
Clean does not mean biologically empty. It means the starting material is appropriate for the intended system and free from unacceptable pests, pathogens, weed seeds, salts, chemical residues, and foreign debris. Commercial packaging is not an absolute guarantee, but it improves traceability. Record the product, batch or lot number, purchase date, starting pH and EC, hydration method, and any amendments. That simple record becomes extremely valuable when one room behaves differently from the previous cycle.
Growing with Soil and Soil-Style Mixes
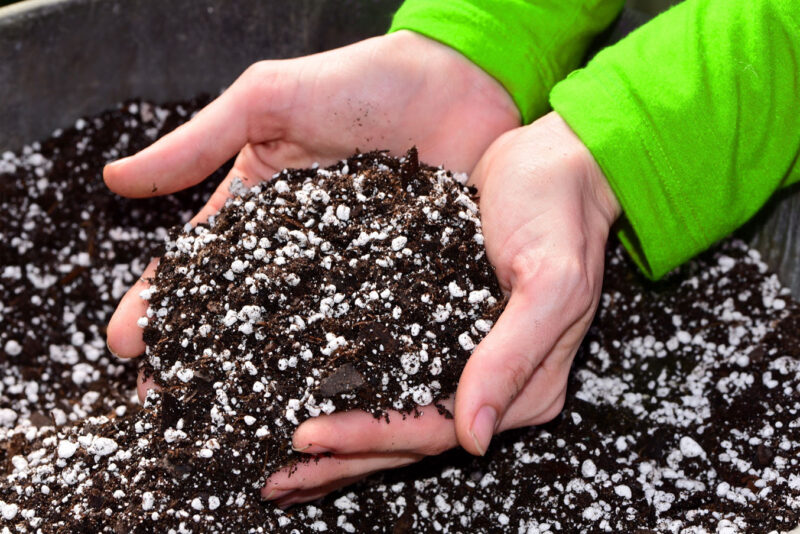
Soil-style growing can be simple, but the word “soil” covers several very different products. A lightly fertilized peat mix supplied with mineral nutrients is managed differently from compost-rich living soil. A hot pre-amended mix is not suitable for every seedling, and unknown garden soil should not be carried indoors.
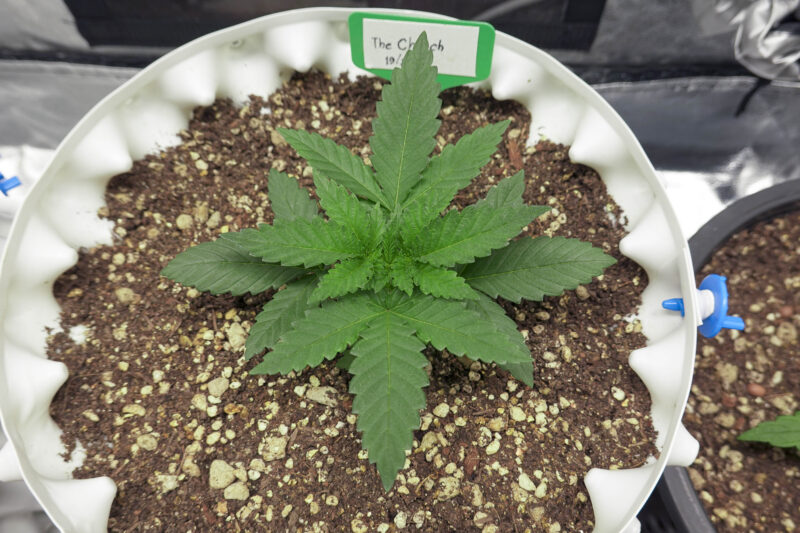
The shared advantage is buffering. Organic matter and exchange surfaces can store water and nutrients and soften small changes. The shared limitation is slower feedback. It may take time for the root zone and leaves to reveal whether a correction worked, so repeated changes can overlap and create a new problem.
Claims that soil automatically produces better aroma or flavor than every soilless system are not established as a universal rule. Genetics, nutrition, root health, environment, harvest timing, drying, and curing all influence final flower quality. A healthy, balanced soil system can support excellent quality, but the medium name alone does not guarantee it.
Why Choose Soil?
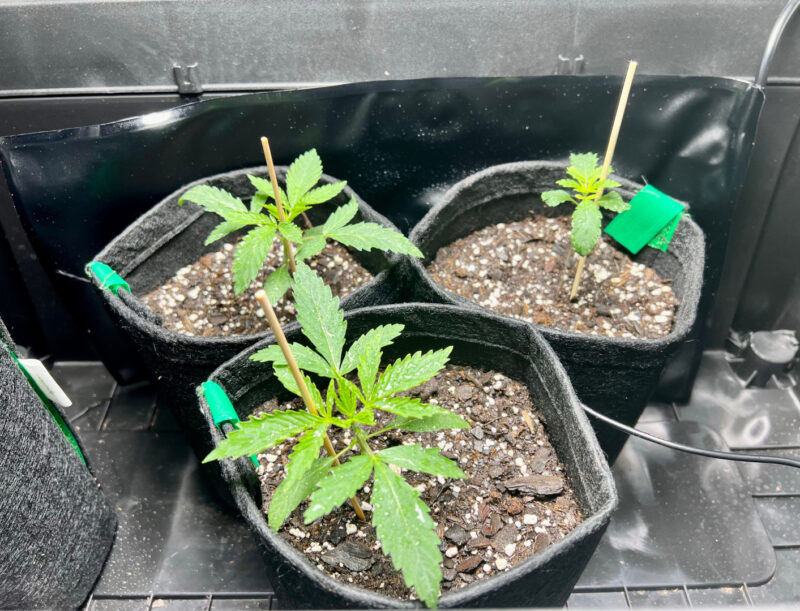
Choose soil or a soil-style mix when you want hand watering, a wider chemical buffer, and the option to use biologically mediated nutrition. It is especially practical when you can provide enough container volume for the selected mix and prefer to make gradual corrections rather than manage a tightly controlled reservoir.
Soil is not automatically low maintenance. Poor drainage, oversized pots, immature compost, excessive amendments, fungus gnats, and unknown starting nutrients can make it difficult. A well-formulated product with traceable ingredients is usually safer for indoor use than backyard soil or a homemade blend assembled from untested materials.
Advice
For a first soil-style setup, choose a moderate, well-aerated mix rather than the strongest advertised formula. It is easier to add measured nutrition later than to remove an excessive charge from a small container.
Function of Soil in Cannabis Grow
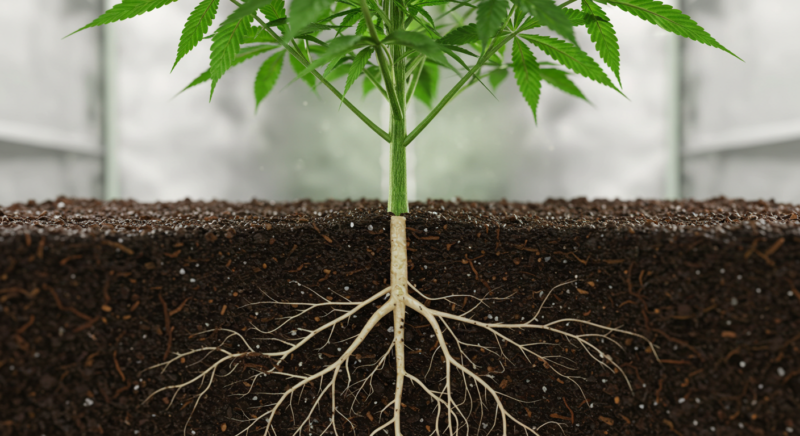
Cannabis is a hardy plant that grows best when its basic needs are met. Soil plays a pivotal role in providing plants with essential nutrients, water, and oxygen. More than just a growing medium, soil acts as an ecosystem for roots, fungi, and microorganisms, all contributing to a plant’s overall vitality.
The type of soil you choose will impact key growth factors such as:
Water Retention and Drainage: Cannabis plants need a delicate balance between water retention and drainage. Too much water can lead to root rot, while too little can cause the plants to dry out and wilt. The texture and composition of soil determine how well it holds water and drains excess moisture.

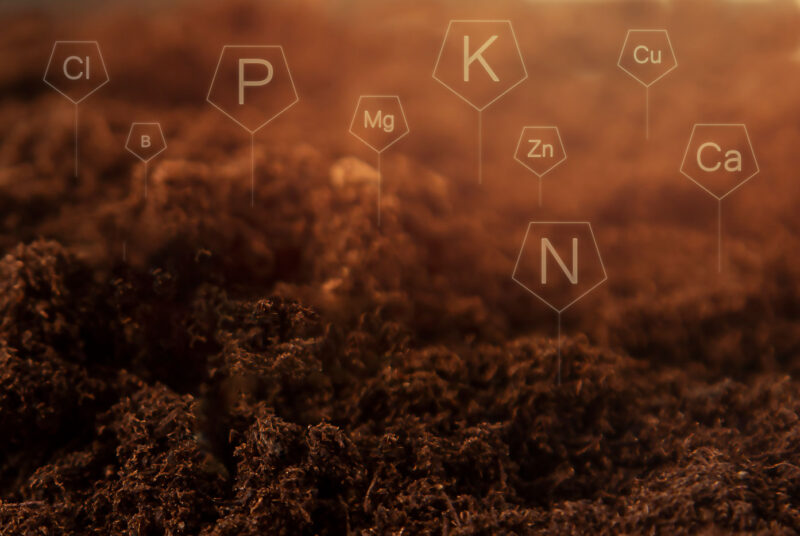
Nutrient Availability: Healthy cannabis plants require a mix of macronutrients (like nitrogen, phosphorus, and potassium) and micronutrients (such as calcium, magnesium, and sulfur). Soil that is too nutrient-poor will starve the plants, while soil that is too rich can cause nutrient burn or lockout.
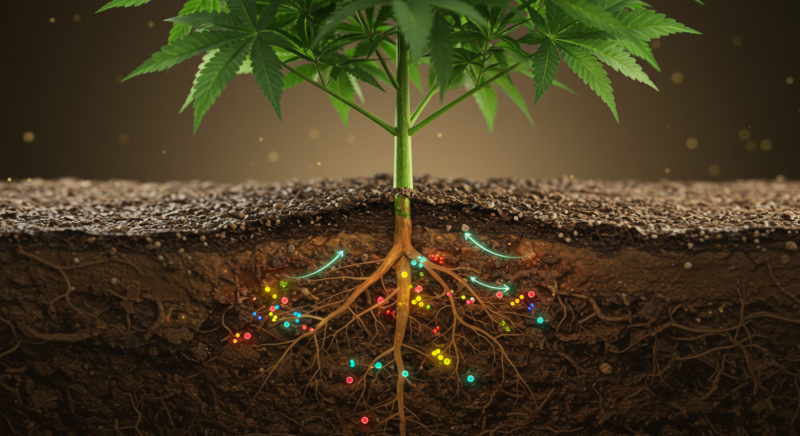
Root Development: Cannabis roots need a well-aerated soil to expand and absorb nutrients effectively. Dense, compacted soil can stifle root growth and lead to poor nutrient uptake, reducing overall plant health.
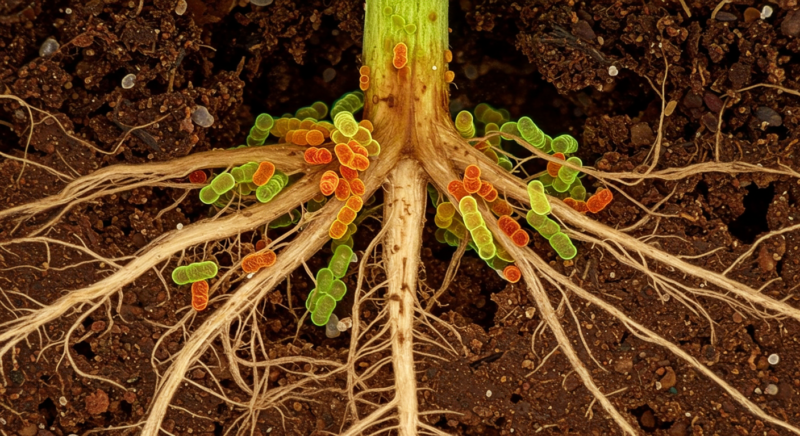
Microbial Activity: Soil isn’t just a passive environment—it’s a dynamic ecosystem filled with microorganisms that help break down organic matter, making nutrients more available to plants. A healthy, living soil supports beneficial bacteria, fungi, and insects, which all contribute to robust plant growth.
Choosing the Right Soil for Cannabis
Not all soil is created equal, and choosing the right soil is crucial for ensuring your plants grow to their full potential. Cannabis requires a well-draining, nutrient-rich medium that provides the right balance of water retention, aeration, and nutrients. Here are some key factors to consider when selecting soil for cannabis:
Drainage: One of the most important characteristics of good soil for cannabis is its ability to drain excess water. Roots need both water and oxygen to grow, and soil that retains too much moisture can suffocate the roots, leading to root rot. To ensure proper drainage, look for soils with added perlite or vermiculite, which improve airflow and prevent water from pooling at the roots.
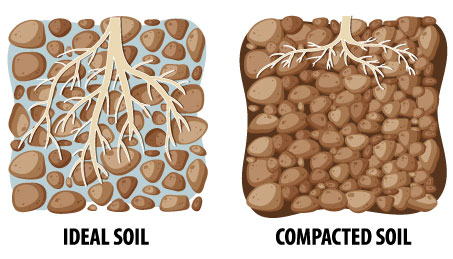
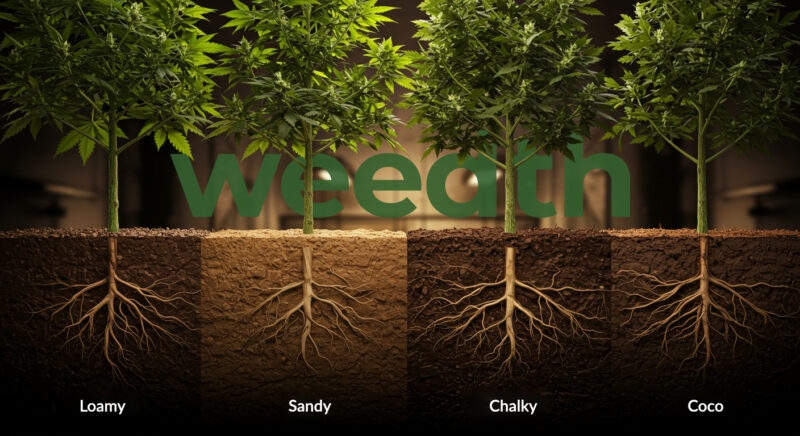
Texture and Structure: The best soil for cannabis is loamy, meaning it has a balance of sand, silt, and clay. Loamy soil provides a good mix of water retention and aeration, ensuring that the roots have access to both moisture and oxygen. Avoid soils that are too clayey, as they tend to become waterlogged, or sandy, as they drain too quickly and may require more frequent watering.
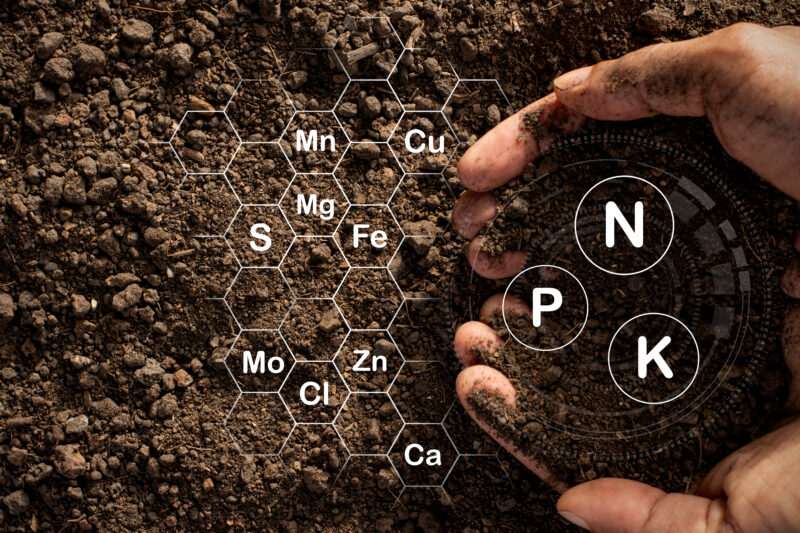
Nutrient Content: Cannabis requires a wide range of nutrients, including nitrogen (N), phosphorus (P), and potassium (K), as well as secondary nutrients like calcium, magnesium, and sulfur. Many commercial soils come pre-fertilized with nutrients, but these may only last for the first few weeks of growth. After that, you’ll need to supplement your soil with additional nutrients, depending on the plant’s growth stage. Organic soils often contain compost, worm castings, or bat guano, which provide slow-release nutrients throughout the grow cycle.
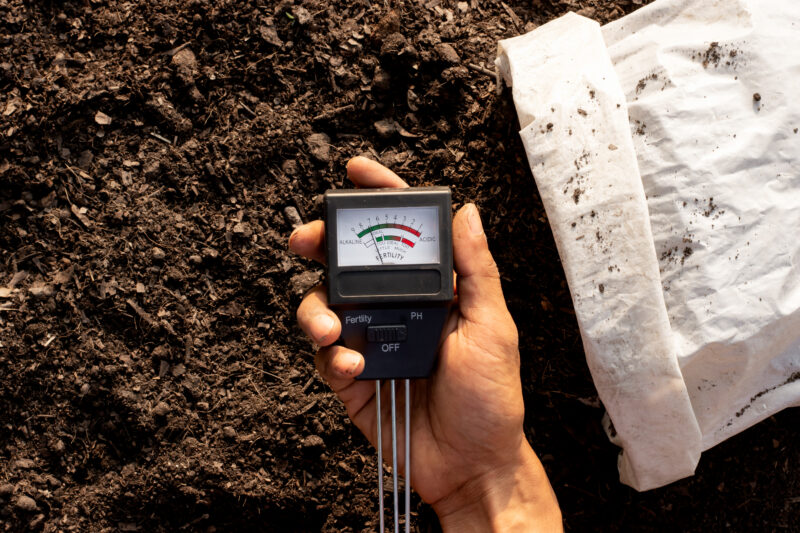
pH Level: Cannabis thrives in slightly acidic soil with a pH level between 6.0 and 7.0. If the soil’s pH is too high or too low, it can prevent the plant from absorbing essential nutrients, leading to nutrient lockout. Many high-quality soils are already pH-balanced, but you can always adjust the pH using lime (to raise pH) or sulfur (to lower pH) if necessary.
Organic vs. Synthetic Soils: Organic soils are rich in natural ingredients like compost, manure, and earthworm castings. These soils promote microbial activity, which helps break down organic matter and deliver nutrients to the plants slowly. Organic growing is often associated with producing higher-quality, more flavorful buds. Synthetic soils, on the other hand, are often enriched with chemical fertilizers that deliver nutrients more quickly but require more careful management to avoid nutrient imbalances.
Soil Types
Choosing the right soil is crucial when growing cannabis, as it directly impacts your plants’ overall health, growth rate, and final yield. The soil is the structural base for your plants and determines how well water, nutrients, and air are distributed to the roots. Cannabis plants require specific conditions for optimal growth, so it’s important to understand how different soil types and amendments influence these factors. We’ll explore the most commonly used soil types for cannabis grow and soil amendments that can enhance your grow. Each section also includes a breakdown of advantages and disadvantages to help you make the best decision for your plants.
Understanding Basic Soil Types
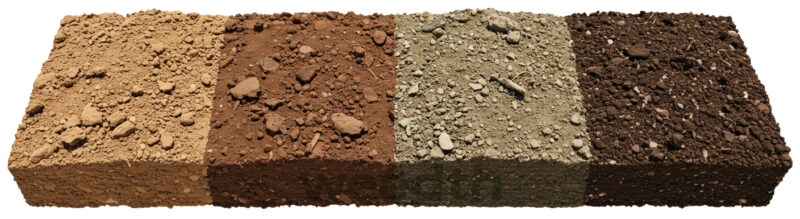
All soils are made up of a mixture of sand, silt, and clay particles in varying proportions. These foundational soil types influence how well your cannabis plants receive water, nutrients, and oxygen. While some of these are not ideal on their own, understanding them helps identify what makes a good soil mix and what to avoid.
-
Sandy Soil: Light and quick-draining, but poor at holding water and nutrients.
-
Clay Soil: Heavy and nutrient-rich, yet prone to compaction and poor drainage.
-
Silty Soil: Smooth in texture and holds water better than sand, but may restrict airflow to roots.
-
Peaty Soil: High in organic matter and moisture retention, though acidic and often needs pH adjustment.
-
Chalky Soil: Alkaline and often stony, which can interfere with nutrient absorption.
-
Loamy Soil: A well-balanced blend of sand, silt, and clay. Loam offers excellent drainage, aeration, and nutrient retention, making it the gold standard for cannabis cultivation.
Now that you’re familiar with the basic building blocks of soil, let’s explore the specific soil types most commonly used by cannabis growers.
Potting Soil
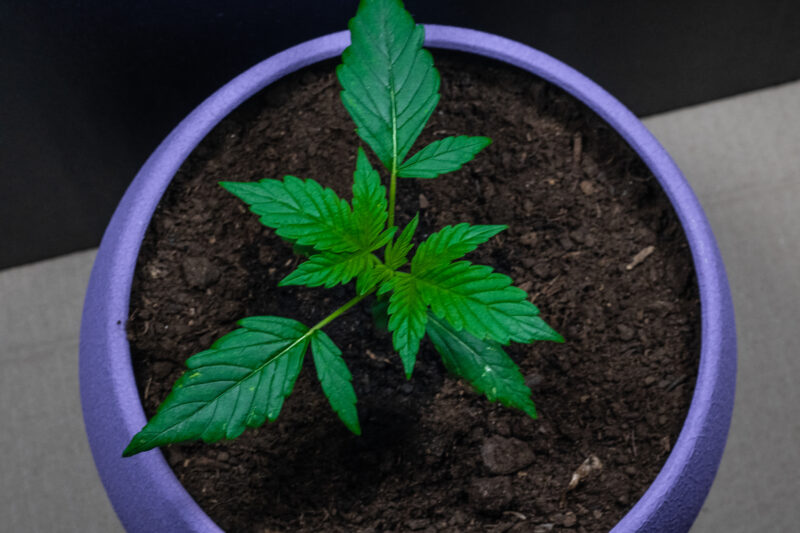
Convenient and Beginner-Friendly
Potting soil is one of the most accessible options for cannabis growers, especially beginners. It’s typically pre-mixed and contains a blend of organic materials like peat moss, compost, perlite, and sometimes bark. Potting soil is designed to offer a balance between water retention and drainage, making it a versatile choice for both indoor and outdoor cannabis cultivation.
Potting soil is often available in various blends, some of which are pre-fertilized, while others are labeled “light mix” to allow for greater control over nutrients. This ease of use makes it a popular starting point for hobby growers and beginners who want something ready to use without too much preparation.
Advantages:
- Widely Available: Potting soil can be found at almost any garden center or hardware store, making it highly accessible.
- Pre-Mixed: Since it’s often pre-mixed, potting soil is convenient and user-friendly, requiring little to no initial amendments.
- Versatile: Suitable for both indoor and outdoor cannabis growing due to its balanced composition.
- Affordable: Potting soil is generally affordable and widely used by home gardeners.
Disadvantages:
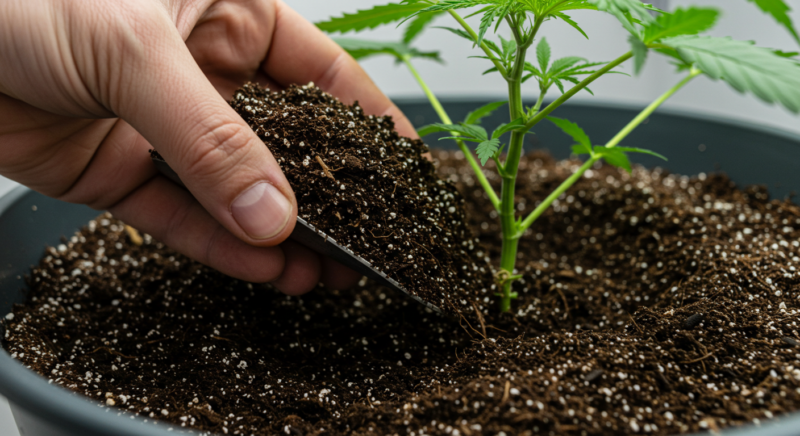
- Pre-Fertilized Versions: Some potting soils contain synthetic fertilizers, which may lead to overfeeding during the initial stages of growth. This can result in nutrient burn or imbalances later.
- May Need Aeration Improvements: Depending on the blend, potting soil may compact over time, reducing aeration and drainage. You might need to amend it with materials like perlite or vermiculite for better air circulation.
- Nutrient Control: Pre-fertilized mixes can limit your ability to control nutrient levels, making it difficult to adjust feeding schedules.
Super Soil
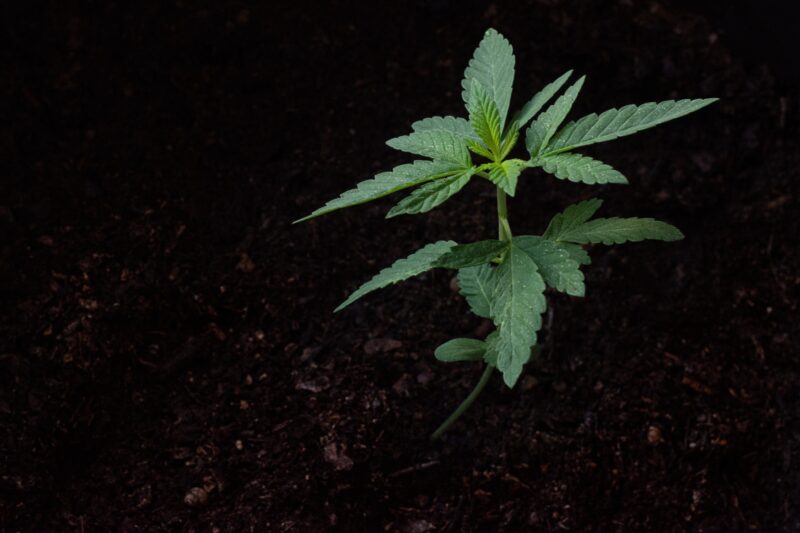
The Ideal Choice for Organic Growers
Super soil is a premium, nutrient-rich organic soil mix that contains everything your cannabis plants need throughout their lifecycle. It is often made from a combination of organic materials like compost, worm castings, bat guano, fish meal, bone meal, and other natural amendments. Super soil is a living medium, rich with beneficial microorganisms that help break down organic matter into nutrients readily absorbed by the plants.
Super soil allows growers to take a hands-off approach to fertilizing because it contains slow-releasing nutrients. This soil type is favored by those who prefer organic cultivation methods and want to avoid synthetic fertilizers altogether.
Advantages:
- No Need for Additional Fertilizers: Super soil is pre-amended with all the nutrients needed throughout the entire growth cycle, reducing the need for extra feeding.
- Promotes Healthy Microbial Life: The organic components foster a thriving ecosystem of beneficial bacteria and fungi, improving soil structure and nutrient uptake.
- Low Maintenance: Once set up, super soil requires little maintenance other than regular watering, making it ideal for growers who want to minimize hands-on care.
Disadvantages:
- Costly or Labor-Intensive: Super soil can be expensive if bought pre-made. If making it yourself, it requires sourcing several ingredients and time to “cook” or break down before use.
- Inconsistent Nutrient Levels: Homemade super soil can be difficult to get just right, and incorrect mixing ratios may result in nutrient deficiencies or imbalances.
- Limited Control: Since super soil is pre-loaded with nutrients, it can be difficult to fine-tune feeding schedules for specific plant needs later in the grow cycle.
Peat-Based Soil
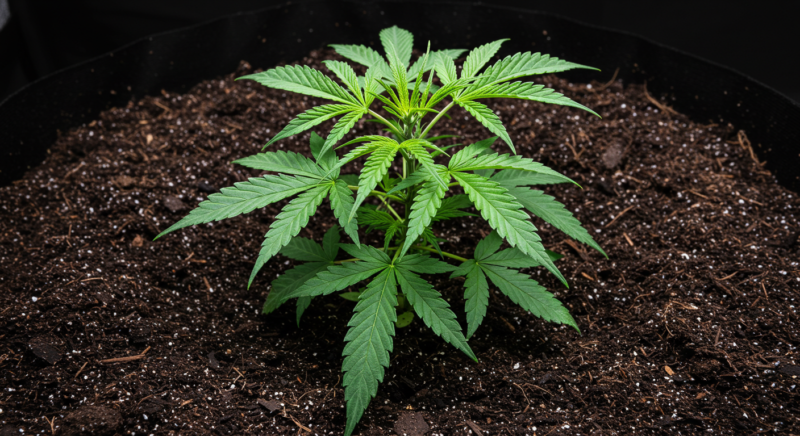
Lightweight and Moisture Retentive
Peat-based soil, commonly made from peat moss, is known for its light texture and excellent water retention. It’s a popular ingredient in many commercial potting soils and can be used on its own or as part of a soil mix. Peat moss is harvested from bogs, making it a highly absorbent material that retains moisture effectively, which is ideal for indoor cannabis cultivation or environments where consistent humidity levels are hard to maintain.
Peat-based soils are also frequently used for seedlings and clones because of their fine texture, which allows delicate roots to establish without being overwhelmed by heavy soil.
Advantages:
- Great Water Retention: Peat moss can absorb a large amount of water, making it suitable for dry climates or for growers who may struggle to maintain consistent watering.
- Lightweight: Peat-based soil is easy to handle and won’t compact too heavily, which is helpful in indoor grow setups where soil movement may be frequent.
- Ideal for Seedlings: Its light texture is gentle enough for young plants or clones, preventing root damage during early growth stages.
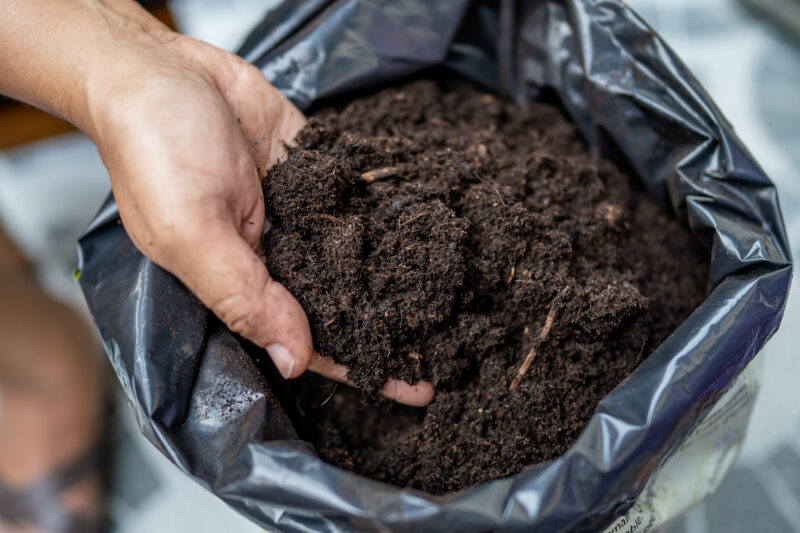
Disadvantages:
- Prone to Compaction: Peat moss can compact over time, especially if it’s not mixed with materials like perlite or vermiculite. This reduces aeration, which can suffocate roots.
- Acidic pH: Peat moss has a naturally acidic pH (around 3.5 to 4.5), which can lead to nutrient lockout if not properly adjusted. Lime is often added to balance the pH.
- Not Sustainable: Harvesting peat moss contributes to the depletion of natural peat bogs, which are important ecosystems. There are more sustainable alternatives like coco coir.
Loam
The Perfect Balance
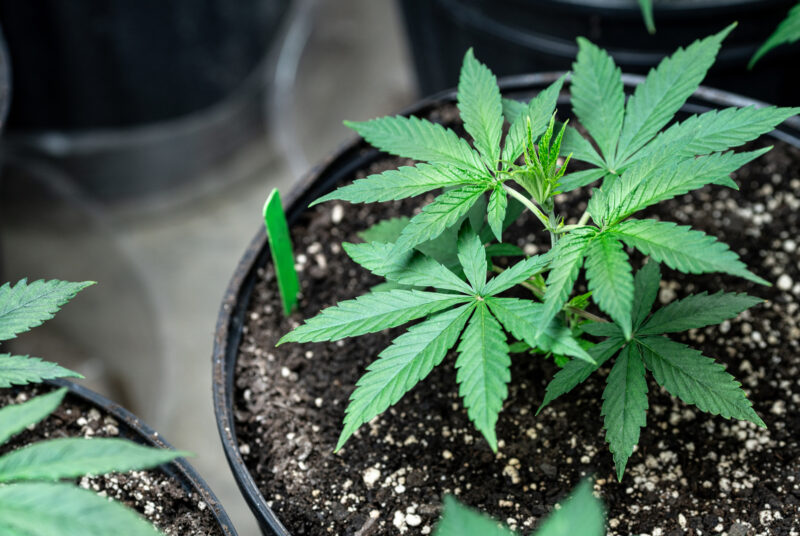
Loam is often considered the gold standard for cannabis cultivation because it perfectly balances sand, silt, and clay. This composition provides an excellent combination of water retention, drainage, and aeration, making loam a highly fertile and versatile soil. It allows water to drain freely while still holding enough moisture to keep the roots hydrated and prevents the soil from becoming too dense or compacted.
Loam is also rich in nutrients and provides a steady supply of both macronutrients and micronutrients to cannabis plants. This makes it an ideal growing medium, especially for outdoor growers, as it supports vigorous root development and robust plant growth.
Advantages:
- Excellent Drainage and Aeration: Loam allows for proper water drainage while still retaining enough moisture for the plant’s roots, reducing the risk of root rot.
- Nutrient-Rich: The natural nutrient content of loam provides cannabis plants with a steady and reliable supply of essential nutrients, promoting healthy growth.
- Promotes Strong Root Development: The balanced texture of loam ensures that roots can expand freely without becoming compacted, which leads to stronger, healthier plants.
Disadvantages:
- Heavy and Expensive: High-quality loam can be expensive and more difficult to find than other soil types. It’s also heavier than alternatives like peat-based soils, which may be an issue for indoor growers who need to move plants frequently.
- May Need Custom Blending: If loam isn’t readily available, growers may need to mix it themselves, combining sandy soil, silt, and clay, along with organic matter to replicate its properties.
Amendments
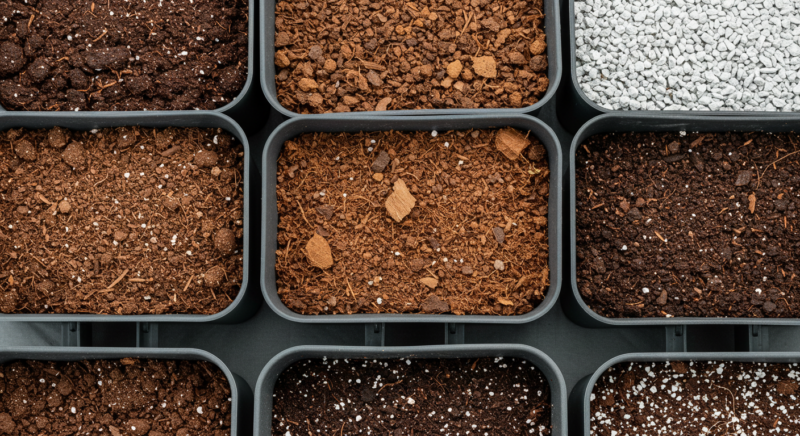
Soil amendments are an essential part of cannabis cultivation. They are materials added to soil to improve its physical properties, such as texture, drainage, nutrient content, and water retention. These amendments allow growers to create a more custom soil environment tailored to their specific plants and growing conditions. The right mix of amendments can drastically improve the health, growth, and yield of cannabis plants by ensuring that roots have optimal access to air, water, and nutrients. Below, we’ll dive deeper into some of the most commonly used amendments, exploring their benefits, risks, and best practices for use.
Coco Coir
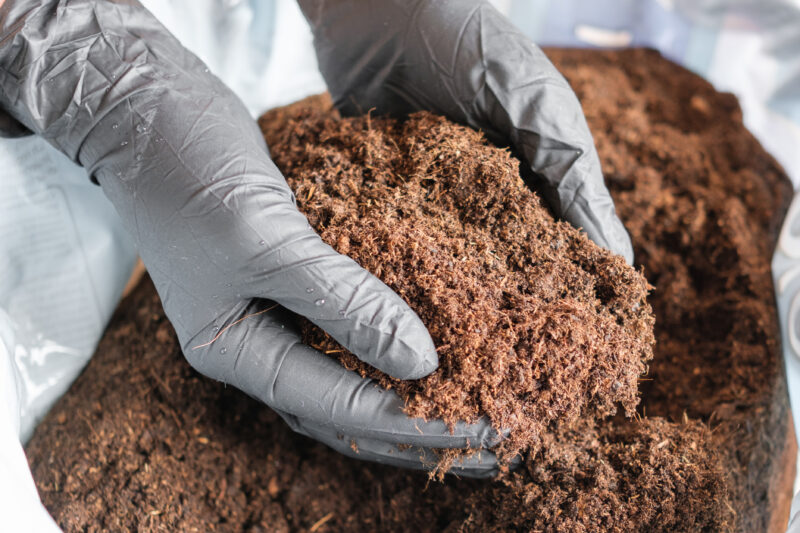
Sustainable and Versatile Amendment
Coco coir, made from the fibrous husks of coconuts, has become a popular soil amendment due to its excellent water retention and aeration properties. As a renewable resource, coco coir is more environmentally friendly than alternatives like peat moss, which is harvested from delicate ecosystems. When added to soil, coco coir improves moisture retention while maintaining a loose structure that prevents soil from compacting, allowing oxygen to reach the roots.
One of the major benefits of coco coir is that it is pH-neutral, simplifying nutrient management. However, because it is inert and lacks inherent nutrients, you will need to provide a full nutrient regimen for your plants. Coco coir also has a tendency to leach calcium and magnesium, which makes it essential to supplement with a Cal-Mag solution to avoid deficiencies. Despite this, coco coir is particularly useful for indoor cannabis cultivation or in environments where consistent moisture levels are a challenge to maintain.
Vermiculite
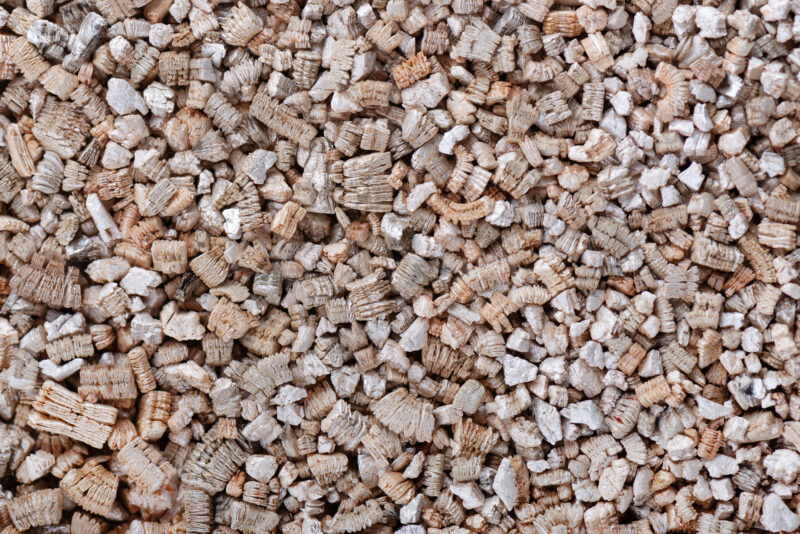
Boosting Water Retention and Nutrient Availability
Vermiculite is a mineral that expands when heated and is commonly used to improve water retention and nutrient buffering in soil. Vermiculite can hold large quantities of water and nutrients, making them more accessible to plants over time. This makes it a valuable amendment for cannabis growers in arid climates or for those who have difficulty maintaining consistent soil moisture. It helps to reduce the frequency of watering while also preventing nutrient leaching, which can wash away vital elements before plants can absorb them.
However, vermiculite’s ability to hold water can sometimes become a problem if overused, as it can lead to overwatering and root rot. It is best used in conjunction with other amendments like perlite, which improves drainage and balances moisture levels in the soil.
Perlite
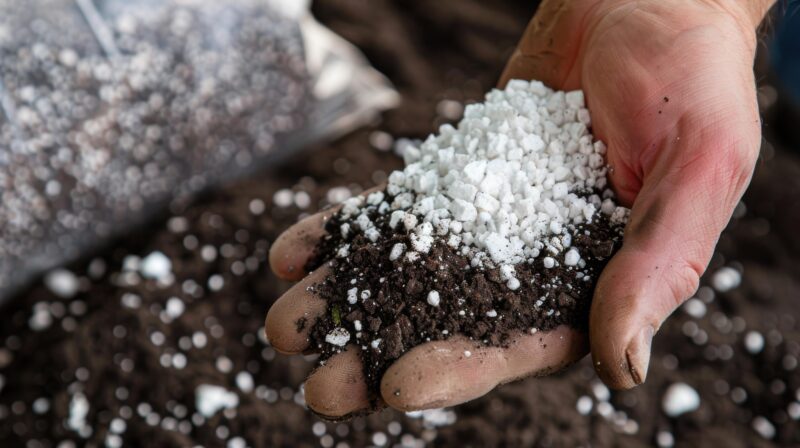
Maximizing Drainage and Aeration
Perlite is a volcanic glass that is heated until it expands into lightweight, porous granules. Its primary function as a soil amendment is to enhance drainage and aeration. Perlite’s porous structure creates air pockets in the soil, ensuring that oxygen can reach the roots and that excess water drains freely. This is crucial in cannabis cultivation, where too much water around the roots can lead to issues like root rot.
Perlite is especially useful when working with dense soils, like clay, or for indoor growers who need better control over their watering schedule. Because it is very lightweight, perlite can sometimes float to the surface of the soil or blow away in outdoor environments, so it may need to be replenished periodically. Despite this, perlite is an invaluable tool for preventing soil compaction and promoting healthy root development in cannabis plants.
Worm Castings
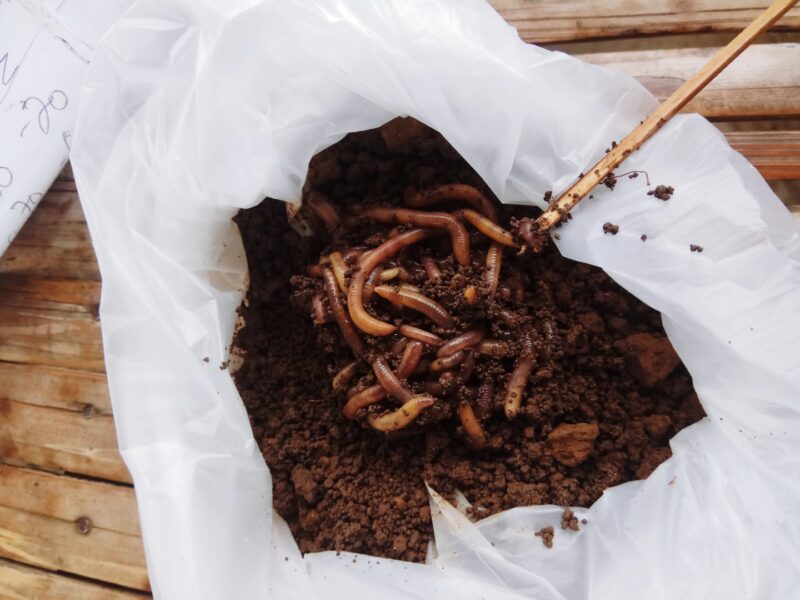
Natural Fertilizer and Soil Enhancer
Worm castings, also known as vermicompost, are an excellent source of micronutrients and organic matter that enrich the soil. Derived from worm excrement, they provide a slow-release source of nitrogen, phosphorus, and potassium, along with beneficial microbes that improve the soil’s structure and promote nutrient absorption. Unlike synthetic fertilizers, worm castings do not burn your plants, making them safe to use in higher quantities without worrying about nutrient overload.
In addition to providing nutrients, worm castings improve the soil’s water-holding capacity and aeration. This makes them ideal for creating a rich, living medium that supports robust root systems. Worm castings can be a foundational component of a soilless mix or a standard potting soil when mixed with other amendments like perlite and vermiculite.
Guano
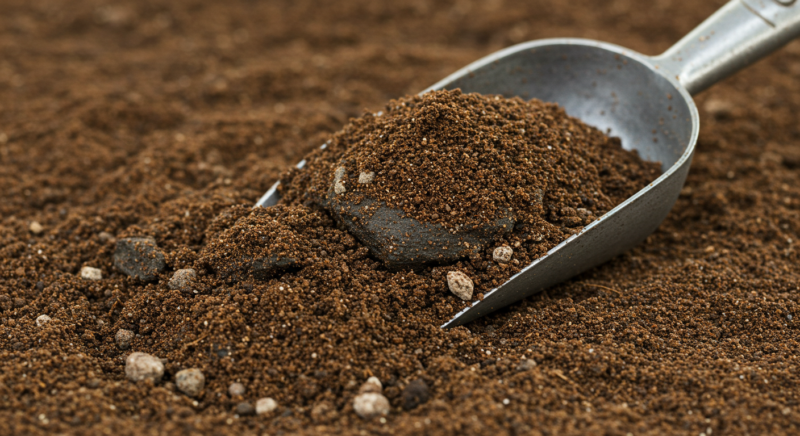
High-Powered Organic Fertilizer
Guano, or dried animal excrement, is another powerful organic amendment that can be either bat or bird-derived. It is available in formulations high in nitrogen, phosphorus, or as a balanced blend. Guano provides an excellent source of nutrients that promotes strong vegetative growth and healthy root systems, depending on its nitrogen or phosphorus content.
Guano is potent and can easily burn your plants if overused. When using guano, it’s important to use it sparingly and mix it well with other amendments to dilute its strength. It’s best used as a supplemental fertilizer rather than a primary soil component.
Bone Meal
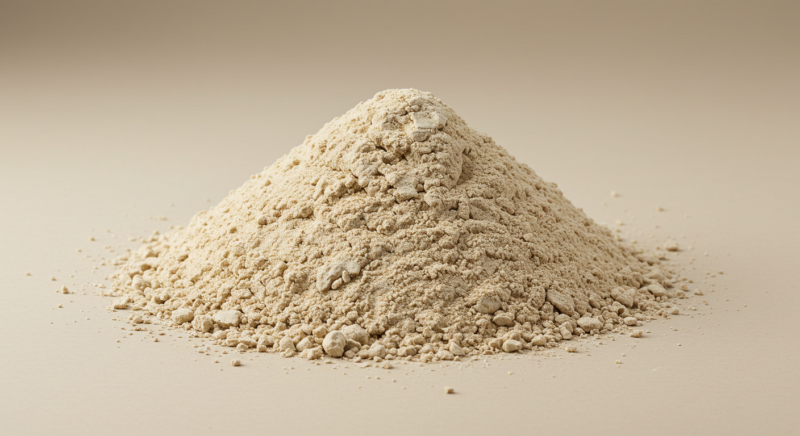
Natural Phosphorus Source
Bone meal is made from ground-up animal bones, typically from slaughterhouses. It is a great natural phosphorus source, essential for healthy root development and flower production in cannabis plants. It slowly releases phosphorus into the soil, providing long-term nutrition.
Bone meal is especially useful for promoting vigorous growth during the flowering stage, but it can pose challenges, particularly in outdoor grows. The smell of bone meal can attract animals, which may dig up your plants. It can also attract pets in indoor grows, so it should be applied carefully and possibly mixed into the soil to reduce odor exposure.
Blood Meal
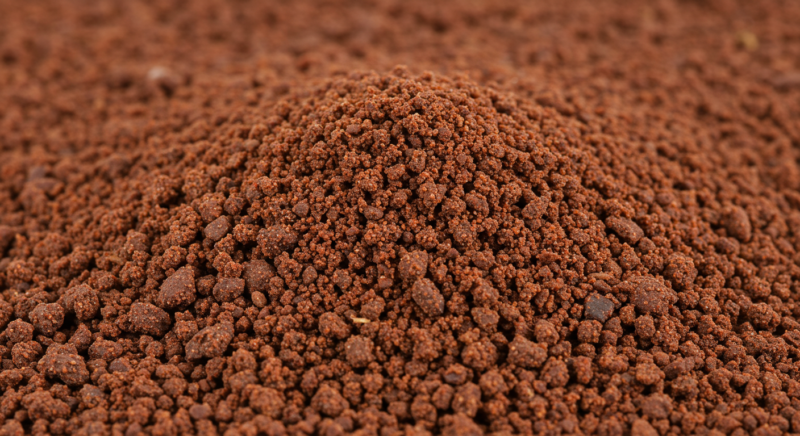
Nitrogen-Rich Organic Fertilizer
Blood meal is another byproduct from slaughterhouses, made from dried animal blood. It is a powerful nitrogen source, promoting lush, green vegetative growth in cannabis plants. Be careful when using blood meal, as it should be applied sparingly to avoid burning plants due to its high nutrient concentration.
Blood meal is also highly odoriferous and can attract animals if used outdoors. For this reason, many growers use it cautiously and mix it thoroughly into the soil to minimize odor and prevent wildlife from disturbing the grow site.
Kelp Meal
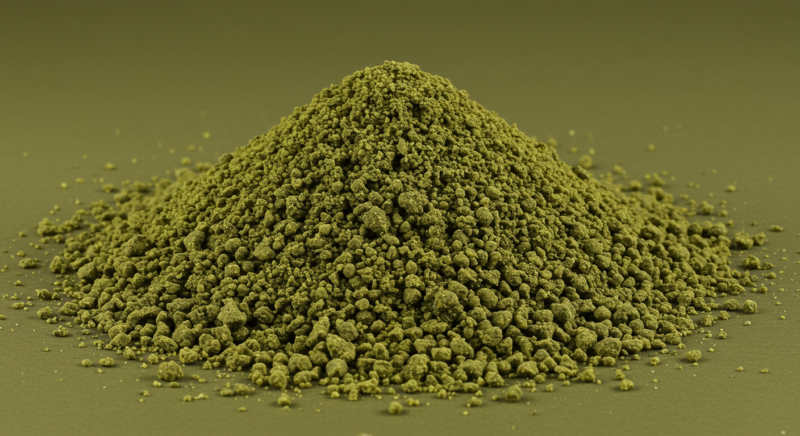
Natural Growth Promoter
The kelp meal is made from dried and ground seaweed, particularly the species Ascophyllum nodosum. This amendment is highly beneficial to cannabis plants because it contains growth hormones that promote the rapid development of both roots and foliage. Kelp meal is also rich in trace elements, enzymes, and other micronutrients that support overall plant health.
Kelp meal is often used as a supplement to boost plant growth during both the vegetative and flowering stages. It helps to strengthen the root system, increase stress tolerance, and improve the plant’s ability to absorb nutrients from the soil.
Dolomite Lime
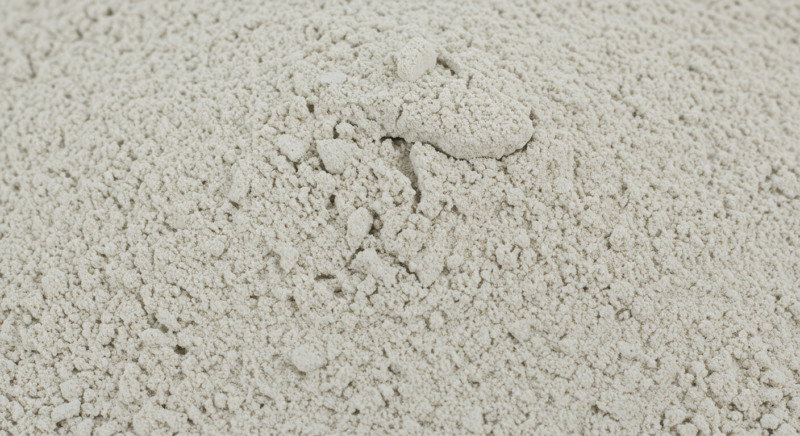
pH Buffer and Calcium Source
Dolomite lime is frequently added to soil to raise pH and offset the natural acidity found in many planting mediums, such as peat-based mixes. Cannabis plants thrive in a slightly acidic to neutral pH, ideally between 6.0 and 6.5, and dolomite lime helps maintain this balance by acting as a buffer.
In addition to balancing pH, dolomite lime provides calcium and magnesium, two essential nutrients for healthy plant growth. This amendment is slower-acting than other lime products, but its buffering capacity makes it a popular choice for maintaining a stable pH throughout the grow cycle.
Backyard Soil: Considerations and Potential Risks
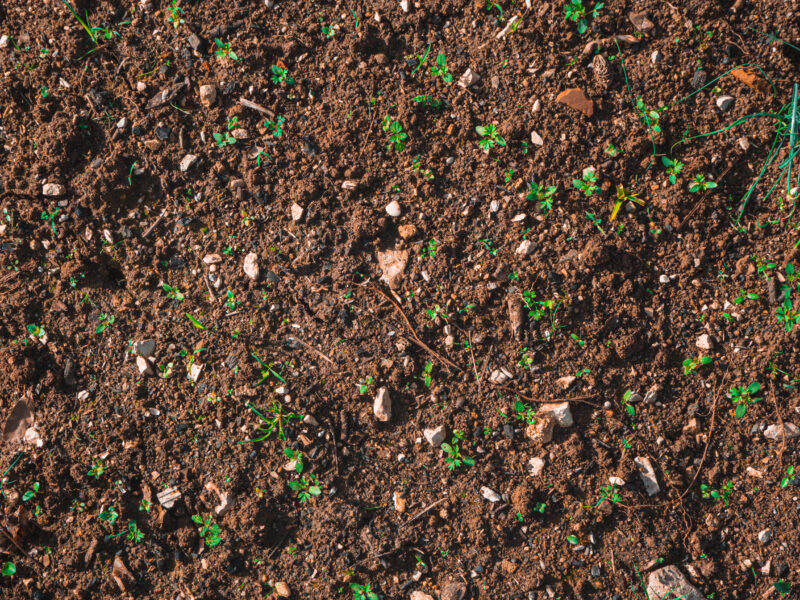
Using backyard soil for cannabis cultivation is an option, but it comes with notable risks that growers need to be aware of and address. Backyard soil often contains weed seeds, pathogens, pests, and fungal spores that can harm your cannabis plants, stunt their growth, or even lead to their death. These contaminants can introduce competition for nutrients, cause diseases, and create an unpredictable growing environment.
If you decide to use backyard soil, sterilization is a crucial step to eliminate these harmful organisms. A common method involves baking the soil in an oven at 392°F (200°C) until the core temperature reaches 140-212°F (60-100°C). This process effectively kills pathogens, weed seeds, and pests, ensuring a safer growing medium. However, it’s important to note that baking soil releases strong, unpleasant odors that can fill your kitchen. This method is only recommended if you have access to a spare or outdoor oven to avoid pungent smells inside your home.
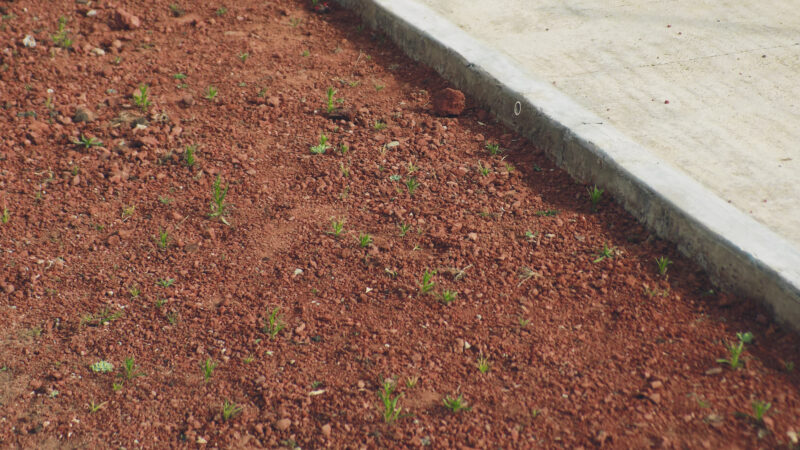
Despite the potential for using backyard soil, many growers choose to avoid the hassle and risks associated with sterilization and instead opt for commercial potting soils or soilless mixes. These products are professionally sterilized and free from contaminants, offering a clean, reliable growing medium that eliminates the guesswork and reduces the risk of pests and diseases. Commercial soils are also specifically formulated to meet the nutrient needs of cannabis, which further simplifies the cultivation process.
If you still prefer to use backyard soil, it is critical to amend it with beneficial additives such as perlite, vermiculite, worm castings, and compost. These amendments will improve the soil’s drainage, aeration, and nutrient content, creating a more balanced and hospitable environment for cannabis roots. Perlite and vermiculite enhance aeration and moisture retention, while worm castings and compost provide essential nutrients and beneficial microbes.
Reminder: Risks of Using Backyard Soil
- Contaminants: Backyard soil can contain weed seeds, pests, or pathogens that may infect or compete with your cannabis plants.
- Sterilization Needed: Without sterilizing the soil, you risk introducing diseases or pests, which can stifle plant growth or lead to poor harvests.
- Odor Issues: Sterilizing soil indoors creates strong odors, making it impractical for most home kitchens unless you have an outdoor or spare oven.
- Nutrient Deficiencies: Backyard soil may not have the proper nutrients for cannabis cultivation, requiring careful amendments to improve its quality.
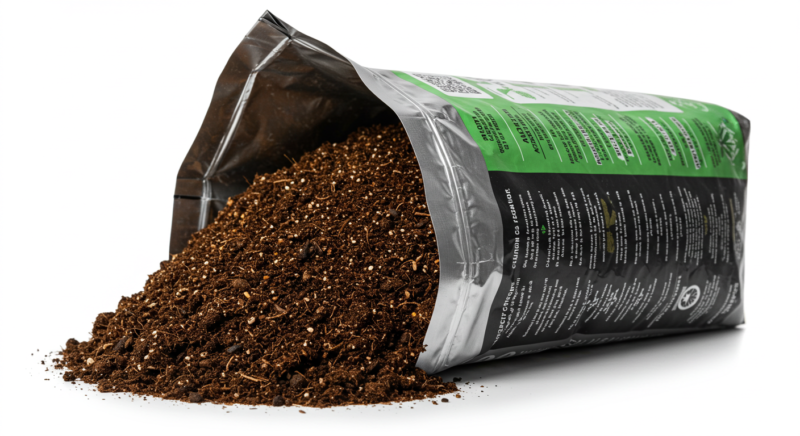
It is strongly recommended to invest in commercially produced soils or soilless mixes when growing cannabis. These products are specially formulated, sterilized, and designed to support the optimal growth of cannabis plants. Commercial soils are free from pests, weed seeds, and pathogens, ensuring that your plants start in a clean and balanced environment. They also contain the right mix of nutrients to support healthy growth from seedling to harvest, reducing the need for guesswork and amendments. By purchasing quality commercial soils, you significantly reduce the risks associated with backyard soil and give your cannabis plants the best chance to thrive.
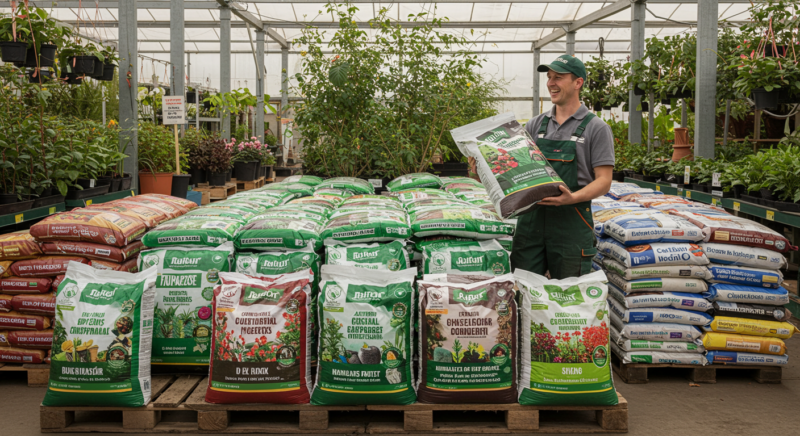
Commercial soils are the most reliable choice for growers who want successful and consistent results, making them well worth the investment. If you're unable to order soil online, visit to a local garden supply store is a great alternative. These stores often carry a wide selection of soil blends and substrates, many of which are well-suited for cannabis cultivation. You can compare textures, check ingredient labels, and even ask staff for recommendations based on your growing environment. Plus, you’ll get your supplies immediately without waiting for delivery.
Soil Temperature
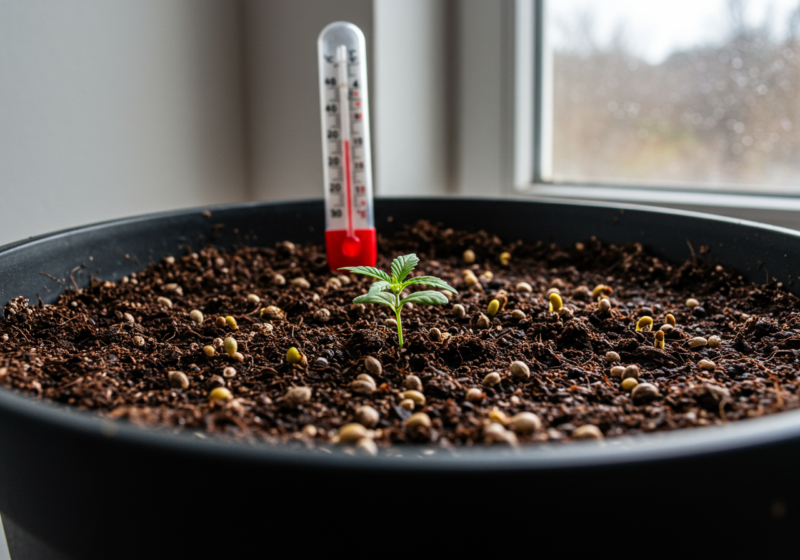
Root-zone temperature changes how quickly roots respire, how much oxygen water can hold, how active microorganisms are, and how rapidly the medium dries. The previous version of this section combined an incorrect Fahrenheit-to-Celsius conversion with a range that was too broad to be useful. A practical indoor target is usually a stable root zone near normal room conditions, often around 18 to 24°C (65 to 75°F), but this is a working range rather than a universal cannabis rule. Cultivar, plant stage, container material, irrigation temperature, dissolved oxygen, and biological activity all matter.
Cold media slow root metabolism and water use. A plant may look underfed even while nutrients remain available because uptake has slowed. Warm, saturated media are a different problem: root respiration rises while dissolved oxygen falls, creating favorable conditions for some root pathogens. The most dangerous combination is therefore not temperature alone, but heat or cold combined with poor moisture management.
Measure inside the active root zone rather than relying on room air temperature. A pot sitting on a cold basement slab can be several degrees cooler than the canopy. A black container near a heater or intense radiant source can run warmer. Check at a repeatable depth and time, then compare the number with pot weight, irrigation temperature, and plant water use.
Tip
Correct the cause gradually. Insulate pots from a cold floor, improve air circulation around containers, shade hot reservoir lines, and avoid shocking roots with very hot or very cold irrigation water. Large temperature swings can be more disruptive than a stable reading slightly outside a preferred band.
How to Maintain Proper Soil Conditions
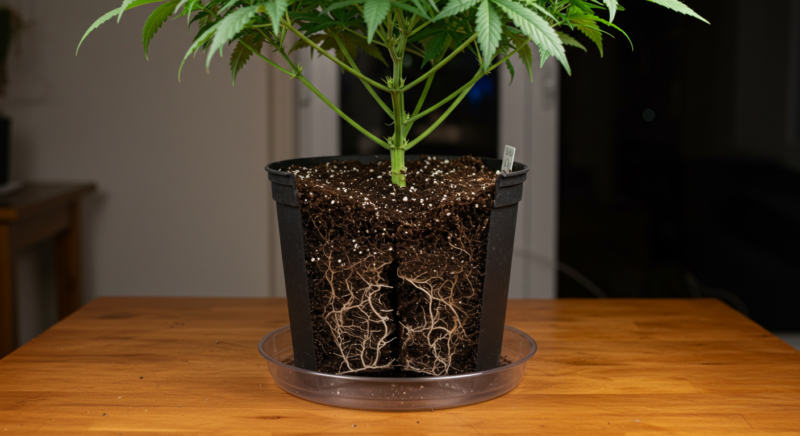
Healthy soil in a container is maintained by matching irrigation to root occupancy, preserving pore structure, and monitoring trends rather than following a rigid calendar. The goal is not to force a dramatic wet-and-dry swing. It is to supply enough water to wet the active root zone, then allow air to return as the plant uses that water.
Start with an evenly built mix: Break up compressed material and blend amendments thoroughly. Fill the container without pounding the mix down. Large loose voids should be closed gently, but heavy compression reduces the pore space that roots need after watering.
Water according to plant demand: A seedling in a large pot may use only a small portion of the total water reserve. Irrigate the occupied root zone progressively instead of repeatedly saturating every liter of unused medium. As roots expand and daily water use rises, broaden the wetted area and increase the irrigation volume.
Use more than one moisture cue: Pot weight is useful, but combine it with surface appearance, a finger or probe check at depth, recent room conditions, and the plant's rate of water use. Fabric-pot edges, the center below the stem, and the lower core can dry at different speeds.
Protect structure: Do not repeatedly cultivate through active roots. Avoid fine, dusty amendments in excessive amounts. Keep containers off standing runoff, and do not let the medium remain compressed beneath heavy equipment or a poorly supported bed liner.
Watch pH and salts in context: In mineral-fed soil or peat mixes, a consistent substrate test can reveal pH or EC drift before leaf damage becomes severe. In living soil, interpret soluble measurements cautiously because nutrient release is biologically mediated. In either case, adding more fertilizer to a wet, oxygen-poor root zone usually compounds the problem.
“The pot still feels heavy, but the leaves look hungry. Should I feed?”
Not yet. First check whether the root zone is staying wet, cold, compacted, or low in oxygen. Those conditions can reduce nutrient uptake while fertilizer remains present. Feeding into the same wet medium can raise EC without solving the limitation. Restore suitable moisture, temperature, and aeration, then reassess new growth.
Keep records: Note irrigation volume, time, input EC and pH when relevant, drainage behavior, and the day the pot becomes ready again. After several cycles, the pattern shows whether the container is too large, the mix is too retentive, or the plant is simply increasing its demand.
Long Term Impact of Soil Health
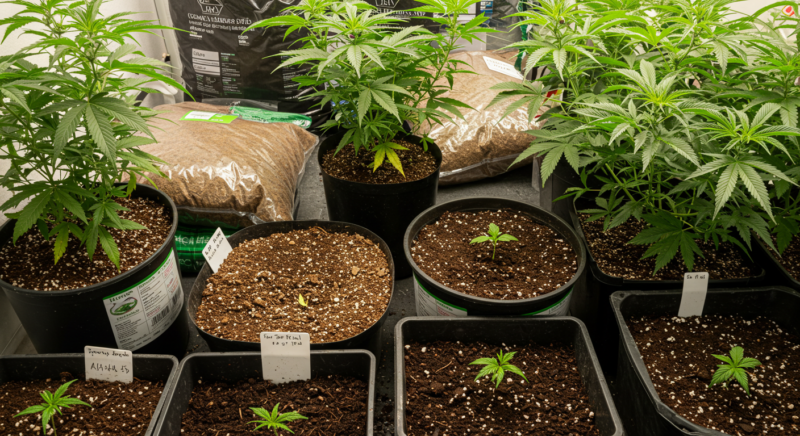
Cannabis roots thrive in an environment that provides balance—proper temperature, enough space, and sufficient nutrients. When your growing medium is properly sized, and the soil temperature is kept within the ideal range, your plants can develop a robust root system that can support vigorous growth and larger yields.
Neglecting these factors often leads to problems—once the roots suffer, the entire plant follows. Nutrient deficiencies, wilting, and even complete crop failure can occur when roots are trapped in a too-small container or suffocated by high heat and excess moisture.
Maintaining the right growing medium size and ensuring proper soil conditions aren’t just minor details—they’re fundamental aspects of cannabis cultivation. Attention to these critical factors will set your plants up for success, giving them the best chance to grow into healthy, high-yielding specimens.
Sizing Your Growing Medium
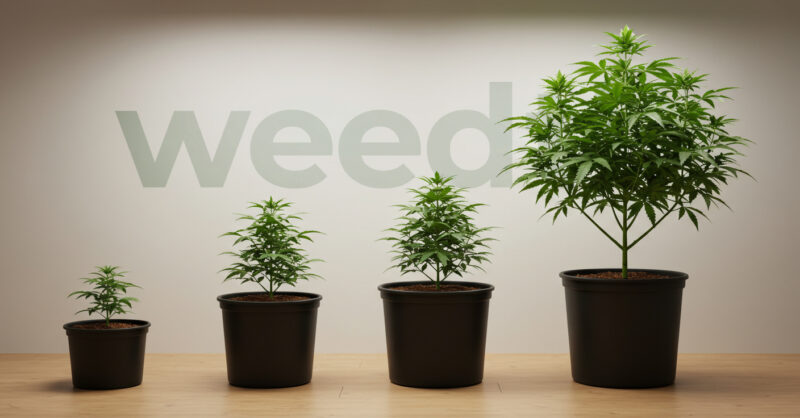
There is no dependable rule that every foot of plant height requires a fixed fraction of a gallon. Plant height does not describe root mass, training style, irrigation frequency, substrate water capacity, or the length of the vegetative period. A compact trained canopy can have a heavily occupied root ball, while a taller young plant may still use little of an oversized pot.
Choose volume by combining four factors: the expected root-development period, the medium's usable water reserve, how often you can irrigate, and the final support required by the plant. Frequent automated fertigation can support a smaller substrate volume because water and nutrients are renewed often. Hand-watered soil usually benefits from more buffer, but excessive volume around a small root system can remain wet for too long.
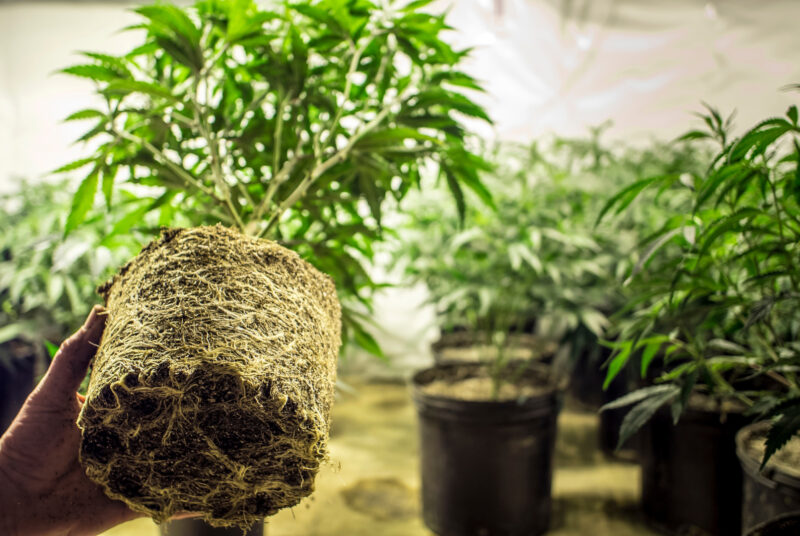
Transplant timing is better judged by behavior than by a date. Look for a root ball that holds together without being a solid circling mat, faster water use, roots reaching multiple sides of the container, and continued healthy growth. A root visible at one drainage hole does not by itself prove that the entire pot is full.
“Should I move straight from a seedling cup into the final container?”
It can work, but irrigation becomes less forgiving because a small root system occupies only part of the final volume. If you choose that route, wet the developing root zone deliberately and expand the irrigation footprint as the plant grows. Staged transplanting makes moisture control easier, while direct-to-final planting avoids another transplant. The better choice is the one you can water accurately.
Master Advice
Do not buy container volume in isolation. Medium, pot geometry, plant count, irrigation capacity, room height, and drainage handling form one system. Changing any one of them changes the useful volume of the others.
Soilless Growing
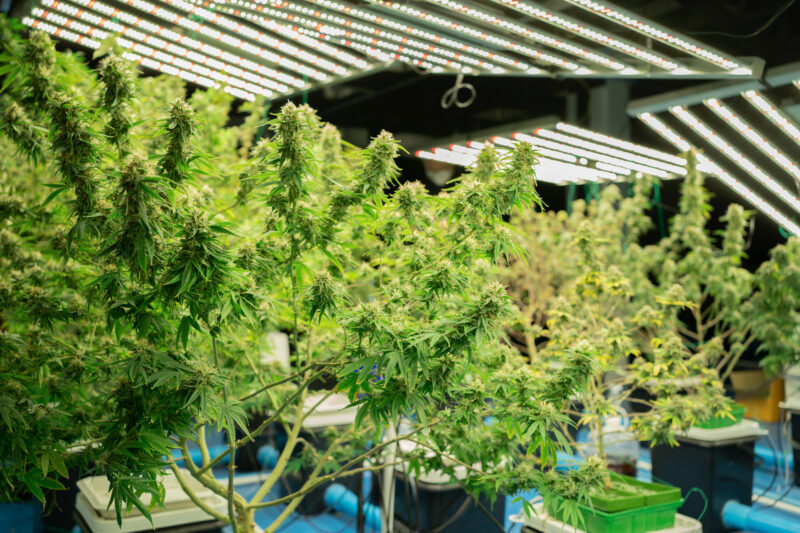
Soilless growing replaces field or mineral soil with a manufactured substrate whose physical properties can be selected and repeated more easily indoors. It does not automatically mean that roots sit in water, and it does not mean every component is inert. Peat, coco, bark, wood fiber, compost, perlite, vermiculite, rockwool, phenolic foam, and expanded clay can all appear in soilless production, but their chemical activity and irrigation needs differ sharply.
The main advantage is control. A grower can choose how much water the medium stores, how much air remains after drainage, how strongly it buffers nutrients, and how easily it integrates with hand watering or automated fertigation. The price of that control is responsibility. The nutrient solution, water quality, irrigation frequency, drainage, and measurement method must match the selected material.
Important
Do not treat “soilless” as one feeding category. A peat-perlite mix, buffered coco, and rockwool may all be soilless, but they do not share identical pH behavior, CEC, dry-back, or irrigation frequency. Follow the chemistry and physical behavior of the actual product.
Traditional soil systems, nutrient availability can vary depending on the type and quality of soil. This can introduce inconsistencies in nutrient levels, water absorption, and even pH control. With soilless growing, the grower eliminates this variability, gaining complete control over what nutrients the plants receive, how much, and when. This gives cultivators the ability to create an ideal growing environment tailored to the cannabis plant’s exact needs at every stage of growth, from seedling to harvest.
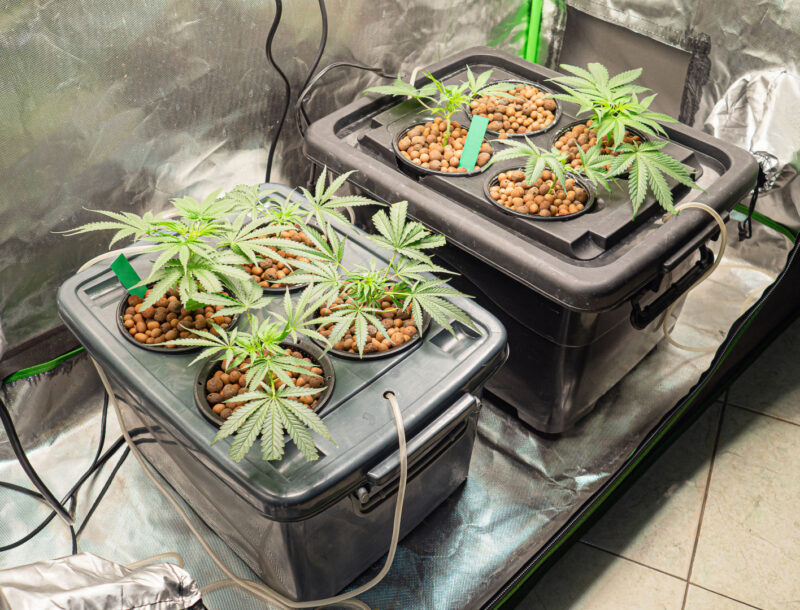
Soilless growing is particularly well-suited for indoor grow setups, where the growing environment (including light, temperature, and humidity) can be fine-tuned. When paired with a soilless medium, controlling every factor that affects plant health becomes a significant advantage, especially for growers looking to optimize growth speed and yield. Carefully managing the supply of water, nutrients, and oxygen, growers can consistently achieve stronger, healthier plants that produce larger, higher-quality buds.
What Is a Soilless Medium?
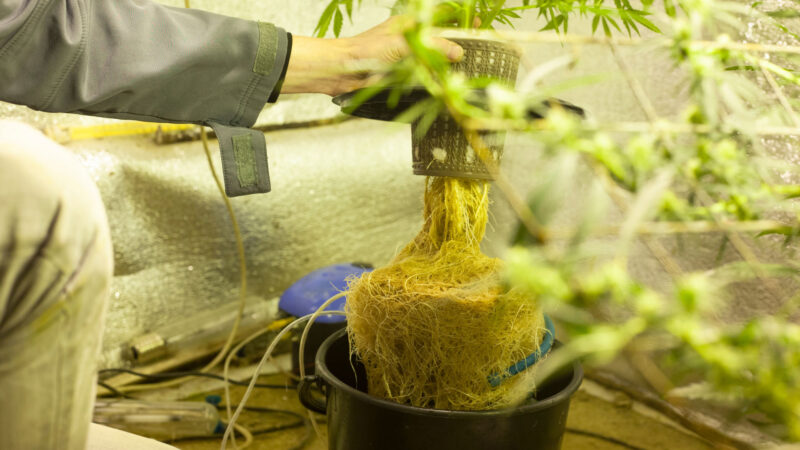
A soilless medium is a root-support material formulated without field soil. It may be organic, inorganic, inert, semi-inert, biologically active, pre-fertilized, or nearly nutrient-free. The term describes what is absent, not a single set of management rules.
Low-buffer mineral media, including rockwool and perlite-dominant systems, allow rapid changes in the root-zone solution. This makes them precise but dependent on reliable fertigation. Semi-inert organic media, especially coco and peat, interact with water and nutrient ions. They offer more reserve than bare-root water culture, but their starting charge, pH adjustment, particle grade, and processing quality affect performance. Biologically active soilless mixes may contain compost or castings and operate more like a living container ecosystem.
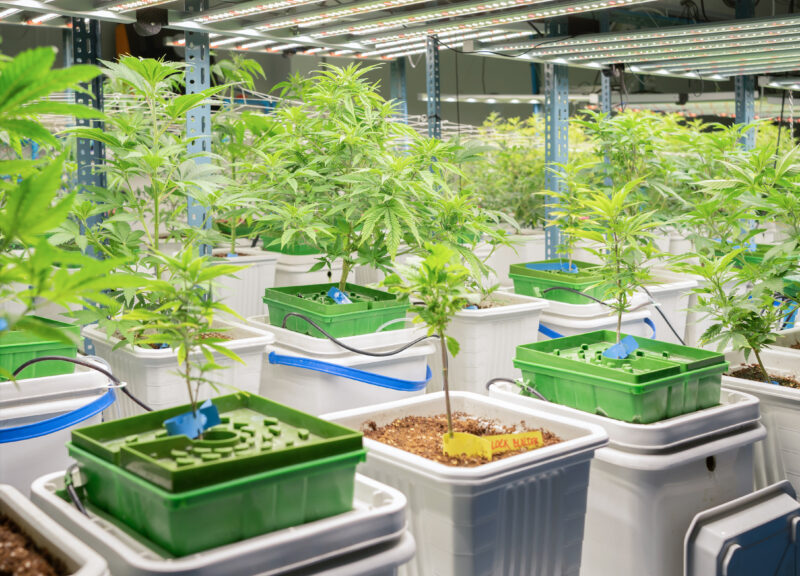
Hydroponics describes nutrient delivery without mineral soil, so many coco, peat, and rockwool systems are technically hydroponic. In everyday grower language, however, “hydro” often means water culture or a recirculating system. State both the medium and the system when diagnosing a problem. “Coco in a hand-watered fabric pot” tells us much more than “hydroponic.”
Inert and semi-inert
An inert substrate contributes little chemical buffering and is managed mainly through the nutrient solution. A semi-inert substrate still receives most nutrition through fertigation but has meaningful exchange, water-buffering, or biological behavior. These are management categories, not claims that a real root zone remains perfectly inactive.
Once the medium and system are named accurately, feeding and irrigation advice becomes much easier to evaluate.
“Can I use my soil nutrient schedule in coco because both are in pots?”
The container does not make the root zones equivalent. Soil and amended mixes may already contain nutrients and stronger buffering. Coco is normally managed through regular fertigation and its exchange chemistry affects calcium, magnesium, potassium, and sodium. Use a program intended for the medium and confirm it against plant response and root-zone trends.
Soilless mediums also offer a high degree of flexibility when it comes to managing moisture and air balance. They generally provide better drainage and prevent the compaction issues that often occur in soil. Proper aeration and drainage makes the roots remain oxygenated, which is crucial for healthy root development. Promotes faster plant growth and improves nutrient absorption, giving the plants more consistent access to vital resources.
Advantages of Soilless Growing for Cannabis
- Precision Nutrient Control:
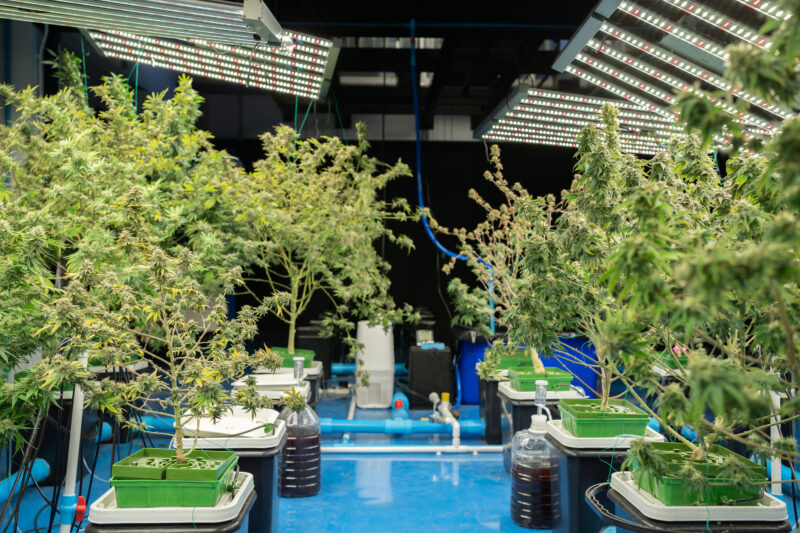
One of the most significant advantages of soilless growing is controlling nutrient intake. In traditional soil, nutrients are naturally present but can be inconsistent, leading to imbalances or nutrient lockout. Soilless mediums are inert, meaning they contain no nutrients on their own. This gives the grower full control over what, when, and how much the plant is fed. Cannabis plants require different nutrient profiles at various growth stages—high nitrogen levels during the vegetative stage, and higher phosphorus and potassium during the flowering stage—soilless growing allows cultivators to precisely adjust nutrient solutions to meet the plants’ needs at each phase. Because nutrients are delivered directly through irrigation or fertigation, the risk of over-fertilization or nutrient deficiencies is minimized as long as the grower is diligent with monitoring and adjusting nutrient levels. This level of precision is a key reason why soilless systems are preferred in commercial and large-scale cannabis operations, where consistent results are paramount.
- Enhanced Aeration and Drainage:
Cannabis plants thrive when their roots have access to both water and oxygen. Roots may struggle to receive enough oxygen in soil-based systems, especially in dense or compacted soil, leading to stunted growth or root rot. Soilless growing mediums, such as perlite, vermiculite, and coco coir, provide excellent aeration and drainage, ensuring that the roots remain well-oxygenated and that excess water drains away effectively. This minimizes the risk of waterlogging, a common issue that can suffocate roots and stunt plant development.
Soilless systems encourage faster root growth and more vigorous plant development by keeping the roots well-aerated and properly hydrated. Faster root development often translates to faster overall plant growth, as the plant can absorb water and nutrients more efficiently.
- Faster Growth and Increased Yields:
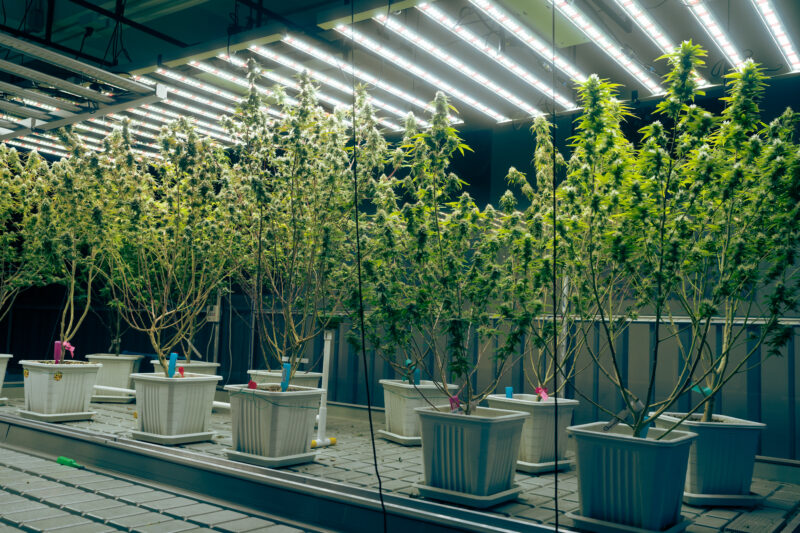
One of the main appeals of soilless growing for cannabis is the potential for accelerated growth and higher yields. Because the grower has complete control over nutrient intake and environmental factors, the plants can often grow faster than in traditional soil. Many growers report that cannabis grown in soilless mediums reaches maturity more quickly, meaning shorter grow cycles and the possibility of more harvests per year.
Increased root oxygenation and improved nutrient uptake in soilless systems lead to stronger, healthier plants that are more likely to produce larger, denser buds during the flowering phase. This ability to optimize every aspect of the growing environment—nutrients, water, oxygen, light, and temperature—makes soilless systems particularly appealing for growers aiming to maximize yield per square foot.
- Fewer Pests and Pathogens:
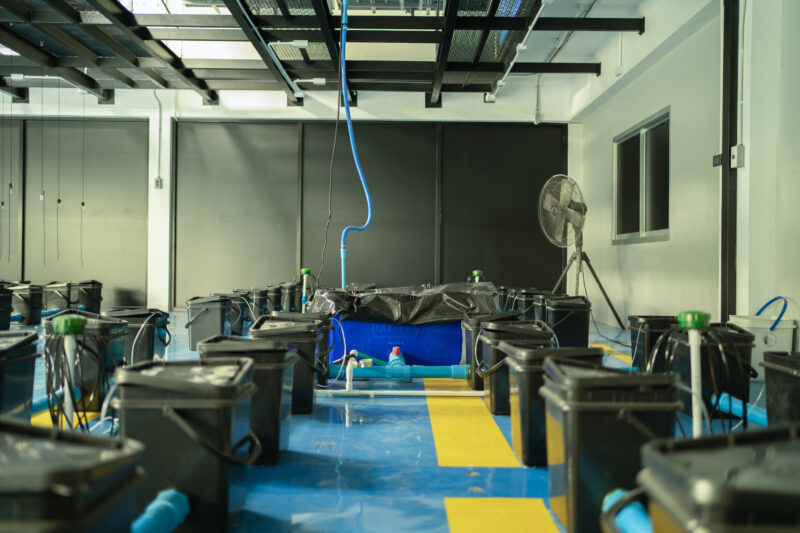
One of the biggest challenges of soil-based growing is the potential for pests, pathogens, and weed seeds to be present in the soil. Soilless mediums are sterile and inert, meaning they do not harbor these contaminants. This drastically reduces the risk of common pests like fungus gnats, root aphids, and soil-borne diseases that can damage or kill your plants. The cleanliness of soilless growing mediums makes them particularly appealing for indoor growers, where maintaining a pest-free environment is crucial.
Additionally, the reduced presence of pathogens in soilless mediums means that plants are less likely to suffer from diseases like root rot or powdery mildew often exacerbated by poor drainage or compacted soil. By removing these risk factors, soilless growing offers a cleaner, more controlled environment for cannabis cultivation.
- Ideal for Indoor Cultivation:
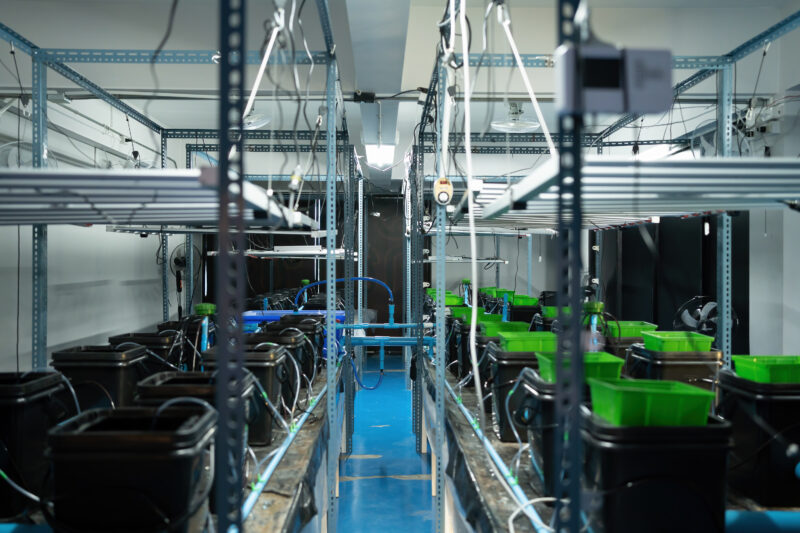
Soilless growing mediums are lightweight and easy to manage, making them an ideal choice for indoor grow setups. They are often easier to transport, mix, and move around than traditional soil, especially when growing in pots or containers. Soilless systems also pair well with indoor grow techniques like grow tents or climate-controlled rooms, where the grower has full control over environmental factors like temperature, humidity, and light.
Because soilless mediums like coco coir, perlite, and vermiculite are excellent at retaining moisture while allowing proper aeration, they support healthy root systems in confined spaces, such as indoor containers or hydroponic setups. The faster growth rates and increased oxygenation in soilless mediums further enhance the effectiveness of indoor growing, making it easier to scale up or down depending on the space available.
Challenges and Considerations in Soilless Growing
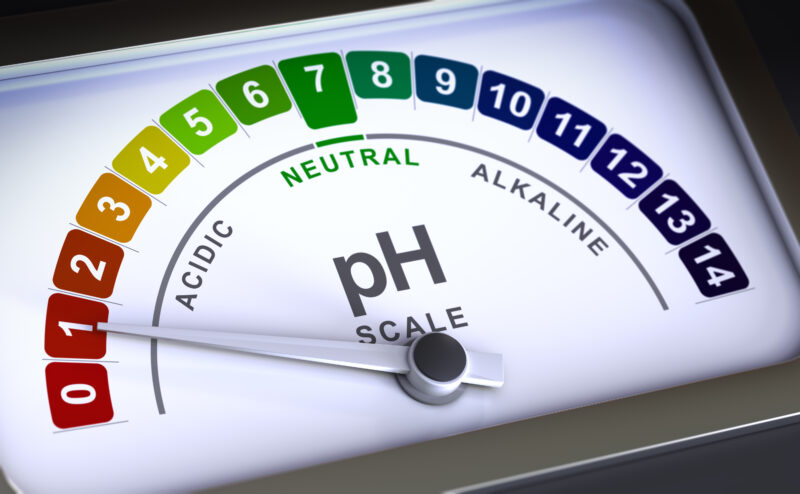
Soilless media expose mismatches quickly. That responsiveness is attractive when the grower can measure and correct the system, but it leaves less time when irrigation fails or solution chemistry drifts. The most common problems are not caused by the material alone. They come from pairing the material with the wrong container volume, irrigation frequency, water source, or feeding assumptions.
Water quality: Measure more than pH. Source-water EC, alkalinity, hardness, sodium, chloride, and bicarbonates can influence the fertilizer program and substrate pH. High alkalinity can push pH upward over repeated irrigations even when every tank is adjusted before use.
Salt accumulation: Evaporation and plant uptake remove water while leaving part of the dissolved salts behind. Small irrigation volumes, uneven emitters, severe dry-back, and a poor drainage path can concentrate EC in sections of the pot or slab. Increasing fertilizer without confirming the root zone may intensify the symptoms.
Irrigation dependence: Coarse perlite, expanded clay, small rockwool blocks, and other low-reserve systems may require several small irrigations under high plant demand. If pumps, timers, emitters, or power fail, the correction window can be short. A larger or more retentive substrate provides more time but may be slower to dry after overwatering.
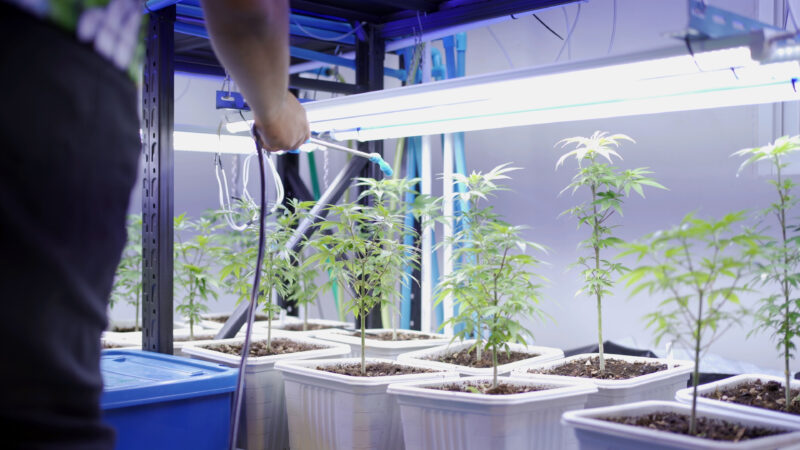
Sampling error: Runoff is affected by where water traveled, how much drained, and when the sample was collected. A sample from the first channel through a dry pot does not represent the whole root zone. Use the same extraction method, timing, and volume each time so trends are comparable.
Pathogens are still possible: Starting with clean soilless material reduces some soilborne risks, but the root zone does not remain sterile. Water, tools, cuttings, floors, reservoirs, biofilm, insects, and reused equipment can introduce organisms. Research has identified pathogenic Pythium, Globisporangium, and Fusarium isolates in both coco and rockwool production systems. Sanitation and oxygen management remain necessary.
Do not correct a wet root zone with more fertilizer
Wilting, pale growth, or slow uptake in saturated media can resemble hunger. Check irrigation distribution, drainage, temperature, root color and odor, and recent EC before feeding harder. Excess nutrients increase osmotic stress and do not restore oxygen.
Local differences matter most when the rest of the room appears uniform, so diagnose the individual container before changing a shared input.
“My input numbers are stable. Why is one pot showing salt stress?”
Uniform input does not guarantee uniform root-zone conditions. A partly blocked emitter, different root occupancy, a tilted container, channeling, or slower drainage can make one pot accumulate salts. Compare emitter output, pot weight, drainage, and a consistent root-zone sample before changing the entire room's nutrient solution.
- Higher Initial Setup Costs:
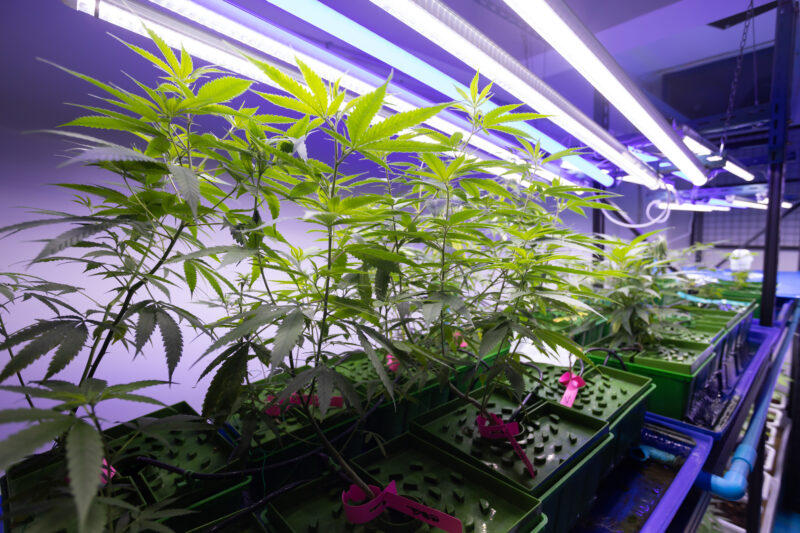
While soilless growing can lead to higher yields and faster growth, the initial setup costs are typically higher than with traditional soil-based systems. Purchasing high-quality soilless mediums like coco coir, perlite, or peat moss, along with the necessary fertilizers and monitoring equipment such as pH meters and EC meters, can add to the upfront expenses. However, many growers find that the increased control, cleaner environment, and potential for higher yields outweigh these initial costs in the long run.
Types of Soilless Mediums
When growing cannabis in a soilless system, the medium you choose plays a pivotal role in determining the health, growth rate, and yield of your plants. Soilless mediums are designed to provide optimal water retention, aeration, and drainage while offering no inherent nutrients. This setup allows the grower to have complete control over nutrient delivery through a customized feeding schedule. By understanding the properties of different soilless mediums, you can tailor your growing environment to meet the specific needs of your cannabis plants, ensuring they get the right balance of nutrients, water, and oxygen for optimal growth.
Below is an expanded look at the most commonly used soilless mediums, each with its own benefits and challenges.
Coco Coir
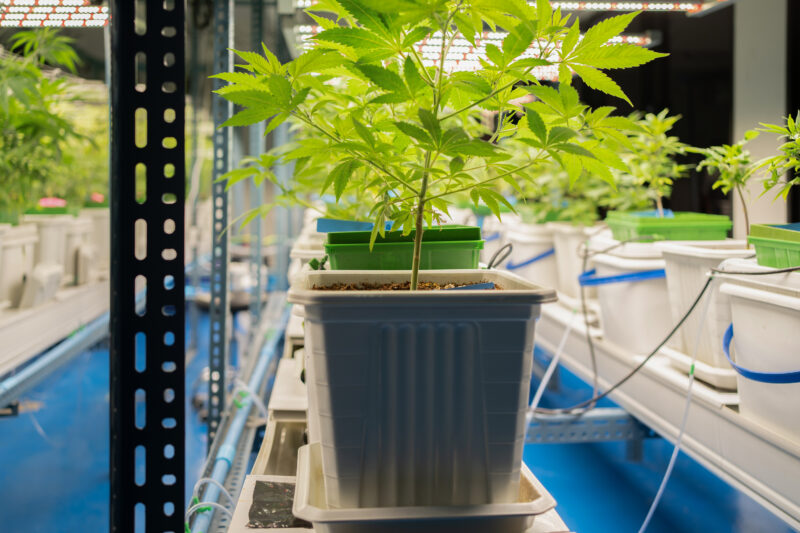
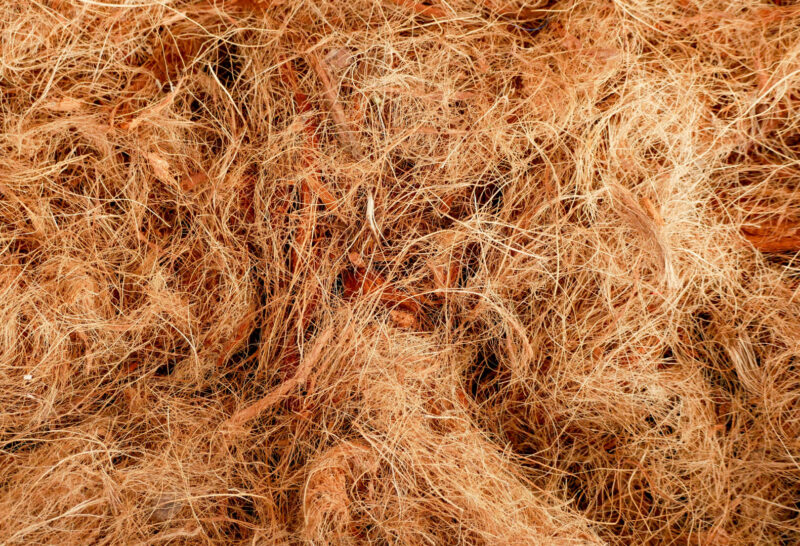
Coco coir is made from coconut husk material and is sold as fine pith, longer fiber, chips, or blends. Those grades matter. Fine pith stores more water; chips and coarse fiber generally increase larger pore space and drainage. A bag labeled “coco” therefore tells you less than its particle distribution, starting EC, washing and buffering history, and intended irrigation style.
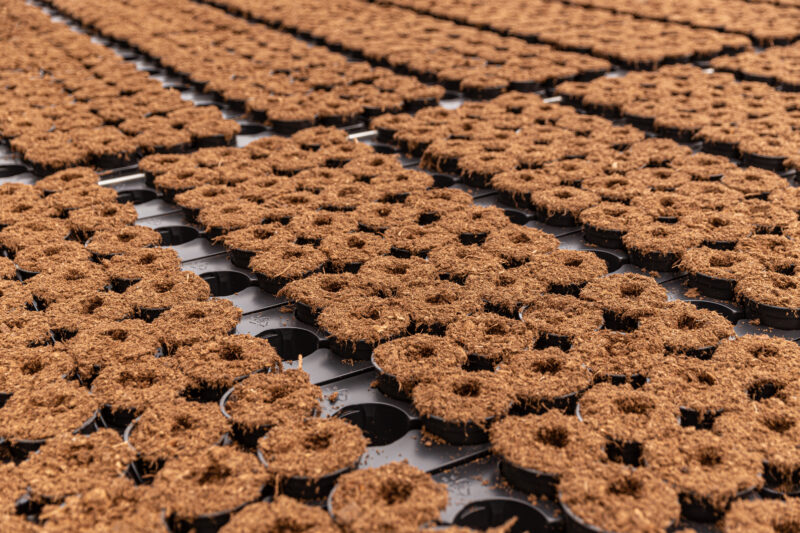
Quality horticultural coco is normally aged or processed, washed to reduce soluble salts, and buffered so exchange sites begin with a more suitable calcium and magnesium charge. Washing and buffering are not synonyms. Poorly processed material may contain excessive sodium, potassium, or chloride. Ask whether the product is washed and buffered, inspect technical data if available, and test a representative sample when changing brands or lots.
undefined
Coco is often described as impossible to overwater. That is misleading. A coarse, well-rooted coco blend can retain useful air even when irrigated frequently, but fine material in a large pot can remain overly wet around a small plant. Container size, compaction, particle grade, root occupancy, and irrigation volume still decide the result.
“Do I need a calcium-magnesium supplement every time I use coco?”
Not automatically. Coco exchange chemistry makes calcium and magnesium management important, but the correct supply depends on source water, the base fertilizer, product buffering, cultivar demand, and root-zone EC. Adding a separate supplement without calculating the complete nutrient solution can create excesses or disrupt other ratios. Start with a coco-compatible program and measure the result.
Coco can support frequent fertigation because it combines water storage with substantial aeration, but it should not be managed by slogan. Avoid letting a mature, heavily fed root ball swing from saturated to severely dry. Large dry-backs concentrate salts and can make rewetting uneven. At the other extreme, do not keep an unrooted pot continuously saturated merely because coco is considered airy.
Its environmental profile is conditional. Coir is a by-product and can replace extracted peat, but processing water, salinity disposal, transport distance, product lifespan, and labor conditions affect the full footprint. Treat “renewable” as one part of the decision rather than proof that every coir product is automatically sustainable.
Benefits:
- Coco coir retains water well while allowing good drainage, preventing waterlogging.
- It is renewable and eco-friendly, making it a sustainable choice.
- The loose, fibrous structure promotes healthy root development through good aeration.
- pH-neutral, reducing the risk of nutrient lockout.
- Can be reused multiple times after sterilization.
Challenges:
- Requires calcium and magnesium supplementation due to its tendency to leach these nutrients.
- Needs a complete nutrient regimen, as it contains no inherent nutrients.
- Initial setup costs can be higher if you need to buy coco-specific nutrients.
Expanded Clay Pebbles (LECA)
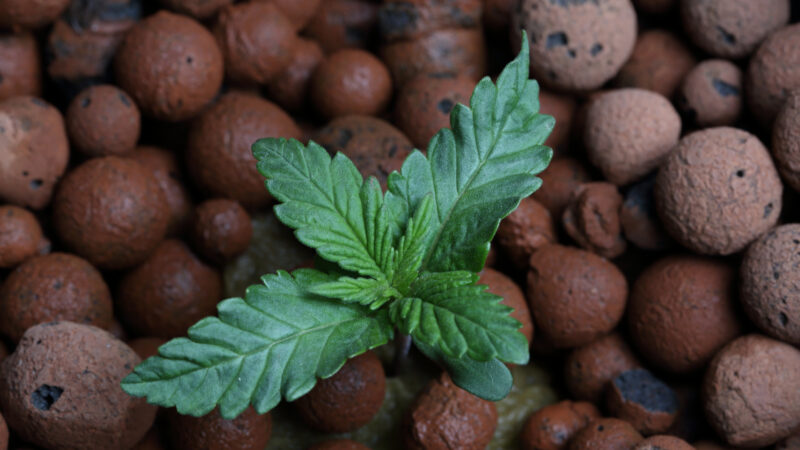
Expanded clay pebbles are coarse, porous ceramic aggregates used in net pots, flood-and-drain systems, drip irrigation, and as a structural component in selected mixes. Their large spaces support rapid drainage and gas exchange, but they hold far less readily available water than peat or coco. That makes irrigation reliability more important.
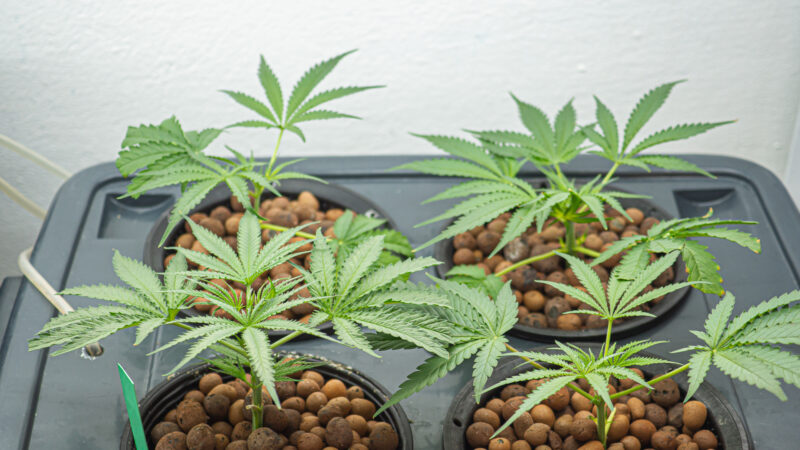
Rinse loose dust before use and verify the starting pH and EC of the rinse water. Reuse may be possible when roots and organic residue can be removed and the material can be cleaned and sanitized appropriately for the next system. Discard pebbles that cannot be separated from diseased roots or contaminated residue.
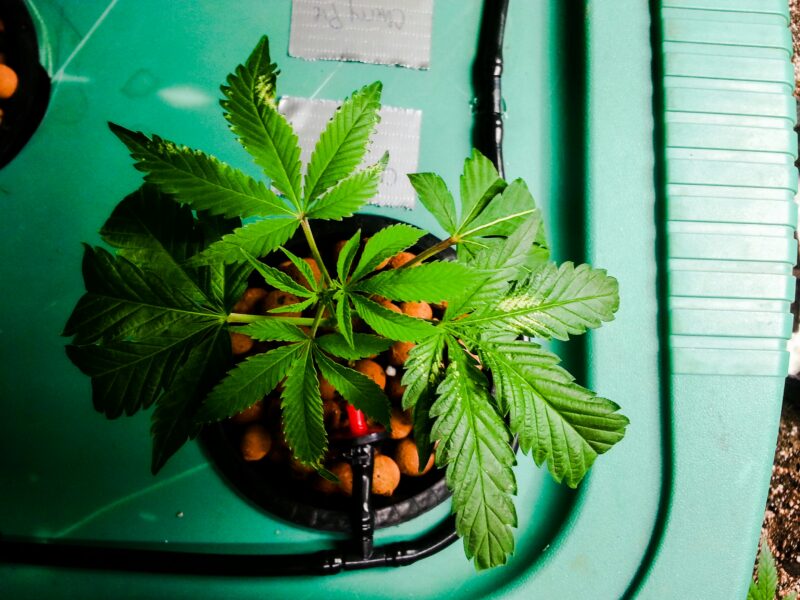
Do not place a thick LECA layer under potting mix to “pull” water out of the soil. The abrupt change from fine mix to coarse aggregate can leave a perched saturated zone in the finer material above. Improve drainage by correcting the medium throughout the root volume, providing unobstructed holes, choosing suitable container geometry, and preventing the pot from standing in runoff.
Never Forget
Expanded clay is a useful hydroponic medium and structural aggregate. It is not a universal cure for an overly retentive potting mix.
Perlite
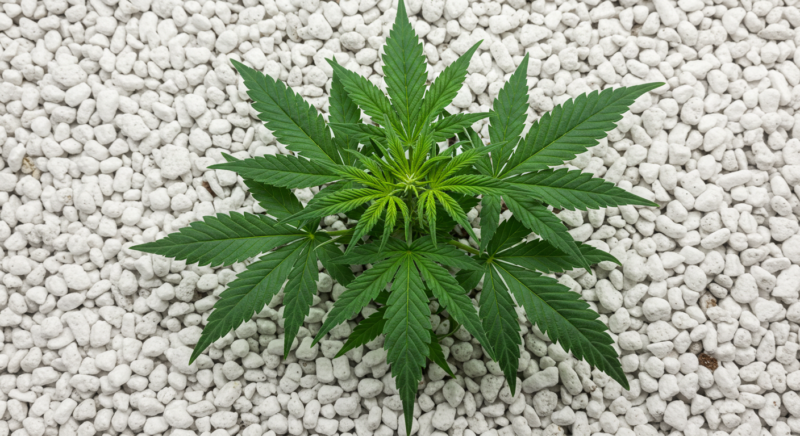
Perlite is a volcanic glass that is expanded through heating to form lightweight, porous granules. It is commonly used in soilless mixes to improve aeration and drainage. Its primary role in cannabis grow is creating air pockets in the growing medium, ensuring the roots receive plenty of oxygen. This prevents root suffocation, which can lead to slow growth and poor nutrient absorption.
Perlite is almost always used as an amendment in combination with other soilless mediums like coco coir, peat moss, or vermiculite. It balances out more water-retentive mediums by ensuring that excess moisture can drain away easily. This makes it particularly useful in preventing waterlogging and root rot, which are common problems in dense growing mediums that retain too much water. In soilless systems, healthy root oxygenation translates directly to stronger plant development and faster growth.
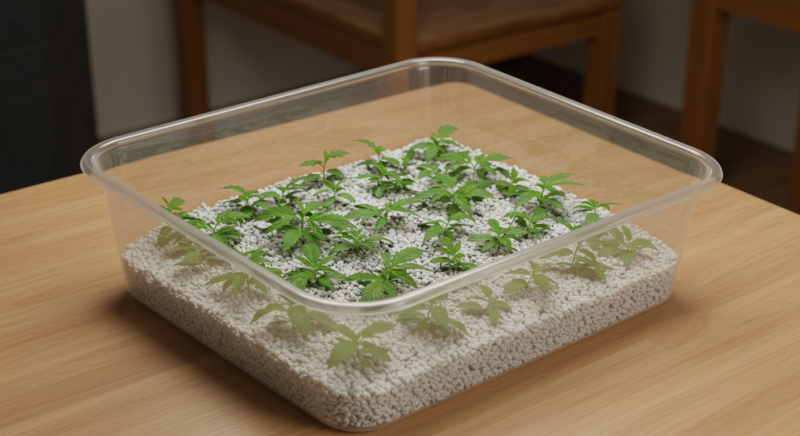
One of the reasons perlite is so effective in cannabis cultivation is its porous structure, which allows for exceptional airflow around the root zone. This helps to promote faster root growth and makes nutrients more readily available to the plant. While perlite doesn’t retain water itself, this feature is often seen as a benefit, especially in well-draining mixes that ensure plants don’t sit in water.
Although perlite is widely used and beneficial, it is also very lightweight, which can cause it to float to the surface of the medium after watering. This can result in some displacement over time, especially if the plants are grown outdoors, where wind and rain can move the perlite out of place. Because of this, growers may need to replenish perlite periodically or mix it thoroughly with other mediums to minimize surface displacement.
Benefits:
- Perlite greatly improves aeration, keeping roots well-oxygenated.
- It prevents compaction in growing mediums, ensuring proper drainage.
- Inert and pH-neutral, making it compatible with most nutrient regimens.
- Ideal for use in both indoor and outdoor growing systems.
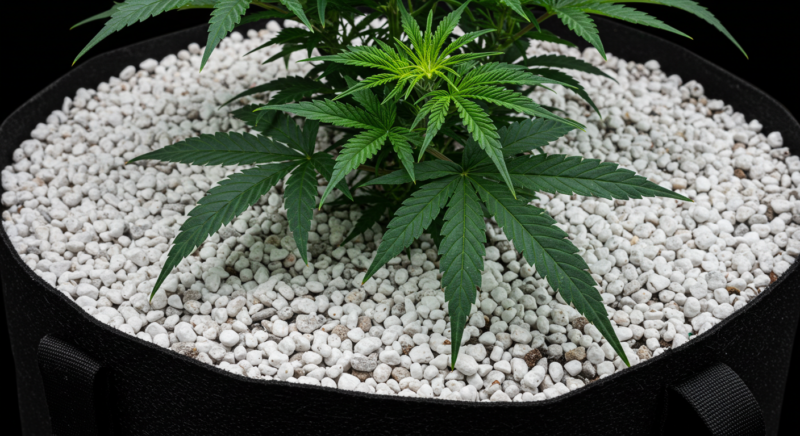
Challenges:
- Does not retain water, so it must be combined with a water-retentive medium.
- Lightweight and prone to floating, requiring periodic replenishment.
- No inherent nutrients, so nutrient delivery must come entirely from fertilizers.
Vermiculite
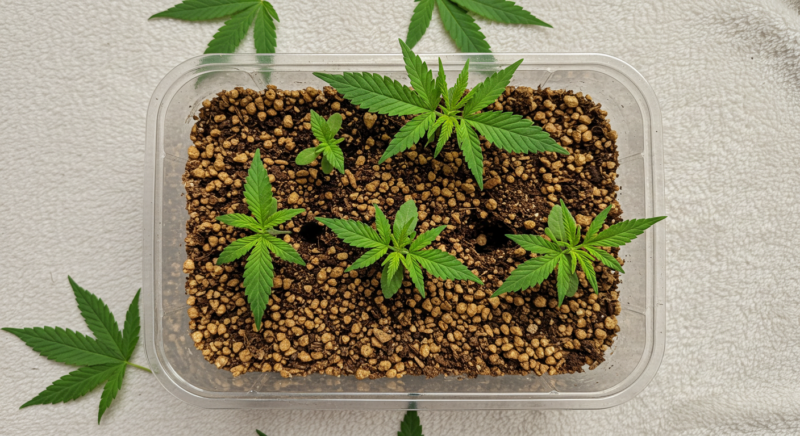
Vermiculite is another natural mineral that expands when heated, creating a lightweight and absorbent material. Unlike perlite used primarily for aeration and drainage, vermiculite’s strength lies in its ability to retain water and nutrients. This makes it particularly valuable for growers in dry climates or for those who struggle to maintain consistent soil moisture levels.
When added to a soilless mix, vermiculite looks like a sponge, absorbing large amounts of water and keeping it readily available for the plant’s roots. This feature is useful in environments where plants may need a buffer against drought or in systems where growers prefer to water less frequently. Vermiculite also holds onto nutrients, making them available to the roots over a longer period of time. This can be particularly helpful during the flowering stage, where nutrient uptake is critical for bud development.
While vermiculite’s water-retaining properties are beneficial in some contexts, it can also pose risks if not managed properly. In high-humidity environments or for growers prone to overwatering, vermiculite can hold too much moisture, leading to root rot or other water-related issues. For this reason, it is often paired with a well-draining medium like perlite to balance out its water retention properties.
Benefits:
- Excellent at retaining water and keeping roots hydrated.
- Holds onto nutrients, providing a slow-release effect.
- Ideal for dry climates or growers who want to reduce watering frequency.
- Lightweight and easy to mix into other mediums.
Challenges:
- Can lead to overwatering and root rot if not used with a well-draining medium.
- Needs careful monitoring of moisture levels to avoid waterlogging.
- Doesn’t provide aeration on its own, requiring perlite or another aerating medium.
Peat Moss
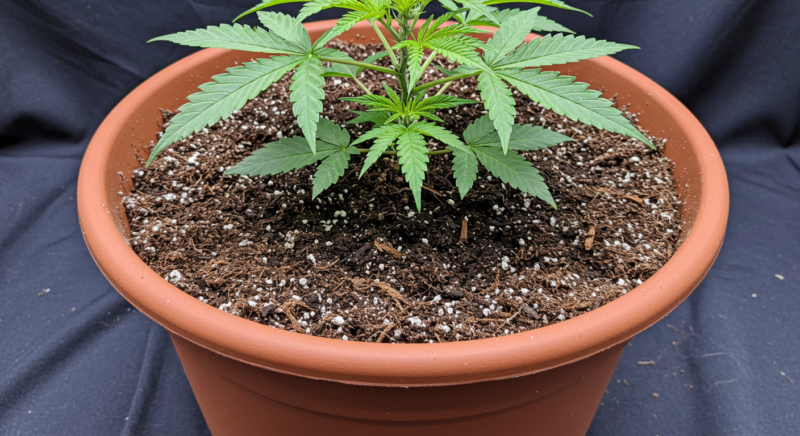
Peat moss has been a long-standing favorite in horticulture and cannabis cultivation due to its excellent water retention capacity. It is harvested from bogs and is commonly used as a base in potting mixes. Peat moss is prized for its ability to hold water, making it ideal for growers who need a medium that can sustain moisture for extended periods.
Peat moss has a soft, spongy texture, allowing roots to spread freely and access water without being restricted by compacted soil. However, one major drawback is that peat moss is naturally acidic, with a pH range between 3.5 and 4.5, which is too low for cannabis plants. To correct this, growers usually mix dolomite lime into the peat moss to raise the pH to a more suitable range for cannabis (5.8 to 6.5).
While peat moss provides great moisture retention, it is not a sustainable resource. Its extraction from sensitive bog ecosystems can cause significant environmental damage, and many growers are looking for more sustainable alternatives like coco coir. Additionally, peat moss lacks nutrients, so you’ll need to add a nutrient mix tailored for cannabis throughout the growing cycle.
Benefits:
- Excellent water retention, making it suitable for moisture-sensitive plants.
- Soft, fibrous texture promotes root growth and allows for easy root expansion.
- Works well in combination with other mediums like perlite to improve drainage.
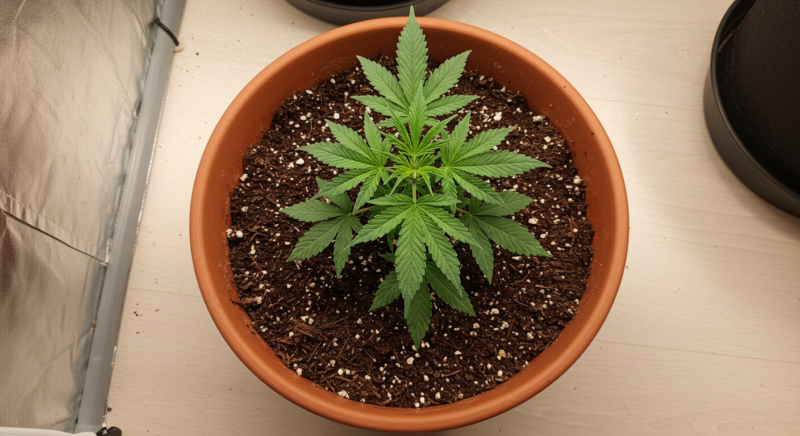
Challenges:
- Naturally acidic, requiring pH adjustment with lime for cannabis cultivation.
- Not sustainable due to environmental concerns over harvesting peat bogs.
- Lacks nutrients, so requires supplementation through a feeding regimen.
Rockwool (Mineral Wool)
Rockwool is manufactured mineral fiber formed into plugs, cubes, blocks, or slabs. Its uniform geometry, high total porosity, low CEC, and compatibility with drip irrigation make it valuable where repeatability matters. Small plugs can be transferred into larger blocks without removing the root support, which simplifies propagation and staged root-zone expansion.
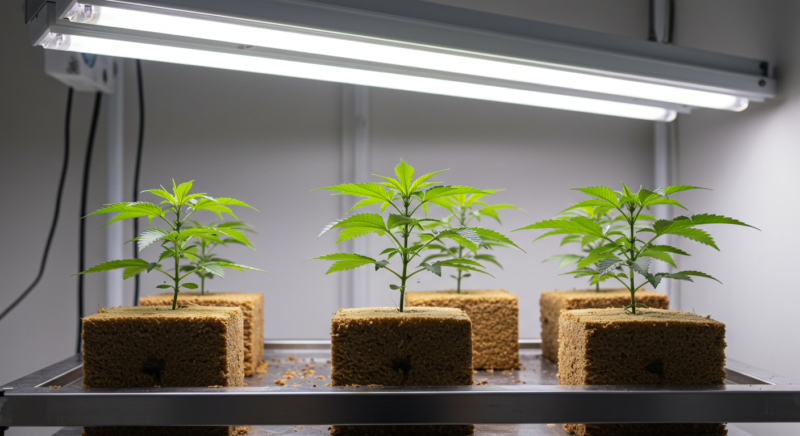
Uniform does not mean maintenance-free. Block dimensions change water distribution. A short block retains a different saturated profile than a taller block. Emitter placement, irrigation volume, drainage slope, plant demand, and dry-back all influence whether roots receive a stable air-water balance. Rockwool is commonly managed with small, frequent irrigations, but copying a commercial schedule without matching light load, plant size, block volume, and room conditions can keep the block too wet.
Prepare the product according to its manufacturer’s instructions. Do not squeeze saturated blocks, because compression can permanently alter their pore structure. Do not allow blocks to become severely dry and hydrophobic. Cover exposed surfaces when algae becomes a recurring problem, and correct light, moisture, and sanitation conditions rather than treating algae as a cosmetic issue.
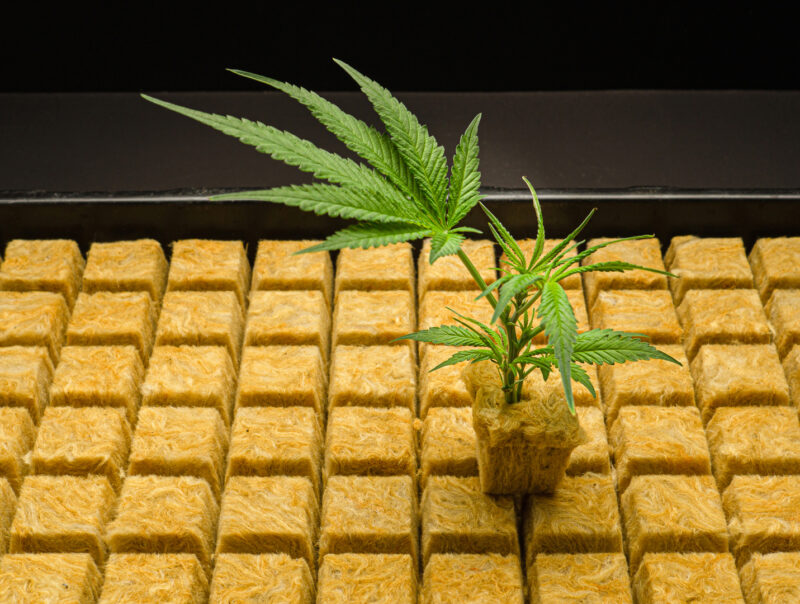
Low chemical buffering allows rapid correction, but it also exposes errors rapidly. Input pH and EC, drain EC trends, irrigation uniformity, and block moisture must be observed as one system. A high EC at the upper surface does not necessarily describe the lower root zone, and an excessive flush can replace salt stress with oxygen stress if drainage is poor.
“Is rockwool beginner-friendly because every block is identical?”
The blocks are consistent, which removes one variable, but the management is less forgiving. A timer, emitter, or mixing error reaches the roots quickly. Rockwool can be an excellent learning medium for a grower who enjoys measurement and has reliable irrigation; it is a poor choice when the garden is checked irregularly.
Rockwool's main environmental limitation is end-of-life handling. It is energy-intensive to manufacture and not biodegradable. Local recycling options vary, and used material containing roots or crop residues may not be accepted. Plan disposal before choosing it for repeated cycles.
Soilless Mixes
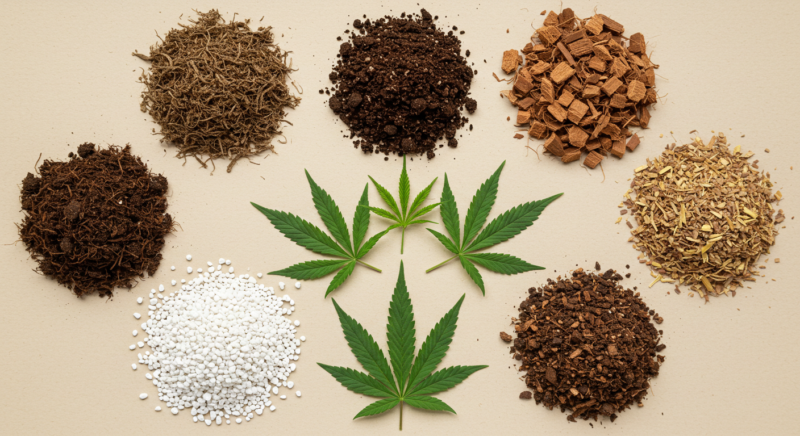
Soilless mixes are becoming a popular choice for cannabis growers because they offer a high level of control over the growing environment compared to traditional soil. These mixes are composed of components like peat moss, perlite, vermiculite, coco coir, and worm castings, providing the ideal conditions for root development, nutrient uptake, and water retention. The primary advantage of using soilless mixes is the ability to tailor the medium to the specific needs of cannabis plants at different stages of growth or under different environmental conditions. Because these mixes are inherently inert, meaning they contain little or no nutrients, growers must supplement the plants with a feeding regimen throughout their life cycle. This allows for precise control over what the plants receive, but it also means that nutrient delivery and pH levels must be closely monitored to ensure healthy growth. Soilless mediums tend to retain less moisture than traditional soil, so they require more frequent watering, particularly during periods of rapid growth.
The flexibility and control offered by soilless mixes come with the added benefit of superior drainage and aeration. These properties help prevent issues like root rot, which is common in overwatered or compacted soil. Well-aerated roots are more effective at absorbing nutrients, which leads to faster growth rates and higher yields in cannabis plants.
Custom Soilless Mixes
Creating a custom soilless mix allows growers to optimize the medium for specific growing conditions, whether for indoor, outdoor, or greenhouse setups. Each component in a soilless mix serves a different function, and by adjusting the ratios, growers can address challenges like moisture retention, nutrient availability, and root aeration.
Here are five effective soilless mix examples for cannabis grow, each designed to advantages based on environmental factors or grow stages:
- 50% Perlite / 50% Vermiculite:
This is a simple yet highly effective mix for cannabis cultivation, especially for those who prioritize excellent drainage and aeration. Perlite provides superior airflow, ensuring that oxygen reaches the roots easily, while vermiculite retains moisture and nutrients, keeping them available for the plants. This mix is perfect for fast-growing strains that require aerobic root environments to thrive. Since it drains so well, it helps prevent root rot and overwatering issues. However, because this mix doesn’t retain moisture for long periods, it requires frequent watering and nutrient feeding.
- 40% Worm Castings / 30% Perlite / 30% Vermiculite:

This blend offers an excellent balance of nutrient retention and aeration. Worm castings serve as a natural fertilizer, providing micronutrients and beneficial microbes that promote plant health and soil biodiversity. Perlite and vermiculite ensure proper drainage while still retaining enough moisture to keep roots hydrated. This mix is ideal for growers who want to boost nutrient availability in a natural way, without relying heavily on synthetic fertilizers. The added microbial life from the worm castings also helps improve root health and nutrient absorption.
- 50% Coco Coir / 30% Perlite / 20% Vermiculite:
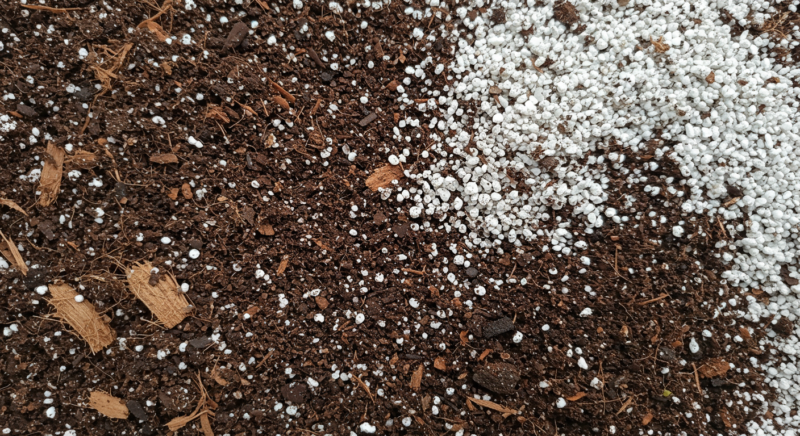
Coco coir is a favorite among cannabis growers because it provides excellent moisture retention while allowing for proper aeration. In this mix, coco coir serves as the primary medium, holding moisture and creating a stable root environment, while perlite increases drainage, and vermiculite balances the mix by retaining some water and nutrients. This combination works especially well for indoor grows, where consistent watering schedules can be maintained. Coco coir’s fibrous structure ensures that the roots are oxygenated while preventing compaction, and the added perlite and vermiculite help ensure the mix drains well to avoid waterlogging.
- 60% Peat Moss / 20% Perlite / 20% Vermiculite:
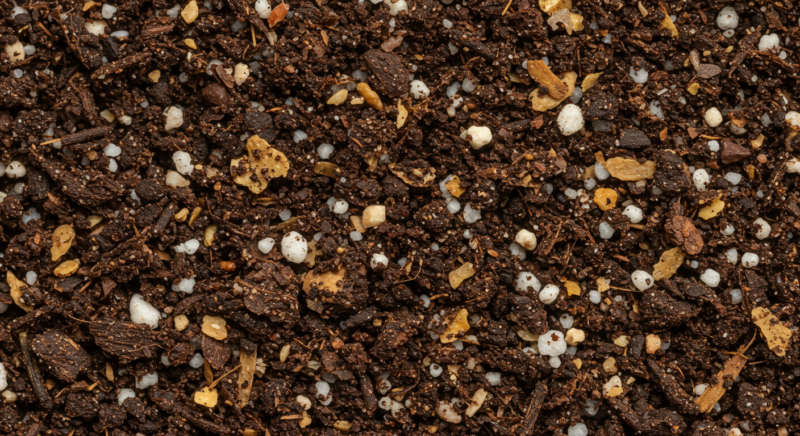
This blend is designed for growers who need a medium with high moisture retention. Peat moss is excellent for holding water, which makes this mix ideal for dry environments or for growers who might not be able to water their plants frequently. The perlite and vermiculite components work together to ensure that the mix does not become too dense or compacted, allowing water to flow through while keeping the root zone aerated. One thing to keep in mind is that peat moss is naturally acidic, so pH adjustments may be necessary. This can be achieved by adding dolomite lime to balance the pH to a range that is suitable for cannabis.
- 40% Coco Coir / 40% Perlite / 20% Worm Castings:
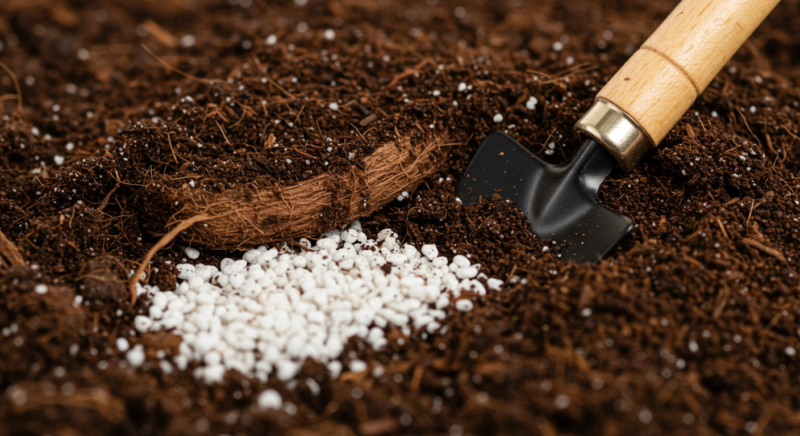
This is a well-rounded, nutrient-rich mix that combines the best attributes of coco coir, perlite, and worm castings. The coco coir and perlite work together to provide superior water retention and drainage, while worm castings offer a natural source of nitrogen and micronutrients. This mix supports strong root development, ensures proper airflow around the roots, and delivers nutrients that promote healthy plant growth throughout the entire life cycle. It’s an excellent option for growers who want to reduce the need for frequent fertilization while still providing their plants with a balanced, nutrient-dense medium.
Master Tip
Treat every recipe in this section as a starting formulation, not a universal prescription. Ingredient grade, container height, irrigation method, source water, climate, and plant demand can make the same volume ratio behave differently. Build one test container, hydrate it exactly as you will in the room, and adjust from measured behavior.
Choose an Indoor Medium Around the Way You Will Maintain It
The most useful question is not “Which medium gives the biggest yield?” Under competent management, several media can support high productivity. The better question is “Which failure mode can I prevent consistently?” Soil, coco, peat blends, and rockwool often differ more in how quickly they reveal mistakes than in their theoretical ceiling.
If You Hand-Water and Inspect Once a Day
A quality potting mix, peat-perlite blend, or coco blend in a sensibly sized container can work well. The decision turns on how often you can return. If the room may be unattended for longer periods, favor a larger usable water reserve and a wider chemical buffer. If you enjoy measuring every irrigation and can respond quickly, a more responsive substrate may suit you.
Do not choose an extremely coarse mix merely because “more oxygen” sounds safer. A medium that dries before the next visit creates repeated drought and salt concentration. Likewise, do not choose a very retentive mix to avoid watering if the room is cool, humid, and occupied by small plants. The buffer must match the demand.
“I can only check the room each evening. Is coco still realistic?”
Yes, if the pot volume and particle grade provide enough reserve for the plant's peak demand. A small pot of coarse coco may need irrigation more often than your schedule allows. A larger or slightly more retentive blend can widen the window, but test it under full light before assuming one daily irrigation will remain adequate through late growth.
If You Use Automated Drip Irrigation
Automation supports smaller substrate volumes and more frequent delivery, but it does not remove the need for observation. Choose a medium that accepts repeated small irrigations without channeling and that drains into a system you can inspect. Coco, rockwool, and peat-based professional substrates can all be automated, but emitter flow, pressure compensation, filtration, and drainage uniformity become part of root-zone management.
Measure every emitter during commissioning and repeat the test during the crop. A timer can be perfectly accurate while a partly blocked dripper starves one plant. Place the emitter where water spreads through the rooted volume rather than down an empty wall. When using two emitters, verify that both contribute to a genuinely more even wetting pattern.
If You Want Living Soil or No-Till Beds
Biological systems need enough volume and continuity to function as ecosystems. A tiny pot filled with strong amendments is not automatically living soil. Larger containers or shared beds create a wider water and nutrient buffer, more stable temperature, and more habitat for decomposers and roots. The cost is weight, room commitment, slower corrective changes, and more complex sanitation decisions.
Keep the surface protected from severe drying, but do not hold the lower profile waterlogged. Organic matter decomposition consumes oxygen. The bed still needs structure, gas exchange, and an irrigation pattern that reaches the active root zone evenly.
Advice
Select the nutrient strategy and medium together. A pre-amended biological mix, a lightly charged peat substrate, and buffered coco may look similar in a pot, but they expect different feeding logic. Buying nutrients first and choosing the medium later often creates unnecessary products and conflicting instructions.
If You Need Fast Correction and Repeatable Batches
Rockwool, foam, and low-buffer aggregate systems make changes visible quickly. This suits growers who monitor pH, EC, moisture, irrigation volume, and drainage and who maintain backup equipment. The same responsiveness means a failed pump or incorrect tank can affect the roots rapidly.
Repeatability also depends on handling. Compressing one block, placing one emitter differently, or allowing one slab to dry beyond its rewetting range can create a local exception inside an otherwise uniform room.
If Budget Is the Main Constraint
The cheapest bag is not always the lowest-cost crop. Include containers, extra amendments, meters, irrigation hardware, cleaning labor, replacement frequency, and disposal. A low-cost potting mix that requires major correction may exceed the cost of a ready-to-use substrate. Conversely, an expensive precision medium is wasted if the garden lacks reliable irrigation and measurement.
“Should I spend more on premium soil or on meters?”
Spend first on the control point your chosen system depends on. A buffered hand-watered mix may benefit more from consistent water and good drainage than from several meters. A coco or rockwool setup depends heavily on trustworthy pH and EC measurement. No premium label can compensate for the missing control that defines the system.
How to Buy, Inspect, and Prepare an Indoor Medium
A medium should be treated as a horticultural input, not anonymous filler. The bag label, batch consistency, storage condition, and preparation method all influence the first irrigation. If the manufacturer publishes technical data, look for particle grade, pH, EC or soluble-salt method, liming, wetting agent, nutrient charge, water-holding capacity, and intended container or irrigation system.
Read the Label Beyond the Ingredient List
An ingredient list does not reveal proportions or physical grade. “Contains peat, coco, and perlite” can describe a light, open mix or a fine, water-heavy one. Look for whether the product is intended for propagation, general containers, high-frequency fertigation, or long-cycle production. Seed-starting mixes are often too fine and low in structure for a large flowering container. Coarse nursery mixes may dry too quickly in a small indoor pot.
- For coco: confirm whether it is washed, buffered, compressed or loose, and whether the grade is pith, fiber, chips, or a blend.
- For peat mixes: check whether lime and a wetting agent are included and whether the product contains a starter fertilizer charge.
- For compost or castings: seek mature, stable material with traceable sourcing and a low risk of salts, pests, and immature decomposition.
- For mineral wool: use a horticultural product with dimensions and orientation intended for the selected system.
- For aggregates: use horticultural-grade perlite, pumice, expanded clay, or similar material rather than unverified decorative or outdoor stone.
Do not bring unknown outdoor material into an indoor root zone
Garden soil, forest material, roadside soil, decorative gravel, and reused construction products may carry pests, weed seeds, pathogens, salts, heavy metals, lime, coatings, or unknown mineral reactions. Indoor containment can turn a small contamination into a room-wide problem.
Inspect the Bag and the Material
Reject packaging that is torn, waterlogged, heavily faded, contaminated with insects, or stored in conditions that suggest chemical exposure. Once opened, check odor, color, particle consistency, foreign objects, visible fungal growth, and moisture distribution. A healthy organic smell is different from sour anaerobic odor.
Do not assume visible fungal strands always indicate a pathogen; many organic materials carry saprophytic fungi. At the same time, do not dismiss an unusual odor or active insect population because the bag is marketed as organic. Isolate questionable material until its condition is understood.
Run a Small Batch Test
Fill one container exactly as planned, including the same compression, amendments, and hydration. Record dry weight. Irrigate slowly until the medium is uniformly wet and drainage begins, then record saturated and drained weight. Observe how long drainage continues, whether water channels down the wall, how the surface settles, and how long the container takes to reach the next irrigation point under room conditions.
For a new commercial batch, a representative substrate test can add pH, EC, and nutrient information. Use a laboratory method intended for greenhouse or soilless media rather than submitting the sample as field soil. Testing methods are not interchangeable, so record the extraction method alongside the number.
“The bag says pH balanced. Do I still need to test it?”
The label describes the product at manufacturing under a particular method. Storage time, source water, fertilizer, amendments, and crop activity can change the root zone. You do not need to distrust every bag, but a baseline test is valuable when changing products or lots, building a large room, or diagnosing repeated drift.
Hydrate Without Creating Dry Pockets
Compressed coco must fully expand before blending. Add water in stages, break apart dense sections, and confirm that the center has hydrated. Peat-based products may need slow, repeated wetting because dry peat can resist water. A included wetting agent helps only within its effective life and dosage.
Moisten the mix enough to blend evenly, but do not turn preparation into compaction. Add dry amendments by measured volume or mass and distribute them throughout the batch. Concentrated pockets of lime, fertilizer, or fine compost can produce local pH, EC, and oxygen problems.
Pro Tip
Keep a sealed sample from each new batch and photograph the bag label and lot code. If a later problem affects only one group of containers, you can compare the original material and determine whether the difference began before planting.
Do Not Sterilize Every Biological Mix by Default
Sanitation strategy should match the system. Inert equipment and reused mineral media may need thorough cleaning and an approved sanitation step. Living soil depends on biological activity, so indiscriminate sterilization defeats its purpose. Unknown backyard soil is not made safe simply by heating it at home; heating can create odor, uneven treatment, chemical changes, and false confidence. Use traceable indoor media instead.
Match Irrigation to the Medium, Container, and Root System
There is no universal “water every two days” rule. The interval is an outcome of plant demand, light, temperature, humidity, airflow, root occupancy, container geometry, and the medium's available water. A correct schedule early in vegetative growth can become inadequate when the canopy expands, then excessive again after pruning or an environmental change.
Wet-to-Dry Cycles Are Not the Same as Drought
In soil and many peat mixes, allowing some water use between irrigations restores air to the pore space and encourages roots to explore. The goal is a controlled decline in moisture, not leaf wilting, hydrophobic media, or a root-zone EC spike. Severe drying damages fine roots and can cause preferential flow during the next irrigation.
Coco and rockwool are often managed with smaller dry-backs because nutrients are delivered with the water and salts concentrate as moisture declines. The right dry-back is a measured steering tool in advanced production, not permission to let the medium become bone dry.
Dry-back
The decrease in substrate water content between irrigation events. It may be described by change in volumetric water content, sensor reading, or container weight. The useful amount depends on medium, container, roots, plant stage, environment, and the purpose of the irrigation strategy.
Small Plants in Large Containers
An oversized root zone holds more water than a small plant can use quickly. Saturating all of it on every irrigation can keep the lower center wet long after the surface looks dry. Start with a controlled zone around the established roots and expand it gradually. Avoid tiny sips that wet only the top centimeter; the aim is a complete but appropriately sized root-zone irrigation.
“Can a seedling be overwatered in an airy fabric pot?”
Yes. Fabric increases sidewall evaporation and gas exchange, but it does not prevent the central medium from staying saturated. A small root system, large pot, cool room, and retentive mix can still create a wet core. Water the occupied zone and verify conditions below the surface.
Hand Watering: Apply Slowly and Evenly
Divide a full irrigation into passes. Wet the surface lightly, pause, then return with a slower pass across the container. This reduces channeling and gives dry fibers time to rehydrate. Rotate your starting point so one side does not receive the first and largest portion every time.
Measure what you apply. “One watering can” is not useful if the can changes or several plants share it. Recording approximate volume and the interval until the next irrigation reveals trends that visual memory misses.
Drip Irrigation: Prove Uniformity
Collect each emitter's output for the same timed event and compare volumes. Check the farthest and highest-pressure points in the line. Filtration, pressure regulation, line length, elevation, and clogging influence delivery. A room with uniform plants can hide unequal irrigation until roots occupy the entire substrate.
Drainage should be visible and serviceable. Recirculating systems need additional control of reservoir EC, pH, temperature, dissolved oxygen, sanitation, and pathogen movement. Drain-to-waste systems avoid recirculating every root-zone change but create a responsibility to minimize and handle leachate appropriately.
Master Advice
Automation repeats both good and bad decisions. Do not automate a schedule until you have observed how the medium wets, drains, and dries under the actual light and plant load.
Runoff Is a Tool, Not a Ritual
Some fertigation programs use a controlled leachate fraction to limit salt accumulation. That does not mean every soil pot needs a fixed percentage of runoff at every irrigation. Excessive leaching wastes water and nutrients and may strip a lightly amended medium. Too little drainage in a high-frequency mineral program can allow EC to climb.
Use runoff when it answers a management question. Standardize the volume, timing, and collection method. Compare it with input and plant response. Do not chase runoff pH by repeatedly flushing until a single number matches the tank; substrate chemistry and extraction method make that interpretation unreliable.
“My runoff EC is higher than the input. Should I flush immediately?”
A higher value can indicate concentration in the root zone, but the size of the difference and the sampling method matter. Confirm that the pot was evenly wetted, the sample was not just the first concentrated drainage, and the meter is calibrated. Review irrigation volume, frequency, and plant response. Correct the cause gradually unless the plant and repeated measurements show an urgent salt problem.
Diagnose the Root Zone Before Blaming the Nutrient Bottle
Leaf symptoms are delayed reports. By the time a leaf fades, spots, claws, or wilts, the root-zone condition that started the problem may already have changed. Begin with the timeline: what changed in irrigation, light, temperature, water source, fertilizer, container weight, or drainage before the symptom appeared?
Compare affected and unaffected plants. If one plant in a uniform room is struggling, inspect its emitter, pot weight, drainage path, root-zone temperature, and transplant history before changing the shared reservoir. If every plant changes together, investigate common inputs such as the tank, water source, environmental shift, or batch of medium.
| Root-zone clue | Possible cause | How to confirm | Corrective direction | Prevention |
|---|---|---|---|---|
| Pot stays heavy and growth slows | Oversized container, fine or compacted mix, low demand, blocked drainage | Check moisture at several depths, pot weight trend, temperature, root odor and color | Pause scheduled irrigation, restore drainage and environmental demand, avoid extra fertilizer | Match volume and texture to root occupancy and irrigation interval |
| Water exits immediately but center is dry | Hydrophobic peat, incomplete coco hydration, wall channeling, compacted core | Probe several zones and compare weight before and after slow multi-pass watering | Rewet gradually in passes and correct persistent structural problems | Avoid severe drying and prepare compressed media completely |
| Input is stable but EC rises repeatedly | Irrigations too small, uneven emitters, strong dry-back, high source-water salts | Use a consistent root-zone test, measure emitters, review water report and drainage | Improve uniformity and irrigation strategy before increasing leaching | Track input, drainage, volume, and interval as one record |
| pH drifts upward after every correction | High alkalinity, excessive lime, sampling inconsistency, nutrient imbalance | Test alkalinity and compare substrate pH with a standardized method | Treat the water or revise the complete fertilizer and lime strategy | Know source-water alkalinity before choosing the medium and fertilizer |
| Only one side of the plant wilts | Localized dry pocket, stem or root injury, uneven irrigation, vascular disease | Compare emitter position, moisture zones, stem base, and roots on the affected side | Restore even irrigation and obtain diagnosis if vascular damage is suspected | Build uniform media and inspect distribution rather than relying on total volume |
| Sour odor, brown roots, wet medium | Oxygen limitation with possible root disease | Inspect root texture and color, drainage, temperature, sanitation history, and spread pattern | Stop automatic watering, isolate affected material, improve oxygen and seek reliable diagnosis | Use clean stock, suitable porosity, drainage, and irrigation based on demand |
“The old damaged leaves did not turn green after I corrected the medium. Did the fix fail?”
Not necessarily. Necrotic tissue and many older chlorotic leaves will not repair. Judge the direction of the problem by new growth, root-zone measurements, water use, and whether symptoms stop spreading. Avoid repeating a correction simply because old damage remains visible.
Measure Consistently
Calibrate pH and EC meters with fresh standards and store probes according to the manufacturer’s instructions. Rinse between samples. Temperature-compensated meters reduce one source of error, but they do not fix poor sampling. Label whether a result came from input solution, first runoff, combined drainage, a pour-through test, or a saturated-media extract.
Do not compare numbers produced by different extraction methods as though they were equivalent. Laboratory reports for greenhouse media should identify the method. Build your own trend line using one repeatable approach and compare changes with the plant.
What to Remember
A correct diagnosis usually combines four records: what went in, what came out or was extracted, how the container's water use changed, and where symptoms appeared first. Any one record alone can mislead.
When to Use a Laboratory
Laboratory testing is worthwhile when a new batch behaves abnormally, repeated crops show the same unexplained disorder, source water may contain sodium or chloride, compost or amendments have uncertain salts or heavy metals, or a suspected pathogen could spread through shared irrigation. Ask for a test designed for soilless greenhouse media when appropriate. A standard field-soil test uses different preparation and interpretation.
Testing does not need to wait until plants are failing. A pre-plant substrate and water baseline makes later diagnosis faster and can prevent an entire room from becoming the experiment.
Reusing and Disposing of Indoor Growing Media
Reuse is not a simple yes-or-no property. It depends on structural stability, crop health, salt accumulation, root removal, sanitation, labor, and the next system. Reusing a medium can reduce cost and waste, but carrying a root pathogen or collapsed structure into the next cycle is not a saving.
Soil and Living Beds
Well-managed living soil is often designed for repeated cycles. Remove the previous stem and large decaying root mass only as the system requires, maintain surface organic matter, and replenish nutrients from soil or substrate testing rather than rebuilding a strong recipe from memory. Watch for compaction, uneven wetting, pest carryover, and nutrient imbalance. More amendment is not automatically restoration.
Coco and Peat-Based Mixes
These media may be reused when the previous root system was healthy and the material still has suitable structure. Remove old roots, assess particle breakdown, check pH and EC, and consider how accumulated organic matter changes water behavior. Sanitizing an organic fibrous substrate thoroughly without damaging its physical properties can be difficult. When disease is suspected, replacement is often safer than uncertain treatment.
Rockwool, Foam, Perlite, and Expanded Clay
Rockwool and foam are frequently treated as single-cycle materials because roots penetrate the structure and sanitation and disposal are difficult. Loose perlite or expanded clay may be reusable if roots can be removed and the material can be cleaned and sanitized, but the labor and water required should be included in the decision. Never mix contaminated media into a new clean batch.
“Can I reuse a medium if the last plant looked healthy?”
A healthy canopy is encouraging, but check the root system, salt level, structure, pests, and irrigation behavior. Some problems remain localized or hidden. Reuse only when you can explain how the material will be cleaned, tested, reconditioned, and kept separate from questionable batches.
Sustainability Is a Whole-System Comparison
Peat extraction affects carbon-rich ecosystems. Coir uses a coconut-industry by-product but involves processing, water, salts, transport, and supply-chain conditions. Rockwool provides uniform performance but requires energy-intensive manufacture and creates a non-biodegradable end-of-life problem. Perlite and expanded clay require mining and heat processing. Compost, bark, wood fiber, rice hulls, and biochar can use regional residual materials, but their consistency and nutrient behavior vary.
There is no universally low-impact ingredient in every region. Compare service life, shipping distance, crop failure risk, irrigation efficiency, reuse, local disposal, and the amount of material required. A slightly higher-impact substrate that performs for several safe cycles may compare differently from a low-density product shipped long distances and discarded after one use.
Advice
The most sustainable medium is not simply the one with the greenest marketing claim. It is the one that provides reliable root-zone performance with the least avoidable water, nutrient, energy, contamination, and disposal burden in your actual location.
Indoor Containers
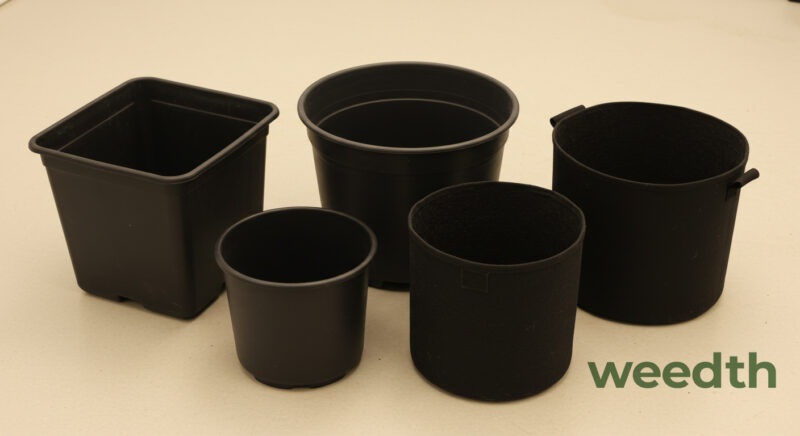
Choosing the right container is one of the most important decisions you’ll make when growing cannabis indoors. The container isn’t just a vessel to hold your soil, it directly affects how well your plants’ roots develop, how much air and nutrients they can access, and ultimately how healthy and productive your plants will be. With all the options out there, it’s crucial to understand what each type of container offers so you can pick the one that’s best for your grow setup.
Let’s break down some of the most common containers used in indoor cannabis cultivation and discuss how they’ll impact your grow.
Traditional Plastic Pots
Growers’ Classic Choice
You’ve definitely seen these before. They’re everywhere from garden centers to indoor grow rooms. Plastic pots are a favorite among growers for one simple reason: they get the job done, and they don’t cost a lot. These pots come in every size imaginable, from tiny seedling starters to massive containers for flowering plants.
Plastic pots are lightweight, easy to move around, and durable enough to last for multiple grow cycles if you take care of them. They hold moisture well, which is great if you don’t have time to water every day. Another advantage is that plastic pots are readily available and inexpensive, making them a go-to for beginners or growers with a lot of plants to manage.
Plastic pots do have their downsides. They’re not breathable, meaning your roots won’t get much air. This lack of aeration can lead to overwatering issues if you’re not careful, causing root rot, which is a grower’s worst enemy. Also, because the roots aren’t pruned by air, they can start to circle around the pot and become root-bound if left in one container for too long. To avoid these issues, make sure you have plenty of drainage holes, and keep an eye on how your plants are growing.
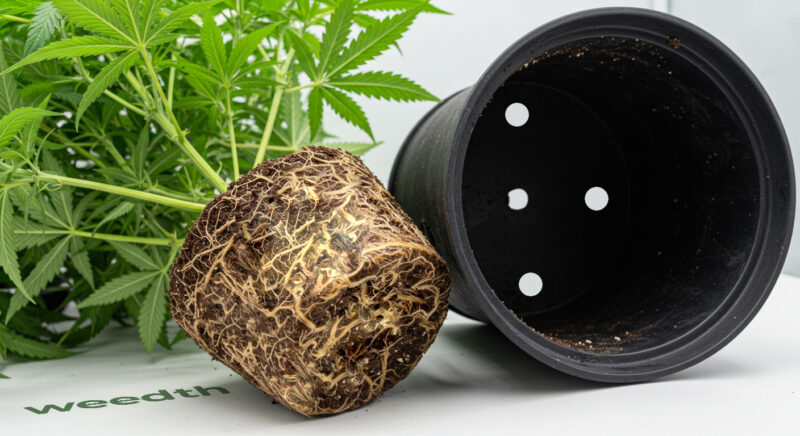
Plastic pots are perfect for growers just starting out or anyone who needs a basic, reliable option that won’t break the bank. Just make sure you’re managing drainage, and you’re good to go.
Fabric Pots
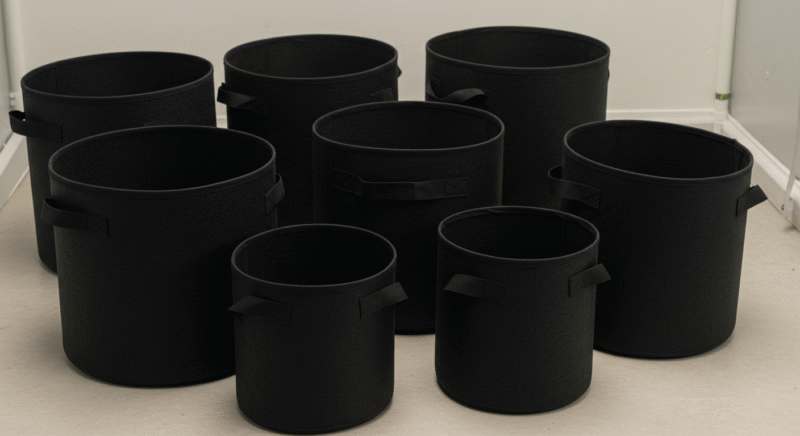
Smart Pots for Smarter Roots
If you want to take your root game up a notch, fabric pots (like Smart Pots) are a great choice. These pots are made from breathable fabric, and they do wonders for your plants’ root systems. Why? Because they allow the roots to air prune naturally.
Here’s how it works: when the roots hit the sides of a fabric pot, they’re exposed to air. This exposure stops them from growing in circles and becoming root-bound. Instead, the roots prune themselves and branch out, creating a dense, fibrous root network. More roots mean your plants can absorb more nutrients and water, which leads to bigger, healthier plants.
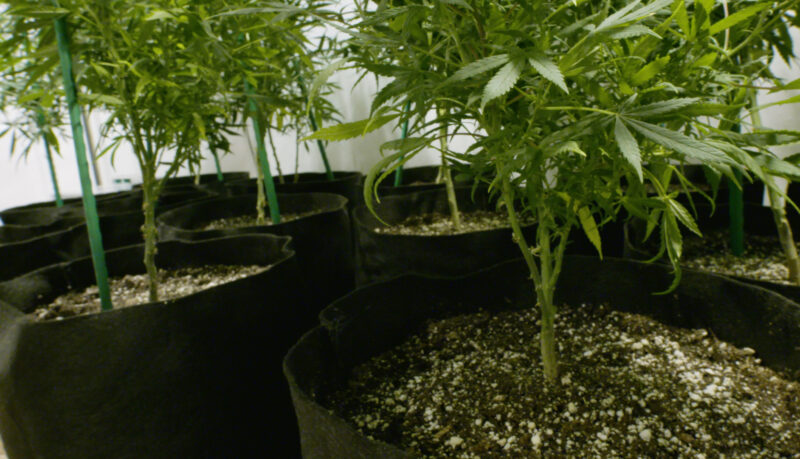
Another benefit of fabric pots is the excellent aeration they provide. The breathable material allows oxygen to reach the roots, which is crucial for plant health. Plus, fabric pots help prevent overwatering. Excess water evaporates through the fabric, reducing root rot risk. However, this also means you’ll need to water more often, as fabric pots dry out quicker than plastic ones.
Fabric pots are perfect for growers who want to boost root health and don’t mind keeping a closer eye on watering. They’re great for both organic soil and coco coir setups because they provide excellent drainage and aeration.
Air Pots
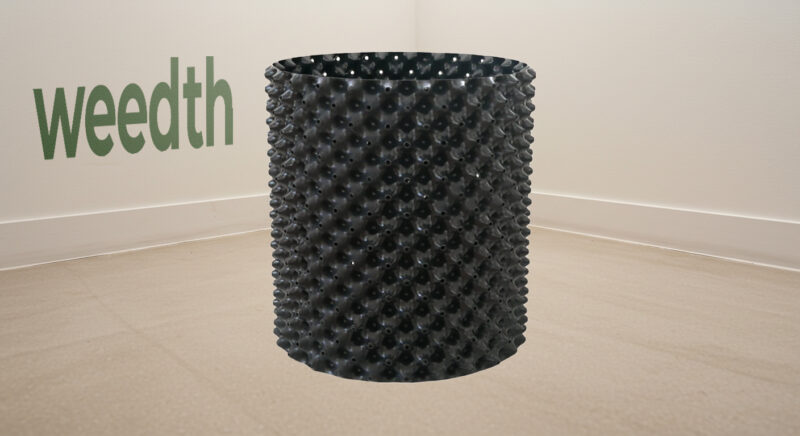
Pots for Cool Stronger Roots
Next up are air pots, which are all about maximizing root development. These containers have a unique design with perforated sides that allow the roots to breathe and grow in a way that’s similar to fabric pots—but with even more focus on air exposure.
The key to air pots is air pruning. As roots grow toward the edge of the pot, they’re exposed to air, which prunes them and encourages them to grow laterally, filling the container with a healthy, fibrous root system. This prevents roots from circling and becoming root-bound, a common problem with traditional plastic pots.
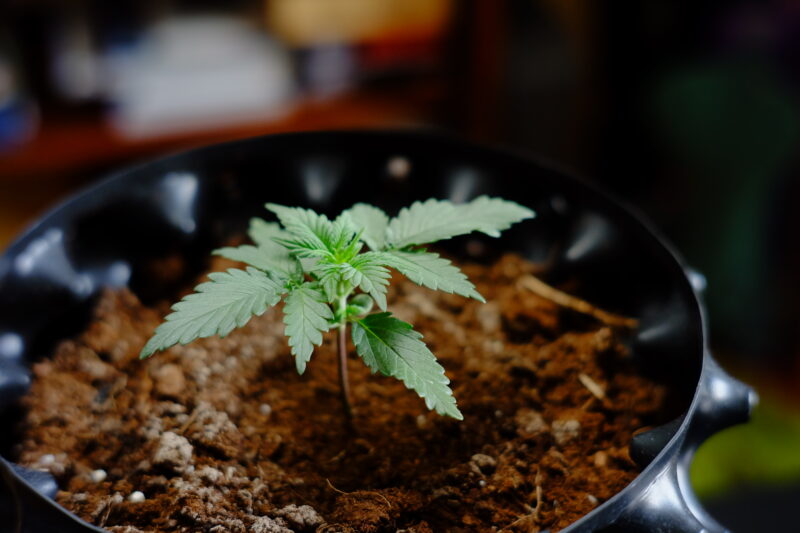
Air pots also offer fantastic drainage. The perforated design allows excess water to escape easily, meaning you’re less likely to deal with overwatering and root rot. Plus, because air pots promote healthier root systems, your plants can grow bigger and faster without needing huge containers. They’re perfect for small indoor grow spaces where you want to maximize plant size without using massive pots.
The downside to air pots? Like fabric pots, they dry out fast because of all that airflow. You’ll need to water more frequently to keep your plants happy. And they can be a little tricky to fill with soil—those holes can let some soil slip through while you’re getting everything set up.
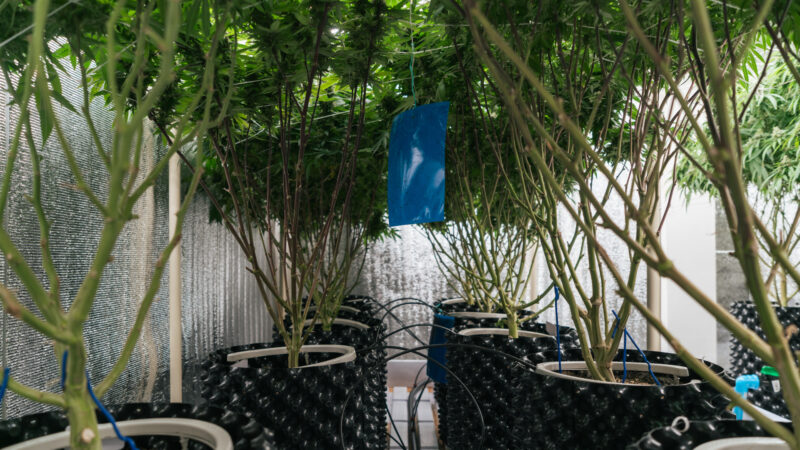
If you’re serious about maximizing root growth and don’t mind the extra attention to watering, air pots are a fantastic option. They’re ideal for experienced growers who want to get the most out of their indoor space.
Plastic Grow Bags
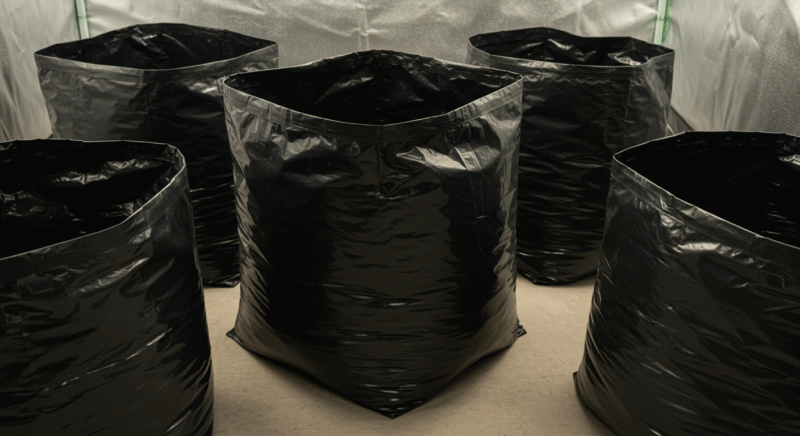
Simple and Effective
If you’re on a budget, plastic grow bags might be just what you’re looking for. These are some of the most affordable containers around, and they’re super easy to use. Grow bags come in a variety of sizes and are perfect if you’re working in a tight space or growing lots of plants.
What makes plastic grow bags great is their price and flexibility. They’re lightweight making them easy to move, and you can pack them tightly in small grow rooms to maximize space. They also come with pre-punched drainage holes, which are crucial for preventing overwatering and allowing excess moisture to escape.
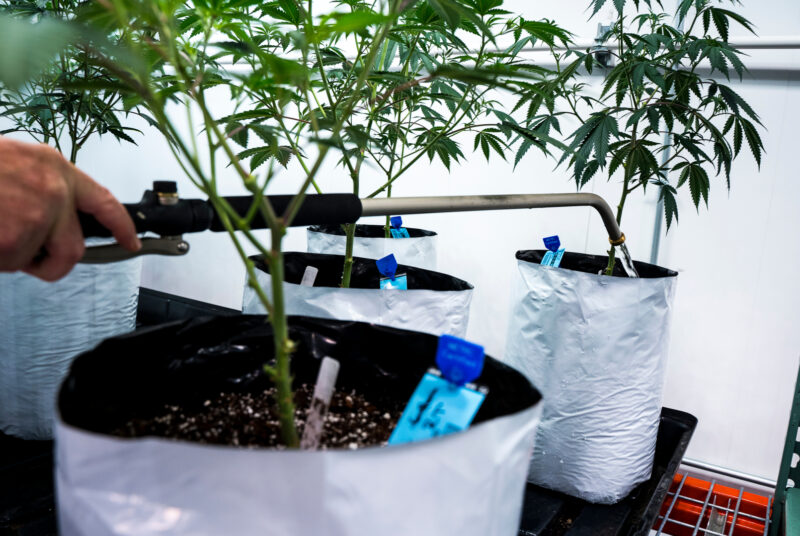
The downside? Plastic grow bags are not very durable. They’ll likely only last for one or two grow cycles before they start to tear or wear out. Also, because they’re flexible, they don’t support your plants’ roots much. Larger plants can become unstable, especially if you move them around.
If you’re looking for a temporary, low-cost solution or you’re growing on a budget, plastic grow bags are a solid choice. They’re great for getting the most out of a small grow space without breaking the bank.
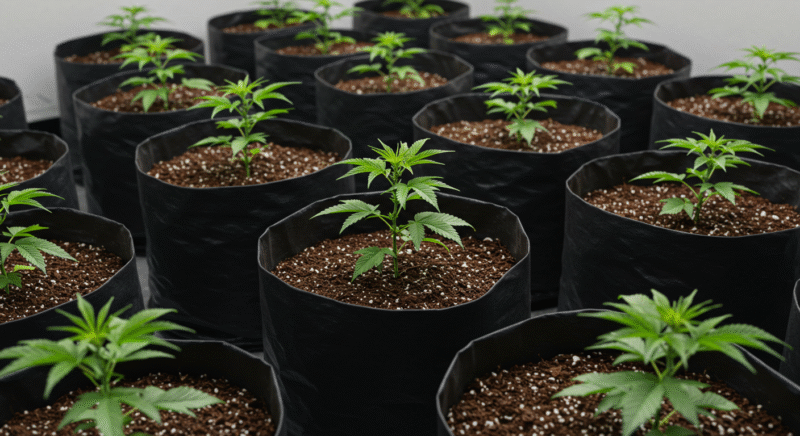
Tip:
Some soil brands sell ready-to-use grow bags that come pre-filled with soil and are specifically designed to serve both as the growing medium and the container. You simply need to cut open the top of the bag and punch holes at the bottom to ensure proper drainage. These bags often feature an integrated drainage layer, and their cylindrical shape helps them stay upright and stable during use.
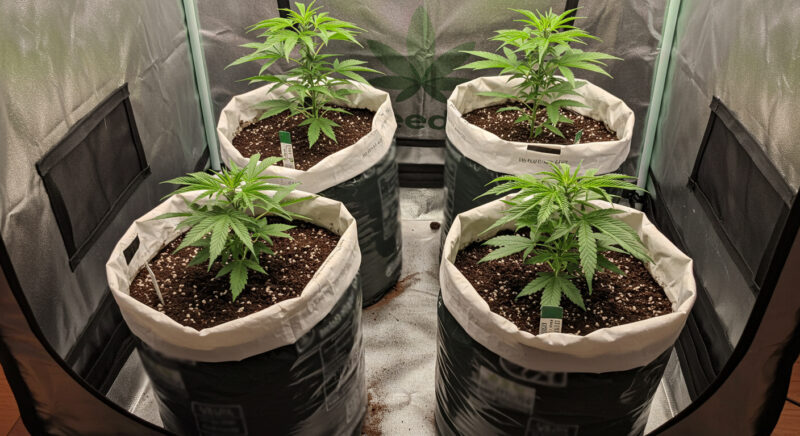
As an alternative, you can also reuse standard soil packaging as makeshift grow bags. However, these bags are not engineered to remain upright when wet. After watering, they may collapse or fall over, potentially spilling all of the soil. If you choose to go this route, make sure to add external support or place the bag inside a crate or another container to reduce the risk of tipping—this is especially important in indoor grow spaces.
Smart Pots with Handles
Easy Mobility
Sometimes you need to move your plants around for better light exposure or to make room for other plants. That’s where Smart Pots with handles come in and these fabric pots have all the benefits of regular fabric pots—air pruning, aeration, and good drainage but with the added convenience of built-in handles for easy transport.
The handles make it simple to lift and reposition your plants without damaging the roots or the container itself. This is especially handy for indoor grows where you might need to rotate plants regularly to ensure even light distribution.
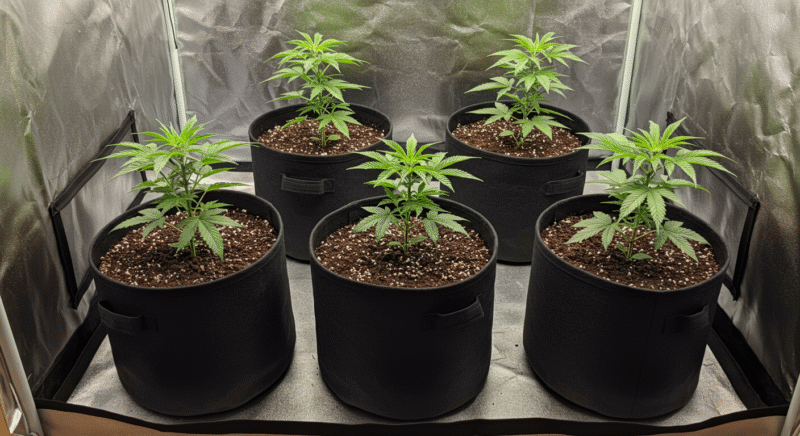
Like standard fabric pots, Smart Pots with handles require more frequent watering due to their breathable nature, and the handles can cause some extra wear and tear over time, especially if you’re moving them around a lot.
If you’re the type of grower who needs to move your plants frequently or you’re working in a dynamic indoor space, Smart Pots with handles are a fantastic option. They provide the flexibility to reposition your plants while still promoting healthy root development.
Net Pots
Hydroponic Growers Essential Pots
Net pots are essential containers for hydroponic growers. These mesh-like pots allow roots to grow through the sides and bottom, giving them direct access to the nutrient solution in your hydro system.
Net pots are ideal for hydroponics because they maximize root exposure to oxygen and nutrients. The open structure lets roots expand freely into the nutrient solution, ensuring they’re constantly taking in what they need. This promotes faster growth and bigger yields. They’re also reusable, making them a great long-term investment for hydro systems.
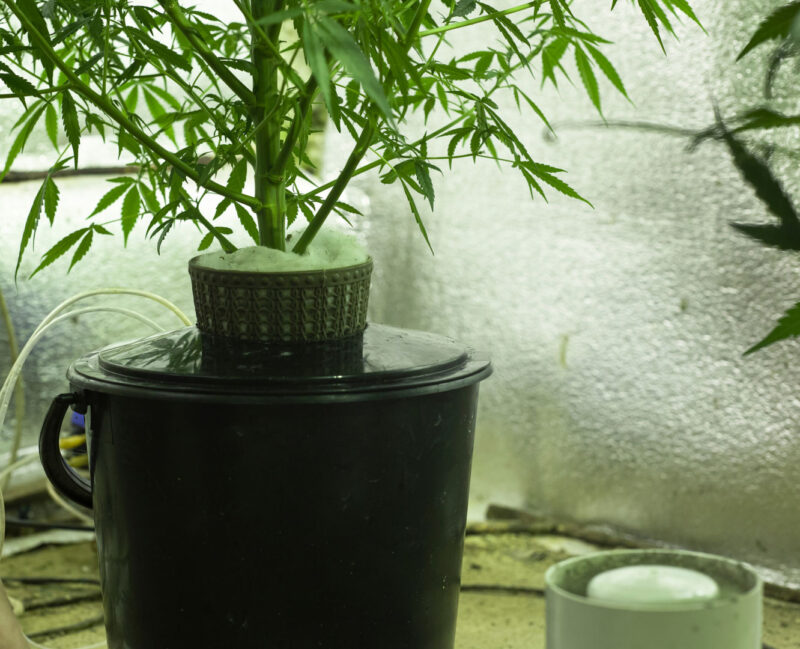
Net pots aren’t designed for soil. They’re built specifically for hydroponic or aeroponic setups, so if you’re a soil grower, you’ll need to look at other options. Additionally, net pots don’t provide much support, so you’ll need to use trellises or stakes to keep your plants upright as they grow.
If you’re thinking of a hydroponic setup and using net pots can provide maximum root exposure to nutrients for your plants. Net pots are durable, easy to use, and essential for rapid root growth in water-based systems.
Wooden Beds and Raised Planter Boxes
Wooden beds or raised planter boxes are an excellent option for large-scale indoor growth. These allow you to grow multiple plants in the same soil bed, giving their roots plenty of space to spread out and develop naturally. Wooden beds are perfect for organic and no-till growers who want to replicate outdoor growing conditions inside.
What’s great about wooden beds is that they give your plants unlimited root space, allowing them to grow large and develop robust root systems. This leads to bigger plants and ultimately higher yields. Wooden beds are sustainable so you can reuse them for multiple grows, and they promote a natural ecosystem in the soil.
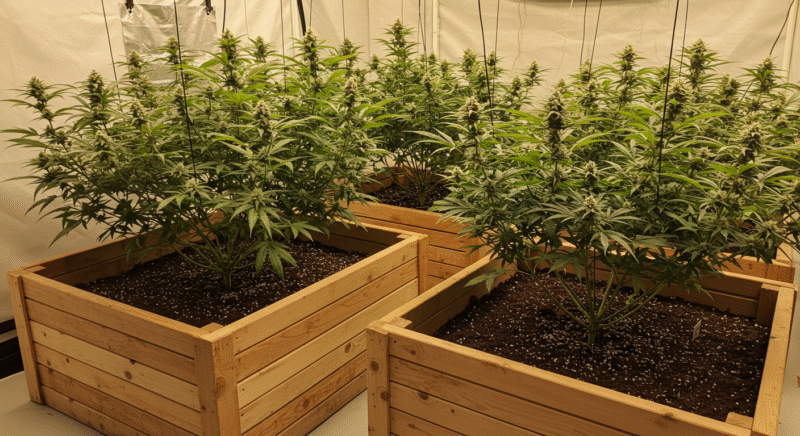
Wooden beds take up a lot of space, once they’re set up and they’re not easy to move. They’re also more labor-intensive to maintain than pots or grow bags. You’ll need to carefully manage watering and feeding to ensure all your plants get equal access to nutrients, especially when growing multiple plants in the same bed.
If you’re an experienced grower with a large indoor space and a long-term plan, wooden beds are a great choice. They’re ideal for organic growers who want to create a sustainable, long-term growing environment.
Preparing Your Container for Planting
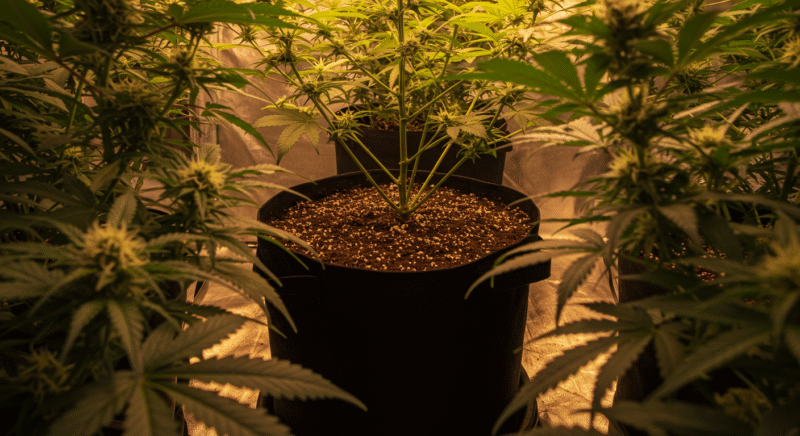
A prepared container gives the medium a clear drainage path, an even fill, enough headspace for slow irrigation, and a stable base that never sits in collected runoff. Preparation is simple, but each step should support the same goal: a uniform root volume with no hidden saturated layer.
Choose the container and medium as a pair. Fabric changes sidewall evaporation. Plastic retains moisture longer. Air-pruning designs increase exposed edges. A shared bed behaves differently from individual pots. Before planting, confirm that the container can be watered, drained, lifted or serviced, and cleaned without disturbing neighboring plants.
Remember
Drainage is a property of the complete system: medium texture, container height, drainage openings, base support, runoff removal, and irrigation volume. No single material at the bottom can compensate for a poor combination above it.
1. Choosing the Right Container
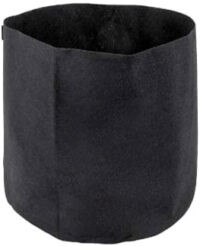
Choose a container that gives the selected medium a predictable water reserve and drainage path. Plastic slows sidewall evaporation. Fabric and air-pruning designs dry more quickly at their edges. A rigid pot is easier to move without flexing the root ball; a fabric pot is easier to store but harder to sanitize completely.
Confirm that the final container fits the irrigation and runoff plan, not only the floor area. Leave access to lift, rotate, inspect, and clean around it. A container that touches a cold floor, blocks its own drainage holes, or cannot be removed from standing water is not ready for planting.
2. Ensuring Proper Drainage Holes
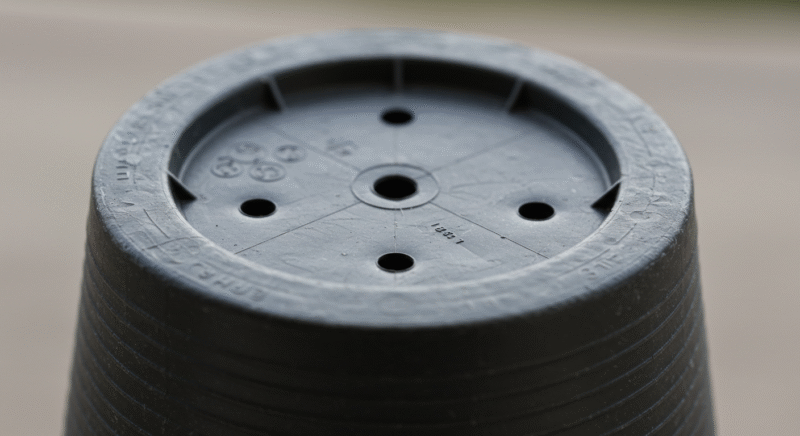
No matter which container type you choose, drainage holes are non-negotiable. Cannabis roots require oxygen, and standing water can suffocate them by pushing oxygen out of the root zone. Without a way for excess water to escape, roots sit in waterlogged conditions, which leads to root rot, stunted growth, or even plant death.
Most store-bought containers come with pre-drilled holes at the bottom. If yours doesn’t, you’ll need to drill them yourself. Use a power drill or hot nail to create several evenly spaced holes. A good rule of thumb is to ensure that water can drain within a few seconds of pouring into the pot. Holes should be large enough to let water pass through, but small enough to retain the soil.
Don’t forget to check if your container has side drainage holes. While bottom holes are essential, side holes—placed slightly above the bottom—can help eliminate stagnant water buildup and promote better aeration at the lower root level.
3. Why a Separate Drainage Layer Usually Makes the Pot Wetter
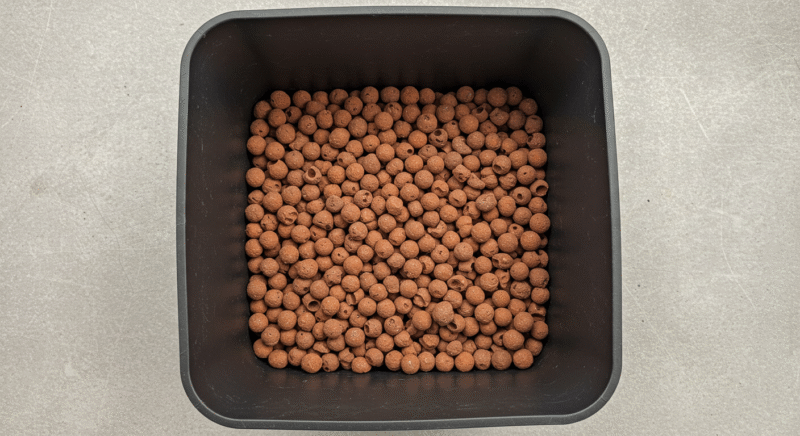
Clay pebbles, gravel, lava rock, pumice, coarse sand, and similar materials are often placed beneath potting mix with the intention of improving drainage. In a standard container, the opposite can happen. Water remains in the fine medium above the abrupt boundary until enough pressure develops to enter the much larger pores below. This creates a perched saturated zone higher in the pot and reduces the usable root depth.
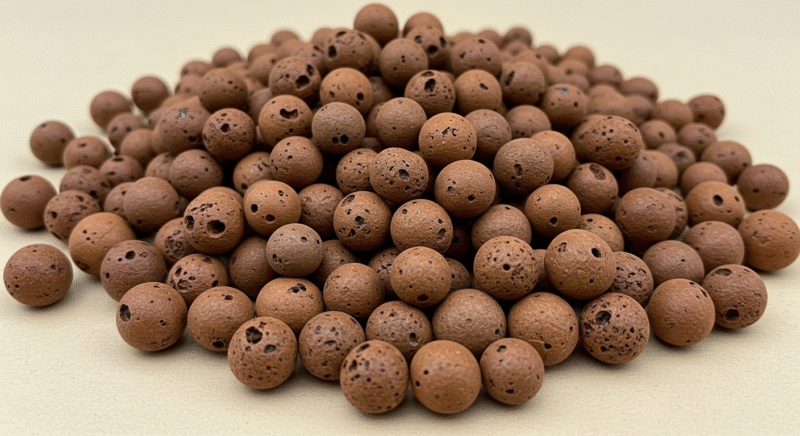
Expanded clay is valuable in hydroponic systems and can be used as a carefully chosen component of some mixes. A thick bottom layer does not pull excess water from peat, soil, or coco.
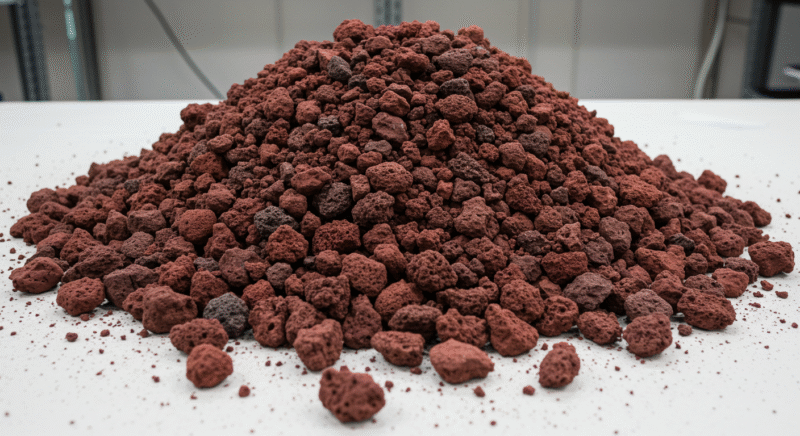
Lava rock and pumice can add durable coarse structure when their grade, chemistry, dust, and proportion are suitable. Mix them through the root volume rather than hiding them beneath it.
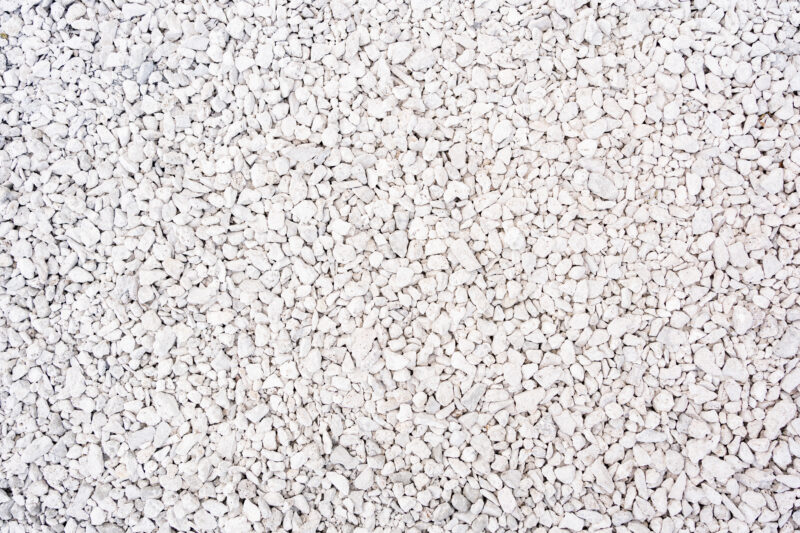
Perlite improves large-pore space when distributed through a blend. The product shown here should be horticultural grade. Very fine dust changes handling and should not be inhaled.
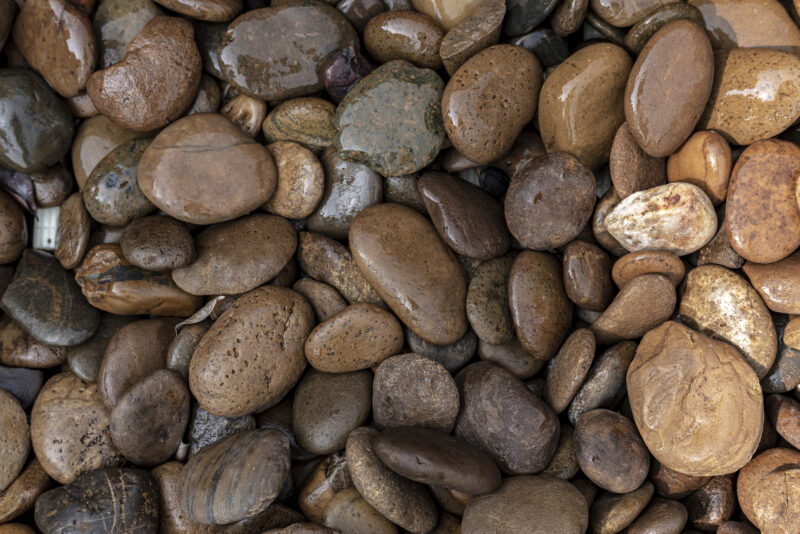
Outdoor pebbles are not an indoor amendment by default. Unknown stone can introduce pests, residues, lime, salts, and variable mineral reactions.
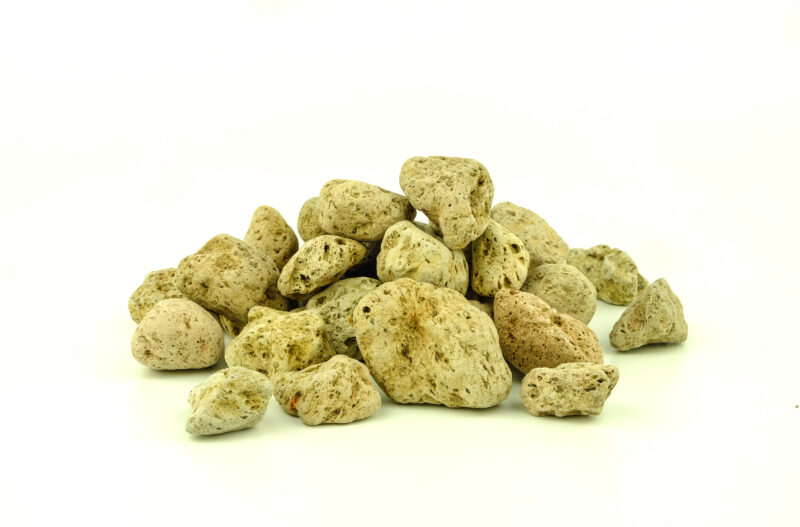
Pumice is heavier than perlite and can provide stable structure, but particle size and local chemistry still matter.
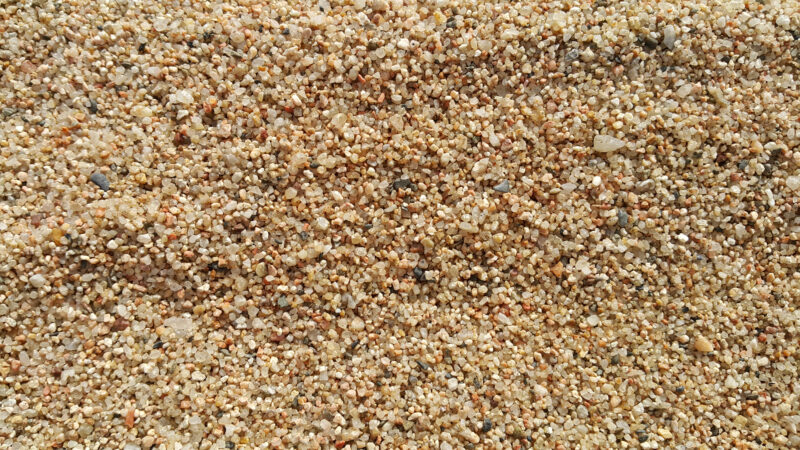
Coarse sand adds weight and may improve structure in specific formulations, but too much fine sand fills larger pores and reduces aeration. Use a tested recipe rather than assuming all sand improves drainage.
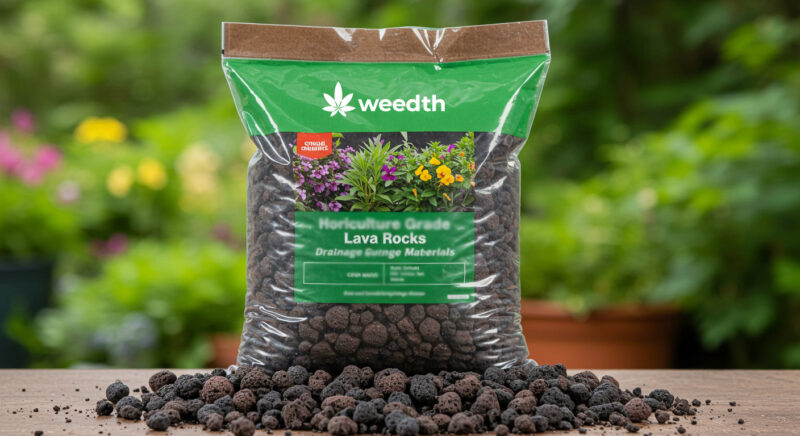
Commercial drainage products should be judged by what they do in the whole mix, not by the word “drainage” on the bag.
Skip the false drainage fix
Use unobstructed drainage holes, elevate the container above collected runoff, correct the medium throughout its volume, and water according to root demand. If a large hole loses material, cover it with a small piece of inert mesh without sealing the opening. Do not build a thick gravel or LECA layer inside the growing pot.
4. Adding the Medium to the Container
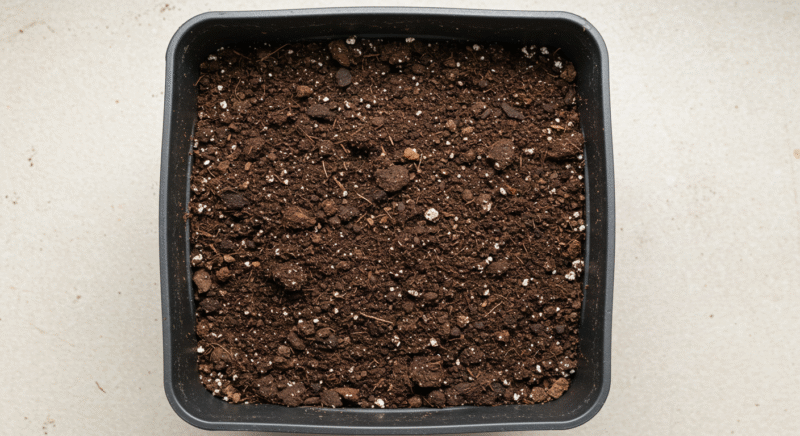
Fill directly above the open container base without a separate stone layer. Break up compressed material and blend amendments evenly before filling. Add the medium in loose lifts and settle it with gentle taps or light hand pressure. Do not ram it down; excessive compaction reduces large pores and changes how the pot drains.
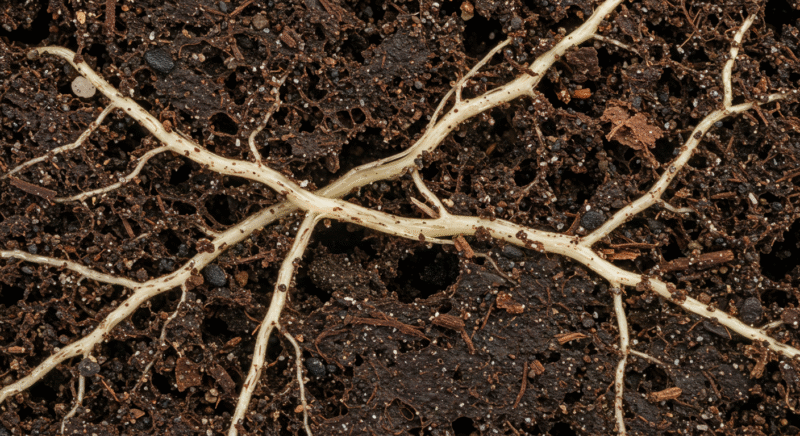
Leave enough headspace for slow irrigation and any planned mulch. Keep the crown or original transplant depth appropriate for the plant. After the first full wetting, top up only where natural settling has created a true void. Do not bury the stem deeply simply because the mix settled.
Tip
Fill every container with the same method. Different compaction between pots can create different water-holding behavior even when all pots receive the same mix and irrigation.
5. First Watering and Final Checks
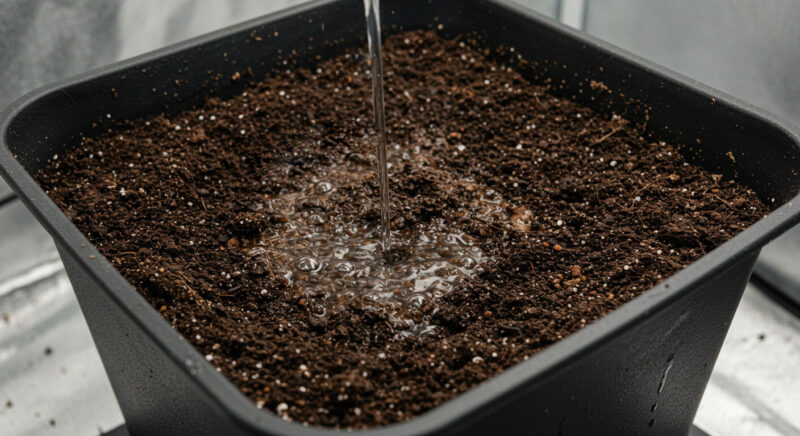
Pre-moisten or irrigate the filled container slowly enough to reveal how the medium accepts water. Use several passes if necessary. Watch for wall channeling, floating perlite, water pooling on the surface, uneven settling, or a container base that blocks the drainage openings.
Allow the pot to drain freely, remove collected runoff, and record the drained weight. Probe more than one location to confirm uniform hydration. If the center remains dry or the lower profile remains saturated for an unexpectedly long time, correct the preparation before planting rather than asking the roots to solve it.
Container Size
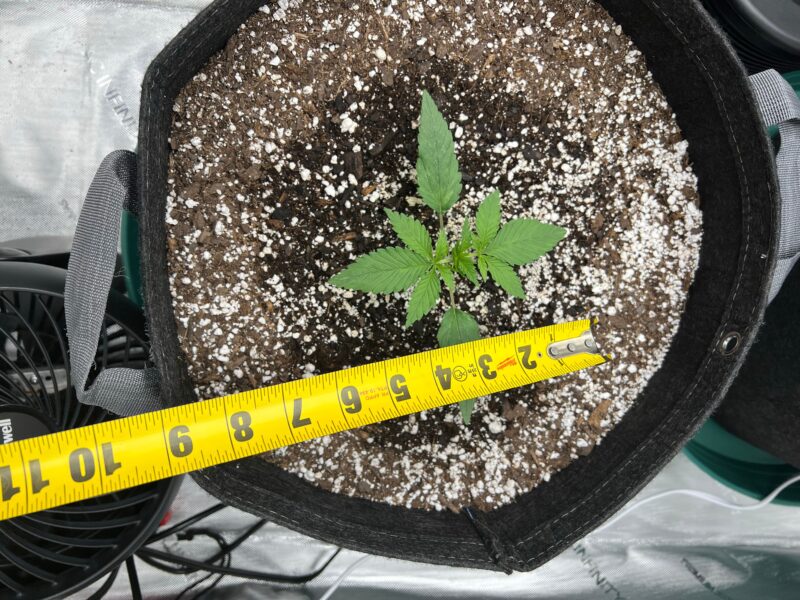
Container size sets the amount of water, air, and buffered nutrients available between interventions. A larger pot does not directly guarantee a larger plant, and a small pot does not automatically increase yield through tighter control. The useful size depends on root-development time, plant training, medium texture, irrigation frequency, and the room's drainage capacity.
Small containers provide fast feedback and make it easier to steer moisture with frequent irrigation. They also have less reserve when the room becomes hotter or an irrigation is missed. Large containers provide a wider water and nutrient buffer, but an unrooted volume can stay wet for too long and becomes heavy to move and difficult to flush or replace.
Start seedlings and young transplants in a volume you can wet accurately. Move up when the root ball is cohesive, water use has accelerated, growth remains active, and roots occupy more than one isolated edge. Avoid waiting until a hard circling mat has formed. For direct-to-final planting, expand the irrigated area gradually as roots colonize the pot.
| Setup pattern | Useful volume direction | Main risk | Management priority |
|---|---|---|---|
| Hand-watered soil or peat mix | Moderate to generous buffer | Oversized wet core around a small plant | Use pot weight and root occupancy to set the interval |
| Frequent coco fertigation | Smaller volume can work with reliable delivery | Rapid dry-back or salt concentration after a missed event | Prove emitter uniformity and drainage |
| Rockwool block or slab | Select geometry for the irrigation strategy | Copying a schedule that does not match block size and demand | Track moisture and EC by a consistent method |
| Living soil bed | Larger shared volume supports biological stability | Uneven wetting, weight, and long-term compaction | Maintain structure and moisture across the bed |
Advice
Size the container for the hardest part of the cycle: peak water demand, the longest period between inspections, and the drainage volume the room can safely handle.
Spacing
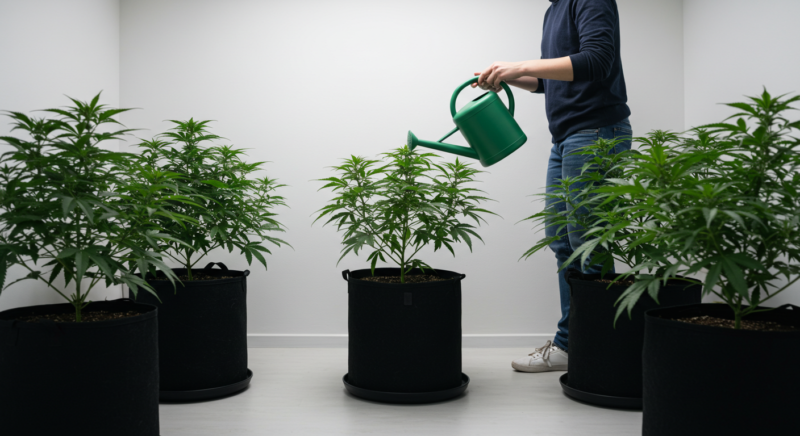
Maximizing Growth Potential
When setting up your grow area, the amount of space you give each plant is crucial to its overall development. A plant’s space depends on its height and growth pattern. Taller plants tend to spread out more, while smaller, bushier plants need less horizontal room. It’s important to provide enough space for each plant to receive adequate light, air circulation, and room for its roots to develop.
Overcrowding can lead to competition for light and nutrients, which can stunt growth and reduce yields. As a general guideline, allow for 1-2 square feet of space per plant. This ensures that each plant has room to grow without being cramped or competing with its neighbors. Proper spacing also helps improve air circulation, which reduces the risk of mold and pest infestations.
Importance of Clean Containers
Remove roots, dried media, algae, mineral deposits, and biofilm before attempting sanitation. A disinfectant cannot reliably reach a surface that is still covered with organic residue. Wash first, rinse, then use a product and contact time approved for the container material and your local horticultural setting. Follow the label and never mix cleaning chemicals.
Inspect seams, handles, fabric folds, drainage holes, and saucers. Fabric pots can retain roots and salts even when the outside looks clean. Cracked plastic, damaged coatings, and containers previously exposed to root disease may be safer to retire than reuse.
“Is rinsing a used fabric pot enough if the last plant looked healthy?”
Rinsing removes loose material but may leave roots, salts, biofilm, and hidden pests in the fibers. Clean it thoroughly, apply an appropriate sanitation process if reuse is justified, rinse as directed, and let it dry. If the previous root zone was diseased or the fabric cannot be cleaned completely, replace it.
Build the Root Zone You Can Read and Maintain
A medium is successful when its behavior is predictable in your room. You should know how it accepts water, how heavy it feels after drainage, how long the active root zone remains within a useful moisture range, and which measurements reveal a real change. That knowledge matters more than copying a fashionable recipe.
Begin with one test container and one clear nutrient strategy. Record the product and batch, source water, container geometry, preparation method, irrigation volume, and the time between irrigations. When the plant changes, follow the timeline before changing several inputs at once. A medium that lets you identify cause and effect will usually produce more consistent results than one that forces you to guess.
What to Remember
Roots need water and oxygen at the same time. Every decision in this guide, from particle size to pot volume and irrigation frequency, is another way of managing that balance.
Scientific and Technical References
- Nemati, M. R., Simard, F., Fortin, J. P., and Beaudry, F. “Growing Mediums for Medical Cannabis Production in North America.” Agronomy, 2021, 11(7), 1366. https://doi.org/10.3390/agronomy11071366
- “Soilless Growing Media for Cannabis Cultivation.” Agriculture, 2025, 15(18), 1955. https://doi.org/10.3390/agriculture15181955
- Westmoreland, F. M. et al. “Elevated Root-Zone P and Nutrient Concentration Do Not Increase Yield or Cannabinoids in Medical Cannabis.” Frontiers in Plant Science, 2025. PubMed Central full text
- Thiessen, L. D. et al. “Pathogenicity and Mefenoxam Sensitivity of Pythium, Globisporangium, and Fusarium Isolates From Coconut Coir and Rockwool in Marijuana Production.” Frontiers in Agronomy, 2021. https://doi.org/10.3389/fagro.2021.706138
- University of Florida IFAS Extension. “Common Media Used in Hydroponics.” Publication EP623. UF/IFAS publication
- Penn State Extension. “Potting Media and Plant Propagation.” Penn State Extension
- University of Illinois Extension. “Container Drainage Options.” Illinois Extension
- Oklahoma State University Extension. “Soilless Growing Mediums.” OSU Extension
- Barrett, G. E. et al. “Achieving Environmentally Sustainable Growing Media for Soilless Plant Cultivation Systems: A Review.” Scientia Horticulturae, 2016, 212, 220–234. https://doi.org/10.1016/j.scienta.2016.09.030
- Gruda, N. et al. “The Challenge of Defining Sustainable Growing Media.” Frontiers in Horticulture, 2026. Frontiers full text