
Is It Expensive to Grow Weed Indoors? The 2026 Cost Guide (CapEx vs OpEx)
Is It Expensive to Grow Weed Indoors? The 2026 Cost Guide (CapEx vs OpEx)
Indoor cultivation can be both liberating and intimidating. The freedom to grow year‑round and control every variable comes with an obvious question: is it actually expensive? The answer depends on what you build, how you control your space, and where your plugs are located. This guide breaks down startup costs (capital expenditure, or CapEx) and running costs (operating expenditure, or OpEx) for 2026. It is structured for small home growers through craft‑scale rooms. Commercial cultivation has its own cost structure and gets its own section.
1: The Real Answer in 60 Seconds
Why “expensive” depends on your setup, your power rate, and your goals
“Expensive” is relative. A single plant in a small tent can cost less to set up than a fancy aquarium, while a craft‑room conversion can rival a used car. The key variables are your footprint (2×2 foot micro tent versus 4×4 foot tent versus dedicated room), your local electricity rate, and your yield goals. Low‑power LED fixtures in a small space draw only a few cents per hour to run and need little cooling. Large gardens with high‑intensity lights and sealed climate control consume kilowatts and require dedicated HVAC. Regional electricity rates vary widely: in February 2026 the average U.S. residential rate was about 18.05 cents per kilowatt‑hour, but rates ranged from 12.44 ¢/kWh in the cheapest state to 39.89 ¢/kWh in the most expensive. In Europe, the household average in early 2025 was about €0.287/kWh (≈28.72 ¢), with Germany nearing €0.3835/kWh. Power costs alone can double or halve your monthly bill.
The two timelines that matter: startup shock vs long‑term savings
Grow costs follow two curves. CapEx is the spike you feel before your first harvest. It includes lights, tent or room build, ventilation, environmental control, medium, and basic monitoring tools. OpEx is the monthly cost to keep the lights, fans, pumps, dehumidifiers and other gear running, plus consumables like nutrients, water and replacement filters. Smart spending up front reduces operating costs later. For example, efficient LEDs cost more initially but cut energy use by 40 percent or more compared with older high‑pressure sodium (HPS) lamps, and they reduce your cooling load.
Who this guide is for (micro grow, tent growers, craft rooms, and commercial readers)
This guide speaks to multiple levels. If you are running a single plant in a closet, you will find micro grow budgeting and payback scenarios. Tent growers (2×4 ft or 4×4 ft) get advice on picking lights, tents and environmental equipment that scale sensibly. Readers building craft‑scale rooms (around 8×8 ft or larger) get an overview of build‑out costs, HVAC and compliance considerations. A final section touches on commercial economics for those exploring larger ventures.
2: CapEx Explained: What You Pay Before the First Harvest
The indoor grow is a system, not a shopping list
Treat your grow as a single system rather than a pile of parts. Lights add heat that dehumidifiers must remove; fans influence humidity and CO₂; your medium choice influences nutrient needs and watering schedule. Buying the cheapest piece of each category rarely delivers a balanced environment. A system approach means sizing your light to your canopy, matching your exhaust to your light and space, and planning environmental control at the same time.
The “minimum safe build” vs “performance build” mindset
There are two ways to start. A minimum safe build covers the essentials: a basic LED, a tent, a small exhaust fan with a carbon filter, a timer, and a hygrometer. It gets you to harvest without major hazards. A performance build adds bigger lights, more powerful fans, better insulation, active intake, automated watering, and sensors to dial everything in. You can yield more per square foot and reduce labor, but you pay more upfront.
What to prioritize first so you do not rebuy gear later
Prioritize the parts that are expensive to upgrade: lighting and environmental control. Buy a light sized for your planned canopy (you can dim a bigger LED but you cannot safely overdrive a small one). Choose a tent with sturdy poles, quality zippers and thick fabric; a cheap tent will leak light and smell. Invest in a properly rated exhaust fan and carbon filter; undersized fans run hot and fail early. Save money on non‑essentials like decorative pots or fancy nutrient lines until your basics are rock solid.
3: Lighting Costs: LED vs HPS Economics in 2026
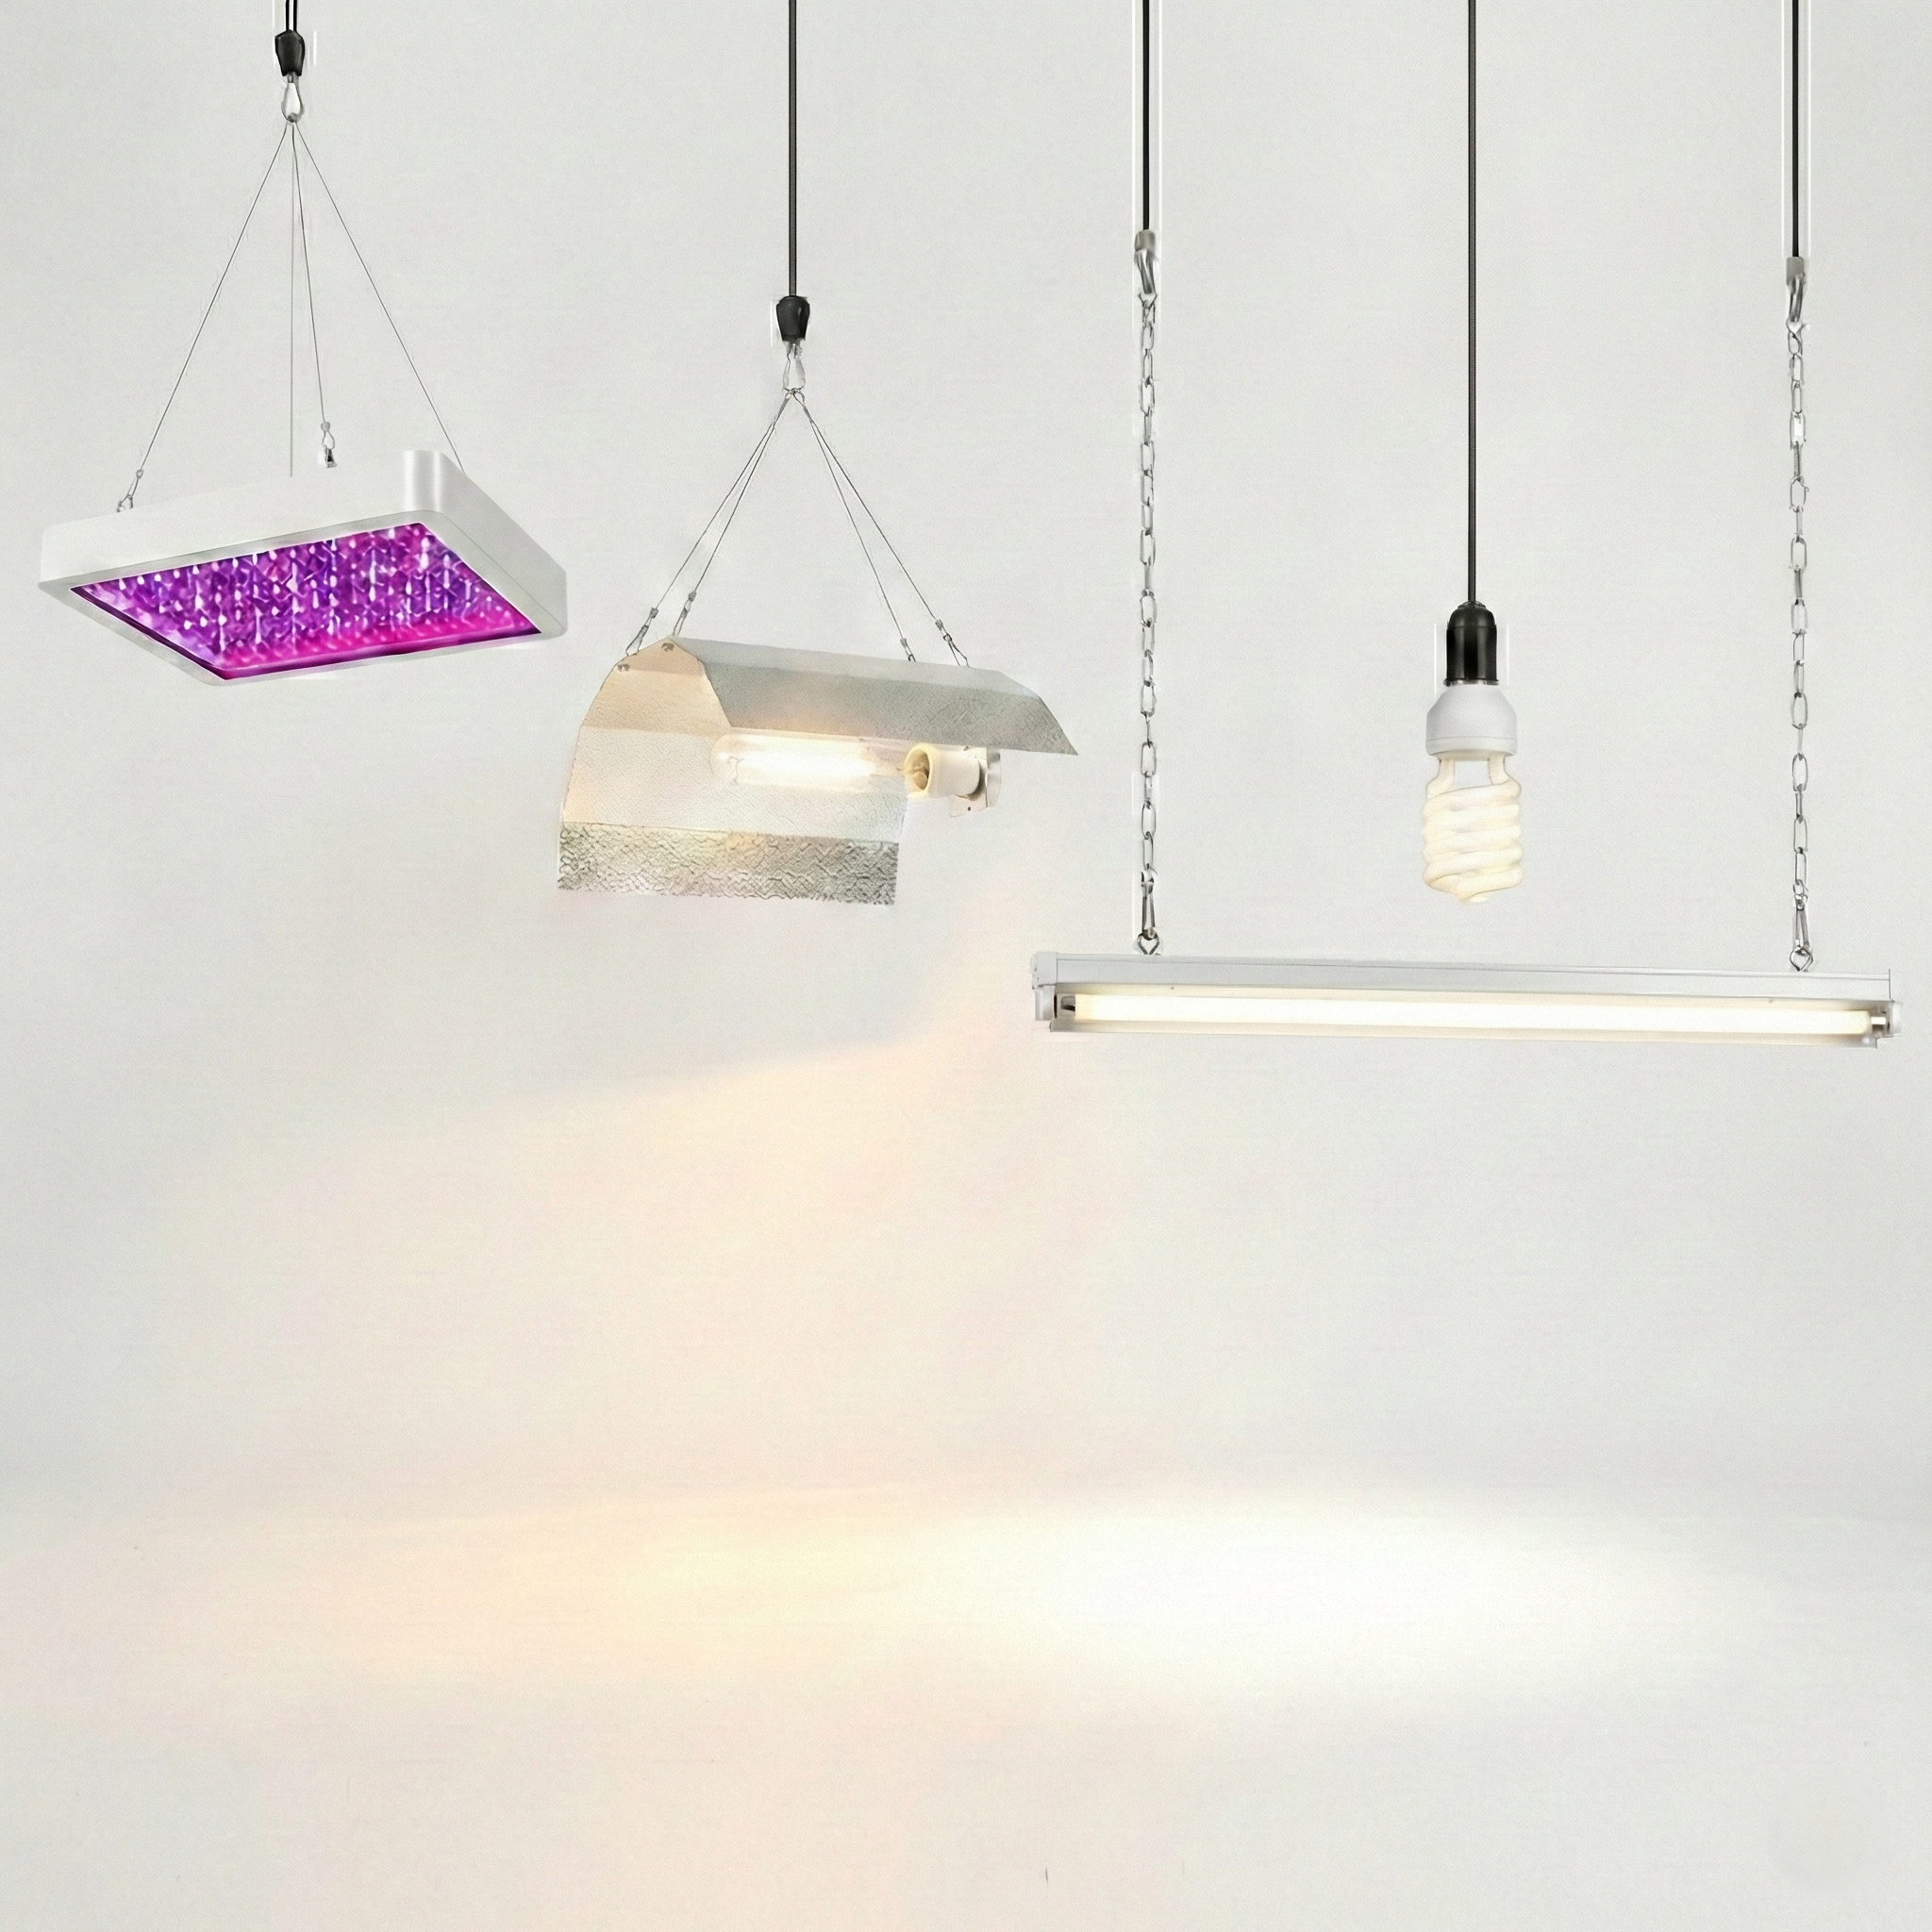
Upfront price vs total cost of ownership
Modern LEDs are the dominant choice for indoor cultivation because they are more efficient and longer‑lived than HPS. Quality LED fixtures deliver 2.5–3 μmol per joule while many HPS lamps deliver around 1.7 μmol per joule. LEDs cost more per watt at the register, but they slash power consumption and reduce lamp replacement costs. A 480 W LED can replace a 600 W HPS fixture. Using LEDs also cuts heat load, which lowers dehumidification and air conditioning requirements. HPS bulbs are cheaper but need replacing every year or two; their ballasts add heat and draw additional power for cooling.
Heat, efficiency, and the hidden HVAC penalty
When comparing lights, account for HVAC. Lighting is responsible for roughly 38 percent of the energy use in a typical indoor cultivation facility, while heating, ventilation and air conditioning (HVAC) systems account for another 51 percent. HPS lights emit more heat, meaning you will need more cooling or dehumidification. LED fixtures reduce heat load and can reduce total energy consumption by 35 percent or more when you consider both lighting and associated cooling. That hidden penalty means a seemingly cheaper HPS can cost more in electricity and cooling within a single year.
How to size lighting for a 2×2, 3×3, and 4×4 footprint
General guidance for 2026: a micro grow (2×2 ft) can thrive under a 150 W LED; a 3×3 ft tent uses about 300 W; a 4×4 ft tent needs around 480 W. Monthly electricity cost is easy to estimate using the formula:
(wattage / 1000) × hours per month × cost per kWh
Assuming 18 hours of light for veg and 12 hours for flower, a typical month averages about 30 days × 15 hours = 450 hours. At the February 2026 U.S. average rate (0.1805 $/kWh), a 150 W fixture uses about 67.5 kWh and costs roughly $12.18 per month, a 300 W fixture uses about 135 kWh (~$24.37), and a 480 W fixture uses about 216 kWh (~$38.99). In low‑rate states (≈12.44 ¢/kWh) those numbers drop to around $8.40, $16.79 and $26.87, while in high‑rate areas (≈39.89 ¢/kWh) they rise to around $26.93, $53.85 and $86.16 respectively. These figures do not include HVAC or dehumidifier consumption, which can easily match or exceed lighting in sealed rooms.
4: The Grow Envelope: Tent vs Room Build Costs
Why tents win for most home growers
Tents offer a controlled environment without construction. Good tents include thick light‑proof fabric, strong frames, multiple ports for ducting and cables, and reflective interiors. They set up in minutes and can be taken down when needed. Costs scale with size and quality; a durable 4×4 ft tent costs more than a thin 3×3 ft budget tent but lasts longer and seals better. For most home growers, a tent is the most cost‑effective way to create a grow space without renovating your house.
What makes a tent “cheap” in the worst ways
Cheap tents may look appealing but often have light leaks, weak zippers, thin fabric and flimsy frames. They can collapse under heavy lights, tear when you adjust poles, and let odors escape. They also have fewer ports, limiting your ventilation layout. Spending more on a well‑built tent avoids the frustration (and rebuy costs) of replacing a failing structure mid‑grow.
When a room conversion becomes worth it and when it is a trap
Converting a spare room or building a dedicated grow room gives you complete control over insulation, noise, and stealth. It also lets you create larger, multi‑light gardens. But room conversions come with hidden costs: adding proper insulation and vapor barriers, installing ventilation with carbon filtration, adding circuits and outlets, sealing light leaks, and controlling temperature and humidity. In many cases you will need a mini‑split air conditioner and a dehumidifier sized to your volume. For small harvest goals, those costs rarely make sense. A room build becomes worth it when you need space larger than about 5×5 ft, plan multiple runs per year, and are comfortable with the permitting and electrical work. Otherwise, a well‑designed tent saves money and time.
5: Environmental Control: The Budget Killer Nobody Plans For
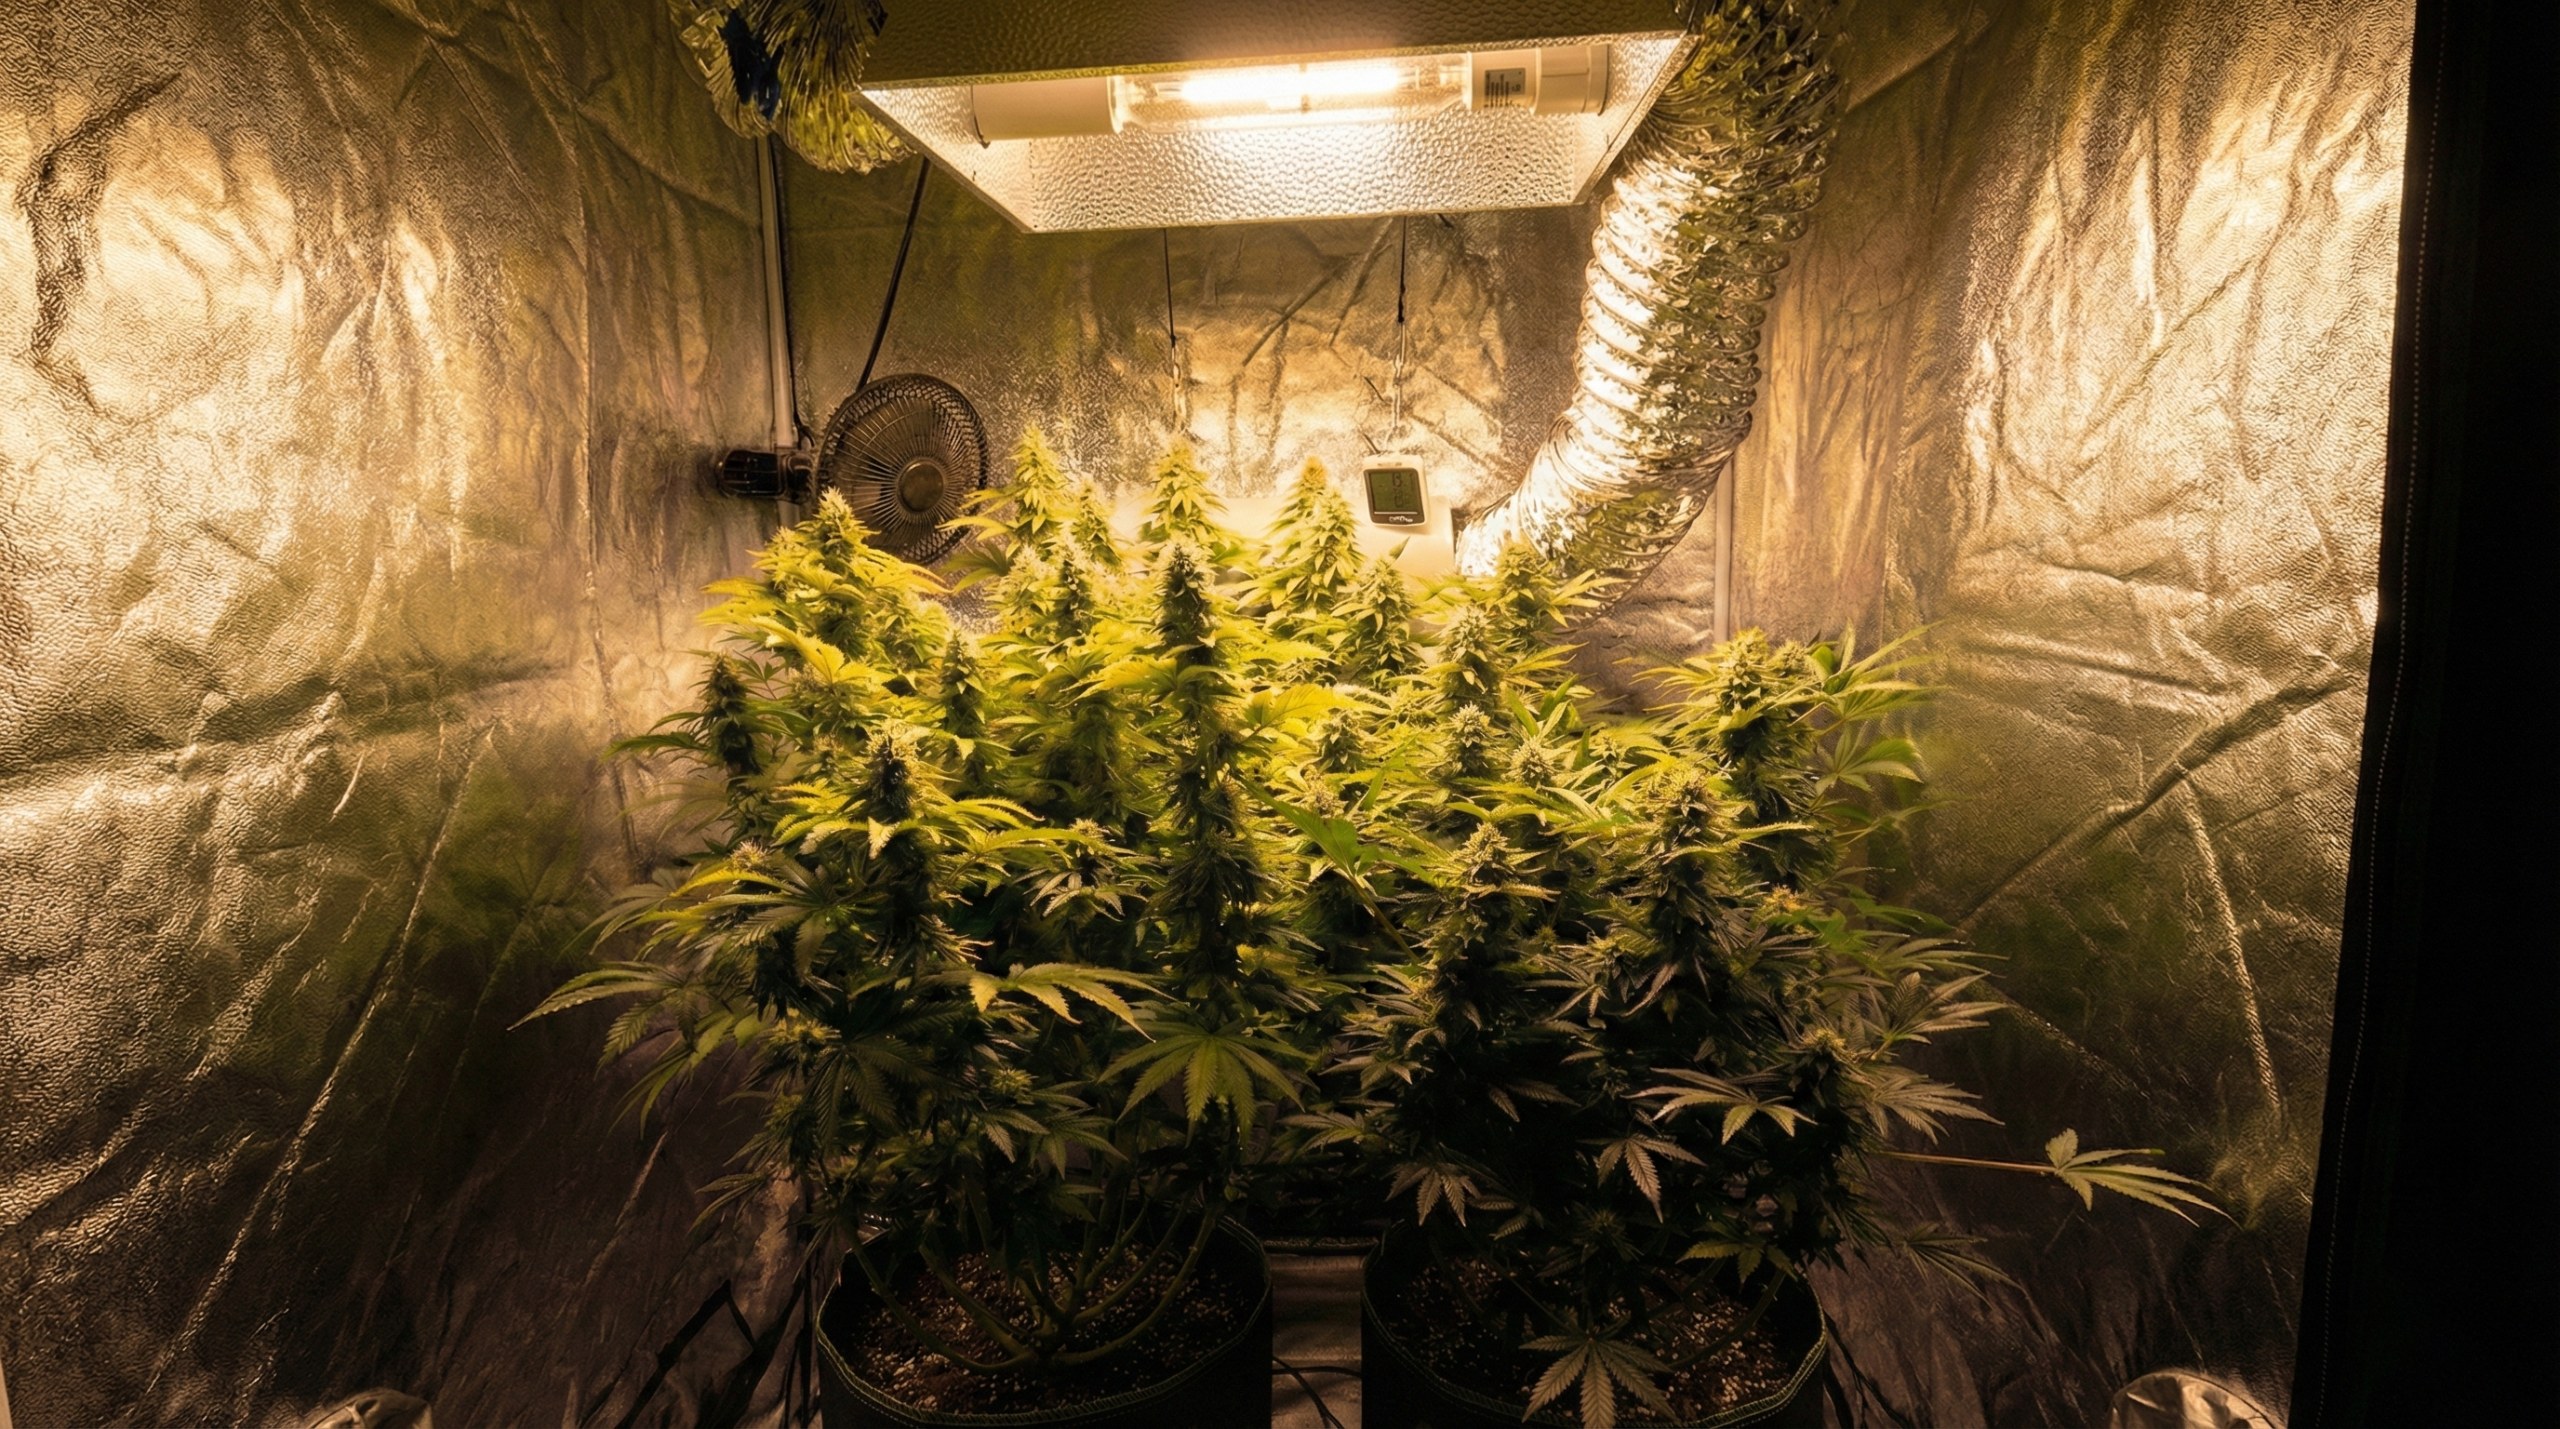
The real job: managing heat, humidity, and air exchange
Lighting and plants add heat and humidity to your space. Your job is to keep temperature and relative humidity in the ideal range (often 70–80°F and 50–60 percent RH during flower) and to exchange air enough to supply CO₂ and remove stale air. Fans alone rarely solve humidity; you usually need active dehumidification once transpiration ramps up. Each plant can transpire 0.5–2 gallons of water per day, so a small garden of eight plants can release 4–16 gallons of water daily. In sealed rooms that water ends up in the air and must be removed. Failing to plan for this latent load leads to mold and health issues.
Dehumidification math: why it can rival your light in power draw
Dehumidifiers use compressors and fans to condense moisture from the air. The energy required to remove moisture is often expressed as liters removed per kilowatt‑hour. Many baseline units remove about 1 liter per kWh, while efficient units remove 2–3.9 liters per kWh. If your plants release 20 liters of water per day, a baseline dehumidifier may use 20 kWh daily (600 kWh per month) just to keep humidity safe. Efficient units cut that consumption by half or more. On the other hand, a sealed 10 kW HPS lighting system may demand 153 MWh of cooling per year. For small tents using modern LEDs, a compact dehumidifier consuming 200–400 W will suffice. In dry climates you may not need a dehumidifier; sometimes an exhaust fan and ambient conditions keep humidity in range.
AC needs, mini‑splits, and when you do not need them
Air conditioning removes both sensible (temperature) and latent (humidity) heat. Small tents often rely on the ambient room HVAC and do not require a dedicated air conditioner if the LED is efficient and the house is cool. Larger tents or sealed rooms with multiple lights often need a mini‑split system. Sizing a mini‑split uses BTU (British thermal unit) guidelines: roughly 3,500 BTU per 1,000 W of lighting, plus extra for dehumidifier and ambient load. If your lights produce 2,000 W of heat and your dehumidifier adds 800 W, a 12,000 BTU (1 ton) mini‑split can handle the load. Oversizing wastes energy; undersizing runs constantly and fails when temperatures spike.
6: Medium Choice Changes the Budget: Soil vs Coco vs Hydro
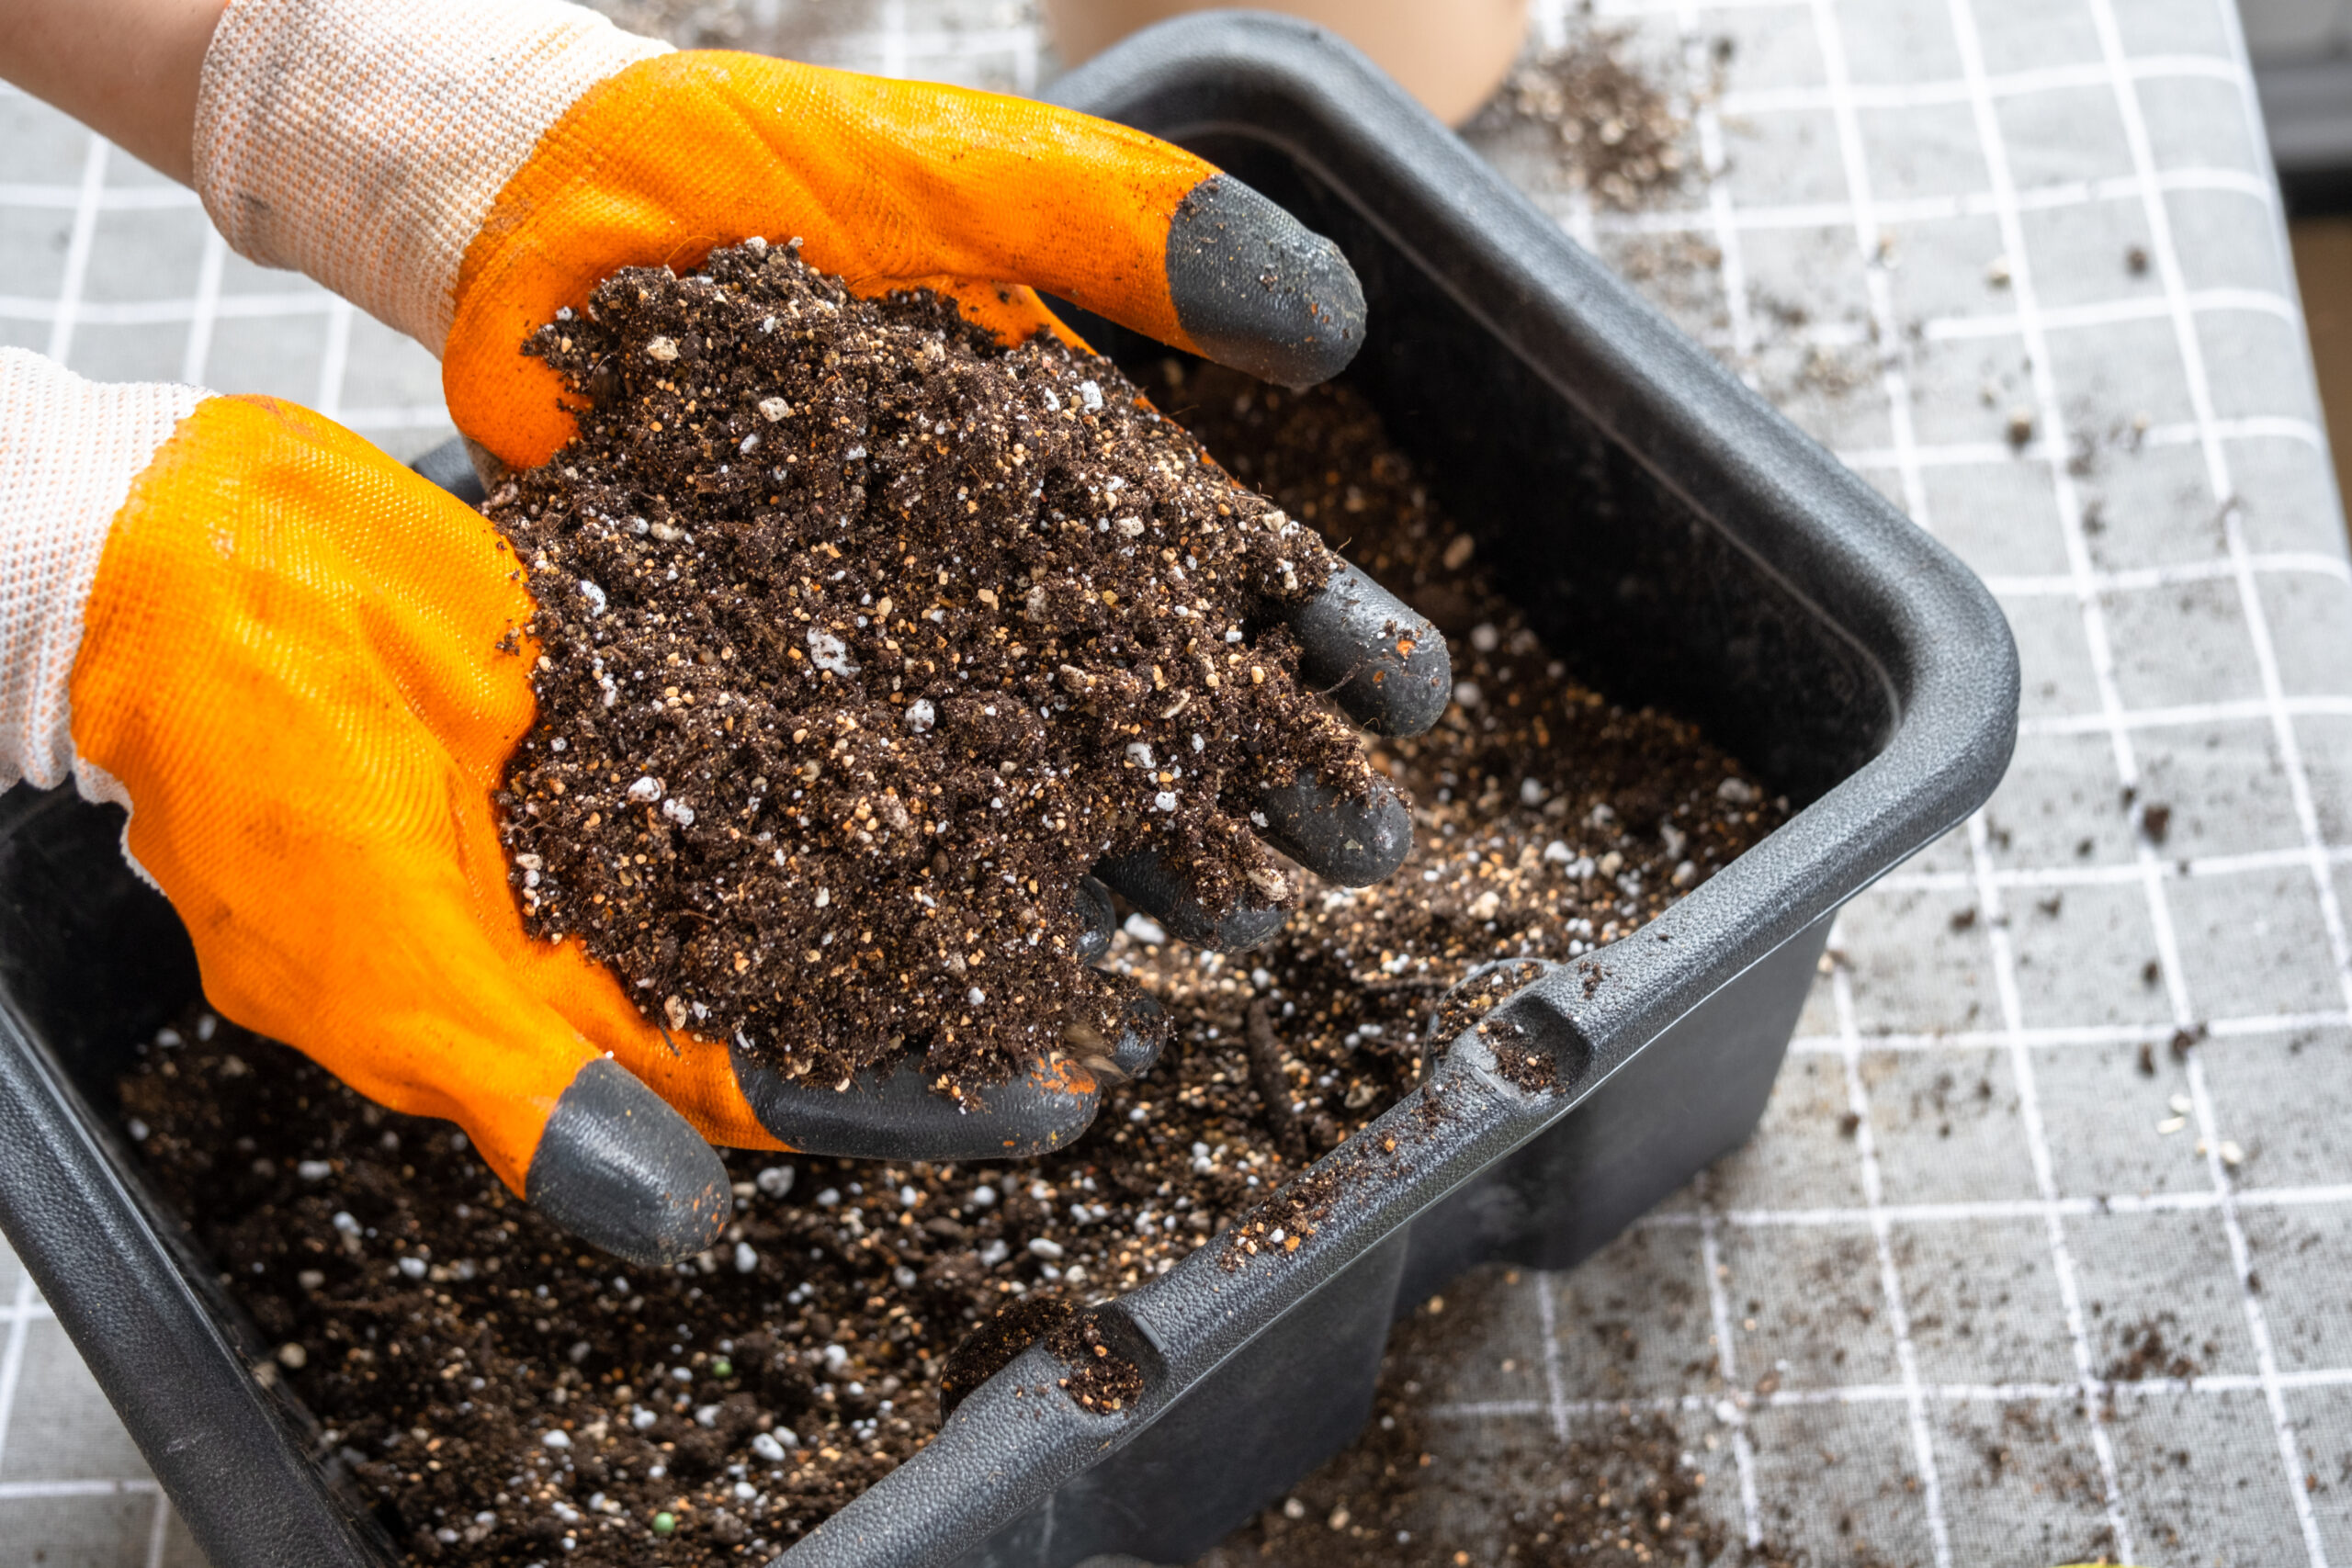
Living soil setup costs and where people overspend
Living soil is attractive because it promises minimal bottled nutrients and robust flavors. Building a living soil bed, however, involves high‑quality compost, aeration (perlite, pumice), organic amendments, and sometimes cover crops and mulch. Overbuying amendments and layering too deep are common overspends. Once set up, costs per run drop because you mostly add water and occasional topdress. The real savings show up after a few cycles when the soil biology stabilizes and the need for bottled feed drops.
Coco costs: cheaper media, higher feeding discipline
Coconut coir is relatively inexpensive and easy to handle. It comes pre‑rinsed or buffered, and you can reuse it after proper washing. You will spend more on nutrients because coco has little nutrient content and requires complete feeding from start to finish. Frequent watering means more runoff and a bit more work. For small grows, the cost is manageable; for larger grows, nutrient expenses add up quickly. The benefits are faster growth, high oxygen at the root zone, and reduced risk of overwatering compared with soil.
Hydro infrastructure costs and the “chiller problem”
Hydroponic systems can deliver high yields but demand the most infrastructure. You need reservoirs, pumps, tubing, air stones, net pots, and sometimes controllers. Water temperature must stay around 65–70°F; warm nutrient solutions create root problems, so you may need a water chiller. Chillers are pricey and draw electricity continuously. Failures (pump failures, nutrient imbalances) can be catastrophic because plants rely entirely on the circulating solution. On the flip side, hydro allows precise control and high nutrient efficiency. Choose hydro only if you enjoy tinkering and are prepared for higher capital and operating costs.
7: Automation and Monitoring: Paying for Precision
The cheap tools that prevent expensive mistakes
Some of the cheapest gear in your grow protects you from major losses. A mechanical or digital timer ensures lights follow a consistent photoperiod. A simple thermo‑hygrometer shows temperature and humidity. An inexpensive pH meter and electrical conductivity (EC) meter keep your nutrient solution in range. Backup batteries or uninterruptible power supplies can power fans or pumps long enough to ride out brief outages. These items cost far less than losing a crop to a late timer or a nutrient lockout.
Controllers, sensors, and what is actually worth buying
After you master the basics, controllers become worthwhile. Environment controllers automate exhaust fans, dehumidifiers and heaters based on setpoints. Some integrate CO₂ sensors and injection control. Smart outlets and Wi‑Fi temperature probes send alerts to your phone when conditions drift. Data loggers help you see patterns and adjust accordingly. Avoid feature bloat—buy what you will monitor. Expensive networked controllers only pay off if you use their data to prevent problems or save energy.
Automation as insurance against crop loss and human error
Automation reduces human error. A float valve plus a reservoir can refill your hydro system automatically. A drip irrigation system on a timer prevents missed feedings. Automated environmental control prevents heat spikes or humidity spikes while you sleep. For busy people, these systems act like insurance. They do not guarantee success, but they keep the environment within safe ranges long enough for you to correct course.
8: Safety and Compliance Hardware
Electrical load, wiring, and common fire‑risk mistakes
Indoor grows can draw more power than a typical household circuit can handle. Lights, fans, dehumidifiers and heaters add up quickly. Overloaded circuits overheat and can cause fires. Always know the amperage rating of each circuit (e.g., a 15 A circuit at 120 V can supply 1,800 W safely). Use properly rated extension cords and power strips. Avoid daisy‑chaining power strips. Hire a qualified electrician for room conversions. If you run a sealed room with high wattage, consider installing dedicated subpanels with GFCI protection.
Odor control as a practical and safety decision
Besides being polite, odor control matters for safety. Smell can attract unwanted attention. Carbon filters paired with fans scrub exhaust air. Keep a slight negative pressure in your tent or room so air leaks inward instead of outward. Check filters annually; carbon loses effectiveness over time. Do not vent into attics or confined spaces without adequate ventilation; humidity and odor can build up and cause damage.
What changes when you scale or operate commercially
Scaling up introduces code requirements. Commercial facilities often must install fire suppression systems, emergency lighting, alarmed exits, and odor mitigation plans. They may need permits for electrical service upgrades, building modifications and hazardous waste handling. Even craft‑scale rooms benefit from adhering to local codes for occupant safety. Factor these compliance costs into any expansion plan.
9: OpEx Explained: The Monthly Cost of Running an Indoor Grow
The electricity formula and how to use it
OpEx is dominated by electricity. Use the simple formula mentioned earlier: (total wattage / 1,000) × hours × cost per kWh. Remember to include lights, fans, pumps, dehumidifiers, heaters, and controllers. For example, a 4×4 ft tent with a 480 W LED, 100 W of fans, and a 200 W dehumidifier draws 780 W when everything runs. Over a 450‑hour month, that is 351 kWh. At the U.S. average 18.05 ¢/kWh, that is about $63 per month; at 12.44 ¢/kWh about $44; at 39.89 ¢/kWh about $140. Adjust this figure for shorter veg periods or cooler seasons.
Veg vs flower power usage patterns
Vegetative growth uses lights for 18 hours per day and often less light intensity. Flowering uses lights for 12 hours per day at full power. Dehumidifiers run hardest in late flower when buds transpire the most. AC demand peaks when lights and dehumidifiers generate combined heat. If you schedule lights to run at night, you may benefit from cooler ambient temperatures and lower utility rates if your area offers time‑of‑use pricing. Plan your cycles accordingly.
The equipment that quietly runs 24/7 and spikes bills
Several devices run constantly: exhaust fans, circulation fans, air pumps in hydro systems, and sometimes humidifiers or dehumidifiers. Each may draw only 30–100 W, but together they add up. A 24/7 circulation fan at 50 W uses 36 kWh per month. Multiple fans plus an air pump can add 100 kWh. It is easy to forget them when planning, so include them in your OpEx calculations.
10: Electricity by Region: Why Location Changes Everything
Low‑rate regions vs high‑rate regions and what that means for setup size
Growers in states with low electricity rates (around 12–15 ¢/kWh) can justify larger grows or additional environmental equipment without breaking the bank. Those paying nearly 40 ¢/kWh will see electricity become their single biggest operating cost. In those regions, smaller footprints, efficient LED fixtures, and energy‑saving environmental equipment are essential. The energy breakdown for a typical indoor facility shows lighting plus HVAC dominating total energy use; efficiency choices have outsized impact on your bill.
The “Europe problem” and the efficiency‑first strategy
European household electricity prices averaged 28.72 ¢/kWh in early 2025 and exceeded 38 ¢/kWh in countries like Germany. In such markets, indoor cultivation can be prohibitively expensive unless you focus on efficiency. That means using high‑efficacy LED fixtures, sealing and insulating your space well, recapturing and reusing heat where possible, and considering smaller harvests with quicker turnaround to maximize grams per kWh. Some growers in high‑cost regions shift to greenhouse or mixed‑light setups to leverage free sunlight and reduce artificial lighting hours.
How to adapt with smaller footprints, faster cycles, and smarter climate control
If energy is expensive, shrink your footprint. A 2×4 ft tent with a 200 W LED can still yield enough for personal use while costing a third of a 4×4 ft tent. Shorten vegetative periods and run more cycles per year. Use precision climate control to stay in safe ranges without overcooling or over‑dehumidifying. Monitor conditions and adjust setpoints to avoid constant compressor cycling.
11: Consumables: Nutrients, Water, Filters, and the Slow Drip of Costs
Nutrient strategy: dry salts vs bottled lines
Liquid nutrient lines are easy but expensive per liter. Powdered or “dry salt” nutrients cost far less per feeding because you pay for minerals rather than water. The tradeoff is mixing accuracy: you must weigh powders and dissolve them correctly. Many growers start with liquids for simplicity and then switch to powdered blends to save money. Whatever you choose, overfeeding wastes money and can harm plants. Dial in feeding based on plant demand.
Water quality, RO systems, and hidden waste ratios
Tap water varies widely. Hard water can cause nutrient lockouts or lead to salty buildup. A reverse‑osmosis (RO) system produces pure water but wastes 2–4 gallons for every gallon produced. Factor the waste into your water bill. Inline carbon and sediment filters extend the life of your RO membranes and cost money on their own. In some regions, rainwater collection or purchase of distilled water may be cheaper than running an RO system continuously.
Replacement cycles: filters, bulbs, calibration fluids, and wear items
Carbon filters lose efficiency over time and need replacing every 12–18 months to maintain odor control. HPS lamps lose output after around 5,000–10,000 hours and should be replaced annually. Even LED drivers and boards have finite lifespans (usually beyond 50,000 hours), but fans and ballasts may fail sooner. pH meters need regular calibration; calibration solutions cost a few dollars but prevent misfeeds. Factor wear items into your budget to avoid surprise failures.
12: Genetics Costs: Seeds, Clones, and Why Cheap Genetics Get Expensive
Seed pricing realities and what you are paying for
Seeds range from inexpensive to premium. The price reflects stability, germination rate, and the breeder’s selection work. Cheap seed packs often include unstable genetics, hermaphrodites, or poor phenotypes that waste space and time. Paying a bit more for seeds from reputable breeders increases the chance of uniform, vigorous plants. Avoid impulse buying large packs—start with small packs, find a keeper, then clone or re‑run the line.
Clones, elite cuts, and the risk behind the price
Clones and “elite cuts” of popular strains cost more because they guarantee sex and shorten the veg cycle. They also carry pathogen risk. Many plant viruses and pests can hitch a ride on clones. A cheap clone from an unknown source can introduce broad mites, root aphids, or hop latent viroid. Factor quarantine time and preventative treatments into the cost. Healthy clones are worth the price because they reduce time to harvest and deliver consistent results.
Pathogen risk and why healthy genetics protect your investment
A clean start is insurance. Viruses and pathogens can decimate yield and quality. Buying from trusted sources or starting from seed reduces risk. Always inspect clones under magnification, quarantine them away from your main room, and consider prophylactic dips. The cost of a lab‑tested clone or properly stored seeds is minimal compared with losing a crop to disease.
13: Hidden Costs: The Stuff That Adds 30 to 40 Percent
Drying and curing as separate infrastructure
Harvest does not mean the costs stop. You need a controlled space to dry your buds slowly, often at temperatures around 60–70°F and humidity 50–60 percent. This may be the same tent used for growing or a separate area with dedicated ventilation and odor control. You also need jars or totes to cure, with hygrometers to track relative humidity. A small drying tent, a rack, and humidity packs add to your budget.
Storage tools, humidity control, and long‑term freshness
Long‑term storage requires airtight containers, humidity‑control packs, and dark conditions. High‑quality glass jars or mylar bags cost more than cheap containers, but they protect potency and flavor. Humidity‑control packs (two‑way humidifiers) keep jar humidity stable around 58–62 percent, which reduces mold risk and overdrying. Over the life of a grow, jars and humidity packs are minor costs but essential for preserving quality.
IPM costs: prevention vs emergency treatment
Integrated pest management (IPM) costs money whether you prevent or treat. Prevention costs include sticky traps, beneficial predators, and gentle sprays such as neem or essential oils. Emergency treatments (e.g., sulfur burners, chemical miticides) cost more and can ruin a harvest if used late. Investing in prevention reduces the chance of expensive rescue measures. Factor in the cost of replacing media or sterilizing equipment after an infestation.
14: The Cost of Mistakes: The Learning Tax
Under‑yielding costs: grams per watt and lost value
Yield determines your cost per gram. A tent that could produce 500 g per harvest but only delivers 250 g effectively doubles your cost per gram. Common causes of under‑yielding include inadequate light, poor environmental control, nutrient imbalances, or genetics that do not perform under your conditions. Tracking grams per watt helps you see where efficiency falls short.
Timing failures that ruin harvests (light leaks, timers, drying errors)
Light leaks can trigger hermaphroditism in photoperiod strains, seeding the crop and reducing quality. Timer failures can throw plants into stress cycles. Drying too fast or too slow can lock in harshness or cause mold. Each mistake reduces yield and quality, increasing your effective cost per gram. Check your timers, test your grow space for light leaks, and monitor drying conditions as carefully as you monitor the grow itself.
Why “cheap now” often becomes “expensive later”
Cutting corners on critical components leads to failures that force replacement. A low‑quality LED may have poor spectrum and low output, causing lower yields. A bargain exhaust fan may fail mid‑cycle, causing heat and humidity spikes that ruin a crop. Investing in reliable gear saves money in the long run by avoiding replacement and lost harvests.
15: Cost Scenarios: From Micro Grow to Full Grow Room
Scenario A: Micro grow for stealth and learning
A single 2×2 ft tent with a 150 W LED, a small exhaust fan and filter, basic pots, and a thermo‑hygrometer might cost a few hundred dollars. Monthly operating cost is low—around $10–15 in electricity at average U.S. rates plus nutrients and water. Expect yields of about 30–80 g (1–3 oz) per harvest. The value is learning and privacy. Upgrading lighting or ventilation later is easy because everything is small and modular.
Scenario B: The 4×4 tent as the best cost‑to‑yield sweet spot
The 4×4 ft tent is popular because it balances cost, yield and manageability. A quality 480 W LED, a 6‑inch fan and filter, a decent tent, medium, nutrients and basic automation might cost $1,000–1,500. Operating costs around $60–100 per month at average electricity rates include dehumidification and fans. Yields of 400–900 g (roughly 14–32 oz) per harvest are common when the environment is dialed in. The cost per gram can drop dramatically compared with small grows because fixed costs are spread over more product.
Scenario C: Craft grow room and when it makes sense
A craft‑scale room (8×8 ft or larger) requires serious investment. Lights alone may total 1–2 kW of LEDs. You need an AC unit, dehumidification sized to remove tens of liters per day, multiple fans, CO₂ supplementation, and perhaps automated watering. Build‑out costs easily exceed $3,000–5,000, and operating costs can exceed $200–300 per month depending on local electricity rates. It makes sense if you have the space, need larger production, and want control over every parameter. It does not make sense if you only need a few ounces for personal use.
16: Home Grow ROI: Break‑Even and Cost per Ounce
A simple break‑even model you can reuse
To calculate break‑even time, add your CapEx and the operating costs per month until your harvest covers those costs. If your initial investment is $1,000 and monthly OpEx is $75, your costs after six months are $1,450. If you harvest 450 g in that period and would otherwise buy flower at $10 per gram, you have saved $4,500. Subtract your costs and you see a payback in the first harvest. If yield or electricity costs are lower, break‑even takes longer. Use your own numbers for wattage, yield, and local prices to plan.
Cost per gram and how efficiency changes the outcome
Divide total cost (CapEx + OpEx for a run) by grams harvested to get cost per gram. A 4×4 ft tent costing $1,200 plus $300 for three months of OpEx and yielding 800 g has a cost per gram of about $1.88. The same setup yielding 400 g has a cost per gram of about $3.75. Efficiency (grams per watt) matters more than what you spend. Investing in better lights and environment can drop cost per gram even if it raises CapEx.
Time cost: when your labor makes the grow “feel expensive”
Growing takes time: mixing nutrients, watering, training plants, trimming, cleaning. A busy person may value their time at $20/hour and see that hours spent on a grow make it expensive. Automation and simple systems reduce labor cost. On the other hand, many hobbyists see time in the garden as a stress reliever and do not assign it a monetary value. How you value your time changes how “expensive” a grow feels.
17: Commercial Indoor Economics: Why It Is a Different Universe
Build‑out cost structure and ongoing overhead
Commercial facilities operate at scales far beyond home grows. Build‑out includes leasing or purchasing property, electrical service upgrades, industrial HVAC and dehumidification, irrigation and fertigation systems, and compliance with local codes. Lighting and HVAC can each require megawatts of power. The Illinois energy guidance notes that in a 10,000 sq ft indoor facility, lighting consumes about 40 to 50 percent of total energy while HVAC consumes 30 to 40 percent. Combined, those two systems dominate overhead. Construction costs run into millions of dollars. Ongoing overhead includes labor, insurance, security, taxes, licensing, and compliance testing.
Taxes, compliance, and the margin squeeze
Commercial producers pay significant taxes and face a complex regulatory environment. In some jurisdictions, they cannot deduct many normal business expenses. Compliance testing for potency and contaminants, packaging, labeling and track‑and‑trace systems all add cost. Wholesale prices have fallen in many markets, squeezing margins. Efficiency and brand differentiation are key to survival.
Why efficiency and brand power decide who survives
Because the largest costs are electricity and labor, efficient operations have an advantage. High‑efficacy lighting, efficient HVAC, and automation reduce cost per gram. At the same time, branding and quality differentiate product in a competitive market. Commodity indoor flower faces price pressure; specialty products with unique terpene profiles or sustainable practices can command higher prices.
18: The Smart 2026 Strategy: How to Spend Less Without Cutting Quality
Spend on what affects quality most and cut what does not
If you have to choose where to allocate your budget, prioritize lighting, environment control, and genetics. Those three variables set your ceiling for yield and quality. Cut costs on items that do not directly affect plant health: skip decorative accessories, avoid overpriced nutrient lines, and build only as much space as you will use.
Microclimate discipline: small optimizations that save big money
Microclimate means the conditions right at canopy height—temperature, humidity, CO₂ and airflow. Small improvements here can save money. For example, lowering light height may reduce intensity needed and cut energy use; moving a fan to eliminate a hot spot may prevent a plant from stalling; slightly reducing humidity in late flower can prevent mold without running the dehumidifier full tilt. Use sensors at canopy level, not just on the wall. Adjust setpoints gradually and watch plant response.
A realistic shopping priority list for first‑time growers
For a 4×4 ft tent:
(1) Quality LED fixture,
(2) Sturdy tent,
(3) Properly sized exhaust fan and carbon filter,
(4) Thermo‑hygrometer and timer,
(5) Quality medium and genetics,
(6) Small circulation fan,
(7) Basic pH and EC meters,
(8) Dehumidifier if your region is humid,
(9) Simple controller or smart plug for automation.
Everything else can wait. Start small, learn, and upgrade only what limits your plants.
19: The Questions That Decide Your Budget
What does it cost per month to run a typical 4×4 tent
A 4×4 ft tent with a 480 W LED, fans and dehumidifier uses roughly 350 kWh per month. At average U.S. rates (18.05 ¢/kWh), that is about $63 per month in electricity. Add $10–20 for nutrients and media, plus filter replacement amortized over its life, and you might spend $75–85 per month. In high‑rate regions (≈40 ¢/kWh), power alone can exceed $140 per month. If you run CO₂, AC or more lights, costs rise.
Which part usually costs more than people expect
Environmental control—dehumidification and AC—often costs as much as or more than lighting. A large dehumidifier can run several hundred watts continuously; efficient units save energy but cost more upfront. HVAC often accounts for 30–40 percent of energy use in commercial facilities. Many new growers underestimate how much moisture plants release and how much power it takes to remove it.
What is a realistic first‑harvest yield and cost per gram
In a well‑run 4×4 ft tent, a first‑time grower might harvest 400–600 g (14–21 oz). If total costs are around $1,500 and you harvest 500 g, cost per gram is $3. If you harvest only 250 g, cost per gram doubles. For micro grows, yields of 30–80 g per run are realistic; cost per gram may be higher because fixed costs spread over fewer grams.
When does a home grow usually break even
Most home grows break even in one to three harvests depending on setup cost, yield and electricity rates. A minimal tent can pay back after the first harvest if yield and quality are good. A more expensive craft room may take several runs. Break‑even is sooner in regions where retail flower prices are high and electricity is cheap, and later where retail prices are low or power is expensive.
What gear is non‑negotiable and what can wait
Non‑negotiable: a safe environment (tent or room), adequate lighting, ventilation with a carbon filter, a timer, a thermo‑hygrometer, and a pH meter if using liquid nutrients. Optional but valuable: dehumidifier (depending on climate), automation controllers, CO₂ supplementation, advanced sensors, and automated watering. Even within non‑negotiables, choose quality over quantity to avoid buying twice.
Wrap‑Up
Indoor cultivation in 2026 is as affordable or as expensive as you make it. Small tents with efficient LEDs can produce high‑quality harvests with modest upfront and monthly costs. Large sealed rooms require careful planning and capital but reward you with control and output. Understanding how lighting, environment, medium and regional electricity rates interact helps you spend wisely. Base your decisions on your goals and constraints, invest in essentials, and treat efficiency as the thread that ties your budget and quality together.
Share this article
A quick overview of the topics covered in this article.
Follow us
Latest articles
July 27, 2026
July 27, 2026

July 27, 2026
July 27, 2026