- Lighting for Indoor Cannabis Grow: The Complete Guide
- Importance of Light for Cannabis Grow
- How Light Affects Cannabis Growth
- Natural Sunlight vs. Artificial Lighting
- Types of Light Sources for Cannabis Growth
- Types of HID Lights
- Advantages of HID Lights
- Disadvantages of HID Lights
- Best Uses for HID Lights
- Using HID Lights Effectively
- HID Lighting Components and Accessories
- Fluorescent Lights
- Compact Fluorescent Lamps (CFLs)
- Light-Emitting Diodes (LEDs)
- Light Spectrum for Grow Stages
- Blue Spectrum: Vegetative Growth
- Red Spectrum: Flowering
- Full Spectrum: Covering All Phases of Growth
- Spectrum Adjustments for CFL and LED Growers
- What is Full-Spectrum Lighting?
- Light Intensity and Placement
- Ballasts
- Reflectors: Maximizing Light Efficiency
- Reflective Surfaces: Boosting Light Efficiency
- Managing Light Distribution
- Supplemental Lighting
- UVB Light Supplementation
- Light Movers: Maximizing Coverage
- Light Schedules and Using Timers Automation
- Using Timers and Automation for Lighting Control
- Lighting Setups for Different Grow Spaces
- Managing Heat from Lights
- Light Burn and Heat Stress: Recognizing and Solving Common Problems
- Heat Stress: What it Looks Like and How to Fix It
- Electrical Safety in Your Grow Room
- Troubleshooting Lighting Systems: Common Issues and Solutions
- Common Lighting Mistakes and How to Avoid Them
Lighting for Indoor Cannabis Grow: The Complete Guide
Importance of Light for Cannabis Grow
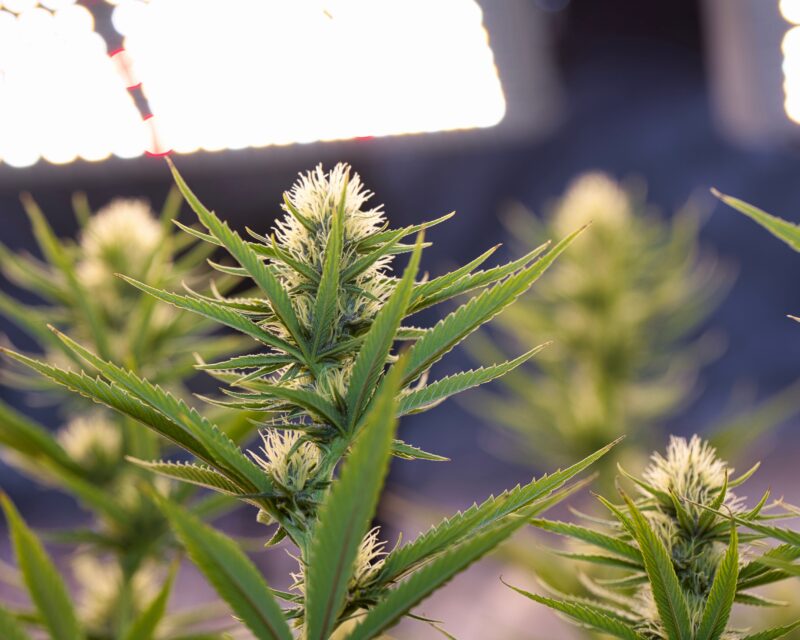
Light is arguably the most important factor when growing cannabis, don’t forget light is everything. Marijuana plants grow on light—it’s their energy source, fueling photosynthesis, growth, and, ultimately, the production of THC-rich buds. The lighting system determines your crop’s quality, potency, and yield. The right lighting system can turn an average grow into an abundant harvest, while poor lighting can lead to weak plants and poor yields.
Artificial lighting allows you to mimic and control the natural light cycles that cannabis would receive outdoors. While natural sunlight is the best light source, most indoor growers rely on artificial lighting systems to recreate these conditions. Investing in proper lighting is critical—it may be your single largest expense, but it’s well worth the cost.
How Light Affects Cannabis Growth
At its core, the growth of cannabis depends on photosynthesis, the process by which plants convert light, carbon dioxide (CO2), and water into food. Light fuels photosynthesis, producing the sugars and carbohydrates that the plant uses to grow. The more light your cannabis plants receive (within reason), the faster and bigger they will grow. Cannabis plants, particularly in the vegetative stage, respond well to high light intensity.
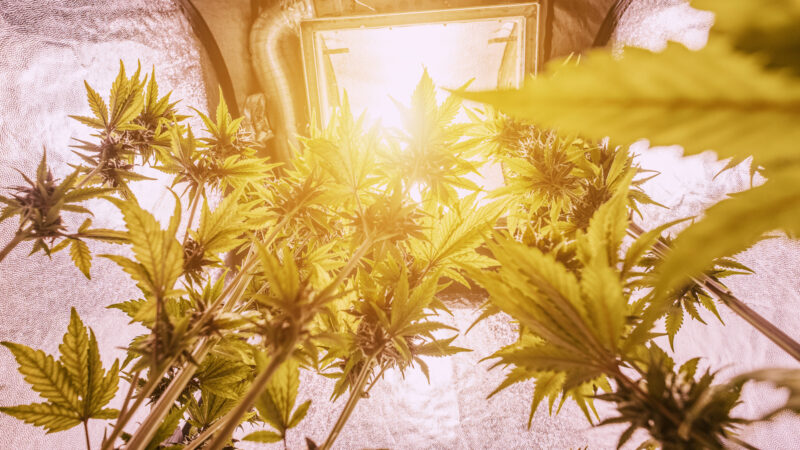
Marijuana is highly sensitive to changes in light, especially as it transitions from vegetative growth to flowering. This sensitivity is due to the plant’s internal biological clock, known as photoperiodism. Growers can control when cannabis switches from vegetative growth to flowering by manipulating light cycles. In nature, cannabis flowers respond to the shortening days of late summer and fall. Indoors, growers use a 12/12 light cycle to mimic this seasonal change and trigger flowering.
Natural Sunlight vs. Artificial Lighting
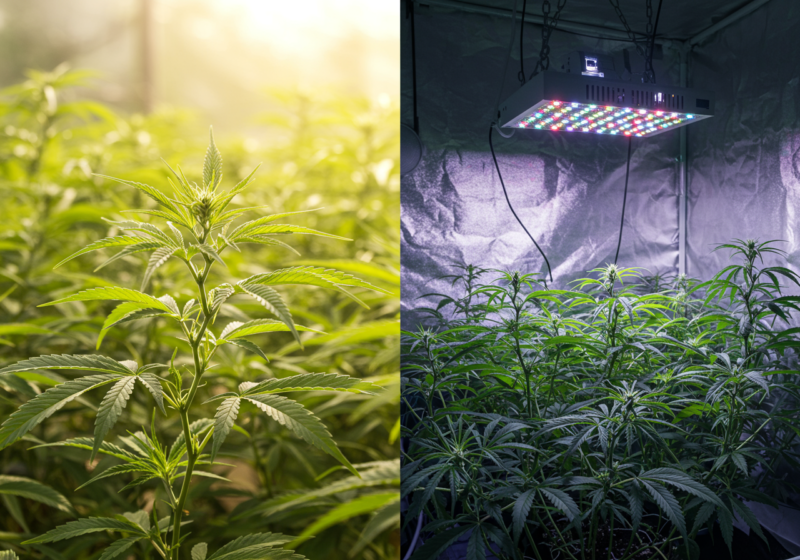
Sunlight is the best possible light source, indoor growing setups rely on artificial lighting to provide the right spectrum, intensity, and photoperiod. Artificial lighting allows complete control over the growing environment, enabling you to extend the growing season and manipulate plant hormones to maximize yields.
Artificial lighting systems for growing cannabis usually include the following components:
- Bulb: The light source itself, which produces the necessary spectrum for plant growth.
- Reflector: A reflective hood that directs light down toward the plants.
- Ballast: A device that regulates the electrical current to the bulb, ensuring it operates efficiently.
- Timer: An essential tool for controlling the light cycle.
- Electrical Inputs/Outputs: Proper wiring and connectors to ensure safe operation.
With artificial lighting, you can create optimal conditions for cannabis at every stage of its life cycle—from seedling to flowering.
Types of Light Sources for Cannabis Growth
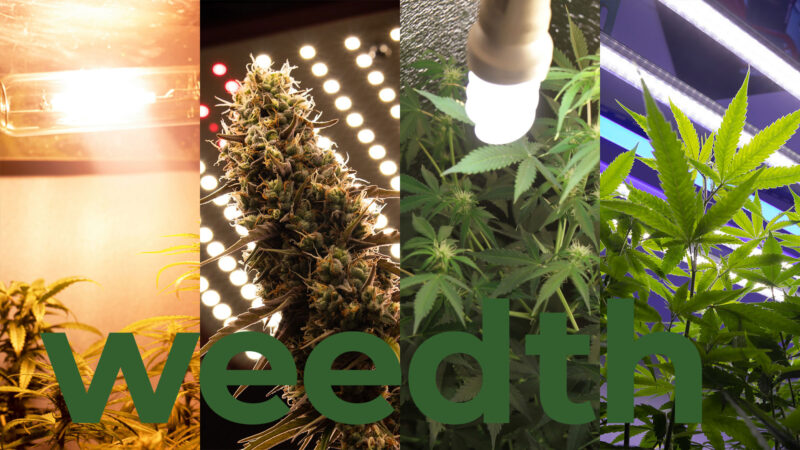
Several types of artificial lights are available for indoor cannabis growing, each with its own strengths and weaknesses. The most common types are:
- High-Intensity Discharge (HID) Lights
- Fluorescent Lights
- Compact Fluorescent Lamps (CFLs)
- Light-Emitting Diodes (LEDs)
Each light source provides different light intensity levels, color spectrum, and efficiency. Choosing the right light depends on your grow space, budget, and goals for your crop.
Types of HID Lights
Metal Halide (MH) Lights
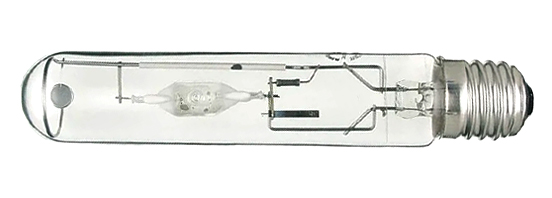
Metal Halide (MH) lights emit a blue-white spectrum, typically in the range of 5000K to 6500K closely resembling natural sunlight during the spring and early summer months. This spectrum is ideal for the vegetative stage of cannabis growth, where the plant focuses on building a strong structure with thick stems, branches, and dense foliage. The higher color temperature of MH lights is particularly effective for promoting leaf development, node growth, and overall plant health during this phase. The blue spectrum encourages compact growth by preventing the plant from stretching, which can weaken its structure and result in thin, lanky plants.
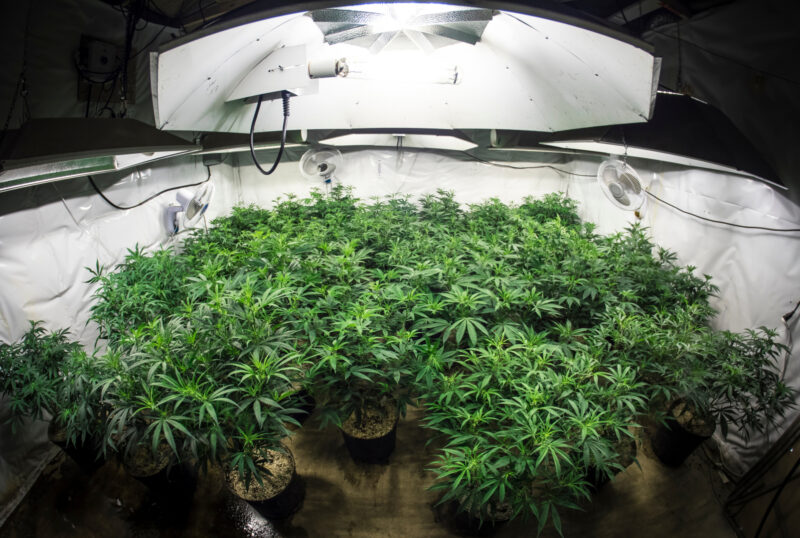
MH lights are highly beneficial for growers aiming to achieve bushy, well-structured plants. This light spectrum helps keep internodal spacing short, resulting in a sturdier plant that can support the heavy buds produced during the flowering stage. Many growers also use MH lights during the first few weeks of flowering to ease the plant’s transition from vegetative growth to bud production. By giving plants a consistent blue light spectrum during the early stages of flowering, growers can help the plant focus on creating strong branches before it shifts energy to flower formation.
MH lights are typically not used throughout the entire flowering stage because the blue spectrum is less effective at stimulating bud growth. However, their importance during the vegetative phase cannot be overstated, as they lay the foundation for a high-yielding harvest.
High-Pressure Sodium (HPS) Lights
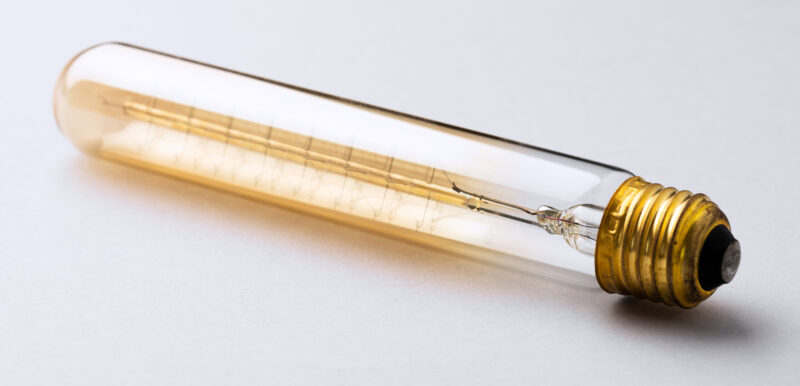
High-Pressure Sodium (HPS) lights emit a reddish-orange spectrum, typically in the range of 2000K to 3000K, which mimics the sunlight plants would naturally receive in late summer and fall. This spectrum is rich in red and far-red wavelengths crucial for promoting flowering and bud production in cannabis plants. During the flowering stage, cannabis plants redirect their energy from vegetative growth to the development of dense, resinous buds, and the red spectrum provided by HPS lights helps maximize this process.
HPS lights are known for their ability to significantly increase yield and potency, making them indispensable during the flowering stage. The intensity of light produced by HPS bulbs ensures that even the lower branches and leaves of the plant receive enough light for proper growth, which is essential for producing large, uniform buds. The red spectrum encourages the production of phytohormones such as auxins, which play a key role in flowering and bud formation. Additionally, the red wavelengths promote trichome development, enhancing the plant’s resin content and cannabinoid levels.
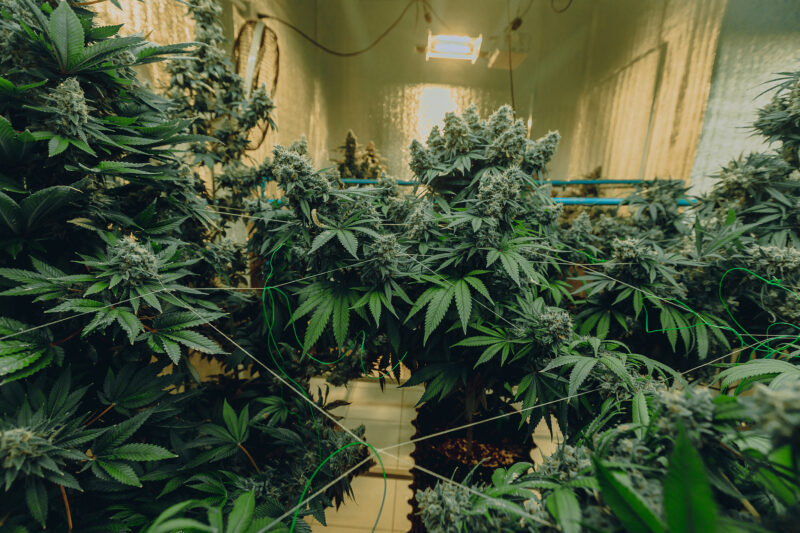
For many growers, the ideal strategy is to use HPS lights exclusively during the flowering stage, following a period of vegetative growth under MH lights. This combination of blue spectrum light for vegetative growth and red spectrum light for flowering maximizes the plant’s potential and ensures a high-quality, high-yield harvest.
Ceramic Metal Halide (CMH) Lights

Ceramic Metal Halide (CMH) lights, also known as Light Emitting Ceramic (LEC) lights, represent an advanced form of traditional MH technology. CMH lights offer a full-spectrum output, with color temperatures typically ranging from 3000K to 4200K. This spectrum provides a balance of both blue and red wavelengths, making CMH lights suitable for both the vegetative and flowering stages of cannabis growth. The ability to use CMH lights throughout the entire growth cycle makes them highly efficient and versatile for growers looking to simplify their lighting setup without compromising plant health.
One of the standout features of CMH lights is their high color rendering index (CRI), which measures how accurately colors are represented under the light. CMH lights typically have a CRI of 90 or higher, which means they closely mimic natural sunlight and provide an accurate visual representation of the plant’s color. This allows growers to easily monitor plant health, spotting issues like nutrient deficiencies or pest infestations early.
CMH lights are also known for their energy efficiency, offering higher lumens per watt than traditional MH and HPS lights. They generate less heat, reducing the risk of heat stress for plants and lowering the need for extensive cooling systems. In addition to their balanced spectrum, CMH lights emit ultraviolet (UV) light, which can stimulate trichome production and increase the cannabinoid content in the final harvest. The UV light also promotes higher THC levels in cannabis plants, making CMH lights an excellent choice for growers focused on producing potent, resin-rich buds.
Dual Arc HID Bulbs

Dual Arc HID bulbs combine the benefits of both Metal Halide (MH) and High-Pressure Sodium (HPS) lights into a single bulb. These bulbs contain two arc tubes—one that emits a blue-white spectrum for vegetative growth and another that produces a red-orange spectrum for flowering. This unique combination provides full-spectrum lighting, allowing growers to use a single light throughout the entire cannabis life cycle without needing to switch bulbs between the vegetative and flowering stages.
Dual Arc bulbs are designed to be an all-in-one solution for growers who want the best of both worlds. The blue spectrum promotes strong vegetative growth, while the red spectrum supports bud development during flowering. This continuous, full-spectrum light ensures that plants receive the correct wavelengths at each stage, helping them thrive from seedling to harvest.
Although Dual Arc bulbs are more expensive than traditional MH or HPS bulbs, they offer the advantage of convenience and efficiency. Growers do not need to invest in separate lighting setups for different growth stages, and the consistent full-spectrum light can simplify the overall grow process. These bulbs are ideal for growers who want to maximize their yields while minimizing the complexity of their lighting system.
Advantages of HID Lights
- High Light Output: HID lights deliver intense light that penetrates deep into the plant canopy, ensuring that even lower leaves and branches receive sufficient light. This is crucial for maximizing both yield and bud density.
- Full-Spectrum Options: With MH, HPS, CMH, and Dual Arc bulbs, HID lights offer a variety of spectrum options to suit the needs of cannabis plants at every stage. Growers can choose between blue light for vegetative growth, red light for flowering, or a combination of both with CMH or Dual Arc bulbs.
- Energy Efficiency (CMH Lights): While traditional MH and HPS lights are known for their energy consumption, CMH lights offer a more efficient solution with a higher lumens-per-watt ratio. This means growers can achieve better results with less energy consumption.
- Proven Results: HID lights have been a cornerstone of cannabis cultivation for decades, consistently delivering high-quality plants with increased cannabinoid and resin production.
- Enhanced UV Output (CMH): CMH lights, in particular, emit ultraviolet (UV) light, which can stimulate trichome production and increase cannabinoid content, leading to more potent buds.
- Penetration Depth: The intense light produced by HID bulbs has greater penetration depth, allowing it to reach lower parts of the plant, which is beneficial for growing taller plants with a dense canopy.
Disadvantages of HID Lights
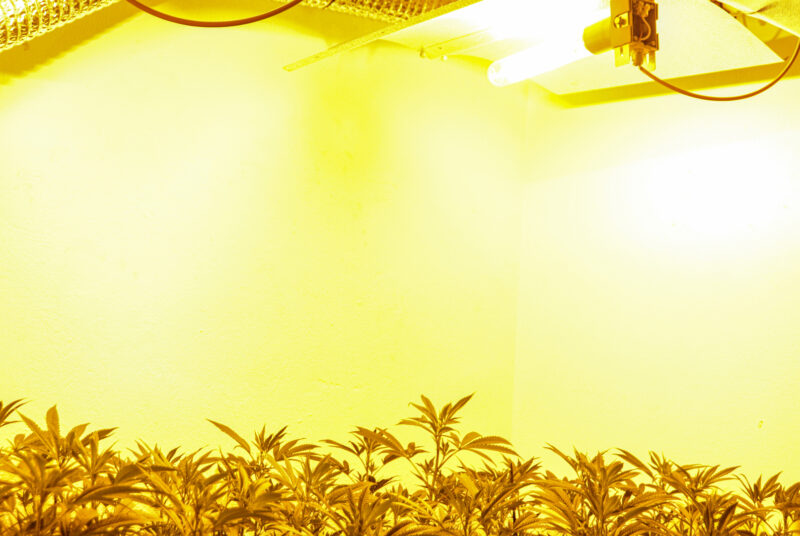
- Heat Generation: HID lights, including MH, HPS, CMH, and Dual Arc bulbs, produce significant amounts of heat. This requires growers to implement cooling systems and proper ventilation to maintain optimal grow room temperatures and prevent heat stress.
- Energy Consumption (Except CMH): Traditional MH and HPS lights are less energy-efficient than modern lighting solutions like LED lights. This can lead to higher electricity costs, particularly in large-scale grows where multiple HID lights are used.
- Bulb Lifespan: HID bulbs need to be replaced more frequently than LEDs, which can add to the ongoing maintenance costs. CMH bulbs tend to have a longer lifespan compared to traditional MH and HPS bulbs but still require periodic replacement.
- Cost of Cooling Systems: Because HID lights generate substantial heat, growers must invest in cooling systems, air-cooled reflectors, and exhaust fans to prevent the grow space from overheating, which increases the total setup cost.
Best Uses for HID Lights
HID lights are ideal for growers looking to maximize yield and potency, especially in larger grow operations where light intensity is crucial. Different types of HID lights can be used for different stages of the cannabis life cycle:
- MH Lights: Perfect for the vegetative stage, promoting compact, sturdy growth that sets the foundation for a high-yield harvest.
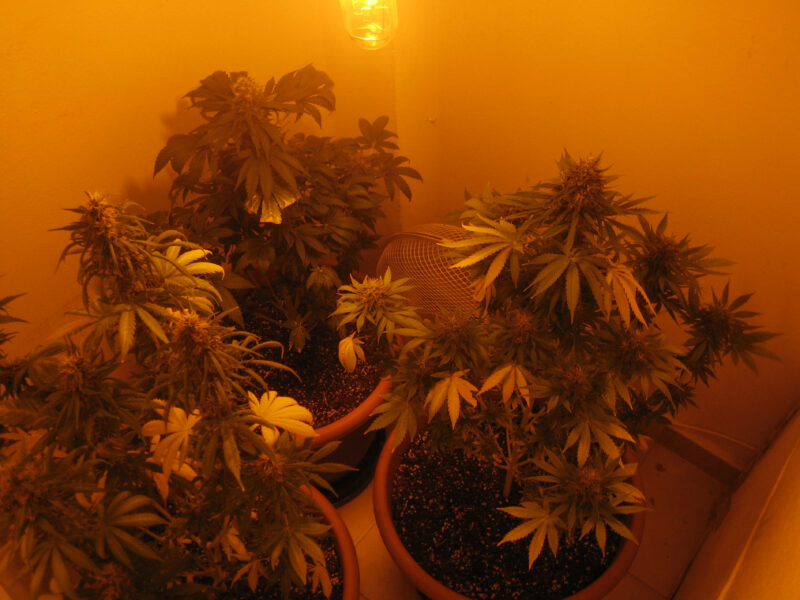
- HPS Lights: Essential for the flowering stage, where the red spectrum stimulates bud formation, resin production, and THC content.
- CMH and Dual Arc Bulbs: Full-spectrum options that can be used throughout both vegetative and flowering stages, providing an efficient and simplified lighting solution for the entire grow cycle.
Using HID Lights Effectively
HID lights, while incredibly powerful, require careful management to be used effectively in cannabis cultivation. These lights generate a lot of heat, so maintaining the proper distance between the lights and the plants is critical to prevent burning or heat stress. The recommended distance between HID lights and the plant canopy depends on the wattage of the lights:
- 400-watt HPS/MH lights: Should be placed about 18 inches from the plant canopy.
- 600-watt HPS/MH lights: Should be positioned 20-24 inches from the plants.
- 1000-watt HPS/MH lights: Need to be kept 24-36 inches away to avoid burning the plants.
Cooling and Ventilation:
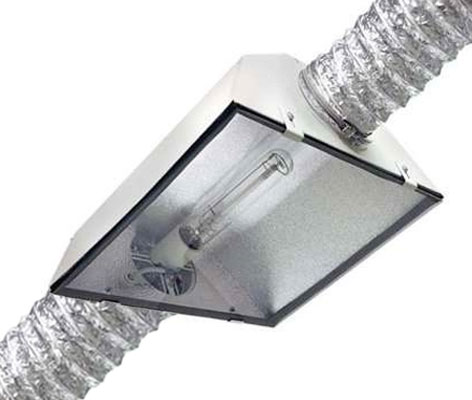
The intense heat output from HID lights makes ventilation and cooling a crucial part of any grow setup. Growers typically use air-cooled reflectors, exhaust fans, or even air conditioning to manage the temperature in their grow rooms. Maintaining an optimal temperature (between 70°F and 85°F) is essential for healthy cannabis growth, and poor ventilation can lead to heat stress, wilted plants, and reduced yields.
Reflectors and Light Distribution:
To maximize the efficiency of HID lights, most growers use reflectors to direct as much light as possible toward the plant canopy. These reflectors help ensure that the light is evenly distributed, minimizing wasted light and ensuring that all parts of the plant receive adequate illumination. Air-cooled reflectors are particularly useful, as they help reduce heat buildup while focusing light where it’s needed most.
Combining MH and HPS for Full Cycle Growing:
For growers looking to optimize their cannabis plants’ entire life cycle, using both MH and HPS lights in tandem is a common strategy. The MH lights can be used during the vegetative stage to encourage strong, leafy growth, while the HPS lights take over during the flowering stage to promote dense, resinous buds. This combination provides the best of light ensuring that the plants receive the right spectrum at each stage of development.
HID Lighting Components and Accessories
To get the most out of an HID lighting setup, there are several components and accessories that growers should consider:
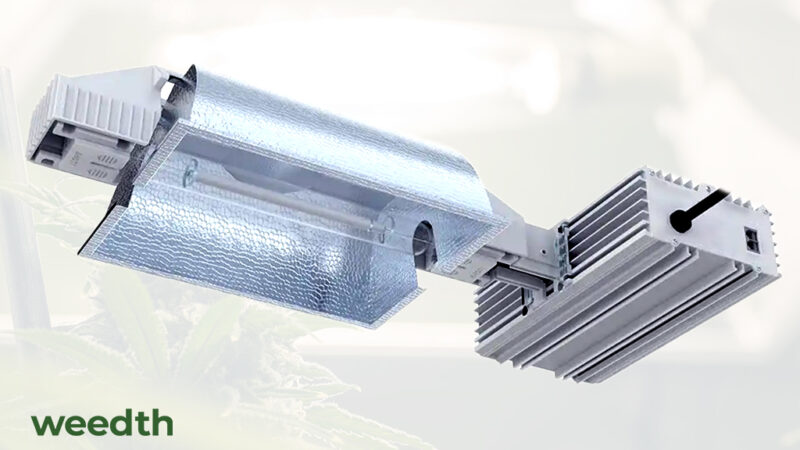
- Ballasts: HID lights require a ballast to regulate the electrical current. There are two main types of ballasts: magnetic and digital. Digital ballasts are more energy-efficient and produce less heat than magnetic ballasts, making them the preferred choice for most modern growers.
- Reflectors: Reflectors direct light toward the plants. They come in different shapes and sizes, including air-cooled versions that help manage heat. Choosing the right reflector can improve light distribution and efficiency.
- Timers: Timers are essential for automating the light cycle, ensuring that plants receive the right amount of light each day. Most growers use a 18/6 light cycle (18 hours on, 6 hours off) during vegetative growth and 12/12 during flowering to mimic natural light patterns.
Fluorescent Lights

Fluorescent lights are a popular choice for beginners and small-scale cannabis growers because they are affordable, energy-efficient, and produce relatively little heat. These qualities make fluorescent lighting suitable for small grow spaces, and they are particularly effective during the early stages of plant growth, such as seedling and vegetative phases. The cool, soft light they emit provides gentle illumination that helps young plants grow without the risk of heat damage.
T5 Fluorescent Tubes
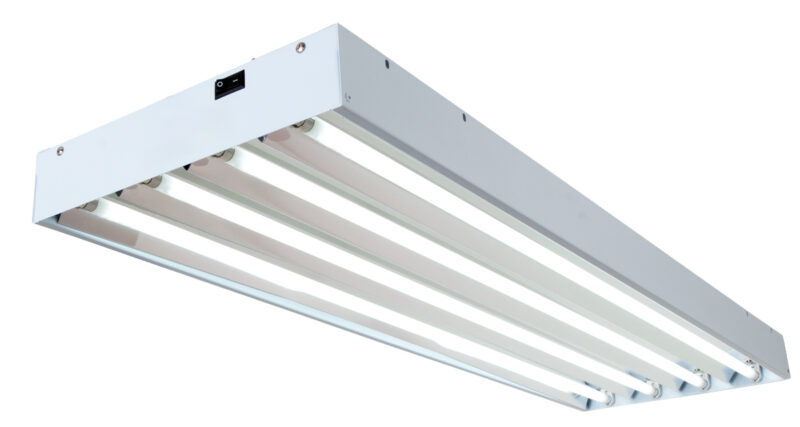
Among the different types of fluorescent lights, T5 fluorescent tubes are the most widely used for growing cannabis. These long, narrow tubes emit light over a wide area, making them ideal for growers who need to cover multiple plants or larger grow trays. They are available in a variety of light spectrums, allowing you to adjust the color temperature depending on your plant’s needs. For example, cool white (around 6500K) is ideal for vegetative growth, while warm red (around 2700K) can be beneficial as plants transition into flowering.
Advantages of T5 Fluorescent Tubes:
- Energy-Efficient: Compared to more powerful grow lights like HID (high-intensity discharge), T5 lights consume significantly less energy, making them an affordable option in terms of electricity costs.
- Low Heat Emission: T5 lights produce very little heat, which means they can be placed close to your plants without risking heat stress. This is particularly useful when growing delicate seedlings or clones that are more susceptible to temperature fluctuations.
- Ideal for Early Growth Stages: T5 fluorescent lights are particularly effective for seedlings, clones, and young plants during their early vegetative growth. The light they provide encourages steady, healthy growth without overwhelming the plants.
Disadvantages of T5 Fluorescent Tubes:
- Limited for Flowering: While T5 lights excel in the early growth stages, they lack the light intensity required for robust flowering. Cannabis plants need stronger light during the flowering phase to produce dense, resinous buds, and T5 lights generally do not provide the necessary intensity.
- Requires Multiple Fixtures: To cover larger grow areas, you will need several T5 fixtures, which can become cumbersome and require more space. Each fixture needs its own positioning to ensure uniform light coverage over the entire plant canopy.
Best Uses for T5 Fluorescent Lights:
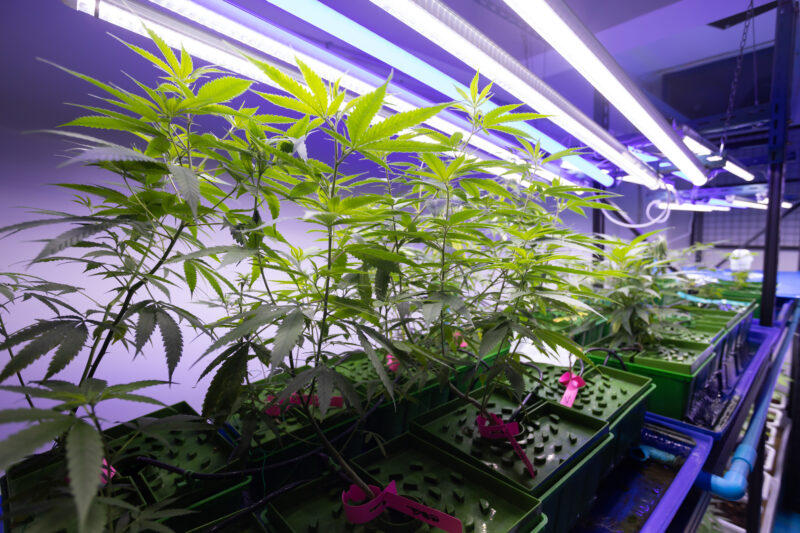
T5 lights are best suited for early vegetative growth, clones, and seedlings. They are often used in small grow tents or as supplemental lighting in larger setups. If you’re growing cannabis in a confined space and prefer a low-cost, low-heat option for the initial stages of growth, T5 fluorescent tubes offer an excellent balance between efficiency and effectiveness.
Compact Fluorescent Lamps (CFLs)
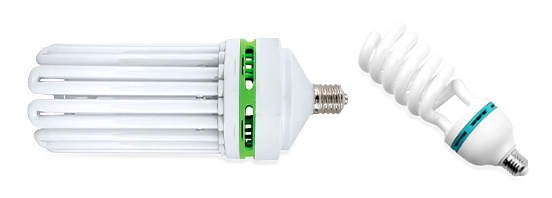
Compact Fluorescent Lamps (CFLs) are another type of fluorescent lighting, but they are distinct from the larger T5 fluorescent tubes. CFLs are small, spiral-shaped bulbs that can be found in most hardware stores, making them a convenient and affordable option for cannabis growers who are just getting started or working with limited space. CFLs are easy to set up since they fit into standard light fixtures, and they come in a range of color temperatures, allowing you to select the right spectrum for different growth stages.
Advantages of CFLs:
- Affordability: CFL bulbs are relatively inexpensive compared to other grow lights. This makes them an accessible option for beginner growers or those who want to experiment with small-scale indoor cannabis cultivation.
- Availability: CFLs are widely available in most retail stores, meaning you won’t have trouble sourcing replacement bulbs or expanding your grow setup with additional lighting.
- Easy Setup: Unlike other types of grow lights that require specialized fixtures or ballasts, CFLs can be screwed into standard light sockets. This makes them easy to install and operate, even for growers with limited experience or technical know-how.
- Great for Small Spaces: CFLs are ideal for small grow spaces, such as a closet or a small grow tent. They work well for growing single plants or a few small cannabis plants, especially when combined with reflective surfaces to maximize light efficiency.
Disadvantages of CFLs:
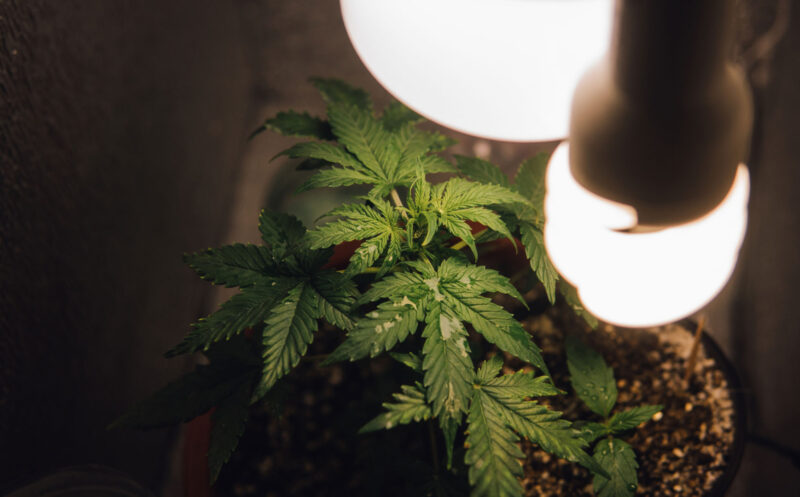
- Low Light Intensity: One of the main drawbacks of CFLs is their relatively low light intensity. This limits their effectiveness for growing larger plants or for achieving dense, high-quality buds during the flowering stage. While CFLs can support cannabis during the vegetative phase, they are often inadequate for flowering without additional lighting.
- Multiple Bulbs Needed: Because CFLs have lower light output than more powerful lighting options, you will need multiple bulbs to properly cover even a small grow area. This can make achieving uniform light distribution across your plants challenging, especially if you are growing more than one plant at a time.
Best Uses for CFLs:
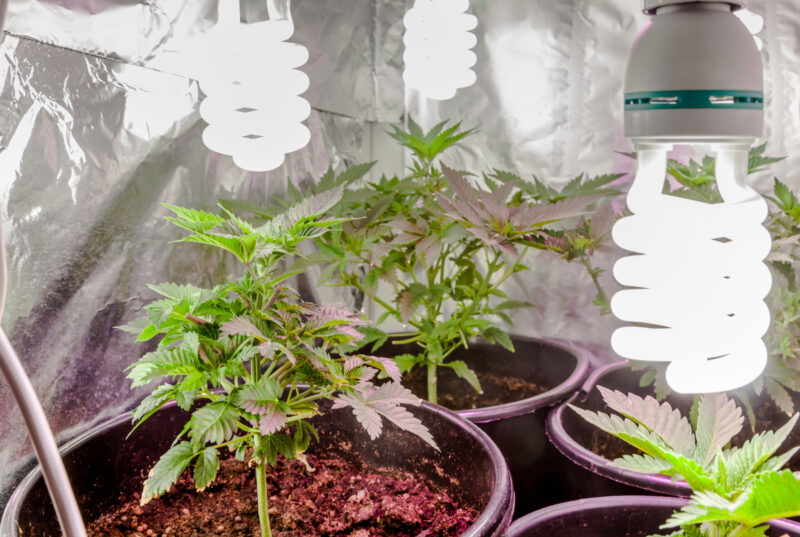
CFLs are best suited for hobbyist growers who are working in small spaces and focusing on growing a single plant or starting seedlings and clones. While they can be used throughout the entire growing cycle, their limitations during the flowering stage mean that they may not produce the same yields or bud density as more powerful grow lights. CFLs are an excellent beginner level option for those new to cannabis cultivation or for growers who need an inexpensive, easy-to-use lighting solution.
Optimizing CFLs in Your Grow:
Place them 2-4 inches above the plant canopy to make the most of CFLs. Since CFLs generate very little heat, they can be positioned close to the plants without causing heat stress, ensuring that your plants receive the maximum amount of light. Additionally, using reflective materials like mylar or even white walls can help amplify the light from CFLs, making your setup more efficient.
Light-Emitting Diodes (LEDs)
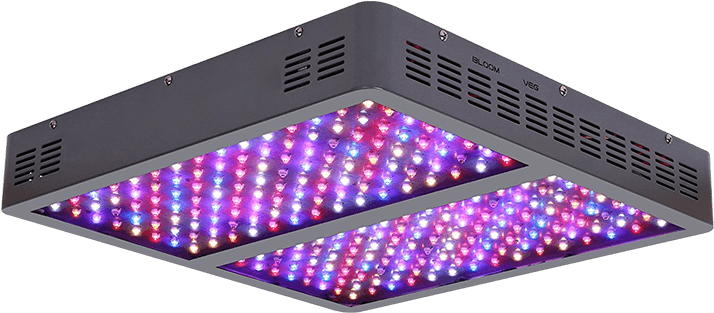
LED grow lights are becoming increasingly popular among cannabis growers due to their efficiency, long lifespan, and low heat output. Modern LED lights can be highly customizable, allowing growers to switch between spectrums for the vegetative and flowering stages.
Advantages of LED Lights:
- Energy-efficient: LEDs consume far less electricity than HID lights, making them cost-effective for long-term growing.
- Low heat output: LEDs run much cooler than HPS or MH lights, reducing the need for extensive cooling and ventilation systems.
- Customizable spectrum: Many LED grow lights come with both vegetative and flowering modes, making it easy to switch between the blue and red spectrums as needed.
- Long lifespan: LEDs have a much longer lifespan than other types of bulbs, often lasting 50,000 hours or more.
Disadvantages:
- Higher initial cost: High-quality LED grow lights can be expensive upfront, though they save money in the long run through lower energy consumption.
- Spectrum quality: Not all LED grow lights are designed equal. Low-quality models may not provide the correct spectrum or intensity for optimal cannabis growth.
Using LED Lights Effectively
When using LEDs, it’s important to choose lights with a full spectrum that covers both the blue and red wavelengths needed for vegetative growth and flowering. Many LED grow lights come with adjustable settings, allowing you to switch between vegetative and flowering modes. If you’re using white or blue daylight LEDs during the vegetative stage, switch to red or orange 2700K–3000K lights or activate the flowering mode when transitioning to flowering. This ensures your plants receive the proper spectrum for bud development.
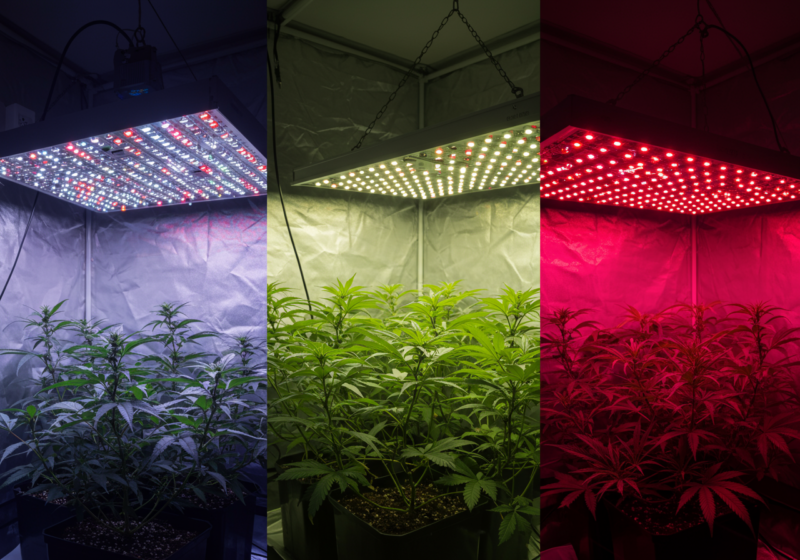
Place LED lights 12-24 inches above the plant canopy, adjusting as necessary to avoid light burn or stretching. The directional nature of LEDs means that all the light is focused downward, providing more efficient coverage without wasting energy.
Light Spectrum for Grow Stages
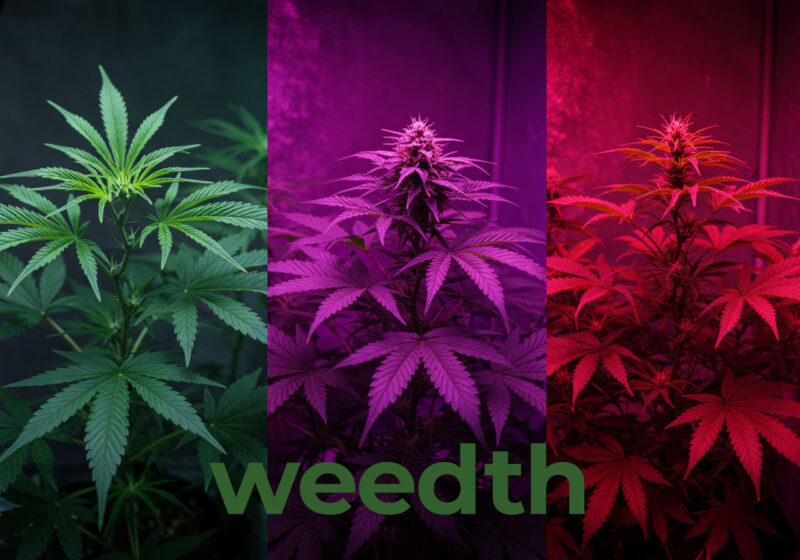
Understanding the light spectrum and its impact on different stages of cannabis growth is essential for optimizing plant health and maximizing yields. Light comes in a variety of wavelengths, each of which affects plant growth in specific ways. The two primary spectrums used for cannabis cultivation are the blue spectrum (cool light) and the red spectrum (warm light), but using a full spectrum of light that includes green, UV, and far-red wavelengths can further enhance plant growth and bud development.
Blue Spectrum: Vegetative Growth
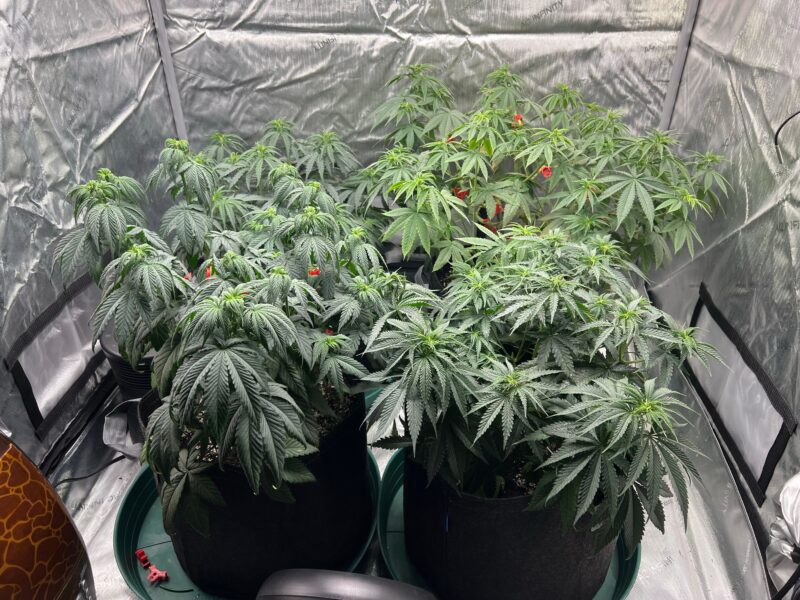
The blue spectrum (4000K–6500K) is ideal for the vegetative stage of cannabis growth. This cooler light mimics the natural sunlight of spring and early summer, which is rich in blue wavelengths. Blue light encourages plants to grow more compact and bushy, preventing them from stretching too much.
Benefits of Blue Spectrum for Vegetative Growth:
- Compact Growth: Blue light promotes short, dense growth, preventing plants from becoming too tall or spindly. This is important in indoor setups where space is limited and light needs to reach all parts of the plant.
- Healthy Leaves and Stems: Blue light supports the development of large, healthy leaves and thick stems, both of which are essential for efficient photosynthesis and nutrient transport.
Best Light Sources for the Blue Spectrum:
- Metal Halide (MH) lights: Metal halide bulbs emit a blue-heavy spectrum, making them perfect for the vegetative stage.
- Daylight CFLs: CFL bulbs in the 6400K–6500K range are also a good option for vegetative growth.
- LEDs in vegetative mode: Many full-spectrum LED grow lights allow you to switch to a vegetative mode that enhances blue light, promoting strong growth.
Red Spectrum: Flowering
The red spectrum (2700K–3000K) is ideal for the flowering stage. This warmer light mimics the sunlight of late summer and autumn, which is rich in red wavelengths. Red light plays a crucial role in bud development and resin production, making it essential for maximizing yield and potency during the flowering phase.
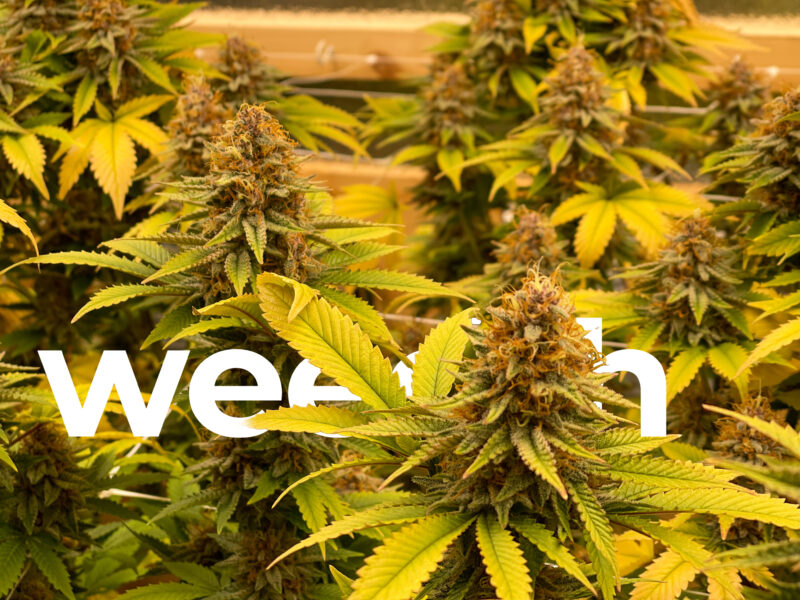
Benefits of Red Spectrum for Flowering:
- Bud Development: Red light encourages the plant to focus on developing buds and increasing resin production, which leads to higher THC levels and more robust harvests.
- Maximizes Yield: The red spectrum triggers hormonal responses in the plant that are crucial for producing dense, resinous flowers.
Best Light Sources for the Red Spectrum:
- High-Pressure Sodium (HPS) lights: HPS lights are widely used during the flowering stage due to their strong output in the red spectrum.
- Warm CFLs: CFL bulbs with a color temperature of 2700K provide the red wavelengths needed for flowering.
- LEDs in flowering mode: Many full-spectrum LED lights have a flowering mode that increases the intensity of red light, ensuring your plants receive the right spectrum for bud production.
Full Spectrum: Covering All Phases of Growth
Full-spectrum lighting replicates the complete range of wavelengths found in natural sunlight, from blue light for vegetative growth to red light for flowering, along with green, UV, and far-red light. Full-spectrum LED lights are designed to provide this broad range of wavelengths, allowing your plants to thrive throughout every growth stage.
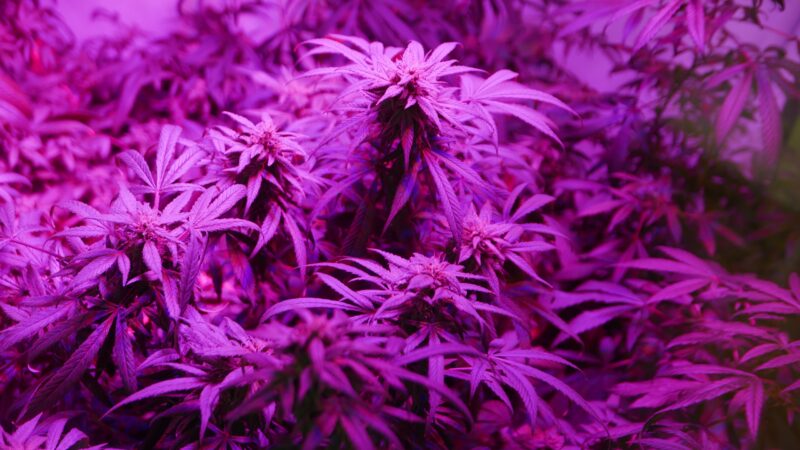
Advantages of Full-Spectrum Lighting:
- Optimized for all growth stages: Full-spectrum lights eliminate the need to switch between different bulbs or light types as your plants transition from vegetative to flowering. You can simply adjust the intensity or mode with the right LED lights.
- Mimics natural sunlight: Full-spectrum LEDs balance blue, red, green, and UV light, creating an environment that closely mimics natural outdoor conditions for plant growth.
- Healthier plant growth: Full-spectrum lights support more efficient photosynthesis, improving overall plant health and resilience.
Ultraviolet (UV) Light for Trichome Production
Ultraviolet (UV) light, particularly UVB, can be used to increase trichome production and resin development in cannabis plants. UVB light mimics the harsh sunlight found at high altitudes, where cannabis plants evolved to produce more resin as a protective mechanism. This increase in trichome production can lead to higher THC levels and more potent buds.
- UVB supplementation: Introduce UVB light during the last 2–3 weeks of flowering, when trichome production is at its peak. Start with 1–2 hours of UVB light daily, and gradually increase to a maximum of 4 hours per day. Keep UVB lights 24–36 inches above the canopy to prevent plant damage.
Tip: UVB lights are most effective when used sparingly. Too much UVB can stress the plants and reduce yields, so be cautious with exposure times.
Spectrum Adjustments for CFL and LED Growers
For growers using CFL or LED lights, it’s important to adjust your lighting when transitioning from vegetative growth to flowering. The ability to fine-tune the light spectrum is especially important when using LED grow lights, as many models allow you to switch between different light settings to optimize growth during each stage.
How to Adjust Light Spectrum:
Transition from Vegetative to Flowering:
If you’re using white or blue daylight CFLs or LEDs during the vegetative stage, switch to red or orange 2700K–3000K lights when transitioning to the flowering phase. This change mimics the natural seasonal shift in sunlight, helping to trigger bud formation.
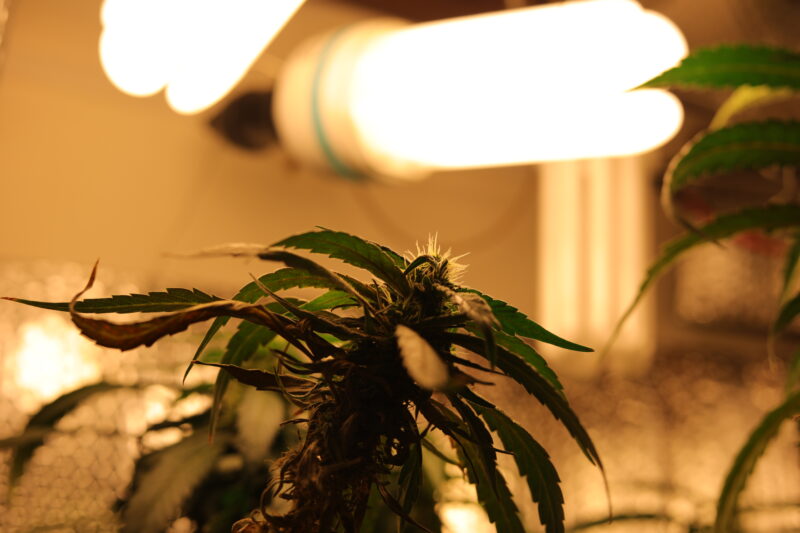
LED grow lights: If you’re using full-spectrum LED grow lights, make sure to switch from vegetative mode to flowering mode when entering the 12/12 light cycle. Many LED lights allow you to customize the spectrum, which helps the plant receive the correct wavelengths for bud development.
Combining Blue and Red Light:
Full-spectrum LED lights often include a combination of both blue and red light, allowing the grower to adjust the balance as needed. During the flowering stage, you can reduce the amount of blue light while increasing red light to maximize bud formation.
Green and Far-Red Light: Some advanced LED grow lights also include green and far-red light in their spectrum. While green light helps penetrate deeper into the plant canopy, far-red light can promote flowering hormone production, speeding up the flowering process and improving bud quality.
What is Full-Spectrum Lighting?
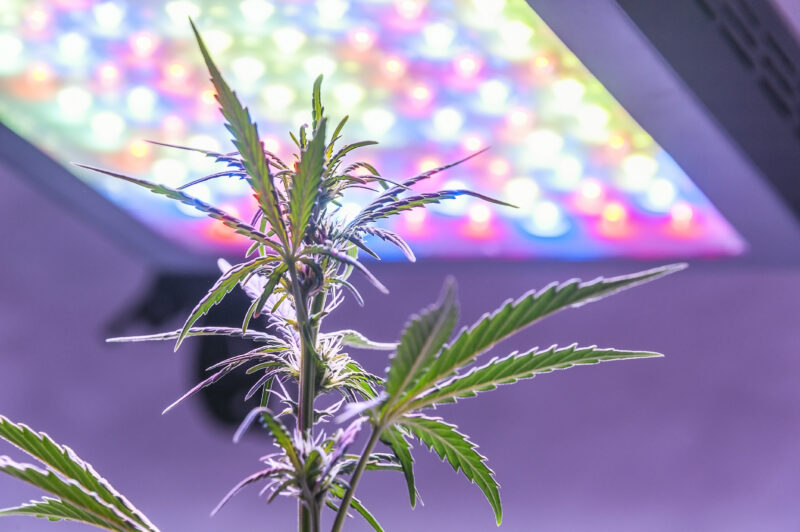
Full-spectrum lighting simplifies your grow setup by supporting all stages of cannabis growth with just one light system. Unlike traditional setups that require different bulbs for vegetative and flowering phases, full-spectrum LED grow lights provide a balanced mix of blue, red, and other essential wavelengths that mimic natural sunlight more closely.
Why Full-Spectrum Lighting is Ideal:
- Complete coverage: Full-spectrum lights cover the entire range of wavelengths needed for cannabis growth, from UV and blue light during vegetative growth to red and far-red light during flowering.
- Energy efficiency: LED grow lights use significantly less energy than traditional HID or CFL systems, making them a more cost-effective option for long-term grows.
- Simplified growing process: There’s no need to switch between different bulbs or light types with full-spectrum lights. You can simply adjust the intensity or switch between vegetative and flowering modes, making it easier to manage your grow room.
Light Intensity and Placement
Light intensity is determining the health and productivity of your cannabis plants. Light intensity directly affects photosynthesis, and the more intense the light, the more energy the plant can produce. However, carefully managing the intensity is crucial, and you need enough light to drive growth but not so much that it causes light burn or stress.
Measuring Light Intensity: Lumens and PAR
Lumens measure the total amount of visible light emitted by a source, but they don’t tell the whole story for cannabis growing. What really matters is how much light the plants can use for photosynthesis that’s where PAR (Photosynthetically Active Radiation) comes in. PAR measures the specific wavelengths of light (between 400 and 700 nanometers) that plants use for photosynthesis.
Cannabis growth is the ideal light intensity depends on the stage of growth:
- During the vegetative stage, cannabis requires 400–600 µmol/m²/s of PAR light intensity.
- During the flowering stage, the plants require 600–900 µmol/m²/s to ensure robust bud development.
Remember that golden rule: the more intense the light, the better the yield. However, balancing intensity with proper placement is crucial to avoid damage.
Light Distance: Getting the Right Height
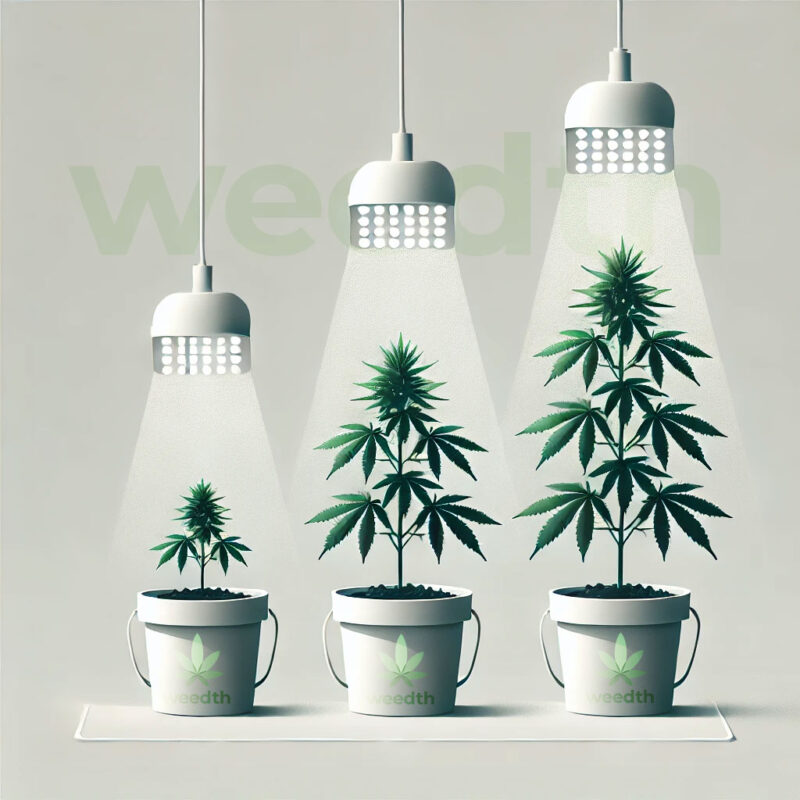
The distance between your light source and the plant canopy is crucial for maximizing light absorption while avoiding damage. Each type of light—whether HID, LED, or CFL—has a recommended distance based on its wattage and intensity.
HID Lights (Metal Halide and High-Pressure Sodium):
- 400-watt HPS/MH: Keep the light 18 inches above the canopy.
- 600-watt HPS/MH: Maintain a distance of 20–24 inches from the plants.
- 1000-watt HPS/MH: These lights should be positioned 24–36 inches above the canopy due to their intense heat and light output.
LED Lights: LED lights run cooler than HID lights but still emit intense light, so they should be placed 12–24 inches above the plants. Adjust the distance based on the intensity of your specific model—too close, and you risk light burn; too far, and the plants will stretch and produce fewer buds.
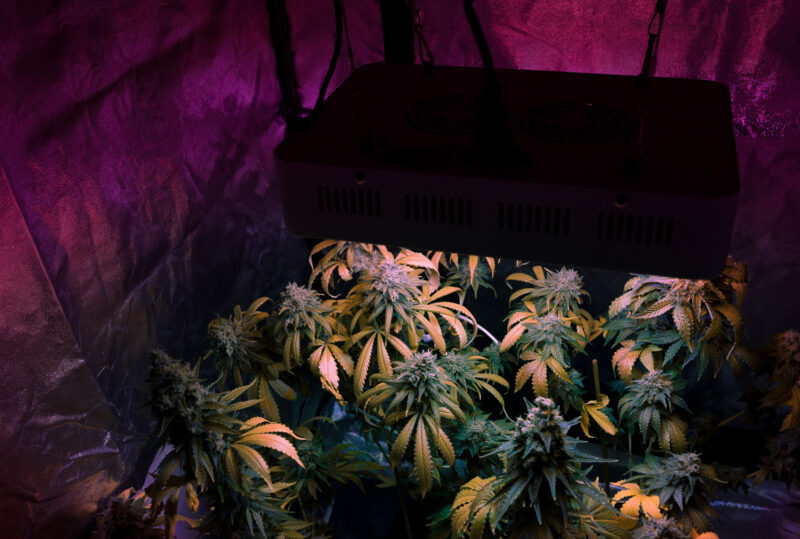
CFL Lights: CFLs are much less intense, so they can be placed 2–4 inches above the canopy without causing heat stress. CFLs work best for seedlings and clones, where the lower light intensity is sufficient for healthy growth.

Adjusting Light Height During Growth
The optimal distance between the light and your plants will change as your cannabis grows, so it’s important to regularly adjust the height of your lights:
- Seedlings and clones need lower light intensity. Keep CFLs or T5 fluorescents close to the canopy (2–4 inches) to encourage healthy, compact growth.
- During the vegetative stage, increase the light intensity and adjust the distance of your HID or LED lights to match the plant’s growing height. Metal halide or blue-spectrum LED lights should be positioned 18–24 inches above the canopy.
- During flowering, as the buds start to develop, maintaining the right intensity becomes even more critical. HPS lights should be kept 24–36 inches away, while LED lights should be around 12–24 inches from the tops of the plants.
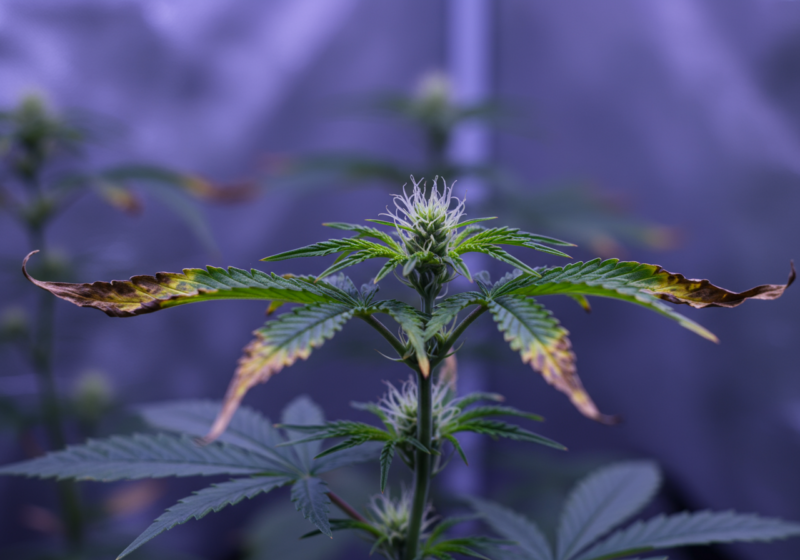
It is important to monitor the plants daily for signs of light burn, such as browning or curling leaves, especially on the topmost buds that are closest to the light. Conversely, if the plants start stretching or developing long internodes, they may be too far from the light and reaching for it.
Maximizing Light Penetration
The amount of light that reaches the plant’s lower branches—called light penetration—is another crucial factor. Light can reach all plant parts with proper penetration, resulting in more even growth and larger yields. Here’s how to improve light penetration:
- Keep the canopy level: By using training techniques like topping, low-stress training (LST), and Screen of Green (ScrOG), you can keep the plant canopy even and ensure that all parts of the plant receive direct light.
- Use reflective surfaces: Reflective walls or Mylar sheets around the grow room can bounce light back onto the lower parts of the plant, improving light penetration and making more efficient use of your light source.
- Rotate your plants: If you’re working in a smaller grow space, rotating your plants can ensure that all sides receive equal light exposure, promoting even growth throughout the canopy.
Ballasts
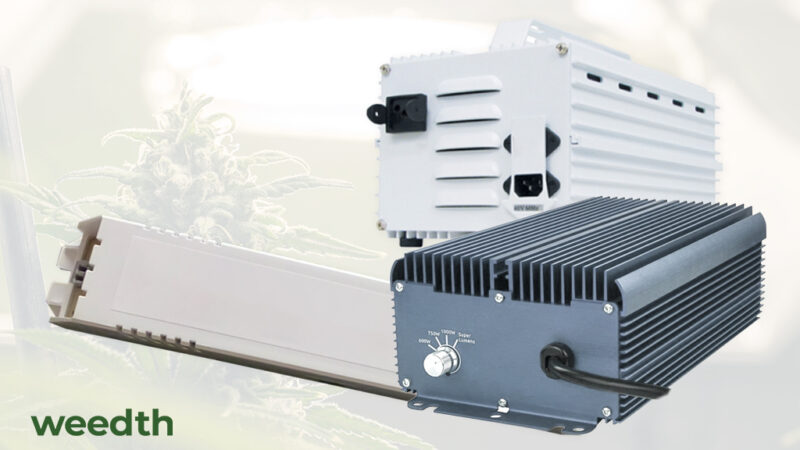
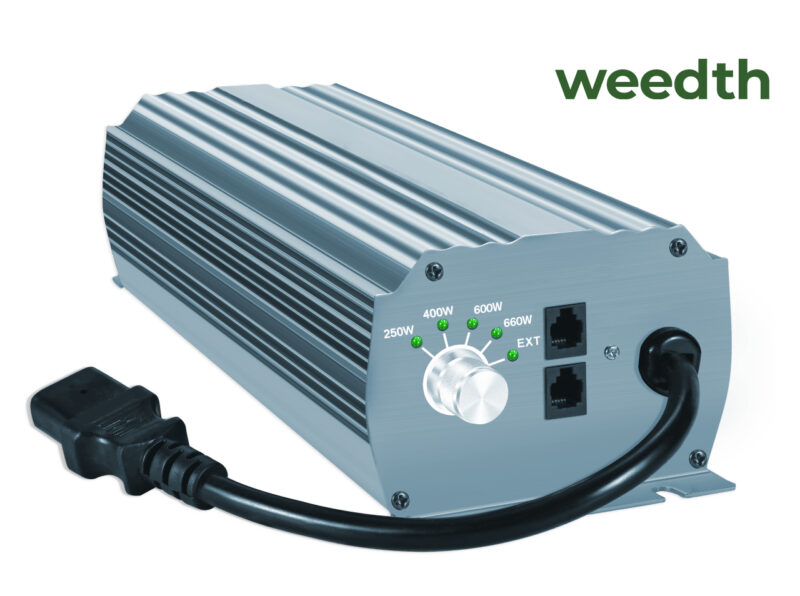
Your ballast is an essential component in any HID lighting setup. Without a ballast, your bulbs won’t work properly, and worse, they could burn out quickly. A ballast controls the electrical current flowing to your light bulb, making sure it operates efficiently and safely.
Types of Ballasts
There are two main types of ballasts for cannabis cultivation: magnetic and digital (electronic).
Magnetic ballasts: These are the traditional ballasts that have been used for years. While reliable, they run hotter and are less energy-efficient than modern digital ballasts.
- Pros: Cheaper upfront cost, reliable.
- Cons: Runs hot, less energy-efficient, bulkier.
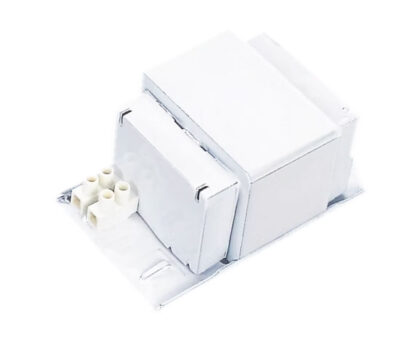
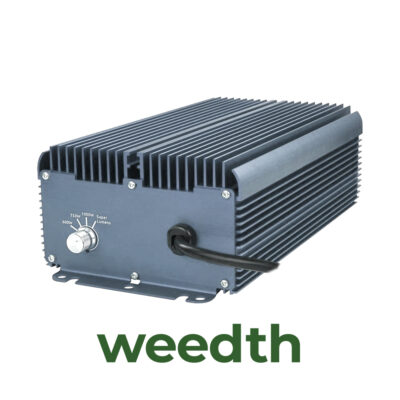
Digital ballasts: These are the newer, more efficient option. Digital ballasts run cooler, use less energy, and offer better performance overall. Many digital ballasts are also dimmable, allowing you to adjust the wattage to match the growth stage of your plants.
-
-
- Pros: More energy-efficient, cooler, quieter, can often run both MH and HPS bulbs.
- Cons: Higher upfront cost, more prone to electrical interference if not properly shielded.
-
Choosing the Right Ballast
It’s crucial to match your ballast’s wattage to your grow light’s wattage. Using the wrong ballast can cause your bulbs to burn out prematurely or fail to reach their full brightness. For example, a 600-watt ballast should be paired with a 600-watt HPS or MH bulb. Many digital ballasts are switchable, meaning they can run both metal halide and high-pressure sodium bulbs with the flip of a switch, making them a versatile option.
Tip: Invest in a dimmable ballast to control light intensity as your plants progress through different growth stages. This way, you can lower the intensity during the vegetative stage and ramp it up during flowering.
Reflectors: Maximizing Light Efficiency
In any grow room, the proper use of reflectors is key to maximizing light efficiency. Light bulbs emit light in all directions, and without a reflector, much of that light will be wasted. Reflectors direct light back toward the plants, concentrating it where needed most. Simply put, a good reflector ensures that the light energy you’re paying for is fully utilized.
Choosing the Right Reflector

There are several types of reflectors and each with own advantages:
- Open-ended reflectors: These are basic curved reflectors that allow heat to dissipate more easily. They are ideal for HID lights, which generate a lot of heat. However, they can sometimes distribute light unevenly, so placement is key.
- Enclosed (air-cooled) reflectors: These reflectors enclose the bulb in a glass casing, allowing you to use ventilation to pull the heat away from the bulb. This helps keep the grow room cooler, making these reflectors a good option if heat is an issue.
- Wing reflectors: Adjustable wings provide a wide spread of light, making them useful for increasing the coverage area. They are also great for minimizing shadow areas in the grow space.
- Parabolic reflectors: These dome-shaped reflectors focus the light downward, which is great for plants directly below the lamp but may not cover a wide area effectively.
Reflective Surfaces: Boosting Light Efficiency
Reflective surfaces are an easy and cost-effective way to increase light efficiency in your grow room. By covering the walls, ceiling, and even the floor with reflective material, you can bounce light back onto your plants, ensuring that all parts of the plant receive as much light as possible.
Types of Reflective Materials
There are several materials commonly used to reflect light in a grow room:
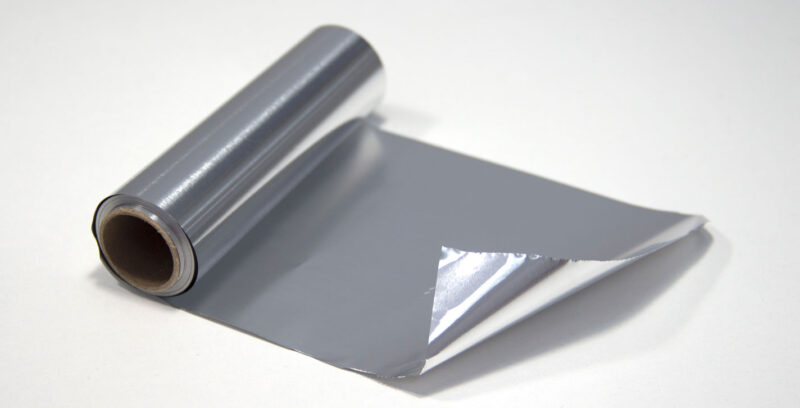
Mylar: Mylar is one of the most effective reflective materials, with a reflectivity of around 90-95%. It’s a shiny, metallic film that is easy to install and highly efficient at bouncing light back toward the plants. Mylar sheets can be hung on walls, ceilings, and even the floor to ensure that no light is wasted.
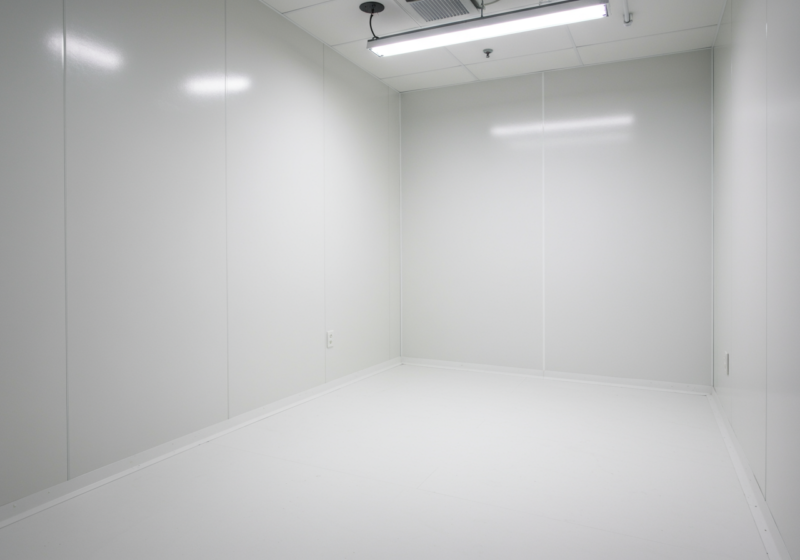
Flat White Paint: If Mylar isn’t available, flat white paint is the next best option. With a reflectivity of about 85-90%, flat white paint is highly efficient and less likely to create hot spots compared to reflective films. It’s also inexpensive and easy to apply.

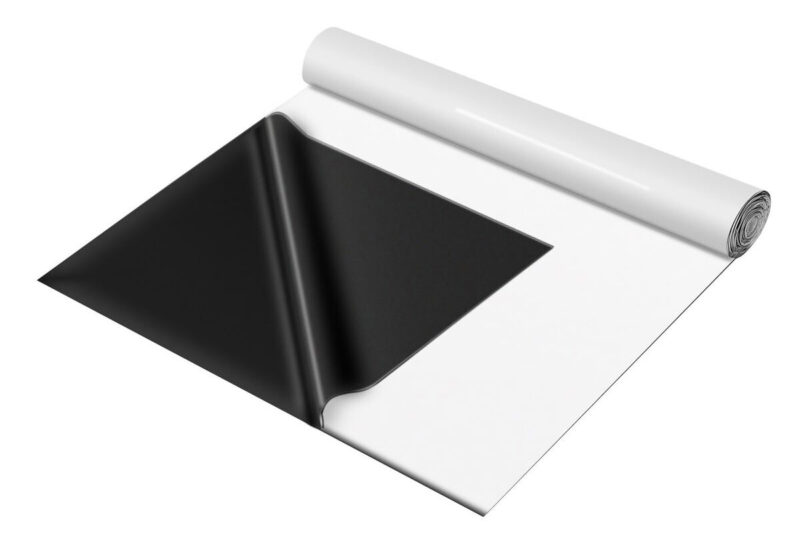
Panda Film: Panda film is a two-sided plastic sheet—one side is black, and the other is white. The white side is used for its reflective properties, while the black side helps block out external light. Panda film is a good option for lining the grow room to reflect light while also controlling external light interference.
How to Use Reflective Materials Effectively
To maximize the benefits of reflective materials, ensure that they are installed properly:
- Line the walls and ceiling with reflective materials to bounce light back onto the plants. Reflective materials help ensure that light is dispersed evenly, reducing shadows and increasing the amount of light that reaches the lower branches of the plant.
- Cover the floor: Even the floor of your grow room can reflect light back onto the plants, especially if you’re working with a small grow space where light intensity is critical.
- Avoid wrinkles and folds: When installing reflective materials, make sure they are smooth and free of wrinkles. Wrinkles can create shadows or uneven light distribution, reducing the effectiveness of the reflective surface.
Tip: Reflective surfaces are essential in larger grow rooms where light intensity can drop off toward the edges of the space. By reflecting light back onto the plants, you increase overall light efficiency without needing to add more lights.
Managing Light Distribution
Maximizing light distribution is crucial for ensuring that every part of your plant receives adequate light. Uneven light distribution can lead to underdeveloped buds, wasted energy, and lower yields. Here’s how to manage light distribution efficiently:
- Use Reflective Walls: Line the walls of your grow room with Mylar, flat white paint, or reflective materials. Reflective surfaces help bounce light back onto your plants, ensuring even the lower branches get enough light to develop properly.
- Employ Light Movers: Light movers shift your grow lights back and forth over the canopy, ensuring all parts of the plant receive light evenly. This is especially helpful when using high-intensity lights like HPS or MH, as it reduces the risk of hot spots and promotes even growth across the canopy.
- Rotate Plants: In smaller setups, rotating your plants regularly helps ensure that each side receives equal light. This promotes more uniform growth and prevents any side of the plant from being under-lit.
- Maintain an Even Canopy: Using training techniques like low-stress training (LST), topping, and ScrOG (Screen of Green) can help keep your plant canopy even, ensuring that light reaches all parts of the plant. An even canopy results in better light penetration, meaning larger and denser buds.
Supplemental Lighting
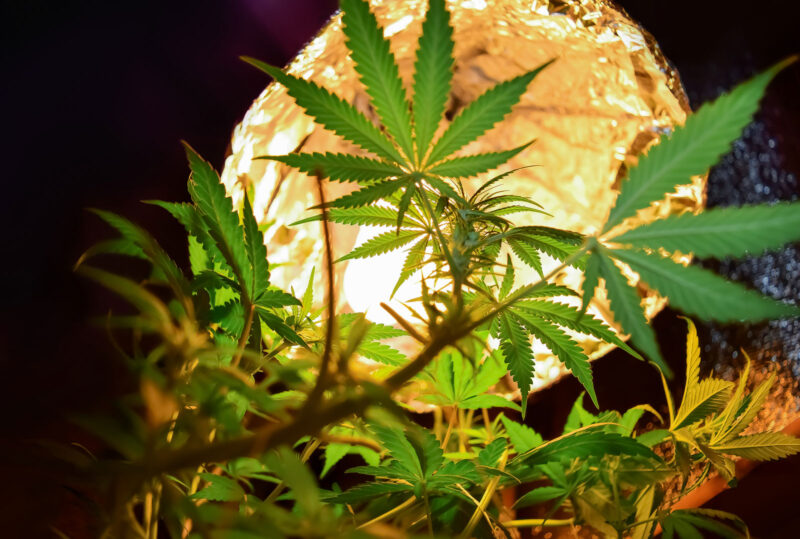
Supplemental lighting provides additional light where the main grow lights may not reach or boost overall light levels during critical growth stages. Here are the most common types of supplemental lighting used in cannabis cultivation:
Fluorescent Lights for Seedlings and Clones
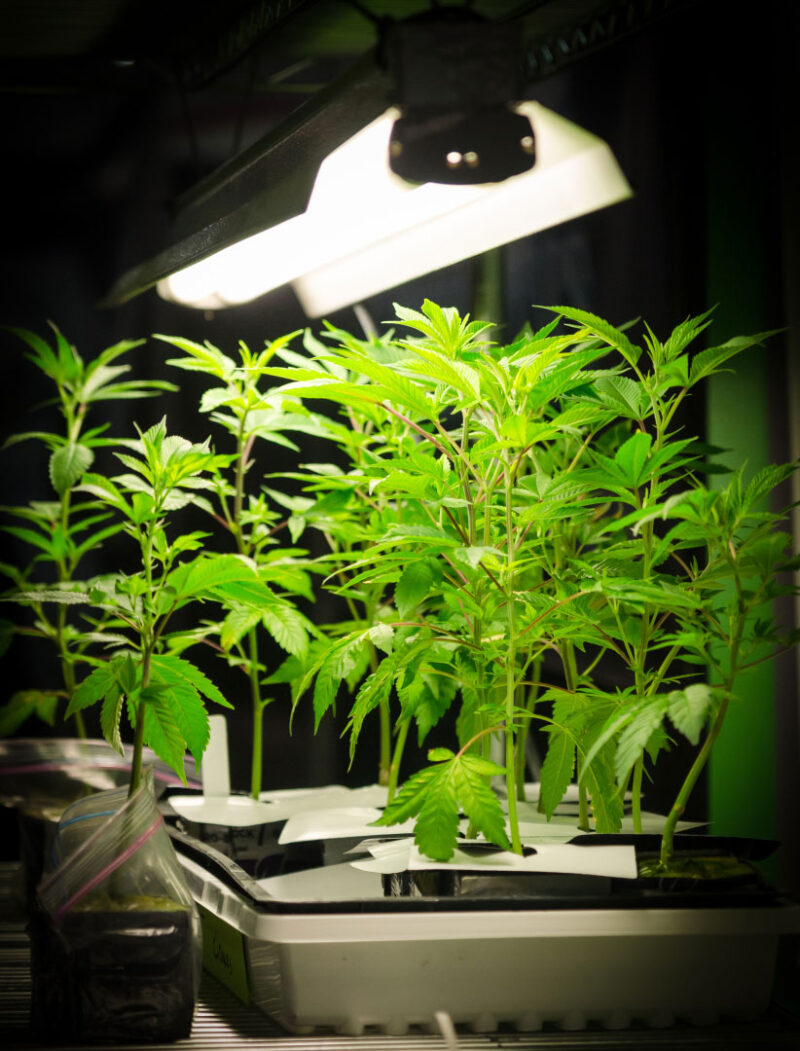
Fluorescent lights (including T5 and CFL bulbs) are commonly used as supplemental lighting for seedlings and clones. These lights provide a gentle, diffuse light that is perfect for the early stages of plant development. Fluorescents can be placed close to young plants without causing heat stress, helping them establish strong roots and stems.
- Best for seedlings and clones: Fluorescent lights are perfect for young plants that need gentle light to establish strong roots and stems.
Side lighting for lower buds: Adding CFLs or T5s along the sides of your plants can help improve light penetration to the lower branches, encouraging bud development lower down the plant.
Side Lighting for Larger Plants
In larger grows, especially where plants have been trained with techniques like LST or ScrOG, the lower parts of the plant can often be shaded by the canopy above. Adding side lighting can ensure that the lower branches receive enough light to produce healthy buds. LED strips or CFLs can be positioned along the sides of the plants to improve light penetration.
Boosting Light During Flowering
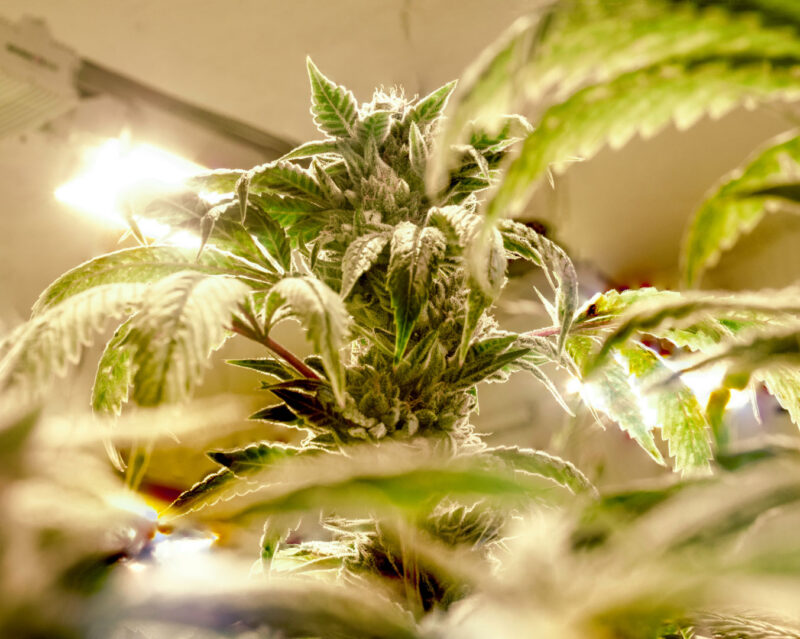
In some cases, adding supplemental lights during the flowering stage can boost overall bud production. This can be as simple as adding extra HPS lights or LEDs to increase overall light intensity and ensure your plants have enough energy to produce large, resinous buds.
Tip: Use supplemental lights to target specific areas that may not be receiving enough light, such as the lower branches or the sides of the plant. This will help ensure even growth and maximize your yield.
UVB Light Supplementation
One of the most exciting developments in cannabis cultivation is the use of UVB light supplementation to increase resin production and boost cannabinoid levels, particularly THC. UVB light is a specific type of ultraviolet light that mimics the natural sunlight found at high altitudes or near the equator, where cannabis plants evolved to produce higher levels of resin as a protective mechanism against intense sunlight.
How UVB Light Affects Plants
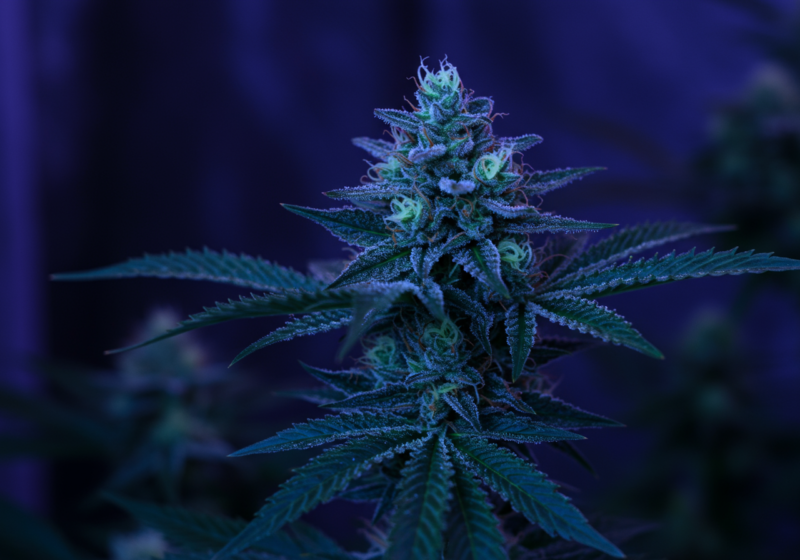
UVB light stimulates the production of trichomes, the small, crystal-like structures on the surface of cannabis buds that contain THC, CBD, and other cannabinoids. Trichomes act as a natural defense mechanism for the plant, protecting it from harmful UV rays. When the plant is exposed to UVB light, it produces more resin to shield itself from the damage, resulting in higher THC levels.
Benefits of UVB Light Supplementation:
- Increases resin production: More trichomes mean more THC and other cannabinoids, leading to more potent buds.
- Enhances flavor and aroma: The increased resin production also boosts terpene levels, enhancing the flavor and aroma of your buds.
How to Use UVB Lights
UVB lights should be used sparingly and only during the flowering stage when trichome production is at its peak. Too much UVB exposure can stress the plant and cause damage, so it’s essential to introduce it gradually.
Best practices for using UVB lights:
- Timing: Start by introducing UVB light for 1–2 hours per day during the middle of the light cycle. Gradually increase the exposure over the course of a few weeks, but avoid using UVB lights for more than 4 hours per day.
- Distance: Place UVB lights 24–36 inches above the canopy to avoid damaging the plants.
- Use with HPS or LED lights: UVB lights should be used in conjunction with your regular grow lights (HPS or LED). They are meant to supplement, not replace your primary light source.
Tip: UVB light is most effective during the last few weeks of the flowering stage when trichome production is at its highest. This is when you’ll see the biggest increase in resin production.
Light Movers: Maximizing Coverage
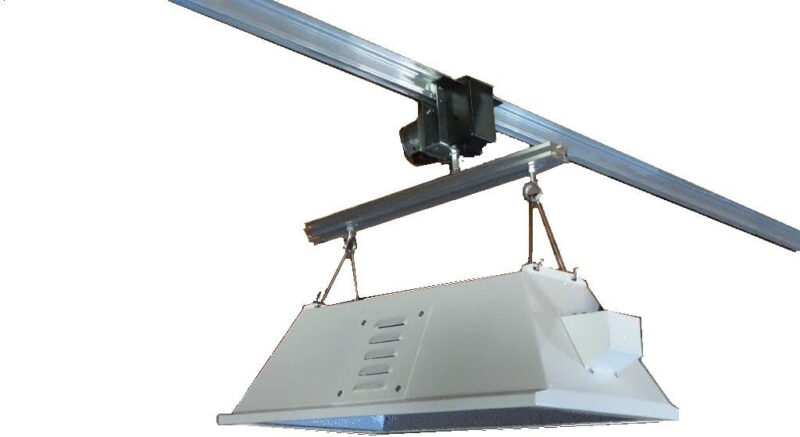
Light movers are mechanical systems that allow grow lights to move back and forth across the plant canopy. They help distribute light more evenly across your plants, ensuring that all areas receive consistent illumination. Light movers can be especially useful in larger grow spaces where a single stationary light might not cover the entire canopy efficiently.
How Light Movers Work
Light movers are mounted on tracks or rails that move the light back and forth over the plants, covering a wider area than a fixed light can. This movement helps reduce the risk of hot spots (areas where the light is too intense) and shadow zones (areas where the light doesn’t reach). By moving the light, you ensure more uniform growth across the entire plant, as every part of the canopy gets equal exposure to the light.
Benefits of Using Light Movers
- Increases coverage: Light movers allow you to cover a larger grow area with fewer lights, as the moving light can reach more plants without the need for additional fixtures.
- Reduces heat stress: Because the light is constantly moving, no single spot on the plant is exposed to the full intensity of the light for too long, reducing the risk of heat stress or light burn.
- Improves light penetration: Moving lights help ensure that even lower branches and leaves receive adequate light, promoting more uniform growth throughout the plant.
Tip: Light movers are particularly useful when using high-intensity lights like HPS or MH, as these lights can generate a lot of heat. By moving the light, you avoid concentrating too much heat in one spot, keeping the plants healthier and reducing the need for excessive ventilation.
Light Schedules and Using Timers Automation
Once you’ve selected your lights and set up your grow room, it’s crucial to manage the light schedules properly. Cannabis plants depend on specific light cycles to regulate their growth, and using timers can automate the process, ensuring consistency.
Vegetative Growth: 18/6 or 24/0 Light Cycle
During the vegetative phase, your plants need 18 to 24 hours of light per day. The longer the light cycle, the faster the plants will grow. An 18/6 cycle is common because it mimics the natural day length, giving the plants a brief rest period each day.
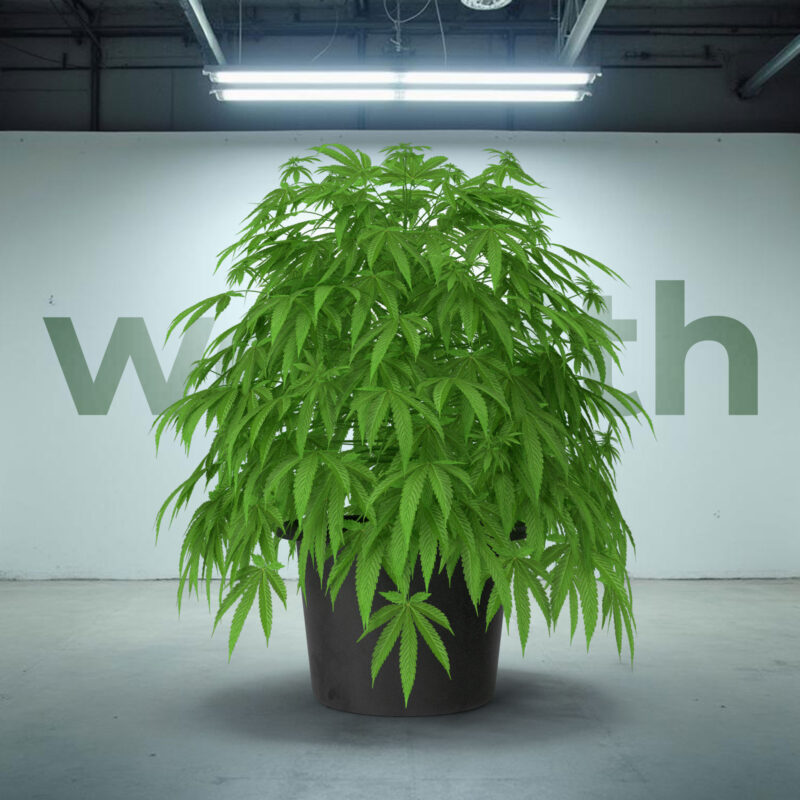
However, some growers prefer the 24/0 cycle, providing continuous light throughout the vegetative phase. This can result in faster growth, but it’s important to monitor your plants for any signs of stress from the lack of a dark period.
Flowering: 12/12 Light Cycle
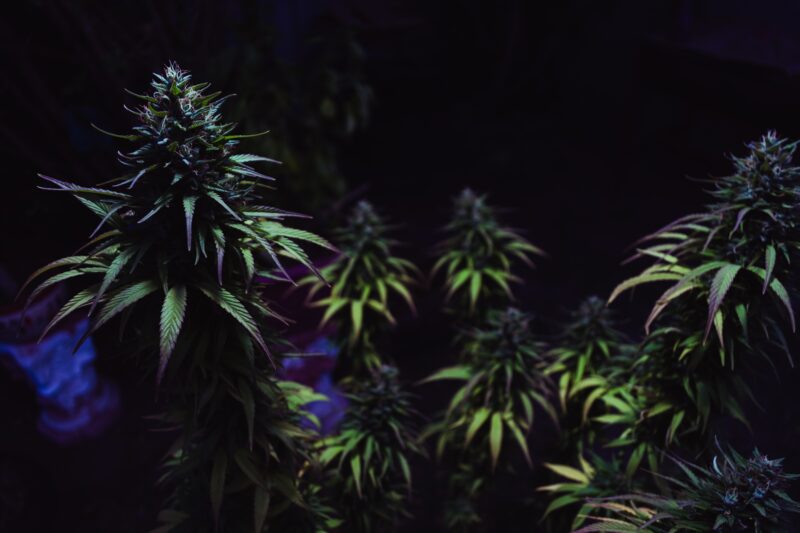
Once your plants are ready to flower, switch the light cycle to 12 hours of light and 12 hours of uninterrupted darkness. This mimics the shorter days of late summer and fall, signaling the plant to begin producing flowers. It’s crucial to ensure complete darkness during the dark cycle—any light interruptions can delay flowering or cause hermaphroditism.
Tip: Use a heavy-duty timer to automate your light schedule. Timers ensure that your plants receive consistent light cycles, which is critical for healthy growth and optimal yields.
Autoflowering Strains and Light Schedules
Autoflowering strains differ from photoperiod strains because they don’t rely on changes in light cycles to trigger flowering. Instead, they begin flowering automatically after a certain period of vegetative growth, usually around 2–4 weeks.
- Light schedule for autoflowers: Autoflowers thrive on a consistent 18/6 light cycle throughout their life cycle. Some growers use a 20/4 light cycle or even 24/0, but the energy savings and potential benefits of adding a short dark period often make 18/6 the most efficient option.
- Faster turnaround: Autoflowering strains have a shorter life cycle, adjusting the light intensity and spectrum to maximize photosynthesis early on is key. Use blue-spectrum light during the first few weeks, then switch to red-spectrum light for the flowering stage.
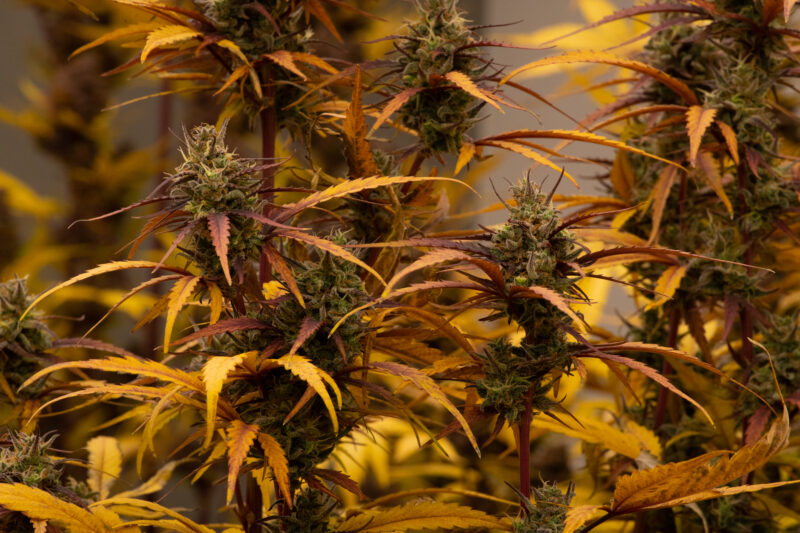
Tip: While autoflowers don’t require changes in light cycles, they still benefit from receiving high-intensity light, especially during the flowering phase. Consider increasing the light intensity slightly during flowering to maximize bud development.
Using Timers and Automation for Lighting Control
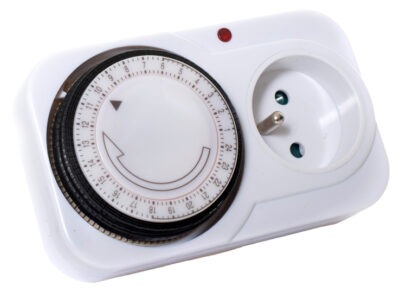
In any indoor grow setup, timers are a critical tool for automating the light schedule. Maintaining consistent light cycles is essential for healthy plant growth, and timers make this process automatic, ensuring that your plants receive the right amount of light at each stage of growth without manual intervention.
Why Timers are Important
Using timers allows you to automate the on/off cycles of your grow lights, ensuring that the light schedule is consistent and reliable. This consistency is crucial for both photoperiod strains, which depend on precise light cycles to trigger flowering, and autoflowers, which benefit from uninterrupted light schedules for maximizing growth.
Key benefits of timers:
- Consistency: Timers ensure that your plants receive light at the same time every day, which helps reduce stress and promote healthy growth.
- Efficiency: Automating the light cycle reduces the need for constant monitoring, freeing up time for other tasks.
- Energy savings: Timers can help reduce energy waste by turning off the lights exactly when needed, avoiding the risk of lights staying on longer than necessary.
Choosing the Right Timer
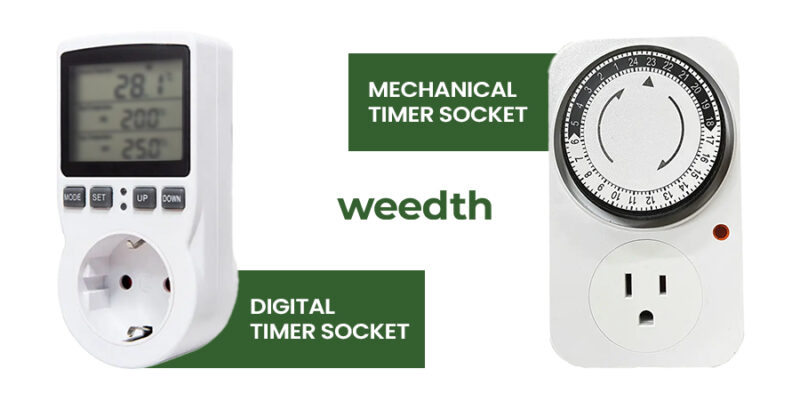
There are several types of timers available for managing your grow lights, each with its own advantages.
Mechanical Timers: These are the most basic and affordable timers. They use a dial to set the on/off cycles and are easy to use.
-
- Advantages: Simple, inexpensive, and reliable.
- Disadvantages: Less precise than digital timers and can be prone to wear over time.
Digital Timers: These timers offer more precision and flexibility. They allow you to set exact on/off times and are more durable than mechanical timers.
-
- Advantages: Accurate, programmable, and durable.
- Disadvantages: Slightly more expensive than mechanical timers, but worth the investment for serious growers.
Smart Timers: These timers are connected to a smart home system or smartphone app, allowing you to control the light schedule remotely. This level of control can be helpful for large grow setups or growers who need to manage multiple grow rooms.
-
- Advantages: Remote control, precise scheduling, and the ability to monitor light cycles from anywhere.
- Disadvantages: More expensive and requires a Wi-Fi connection.
Tip: For HID lights, make sure to use heavy-duty timers that can handle the high wattage of your grow lights. Basic timers may not be rated for the power requirements of high-intensity lights, which could lead to malfunctions or even fire hazards.
Lighting Setups for Different Grow Spaces
The size of your grow space will dictate the type of lighting setup you need. Whether you’re working with a small closet grow or a large commercial setup, tailoring your lighting system to the size of your space is essential for achieving the best results.
Small Grow Spaces (Closets, Cabinets, Tents)
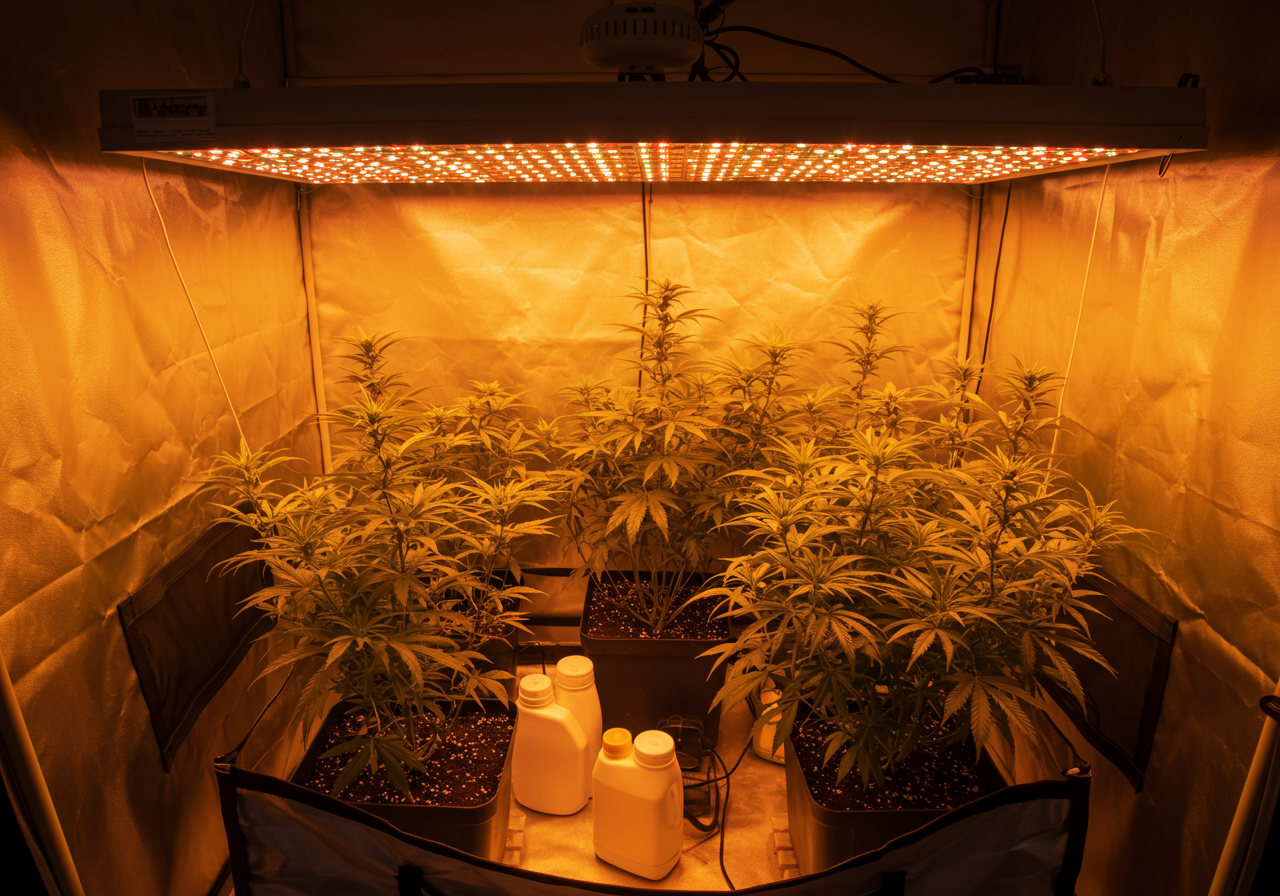
In smaller grow spaces, efficient use of space and light is critical. Fluorescent lights, CFLs, or lower-wattage LEDs are often ideal for these setups because they generate less heat and can be placed closer to the plants.
- Fluorescent and CFL Lights: These lights are great for small grows because they don’t produce as much heat as HID lights. They can be placed close to the plants without causing heat stress, which is crucial in a confined space.
- LED Lights: LED grow lights are increasingly popular for small grow spaces. They are energy-efficient, produce less heat, and can provide both the blue spectrum (for vegetative growth) and the red spectrum (for flowering) in one fixture. Make sure to switch to flowering mode or adjust to 2700K–3000K color temperature when transitioning to flowering.
Medium Grow Spaces (Small Rooms, Large Tents)
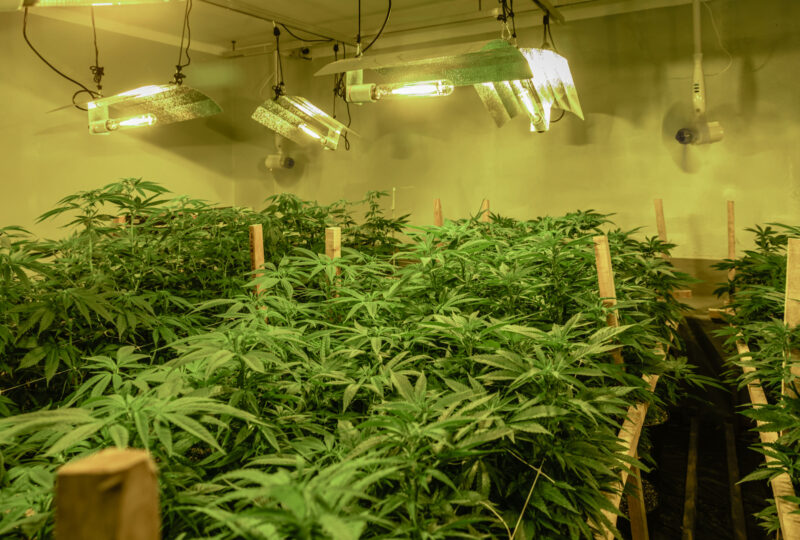
For medium-sized grow spaces, HID lights (metal halide and high-pressure sodium) are the most common choice. They provide high-intensity light, which is necessary for robust growth and large yields. However, you’ll need to manage heat carefully in these spaces.
- 400-600 Watt HPS or MH Lights: These lights offer the best balance between light intensity and energy consumption for medium-sized grow rooms. 600-watt HPS lights are particularly efficient, providing high light output without excessive electricity use.
- Air-cooled reflectors: It’s important to control heat in medium grow spaces, especially when using HID lights. Air-cooled reflectors with ventilation systems can help keep the grow room temperature within the optimal range for plant growth.
Large Grow Spaces (Commercial Setups, Large Rooms)
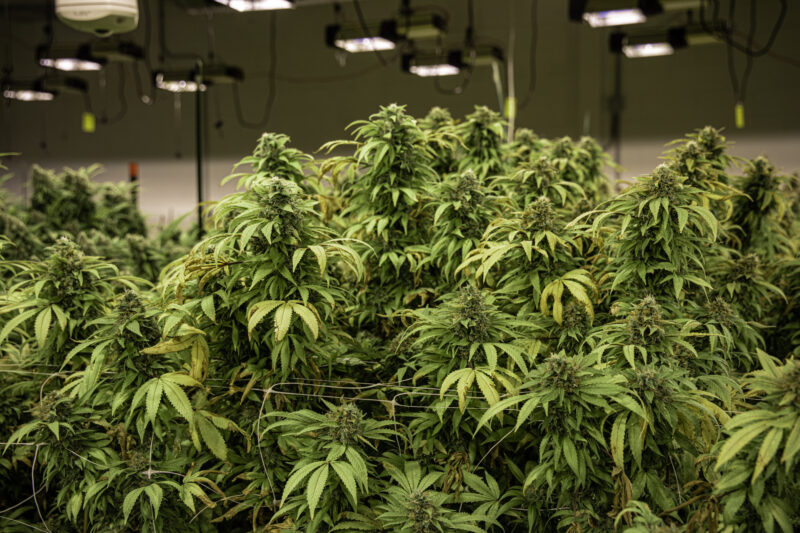
In large grow spaces, high-intensity lights and efficient light distribution are critical. Growers often use 1000-watt HPS lights or high-output LED lights to ensure that the entire canopy receives sufficient light. Multiple light fixtures, combined with light movers and reflective walls, help to maximize light coverage.
- 1000-Watt HPS or LED Lights: In large grow spaces, 1000-watt lights are the best option for ensuring adequate light intensity across the entire canopy. Multiple light fixtures should be arranged to cover the grow space evenly.
- Light Movers: Light movers are essential in large grow spaces to avoid hot spots and ensure even light distribution. They help move the lights across the canopy, ensuring that every part of the plant receives equal light exposure.
Tip: In large grow spaces, using air-cooled reflectors and ventilation systems is key to managing the heat generated by high-wattage lights. Proper ventilation helps maintain the optimal temperature and humidity levels, ensuring that your plants grow healthily without being stressed by excessive heat.
Managing Heat from Lights
One of the biggest challenges when using powerful grow lights, especially HID systems, is managing the heat they produce. Too much heat can stress your plants, cause light burn, and even stunt growth or reduce yields. Proper temperature and ventilation management are essential for keeping your plants healthy and maximizing the effectiveness of your lighting system.
Why Temperature Management is Crucial
Cannabis grows in a specific temperature range, and maintaining that range is key to successful growth. Plants become stressed when temperatures are too high, leading to wilting, slowed growth, or heat stress. Low temperatures can slow metabolism and affect bud development, especially during the flowering phase.
Optimal temperature range for cannabis:
- During the vegetative stage: Keep temperatures between 70–85°F (21–29°C) during the light cycle and 60–70°F (15–21°C) during the dark cycle.
- During the flowering stage: Temperatures should be slightly lower, around 65–80°F (18–26°C), with cooler nights (around 60°F or 15°C) to encourage resin production and denser buds.
Heat Management for HID Lights
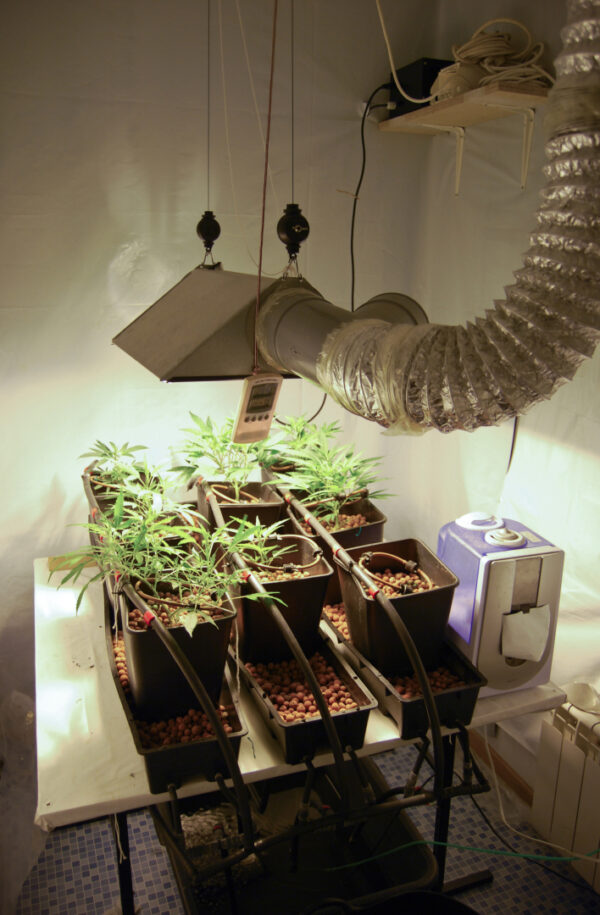
HID lights (metal halide and high-pressure sodium) are notorious for running hot, especially in small grow rooms or enclosed spaces. Without proper heat management, the grow room can quickly become too hot, leading to heat stress on your plants. There are several methods to manage heat from HID lights:
- Air-cooled reflectors: Air-cooled reflectors have built-in ducting that allows you to attach exhaust fans to pull heat away from the bulb. This prevents heat from building up in the grow room and helps maintain a stable temperature. Air-cooled reflectors are a must when using high-wattage HID lights in smaller spaces.
- Exhaust systems: Proper ventilation is critical when using HID lights. Installing an exhaust system with inline fans will help remove hot air from the grow space and replace it with fresh, cooler air. Place your exhaust fan at the top of the grow room since heat rises. Ideally, you want to create negative pressure, meaning more air is being pulled out than being pulled in, which helps keep temperatures stable.
- Oscillating fans: In addition to an exhaust system, oscillating fans help circulate air within the grow room, distributing heat evenly and preventing hot spots. Fans should be placed at different levels of the grow room to promote airflow around and through the plants, preventing humidity buildup and mold.
- Distance between lights and plants: Maintaining the proper distance between your HID lights and the canopy is essential to avoid heat stress. The higher the wattage, the greater the distance should be. For example:
- 400-watt HID: 18 inches above the canopy.
- 600-watt HID: 20–24 inches above the canopy.
- 1000-watt HID: 24–36 inches above the canopy.
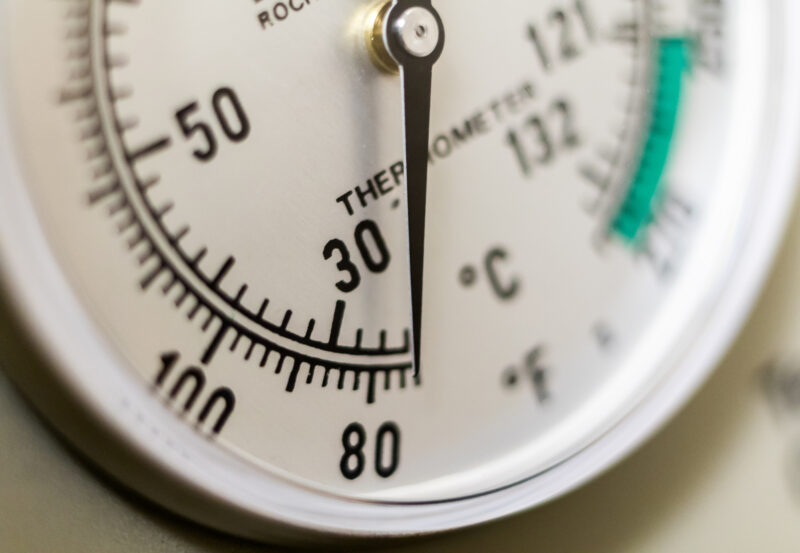
Tip: If your plants are exhibiting signs of heat stress (curling leaves, wilting, or yellowing), check the temperature at the canopy level using a thermometer or temperature gauge. If necessary, raise the lights and increase ventilation.
Heat Management for LED and CFL Lights
LED and CFL lights produce far less heat than HID lights, making them easier to manage in terms of temperature. However, you still need to ensure proper airflow and ventilation to avoid stagnant air, which can lead to mold or mildew.
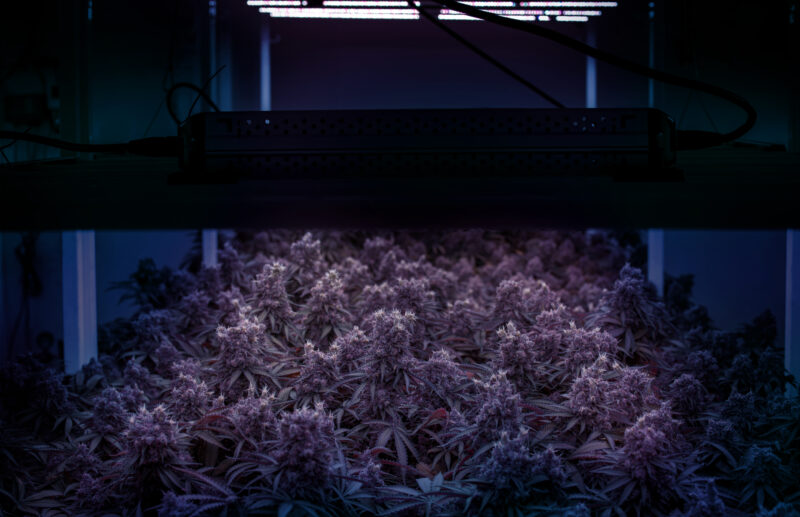
LED lights typically run cool, so they can be placed closer to the plant canopy without causing heat stress. The optimal distance is 12–24 inches, depending on the intensity of the light. Some high-power LEDs can produce more heat, so keep an eye on the temperature at the canopy level.
CFL lights are even cooler and can be placed 2–4 inches above the plants without causing heat issues. Since CFLs have lower light intensity, keeping them close to the plants is essential for effective growth.
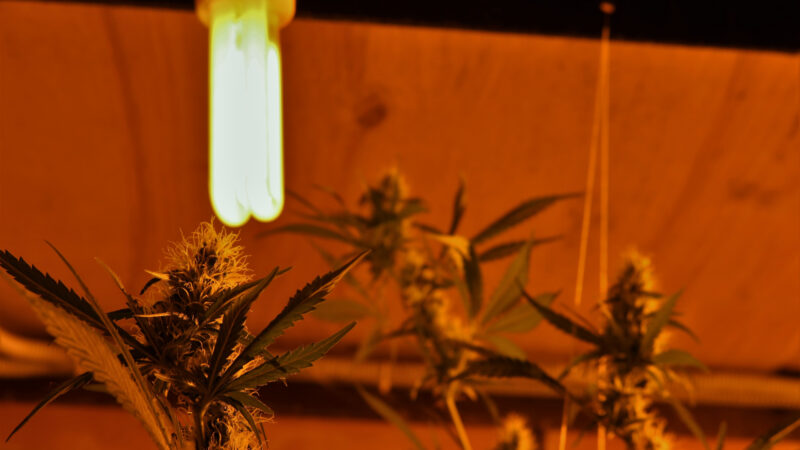
In both cases, use oscillating fans to keep the air moving and prevent hot air from building up around the plants.
The Importance of Ventilation
Proper ventilation does more than just control temperature—it’s also essential for maintaining humidity levels and ensuring a constant supply of CO2 to your plants. Cannabis plants use CO2 during photosynthesis, and without fresh air, CO2 levels can drop, reducing the plant’s ability to produce energy and grow efficiently.
Ventilation tips:
- Exhaust fans: Install exhaust fans to pull hot air out of the grow room. The fan should be placed near the top of the room, where the hottest air collects. Ensure that fresh air is coming in from the bottom of the grow room to replace the hot air being removed.
- Intake fans: In larger grow spaces, intake fans may be necessary to pull fresh air into the room. Make sure the intake and exhaust fans are balanced to create consistent airflow.
- CO2 supplementation: If you’re running a sealed grow room with limited airflow, consider adding CO2 supplementation to ensure your plants have the carbon dioxide they need for optimal growth.
Tip: Use hygrometers to monitor the temperature and humidity inside the grow room. Keeping the temperature and humidity in the optimal range is essential for healthy plants and large yields.
Light Burn and Heat Stress: Recognizing and Solving Common Problems
Even with proper lighting setups, it’s possible to encounter issues like light burn and heat stress if lights are placed too close to the plant canopy or if the room becomes too hot. Recognizing these signs early is essential to preventing long-term damage to your plants.
What is Light Burn?

Light burn occurs when the light is too intense, causing the top leaves and buds to become scorched or bleached. It typically happens when lights are placed too close to the canopy, and it’s more common with HID and LED lights due to their high intensity.
Symptoms of Light Burn:
- The leaves closest to the light turn yellow or white and begin to curl upward.
- The tips of the leaves may appear burnt or crispy.
- Bleaching of the top colas, where the buds appear white or bleached instead of vibrant green.
Solving Light Burn
The best way to prevent light burn is to ensure the lights are at the proper distance from the plant canopy. Here’s how to correct light burn:
- Raise the lights: If you notice signs of light burn, raise the lights by a few inches and monitor the plants closely for improvement. For HID lights, the recommended distance is 18–36 inches, depending on wattage. For LEDs, maintain a distance of 12–24 inches.
- Use light movers: If raising the lights isn’t enough, consider using a light mover to distribute the light more evenly and reduce the intensity in one spot.
Heat Stress: What it Looks Like and How to Fix It
Heat stress occurs when the grow room becomes too hot for the plants to handle. High temperatures cause the plant to lose more water through transpiration than it can absorb, leading to wilting, curling leaves, and stunted growth.
Symptoms of Heat Stress:
- Curling leaves: The edges of the leaves curl up or down as the plant tries to conserve water.
- Wilting: The entire plant may droop or appear limp.
- Slowed growth: Heat-stressed plants often stop growing as they conserve energy to survive.
- Yellowing: Leaves may start to turn yellow or develop brown, crispy edges.
Solving Heat Stress
To resolve heat stress, it’s essential to lower the temperature in the grow room and improve airflow:
- Increase ventilation: Add or upgrade exhaust fans to pull hot air out of the grow space. Ensure that fresh, cool air is being brought in to replace the hot air.
- Use oscillating fans: Keep the air circulating throughout the grow room to prevent hot spots and improve overall airflow around the plants.
- Raise the lights: If your lights are too close to the canopy, raise them to reduce heat exposure. HID lights, in particular, can generate a lot of heat, so maintaining the right distance is key.
Tip: Aim to keep the grow room temperature below 85°F (29°C) during the light cycle. For flowering plants, it’s best to maintain temperatures between 65–80°F (18–26°C) to ensure healthy bud development.
Electrical Safety in Your Grow Room
One of the most critical aspects of managing grow lights—especially powerful HID and LED systems—is ensuring that your electrical setup is safe and capable of handling the load. Grow lights consume a lot of electricity, and if your wiring isn’t up to code, it can lead to overheating, electrical fires, or equipment failure.
Calculate Electrical Load
Before setting up your grow lights, it’s important to calculate the electrical load you’ll be placing on your circuits. Most grow lights come in 400-watt, 600-watt, and 1000-watt varieties, and it’s crucial to understand how much electricity each will consume.
Electrical load formula:
Watts / Voltage = Amps
For example, if you’re using a 1000-watt light on a 120-volt circuit, the calculation would be:
1000 watts / 120 volts = 8.3 amps
Most household circuits are rated for 15 or 20 amps, meaning you could safely run one or two 1000-watt lights on a 20-amp circuit. However, it’s recommended to never exceed 80% of the circuit’s capacity, so you should aim to stay below 16 amps on a 20-amp circuit.
Tip: Avoid running lights and other high-draw equipment (like fans and air conditioners) on the same circuit. Overloading a circuit can trip breakers or, worse, start a fire.
Ground Fault Circuit Interrupters (GFCIs)
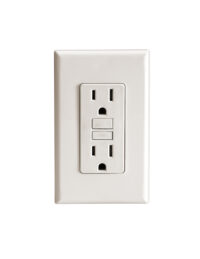
A Ground Fault Circuit Interrupter (GFCI) is a critical safety feature in any grow room, especially if you’re growing in a hydroponic setup or if there’s any chance of water exposure near electrical equipment. GFCIs are designed to cut power immediately if they detect any imbalance in the electrical current, preventing electrical shock or fires.
Where to install GFCIs:
- Near water sources: If your grow room has any water reservoirs, pumps, or hydroponic systems, GFCI outlets are a must.
- At the breaker box: You can also install a GFCI circuit breaker to protect the entire grow room’s electrical setup.
How It Works:
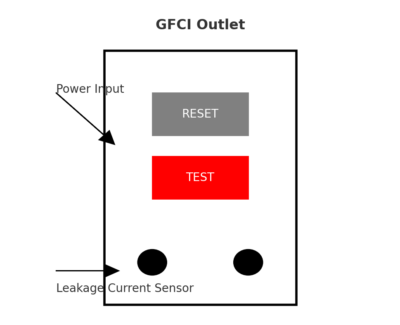
Detects Current Imbalance:
- A GFCI monitors the current flow between the hot (live) and neutral wires.
- If it detects an imbalance (as little as 4-6mA), indicating leakage to the ground (e.g., through water or a human body), it immediately shuts off power.
Rapid Power Cutoff:
- The power is cut off within milliseconds to prevent electrocution.
- This is why GFCIs are essential in wet environments where electrical hazards are higher.
Reset and Test Buttons:
- RESET (Gray Button): After a trip, pressing this button restores power once the fault is cleared.
- TEST (Red Button): Pressing this button simulates a fault and ensures the GFCI is functioning correctly.
Preventing Electrical Fires
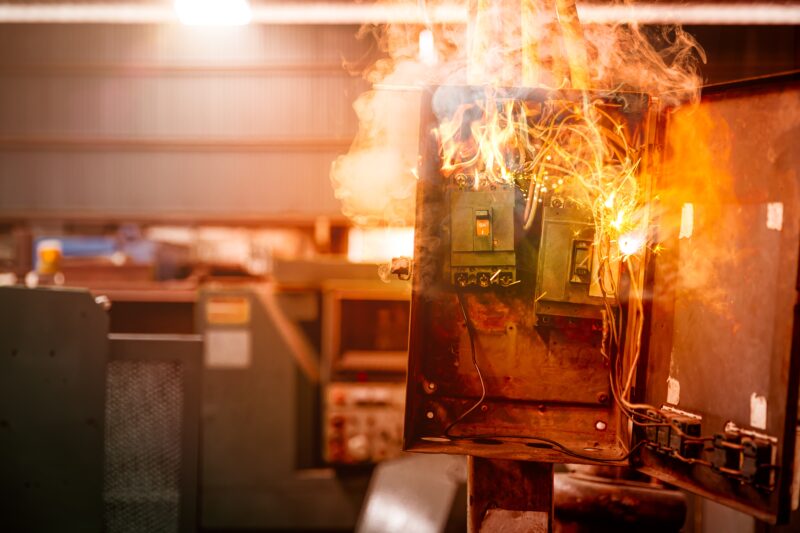
With the high wattage required for grow lights, overheating and fires are real risks if your electrical system isn’t managed correctly. Here are some tips to prevent electrical fires in your grow room:
- Use heavy-duty extension cords: Avoid using cheap extension cords to run grow lights, as they can overheat. Use heavy-duty, grounded extension cords that are rated for high wattage.
- Don’t overload outlets: Never plug too many devices into a single outlet or power strip. Spread the load across multiple circuits to reduce the risk of overloading.
- Install surge protectors: Grow lights, especially digital ballasts, can sometimes cause power surges. Using surge protectors helps safeguard your equipment and reduces the risk of electrical damage or fire.
- Inspect wiring regularly: Periodically check all wiring and connections in your grow room for signs of wear, fraying, or overheating. Replace any damaged wiring immediately.
Tip: Always have a fire extinguisher rated for electrical fires nearby in the grow room. It’s an essential safety measure, especially when dealing with high-wattage lights.
Troubleshooting Lighting Systems: Common Issues and Solutions
Even with the best planning, issues with your lighting system can arise. Whether it’s a technical malfunction, plant stress, or improper setup, understanding how to troubleshoot common problems with your lighting system will help you maintain a healthy grow environment and avoid setbacks in your cannabis cultivation.
Flickering or Dimming Lights
Flickering or dimming lights are often caused by electrical issues, such as faulty wiring, a failing ballast, or an overloaded circuit. Flickering lights can stress your plants and interfere with their growth cycles, so it’s important to address this problem immediately.
Possible Causes:
- Faulty Ballast: If you’re using HID lights and notice flickering, the ballast may be failing. Ballasts wear out over time and can cause inconsistent power to the bulbs.
- Overloaded Circuit: If you’re running too many lights or other high-wattage devices (like fans and dehumidifiers) on the same circuit, it could cause the lights to flicker or dim as the circuit struggles to handle the load.
- Loose Wiring: Poorly connected wires or damaged sockets can cause inconsistent power delivery to your lights, resulting in flickering or dimming.
Solutions:
- Check the Ballast: If your lights are flickering, start by checking the ballast. Replace it if necessary, especially if it’s an older magnetic ballast. Upgrading to a digital ballast can improve light consistency and energy efficiency.
- Inspect Wiring: Ensure that all wiring is properly connected and that there are no loose or frayed wires. If you’re unsure, consider hiring an electrician to inspect your grow room’s electrical system.
- Upgrade Circuit Capacity: If your lights are dimming due to an overloaded circuit, consider running your lights on a dedicated circuit or spreading the load across multiple circuits. You can also upgrade to a 20-amp circuit if necessary.
Common Lighting Mistakes and How to Avoid Them
Even experienced growers can make mistakes when setting up or managing their lighting systems. Avoiding these common mistakes can improve your plant’s growth and prevent unnecessary problems throughout the grow cycle.
Mistake #1: Placing Lights Too Close or Too Far from Plants
One of the most common mistakes is placing lights either too close or too far from the plant canopy. Lights that are too close can cause light burn, while lights that are too far away can lead to stretching, where the plant grows tall and lanky in search of more light.
Solution:
- Keep the lights 18–36 inches above the canopy for HID lights, depending on wattage.
- For LED lights, maintain a distance of 12–24 inches, adjusting based on light intensity and plant height.
Monitor your plants regularly. If you see browning or yellowing leaves at the top, raise the lights to prevent light burn. If the plants stretch or develop long internodes, lower the lights to increase intensity.
Mistake #2: Incorrect Light Spectrum at the Wrong Growth Stage
Using the wrong light spectrum for a specific growth stage is a common mistake. Blue light (4000K–6500K) is ideal for the vegetative stage, while red light (2700K–3000K) is crucial for flowering. Using the wrong spectrum at the wrong time can stunt growth or reduce bud production.
Solution:
- During the vegetative stage, use lights with a blue spectrum (MH, daylight CFLs, or LEDs in vegetative mode).
- During flowering, switch to lights with a red spectrum (HPS, warm CFLs, or LEDs in flowering mode). If using LED lights with both vegetative and flowering settings, ensure you switch modes when transitioning to the flowering stage.
Mistake #3: Ignoring Light Spread and Coverage
Many growers focus on light intensity but forget about light spread—ensuring that light is evenly distributed across the entire grow space. Uneven light distribution can lead to underdeveloped buds in areas that receive less light, ultimately reducing your yield.
Solution:
- Use reflectors to direct light back toward the plants and improve light coverage.
- Consider adding side lighting or using light movers to ensure that all parts of the plant receive sufficient light.
- Regularly rotate your plants if you’re working in a small grow space to ensure all sides receive equal light exposure.
Mistake #4: Using Incorrect Timers
Another common mistake is using the wrong type of timer for your lighting system. Mechanical timers may not handle the wattage required for HID lights, which can lead to malfunctions or even fire hazards.
Solution:
- Use heavy-duty timers specifically designed for high-wattage grow lights, especially HID systems. Ensure that your timer can handle the electrical load of your lighting system to avoid potential safety risks.

