First Outdoor Grow: A Week-by-Week Planning Checklist
Your first outdoor cannabis grow becomes much easier when you stop treating the season as one long stretch of time. A plant can look calm for weeks and then ask for very different things once the weather warms, the roots fill more of the soil, the canopy expands, or flowering begins. If you only react when something looks wrong, the season can feel unpredictable. If you break the same season into repeatable checkpoints, it starts to make much more sense.
This guide is built around that second approach. We are going to use a week-by-week planning system, but not a rigid calendar that pretends every grower lives at the same latitude or grows the same cultivar. The weeks are anchors for observation and decisions, not promises about what the plant must be doing on a particular date.
That distinction matters outdoors. A grower in a long, dry summer climate may have a very different finishing window from someone who reaches cold autumn rain early. A day-neutral cultivar follows a different reproductive clock from a photoperiod-sensitive plant. A container on a hot patio can dry much faster than an in-ground plant only a few meters away. The planning system has to follow those differences rather than erase them.
We will use Week 0 as the week the plant becomes established in its intended outdoor growing position. The weeks before Week 0 are preparation and acclimation weeks. The weeks after Week 0 are field-management weeks. When clear reproductive development begins, you will add a second marker in your notes called Flowering Checkpoint 0. That gives you a practical way to follow the crop without forcing a universal outdoor calendar onto it.
This resource stays focused on planning, inspection, and verification. It does not replace the full cultivation process. If you need the broader outdoor workflow from setup through harvest, use the complete outdoor cannabis growing guide as the parent reference.
Resource Navigation
In This Resource
- Define the outdoor decision in terms of site, season, climate, legal access, and plant risk
- Measure the site: sun path, shade, temperature, humidity, wind, drainage, water access, cold pockets, or contamination as relevant
- Seasonal timing: latitude, photoperiod, weather windows, and cultivar behavior
- Practical setup/response plan with materials, placement, inspection points, and a backup option
- Failure modes: stagnant air, trapped moisture, heat load, frost, wind damage, water shortage, security, or neighbor impact
- Legal/safety boundary without guessing local rules or recommending dangerous traps
- Pre-season and weekly checklist that turns the article into a repeatable field procedure
Define the outdoor decision in terms of site, season, climate, legal access, and plant risk
Before we create a weekly plan, make sure the plan is attached to a real outdoor site. This sounds obvious, but a surprising amount of first-grow planning begins with the plant instead of the location. The grower buys a container, chooses a cultivar, gathers soil and nutrients, and only then looks around for somewhere to put everything.
Reverse that order.
Go to the place where the plant would actually live and stand there for a few minutes. Look upward, then around you, then down at the soil. Ask yourself whether this location can still work when the plant is much larger than it is now. Your first outdoor plan should be based on the site you actually have, not the site you wish you had.
Start with the five questions that can stop the grow before it starts
For a first grow, five questions deserve answers before the weekly calendar begins.
Can you legally cultivate at this location? A technically excellent garden is not usable if cultivation is prohibited or if you do not have permission to use the property.
Does the location receive enough useful direct sunlight? Bright ambient light is not the same as several hours of direct sun reaching the canopy.
Can the root zone drain after rain while still holding enough moisture between irrigations? Outdoor roots need both water and oxygen. A site that remains waterlogged is not made safer by watering less after the damage has already started.
Can you supply water through the driest part of the season? Spring rainfall can make water access look less important than it becomes in midsummer.
Does the cultivar have a realistic path to finish before the local weather becomes consistently hostile? A plant that flowers too late for your autumn is not a scheduling problem you can solve with a notebook.
If one of these questions has no answer yet, that becomes your first planning task.
Week 0
In this resource, Week 0 is not a universal date on the calendar. It is the week the plant becomes established in the outdoor position you intend to use for the season. All preparation weeks count backward from that point, and all field-management weeks count forward from it.
Your first outdoor grow is a site-management project
It helps to think of the plant and the site as one system. The plant can only respond to the environment you give it. If the location heats up beside a wall every afternoon, the plant experiences that heat. If cold air settles into a low corner overnight, the plant experiences that too. If the only hose connection is so far away that watering becomes a chore, that logistical problem eventually becomes a root-zone problem.
This is why a first grow should not be judged only by what happens to the leaves. You are also learning how the property behaves through a season.
By the end of the grow, you should know where the morning sun arrives first, which corner dries fastest after rain, which wind direction creates the most movement, how quickly the container dries during hot weather, and roughly when your cultivar begins reproductive development at your latitude.
That knowledge is more valuable for the next season than memorizing a generic outdoor calendar.
Choose a manageable first-season risk profile
You do not have to solve every outdoor challenge in your first year. In fact, choosing a relatively forgiving setup is one of the best ways to learn.
If you have a choice between a plant you can inspect from the back door and a remote site that requires a long drive, the nearby plant teaches you more because you can see small changes sooner. If the native soil has uncertain drainage, a clean container or raised growing area may reduce one major unknown. If your autumn is wet, a cultivar known to finish earlier may make more sense than choosing only by maximum potential size.
The goal is not to eliminate all risk. Outdoors, that is impossible. The goal is to avoid stacking several avoidable risks on top of one another during the same first season.
Choose the site you can observe consistently
A first grow becomes easier when sunlight, water, drainage, access, and security can be checked without turning every inspection into a major task.
Stacking several unknowns at once
Unknown soil, uncertain water, heavy shade, difficult access, late genetics, and an exposed weather site create too many variables for a first season to teach you clearly what went wrong.
Write down what success means before the plant is outside
For a first grow, success should not be defined only as a large harvest. That makes every smaller setback feel like failure and encourages unnecessary interventions.
A better first-season definition is: the plant remains healthy enough to complete the season, you can explain the major changes you made, you avoid preventable safety and legal problems, and you finish with records that make the next grow easier.
Yield and flower quality still matter. But they are outputs of the system. The planning checklist should focus on the inputs and observations you can control.
Field Advice: Your first outdoor season is partly a crop and partly a site survey. Treat every week as a chance to learn what the plant needs and what the location does naturally.
Do I need to follow the exact same week numbers as someone growing in another state or province?
Question sent by: Ethan Brooks, via email.
No. Use the sequence, not somebody else’s dates. Anchor Week 0 to your own outdoor placement window, then move through the checks relative to that point. Your frost risk, day length, cultivar, container size, and autumn weather may all differ. The value of the checklist is that it reminds you what to inspect next without pretending the plant must follow another grower’s calendar.
Measure the site: sun path, shade, temperature, humidity, wind, drainage, water access, cold pockets, or contamination as relevant
The first planning weeks belong to the site. Before the plant is committed to a permanent position, you have the freedom to change your mind. Use that freedom.
You do not need a professional weather station. A basic thermometer, local forecast, a few timed observations, and a notebook can tell you a surprising amount. What matters is that you check the location more than once.
Week -6: map the sun instead of guessing
Six weeks before your intended Week 0 is a good time to start observing the sun path. It does not have to be exactly six weeks. The point is to do this early enough that changing the growing position is still easy.
Visit the site several times during a clear or mostly clear day. Record whether the exact future canopy position is receiving direct sun in the morning, around midday, and later in the afternoon. If you want a more useful picture, add hourly or two-hour observations.
Do not simply write “sunny.” Write what happened.
| Time | Site Observation |
|---|---|
| 08:00 | Direct sun reaches the proposed canopy area. |
| 10:00 | Direct sun continues with no major obstruction. |
| 12:00 | Full direct sun. |
| 14:00 | Full direct sun, warm reflection from nearby wall begins. |
| 16:00 | Partial shade from tree canopy. |
| 18:00 | Full shade behind neighboring structure. |
This record is not meant to create a universal sunlight requirement. It tells you whether your particular position is receiving a useful portion of the day’s direct radiation and when the limitations occur.
Remember that shade can change through the season. Trees fill out. The sun angle changes. A location that looks open early in spring may behave differently later. Borderline sites deserve another check after surrounding vegetation develops.
Week -5: learn the site’s temperature and moisture behavior
Now spend a week watching the local microclimate. Compare the growing position with the regional forecast. If the forecast says 27°C (81°F), but the container position beside a masonry wall feels dramatically hotter every afternoon, the local site is giving you information the weather app cannot.
Record a morning temperature, a mid-afternoon temperature, and the overnight minimum if you can. After rain or heavy dew, note how quickly the location dries. You are looking for patterns rather than chasing an ideal number.
A sheltered garden can remain warmer at night. A low depression can become colder. A paved patio may be much hotter around the root zone. Dense surrounding vegetation can slow drying after wet weather.
Those differences help you decide whether the location needs adjustment before planting.
One warm weekend does not prove spring frost risk is finished
Use local historical frost information, current forecasts, and actual nighttime conditions rather than one unusually warm spell. Young plants moved from protected conditions can also be damaged by sudden changes in light, wind, and temperature even when freezing is not expected.
Week -5: test drainage if you plan to use native ground
If the plant will grow directly in native soil, look below the surface before trusting it. Dark soil can still sit over compacted clay. A garden bed can appear dry on top while remaining saturated lower down.
A simple drainage check can expose obvious problems. Dig a test hole in or close to the intended root zone, wet the soil thoroughly, then observe how long excess water persists. You are not trying to calculate a laboratory infiltration rate. You are checking whether the area stays saturated or forms standing water after normal wetting.
If the site remains waterlogged for long periods or routinely puddles after rain, do not solve that by putting random stones at the bottom of the hole. Drainage is a property of the whole soil profile and root-zone design.
Use another location, correct the drainage properly, build above grade, or switch to a clean container or raised-bed system. The cannabis soil and growing media guide covers those root-zone choices in more detail.
Week -4: physically test the water route
Do not write “hose available” in your plan until you have actually pulled the hose to the site. If you use watering cans, fill them and walk the route. If the plant will be on a balcony, check where drainage water can legally and safely go.
This is also the moment to think ahead to midsummer. A small plant may need little water now, but a larger canopy in hot, windy weather can use water much faster. The exact demand depends on plant size, root volume, soil, weather, and cultivar. What you are verifying here is not a fixed number. You are verifying that water can reach the plant reliably when demand rises.
Week -4: observe wind before installing support
Watch how air moves through the location. You do not need a completely still garden. Some airflow helps foliage dry. The concern is repeated strong exposure that can bend the plant heavily, loosen a root ball, knock over a container, or snap branches later when flowers add weight.
Look at existing vegetation. Permanent leaning, torn leaves, or repeated movement from one direction can reveal the prevailing exposure. Check building corners and narrow passages where wind accelerates.
If the site needs shelter, plan it before the canopy becomes large. A support installed calmly in advance is much easier to manage than an improvised structure built when a storm is already approaching.
Week -3: check soil history and contamination risk
If you are using native ground, ask what happened there before you arrived. This step is easy to skip because contamination is usually invisible.
Old workshops, burn piles, demolition fill, treated timber, industrial areas, heavily trafficked roads, unknown dumping, and previous chemical use deserve caution. Cannabis sativa has been studied for its ability to take up certain metals from soil, so healthy growth is not proof that the harvested material is suitable for consumption.
If the history is questionable, proper testing or a clean controlled growing medium is safer than guessing.
The spot gets good sun now, but there is a large deciduous tree nearby. Should I trust the current light?
Question sent by: SoilAndSun, via email.
Treat the current observation as the first measurement, not the final answer. If the tree is still filling in, return after the canopy develops and repeat the same sun check. You are planning for the light the cannabis plant will receive later, not only the light available on the day you chose the site.
Finish the site phase with one simple map
By the end of these early weeks, draw a very rough site map. It can be on paper or in your phone. Mark the plant position, water source, major shade sources, strongest wind direction, fence or property boundary, drainage direction, and any area that stays unusually wet or cold.
This small map becomes useful later because you can compare new problems with site features. If one side of the canopy develops more weather damage, you already know which direction receives the wind. If the lower corner stays wet, you know where runoff collects.
The point is not to make your garden look technical. The point is to reduce guessing.
Seasonal timing: latitude, photoperiod, weather windows, and cultivar behavior
Once the site works, the next question is whether the season works. This is where a week-by-week guide can become misleading if we are careless. Outdoor cannabis does not follow one global schedule.
The safest approach is to plan with two clocks. The first clock is your local weather window. The second is the plant’s actual development.

Week -4 to -2: identify the safe outdoor placement window
Use local weather records and current forecasts to estimate when the site becomes reasonably safe for outdoor establishment. Cold nights matter, but so does the transition from protected conditions to full sun and wind.
General horticultural guidance recommends gradually acclimating protected seedlings before permanent outdoor transplanting. This process is often called hardening off. The exact pace should respond to the plant and weather. The practical principle is simple: do not move a plant from a protected environment directly into intense sun, strong wind, and cold nights all at once.
If your plant has been raised under artificial light or behind glass, introduce outdoor sun progressively. Watch the newest and most exposed tissue. Pale bleaching, scorched patches, or severe wilting after the move can indicate that the transition was too abrupt.
Use latitude to understand the direction of the season
Latitude changes how day length behaves through the year. At higher latitudes, summer days become longer and the seasonal change can be more dramatic. Closer to the equator, the annual difference in day length is smaller.
Photoperiod-sensitive cannabis responds to those changing day and night lengths, but not every cultivar responds at the same threshold. Controlled studies have shown flowering initiation in some cannabis cultivars under photoperiods longer than the familiar indoor 12-hour flowering schedule. Other research in hemp has found critical photoperiod thresholds that differ by cultivar and can shift flowering response with changes as small as minutes near the threshold.
For outdoor planning, the lesson is not to memorize one number. It is to stop treating 12/12 as an outdoor date.
Remember: The indoor 12/12 schedule is a management tool. Natural outdoor flowering is cultivar-dependent and develops under gradually changing day length, twilight, temperature, plant maturity, and other environmental conditions.
Plan backward from your difficult autumn
Ask when your local finishing weather usually becomes unreliable. This may be the period of repeated frost risk, cold rain, persistent humidity, major storms, or another seasonal problem.
Then work backward.
If the cultivar commonly finishes late and your location regularly turns cold and wet before that window, you have identified a mismatch before the grow begins. That is far more useful than discovering the problem with dense unfinished flowers during autumn rain.
Do not treat breeder finish dates as guarantees. Use them as planning information and combine them with local observations. Once you grow the cultivar at your site, your own recorded transition and finish dates become more valuable.
Week 0 is placement, not necessarily germination or transplant day
This resource deliberately avoids turning germination into part of the outdoor checklist. Week 0 simply means the plant is ready to live in the intended outdoor position. Depending on your method, that may involve a final container, a prepared bed, or direct ground.
The important thing is that the plant arrives at Week 0 healthy enough to tolerate the outdoor environment and that the site is already prepared. Do not make Week 0 the same day you discover the hose is short, the soil does not drain, and the windbreak needs rebuilding.
Create a second clock when flowering begins
During mid and late season, calendar weeks become less informative than actual reproductive development. When you see clear, sustained flowering rather than a few ambiguous preflowers, write Flowering Checkpoint 0 in your notes.
From that point forward, add a second count:
Calendar Week 11, Flowering Checkpoint Week 2.
This tells you both where you are in the outdoor season and how far the plant appears to have progressed reproductively. If wet autumn weather is approaching while reproductive development is still early, you can see the risk developing rather than feeling surprised by it.
Should I mark flowering as soon as I see the first pistils?
Question sent by: ColdFrameChris, via Facebook page.
Use the first pistils as an observation, but wait for a clear and sustained reproductive transition before starting your flowering checkpoint count. A few early preflowers do not always mean the plant has entered full flowering. Record what you see, then confirm that the change is continuing across the plant during the next inspections.
Autoflowering or day-neutral plants need a different weekly emphasis
Day-neutral plants reduce dependence on seasonal day-length change, but they do not remove the need for planning. Their shorter developmental cycle means early mistakes can consume a larger percentage of the plant’s total life.
With a photoperiod plant, an early setback may be followed by weeks of vegetative recovery. A short-cycle plant has less time to replace lost growth. For that reason, the pre-season site checks and first two outdoor weeks become especially valuable. You want the root zone, sunlight, and watering routine functioning before the plant is forced to spend part of a short cycle recovering from an avoidable setup problem.
Practical setup/response plan with materials, placement, inspection points, and a backup option
Now we can build the actual week-by-week field plan. The following schedule assumes Week 0 is permanent outdoor placement. It is deliberately written as a flexible procedure. A fast-growing plant may move through some changes earlier. A cooler climate may slow development. A very long-season photoperiod plant may spend many more weeks in vegetative growth.
The schedule tells you what to inspect. The plant tells you whether the action is needed.
The pre-season countdown
| Stage / Period | Plant Status | Main Task | Risk / Check |
|---|---|---|---|
| Week -6 | Site not committed | Map direct sunlight through the day and note seasonal shade sources. | Do not choose the site from one midday visit. |
| Week -5 | Site testing | Record microclimate, drainage behavior, wetness persistence, and obvious cold pockets. | Standing water, reflected heat, or slow drying may require a different location. |
| Week -4 | Infrastructure planning | Test the water route, access, wind exposure, support options, and legal site requirements. | Confirm that water and access remain practical when the plant is larger. |
| Week -3 | Root-zone planning | Prepare tested native soil, raised bed, or clean container medium. Review soil history where relevant. | Do not introduce unknown outdoor soil or random materials into a controlled container system. |
| Week -2 | Plant preparation | Begin or continue gradual acclimation to outdoor sun, wind, and temperature if the plant was protected. | Watch for light scorch, severe wilt, or cold stress after exposure. |
| Week -1 | Final setup check | Install support, confirm drainage, stage watering equipment, inspect the weather forecast, and prepare one backup response. | Do not make permanent placement the same day you discover missing infrastructure. |
Week 0: place the plant and change as little as possible afterward
Week 0 should feel almost boring. That is a good sign.
The site has already been checked. Water reaches it. The root zone is ready. The support can be installed without damaging roots. You know what the next several nights are expected to do.
Once the plant is placed, resist the urge to improve five things at once. Outdoor transition is already a change in environment. Give the plant a little time to show you how it responds.
Record the placement date, container or bed details, recent weather, and a simple photo from the same angle you can reproduce later. That photograph becomes a useful reference when you are trying to decide whether growth accelerated, slowed, or changed shape.
Week 1: verify establishment
Your first week is about confirming that the original plan works in practice.
Check moisture below the surface rather than judging only the top layer. Watch whether the plant recovers normally after irrigation. Look for midday wilt and then check whether the root zone is actually dry before assuming the plant needs more water.
Inspect the most sun-exposed leaves for bleaching or scorch if the plant recently moved from protected conditions. Watch stem movement in wind. Check whether the container rocks or the root ball shifts.
If the plant looks slightly unsettled after the move but new growth is healthy, avoid overreacting. Establishment can involve a short adjustment period.
Week 2: confirm the watering rhythm
By the second week, you should begin seeing a pattern in how quickly the root zone dries. Do not turn that pattern into a permanent calendar. Weather will change and the plant will become larger.
Instead, learn the relationship between container or soil weight, moisture below the surface, leaf posture, temperature, and wind.
If you water by hand, apply water slowly enough to wet the root zone rather than creating surface runoff. If you use a drip system, check the actual wetting pattern rather than assuming every emitter is delivering evenly.
For broader irrigation guidance, see Cannabis Watering Basics. The useful principle is the same here: watering is a root-zone decision, not a day-of-the-week appointment.
It rained yesterday. Should I still do my normal Week 2 watering?
Question sent by: Madison Clarke, via contact form.
No. The weekly plan tells you when to inspect, not when to pour water. Check how deeply the rain actually wetted the root zone and whether the medium still needs water. A container under partial cover may receive surprisingly little rain, while an in-ground bed may remain moist for days. Verify the moisture, then decide.
Week 3: inspect structure and access
The plant is still relatively easy to work around, so use Week 3 to check structural planning.
Can you reach every side? Is the main stem rubbing against a stake? Are ties already tightening? Is one branch growing toward a wall or fence where it will become difficult to inspect later?
If you intend to use low-stress training or another structural method, this is where the broader cultivation guide becomes more appropriate. This resource does not turn the weekly checklist into a training tutorial. The planning point is simply to make sure the plant can expand without blocking inspection or creating a mechanical problem.
Week 4: establish the scouting habit
At this point, make one inspection each week deliberately slower than the quick checks you do while watering.
Start at the top. Look at new growth. Move into the interior. Check the underside of leaves. Look along stems and branch junctions. Inspect the soil surface and the base of the plant.
Cornell field guidance for hemp emphasizes regular scouting and recordkeeping because the distribution of symptoms can help separate environmental stress from disease or pest problems. A single damaged leaf and a whole section of plants showing the same pattern tell different stories.
Write down what you see before you treat anything.
Pro Tip: Take one photograph from the same position every week. You will notice changes in canopy size, color, leaning, and site shade that are harder to see when you look at the plant every day.
Weeks 5 to 8: follow expansion instead of chasing a fixed schedule
This is where first-time growers often become too comfortable. The plant may look healthy, the weather may be stable, and the routine may feel solved. But the system is changing quickly.
More leaf area means more transpiration. A larger canopy catches more wind. Roots occupy more of the available volume. Shade inside the plant increases. Water demand can rise even when the weather stays similar.
During these weeks, compare the plant with its Week 1 and Week 2 behavior. If a container that used to remain comfortably moist for several days is now drying much faster, that may simply reflect a larger plant. The correct response might be a change in irrigation frequency, more root-zone volume if transplanting is still appropriate, or improved moisture buffering. It is not automatically a nutrient problem.
If you are growing in containers, review the Cannabis Containers and Pots resource when root volume or drying speed becomes the limiting factor.
Weeks 8 onward: start watching the season as closely as the plant
The exact number here is less important than the shift in mindset. Once summer is established and the plant is large, start looking farther ahead in the forecast.
A three-day weather view may be enough early in the season. Later, you should also know what the next week is likely to bring. Repeated heat, long rain events, strong wind, or a sudden cold period can change the management plan before visible stress appears.
This is especially important as flowers begin forming. A vegetative canopy may tolerate wet weather that becomes much more concerning once dense inflorescences are present.
Flowering Checkpoint Weeks 0 to 2: confirm the transition and adjust inspection
When clear flowering begins, do not suddenly rewrite the whole grow. The first task is confirmation.
Check several parts of the plant. Make sure reproductive development is progressing rather than relying on one isolated site. Record the date and recent day length if you track it.
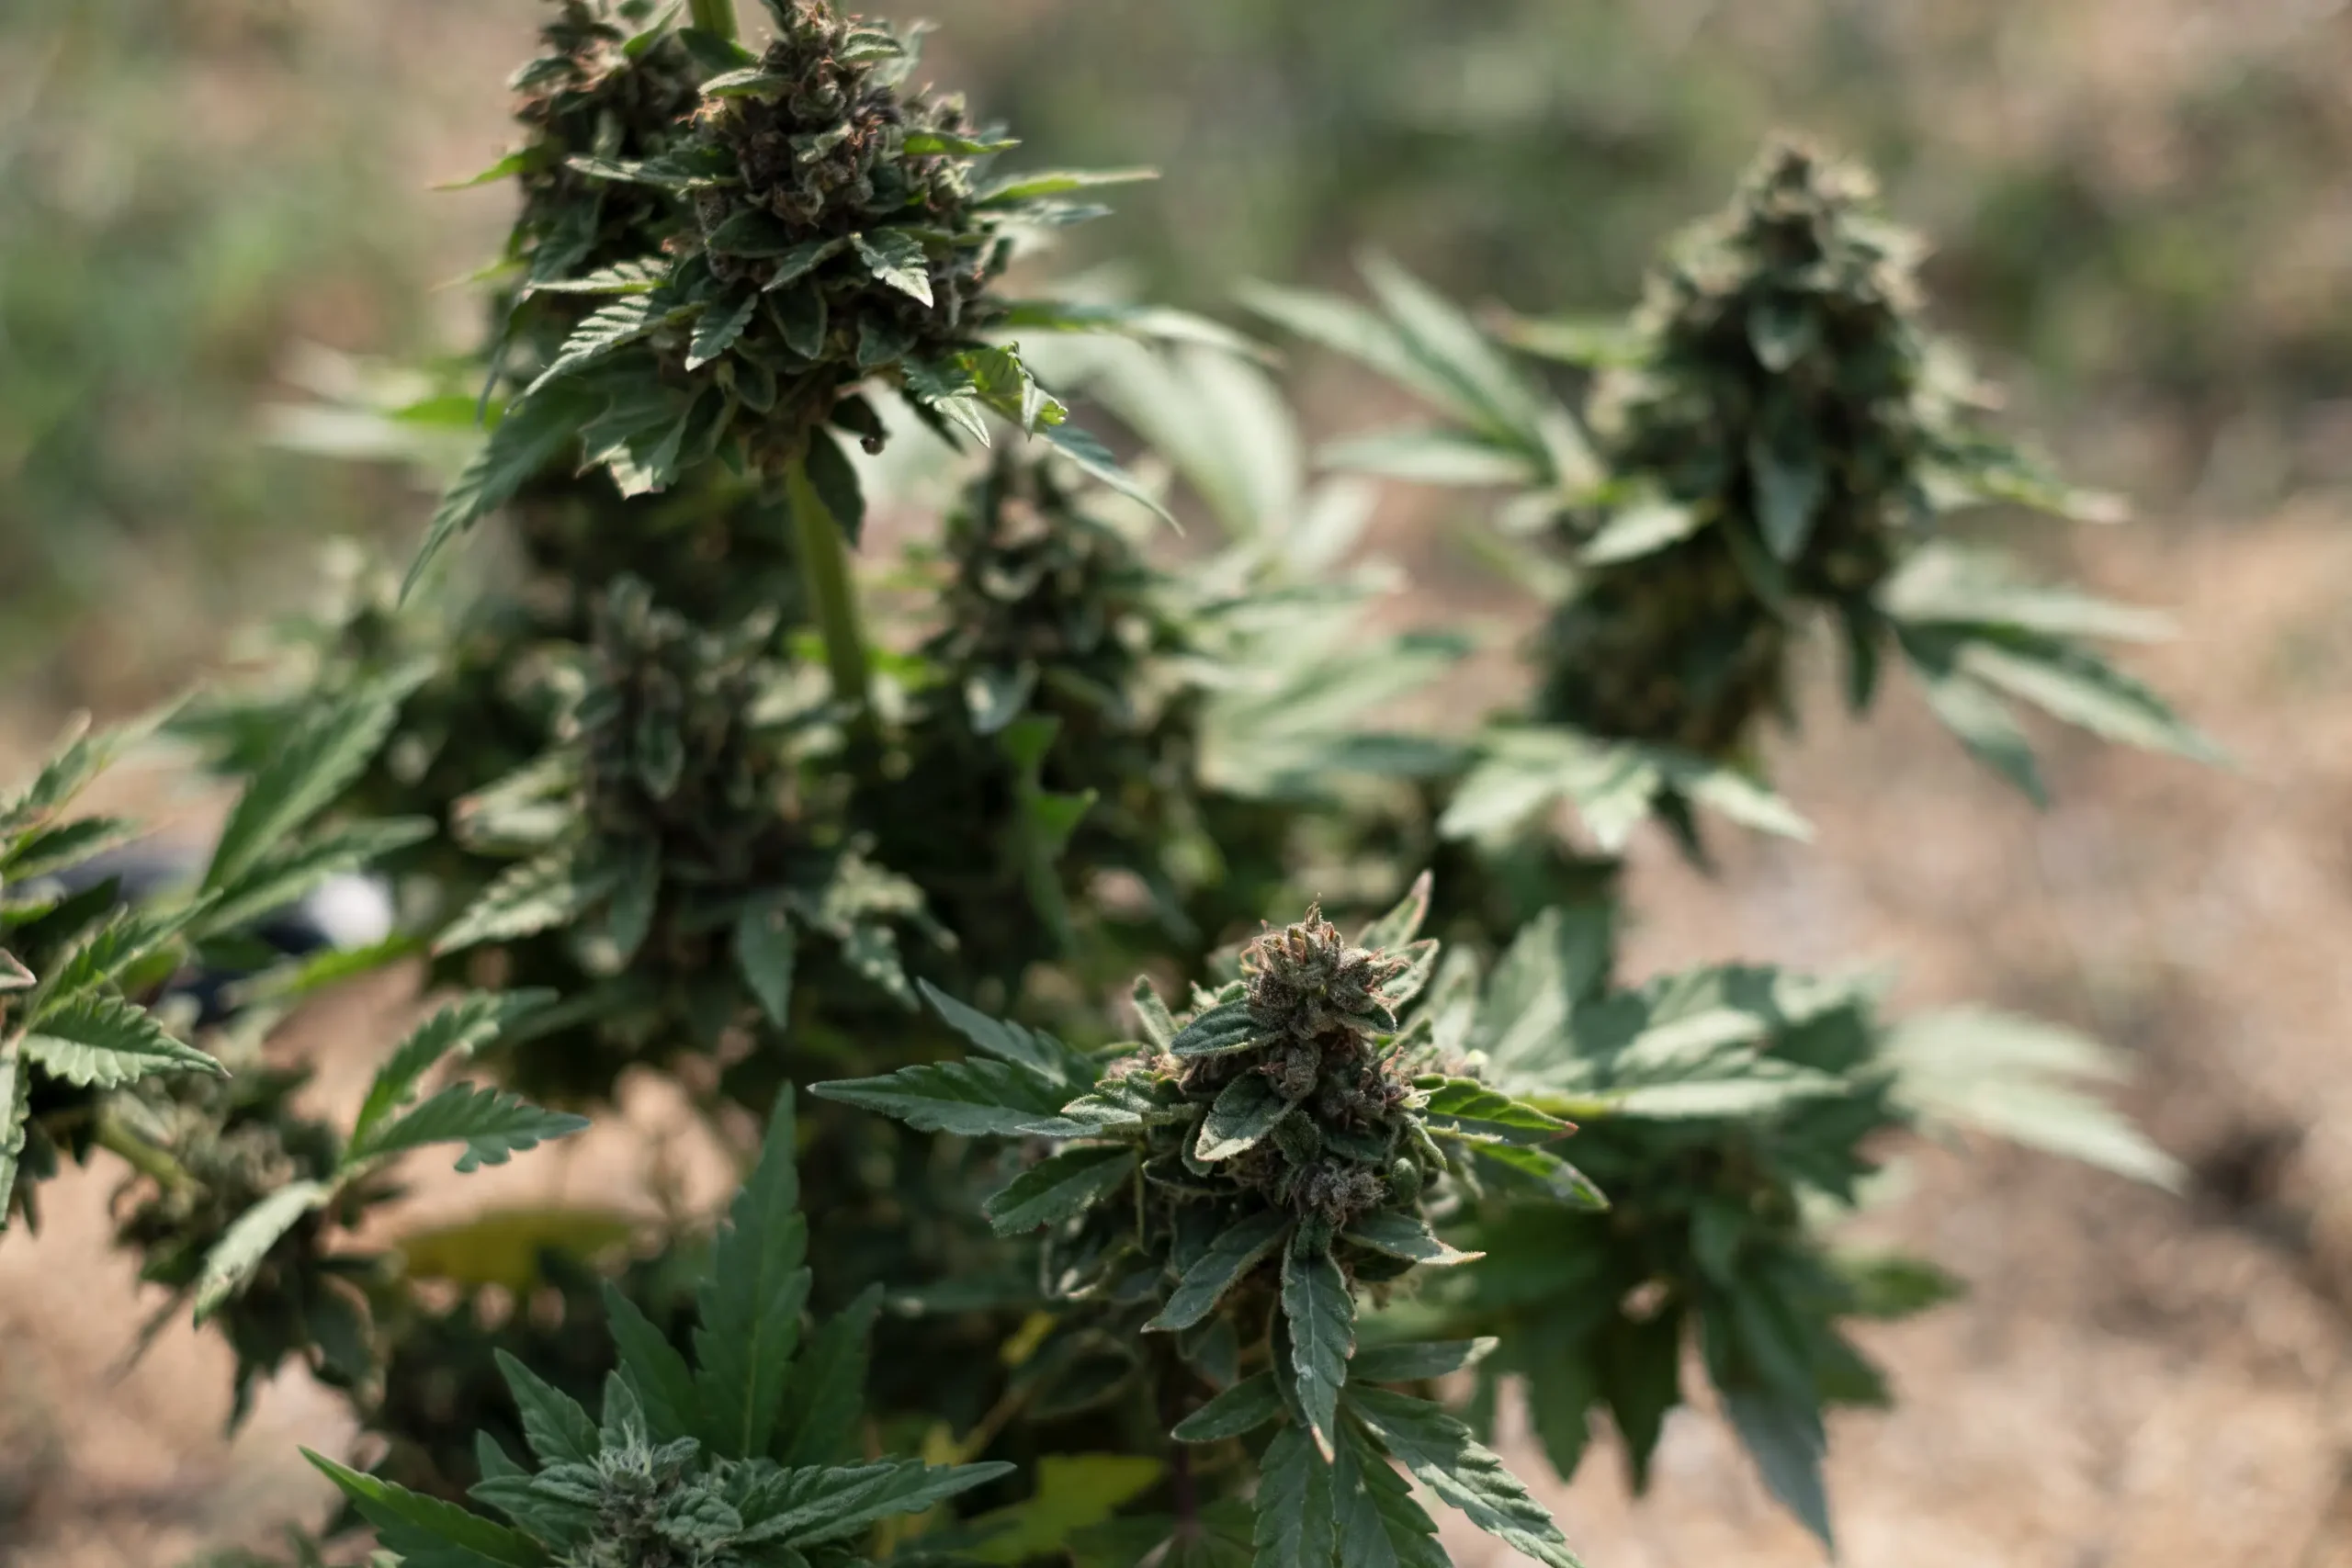
Then adjust your scouting. Pay more attention to interior airflow, moisture persistence, branch support, and areas where flowers contact leaves or neighboring branches.
This is also when the season’s remaining weather window becomes more important. Compare expected development with the likely arrival of cold or wet autumn conditions.
Flowering Checkpoint Weeks 3 to 5: protect function rather than forcing growth
As flower mass increases, avoid the first-grow temptation to make aggressive changes because you want the buds to become larger faster. The plant still depends on working roots, healthy leaves, enough light, and stable water availability.
Watch whether branches need additional support. Inspect flowers after rain or heavy dew. Check the inner canopy where humidity can remain higher than the outside suggests.
Cornell weather and disease guidance for hemp places strong emphasis on reducing prolonged leaf wetness and monitoring temperature, humidity, and rainfall. Outdoor cannabis is not identical to field hemp production, but the disease principle remains useful: wet tissue that dries slowly deserves attention before symptoms become obvious.
Flowering Checkpoint Weeks 6 and beyond: plan the finish, not just the harvest date
Late flower is when the weekly plan earns its value. Do not stare only at trichomes or breeder dates. Look at the whole finishing environment.
Is the plant still healthy enough to continue? Are nights becoming colder? Is heavy rain forecast? Is flower wetness taking longer to clear in the morning? Are branches carrying more weight than their supports were designed for?
The final decision is a balance between plant maturity and environmental risk. This article stays on planning rather than turning into a harvest-readiness guide, but the weekly record gives you the context needed to make that later decision calmly.
Failure modes: stagnant air, trapped moisture, heat load, frost, wind damage, water shortage, security, or neighbor impact
A weekly checklist is most useful when it helps you notice failure before failure becomes obvious. The first sign is often a pattern, not a dramatic symptom.
Use the weekly inspection to ask what changed since the last visit.
Stagnant air becomes easier to miss as the canopy fills
A site that felt open in Week 1 can become crowded by Week 8. The cannabis plant is larger, nearby vegetation has grown, and a privacy screen or fence may now sit much closer to foliage.
Check the interior after a damp morning. If outer leaves are dry but the middle remains wet, investigate why. Has surrounding vegetation closed the gap? Are branches pressed against a wall? Has the canopy become so dense that inspection is difficult?
Do not immediately solve every moisture concern with aggressive pruning. First look at the site around the plant. Sometimes removing an unnecessary external obstruction or restoring spacing solves the actual problem.
Trapped moisture can look harmless until flowering
Early in the season, slow drying may not cause obvious trouble. Later, dense flowers create protected pockets where moisture can persist.
After rain, inspect the inner canopy and flower clusters rather than touching only the outside of the plant. Look for damaged tissue, insect feeding, browning, or areas that remain wetter than the rest.
Your weekly notes should include how long the site stayed wet, not only how much rain fell. Two centimeters of rain followed by bright dry wind is a different disease environment from a smaller rainfall followed by cool humid weather.
Heat load can increase as the season and plant change
A container that tolerated spring sun may experience much stronger heat later. Nearby paving and walls can store solar energy. A larger plant may also be using water much faster.
If the plant repeatedly wilts at the same time each afternoon, check root-zone moisture before assuming drought. If the root zone is already adequately moist, the site may be creating excessive radiant or root-zone heat.
Compare the plant with nearby vegetation and the local forecast. If the problem exists only in the container position, the microclimate may be the real variable.
Do not respond to every wilt with more water
Wilt can occur in dry soil, but it can also appear with saturated roots, severe heat, root damage, or disease. Before watering again, check the moisture and recent conditions. Treating the symptom without checking the root zone can turn a diagnosis problem into an overwatering problem.
Frost risk matters twice
Most new growers think about frost only when moving plants outside in spring. The second frost problem appears near the end of the season.
Add two reminders to your weekly plan. Before Week 0, watch overnight lows and local frost guidance. Late in flowering, begin watching the first autumn frost window again.
Do not wait for the evening of a frost warning to discover that your temporary protection cannot fit around the plant or that moving the container is no longer physically possible.
Wind risk grows with canopy size and flower weight
The plant’s exposure changes as it becomes larger. A broad canopy catches more wind, and flowering branches carry more mass.
During weekly inspections, look at branch junctions and support points. Small splits, rubbing, loose stakes, and tightening ties are early warnings.
If support needs reinforcement, do it during calm weather. Storm preparation is safer before the storm exists.
Water shortage is often a planning failure before it becomes plant stress
By midseason you should know roughly how quickly the root zone dries during ordinary weather and during hotter periods. Use that information to ask whether your water system has enough resilience.
What happens if the hose fails? What happens if you are away? What happens if a heatwave increases demand for several consecutive days?
A backup might be stored water, a tested drip system, another lawful caregiver, or another practical source. The best backup is the one that can actually be used without creating a new problem.
Security changes as the plant becomes visible and aromatic
A small vegetative plant may attract very little attention. A large flowering plant can be visible from new angles and may produce much stronger odor.
Include visibility and access in the weekly site walk. Stand outside the immediate garden and look back toward the plant. Check gates, fences, and normal property-security measures.
Keep security passive, lawful, and safe. Do not use tripwires, improvised electrification, concealed sharp objects, chemical irritants, or devices intended to injure people or animals.
Neighbor impact can build gradually
Outdoor cannabis shares an environment with nearby homes when the garden is residential. Odor, visibility, runoff, lighting, noise from pumps, or branches crossing a boundary can become a problem even when the plant itself looks excellent.
The weekly boundary walk helps you see the grow from outside your normal viewpoint. If something is becoming intrusive, it is easier to adjust early than after it becomes a dispute.
My plant has looked healthy for weeks. Can I reduce inspections to every couple of weeks now?
Question sent by: Emma, via X.
I would keep the structured weekly inspection even when the plant looks healthy. The inspection is not only for visible disease. It catches tightening ties, changing water demand, new shade, blocked drainage, pest signs, slow flower drying, and weather exposure before they become obvious from a distance. Healthy weeks are exactly when you can make small corrections calmly.
Use the same failure sequence every time
When something looks wrong, use a four-part sequence:
Observe. Describe what changed without diagnosing it yet.
Verify. Check the root zone, weather, distribution of symptoms, support, pests, and recent changes.
Change one main variable. Avoid correcting water, feeding, pH, pruning, and environment simultaneously unless safety demands immediate action.
Recheck. Look for the expected response during the next irrigation, weather event, or inspection.
This sequence protects a first-time grower from one of the most common mistakes: turning a small unknown problem into several new variables.
Change one main variable and document it
When the cause is not urgent or dangerous, make the smallest sensible correction and give yourself a chance to see whether it worked.
Throwing several fixes at one symptom
Changing fertilizer, irrigation, pH, pruning, and location at the same time makes the result harder to interpret and can create new stress.
Legal/safety boundary without guessing local rules or recommending dangerous traps
A weekly grow plan is incomplete if the garden is horticulturally organized but legally or physically unsafe.
Cannabis rules vary between countries and can also vary between states, provinces, territories, municipalities, rental agreements, building rules, and other property arrangements. A global resource should not pretend to know the rule at your address.
Put legal verification before Week -6
Do not make legal research the final checkbox after the site is built. Do it before the planning countdown starts.
Check current official sources at every level that can apply to the property. Depending on jurisdiction, relevant rules may address plant count, visibility, locked areas, age, location, possession after harvest, odors, property access, or other requirements.
If official sources conflict or the rule is unclear, resolve that uncertainty before establishing the grow. Do not rely on an old forum post, a neighbor’s memory, or a social-media summary as the final authority.
Permission and legality are separate questions
A jurisdiction may permit home cultivation while a rental agreement, shared property arrangement, or other property rule creates additional restrictions. Likewise, land that appears unused is not automatically available for cultivation.
Grow only where you have a lawful right and permission to use the space.
Weekly safety includes the route around the plant
Outdoor grows accumulate equipment slowly. A hose crosses a path. A stake is added. A support line moves. A watering container stays beside the plant. By midseason, the area may be much harder to walk through than it was at Week 0.
During the weekly inspection, check for trip hazards, sharp exposed stakes, unstable structures, and standing water. If children or pets can access the area, the security plan should prevent unintended contact rather than depending on supervision every minute.
Store nutrients, pesticides, concentrates, fuels, cutting tools, and other garden chemicals or equipment securely and according to their labels.
Do not turn crop security into a hazard
Safe security uses normal barriers and access control. Fences, lawful locks, gates, lighting, cameras where permitted, and privacy measures are different from devices designed to injure somebody who enters.
Do not use concealed wires, hidden blades, improvised electric barriers, traps, chemical irritants, or weapons triggered by access.
The same rule applies to wildlife. Use appropriate exclusion methods, not harmful improvisation.
Safety Note: If the garden only feels secure after adding something that could injure a child, pet, visitor, wildlife, emergency worker, or you, redesign the security system.
Watch outdoor electricity and water carefully
A simple outdoor grow may not need electricity. If you add pumps, timers, cameras, supplemental equipment, or lighting, use components suitable for outdoor conditions and follow applicable electrical standards.
Do not leave indoor extension connections in irrigation paths or standing water. Weather protection should be designed for the equipment, not improvised after rain begins.
Keep the weekly log factual
Good records do not need to read like a diary. Keep them simple: date, plant stage, weather, watering, unusual observations, changes made, and the result at the next check.
If local law requires particular records, labels, tags, or other compliance steps, those rules take priority over this generic log.
Pre-season and weekly checklist that turns the article into a repeatable field procedure
Here is the full system in one place. You can copy this structure into a note and reuse it every season.
The weekly procedure has three parts:
Look backward. What changed since the last inspection?
Look at the plant now. What is the root zone, canopy, structure, and site telling you?
Look forward. What weather or developmental change is likely to matter before the next inspection?
The first-grow master timeline
| Stage / Period | Plant Status | Main Task | Risk / Check |
|---|---|---|---|
| Before countdown | No grow established | Verify current legal permission and property access. | Do not rely on outdated summaries or assumptions. |
| Week -6 | Site selection | Map direct sunlight and major shade sources. | Repeat later if seasonal vegetation can change the result. |
| Week -5 | Site testing | Observe temperature, wetness, drainage, cold pockets, and microclimate. | Change location if the site creates a major unmanageable problem. |
| Week -4 | Logistics | Test water access, wind exposure, inspection access, and security. | Plan for midsummer plant size rather than current plant size. |
| Week -3 | Root-zone preparation | Prepare tested native ground, raised bed, or clean container medium. | Check contamination history and drainage. |
| Week -2 | Plant preparation | Acclimate protected plants gradually to outdoor conditions. | Watch for sun scorch, severe wilt, or cold injury. |
| Week -1 | Final readiness | Install support, check forecast, stage watering, and confirm backup plan. | Do not discover missing infrastructure on placement day. |
| Week 0 | Outdoor placement | Place plant, water according to root-zone need, photograph baseline, and record conditions. | Avoid multiple unnecessary changes immediately after placement. |
| Week 1 | Establishment | Verify recovery, root-zone moisture, sun response, and wind stability. | Separate transition stress from true irrigation problems. |
| Week 2 | Early growth | Confirm irrigation pattern and drainage under real conditions. | Rainfall does not automatically mean the entire root zone was watered evenly. |
| Week 3 | Structure expanding | Inspect ties, stakes, access paths, and branch clearance. | Correct rubbing and constriction before stems thicken. |
| Week 4 | Routine established | Begin full top-to-bottom weekly scouting and consistent photography. | Do not treat before recording what you actually see. |
| Weeks 5-8 | Rapid expansion | Reassess water use, container/root volume, shade, support, and canopy access. | Old watering frequency may no longer match current plant size. |
| Midseason | Large vegetative canopy | Watch longer-range weather, surrounding vegetation, wind load, and security. | The site can become more crowded and less ventilated over time. |
| Flowering Checkpoint 0 | Clear reproductive transition | Record date, confirm development across the plant, and begin flowering-specific inspection. | Do not confuse isolated preflowers with full transition. |
| Flowering Weeks 1-2 | Early flower | Review remaining season, moisture persistence, inner-canopy airflow, and support. | Compare flowering progress with approaching weather risk. |
| Flowering Weeks 3-5 | Flower mass increasing | Protect root function, leaf health, support, and dry-down after rain or dew. | Avoid aggressive corrections intended only to force faster flower growth. |
| Late flower | Finishing stage | Watch cold, rain, humidity, branch load, plant health, and maturity together. | Do not evaluate harvest timing from one signal while ignoring weather risk. |
| End of cycle | Harvest planning | Prepare clean handling, drying space, security, and post-harvest workflow before cutting. | Do not wait until harvest day to discover that post-harvest space is not ready. |
The ten-minute weekly walk
Once the crop is established, you can perform a useful first pass in about ten minutes. Longer troubleshooting may be needed if something is wrong, but the routine itself stays simple.
First, stand back and look at the whole plant. Compare its shape and color with last week.
Second, move closer and inspect the newest growth, inner canopy, lower foliage, leaf undersides, stem, branch junctions, and root-zone surface.
Third, touch or otherwise assess root-zone moisture in a way appropriate to the medium. Check whether the watering pattern still matches plant size and weather.
Fourth, inspect supports, ties, container stability, drainage, and access paths.
Fifth, look outside the plant. Check wind exposure, surrounding vegetation, visibility, runoff, and anything that changed in the site.
Finally, review the coming weather and write one sentence about what deserves attention before the next inspection.
First Outdoor Grow Checklist
- Check current legal and property requirements before the season and recheck if rules or circumstances change.
- Record Week 0 as the permanent outdoor placement week rather than copying another grower’s calendar.
- Map direct sunlight before placement and repeat the check if seasonal shade changes.
- Watch local temperature rather than relying only on the regional forecast.
- Check how quickly dew and rain dry from the actual canopy location.
- Verify drainage before using native ground.
- Review soil history when contamination is possible.
- Physically test the water route before the plant becomes large.
- Identify prevailing wind and install support before severe weather makes it urgent.
- Acclimate protected plants gradually to outdoor sun, wind, and temperature.
- Photograph the plant from a consistent angle each week.
- Inspect the root zone before changing the watering schedule.
- Inspect ties and supports as stems thicken and flower weight increases.
- Look inside the canopy instead of judging plant health only from the outside.
- Check leaf undersides, branch junctions, stem base, and root-zone surface during the structured weekly inspection.
- Track major weather events next to plant symptoms in your notes.
- Start a Flowering Checkpoint count when reproductive development is clearly established.
- During flowering, track how long flowers and inner foliage remain wet after rain or dew.
- Reassess water demand as the canopy and root mass increase.
- Walk the property boundary and check visibility, odor, runoff, access, and neighbor impact.
- Keep security passive, lawful, and safe.
- Store nutrients, pesticides, tools, and other garden materials securely.
- When something changes, observe and verify before correcting several variables at once.
- After a correction, verify the result during the next relevant irrigation, weather event, or weekly inspection.
- Prepare the harvest and post-harvest area before the plant reaches the final finishing window.
Use green, yellow, and red notes
If detailed journaling feels like homework, use three colors or labels.
Green: normal condition, no action needed.
Yellow: a change that deserves monitoring or a small correction. Examples include a tie beginning to tighten, faster container dry-down, slower morning drying, or new shade from surrounding vegetation.
Red: a condition that can cause significant damage or a safety problem if ignored. Examples include standing water, severe wind instability, no dependable water during hot weather, suspected contaminated soil, serious legal uncertainty, dangerous electrical exposure, or rapidly progressing flower disease.
This keeps the notebook useful without making every observation feel urgent.
Verification is the final weekly step
The most important habit in the entire checklist comes after you make a change.
If you adjusted support, inspect it during the next windy period.
If you changed watering, check moisture after the next irrigation and again during the next dry-down.
If you moved a container away from a hot wall, compare the same afternoon period before and after the move.
If you opened space around a wet canopy, see whether the interior dries faster after the next dew or rain event.
If you suspected a nutrient or root-zone problem, check whether new growth or new symptoms move in the direction your diagnosis predicted.
A grower does not really know that a correction worked until the result is checked.
What you should know by the end of your first season
If you follow this system, the end of the grow should leave you with much more than a harvest.
You should know roughly how the sun moves through your site. You should know which weather makes the root zone dry quickly and which weather keeps it wet. You should know whether your cultivar begins flowering early enough for the local finish window. You should know where wind causes the most stress and which supports worked. You should know which parts of the canopy dry slowly and when the garden becomes most visible or aromatic.
Most importantly, you should have records showing what you changed and whether the change helped.
That is what turns a first outdoor grow into a second grow with experience behind it.