
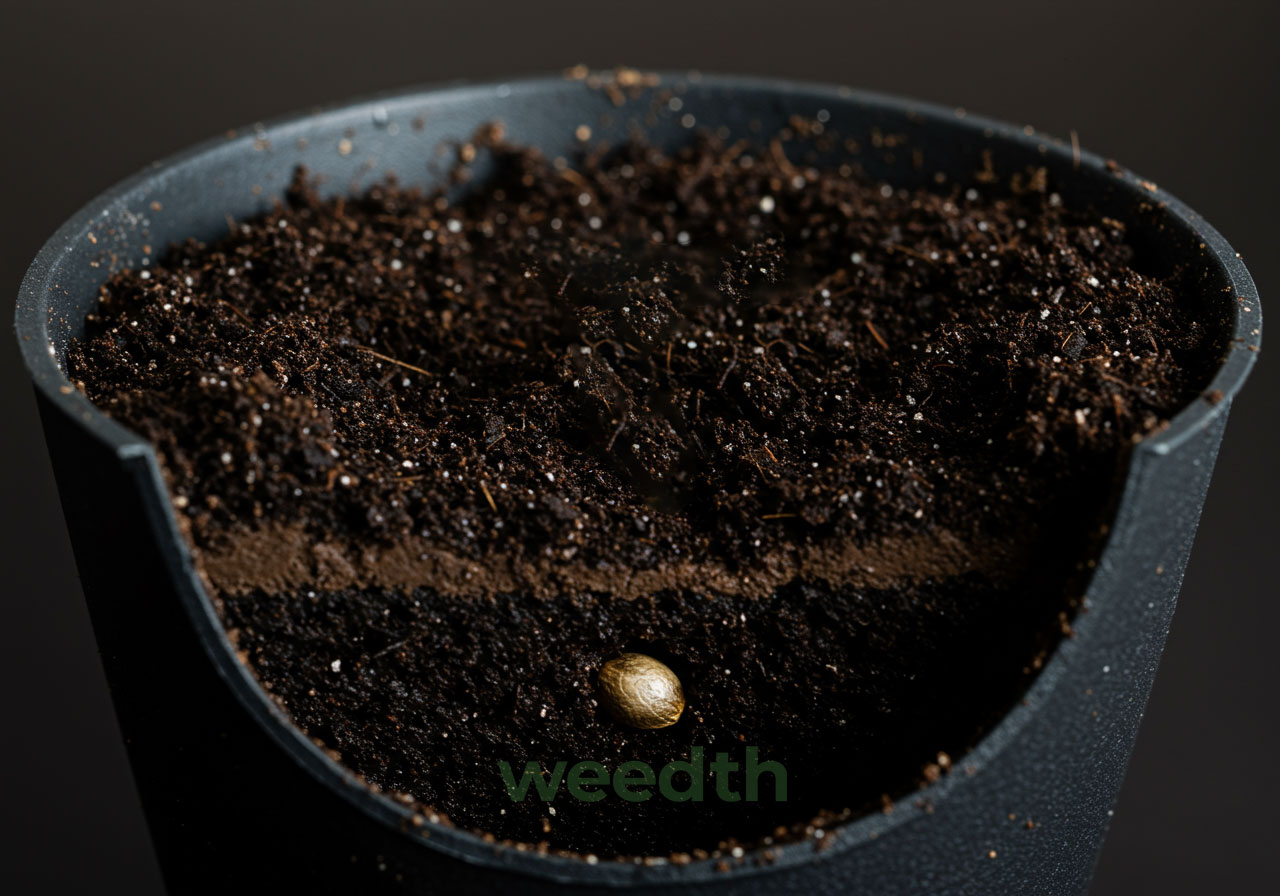
How Deep to Plant Cannabis Seeds
How deep should you plant a cannabis seed? For most small containers filled with a light, evenly moist seed-starting mix, place the seed about ¼ to ½ inch deep, or roughly 6 to 13 mm. If the seed has already opened and shows a taproot, stay near the shallow end of that range. Cover it lightly, keep the seed zone moist rather than soaked, and give the seedling a short, low-resistance route to the surface.
That is the quick answer. The useful answer is a little more flexible, because half an inch of loose mix does not behave like half an inch of compact garden soil. Planting depth works together with moisture, oxygen, temperature, seed vigor, and the physical resistance of the growing medium. Once we read those factors together, choosing the right depth becomes much easier.
Important: Cannabis laws vary by location. Possession of seeds may be treated differently from germination or cultivation, so confirm the rules that apply where you live before planting.
Germination and emergence are not the same event
Germination begins as the seed takes up water and the first root breaks through the seed covering. Emergence happens later, when the young shoot reaches the surface. A seed can germinate below the soil and still fail to emerge if it is buried too deeply, kept too wet, chilled, or trapped beneath a hard surface.
How Deep to Plant Cannabis Seeds: The Practical Range
If you want one dependable starting point, make a hole about ⅜ inch deep, or close to 1 cm. This sits comfortably inside the usual ¼-to-½-inch range and gives a cannabis seed enough cover to hold moisture without creating a long climb.
The measurement does not need laboratory precision. What matters is that the seed is fully covered by a light layer and that the surface is not pressed into a hard cap. Use the first joint of a clean fingertip, the end of a plant label, or a marked toothpick as a simple depth guide. Make the hole first, place the seed, then close it gently. Pushing a seed down through the mix can compact the path around it.
| Starting situation | Useful depth | Best starting point | Main adjustment |
|---|---|---|---|
| Uncracked seed in a light mix | ¼–½ in 6–13 mm |
About ⅜ in or 1 cm | Go slightly shallower if the mix compacts easily |
| Pre-germinated seed with a short taproot | About ¼–⅜ in 6–10 mm |
Seed body just below the surface | Protect the taproot without creating a deep tunnel |
| Coco or a fine soilless mix | ¼–½ in 6–13 mm |
About ⅜ in or 1 cm | Use a light cover and avoid packing fine particles |
| Prepared outdoor soil | ½–¾ in 13–19 mm |
Use the shallow end in heavy soil | Account for wind, rain, crusting, and surface drying |
| Field hemp in a fine, firm seedbed | Often ½–1 in 13–25 mm |
Follow local agronomic guidance | This is not the default for a hand-planted seed in a pot |
The wider field-hemp range explains why different articles appear to contradict one another. Agricultural recommendations often assume a prepared seedbed, direct drilling, outdoor moisture loss, and a large number of seeds. A single high-value seed in a controlled starter pot has a different risk profile. Indoors, it is usually better to control surface moisture than to bury the seed deeply for insurance.
What to Remember: Depth is measured from the top of the seed to the finished surface, not from the bottom of the hole. A ½-inch hole with a large seed inside may leave much less than ½ inch of cover.

“Is one inch too deep for a cannabis seed?”
Question sent by: Marcus Hale, via email.
In a small pot, one inch is deeper than necessary for most cannabis seeds. A vigorous seed may still emerge through a loose mix, but the extra distance increases the demand on its stored energy and keeps it in a wetter, lower-oxygen zone for longer. Remove a little loose cover if the seed was planted recently, but do not dig until you touch the seed or taproot. In a prepared field seedbed, deeper recommendations can make sense, but that is a different setting.
Why Planting Depth Matters So Much
A cannabis seed begins with a limited supply of stored energy. Those reserves support the first root, the curved young shoot, and the cotyledons until the seedling reaches light and starts photosynthesizing. The seed cannot replace that energy while it is still underground. Every extra millimeter of compact, wet, or cold medium makes emergence more demanding.
The seed needs water, but it also needs oxygen
Water starts imbibition, the physical uptake that swells the tissues and activates germination. Oxygen supports respiration as the embryo begins to grow. This is why “keep it wet” is incomplete advice. A saturated seed zone may contain plenty of water while offering too little air. Deep planting makes that problem more likely when the medium is fine, compacted, or repeatedly watered.
At the other extreme, a seed resting at the surface can hydrate, begin to open, and then dry before the taproot becomes established. The ¼-to-½-inch range is useful because it buffers small moisture changes while preserving access to air.
The shoot has to lift soil before it can use light
After the radicle emerges, the hypocotyl curves upward and carries the cotyledons toward the surface. Loose material moves aside. A crusted or compressed layer behaves more like a lid. Two seeds at exactly the same measured depth can therefore face very different resistance.
This gives us a better rule than “deeper is safer”: use the shallowest depth that still keeps the seed zone steadily moist in your setup. When moisture can be controlled, a short route to the surface usually wins.
Temperature changes both speed and risk
Stable warmth helps cannabis seeds germinate and emerge consistently. Controlled research on industrial hemp found a broad favorable germination range from about 19 to 30°C, while constant 35°C reduced seedling emergence in the tested material. For a practical home setup, a steady seed-zone temperature near 21 to 26°C, or roughly 70 to 79°F, is a comfortable target for many viable seeds.
A cold seed may simply move slowly, tempting the grower to add more water. That combination, cold plus repeated watering, can be more damaging than the original delay. Measure the medium if possible, especially when the pot sits on a cold basement floor, near a window, or directly on a heating mat.
Do not use strong heat to “force” a seed
A heating mat can warm a cold root zone, but an unregulated mat can overheat a small container quickly. Warm the medium gently, use a thermostat when practical, and verify the temperature where the seed actually sits rather than relying on the room thermostat.
Direct Sowing or Planting a Germinated Seed?
Both methods can work well. The best choice is the one you can perform cleanly and consistently. Direct sowing reduces handling. Pre-germination lets you confirm that the seed has opened before it goes into the medium. Neither method changes the basic need for a shallow, airy, evenly moist seed zone.
Direct sowing into the growing medium
With direct sowing, the seed completes germination where the seedling will begin growing. There is no exposed taproot to move and no paper towel to dry out. This simplicity is a real advantage, particularly when the medium is clean, light, and easy to keep stable.
The tradeoff is visibility. You cannot see whether the seed has cracked, so it is easier to mistake slow germination for a watering problem. Mark the planting point and date, then resist the urge to investigate every few hours.
Planting after paper-towel or water germination
A pre-germinated seed is more delicate because the emerging root is living tissue, not a handle. Prepare the pot and planting hole before opening the paper towel. Move the seed by the shell with clean tweezers or clean fingertips, keep the root exposure brief, and never pinch, wipe, or straighten the taproot.
If the taproot is only a few millimeters long, make a shallow hole and place the root downward or gently to the side. Let the seed body rest just below the surface and close the mix loosely around it. If the root has grown long, make a narrow channel deep enough to receive it without bending it sharply, but keep the seed body near the surface. The answer is not to bury the whole seedling at the bottom of a deep hole.
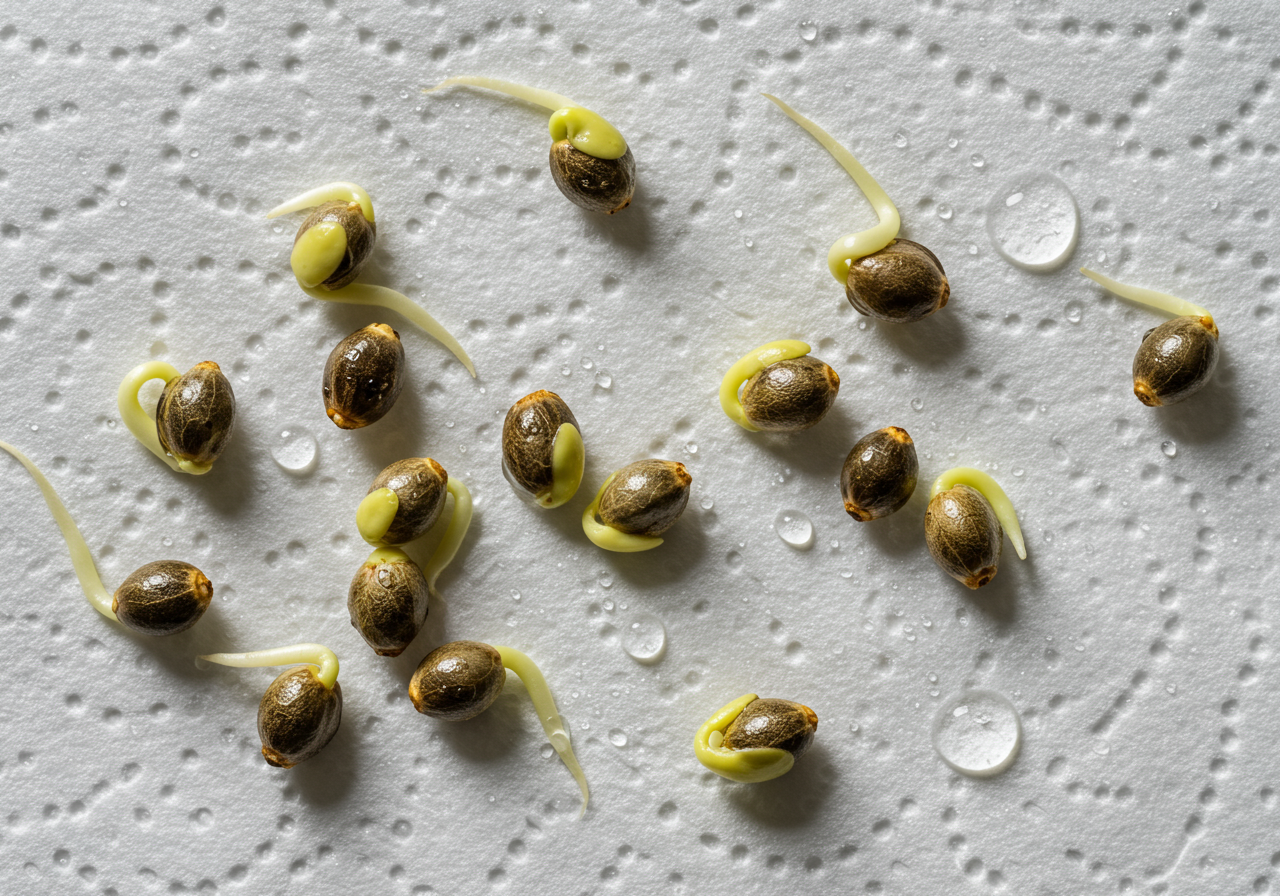
Pro Tip: Set up the labeled pot, planting hole, tweezers, and water before handling a germinated seed. The safest transfer is a short, calm transfer.
“My taproot is almost an inch long. Do I bury all of it?”
Question sent by: Tessa Morgan, via contact form.
Make a narrow channel that accepts the root without folding or forcing it, but keep the seed shell close to the surface. Guide the root downward or in a gentle curve, then close the medium around it lightly. Do not push the root into the hole with a tool. A long taproot is fragile, so the priority is preventing abrasion and sharp bends rather than matching a rigid depth number.
Does the seed need a specific orientation?
If the taproot is visible, place it downward or slightly sideways. The root responds to gravity and the shoot turns upward, but a sensible starting orientation reduces the correction the seedling must make. If the seed is unopened and you cannot confidently identify its ends, place it on its side. Cannabis seeds can orient themselves; unnecessary handling creates more risk than a sideways seed.
Do not confuse orientation with depth. A perfectly oriented seed can still fail beneath a compact inch of wet soil, while a sideways seed can emerge normally from a light, well-managed cover.
What is the taproot?
The taproot is the first primary root that emerges from a germinating seed. It anchors the seedling and begins exploring for water and oxygen. The white tip is actively growing and easily damaged, which is why the seed shell, not the root, should be used as the handling point.
How to Plant a Cannabis Seed Step by Step
Let us turn the depth range into a repeatable method. The goal is not to create a sterile laboratory. It is to remove the common variables that make people second-guess a seed that is doing exactly what it should.
1. Choose a light starter medium
Use a clean, fine-textured mix that holds moisture but still drains and breathes. Large bark pieces can leave air gaps around the seed, while dense garden soil may compact or carry pathogens. A modest seed-starting mix, light potting mix, or properly prepared coco-based medium is easier to manage.
Young seedlings do not need a heavily fertilized root zone. The seed carries reserves for its first emergence, and a “hot” mix can add stress before the roots have established. If the main growing medium is rich, create a small mild starter pocket around the seed or begin in a separate starter container.
2. Pre-moisten before making the hole
Mix water through the medium until it is evenly damp. It should feel moist throughout without dripping when gently squeezed. Pre-moistening prevents the first watering from collapsing the hole, floating the seed, or creating dry pockets beside it.
Fill the container loosely and settle it with a light tap. Do not press the surface hard. If the medium shrinks dramatically after a normal watering, it was either too dry or too loosely filled to hold a stable planting depth.
3. Make a measured planting hole
For most small starter pots, make the hole about ⅜ inch or 1 cm deep. Use a marked tool if depth is difficult to judge. A narrow hole is better than a wide crater because it keeps the seed in position and makes closing the surface simple.
4. Place the seed without forcing it
Set an unopened seed on its side or with the likely root end downward. Place a germinated seed with the taproot down or gently sideways. The seed should rest in the hole; it should not be pushed into dense material at the bottom.
5. Close the surface lightly
Brush loose medium over the seed until the surface is level. Use just enough contact to remove a large air gap. Do not tamp the spot with a fingertip. Think of placing a breathable blanket over the seed, not sealing it beneath a lid.
6. Add only the water the seed zone needs
If the medium was pre-moistened correctly, a few gentle drops or a light mist may be enough to settle the cover. Do not repeatedly soak a large final pot just because the seed is small. A seedling cannot use all the water stored in that volume, and the center may remain saturated long after the surface looks dry.
Apply water around the planting point slowly and widen that circle as the seedling establishes roots. The exact amount depends on container size, medium, temperature, and airflow, so observe the moisture zone instead of following a fixed milliliter number.
7. Mark the seed and create a stable environment
Add a label with the planting date and seed identity. Put the container in stable warmth and arrange gentle light before emergence so the seedling does not surface into darkness and stretch while you are away. The light should support a young seedling without overheating or drying the surface.
A humidity dome is optional. Use one when the surface dries too quickly, but vent it and remove it once the seedling emerges. If condensation is constantly running down the dome and the medium remains glossy wet, the setup needs less water, more ventilation, or both.

Before you leave the seed alone
- The container has drainage and the medium is evenly moist, not saturated.
- The seed is about ¼ to ½ inch below the finished surface.
- The cover is loose and level, with no hard thumbprint over the seed.
- A visible taproot was handled by the shell and placed without a sharp bend.
- The seed location and planting date are labeled.
- The seed zone is warm and stable, not sitting directly on uncontrolled heat.
- Gentle seedling light will be available as soon as the shoot emerges.
- You have a moisture-check plan, not an automatic watering calendar.
“Should I soak the whole pot after planting one seed?”
Question sent by: PrairieNorth, via Facebook page.
Not automatically. Pre-moisten the medium evenly, plant the seed, and settle the immediate area gently. A small seed in a large pot cannot use a potful of water, so repeated full saturation can leave the center cold and oxygen-poor. Keep the seed zone stable, then expand the watering area as roots and leaves develop.
Adjusting Depth for Soil, Coco, Plugs, and Rockwool
The ruler gives us a starting point. The medium tells us whether to use the shallow or deep side of the range. Compare how easily the material compacts, how quickly its surface dries, and whether the seed sits in a preformed hole.
| Medium | Depth approach | Moisture approach | Common mistake |
|---|---|---|---|
| Light seed-starting mix | ⅜ in or 1 cm is a strong default | Pre-moisten evenly and settle gently | Compressing the fine surface after planting |
| Potting soil with coarse pieces | Create a small pocket of screened fine mix | Keep the pocket moist without soaking the pot | Leaving the seed against bark or a large air gap |
| Coco coir | ¼–½ in with a very light cover | Keep consistently moist and well aerated | Letting a small plug dry or packing fine coir tightly |
| Peat pellet or starter plug | Use the opening, but keep the seed near its top | Hydrate fully, then let excess water drain | Dropping the seed to the bottom of a deep opening |
| Rockwool cube | Place just inside the prepared hole and close lightly | Moist throughout, never standing in water | Over-compressing the cube or keeping it submerged |
| Dense outdoor soil | Stay shallow and improve the small seed pocket | Protect from crusting and heavy rain | Using depth to compensate for unsuitable soil structure |
Soil and light potting mixes
A light seed-starting mix is forgiving because the shoot can move through it with little resistance. If the potting soil contains large woody pieces, do not simply plant deeper to find moisture. Screen a handful of the mix or create a small pocket of finer material around the seed. The seed needs contact with moist particles, not a cavern beneath bark.
Garden soil taken straight from the ground is usually a poor choice for a small indoor starter pot. It can compact, drain unpredictably, and bring insects or disease organisms indoors. If direct outdoor sowing is lawful and appropriate, loosen a small area, remove stones and coarse debris, and use a fine, light cover over the seed.
Coco coir
Coco can provide an airy root zone, but small volumes can dry quickly. Plant within the same ¼-to-½-inch range, using the shallow side for a seed with an exposed taproot. Keep the coco evenly moist and remember that a fine grade packs more readily than a coarse, aerated blend.
Coco is also chemically different from soil. Once the seedling begins establishing, nutrition and water quality need to fit the coco system. That later feeding decision does not justify adding concentrated nutrients directly to the planting hole.
Peat pellets and propagation plugs
Many plugs have a hole deeper than the seed should sit. Treat that opening as access, not a command to drop the seed to the bottom. Place the seed near the upper part of the plug and gently close the surrounding fibers. Hydrate the plug completely before planting, then allow it to drain so the seed receives both moisture and air.
A netted pellet should remain evenly moist but should not stand in a tray of water. Once roots show at the sides, transplant before the small plug begins cycling from soaked to dry too rapidly.
Rockwool
Rockwool holds a great deal of water while also containing air when it is managed correctly. Place the seed just inside the prepared opening, not at the bottom of a long hole, and close the top lightly. Do not squeeze a wet cube around the seed because that changes its pore structure and can leave the center too wet.
Condition and use rockwool according to the needs of that material and your cultivation system. A cube should be moist throughout but not submerged continuously. After roots appear, the next cube or system should be ready so the seedling does not become root-bound in a tiny block.
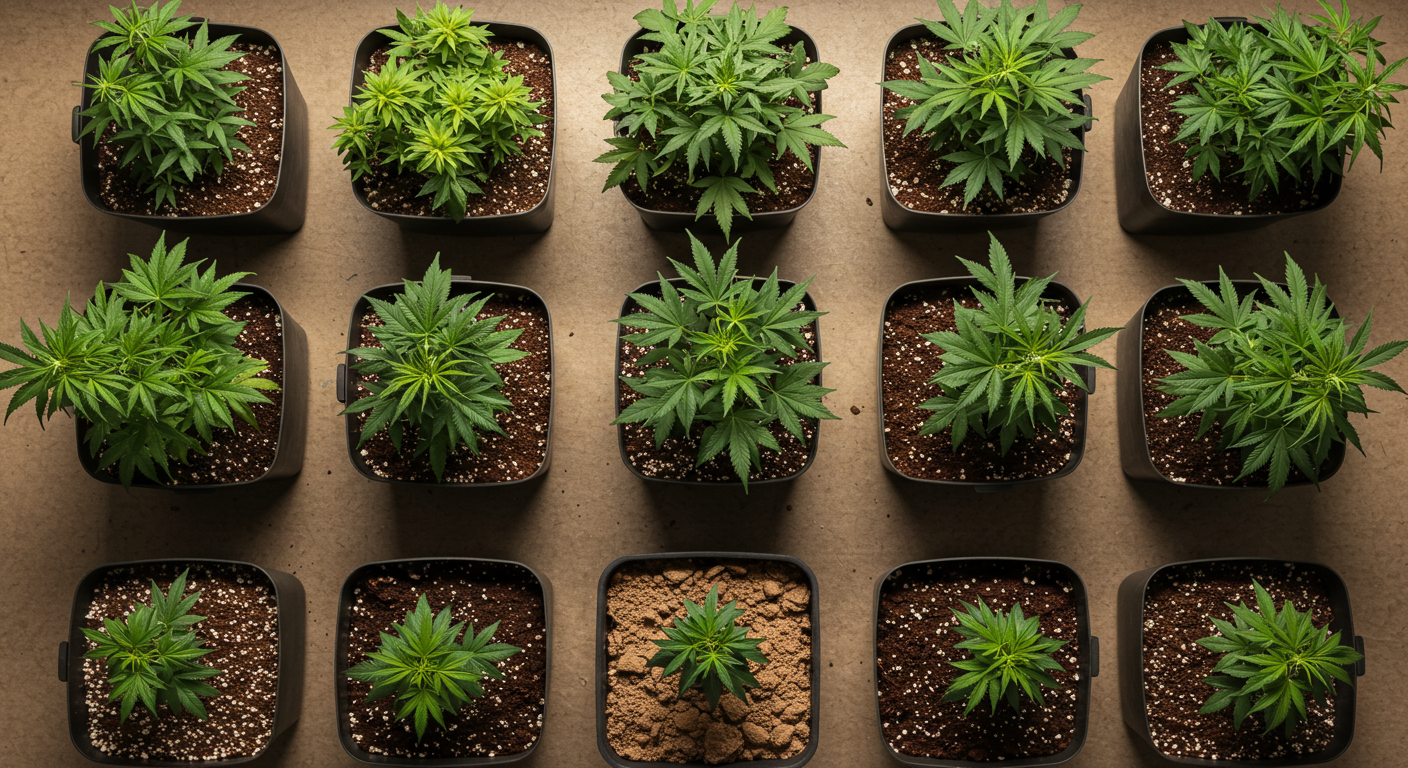
Advice: If a medium needs heavy pressing to hold a planting hole, improve the seed pocket instead of burying the seed deeper. Depth cannot repair poor structure.
“The hole in my starter plug is nearly an inch deep. Should the seed go to the bottom?”
Question sent by: Lauren Pierce, via email.
No. Keep the seed near the upper section of the plug, usually with about ¼ to ½ inch of material above it. Close the opening lightly so the seed has contact without being wedged. A manufactured hole is designed for access and flexibility; its full depth is not a planting instruction for every seed.
Starting in a Small Pot or the Final Container
A starter pot is easier to read. You can feel its weight, control the moisture zone, and keep the seedling under suitable light without maintaining a large volume of unused wet medium. The cost is one later transplant.
A final container removes that transplant, which can be attractive for autoflowering plants or anyone who prefers minimal handling. The challenge is watering scale. The container may hold far more water than a seed or new seedling can use, so we manage a small local zone first and widen it as roots expand.
| Choice | Why it can work | What needs attention |
|---|---|---|
| Small starter pot | Easy moisture control, easy observation, efficient use of light and space | Transplant before roots become crowded or the pot dries too quickly |
| Final container | No transplant and plenty of future root volume | Do not saturate the entire container repeatedly around a tiny root system |
| Biodegradable starter | Can reduce root disturbance during planting | Remove or open restrictive material if it will not break down quickly in your conditions |
Whatever container you choose, drainage is not optional. Water must be able to leave, and air must be able to return to the pore spaces. A decorative cup without drainage can turn a correct planting depth into a stagnant seed zone.
Do
Control a small root zone first
Pre-moisten the medium, plant at a shallow measured depth, and water a modest area around the seed. Expand that area as roots and leaf area grow.
Avoid
Treating a seed like a mature plant
Do not repeatedly drench a large container, add strong fertilizer, or use intense light to speed a process that depends first on stable moisture, oxygen, and warmth.
Indoor and Outdoor Planting Need Different Adjustments
Indoor containers
Indoors, you control most of the reasons a seed might need deeper protection. You can reduce airflow over the surface, stabilize temperature, use a dome briefly, and deliver water precisely. This is why the shallow ¼-to-½-inch range works so well in a light container mix.
Watch the real seed-zone temperature. A warm room can still have a cold floor, and a bright fixture can dry the top of a small pot while the center remains wet. Raise pots off cold concrete and give them gentle air movement, but do not aim a fan directly at the planting point.
Outdoor containers and prepared ground
Outdoors, the surface can change within hours. Sun and wind dry it; rain compresses it; birds or rodents disturb it; and cold nights slow the seed. In loose prepared soil, planting around ½ inch deep can provide useful moisture protection. In dense clay or crust-prone soil, staying shallower and improving the cover is usually safer than burying the seed deeply.
A clean, ventilated cloche or fine protective mesh can reduce disturbance where lawful, but it must not trap extreme heat. Check it daily and remove it once the seedling no longer needs protection. Never use wildlife controls that can injure animals, children, visitors, or pets.
Heavy rain can expose one seed and bury another. If severe weather is expected, starting in a protected container and transplanting later may be more reliable than trying to compensate with extra depth.
Remember: Outdoor depth is not just about the average weather. It is about the strongest rain, fastest drying afternoon, and hardest surface crust the seed may face before emergence.
“Can I plant deeper outdoors so I do not have to water as often?”
Question sent by: Nolan Avery, via email.
A small increase in loose, fast-drying soil can protect moisture, but depth is not a substitute for checking the seed zone. A deeply buried seed may stay wet while struggling to emerge, especially after rain compacts the surface. Improve the small planting pocket, protect it from harsh weather, and use gentle moisture management rather than treating extra soil as a reservoir.
How Long Should a Cannabis Seed Take to Emerge?
A fresh, vigorous seed in stable conditions may crack within 24 to 72 hours and emerge from a shallow medium a few days later. Other healthy seeds take longer. Temperature, seed age, genetics, storage history, moisture, and planting depth all affect the clock.
Think in stages rather than a single deadline:
- First 24–48 hours: the seed is taking up water and may begin opening.
- Days 2–5: many viable seeds develop a root and begin moving toward emergence.
- Days 5–7: a well-planted seed may emerge, open its cotyledons, and begin turning green.
- Days 7–10: slower seeds can still emerge, especially in cooler conditions or after less-than-ideal storage.
- Around 10–14 days: continued absence makes a careful diagnosis more reasonable, though there is no universal expiration date.
These are observation windows, not promises. Controlled studies have documented radicle emergence within 24 to 48 hours in some conditions, while other cannabis material produced seedlings over a longer period. Your seed is not late simply because another grower posted a 24-hour photograph.
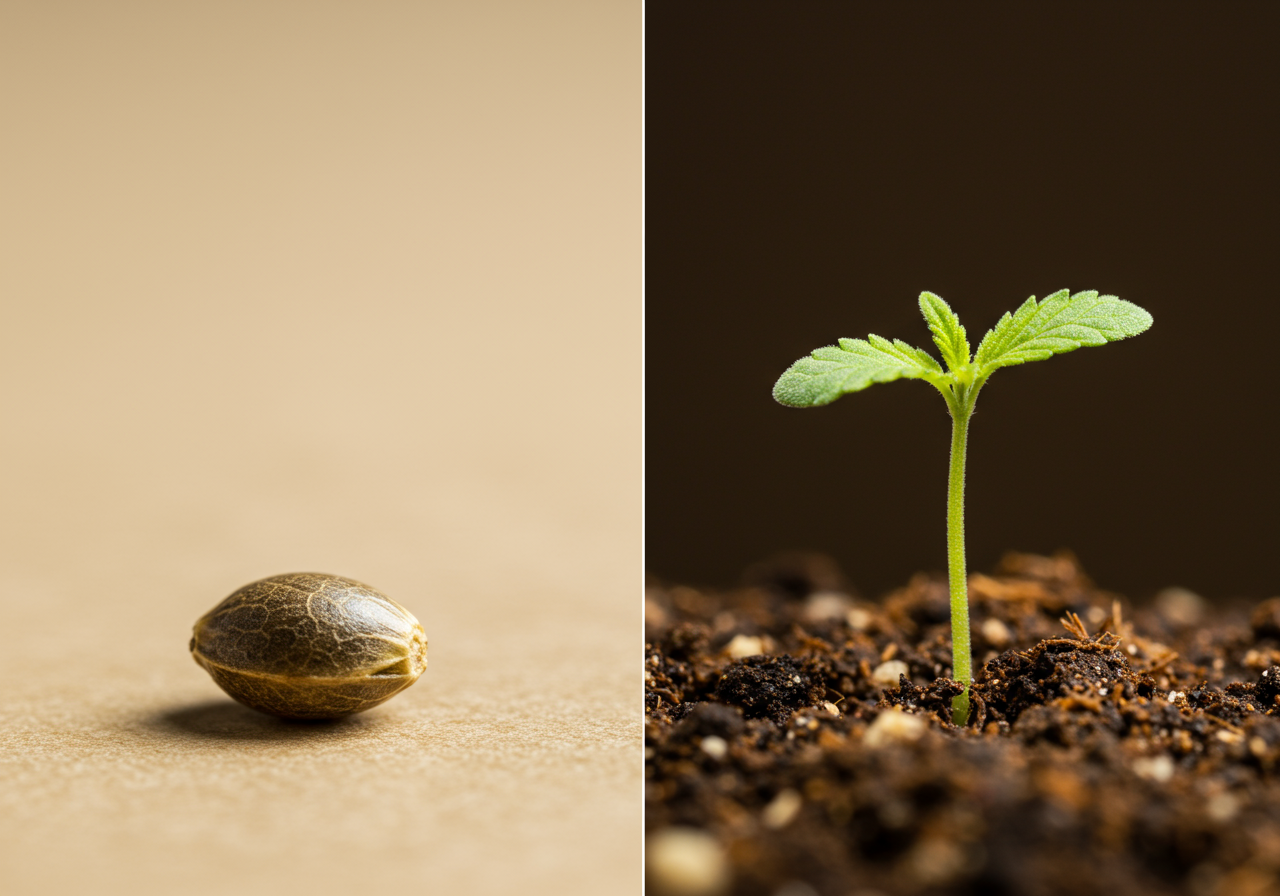
“It has been four days and I see nothing. Should I dig it up?”
Question sent by: Claire Donovan, via email.
Usually not yet. Confirm that the seed zone is warm, lightly moist, and not saturated, then give it more time. Digging can break a root that has already emerged below the surface. If conditions were poor or nothing appears after a longer waiting period, inspect one test seed carefully from the side rather than repeatedly excavating the planting point.
Do not panic-water a slow seed
A delayed seed does not drink faster because more water is added. Repeated watering can remove oxygen, chill the root zone, compact the cover, and turn a recoverable delay into decay. Check moisture below the surface before adding anything.
How to Read the Surface After Planting
The top color of the pot is only one clue. A pale surface can hide a wet center, while a dark surface can dry quickly beneath strong airflow. Learn the small planting zone rather than watering by appearance alone.
If the surface dries within hours
Reduce direct airflow, move intense heat away, or use a ventilated humidity cover for a short period. Add small amounts of water gently around the marked point. Do not solve rapid evaporation by filling the pot with water from below unless you understand how wet the center becomes.
If the surface stays glossy or wet for days
Pause watering and improve the environment. Confirm drainage, temperature, and airflow. A cool, fine medium in an oversized pot can remain wet much longer than expected. Do not add fertilizer to a seed that looks “stalled” in a saturated root zone.
If a crust forms
A crust usually indicates fine particles, compaction, forceful top watering, or all three. If the seed has not emerged, lightly roughen only the very top surface around the planting point without digging to seed depth. Prevention is safer: pre-moisten, cover with loose fine material, and water with low force.
If the seed becomes exposed
Sprinkle a small amount of moist, loose mix over it until the shell is just below the surface. Do not push the seed down with a finger. If a taproot is visible, shield it from light and drying immediately while disturbing it as little as possible.
Master Advice: Make one correction at a time. When warmth, water, airflow, depth, and light are all changed together, you cannot tell which change helped and which one created the next problem.
Signs the Seed Was Planted Too Deep
Depth problems are difficult to diagnose from the surface alone, but several clues can point in the same direction:
- Other seeds from the same batch emerge while one deeply planted pot remains empty.
- The medium has stayed cold and wet for several days.
- A test seed has germinated below the surface but the shoot is pale, curved, or unable to break through.
- The surface was pressed firmly or formed a hard crust after watering.
- A late seedling emerges weak after a much longer underground route.
If you know the seed was planted too deeply and only a short time has passed, carefully remove a thin layer from the top. Stop before reaching the seed. If the seed has already germinated, avoid lifting or rotating it. A gentle reduction in cover is safer than a full excavation and replant.
Do not assume every non-emergence is a depth failure. Old seed, temperature stress, saturated medium, disease, and nonviability can create the same empty surface.
“I planted too deep yesterday. Can I remove some soil now?”
Question sent by: Eli Bennett, via Facebook page.
Yes, if the cover is loose and you can remove only the upper layer without touching the seed. Bring the finished depth closer to ¼–½ inch, then leave the area stable. Do not search for the seed, rotate it, or pack the newly adjusted surface. If you are uncertain about its exact location, a small reduction in cover is safer than a deep rescue attempt.
Signs the Seed Was Planted Too Shallow
A shallow seed can germinate normally when humidity is controlled, but it has less protection from drying and movement. Watch for:
- The shell or taproot becomes visible after watering.
- The seed opens and then the white root tip dries or darkens.
- The seedling emerges with little anchorage and leans because roots were exposed.
- The shell remains dry and tightly attached because it did not receive enough moist contact.
- One side of a tray emerges while the windward or warmer edge stays empty.
Add a light ring of moist medium around an unstable stem or exposed root. Support the seedling without burying the cotyledons. Increasing light intensity will not repair exposed roots, and heavy watering may wash away the little cover that remains.
When the Seed Shell Stays on the Seedling
A seedling sometimes emerges wearing the shell like a helmet. This can happen when the seed was very shallow, the cover was too loose to provide gentle friction, or the inner membrane dried around the cotyledons. It does not always require intervention.
First, raise local humidity briefly and place a small drop of clean water on the shell. Give it time to soften. The expanding cotyledons often push it away. If the shell is clearly loose after moistening, it may be eased off with clean tools, but never pull against resistance. The thin membrane underneath can hold the cotyledons together even after the hard shell moves, so inspect carefully and keep it moist.
If you must intervene, steady the seedling without squeezing the stem and move the shell by its edges. A damaged growth tip is a much bigger problem than a shell that needed another few hours.

“Should I pull off a shell that is stuck on the first leaves?”
Question sent by: NorthernStep, via Facebook page.
Soften it first and wait. Add a small drop of water, increase local humidity briefly, and let the cotyledons work. Only assist when the shell is visibly loose and can move without force. If it resists, stop. Pulling too early can tear the cotyledons or damage the growth point.
Troubleshooting a Seed That Has Not Emerged
Before touching the pot, work through the evidence. A useful diagnosis begins with what the seed experienced, not with the most dramatic possible explanation.
| What you observe | Likely possibilities | What to check | Best next move |
|---|---|---|---|
| Nothing after several days | Cool medium, old seed, deep planting, or normal variation | Seed-zone temperature, planting date, and moisture below the surface | Stabilize conditions and wait before inspecting |
| Surface stays wet | Overwatering, poor drainage, oversized pot, low temperature | Drain holes, pot weight, center moisture, and heat source | Pause watering and restore air to the root zone |
| Seed cracked but stopped | Drying, root damage, saturation, or low vigor | Taproot color, surrounding moisture, and handling history | Correct the environment without moving the root repeatedly |
| White surface growth | Constant surface moisture and weak airflow | Whether growth is on the medium, seed, or collapsing stem | Reduce surface wetness and improve gentle ventilation |
| Seedling collapses at soil line | Damping-off or severe stem/root stress | Pinched dark stem, saturated medium, sanitation, and spread | Isolate, improve conditions, and do not reuse contaminated material |
The seed is still firm and has not opened
A firm unopened seed may be dormant, slow, cold, or nonviable. Return it to stable warmth and moisture without submerging it indefinitely. Do not scarify, cut, or chemically treat valuable seeds casually. Specialized treatments used in research are controlled protocols, not proof that stronger household treatments are safer.
The seed is soft, dark, or smells unpleasant
Soft tissue and an unpleasant odor point toward decay. Check whether the medium remained saturated, the container lacked drainage, or the seed was damaged before planting. Reusing the same wet pocket for a replacement seed without correcting the cause invites the same result.
The taproot appeared and then turned brown
A root tip may darken after drying, abrasion, overheating, chemical exposure, or low-oxygen conditions. Stabilize the environment and avoid more handling. A seed with damage behind the growing tip may still produce side roots, but a completely collapsed embryo is unlikely to recover.
White fuzz appears near the seed
Fine root hairs can look like white fuzz when they occur in an orderly zone along a healthy root. Irregular growth spreading over the shell or medium may be fungal. Look at location, pattern, smell, surface wetness, and seedling condition rather than treating every white filament as mold.
“I found the seed intact after a week. Can I replant it shallower?”
Question sent by: Maya Thompson, via email.
If it is firm, clean, and undamaged, you can place it in a fresh, properly moist pocket at the correct depth. First correct the condition that delayed it, such as cold medium, saturation, or compaction. If the seed is soft, split in a decayed way, or smells unpleasant, changing depth will not restore viability.
Do Autoflower, Feminized, and Regular Seeds Need Different Depths?
No. Seed type describes genetics, reproductive outcome, or flowering behavior; it does not create a separate planting-depth rule. An autoflowering seed does not need to be planted deeper than a photoperiod seed, and a feminized seed does not need a different hole from a regular seed.
Individual seed size and vigor still vary. Use the seed’s physical condition, the medium, and the moisture environment to choose within the normal range. With expensive or limited seeds, simpler handling and careful labeling matter more than inventing a special technique for the label on the package.
“Do autoflower seeds need to start in the final pot and go deeper?”
Question sent by: Carter Mills, via email.
They do not need a deeper planting depth. Starting in the final pot can avoid a later transplant, but it makes early watering more demanding because the root system is tiny compared with the container. Plant about ¼–½ inch deep, manage a small moist zone first, and widen it as the plant establishes.
Common Depth Myths That Cause More Problems
“Plant it one knuckle deep”
Hands are different sizes, and a full finger joint can be much deeper than a cannabis seed needs. Use a marked tool or a clear ¼-to-½-inch reference until your eye is calibrated.
“The longer the taproot, the deeper the seed should go”
A long root needs a safe channel, not a deeply buried seed body. Keep the shell near the surface and accommodate the root below it without bending sharply. Better still, plant while the taproot is short so the transfer is simple.
“More water helps a deep seed push upward”
Water does not provide lifting force. Excess water can remove oxygen and make fine soil settle more tightly. A deep seed needs lower resistance and stable conditions, not a flood.
“A seed needs darkness, so it should be buried deeply”
A light cover provides darkness without requiring a long climb. Darkness during germination and useful planting depth are separate questions. Once the shoot approaches the surface, having gentle light ready helps prevent early stretch.
“Every seed from the same pack should emerge together”
Even well-produced seeds vary in size, maturity, storage history, and vigor. Consistent planting reduces environmental variation, but it cannot make every living seed follow the same minute-by-minute schedule.
Never Forget: The seed is alive, not a timer. Give it a repeatable environment and judge trends across days rather than reacting to every hour.
Frequently Asked Questions About Planting Depth
What is the best exact depth for a cannabis seed?
About ⅜ inch, or 1 cm, is a strong default in a light, evenly moist starter mix. The practical range is ¼ to ½ inch, or 6 to 13 mm. Use the shallow side for a visible taproot or compacting medium and the deeper side when a loose surface dries quickly.
Can I plant a cannabis seed directly in soil?
Yes. Direct sowing reduces handling and can work very well in a clean, light, evenly moist medium. Mark the location, keep conditions stable, and avoid digging simply because the seed is not visible.
Should the taproot point up or down?
Place a visible taproot down or gently sideways. If the seed has not opened and its orientation is unclear, placing it on its side is safe. The seedling can respond to gravity, so gentle handling matters more than forcing a perfect angle.
How much soil should cover a germinated cannabis seed?
Cover the seed body with roughly ¼ inch of loose medium while allowing a longer root to extend into a narrow channel below. The shell should remain near the surface rather than being buried at the bottom of the taproot hole.
Can a cannabis seed grow if planted upside down?
It often can. Roots and shoots respond to gravity and can change direction. The correction uses time and energy, so orient a visible taproot sensibly, but do not excavate an unopened seed just to turn it.
Should I press the soil after planting?
Only enough to remove a large air gap. Brush the medium closed and make light contact; do not tamp it into a hard cap. Seed-to-medium contact helps hydration, while compaction increases resistance and reduces aeration.
Do cannabis seeds need light before they sprout?
The buried seed does not need intense light to begin germination, but gentle seedling light should be ready when the shoot emerges. Strong light or heat that dries the surface is counterproductive during the earliest stage.
Should I use a humidity dome?
Use one only when it helps the small seed zone stay stable. Vent it, monitor temperature, and remove it after emergence. A dome cannot correct saturated medium and may worsen fungal pressure when used without airflow.
Can I add nutrients to help the seed emerge?
Strong feeding does not help the shoot push through soil. The seed carries stored reserves for early growth. Begin with a mild, suitable root zone and introduce nutrition according to the medium and the seedling’s development rather than loading the planting hole.
How deep is too deep?
In a small container, anything beyond about ½ inch deserves a reason, and one inch is usually deeper than necessary. The denser and wetter the medium, the sooner a measured depth becomes functionally “too deep.”
“Can I use a pencil to make the hole and leave it open?”
Question sent by: Rowan Lake, via X.
A pencil makes a useful depth guide, but close the hole after placing the seed. An open shaft dries unevenly, exposes the seed, and leaves poor contact around the shell. Brush loose medium over the opening and settle it with a few gentle drops of water instead of packing it down.
The Weedth Planting-Depth Method
When the seed matters, simple and repeatable beats complicated. Start with a light medium, moisten it evenly, make a ⅜-inch hole, place the seed gently, close the surface without pressure, and keep the seed zone warm and lightly moist. Then give it time.
If conditions require an adjustment, change the environment before changing the rule. A fast-drying surface may need less airflow or a brief dome. A wet center may need less water, more drainage, or more warmth. A hard surface may need better medium structure. Extra depth is only one tool, and usually not the first one.
Once the seedling emerges, the planting-depth question is finished. Shift your attention to gentle light, root-zone oxygen, gradual watering, and a stable path into early growth. The cotyledons will open, the first true leaves will follow, and that small planting decision will have done its job.
Continue from seed to a healthy seedling
If you are choosing a germination method, read how to germinate cannabis seeds without killing them. For the next watering decisions, use our cannabis watering basics. You can also compare pots and starter containers, understand the full cannabis life cycle from seed to harvest, or learn how seed age and storage affect viability.
Scientific and Technical References
- Temperature Limits for Seed Germination in Industrial Hemp (Cannabis sativa L.). Controlled research on germination temperature and seedling emergence.
- Degeneration of Oil Bodies During Seed Germination in Cannabis sativa L.. Microscopic study of seed structure, the radicle, and stored reserves during germination.
- Development of a Direct In Vitro Plant Regeneration Protocol From Cannabis sativa L. Seedling Explants. Documents early radicle emergence and seedling development stages.
- Development and Standardization of a Rapid and Efficient Seed Germination Protocol for Cannabis sativa. Controlled comparison of germination and early soil establishment.
- Propagation of Cannabis for Clinical Research. Reviews direct sowing, starter pots, and other propagation routes.
- Soil, Seedbed Preparation and Seeding for Hemp in Oregon. University technical guidance explaining field seedbed conditions and agricultural seeding depth.
- Evaluation of Industrial Hemp Seed Treatments for Management of Damping-Off for Enhanced Stand Establishment. Multi-site field research on emergence and seedling disease pressure.
Share this article
A quick overview of the topics covered in this article.
Follow us
Latest articles
September 25, 2026

September 25, 2026
September 25, 2026
September 25, 2026
