
How to Predict an Outdoor Finish Window
An outdoor cannabis finish date should never begin as a single day circled on a calendar. The useful prediction is a window with an earliest plausible finish, a most likely finish period, and a latest acceptable finish. That window starts wide, then narrows as the plant reveals when it truly entered flowering, how quickly its flowers are developing, and whether autumn weather is becoming more dangerous than the extra maturity you are waiting for.
This distinction matters because outdoor flowering is not an indoor timer. A cultivar can begin reproductive development on a different date at different latitudes. Plants sold under the same name can vary. A cool cloudy finish can progress differently from a warm bright one. A dense flower exposed to repeated rain may reach its practical harvest deadline before a visually similar flower in a dry climate. Meanwhile, the last few weeks can still add meaningful flower mass even after cannabinoid concentration has stopped increasing at the same rate. Finish prediction is therefore a scheduling problem and a biological maturity problem at the same time.
The method in this resource uses five anchors: the plant’s real flowering onset, the cultivar’s documented or observed duration range, the local seasonal light and temperature pattern, flower-maturity observations, and a weather-risk deadline. You will update those anchors repeatedly instead of trusting a printed “September” or “8 weeks” claim as if it were a guarantee.
This page stays focused on predicting the finish window. It does not repeat the whole outdoor growing system. For soil, irrigation, training, security, legal planning, and the full season from planting to harvest, use the Outdoor Grow Comprehensive Guide.
In This Resource
- Define the outdoor decision in terms of site, season, climate, legal access, and plant risk
- Measure the site: sun path, shade, temperature, humidity, wind, drainage, water access, cold pockets, or contamination as relevant
- Seasonal timing: latitude, photoperiod, weather windows, and cultivar behavior
- Practical setup/response plan with materials, placement, inspection points, and a backup option
- Failure modes: stagnant air, trapped moisture, heat load, frost, wind damage, water shortage, security, or neighbor impact
- Legal/safety boundary without guessing local rules or recommending dangerous traps
- Pre-season and weekly checklist that turns the article into a repeatable field procedure
Define the outdoor decision in terms of site, season, climate, legal access, and plant risk
The direct answer: predict a range first, then earn the right to narrow it
Before the plant flowers, your finish window is mostly a planning estimate. Once flowering is clearly underway, it becomes an observation-based forecast. In late flower, it becomes a risk-managed harvest decision. Treating those three phases as if they offer the same certainty is one of the main reasons outdoor harvest predictions fail.
A practical forecast should contain three dates or date ranges:
| Window marker | Plant status | Main task | Risk / check |
|---|---|---|---|
| Earliest plausible finish | Flower development is advanced enough that a defensible harvest may become possible | Begin close maturity inspection and weather planning | Do not harvest just because this date arrives |
| Likely finish window | Most biological and historical evidence points here | Inspect representative flowers repeatedly and prepare harvest logistics | Weather or genotype can move the window |
| Latest acceptable finish | Remaining maturity benefit is being weighed against rising seasonal risk | Use current plant condition and forecast to decide whether waiting still makes sense | Do not turn “latest” into a challenge to survive the worst weather |
The three markers are not promises. They are a decision framework. If you plant a cultivar with very little outdoor history in your region, the initial range should be wider. If you are growing a clone whose previous outdoor behavior on the same property is well documented, the range can be narrower. If the plant shows an unusual flowering response, the forecast widens again until new observations support a correction.
Key Term
Finish Window
The period in which an outdoor cannabis plant is expected to move from late floral development into a defensible harvest state, after accounting for genotype, actual flowering onset, flower maturity, local climate, and crop-risk conditions. It is not the same thing as a guaranteed harvest date.
Separate flowering onset from finish prediction
The first date you need is not “when August started” or “when the days became shorter.” It is the date the plant entered a clear whole-plant reproductive transition. Mature cannabis can show isolated preflowers at nodes while still behaving vegetatively. For forecasting, an isolated pair of stigmas should not automatically start the flowering clock.
Use a consistent field marker. One practical marker is the appearance of repeated new floral clusters with stigmas at several actively growing shoot tips, followed by continued reproductive development at the next inspection. Controlled research has used defined stigma counts at the shoot apex to mark flowering initiation. Your home-garden method does not need to duplicate a laboratory protocol, but it should be repeatable enough that “flowering started” means the same thing every season.
Write that date down. If you are unsure whether the transition began three or four days earlier, record a range rather than pretending you know. A finish forecast built from “flowering onset: August 9 to 12” is more honest than one built from a false single-day precision.
Field Advice: The first useful finish prediction starts when you can defend the flowering-onset date from your own notes and photos. Before that, you have a cultivar-and-climate estimate, not a crop-specific forecast.
A breeder or seller flowering time is a prior, not a stopwatch
If you have a reliable flowering-duration range from a well-documented source, use it as your starting prior. The problem begins when “8 to 9 weeks” is converted into “day 56 is harvest day.” Published flowering duration may come from indoor production under an immediate inductive photoperiod. Outdoor flowering can enter gradually as nights lengthen. The plant may not receive the same temperature, daily light, nutrition, root-zone conditions, or stress profile as the source crop.
A catalog-style outdoor harvest month has a different limitation. “Late September” may describe one latitude, one climate, one phenotype, or a broad marketing average. At another latitude, the same photoperiod-sensitive genetics can initiate later or earlier. Research on Cannabis sativa flowering shows marked genotype differences in critical photoperiod and flowering behavior. That is exactly why a local record becomes more valuable after the first season.
Use documented duration to build the first range, then let the plant replace the prior with evidence. If the source says 8 to 10 weeks and you mark convincing flowering onset on August 5, your first simple window might center roughly around late September to mid-October. It should remain a planning range, not a promise. The next sections explain how to tighten or move it.
Decide what “finished” means before you start chasing maturity
“Finished” can mean several different things. A grower producing dried flower may value a different point than a researcher maximizing one measured cannabinoid concentration. A cultivar can continue adding reproductive dry mass while tissue cannabinoid concentration follows a different time course. A 2025 controlled-environment study on a high-CBD cannabis cultivar found that reproductive dry mass continued increasing across the measured flowering period while cannabinoid concentration reached a maximum and then declined. The week that maximized crop dry mass was not necessarily the same week that maximized every cannabinoid-yield metric.
That does not give outdoor growers a universal number of weeks. It gives a more useful lesson: maturity is multi-dimensional. Do not assume the latest possible cut automatically maximizes quality, chemistry, or usable flower. Likewise, do not assume an earlier harvest is “safer” if the flower is still biologically immature.
For a home flower crop, the finish decision usually combines floral structure, stigma progression, glandular trichome development on representative flower tissue, continuing swelling, plant health, disease status, and weather risk. None of those should stand alone.
Photoperiod-sensitive and day-neutral plants need different forecast anchors
This article primarily addresses photoperiod-sensitive outdoor cannabis. Day-neutral or strongly autoflowering plants do not use the seasonal night-length transition in the same way. Their finish forecast should begin with age and the plant’s actual developmental stage rather than a latitude-driven flowering trigger.
Even then, do not assume an autoflower’s printed “seed to harvest” number will be exact outdoors. Temperature, root restriction, transplant stress, water, and light can change developmental rate and plant size. The general principle remains the same: start with the genetic schedule, then update it with the plant.
Grower Question
“Can I just count eight weeks from the first pistils?”
Editorial example. Question sent by: Rachel Morgan, via email.
Use eight weeks only if it comes from credible history for that cultivar, and do not start the count from one isolated preflower. Mark a repeatable whole-plant flowering transition, build a range from the documented duration, then verify flower maturity and weather every week. The count creates a forecast. It does not replace inspection.
The site sets the deadline even when genetics set the potential
A long-season cultivar can only express its potential if the site can carry it through the finish. The same genetics may have a comfortable October finish in one garden and an unacceptable October finish in another because of frost pockets, persistent autumn rain, mountain shade, coastal fog, limited access, or strong disease pressure.
This is why the finish-window decision starts with the plant but ends with the plant inside its site. You are not predicting when the cultivar could finish under ideal conditions. You are predicting when this plant is likely to become harvest-ready and how much safe seasonal runway remains around that point.
Measure the site: sun path, shade, temperature, humidity, wind, drainage, water access, cold pockets, or contamination as relevant
Build a finish-season site profile, not just a summer site profile
A location that looks excellent in June can become a different garden in September and October. The solar path lowers. A building or tree line can create longer afternoon shadows. Night temperatures fall. Dew can remain on flowers later into the morning. Rain events may become more frequent. Soil dries more slowly. Wind direction can change with seasonal weather systems.
Before planting, map the conditions that will exist during the likely finish period, not only the conditions that exist when you are standing there in spring. Historical weather data can help define the broad season, but your own microclimate observations should determine whether the site tends to run colder, wetter, darker, or windier than the nearest station.
Record first-frost probability as a risk curve, not one magic date
“First frost date” is often presented as if autumn has an appointment. Climate normals are probabilities. Extension guidance based on NOAA/NCEI data shows that freeze and frost dates can be interpreted at different risk levels. A conservative grower may plan around an earlier low-risk date, while a risk-tolerant grower may accept a later probability. Your own low spot can frost before the official station, while a protected urban garden may stay warmer.
For finish-window planning, record at least three pieces of information: the long-term first-frost probability for the nearest useful station, the plant’s actual microclimate, and the short-range forecast as harvest approaches. Do not use a climate normal as a substitute for the forecast. Do not use the forecast as if it could describe the entire remaining month.
Warning
A frost date is not a universal cannabis harvest deadline
Cold injury depends on actual canopy temperature, duration, plant condition, cultivar, wind, humidity, and the severity of the event. Historical frost probabilities are planning tools. They do not tell you that every plant is safe until one exact date or ruined immediately after it.
Measure the cold pocket before the last month
Cold air settles into low terrain on calm clear nights. A garden only a few meters lower than the surrounding property can record a lower overnight minimum. Fences, walls, hedges, and buildings can also change cold-air drainage. If finish timing matters, place comparable min/max thermometers or data loggers in the candidate garden and at a slightly higher reference position before the flowering season becomes urgent.
Use the same sensor type and radiation protection, and keep placement consistent. If the lower garden repeatedly runs 2°C or 3°C colder than the reference under clear calm conditions, include that difference in the finish-risk plan. The regional forecast may say 4°C while the plant canopy briefly falls much closer to freezing.
Track leaf wetness conditions even if you do not own a leaf-wetness sensor
Dense late flowers create a different disease environment from a vegetative canopy. Record how often flowers become wet from rain, fog, overhead irrigation, or heavy dew, and how long they remain wet into the day. Note morning sun exposure, airflow, and whether inner flower surfaces stay damp after the outside appears dry.
Virginia Tech hemp guidance emphasizes that flower blights including Botrytis can threaten floral crops and that poor air movement, humid conditions, condensation, plant wounds, and dense plantings can increase disease pressure. The finish-window implication is straightforward: a ten-day maturity gain is not automatically valuable if the crop is entering a pattern of repeated wetting and increasing flower disease.
This does not mean harvest at the first rainy forecast. It means add weather exposure to the maturity decision. Inspect inside dense flowers after wet events. Remove and manage diseased material according to local rules and accepted plant-health guidance. Never smoke or consume visibly moldy flower.
Map late-season sun and drying opportunity
The same obstruction that seemed minor in midsummer can matter more when the sun is lower. Mark the hour direct sun reaches the flowers after dew and the hour the site loses meaningful afternoon light during the expected finish window. A cool shaded morning can leave dense flowers wet longer. A site that receives bright early sun may dry faster after dew even if the total summer light difference seemed small.
You do not need a full DLI study to use this information. A simple late-season sun-path log can explain why one side of the property repeatedly dries earlier than another. If you have already mapped the site’s microclimate or light, reuse that data rather than starting from zero.
Wind helps drying until it becomes structural damage
Moderate airflow can shorten leaf and flower wetness, but exposed late-season sites can also receive storm gusts when branches are carrying their greatest mass. Record the direction of strong weather systems, whether branches already require support, and whether the plant is exposed to funneling between buildings or fences.
Do not wait until a storm warning to discover that the plant cannot be supported safely. The finish window should include a harvest-access plan and a branch-support plan. A broken, soil-contaminated, or repeatedly damaged flower is not “more mature” because it stayed outside another week.
Water access can change the last weeks even when the weather is cooler
Late flower is not a license to let the root zone swing wildly between drought and saturation. Containers can still dry rapidly in bright windy weather. Native soil may stay wet longer as temperatures fall. If irrigation access becomes unreliable near harvest, that operational risk belongs in the forecast.
Record actual irrigation frequency and root-zone response instead of deciding in advance that plants “drink less in late flower.” If water use declines, determine whether the cause is cooler weather, reduced transpiration, smaller active leaf area, root problems, disease, or normal developmental change. A finish-window prediction becomes less reliable when the plant is simultaneously experiencing severe stress.
Site contamination and access are go/no-go factors, not maturity variables
If the soil, irrigation water, flood exposure, or previous land use raises a credible contamination concern, resolve that before the crop reaches harvest. Likewise, confirm that you can legally and physically access the site during the expected finish period. A crop that can only be reached when a dirt road is dry needs an emergency access plan before autumn storms arrive.
These conditions do not tell you when the flower is mature. They tell you whether the garden can be operated responsibly through the predicted window. Keep them in a separate risk column so they do not get confused with plant-development indicators.
Seasonal timing: latitude, photoperiod, weather windows, and cultivar behavior
Latitude changes flowering onset more directly than it changes “weeks to finish”
Latitude determines the seasonal day-length curve. Photoperiod-sensitive Cannabis sativa responds to that changing light-dark cycle, and research has shown that critical photoperiod varies between cultivars. A genotype that transitions at one point in the season at 35 degrees latitude may transition later at 45 or 50 degrees because long summer days persist longer.
Once strong flowering is established, the relationship becomes more complicated. Latitude also changes late-season DLI, night temperature, frost risk, and the speed at which the weather window closes. The practical effect is that a cultivar may have enough biological time to complete its flowering program but not enough usable outdoor season to do it reliably.
Use three clocks: flowering clock, maturity clock, and weather clock
A strong finish forecast keeps three clocks visible at the same time.
| Clock | What it tracks |
|---|---|
| Flowering clock | Time since a clearly defined whole-plant reproductive transition. Useful for comparing the crop with known cultivar history. |
| Maturity clock | Changes in flower structure, swelling, stigma progression, glandular trichomes, and other repeated crop-specific observations. |
| Weather clock | Remaining probability of acceptable conditions before frost, prolonged wet weather, storms, smoke, access failure, or another site-specific seasonal hazard. |
If all three clocks point to the same period, confidence rises. If the flowering clock says “two weeks left,” the maturity observations say “still clearly immature,” and the forecast shows a cold wet pattern beginning tomorrow, confidence falls. That is not a failure of the method. It is the method revealing a real tradeoff.
Flower duration is not completely independent of environment
Flower development is a biological process supported by photosynthesis, temperature, water, mineral nutrition, and a functioning canopy. Controlled environments minimize many of those variables. Outdoors, late-season cloud can sharply reduce daily light. Cool nights can slow metabolism. Severe root stress can stop normal development. Heat and drought can damage tissue. Disease can destroy flower faster than it matures.
Do not respond to slower late-season progress by automatically adding fertilizer or extending the calendar. First determine whether the plant is healthy and whether the remaining environment can support continued development. A plant under declining light and repeated disease pressure may not “catch up” simply because you leave it longer.
Cultivar behavior matters more than broad indica/sativa labels
Predict finish from observed genetics, not folk taxonomy. Broad labels such as indica, sativa, or hybrid do not provide a reliable outdoor finish calculation. What matters is the actual line’s photoperiod response, flowering onset, flower-development rate, architecture, disease behavior, and previous finish dates under comparable conditions.
Flowering-time genetics in Cannabis sativa are heritable and can have large effects, but real seed populations can still vary. Two seed-grown plants from the same packet may not enter or complete flowering on exactly the same schedule. Record plants individually if the difference becomes visible. One finish window for the whole garden may hide an earlier and a later phenotype.
Do not confuse first visible frost with the only autumn threat
Many growers focus so strongly on freezing temperature that they miss the wet-weather deadline. In humid climates, several days of rain, fog, and cool nights around dense mature flowers can create a more immediate crop-quality risk than a first frost that is still weeks away. In dry windy climates, the opposite may be true: low humidity, rapid root-zone drying, dust, smoke, or a sudden hard freeze may dominate the finish decision.
Create a site-specific hazard calendar. Put frost probability, typical rain increase, storm season, wildfire-smoke season where relevant, and access limitations on the same page as the biological finish estimate. The “latest acceptable” marker should sit inside that calendar rather than floating independently from it.
Stigma color is useful, but it is not a universal countdown
Stigmas commonly change from pale colors toward yellow, orange, red, brown, or amber as flowers mature, depending on genotype. A 2025 study of 25 genotypes found that most reached peak measured cannabinoid concentrations in later stigma-color stages, while several peaked earlier. The study supports stigma transition as a useful non-destructive approximation for many genotypes, while also showing why one percentage of brown stigmas cannot be a universal harvest law.
Use stigma progression as a trend. Photograph the same representative flowers under similar lighting each week. If new pale stigmas are still being produced aggressively while bracts continue swelling, the plant may still be actively developing. If the flower structure has stabilized and stigma color has largely progressed, move closer to glandular-trichome and risk-based verification.
Glandular trichomes are developmental structures, not a traffic-light app
Trichome development changes through flowering. Recent work has described distinct pre-secretory, secretory, and post-secretory phases with changing morphology and metabolite activity. This supports the value of looking at glandular trichomes, but it does not validate a universal internet formula such as “10 percent amber means X effect” for every cultivar and product goal.
Inspect gland heads on the actual flower bracts, not only exposed sugar leaves. Outer sugar-leaf trichomes can experience different light, heat, abrasion, and developmental timing from gland heads on the inflorescence. Sample several mature flowers from representative canopy positions. Keep magnification, lighting, and the tissue you inspect consistent.
Grower Question
“The top sugar leaves have amber trichomes. Is that enough to call the plant finished?”
Editorial example. Question sent by: FrostLineGrower, via contact form.
No. Inspect gland heads on representative flower tissue, especially bracts, and compare several locations. Exposed sugar leaves can appear more advanced. Use trichomes together with flower structure, stigma progression, the flowering timeline, plant health, and weather risk.
Build confidence from convergence, not one perfect signal
The finish window becomes narrower when independent observations converge. If the plant is within the documented duration range, the same flower sites have stopped producing large amounts of fresh floral growth, stigma progression is advanced, glandular trichomes on the bracts are predominantly in a mature-looking phase, and the weather remains manageable, you have several lines of evidence pointing in the same direction.
If one signal disagrees strongly, investigate. A flower can produce fresh stigmas after physical damage or environmental stress. Foxtailing can create new growth on an otherwise mature flower. Disease can brown tissue without indicating desirable maturity. Hot direct light can age exposed surfaces faster than inner tissues. The purpose of the multi-signal approach is to catch exactly these look-alikes.
Remember: A finish forecast gets stronger when unrelated observations agree. It gets weaker when one visual cue is doing all the work.
Practical setup/response plan with materials, placement, inspection points, and a backup option
Use a simple finish-window worksheet from the first week of real flower
You do not need laboratory equipment to build a much better harvest forecast. You need consistent observations. Create one page for each cultivar or clearly different phenotype. Keep the flowering-onset range at the top, then update the forecast once per week until the expected window is within about three weeks. At that point, increase inspection frequency as conditions require.
Finish-Window Kit
- A dated grow journal or spreadsheet.
- Consistent photos of the same labeled flower sites.
- A hand lens, loupe, or macro imaging method capable of showing gland heads clearly.
- A min/max thermometer or temperature logger near the garden.
- A reliable local weather forecast and a historical climate reference.
- A late-season sun/shade note for the site.
- A disease-inspection routine for dense flower interiors.
- A harvest-access and drying-space plan ready before the earliest plausible date.
Step 1: establish the pre-season planning window
Before flowering, gather the best history you have. Record the cultivar or clone identity, whether the source describes a photoperiod or day-neutral plant, the reported flowering-duration range, any credible outdoor finish information, and the location or latitude associated with that information when available.
Then record your site’s seasonal deadline. Use historical first-frost probabilities, typical autumn rain or humidity patterns, and known access constraints. The initial pre-season window can be broad. Its job is to tell you whether the genetics appear compatible with the site at all.
If the only information is “October,” do not invent a narrower week. Write “October, low confidence” and plan to replace it with crop-specific evidence.
Step 2: mark flowering onset as a range
As seasonal flowering begins, inspect at least two or three times per week if practical. Look at several active shoot tips. When repeated reproductive clusters are clearly increasing, mark the transition. If one inspection shows vegetative dominance and the next four days later shows obvious flowering, the onset range lies between those observations.
Take photographs. Use the same plant labels. A photograph is especially useful the following year when your memory says “it started around the same time.” It lets you compare actual developmental stage rather than vague calendar familiarity.
Step 3: calculate an initial earliest, likely, and latest window
Use the documented flowering-duration range as a starting bracket. If history is strong for the same clone in a comparable environment, weight it heavily. If history is a generic seed description, weight it lightly. Your worksheet can use a simple form:
| Input | Example of how to record it |
|---|---|
| Flowering onset | Aug 7-10, medium confidence |
| Documented duration | 8-10 weeks, source context uncertain |
| Initial biological finish | Roughly early October through mid-October |
| Site weather deadline | Wet-weather risk often increases in early October; frost probability rises later |
| Initial working window | Late September to mid-October, wide confidence band |
The dates above are examples of the method, not a cannabis schedule. Your actual output should use your own flowering date, genetics, hemisphere, latitude, and climate.
Step 4: create fixed inspection points on the plant
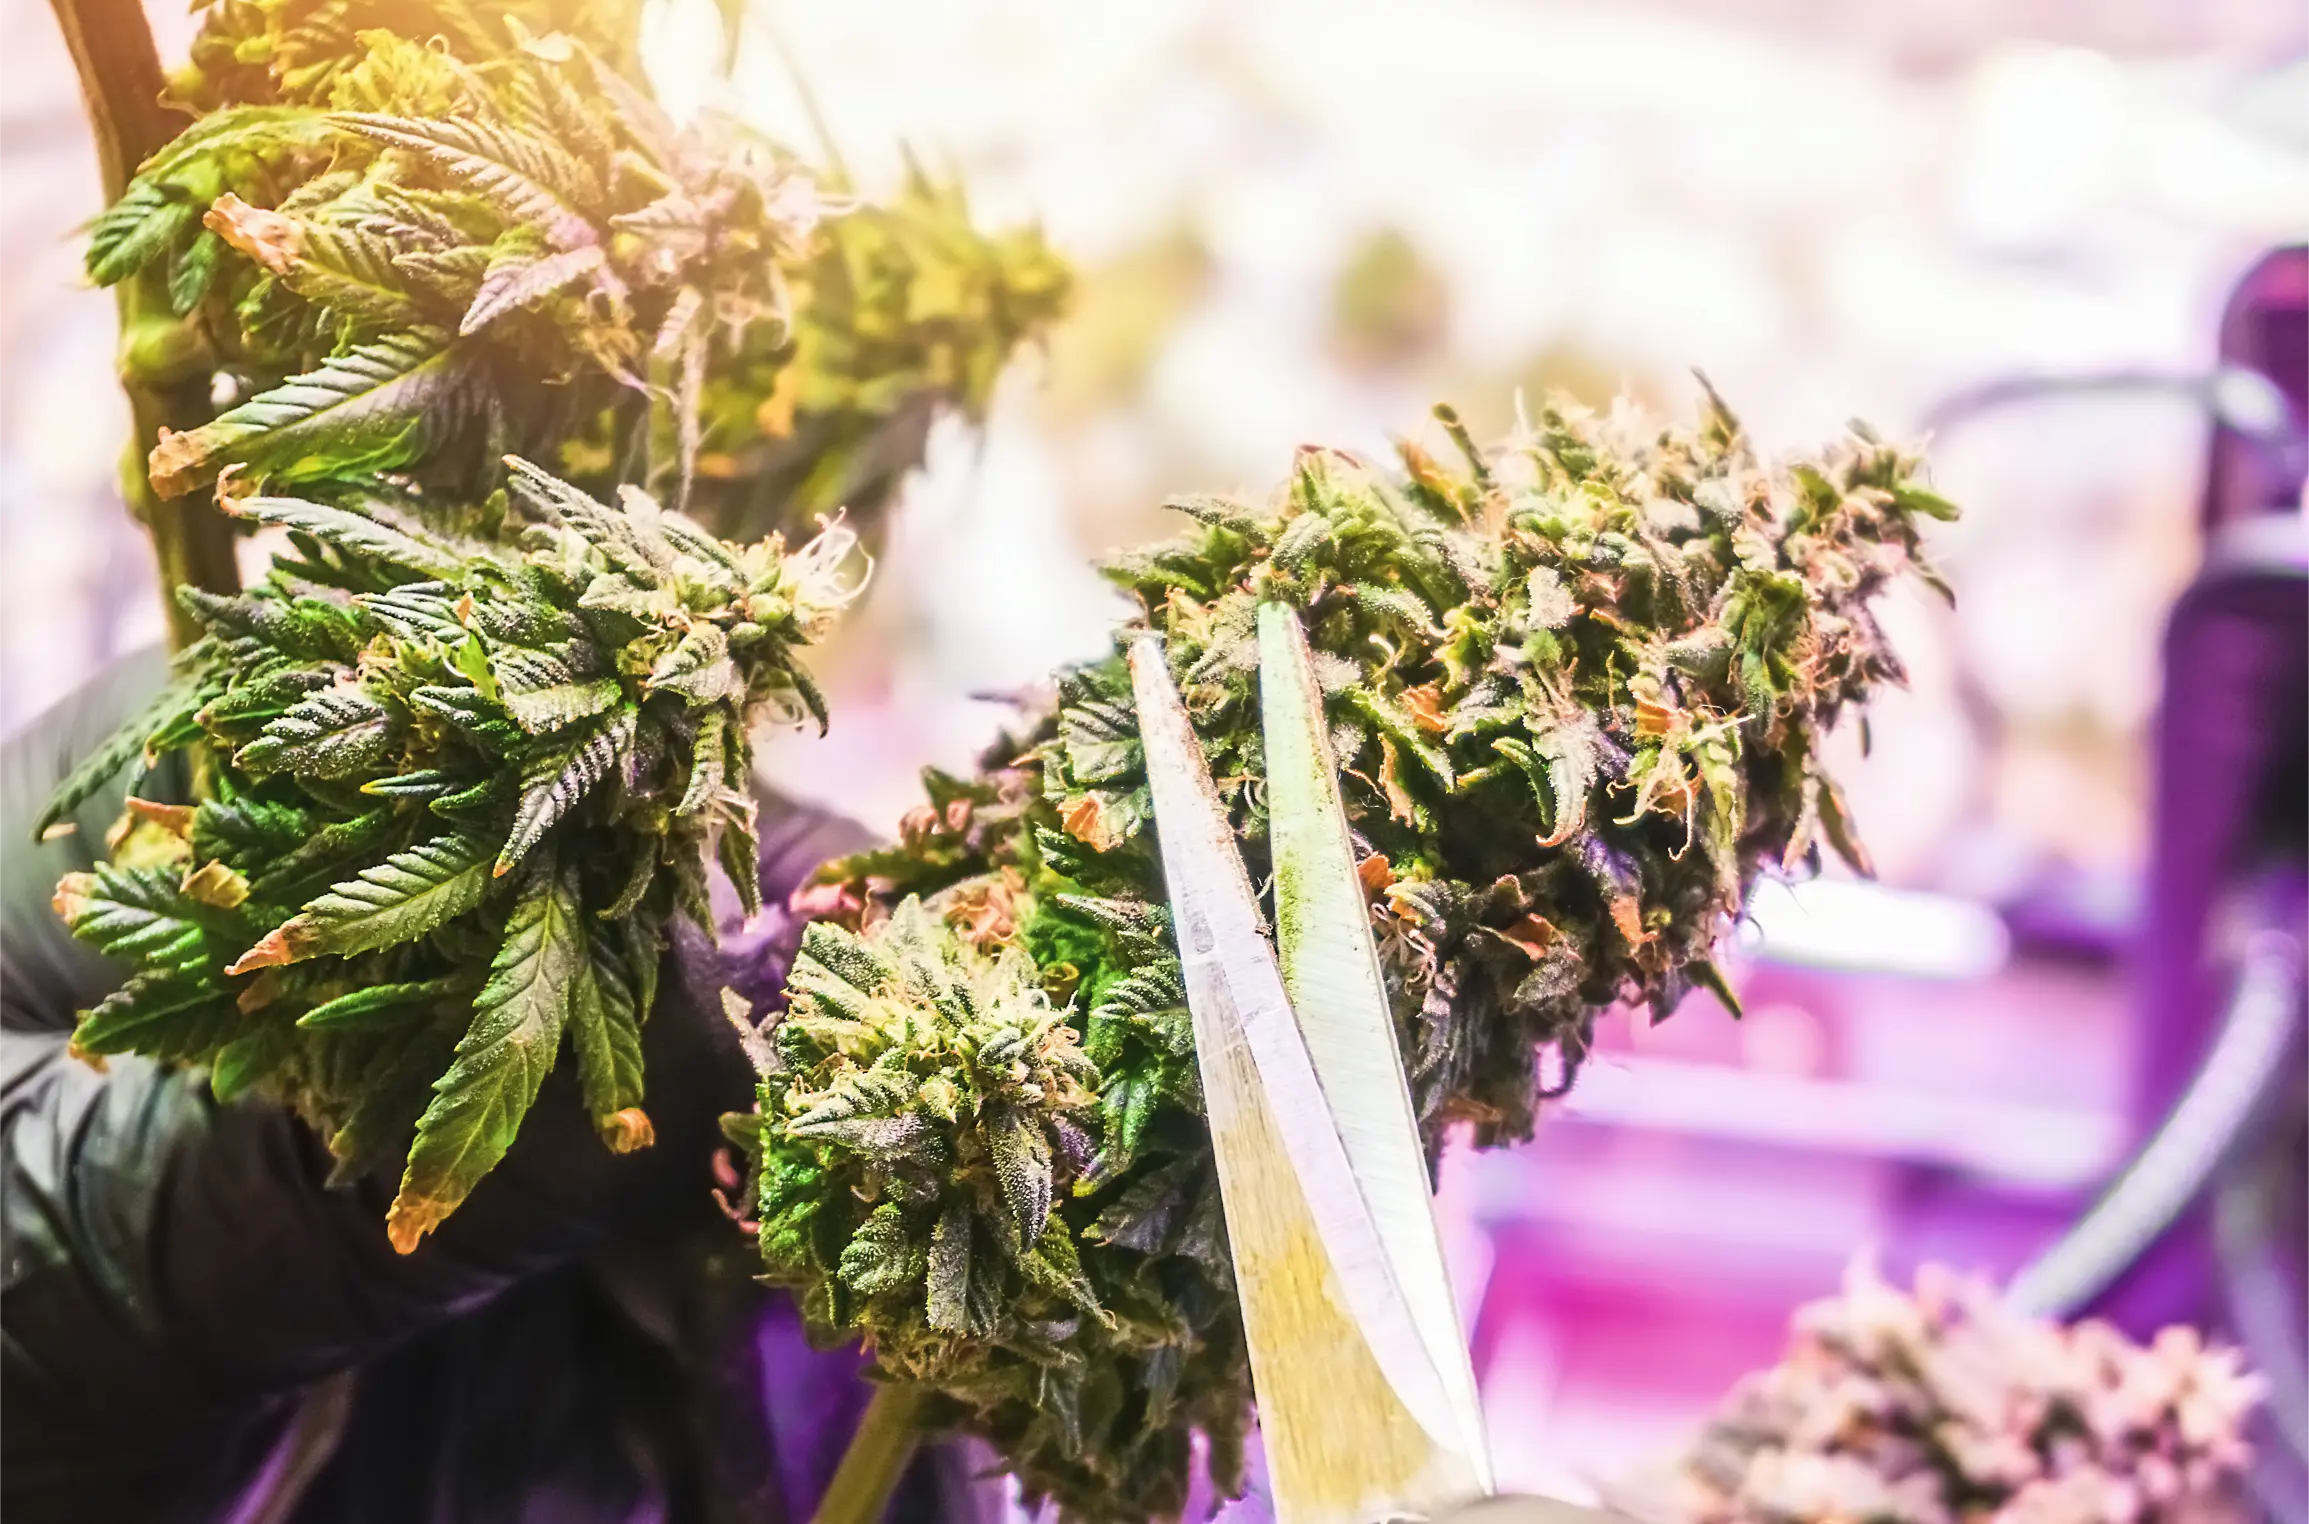
Randomly examining whichever flower looks best each week introduces bias. Label representative locations. On a large outdoor plant, choose at least one well-lit upper flower, one middle-canopy flower, and one representative flower from a slightly less exposed position. Avoid using only the earliest, largest, or most damaged top.
Photograph the same sides where possible. When using magnification, inspect flower bracts and record the tissue sampled. If the top is advancing much faster than the lower canopy, write that down instead of averaging the difference away. The garden may eventually support a staged harvest, if legal and practical, but the prediction should first reveal that maturity is uneven.
Step 5: score development weekly without pretending the score is chemistry
A simple 0-to-3 field score can make trends visible. It should not be called a potency score or a laboratory maturity index. Use it only to keep your observations consistent.
| Stage / Period | Plant Status | Main Task | Risk / Check |
|---|---|---|---|
| 0 – Active build | Flower structure still expanding rapidly; many fresh stigmas; clear continuing development | Keep broad forecast | Do not rush because weather is merely cooler |
| 1 – Mid maturation | Flowers filling; stigma transition increasing; trichome development advancing | Begin comparing with cultivar history | Inspect disease and weather more closely |
| 2 – Finish window approaching | Major structure established; repeated maturity indicators converging | Narrow earliest and likely dates | Prepare harvest and drying space |
| 3 – Harvest decision zone | Crop is within a defensible maturity range based on multiple signals | Balance remaining development against current risk | Do not wait automatically for a later calendar date |
The score is intentionally qualitative. If you have analytical testing available and legal to use, it can add another evidence layer, but most home growers will make the decision from repeated non-destructive observation and risk management.
Step 6: update the weather-risk line every week, then every few days
Early in flower, historical climate is enough for broad planning. Within three weeks of the likely window, use the actual forecast and site observations. Record expected overnight lows, rain duration, humidity or dew pattern, wind events, and any condition that could prevent inspection or harvest access.
The forecast should change the risk side of the decision, not rewrite plant biology. If the plant still looks clearly immature, a wet week does not magically make it mature. It may, however, force a difficult decision about whether the remaining biological gain is worth the crop-loss risk. That tradeoff is why early cultivar and site selection matter so much.
Step 7: narrow the window only after two consecutive inspections agree
One inspection can be distorted by lighting, weather, which flower you sampled, or wishful thinking. Before moving a broad window to a narrow one, look for the same maturity trend at two consecutive inspections. If the same labeled flowers continue moving in the expected direction and the flowering clock fits, confidence improves.
If the plant suddenly appears “more mature” after heat, drought, pest damage, or disease, do not immediately narrow the window. Determine whether you are seeing normal maturation or stress injury.
Step 8: define a weather-forced decision point before the forecast becomes emotional
Write down what conditions would trigger an emergency review. Examples include a forecast hard freeze, several consecutive days of cold rain around dense flowers, a serious wind event, loss of legal site access, a rapidly expanding flower disease, or another clearly defined local hazard.
The trigger does not have to mean “harvest everything.” It means stop following the default calendar and reassess the crop. Depending on maturity and legal constraints, the response might be additional support, shelter that does not create trapped humidity, selective removal of diseased material, a staged harvest of demonstrably mature sections, or a full harvest. The correct response depends on the crop and the hazard.
Do
- Start with a range and narrow it from repeated evidence.
- Photograph the same labeled flowers through late flower.
- Inspect bract trichomes rather than relying on sugar leaves alone.
- Keep the weather deadline beside the maturity forecast.
- Prepare drying space and harvest logistics before the earliest plausible date.
Avoid
- Adding a fixed number of weeks to one preflower.
- Using a seed description as an exact outdoor calendar.
- Harvesting from pistil color alone.
- Waiting for every flower on a large plant to look identical.
- Leaving a mature crop outside only to reach a prettier calendar date.
Use a backup option that protects quality, not a panic trick
Your backup plan should be ordinary, safe, and legal. Know where the crop will be dried. Make sure that space is clean, secure, and able to handle the expected volume. Have clean cutting tools and supports ready. Confirm that weather protection, if used, does not trap wet air around flowers. If a remote legal garden can become inaccessible after heavy rain, decide how much lead time you need to harvest safely.
A backup plan is not a reason to force the crop to remain outside. It is what allows you to make a calm decision when the forecast changes.
Failure modes: stagnant air, trapped moisture, heat load, frost, wind damage, water shortage, security, or neighbor impact
Failure mode 1: calendar fixation
The classic mistake is deciding on a harvest date early and then interpreting every observation to support it. If “October 10” is written in your head as the finish day, immature flowers on October 9 can look more mature than they are, while a crop that is clearly ready on October 2 can be left outside for no biological reason.
Prevent this by writing a range and attaching confidence to it. Dates should move when evidence changes. A forecast that never updates is not a forecast.
Failure mode 2: starting the clock from isolated preflowers
Sexual maturity and full flowering transition are not identical. Plants can show preflowers before the seasonal signal is strong enough for robust flower development. Starting the countdown too early can make a normal plant look “late” and can push the grower toward premature harvest.
Use whole-plant transition markers and multiple shoot tips. If the date remains uncertain, record a range.
Failure mode 3: treating stigma color as a universal percentage rule
Stigma progression is accessible and useful, but genotype matters. The 2025 multi-genotype study found that most tested plants reached peak cannabinoid concentrations in later amber stages, while some peaked earlier. Damage, pollination, heat, and local flower age can also affect stigma appearance.
Use the trend across labeled flowers. Combine it with glandular trichome development and structural maturity. Do not convert “80 percent brown hairs” into a universal biochemical law.
Failure mode 4: reading the wrong trichomes
Sugar-leaf trichomes are easy to see and easy to over-weight. Exposed leaves can mature or weather differently from flower bracts. A finish decision should use gland heads on the flowers you intend to harvest, sampled from representative positions.
Also watch the limitations of the tool. Phone digital zoom can invent sharpening artifacts. Cheap microscopes can create glare that makes transparent heads look cloudy. Strong warm light can change perceived color. Use consistent illumination and compare trends rather than one dramatic image.
Failure mode 5: confusing stress senescence with desirable maturity
Late-season yellowing can be normal as the plant reallocates resources and older leaves age, but widespread yellowing can also result from root problems, nutrient imbalance, cold wet soil, disease, or drought. A plant that is failing is not necessarily finished.
Check whether flower development has actually progressed. Inspect roots and moisture where appropriate. Review recent weather. If a plant declines suddenly after a stress event, do not treat the decline itself as a harvest marker.
Failure mode 6: waiting through repeated trapped moisture
As flowers become denser, their internal drying time matters more. Stagnant air, overnight humidity, fog, and repeated rain can keep internal tissue wet even when outer surfaces dry. Botrytis and other flower blights can then turn a “wait another week” decision into lost usable flower.
Inspect dense flowers carefully after wet periods. Look for localized discoloration, collapsed tissue, unusual softness, dead sugar leaves pulling easily from a flower, or visible fungal growth. Do not smoke, vape, or otherwise consume moldy cannabis.
Important
Do not solve late-flower moisture with a sealed plastic cover
A cover that blocks rain but traps humid air around dense flowers can exchange one risk for another. Any lawful weather protection should preserve ventilation, structural safety, and access. Remove standing water and inspect the crop rather than assuming “covered” means “dry.”
Failure mode 7: panicking at the first cold forecast
Cold risk should be evaluated from actual forecast temperature, expected duration, wind, humidity, canopy microclimate, and the plant’s maturity. A cool night above freezing is not the same event as a hard freeze. A brief radiational frost in a low pocket is not the same as an advective freeze with wind and prolonged subfreezing temperatures.
Your response should also consider how close the crop already is to the finish window. A clearly immature plant may justify reasonable protection if legal and safe. A crop already within its defensible harvest range may not justify exposing mature flowers to a severe event simply to gain another few days.
Failure mode 8: ignoring storm and wind load as flowers gain mass
Late flower changes plant mechanics. Branches carry more mass and wet flowers become heavier. A branch that handled summer wind can split in an autumn storm. Tie and support systems should be checked before the likely finish window, not after a forecast warning.
After severe wind, inspect branch unions and damaged flower. Physical wounds can increase disease opportunity. If part of the plant is broken and contaminated with soil, treat it as a plant-health problem, not a maturity shortcut.
Failure mode 9: allowing root-zone extremes to distort the finish
Repeated drought can wilt leaves, reduce photosynthetic function, and accelerate stress symptoms. Persistent saturation can reduce root-zone oxygen and contribute to disease. Both can change how the plant looks late in the season. Neither makes a weak finish prediction stronger.
Keep irrigation responsive to the actual root zone. Do not “dry the plant out before harvest” as a substitute for normal water management. Likewise, do not keep a cool native soil constantly wet because the calendar says the plant has two weeks left.
Failure mode 10: treating every part of a large plant as one maturity stage
Outdoor plants can be three-dimensional light environments. Upper sun-exposed flowers, shaded inner branches, and late secondary growth may not mature uniformly. If the difference is substantial, record it. The finish window for the highest-quality mature flowers may not perfectly match the least developed lower material.
Where legal and operationally practical, a staged harvest can sometimes resolve true maturity separation. It should not be used to chase tiny visual differences or create unnecessary handling. If local law treats harvested and growing material differently, verify the rule first.
Failure mode 11: forgetting neighbor, odor, and security pressure near harvest
Late flower is often the most visible and aromatic part of the season. Odor can become stronger, branches may rise above screens, and harvest activity can attract attention. These are not biological maturity signals, but they can create practical and legal pressure that influences how safely the finish window can be managed.
Use lawful privacy, access control, and considerate neighbor planning. Do not use dangerous traps, improvised electrical deterrents, hidden hazards, or confrontation. If the site is not secure enough for the final weeks, that is a planning failure to fix before planting next season.
Failure mode 12: assuming later is always stronger
The belief that every additional day improves potency is not supported as a universal rule. Temporal cannabis studies show that cannabinoid concentration and flower mass can follow different curves, and the optimal harvest point depends on genotype and the outcome being measured. Trichome development also passes through distinct biological phases rather than rising forever.
Use the plant and your crop goal. Once maturity signals have converged, continued waiting should have a reason. “Later must be better” is not a reason.
Legal/safety boundary without guessing local rules or recommending dangerous traps
Verify the rules that apply at harvest, not only the rules that applied at planting
Home-grow rules can govern more than the number of living plants. Depending on jurisdiction, there may be requirements involving age, location, visibility, locked access, property permission, possession limits, harvested material, transport, odor, structures, pesticides, or how a medical authorization interacts with general home cultivation.
Do not assume that a legal plant can be harvested, stored, transported, or processed in any quantity or location. Use current official government or regulatory sources for your address. If the rule is unclear, obtain qualified local advice rather than relying on an old forum post or a summary from another state, province, or country.
The Outdoor Grow Comprehensive Guide provides the broader planning context, but no general cultivation guide can replace the current local rule.
Pesticide labels and pre-harvest intervals can create a separate deadline
If a crop-protection product is legally permitted for cannabis in your jurisdiction, follow the current label exactly. A label may include application rate, personal protective equipment, re-entry requirements, harvest restrictions, or a pre-harvest interval. Never shorten a required interval because weather is deteriorating or because the crop “looks ready.”
Conversely, do not apply an unapproved product late in flower because you are trying to rescue the finish window. When a problem cannot be managed safely and legally, removing affected material or accepting crop loss may be the responsible choice.
Harvest access should be physically safe
Do not harvest tall wet plants from unstable ladders in a storm. Do not run extension cords through wet grass to power improvised lighting. Do not work under damaged branches or unsafe temporary structures. If a legal remote garden requires travel on a road that becomes hazardous in severe weather, factor that access risk into the latest acceptable finish date.
Prepare clean tools, stable work surfaces, lighting, containers, and transport before the earliest plausible finish. A rushed harvest is where otherwise simple tasks turn into cuts, falls, contamination, and lost labels.
Do not use dangerous security measures to protect a crop that is nearly ready
A mature outdoor plant may increase theft concern, but the response should remain lawful and non-injurious. Secure gates, ordinary fencing, lighting that does not create an avoidable photoperiod problem, cameras where lawful, and controlled access are fundamentally different from hidden wires, booby traps, sharpened obstacles, improvised electrification, or devices intended to hurt an intruder or animal.
Plant value never justifies creating an uncontrolled hazard to a child, pet, neighbor, emergency responder, worker, or wildlife.
Grower Question
“If the law allows me to grow, can I harvest early and keep the plant count the same by starting another plant?”
Editorial example. Question sent by: CedarLaneGrower, via email.
Do not guess. Some jurisdictions count plants by stage, some use total plant limits, and possession or harvested-material rules may be separate. Check the current official rules that apply to your address before using harvest timing to plan another crop.
Smoke, wildfire, flood, and contamination can override a normal finish forecast
Severe environmental events belong in the safety boundary because they can change the crop itself. Floodwater can carry sewage, fuel, pathogens, and other contaminants. Heavy smoke and ash can deposit material on flowers. A nearby chemical release or pesticide drift may create an exposure concern that cannot be solved by “washing the buds” without evidence.
If the crop may be contaminated, pause the ordinary maturity decision and seek appropriate local agricultural, public-health, laboratory, or regulatory guidance. Do not assume visual cleanliness proves safety.
Protect children and pets during the finish and harvest period
Late-season planning should include the harvest route and temporary holding area. Cut branches, fresh flowers, trimmed material, edibles, concentrates, nutrients, pesticides, tools, and waste should not be left where children or pets can access them. Secure harvested cannabis according to local law and keep it away from animals.
This is particularly important on harvest day, when gates are open, tools are moving, and material may temporarily leave the locked or enclosed grow area.
Pre-season and weekly checklist that turns the article into a repeatable field procedure
Pre-season: decide whether the genetics fit the seasonal runway
Before planting, your goal is not to predict an exact harvest. It is to reject obviously poor matches and define the data you need to collect. A long-season photoperiod-sensitive plant at a site with an early wet autumn may have a finish-risk problem before the seed is ever germinated.
Pre-Season Finish-Window Checklist
- Confirm cultivation is lawful at the address and that you have permission to use the site.
- Record whether the genetics are photoperiod-sensitive or day-neutral/autoflowering.
- Collect the best available flowering-duration and outdoor-finish history without treating it as a guarantee.
- Record the latitude and hemisphere.
- Review historical first-frost or freeze probabilities from a reputable climate source.
- Identify the part of autumn when rain, fog, storms, smoke, or access problems commonly increase.
- Map late-season sun, shade, drainage, cold pockets, and water access.
- Decide how you will mark flowering onset consistently.
- Prepare a clean, secure drying location before the crop exists.
- Keep at least one cultivar or phenotype backup strategy for a season that proves too short.
At flowering onset: create the first crop-specific forecast
As soon as the whole-plant transition is clear, create the first real finish window. Do not wait until late flower, when the only remaining question is whether you guessed correctly.
| Stage / Period | Plant Status | Main Task | Risk / Check |
|---|---|---|---|
| Onset week | Reproductive development confirmed at multiple shoot tips | Record onset range and photos | Do not use isolated preflowers |
| Early flower | Flower clusters expanding | Apply documented duration as a broad bracket | Flag low-confidence source claims |
| Mid flower | Structure and resin increasing | Compare actual progress with the bracket | Watch disease, water, and light changes |
| About 3 weeks from likely window | Finish signals becoming readable | Start closer weather and maturity review | Prepare harvest logistics |
| Decision zone | Multiple maturity signals converge | Choose harvest timing from plant + weather evidence | Do not wait for the calendar alone |
Weekly: inspect the same plant positions
A repeatable inspection should take only as much detail as the decision requires. In mid flower, weekly photos and health notes may be enough. In the final window, inspect more frequently if the weather is changing quickly or disease risk is increasing.
Weekly Finish-Window Recheck
- Date and week since confirmed flowering onset.
- Photo of each labeled representative flower site.
- New flower growth still rapid, slowing, or mostly stabilized.
- Stigma progression at the same flower sites.
- Bract trichome appearance at several representative locations when close enough to matter.
- Any new foxtailing, physical damage, pest injury, or disease that could mimic maturity.
- Morning flower wetness and drying time after rain or dew.
- Root-zone moisture trend and major irrigation changes.
- Night minimum temperature and any cold-pocket difference.
- Forecast rain, storm, wind, smoke, or freeze risk.
- Access, security, neighbor, and legal changes that affect the finish plan.
- Updated earliest, likely, and latest markers with a short reason for every change.
Within three weeks of the likely window: move from weekly to decision-frequency checks
The exact inspection frequency depends on weather and crop risk. A dry stable garden may not need daily microscopy. A humid garden during a wet late-flower pattern may need frequent physical inspection for disease. The purpose is not to obsess over tiny changes. It is to shorten the delay between a meaningful change and your response.
Keep the log brief enough that you actually use it. A five-minute consistent record is more valuable than a complicated scorecard abandoned after two weeks.
Use a go / wait / reassess decision instead of “ready / not ready”
| Decision | When it fits |
|---|---|
| Wait | The crop is still developing clearly, weather risk is manageable, plant health is stable, and additional time has a reasonable biological purpose. |
| Go | Multiple maturity indicators have converged, the crop is inside the defensible finish window, and further waiting offers little clear benefit or increases risk. |
| Reassess now | A severe forecast, disease, branch damage, contamination concern, access failure, or another major event has invalidated the default plan. |
After harvest: record what actually happened so next year starts smarter
Your strongest outdoor finish predictor is often your own previous season with the same genetics at the same site. Record the actual harvest date or staged dates, flowering-onset range, major weather events, maturity observations, whether the crop felt early or late after drying, and any flower that was lost to disease or weather while you waited.
Next season, compare the photographs from the same relative stage. If a clone consistently begins full flower around the same seasonal window and finishes within a similar range, confidence rises. If seed-grown phenotypes vary widely, record them separately rather than forcing them into one average.
Also record the forecast error. If you originally predicted October 5 to 15 and the crop was clearly ready September 28, ask why. Did flowering begin earlier than you noticed? Was the source duration too long? Did the phenotype finish quickly? If the crop needed until October 20, determine whether onset was later, the finish was slower, or your maturity standard changed.
Master Advice: Do not judge your forecast only by whether the final harvest date landed inside the original range. Judge it by whether the method helped you see the crop becoming ready, recognize rising weather risk, and make the decision without guessing.
The finish-window decision you should leave with
Predict an outdoor finish window by starting wide and updating relentlessly. Mark the real flowering transition. Use cultivar history as a prior. Add the site’s frost, wet-weather, light, and access limits. Follow the same flowers through late development. Read stigma and glandular-trichome changes as trends, not universal percentages. As the likely window approaches, let independent signals converge.
The final question is not “Did I reach week eight?” It is: is this crop now within a defensible maturity range, and does waiting longer offer enough likely benefit to justify the environmental risk of leaving it outside? That is a decision a calendar cannot make for you, but a good field record can make much easier.
Share this article
A quick overview of the topics covered in this article.
Follow us
Latest articles

September 4, 2026
September 4, 2026
September 4, 2026
September 4, 2026
