
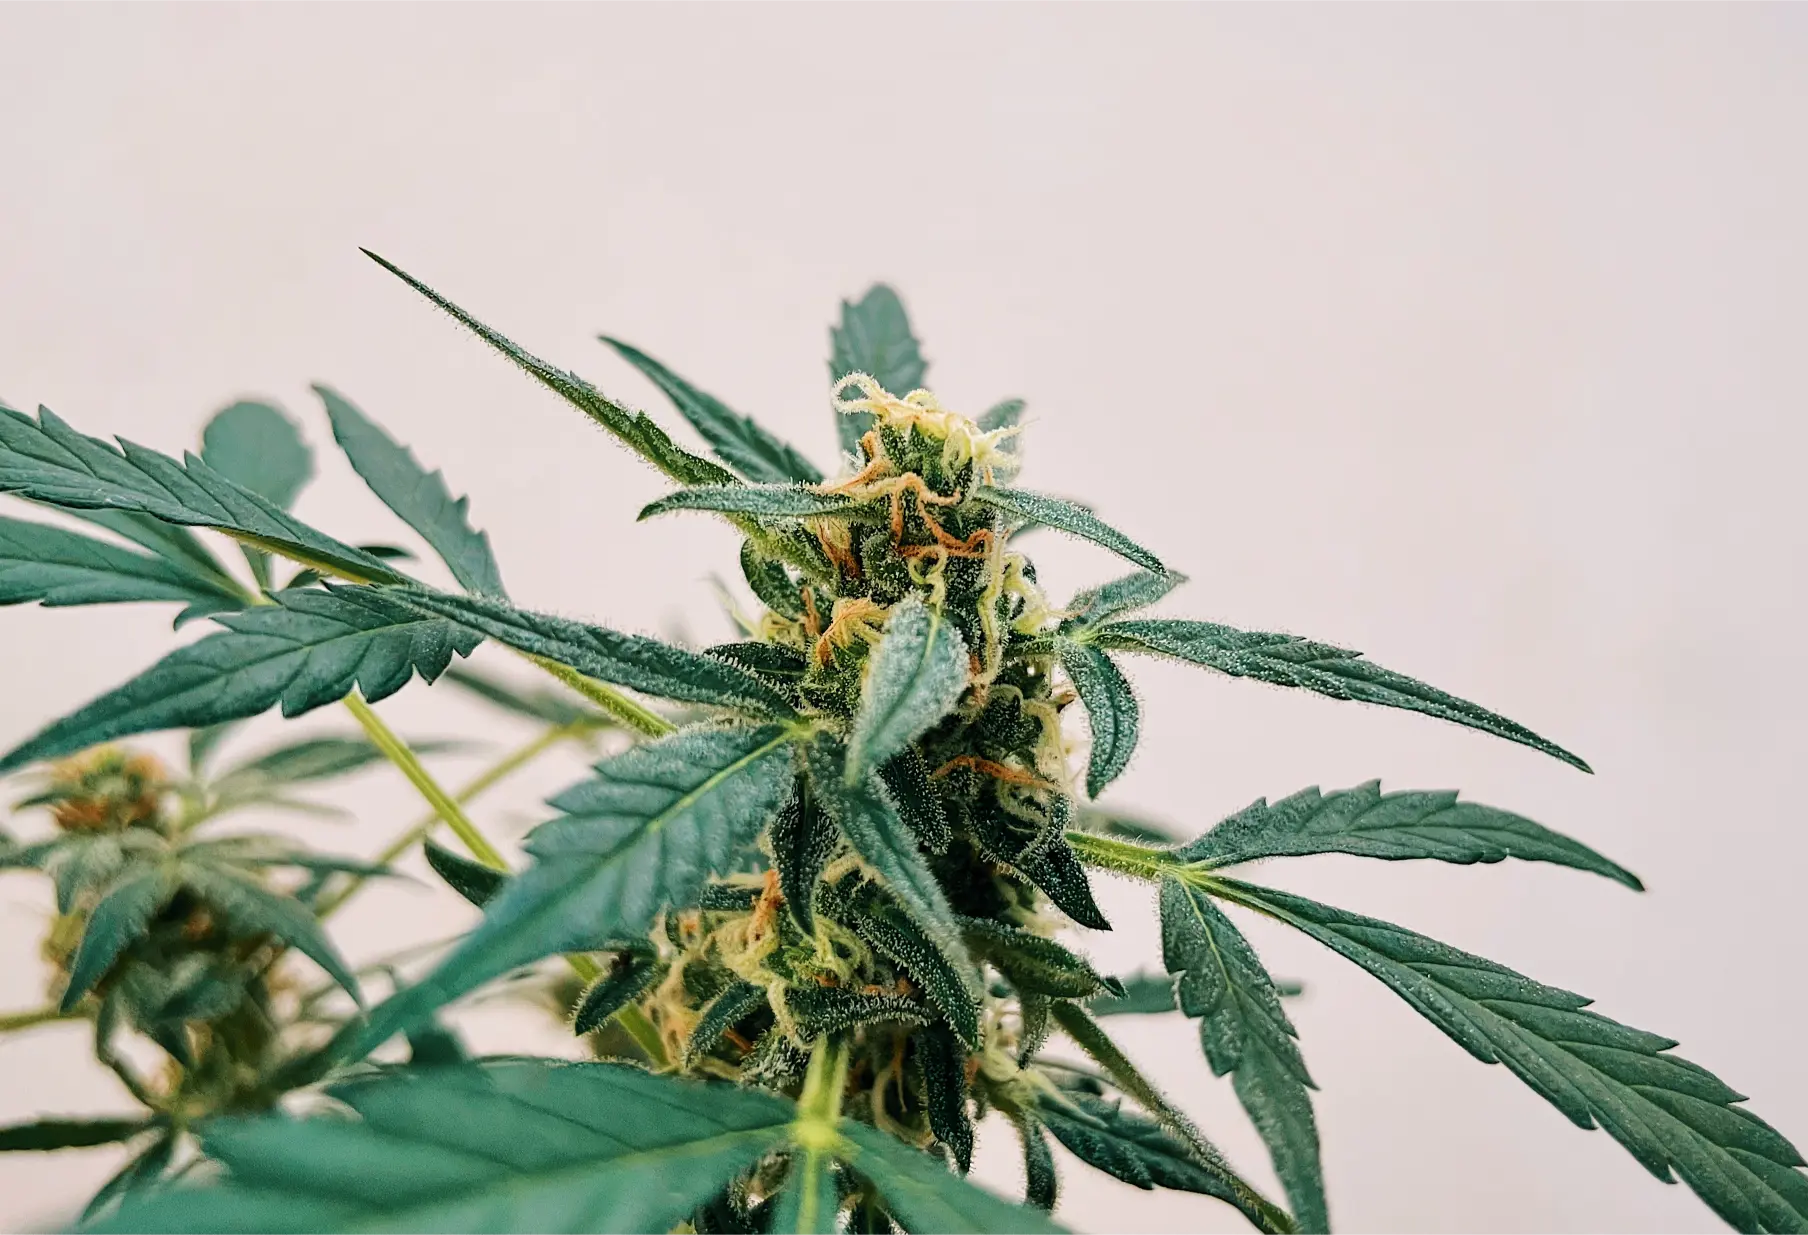
How to Mark and Photograph Plant Symptoms
How to Mark and Photograph Plant Symptoms
A plant-symptom photo becomes useful when it preserves three things at the same time: where the symptom is, what it looks like, and whether it is changing. A close-up of one damaged leaf can show detail, but it can also hide the pattern that matters most. The same spot may come from feeding, a splash mark, heat injury, an old nutrient problem, mechanical damage, or disease. Good marking and photography keep the plant context attached to the symptom so you can compare evidence instead of relying on memory.
The most reliable workflow is simple: identify the plant and zone, mark the affected area without injuring it, photograph the garden pattern and whole plant before moving closer, capture the symptomatic organ from several useful angles, include scale when size matters, record environmental and root-zone context, then return to the same marked location after the next irrigation, weather event, or correction. The follow-up image is often more informative than the first image.
Diagnostic Photo Series
A diagnostic photo series is a set of images that preserves spatial context from broad to close: site or zone, whole plant, affected branch or organ, and close-up symptom or sign. It is paired with a plant ID, date, location, and short history so the image can be interpreted and compared later.
Mark the Plant Before Changing Anything
When a symptom first appears, the instinct is often to remove the leaf, change the feed, spray something, or take a close-up and move on. That can erase the baseline. Before you correct anything, decide exactly what you want to find again.
Give the plant a stable ID
If the garden contains more than one plant, use a plant ID that will still make sense weeks later. A row and position, bed and plant number, container number, cultivar code, or another simple system is enough. Avoid labels such as “sick plant” or “yellow one” because the appearance may change while the plant remains the same.
For a larger outdoor garden, connect the plant ID to the irrigation zone, soil area, cultivar, or other management unit. That lets you distinguish a plant-specific problem from a pattern that follows water delivery, exposure, soil, or genetics.
Mark the branch or symptom without constricting it
Use a loose, visible tag near the affected branch, petiole, or node rather than fastening a tight tie around growing tissue. A soft colored tie, plant label, flag, or tag can work if it leaves room for expansion and does not rub the stem in wind.
Do not puncture leaves, carve stems, wrap adhesive tape directly around living tissue, or use a tight wire merely to create a marker. The marker should help you relocate the symptom without creating a second symptom.
Field Advice: Mark near the symptom, not on top of it. You want the tissue to keep developing naturally so the follow-up image shows what the plant did, not what the marker did.
Mark a reference point when the exact leaf may disappear
Older damaged leaves can yellow further, tear, fall, or be removed for sanitation. If the exact leaf may not remain, mark the branch node or adjacent stem position and note which leaf was photographed. That preserves the location even if the tissue itself disappears.
For flower symptoms, mark the supporting branch rather than tying material tightly around a flower. For a root-zone problem, mark the container, emitter, probe point, or bed position instead of disturbing roots just to create a visual reference.
Photograph before removing suspicious tissue
If a leaf, flower, root sample, or stem section may need to be removed for diagnosis or sanitation, photograph it in place first. The attached position tells you which canopy level, branch, side, and neighboring tissues were involved. Once the sample is detached, that spatial information is easy to lose.
“Should I remove the spotted leaf before taking photos so the plant looks cleaner?”
No. Photograph the leaf in place first, along with the whole plant and nearby leaves. Removing it may erase useful evidence about canopy position and spread. If the tissue later needs to be removed, take a second photo of the detached sample and record where it came from.
Question sent by: Ethan Brooks, via email.
Create a simple marker key
If you use colored markers, define what the colors mean. For example, one color can mark new symptoms awaiting confirmation and another can mark a location already corrected and scheduled for recheck. Do not create so many categories that the system becomes harder to use than the garden itself.
The marker should answer one question immediately: where do I return next time?
Capture Context Before the Close-Up
Diagnostic photography should move from broad context to fine detail. Mississippi State University Extension recommends a series that includes the surrounding location, the entire plant, the affected plant part, and a close-up of signs or symptoms. This sequence matters because plant problems are often identified partly by distribution.
Photo 1: the site or zone view
Stand far enough back to show where the affected plant sits in the garden. Include neighboring plants, the row or bed, nearby wall or fence, irrigation layout, low area, shade edge, or other relevant feature when possible.
This photo can reveal patterns that disappear in a leaf close-up. Several affected plants may line up with an irrigation lateral. Injury may be strongest on the windward edge. A wet hollow may contain more wilted plants than higher ground. A single isolated plant may point toward a local root, stem, or mechanical problem instead of a crop-wide issue.
Photo 2: the whole plant
Frame the entire plant from base to top. The goal is to show posture, relative size, canopy shape, and the distribution of symptoms. Is only the lower canopy yellow? Is one branch wilted? Is new growth distorted while older leaves remain normal? Is one side bleached while the shaded side looks healthy?
A whole-plant image is especially important when the close-up symptom has many look-alikes. Yellow leaf tissue alone cannot show whether the problem begins on old leaves, new growth, one branch, or the whole plant.
Photo 3: the affected branch or organ
Move closer and show the symptomatic leaf, flower, stem, branch, or root-zone feature in relation to surrounding healthy tissue. Include the transition between affected and unaffected tissue when that boundary is visible.
For a leaf problem, photograph the entire leaf rather than only one lesion. For a stem problem, include enough stem above and below the injury to show its position. For a flower problem, include the surrounding flower structure without pulling dense tissue apart unnecessarily.
Photo 4: the close-up evidence
Now capture the fine feature that may help confirmation: lesions, stippling, eggs, webbing, frass, fungal growth, residue, stem cracking, insect feeding, root discoloration, or another visible sign.
Mississippi State distinguishes between symptoms and signs because visible plant damage and visible evidence of a causal organism are not the same thing. A brown spot is a symptom. Fungal structures, an insect, eggs, or frass may be more specific evidence.
| Image level | What it should show | Question it helps answer |
|---|---|---|
| Site or zone | Affected plant plus surrounding plants, bed, row, exposure, irrigation, or terrain | Is there a spatial pattern? |
| Whole plant | Entire plant, posture, canopy, top-to-bottom distribution | Which tissues and plant parts are involved? |
| Organ or branch | Whole leaf, flower, stem section, branch, crown, or root-zone area | Where does affected tissue meet normal tissue? |
| Close-up | Lesion, insect, egg, webbing, frass, growth, residue, wound, root detail | What specific visible evidence is present? |
Take both sides of a leaf
University of Maryland Extension specifically recommends photographing both the top and bottom of symptomatic leaves because insects and other diagnostic clues may be visible on only one surface. Cannabis makes this especially useful because mites, aphids, eggs, cast skins, and webbing can concentrate on the underside while the upper surface mainly shows feeding damage.
If the underside is difficult to photograph while attached, support the leaf gently. Do not fold or crush it simply to get the camera closer.
Include healthy comparison tissue
Take at least one photo of comparable healthy tissue from the same plant or a nearby plant under similar conditions. A healthy reference can show whether a color, trichome, leaf hair, vein pattern, or texture is actually abnormal.
Comparison photos are especially valuable for subtle discoloration because phone cameras automatically change exposure and white balance. Looking at affected and healthy tissue captured under the same light is more useful than comparing today’s image with a random internet photo.
Do
Move from site context to whole plant, organ, close-up, and healthy comparison.
Avoid
Submitting one tightly cropped lesion photo and expecting it to explain the entire plant problem.
Photograph the Symptom Clearly
A diagnostically useful photo does not need professional camera equipment. It needs focus, believable color, enough depth of field, and a clear subject.
Clean the camera lens first
Cornell Cooperative Extension and University of Maryland both recommend cleaning the phone or camera lens before taking diagnostic photos. Finger oil can soften detail and create haze that becomes especially misleading when you are trying to distinguish powdery growth, residue, fine webbing, or trichome appearance.
Use focus before zoom
Move the camera physically closer while it can still focus rather than relying heavily on digital zoom. Cornell’s crop-diagnostic guidance warns that excessive zoom reduces sharpness and recommends adjusting distance first.
Tap the screen on the symptom to place focus where it matters. Take several frames and keep the sharpest one. If a small target will not focus at close range, back away slightly and crop later rather than saving a blurred image.
Stabilize the camera and the plant
Brace an elbow against your body, knee, stake, bench, or other stable surface. Wind can move a leaf several times while the phone captures one frame, causing detail to blur even when the camera itself is steady.
Where appropriate, support a leaf gently with the other hand. For very small insects or details, the principles from a hand lens apply: use magnification only after you have preserved the larger context.
Use light that preserves real color
Avoid shooting directly into strong sun because the plant can become a dark silhouette. Move so the main light comes from behind or beside you, or shade the subject during harsh midday light. Maryland Extension specifically recommends avoiding major light sources in front of the camera and taking multiple angles.
When color itself is diagnostically important, try to repeat follow-up photos under similar light. Early morning shade and orange sunset light can make the same yellowing look different. Indoor colored grow lights can be even more misleading.
Do not treat a phone photo as a calibrated color measurement
Automatic white balance, exposure, HDR processing, screen settings, and image compression can change apparent color. A neutral gray card or proper color target can improve consistency, but unless you are using a calibrated photographic workflow, the image should remain a visual record rather than a numerical chlorophyll or nutrient measurement.
Important: Do not use filters, beauty modes, saturation boosts, or automatic enhancement tools on diagnostic originals. Keep an unedited original even if you create a brighter copy for discussion.
Use a ruler or scale when size matters
Maryland Extension recommends a ruler as the best size reference when possible. Coins, pens, or other common objects can provide rough scale, but their dimensions can vary by country and product.
Place the ruler beside the symptom on the same visual plane when practical. If it sits several centimeters closer to the camera than the lesion, apparent size can be distorted. Do not cover the symptom or press a dirty object into a flower just to show scale.
Use a label card without blocking the plant
A small card can show plant ID, date, and sample location in the frame. Keep it off to the side and avoid covering diagnostic tissue. A dry-erase card or reusable plant ID can speed up large scouting rounds.
Do not rely only on the text in the picture. Keep the same information in the written log because photos can be renamed, compressed, or separated from their original metadata.
Photograph tiny targets through magnification only after the standard images
Cornell’s crop-photo guidance suggests placing a scouting lens near the phone camera for very small subjects. That can work for mites, eggs, small insects, or fine structures, but it can distort the image edges. Center the target and keep a normal close-up too.
The dedicated hand-lens resource should own the detailed magnification technique once its live URL is verified. This page only uses magnification as an optional close-up layer.
“Can I just use portrait mode so the background disappears?”
Use it cautiously. Background separation can help the camera focus on a leaf or insect, but software blur can also erase fine edges or small objects. Keep at least one normal, unprocessed image with the full context and compare the result before relying on a computationally altered version.
Question sent by: Julia Schneider, via contact form.
Record the History Behind the Image
Mississippi State emphasizes that photos should be submitted with additional information because many plant problems cannot be diagnosed from images alone. A symptom image without history can support several incompatible explanations.
Record when the symptom first appeared
Write the first date you noticed it, not only the date you photographed it. If you are unsure, record the earliest date you can support rather than inventing precision.
Then note whether the symptom appeared suddenly or gradually. Sudden widespread injury after one event can point in a different direction from a slowly expanding cluster.
Record recent changes
Useful history can include:
- irrigation changes, missed watering, standing water, or a clogged emitter,
- fertilizer, pH adjustment, amendment, foliar feed, or spray application,
- transplanting, pruning, training, staking, or root disturbance,
- heat, cold, hail, heavy rain, prolonged leaf wetness, wind, or smoke exposure,
- nearby herbicide or pesticide use, mowing, construction, or dust,
- new plants introduced to the site,
- pest sightings or trap changes,
- changes in water source or water quality.
The existing Complete Outdoor Growing Guide already uses the question “What changed?” as a diagnostic starting point. This resource turns that principle into a photo record instead of repeating the complete diagnostic framework.
Record the plant stage and tissue age
Write whether the plant is a seedling, newly transplanted, vegetative, transitioning, flowering, or near harvest. Also note whether the symptom begins on old leaves, mature leaves, new growth, flowers, stems, crown, or roots.
The same color can imply different things depending on tissue age and stage. Photography preserves the appearance; the written note preserves the biological context.
Record the root-zone condition
Many leaf symptoms are actually root-zone problems. Note whether the root zone was wet, dry, recently irrigated, slow to drain, compacted, salty, unusually hot, cold, or inconsistent with neighboring plants.
Use Cannabis Watering Basics for the broader watering framework rather than trying to diagnose every moisture problem from a photograph.
Record the pattern across the garden
Write how many plants show the same defined symptom and where they are. A single plant, one cultivar, one row, one irrigation zone, a low spot, the field edge, or the entire garden are different diagnostic patterns.
This is where marking and photography connect to scouting. The newly drafted outdoor scouting route should eventually be the detailed internal link for representative sampling and incidence records once the URL is live.
| Record field | Example of useful information | Why it matters |
|---|---|---|
| Plant ID and location | Bed B, Plant 4, west irrigation zone | Lets you return to the same plant and detect spatial patterns |
| First noticed | September 8, after two wet nights | Connects symptoms to weather and management history |
| Tissue involved | Lower mature leaves, upper surface spots, underside clean | Separates look-alikes by tissue age and location |
| Root-zone status | Still wet 24 hours after irrigation while neighbors are drying | Tests whether the leaf symptom may be secondary to water or oxygen stress |
| Spread | One branch on day 1, three nearby branches on day 4 | Shows whether the process is active |
| Action | Emitter corrected, no nutrient change | Allows the next photo to test one intervention |
Separate Look-Alikes With Comparison Photos
A photo series is most useful when it helps reject wrong explanations. Many cannabis symptoms are visually similar from one angle but different when pattern, underside evidence, root-zone condition, and time are added.
Old damage vs active damage
An old lesion can remain brown for the rest of the leaf’s life. If you photograph it today and again next week, the mark may look just as dramatic even though the original problem stopped.
Mark the boundary or photograph adjacent healthy tissue so the next inspection can ask whether the lesion expanded, whether new lesions appeared, or whether new growth remained clean. Persistence is not the same as progression.
Nutrient-like discoloration vs root-zone stress
Yellowing, marginal damage, spotting, or weak growth can follow nutrient imbalance, pH problems, salt stress, wet roots, dry roots, root disease, or normal aging. A leaf photograph alone cannot resolve all of these.
Pair the images with root-zone moisture, irrigation history, pH or EC measurements when relevant, and the distribution across old versus new leaves. Do not add several nutrients because one photo resembles a deficiency chart.
Powdery mildew vs residue, dust, or dried droplets
Photograph the material from several angles and on both exposed and sheltered leaves. Include the recent spray history. A close-up can reveal structure, but a plant clinic may still be needed when treatment depends on confirming the cause.
Spider-mite feeding vs other stippling
Capture the upper-surface stippling and the underside of the same leaf. Add a magnified image if mites, eggs, cast skins, or webbing are present. The pair is much stronger evidence than the stippling alone.
Wind, hail, or abrasion vs chewing
Mechanical injury often follows exposure, contact points, storm direction, trellis rub, or neighboring branches. Photograph the whole plant and nearby structures so torn leaf tissue is not isolated from the event that caused it.
Heat wilt vs dry-root wilt
Photograph plant posture and record root-zone moisture, time of day, temperature, wind, and recovery later in the day. A plant that droops during peak heat with a moist root zone but recovers as conditions moderate is a different pattern from a plant that continues declining because the root zone is depleted or damaged.
Do
Build photo pairs that test alternatives: top and bottom, affected and healthy, exposed and sheltered, before and after, plant and root-zone context.
Avoid
Matching one dramatic close-up to an online image and treating visual similarity as confirmation.
Use the hand lens when the clue is smaller than the damage
When the symptom suggests mites, aphids, eggs, cast skins, webbing, frass, or fine fungal structures, magnification may add the missing evidence. If the target remains too small or ambiguous, move to stronger microscopy or professional diagnosis rather than assuming the lens found nothing.
Do not use a hand lens or photo to confirm viruses, viroids, or many internal pathogens. The photo records symptoms; laboratory methods may be required to identify the cause.
Rephotograph After the Next Change
The most important reason to mark a symptom is to return to it. Without a marker, another old spot can look like new spread and a different leaf can be mistaken for the original sample.
Choose the recheck interval from the risk
There is no universal number of days. A rapidly spreading flower rot, severe wilt, or active pest outbreak may need reinspection within hours or the next day. A stable leaf symptom after a root-zone correction may be more useful to assess over several irrigation cycles or new-growth intervals.
Write the next recheck date when you take the first photo. Do not leave the timing to memory.
Use the same angle when practical
Return to the marked branch and reproduce the broad view and one or two important detail views. Exact scientific image registration is not necessary for ordinary grower records, but similar framing makes change easier to judge.
Keep one recognizable reference in the frame, such as the same node, branch union, tag, ruler position, or neighboring leaf. Do not crop so aggressively that the reference disappears.
Ask whether damage is expanding or only aging
Old tissue rarely turns green again after necrosis. Therefore, recovery is often measured by no new damage, stable lesion boundaries, improved posture, healthy new growth, or reduced pest evidence, not by disappearance of the original mark.
This distinction is already present in Weedth’s current outdoor pillar. The parent guide states that after correction the grower should return to the same marked leaves, tips, or flowers and evaluate the rate of new damage. The new resource should own the detailed photo method while the pillar keeps that principle brief.
Change one major variable when possible
If the plant is not in immediate danger, avoid changing irrigation, fertilizer concentration, pH, foliar products, pruning, and pest treatment simultaneously. A before-and-after photo cannot tell you which change mattered if five things changed at once.
In urgent situations, plant or crop safety can require multiple actions. Record them all so the follow-up image is not falsely attributed to one correction.
“The brown spot is still there after I corrected watering. Does that mean the fix failed?”
Not necessarily. Dead tissue usually stays dead. Compare the marked boundary, nearby leaves, plant posture, and new growth. If the original spot is stable and no new symptoms appear, the correction may be working even though the old damage remains visible.
Question sent by: MapleGrower, via Facebook page.
Keep originals in chronological order
Use a simple naming pattern such as date, plant ID, tissue, and view. For example: 2026-09-10-B4-lower-leaf-top.jpg. Avoid filenames that encode an unconfirmed diagnosis such as magnesium-deficiency.jpg before you know the cause.
Store edited discussion copies separately from originals. If an image later needs to be reviewed by an extension specialist or diagnostic lab, the untouched file preserves more reliable visual information.
Know When Photographs Are Not Enough
Mississippi State states plainly that many plant diseases cannot be diagnosed from photos alone. Wilt, leaf spots, discoloration, and stunting can result from pathogens, insects, nutrient problems, water stress, chemical injury, or other abiotic causes. The photograph can narrow the question, but it cannot manufacture missing evidence.
Escalate when the diagnosis changes a high-consequence action
Seek qualified diagnosis when the answer will determine whether you remove plants, quarantine propagation material, use a pesticide or fungicide, discard flowers, change a major fertility program, or make another costly or irreversible decision.
For a suspected virus, viroid, or internal pathogen, imaging may document the symptom pattern but molecular or laboratory testing can be necessary. Weedth’s Cannabis Seeds and Plant Pathogens resource explains this distinction in more depth.
Send both photos and history
If you ask an extension specialist, crop consultant, or plant diagnostic laboratory for help, send the photo series plus plant ID, cultivar when relevant, stage, symptom timeline, distribution, recent weather, irrigation, fertility, spray history, and any prior correction.
Do not send only a screenshot from social media or a cropped image stripped of context when the original is available.
A physical sample may be required
Laboratory diagnosis can depend on tissue that includes the transition between healthy and affected areas, roots or crown when above-ground symptoms may originate below ground, or a complete insect specimen. Follow the receiving laboratory’s current sample instructions rather than improvising packaging.
Photographs Are Evidence, Not a Laboratory
A sharp image can support a confident diagnosis when the visible signs are distinctive, but it cannot detect every pathogen, quantify nutrient status, prove root oxygen conditions, or measure plant chemistry. When the missing information matters, collect the measurement or sample instead of asking the photo to answer a question it cannot answer.
Be cautious with automated photo diagnosis
An image-recognition system can suggest possibilities, but the same limitation still applies: the photo may not contain root-zone history, irrigation data, the underside of the leaf, neighboring plant patterns, microscopic signs, or laboratory evidence. Use automated suggestions as hypotheses, not as treatment authorization.
Protect privacy and location data when necessary
Photos can contain metadata or visible landmarks. For a lawful cannabis garden, decide whether exact location information needs to be shared with the person or laboratory receiving the image. Provide the environmental context needed for diagnosis without unnecessarily publishing private site details.
Master Advice: A useful diagnostic record should let another person understand what changed without standing beside you in the garden.
Plant Symptom Photo Checklist
The strongest symptom record does not depend on an expensive camera. It depends on returning to the same plant with enough context to tell whether the problem is new, stable, spreading, or responding to a correction.
Before You Diagnose From a Photo
- Give the plant a stable ID and record its garden location or management zone.
- Place a loose marker near the affected branch, node, flower, or root-zone point without constricting tissue.
- Photograph suspicious tissue in place before removing it.
- Take a site or zone photo that shows neighboring plants and relevant irrigation, exposure, or terrain.
- Take a whole-plant photo from base to top.
- Take an organ-level photo showing the entire affected leaf, flower, branch, stem section, or root-zone area.
- Take a sharp close-up of the symptom or visible sign.
- Photograph both upper and lower leaf surfaces when leaves are involved.
- Capture comparable healthy tissue under the same light.
- Clean the camera lens and avoid heavy digital zoom.
- Brace the camera and stabilize moving leaves when possible.
- Use bright, neutral light and preserve the unedited original.
- Include a ruler or another known scale when lesion, insect, egg, or wound size matters.
- Record date, plant stage, tissue age, symptom distribution, and when the problem was first noticed.
- Record irrigation, root-zone condition, fertilizer, sprays, weather, training, transplanting, and other recent changes.
- Do not name the file after an unconfirmed diagnosis.
- Use photo pairs to test look-alikes: top/bottom, healthy/affected, exposed/sheltered, before/after.
- Write the next recheck date and return to the same marker.
- Judge recovery by new damage, spread, posture, and new growth rather than expecting old necrotic tissue to heal.
- Escalate to magnification, measurements, physical samples, or laboratory testing when the photograph cannot answer the decision safely.
Share this article
A quick overview of the topics covered in this article.
Follow us
Latest articles
September 27, 2026
September 27, 2026
September 27, 2026
September 27, 2026
