Harvest Hygiene and Lot Labels
A harvest can lose its identity before it loses its aroma. Two branches from different plants land on the same table, someone moves an unlabeled tray, or a suspicious flower enters an otherwise clean collection. The cutting itself may take seconds, but the decisions around that cut determine whether you can later explain where the material came from and what happened to it.
Start with a clean handling route and an unbroken identity chain. Inspect the standing crop and the work area, assign each harvest group a distinct identifier, prepare its receiving container, make and record the cut, and move the material to its next controlled location without mixing identities or leaving fresh flowers in unmanaged conditions. If anything looks contaminated or loses its identity, stop and segregate it rather than guessing.
This resource covers harvest-day hygiene, physical lot boundaries, internal work labels, handoffs, and a practical verification audit. It is not a substitute for determining when flowers are mature, selecting a drying schedule, designing a complete commercial tracking system, or interpreting a laboratory certificate. For the wider sequence from plant care to harvest, use the Cannabis Grow Basics resource. Follow the laws and any licence conditions that apply to the cultivation, possession, processing, transport, testing, and sale of the material.
The Harvest Decision: Clean Material and Known Identity
Harvest hygiene has two simultaneous outcomes. The first is material control: flowers should not acquire avoidable soil, debris, microbes, tool residues, cleaning chemicals, hair, glove fragments, or moisture from the handling process. The second is identity control: every basket, branch group, rack, and later subdivision should point back to the source material and the events affecting it. A clean tray with the wrong label has failed the second goal. A perfectly labeled tray holding visibly rotten flower has failed the first.
Define the unit you are trying to protect
The working unit may be one plant, a group of branches from one plant, or a properly defined group from several plants. That choice depends on whether plants have compatible provenance, disease observations, harvest conditions, intended handling, and applicable record rules. Do not use a cultivar name as a unique harvest identifier. A name such as “Cultivar A” cannot separate two plants with different histories, a wet outer-canopy harvest from a clean inner-canopy harvest, or an early cut from material collected a week later.
For a home grow, an internal harvest lot is an organizational grouping connected to individual plant IDs. A regulated business must instead follow its jurisdiction’s official definitions, inventory identifiers, batch limits, traceability platform, lot-release and labeling requirements. These are not interchangeable: the example internal codes below are not a regulatory system or legally sufficient consumer package labels.
Definition: Harvest lot. In this resource, a harvest lot is a clearly bounded group of harvested material with a unique internal identifier and a record of its origin, date, handling, status, and later movements. Local law may define a regulated batch or lot differently. The internal record should map to official identifiers where required without pretending that a home-made code replaces them.
Three separate gates prevent a false sense of security
A useful harvest has three gates. The material gate asks whether flowers are suitable to enter clean handling or need to be held apart. The identity gate asks whether the source plant and proposed lot are known without relying on memory. The transfer gate asks whether the next container, location, and receiver can preserve that material’s status and ID. Failing one gate should pause that unit, not silently change the documentation to make it look acceptable.
The harvest label does not certify microbial safety, cannabinoid content, maturity, or dryness. Those are separate assessments. A dated record and clean work surface reduce preventable errors; they do not transform untested material into tested material or guarantee that internal flower tissue is free of mold.
Remember: A harvest lot is useful only while the material, its physical label, and its record agree. Check all three at each handoff.
Decide what belongs outside this procedure
Whether to cut before an approaching rainstorm is a weather and crop-quality decision; a harvest hygiene checklist cannot supply a universal rain threshold. Drying temperatures, relative humidity, water activity, cure duration, and terpene changes belong to a dedicated postharvest process. Once material enters the drying area, this article follows only the label, location, status, and exception record. The drying-rule discussion explores why one environmental rule of thumb does not fit every batch.
Inspect Flowers, Tools, People, and the Receiving Area
Inspection starts before the first branch is cut. A brightly lit table can reveal debris after harvest, but it cannot always tell you whether a brown interior appeared on a standing flower, during transfer, or after a tray was mixed. Examine the plants in place and make the receiving route ready before material moves.
Inspect representative flowers and known trouble spots
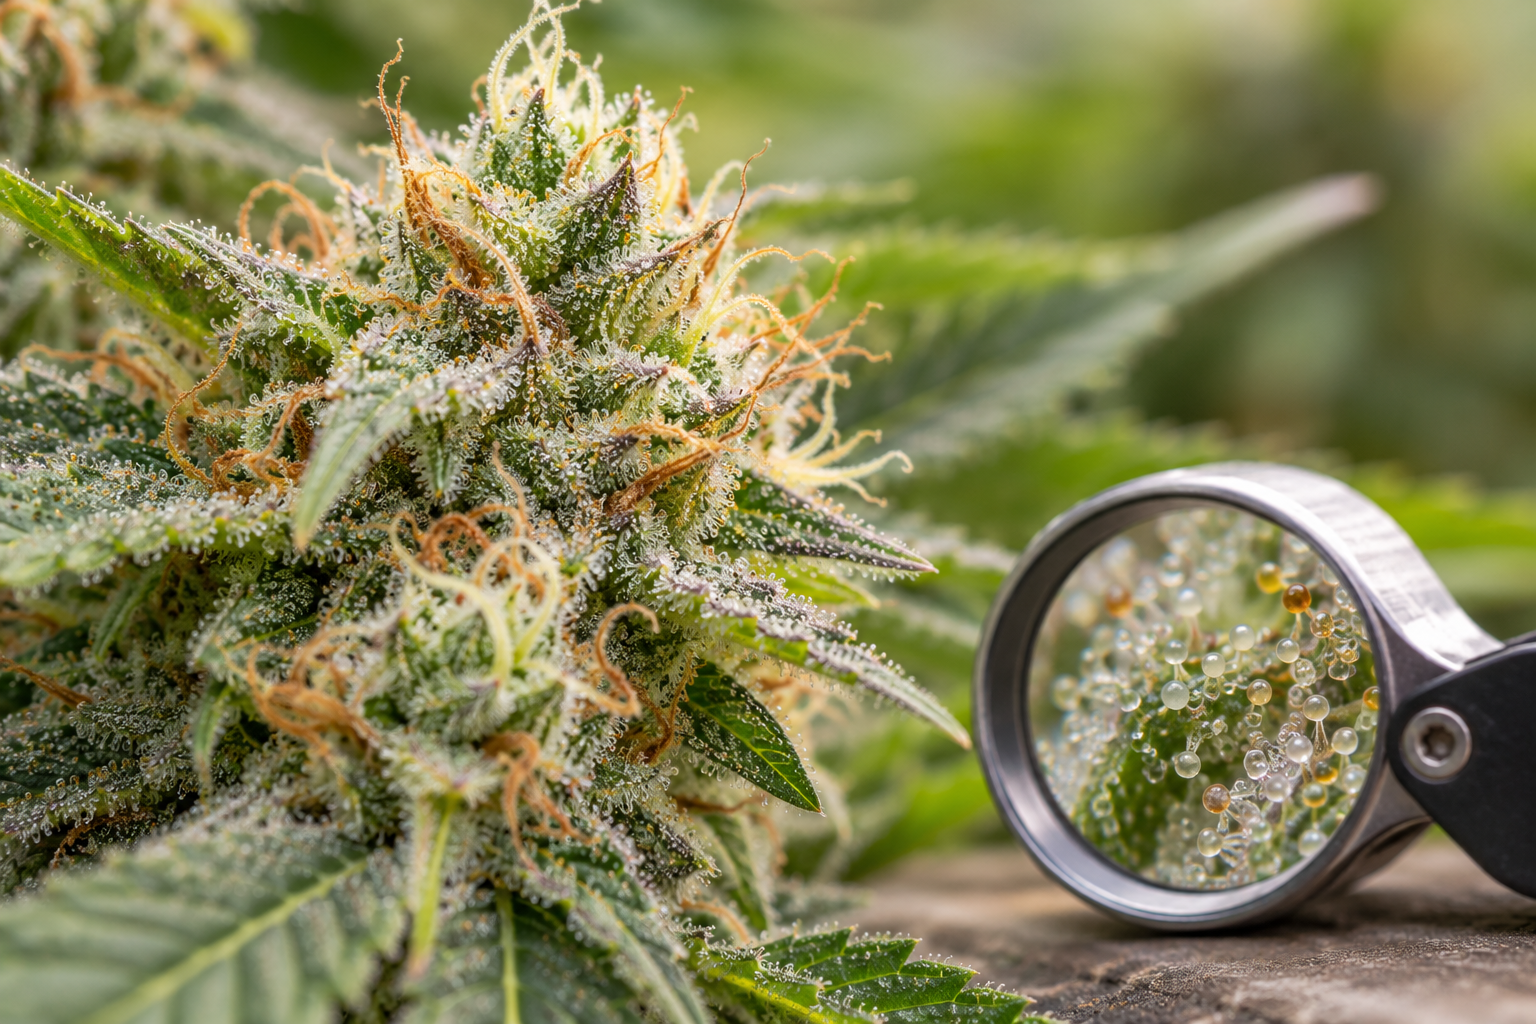
Walk the planned harvest area, reading plant IDs as you go. Look at exposed and sheltered branches, dense and open flowers, upper and lower canopy sites, and places previously marked after rain or pest inspection. Use clean hands or suitable gloves and a hand lens where helpful; avoid shaking or repeatedly pulling apart suspicious flowers over sound material. A normal-looking outer surface is not reliable proof of an unaffected interior, particularly in dense flowers.
Record whether a questionable finding is confined to one flower, branch, plant, or larger grouping. Note its exact source and observed features: unexplained internal browning, collapse, gray growth, abnormal odor, wet pockets, insect frass, or obvious foreign material. Avoid diagnosing the species of a fungus from appearance alone, and do not substitute a photograph for appropriate testing when the decision requires laboratory evidence.
Warning: Do not blend suspicious flower into a clean lot. Where visible mold, rot, animal contamination, unknown chemical exposure, or other credible hazards are present, separate and identify the affected material. Do not smoke, sell, blend, wash, or process visibly moldy flower as a home salvage method. The fate of adjacent or related material requires the actual risk assessment and applicable legal or professional requirements.
Give the work surface a clean-to-dirty route
Identify a clean receiving space, a separate place for waste, and a clearly marked hold area for suspect material. Place unused containers and labels away from soil, foot traffic, waste and chemical storage. Ensure tools and bins are intact and cleanable; cracks, frayed fabrics and damaged plastics can trap debris or shed fragments. A bin that carried soil amendments or pesticide equipment should not automatically become a flower container after a quick wipe.
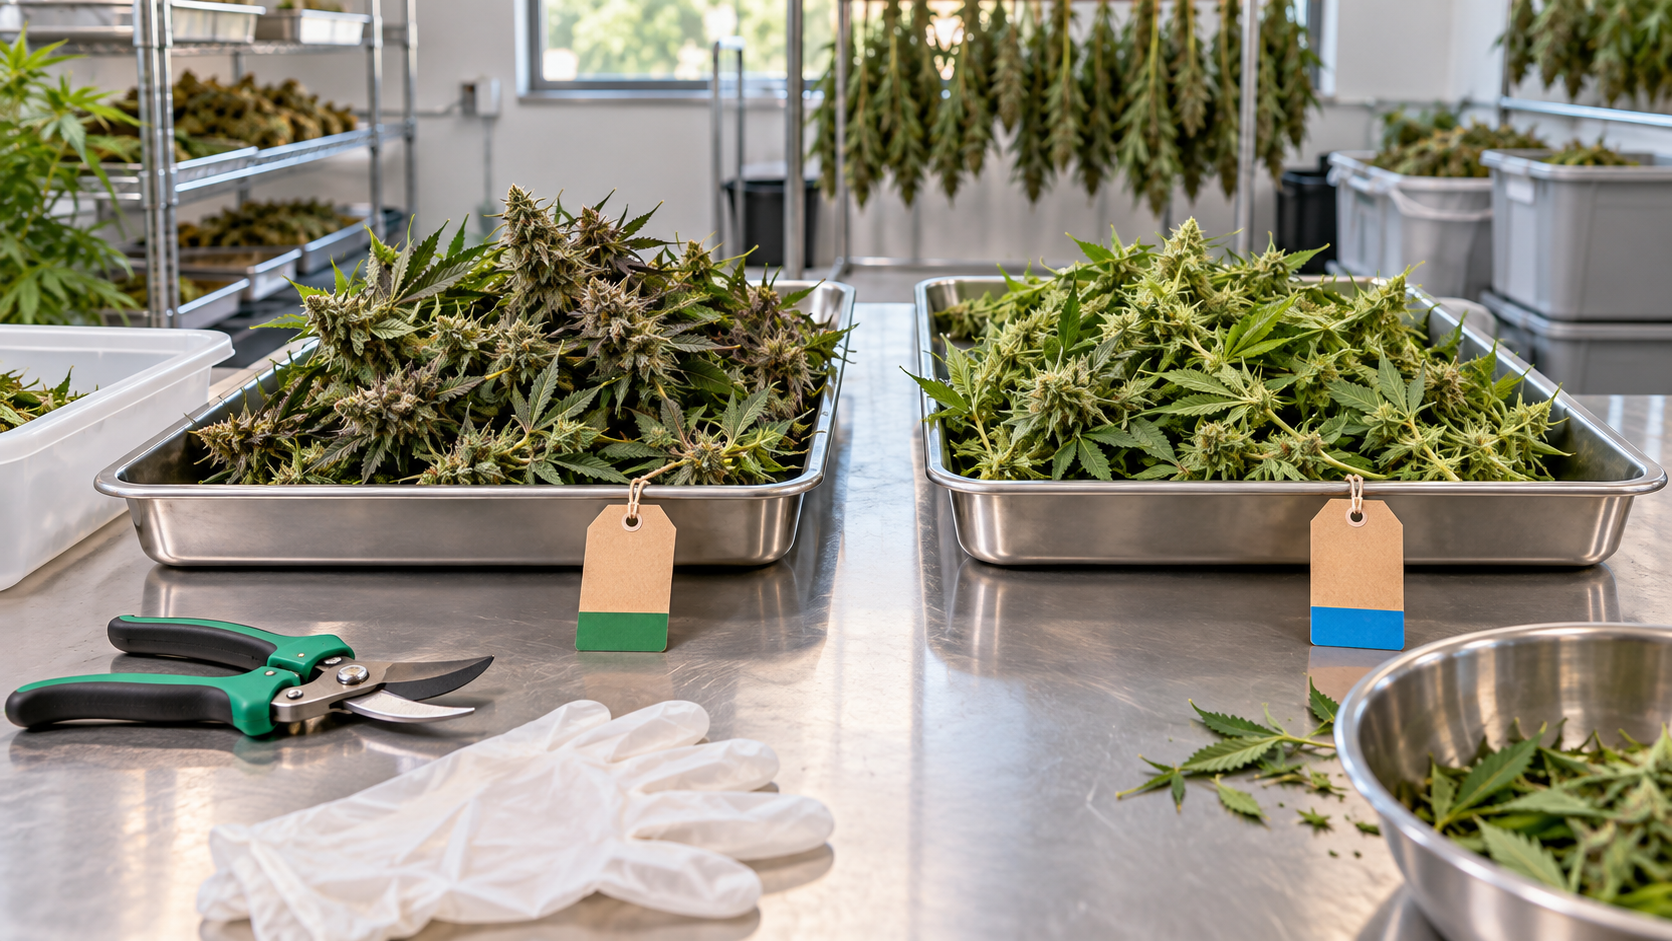
Fresh branches need an identified destination before cutting: a labeled receiving rack, a clean tray with a matching record, or a designated transport carrier. Keep the route simple enough that a helper cannot place the next plant’s flowers into the first plant’s container by mistake. Direct contact with the ground, ordinary household clutter, or dirty vehicle surfaces defeats the clean handling route.
Prepare tools through a defined cleaning procedure
Inspect snips, shears, branch cutters, hanging hardware, scale pans and reusable bins for sap, soil, plant fragments, corrosion or damaged surfaces. Remove visible debris and clean using a procedure appropriate for the material and equipment. Apply a suitable, legally authorized sanitizer or disinfectant only where indicated, following its product label, surface compatibility, contact time, personal protective equipment, rinse requirements and drying instructions. Keep the chemical and its spray mist away from exposed flowers.
Cleaning and disinfection are different tasks. Dirty organic residue can compromise sanitation; a shiny blade does not show that a plant pathogen has been inactivated. Likewise, an everyday alcohol wipe is not a validated, universally effective protocol against every cannabis pathogen or viroid. Use approved site procedures and specific evidence rather than inventing a generic disinfectant concentration.
Keep clean tools protected from used tools. After suspect material, soil contact, floor contact or an interrupted procedure, stop and apply the relevant cleaning and re-entry step. A tool from one plant should not move into another without the required hygiene check. Detailed organism-specific disinfection methods require verified guidance for the organism and tool involved; follow the applicable product label, site procedure and qualified local advice instead of relying on a generic shortcut.
Important: Complete chemical cleaning steps before exposed flower enters the area. Never spray an improvised cleaning mixture over harvested buds or assume its residue is acceptable for inhalation.
Check people and protective equipment
People are part of the contact chain. Provide appropriate handwashing access; wash and dry hands before handling clean material and after toilet use, breaks, waste work, touching soil or contaminated equipment. Clean gloves can reduce direct contact when used correctly, but gloves are not self-cleaning. Change them when torn, dirty, after suspect material or after switching tasks. Do not touch a phone or door handle with flower-handling gloves and then return to clean buds.
Keep drinks, food, smoking, unnecessary personal items, hair, loose jewelry and nonessential visitors away from open flower. Staff who may contaminate product because of illness or an exposed wound should not handle it until the issue has been addressed under the applicable workplace procedure. Repetitive cutting and exposure to dusty or moldy material are also worker-safety concerns. Choose ergonomic tools and task rotation where practical; obtain appropriate occupational guidance and respiratory protection for hazardous exposures rather than assuming an ordinary face covering makes mold handling safe.
Check the scale and label supplies before weighing
If harvest mass is recorded, verify the scale is suitable, stable, clean and checked or calibrated as required for its purpose. Record container tare or net weight consistently, plus the unit and whether the measurement is fresh/wet material. A wet harvest weight cannot be compared directly with dried flower weight. Set out durable tags, a water-resistant marker or printed labels, a matching paper or digital log, and a backup way to recover a damaged tag. Every container should be identifiable without opening it.
Design Harvest Lots and Labels Before Cutting
The safest moment to define a lot is before material from multiple plants is detached. A lot boundary should reflect a real physical group, not a convenient code applied after everything has been piled together. Use the existing plant-label and lot-record system for the source identity and propagation chain. At harvest, add a distinct event and physical material identifier while retaining the original plant references.
Keep source ID, harvest lot ID, and container ID distinct
A plant ID answers “which living individual?” A harvest lot ID answers “which defined collection of cut material?” A container or rack position answers “where is that collection now?” A later dry lot, processing batch, laboratory sample or retail package may need another identifier or an official link. One code should not silently change meanings across stages.
Here is a simplified traceability example: plant P-026 contributes selected branches to harvest lot H-2026-09-20-01, placed in trays T01 and T02. Both tray records point to the same harvest lot, which points to P-026. If the second tray is withheld after a suspicious finding, its disposition and status must be recorded separately; the common harvest date does not make it safe to blend the trays again.
Definition: Parent-child record. A parent lot describes the source group. A child or subdivision describes material separated from it during handling. The record preserves both directions: what each child came from and where every portion of the parent went. This example is an internal tracking model, not a substitute for legally defined inventory or batch rules.
Choose boundaries that preserve meaningful differences
Keep materials separate when a difference could affect safety, traceability, downstream handling or fair comparison: another plant or source, a different cut date, a wet section exposed to rain, a suspicious branch, different treatment history, a different intended processing path or different responsible operator where required. Not every branch needs a unique lot, but the group must be explainable without reconstructing its contents from memory.
Commercial operations should use the lot, batch, harvest group, package and track-and-trace definitions required by the actual jurisdiction and licence. They should never merge material merely because internal spreadsheets make it convenient. For a lawful home grow, simpler groupings may be sufficient, but do not call a multi-plant mixed harvest a single-plant measurement later.
| Identifier or field | Question it answers | Minimum practical check |
|---|---|---|
| Original plant ID | Where did the material originate? | Matches the standing plant tag and source record before cutting. |
| Harvest lot ID | What cut material belongs to this defined group? | Unique internal code; not reused or confused with a regulatory code. |
| Container, hook, or rack ID | Where is each physical portion? | Visible tag plus receiving-position log agree. |
| Harvest date and event | When and under what event was it collected? | Actual date, any separate collection interval where relevant. |
| Material and status | What is inside, and may it move? | Fresh branch, trimmed flower, waste, HOLD, released, or discarded as applicable. |
| Operator and destination | Who transferred it, and where did it go? | Handoff record names accountable people and locations where needed. |
| Weight and units | What quantity moved at this stage? | Net or gross clearly identified; fresh and dry weights not interchanged. |
Print or write the label before the first cut
Prepare a physical tag and a corresponding record while the source plant is still clearly visible. A useful working label shows a distinct harvest lot ID, originating plant ID(s), date, material description, container identifier and current status. Details too long for the tag belong in the linked record, not in an unreadable miniature label. Protect tags from moisture, condensation, abrasion and ink transfer. Do not attach wet paper in a way that contacts flower or leaves adhesive residues on plant tissue.
Where two people work together, have one read the source plant ID aloud and the other confirm the receiving label before cutting. For solo work, photograph the source tag and empty labeled container together, then record the start of the lot. A photograph helps recover context, but it does not replace a legible physical identifier or a written transfer record.
What if several plants are harvested into one group?
If a grouping is lawful and appropriate, record every contributing plant or source lot and the rule used to decide inclusion. Preserve any condition that makes one plant different. Once mixed physically, a contribution cannot reliably be assigned back to an individual flower simply because the original plant IDs are listed. If plant-level yield, disease incidence, terpene comparisons or breeding selection matters, keep those plants separate until measurements and decisions are finished.
Do: Decide and document grouping rules while plants and empty containers can still be matched one-to-one. Create an explicit child record whenever a portion is held, sampled, moved or discarded.
Avoid: Giving an unlabeled mixed pile a new code afterward and treating it as proof of origin, testing status or uniform quality.
Run a Clean Harvest and Document Every Handoff
The best harvest procedure is repeatable even when weather changes, a helper joins late or the cutting team has to stop. Use a consistent sequence that prevents both physical contamination and identity drift. The steps below are operational checkpoints, not universal legal or laboratory specifications.
Step 1: Open the harvest event
Record the date, location, intended source plant(s), planned lot ID, responsible person, expected destination and any observed exceptions. Confirm that the harvest is lawful and that site access, work surfaces and downstream space are ready. Inspect the first receiving container and match its tag to the event record. Set up dedicated HOLD and waste routes before any questionable material appears.
Step 2: Inspect and classify material while still attached
Look at the plant from outside inward, with attention to dense flowers, previously wet branches and hidden interior defects. Identify what will enter the ordinary lot and what must be removed from the clean flow. Record any suspect branch with its source position and status rather than calling a whole plant clean or diseased from one symptom. If the potential hazard cannot be assessed safely in the field, pause that unit and seek appropriate advice or testing.
Step 3: Verify the label at the cut point
Before severing a branch, compare the living plant’s ID with the intended harvest lot and the destination tag. Place cut material directly into its assigned clean, suitable receiver or hang it on an identified position. Avoid setting it down “temporarily” on the ground, a shared unlabeled table, an open waste container or a tray reserved for another plant. Temporary holding that is unlabeled is still an identity break.
Step 4: Cut and handle without unnecessary contact
Use well-maintained tools and support heavy limbs so they do not fall through the crop, drag on the ground, or crush adjacent flowers. Keep contact points limited and stable. Handle branches by sturdier stem portions when practical rather than repeatedly grasping inflorescences. Avoid shaking, brushing loose debris over other flowers, exposing material to cleaning chemical mist, or piling fresh cut material so deeply that it crushes or retains heat and moisture.
Where a task switches between clean and suspect plants or between dirty and clean zones, stop and complete the appropriate hand, glove, tool and surface reset. Maintain a distinct tool or cleaning sequence if the site’s approved procedure requires one. Record meaningful deviations, such as a dropped branch, broken container, suspected mold event, mislabeled rack or interrupted sanitation step. Do not erase the original event because a corrective action was taken.
Step 5: Tare and record mass only if it is useful
Measure each defined lot or physical subdivision using clean equipment. Note whether weight includes stems, large leaves, racks or containers, and record the units. Net fresh harvest weight is a logistical baseline, not finished usable flower yield. If the tare cannot be verified, record the limitation instead of inventing precision. A missing or inconsistent quantity is a reconciliation exception, not permission to modify the lot’s identity.
Step 6: Transfer to the next controlled location
Move the material promptly to its prepared next stage without mixing labels or leaving freshly cut flowers in unmanaged, wet or contaminated conditions. Record the source location, destination rack or area, the person completing the transfer when relevant, timestamp or event order where useful, container count, quantity and status. Confirm receiving labels immediately. The drying team should not need to guess which rack belongs to a held lot or which branch group was collected after rain.
This is a transfer protocol, not a drying recipe. Start the appropriate validated or evidence-informed drying process promptly; never assume that a clean label protects wet packed material from microbial growth. The broader grow-to-harvest guide covers the relationship between harvest and subsequent drying without turning harvest hygiene into a full curing manual.
Field Advice: Complete a read-back at every handoff: lot ID, source, quantity or container count, status and destination. A five-field verbal check is easier than reconstructing an unexplained mix-up later.
Step 7: Close the event and reset the area
After the last group, confirm that all filled containers appear in the record, that their tags match their physical contents and that HOLD and waste remain separated. Remove debris under the site’s waste procedure, clean tools and surfaces through the correct sequence, record sanitation if appropriate, and protect unused containers from recontamination. Do not close a lot as “approved” merely because the team finished cutting; regulated release may require additional reviews, tests and authorization.
Recognize Contamination, Identity Loss, and False Reassurance
Most failures are ordinary: a worker takes an unlabeled tray to a rack, a wet branch touches the floor, a glove handles waste and then a clean flower, or two same-name cultivars get combined. These events do not all demand the same response, but each must be recognized before the lot continues through the process.
Mold and other suspect flower cannot be fixed by relabeling
Gray or fuzzy growth, unexplained interior decay, objectionable musty odor or visibly contaminated material calls for separation and a documented disposition. Do not infer that only the visibly damaged fleck is affected or that removing it makes nearby material safe. Sampling, professional evaluation and discard decisions depend on the actual situation and any applicable regulations. A laboratory result for a correctly sampled lot may inform a regulated decision; a normal-looking flower or a missing smell is not a validated negative test.
Outdoor cannabis harvesting and trimming can involve substantial airborne biological material, as a small occupational field study found. That work identifies potential exposures and supports precautions, not a universal contamination percentage for every site. Avoid vigorous disturbance of suspect flower and prevent its waste path from crossing clean handling. Where hazardous mold exposure is possible, apply proper worker protections and seek professional guidance instead of relying on improvised consumer PPE.
Mechanical, chemical and foreign-material hazards need different responses
Broken glass, metal chips from tools, damaged gloves, soil, hair, pesticide drift and spilled cleaning chemicals cannot be treated as equivalent to ordinary leaf fragments. Isolate the affected material and equipment, establish how far the event could have spread, and document the investigation. Do not spray the flowers with a disinfectant or rinse them in unvalidated solutions to “reset” a contaminated harvest. Preventing the event is more reliable than attempting cosmetic recovery afterward.
Wet material and crowding can undermine an otherwise clean harvest
Fresh flowers contain substantial water. Deep stacking, prolonged transport, wet bins and poorly controlled receiving rooms can create pockets of retained moisture and physical damage. These conditions require a prompt handling or process correction, not simply a new lot label or optimistic room-RH reading. Cannabis-specific industrial-hemp research confirms that drying method and curing affect microbial measurements and moisture outcomes, but its cultivar and treatment comparisons are not a universal flower-drying schedule for every high-THC cultivar.
At harvest, record pre-existing wetness, exposure after rain, time out of controlled space when known, unusual odor, crushed tissue and any interruption to the transfer. The next drying operator needs those exceptions because a clean harvest record is an input to risk assessment, not a certificate of future stability.
Wrong labels and mixed lots require an identity hold
When an ID is missing or conflicting, stop moving the material, mark it as identity-uncertain, and preserve the physical group separately. Compare contemporaneous records, position maps, photographs, operator logs, scale entries and any intact secondary tags. Document what evidence actually supports each possible source. If origin cannot be established, do not guess from smell, appearance or expected weight; a “likely” cultivar is not a verified plant ID.
Reconciliation must also cover subdivision and mixing. A portion taken for testing, a damaged branch discarded, or a rack split into two positions needs an explicit parent-child or movement record. Mixing a failed, held or unidentified group into a clean group destroys the boundary on which later sampling and decision-making depend. If an incident affects multiple lots, expand the hold according to the actual common-contact path rather than declaring every neighboring lot contaminated or safe without evidence.
Warning: Never release an identity-uncertain or suspect lot by rewriting history. Record the original mismatch, evidence reviewed, corrective action, authorization if required and final status. A new neat label is not a substitute for a valid traceability chain or required testing.
| Observation | Immediate control | What verifies the next decision? |
|---|---|---|
| Suspected rot or mold on one branch | Stop handling that unit; segregate, prevent spore disturbance, record exact source. | Assessment of affected and linked material under applicable safety and testing procedures; not smell alone. |
| Tool touches soil or suspect flower | Remove tool from clean workflow and apply appropriate cleaning sequence. | Procedure completed and documented where required; no assumption that a quick wipe sterilizes all agents. |
| Missing or conflicting tray label | HOLD physical group; stop mixing or transferring. | Independent contemporaneous source evidence reconciled, or uncertainty permanently recorded. |
| Mixed material from plants being compared | Preserve combined group, label the known mix, stop plant-level attribution. | List of confirmed contributors; do not manufacture individual yield measurements. |
| Fresh material held wet or crushed | Correct handling promptly; flag lot for risk evaluation. | Receiving and drying team checks actual material and process records; a clean tag is insufficient. |
| Chemical, glass or other foreign material | Isolate exposure area and related lots; inspect equipment and event path. | Documented investigation and applicable professional/regulatory disposition, not visual cleaning alone. |
Three common misconceptions
“Every flower from the same cultivar belongs to one lot.” Not necessarily. A name is not an identity boundary, and different dates, plants, events or risk statuses may make grouping inappropriate. “The room was clean, so every flower is clean.” Sanitation reduces avoidable contamination but does not reveal concealed preharvest infection or replace required testing. “A batch number makes the harvest compliant.” Legal compliance depends on the actual jurisdiction, licences, inventory reporting, packaging, quality assurance, sampling and retention rules; an internal harvest sticker cannot meet all these requirements by itself.
When the problem is outside this resource
If the key problem is deciding whether to harvest immature flowers before a forecast storm, use a dedicated weather-risk decision rather than a hygiene label rule. If flowers are already drying and the question is moisture distribution or unsafe storage, inspect the postharvest environment and product under the appropriate drying procedure. If an unknown disease or contaminant requires identification, escalate to a qualified laboratory or relevant professional instead of assigning a disease name from a photograph.
Verify the Lot With Reconciliation and Follow-Up
The success check is not whether the harvest finished quickly or every container has a printed sticker. Test whether the identity and hygiene process still works after movement, subdivision, cleaning and a change of operator. Use objective evidence where available and record unresolved uncertainty as such.
Perform a physical-to-record reconciliation
Start at the receiving rack or drying location. For each real container or hanging group, read the label and locate exactly one corresponding record. Check the plant source, harvest event, material description, current status and current location. Then reverse the direction: start at each harvest record and find its physical material or recorded disposition. Both directions matter. A spreadsheet may list a tray that was never filled; a drying hook may hold branches that the spreadsheet never captured.
Compare the number of physical units against the movement log. If weights were taken, reconcile net and gross conventions and any expected subdivision, retained sample, discard or tare. Do not demand equality between fresh and dry weights. Water loss makes that comparison physically inappropriate, and stem/trim removal can further change the product class. For yield analysis, compare equivalent dry, trimmed and defined product fractions, not incompatible stages.
Inspect label durability and status visibility
Check whether every label is still readable and attached after transfer. Can a receiving worker distinguish clean handling status from HOLD at a glance without using the same color code ambiguously? Does the container ID agree with the rack position? Is an original plant ID still accessible through the lot record? Are discarded portions accounted for? A legible code whose record has no destination is only partly traceable.
Audit one full traceback and one forward trace
Choose one finished receiving group without telling the person conducting the audit which source to expect. Ask them to trace it backward to its original plant, collection event, operator or source record, and any holds or deviations. Next choose one plant ID and trace every harvested portion forward to a rack, sample, disposal entry or later subdivided lot. The point is not a universal traceability time limit; it is to find missing links before a complaint, failed test or mistaken sale requires an urgent search.
Definition: Reconciliation. A two-way check that physical material and documented quantities, locations, identities, status changes and dispositions account for one another. Discrepancies are investigated rather than corrected by quietly editing an old record.
Separate process verification from product release
A hygiene checklist can verify that equipment preparation and handoffs were performed and that exceptions were documented. It cannot independently prove that a lot passes microbial specifications, is free of pesticide residue, or meets potency or other legal limits. Where law requires sampling, validated laboratory analysis, retained samples or designated quality authorization, complete those separate requirements. A home grower should not infer lab-grade safety from appearance or personal experience.
Keep a process exception record alongside any relevant product testing. If a sample fails, you need to know which physical containers and parent lots it represents. A test result from another plant, date or finished form does not automatically clear this harvest. Sampling is only interpretable when the lot population and chain of custody are clear.
Use the next shift as a practical stress test
Ask someone who did not perform the harvest to identify three randomly chosen physical units and reconstruct their records. If the person cannot tell which plant, date, status or destination each unit belongs to, improve the label or transfer procedure before the next harvest. Document training needs, poor tag adhesion, unclear status colors, confusing reuse of container IDs or gaps in handling-space capacity. The best system is the one an ordinary operator can follow consistently without relying on one person’s memory.
Do: Verify identity in both directions, keep status changes visible, log sanitation deviations, and recheck questionable material using appropriate evidence.
Avoid: Treating a clean-looking flower, a quick disinfectant wipe, a familiar strain name or an unlinked lab report as a substitute for a complete record.
Harvest Hygiene and Lot-Label Checklist
Use this checklist immediately before cutting and again when the last group reaches its receiving location. A missed item should generate a pause, an exception or a corrective action rather than being ticked off retroactively. Keep the version that applies to your actual grow and add any mandatory procedures from the appropriate authority.
Before the first cut
- Confirm cultivation and harvest activities are lawful and relevant site rules are available.
- Check planned plants for visible disease, contamination, wetness and known exceptions.
- Confirm clear clean, HOLD and waste routes with separate physical receivers.
- Inspect and clean tools, bins, scale pans, work surfaces and receiving racks as appropriate.
- Provide handwashing supplies, suitable gloves and any required worker protection.
- Assign unique harvest lot IDs linked to confirmed plant IDs; prepare durable labels and records.
- Confirm that each assigned container or rack position matches the intended source and status.
During harvest and transfer
- Re-read the plant ID, lot ID and receiving label before separating material.
- Keep flowers off the ground and away from dirty tools, waste and cleaning chemicals.
- Prevent suspect material from entering clean handling; record exact source and disposition.
- Reset hands, gloves, tools and contact surfaces when task or contamination status changes.
- Record net or gross weight accurately, including unit and fresh/wet status if measured.
- Log any split, sample, discard, transfer, equipment failure or label mismatch.
- Move material promptly to a prepared location without unlabeled interim piles.
Before closing the event
- Trace each physical container to a record and each record to material or disposition.
- Confirm labels remain readable, status is visible and HOLD material remains separated.
- Check that downstream handling has the correct source, date, exceptions and receiving location.
- Complete the cleaning reset and record deviations and corrective actions.
- Keep harvest hygiene approval separate from laboratory results and regulated product release.
The final practical test is simple: hand an identified harvest group to someone who was not present when it was cut. If they can identify its source, status, handling exceptions and destination without guessing, and the material has stayed in an appropriate clean handling route, the harvest system has done its job. If they cannot, improve the chain before the next batch, not after the label has been lost.
Share this article
A quick overview of the topics covered in this article.
- The Harvest Decision: Clean Material and Known Identity
- Inspect Flowers, Tools, People, and the Receiving Area
- Design Harvest Lots and Labels Before Cutting
- Run a Clean Harvest and Document Every Handoff
- Recognize Contamination, Identity Loss, and False Reassurance
- Verify the Lot With Reconciliation and Follow-Up
- Harvest Hygiene and Lot-Label Checklist
Follow us
Latest articles
October 4, 2026
October 4, 2026