
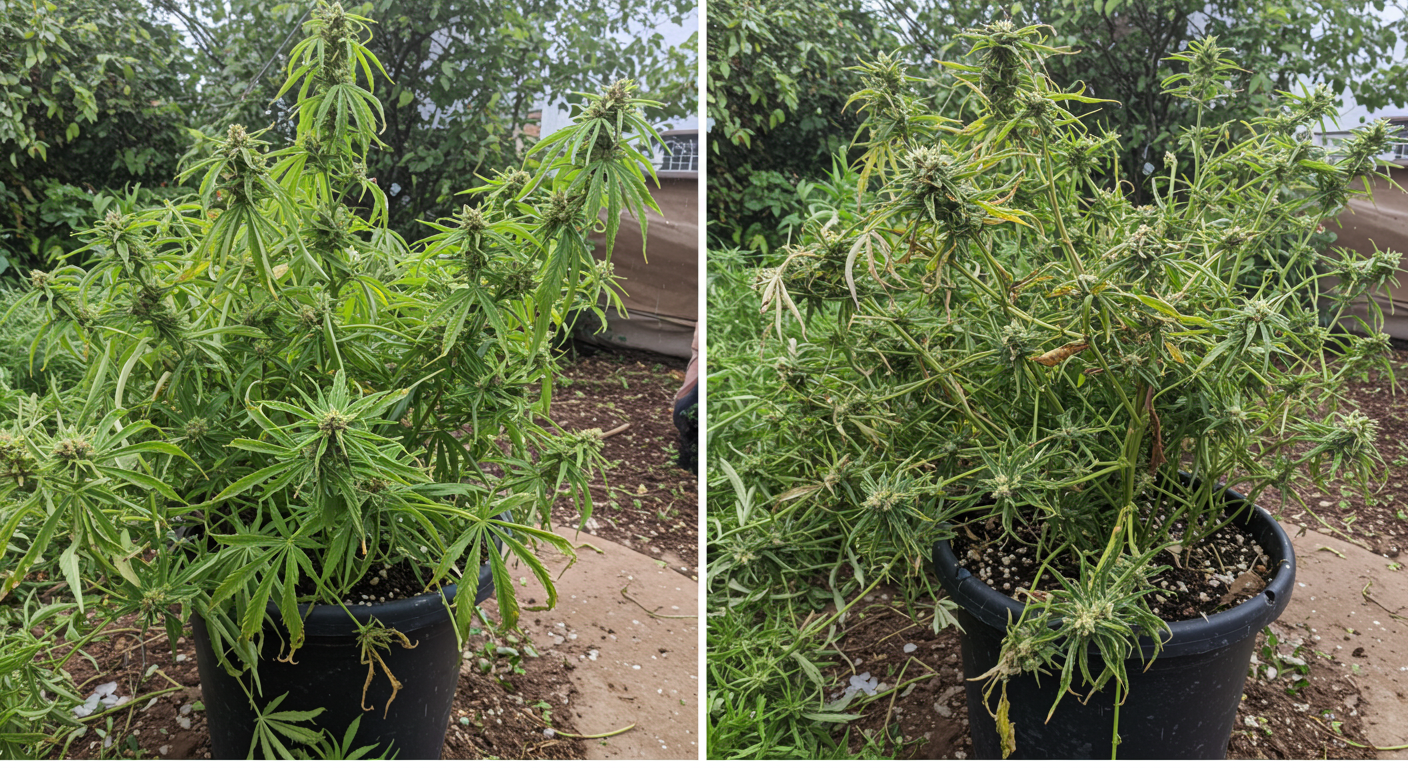
Post-Storm Cannabis Inspection: Base to Flower
After a strong storm, the fastest way to miss important damage is to start with the most dramatic-looking leaf or flower. Outdoor cannabis can be bent, soaked, twisted, partially uprooted, bruised, or left standing in saturated soil at the same time. A broken leaf may be obvious, but the more consequential problem may be a moving root ball, a split at the stem base, a loosened support, or moisture trapped deep inside a dense inflorescence.
The safest inspection order is therefore ground to flower. First confirm that the site is safe to enter. Then inspect drainage and the root zone, the stem base, main branch unions, support points, leaves and shoots, and finally the flowers. Record what you see before making several corrections at once. Storm damage is often a combination of mechanical injury, root-zone stress, water exposure, and delayed disease pressure, so the first inspection should establish a baseline rather than create new damage.
This resource stays focused on the post-storm inspection itself. For broader outdoor planning, site selection, irrigation, seasonal timing, weather preparation, and crop management, use the Outdoor Grow Comprehensive Guide.
Start With Site Safety and Ground Conditions Before Touching the Plant
The first post-storm question is not whether the plant looks damaged. It is whether the site is safe to enter and whether the conditions around the plant have changed enough to alter the inspection. Wind can leave loose structures, hanging branches, damaged power lines, unstable hail frames, standing water, sharp debris, and softened ground. Heavy rain can move containers, wash soil away from roots, or undermine stakes that looked secure the day before.
Do not begin by pulling branches upright or cutting damaged tissue. Walk the perimeter first. Look at the garden as a system. Note where water entered, where it collected, what direction branches were pushed, whether a support frame moved, and whether runoff deposited sediment or debris. These patterns often explain plant damage before you touch the plant.
Do not enter an unstable storm-damaged structure to inspect the crop
If a hail frame, trellis, fence, tree limb, electrical line, or other overhead structure is leaning, loaded, or visibly damaged, keep people away until the hazard is made safe. Plant inspection comes after site safety.
Classify the storm before you interpret the damage
Write down what actually happened: sustained wind, short violent gusts, hail, heavy rain, prolonged rain, flooding, lightning nearby, rapid temperature change, or a combination. Each load leaves a different fingerprint. Wind tends to create directional lean, branch torsion, rubbing, and support movement. Hail creates impact injury and can strip or bruise exposed tissue. Prolonged rain raises wet-load and root-zone saturation risk. Flooding adds a separate contamination question.
This classification keeps the inspection disciplined. If the event was mainly wind, start by comparing windward and leeward sides and checking branch unions. If the event delivered hail, inspect exposed upper surfaces and flowers for impact injury. If the event was several hours of heavy rain with little wind, drainage, wet flower interiors, and root-zone oxygen become more prominent. A mixed storm requires all of these checks, but the event history tells you where failure is most likely to appear first.
Separate structural urgency from cosmetic damage
Not every visible injury deserves the same response. A torn fan leaf can look dramatic and still have little effect on the plant’s immediate stability. A small split at the base of a heavily loaded branch may look minor and still threaten a large section of the canopy. Use consequence rather than appearance to rank the inspection.
High-priority findings include root movement, a main-stem crack, a major branch union opening, a support post pulling from wet soil, contaminated water exposure, and dense flowers that remain wet around damaged tissue. Lower-priority findings include isolated leaf tears, cosmetic abrasion, and minor bending that is stable. Handle the high-consequence failures first, then return to cosmetic cleanup later.
Distinguish ordinary rainwater from uncontrolled floodwater
Pooled rainwater after a storm and floodwater moving across a property are not the same contamination problem. Floodwater may carry sewage, petroleum products, pesticides, heavy metals, pathogens, or other contaminants from outside the garden. If potentially contaminated floodwater contacted consumable flowers, do not assume that rinsing the plant makes the material safe.
FDA guidance for food crops is not a cannabis-specific rule, but it illustrates the seriousness of uncontrolled floodwater: edible crop portions contacted by floodwater are treated as a major contamination concern because there is no simple washing step that reliably makes them safe. For cannabis, local regulations and testing requirements may differ, but the practical safety principle is the same: isolate questionable material and do not process or consume it while contamination is unresolved.
Photograph the site before moving anything
Take wide photographs from at least two directions. Include the base of the plant, surrounding soil, containers, stakes, trellis posts, and nearby structures. Then take closer photographs of obvious branch bends or splits. This creates a record of how the storm moved the plant and helps you detect whether a lean, crack, or sag is progressing over the next several days.
Photographs are especially useful when several plants were exposed to the same storm. If every plant leans in the same direction, wind loading is a likely explanation. If only one plant is leaning and the root ball is visibly displaced, the problem is more local. Pattern recognition reduces the temptation to diagnose every damaged leaf as a separate problem.
Map standing water and erosion before it disappears
Mark where water is still standing, where soil was scoured away, where mulch floated, and where sediment accumulated. A root zone that drains normally after rain is different from one that remains saturated long enough to limit oxygen. The visible water may disappear before root-zone stress becomes obvious, so the first inspection should capture this information.
In containers, inspect saucers, trays, and low spots under fabric pots. A container that sat in pooled water may remain much wetter than a neighboring pot even after the surface looks normal. In native ground, look for small channels that exposed roots or concentrated runoff around the trunk.
Check the supports before asking them to carry more load
A wet flowering plant is heavier than a dry plant, and storm movement can loosen stakes, posts, clips, and ties. Before you pull a branch back into position, check whether the structure you plan to use is still stable. A stake that shifted in saturated soil can appear upright while offering much less resistance than before the storm.
Mark any post or anchor that moved. Recheck it again after the soil begins to dry. The support system may need correction before the plant does.
Field Advice: The first inspection should reduce uncertainty. Do not turn it into a repair session before you know whether the ground, root zone, and support system are stable.
Inspect the Root Zone and Stem Base for Movement, Flooding, and Structural Shift
Once the site is safe, move to the lowest part of the plant. Major canopy symptoms can originate at the base. If the root ball shifted, the main stem cracked near the soil line, or the root zone remained saturated, the entire canopy may wilt or lean even when upper branches are still attached.
Look for a displaced root ball before testing the stem
Stand back and compare the stem angle with your pre-storm photographs if you have them. Look for a new gap between the root ball and surrounding soil, raised soil on one side, compressed soil on the other, exposed roots, or a container that has tilted. These signs matter more than a few torn leaves because they tell you the plant’s foundation moved.
If you need to test movement, use only gentle pressure. The goal is not to see how far the plant can bend. Watch whether the root ball rocks separately from the surrounding soil. If it does, stop adding force. A plant with root movement needs stabilization and time, not repeated testing.
Inspect the crown and lower stem from every side
Storm cracks can hide on the leeward side of the stem or directly behind a support tie. Move mulch or loose debris only enough to see the stem base. Look for fresh splits, bark tearing, crushed tissue, deep abrasions, soil packed into a wound, or a new bend immediately above the root zone.
A clean flex in an upper branch is different from a crack at the main stem base. The lower the structural failure, the more canopy it can affect. Mark the location and photograph it before deciding whether the plant can be stabilized.
Root-plate movement
Movement of the root mass and surrounding soil as a unit after wind, saturated soil, or mechanical force. It is different from a flexible stem bending above a stable root zone. Root-plate movement can compromise anchorage and root function even when the canopy remains green immediately after the storm.
Measure how quickly the root zone begins to drain
Do not judge the root zone only by the surface. Use the same moisture-check method you normally use at a consistent depth and location. In containers, compare storm-exposed pots with a similar reference pot if possible. In native soil, compare the planting zone with nearby ground that did not pond.
Waterlogging reduces the air available to roots and can create hypoxic conditions. The practical response is not to dig aggressively around stressed roots. Record the moisture state, keep unnecessary irrigation off, and watch how quickly the root zone returns toward its normal range. If the area stays saturated because of site drainage rather than one exceptional storm, the problem belongs in the site design, not in repeated emergency corrections.
Check for runoff channels that changed water distribution
A storm can create a small trench beside a plant, wash mulch against the trunk, expose one side of a root zone, or deposit fine sediment over the surface. These changes can alter future irrigation even after the plant recovers from the storm itself.
Restore the intended water path carefully. Do not pile wet soil or mulch against a damaged stem. If a container lost media, replace only what is needed to restore root coverage and stability rather than burying the stem deeper than before.
“The plant is leaning after the storm, but the branches are not broken. Should I pull it upright immediately?”
Question sent by: CedarRoute, via email.
Inspect the root ball and stem base first. If the entire root mass shifted, forcing the top upright can create more root tearing. Stabilize the plant only after you understand where the movement occurred, and make corrections gradually enough that you are not using the canopy as a lever against damaged roots.
Record the base condition before moving upward
Your base inspection should end with a simple classification: stable, questionable, or unstable. Stable means no progressive root-ball movement, no new structural split at the base, and drainage moving back toward normal. Questionable means movement or saturation is present but not clearly worsening. Unstable means the plant cannot hold position, the root mass is displaced, or the main stem is structurally compromised.
That classification changes how aggressively you inspect the canopy. A stable plant can tolerate normal handling. An unstable plant should not be pushed, shaken, or repeatedly moved while you examine flowers.
Follow the Load Path Up the Main Stem and Branch Unions
From the base, move upward through the structural skeleton. Follow the main stem and each major branch union in sequence. This is more reliable than jumping directly to the branch with the biggest flower because storm force travels through the plant. A branch may look intact at the tip while its union is partially split lower down.
Inspect one major branch at a time
Start with the lowest structural branches and work upward. Look at the branch collar or union before the branch tip. Fresh splits often show lighter internal tissue, separated bark, new creases, or a change in branch angle. Compare both sides of the union because a crack can open on one side and remain visually closed on the other.
Then follow the branch outward. Check old training bends, topping sites, previous repairs, and tie points. These are not automatically weak, but they are locations where stress can concentrate when a wet canopy moves in wind.
Separate bending from structural failure
Not every branch that moved needs repair. Flexible branches can bend substantially and return toward their previous position once wind and water load are gone. A structural failure is different: the branch angle changes permanently, the union opens, tissue tears, or the branch no longer supports its own load.
Do not make a sharp correction just because a branch sits lower than before. First remove obvious external load such as a failed support resting on it, then observe the branch in a calmer, drier state. If the angle continues to fall or the split opens with gentle movement, support is justified.
Check whether the support system caused injury
Storm damage does not always come directly from wind. Narrow ties can cut into stems, trellis lines can rub flowers, clips can twist, and rigid supports can create pressure points when the plant moves around them. Inspect every tie that carried significant load.
Look for girdling, flattened tissue, bark abrasion, a tie that migrated into a branch union, or a branch trapped against a hard edge. Replace damaging ties with wider, softer, adjustable support where appropriate. The goal is to stabilize the branch without creating a second wound.
Mark fresh splits before deciding whether to remove or stabilize
If a branch is partially attached, support the branch enough to stop additional tearing while you evaluate it. Do not repeatedly open the split to inspect the inside. A branch that remains well attached, has a clean fresh split, and can be returned to a natural position may be a candidate for stabilization. A branch that is nearly detached, crushed, contaminated, or progressively wilting requires a different decision.
This resource does not prescribe a universal percentage of remaining tissue because geometry, branch size, flowering load, contamination, and local conditions matter. The inspection goal is to determine whether the connection is stable enough to monitor or whether damaged tissue is becoming a liability.
- Support a partially failed branch before manipulating it.
- Inspect the union and the support point separately.
- Use clean tools if damaged tissue must be removed.
- Photograph the repair point for later comparison.
- Repeatedly bending a split open to see inside.
- Tight wire or narrow cord directly against living stems.
- Using fertilizer as a substitute for structural support.
- Assuming a branch is recovered because the leaves remain green for one day.
Check the main stem for torsion, not just visible cracks
Strong gusts can twist the canopy. A main stem may show a spiral abrasion, a shifted tie, or an upper canopy that now points slightly off-axis without an obvious open split. Follow the stem visually from the base upward and compare branch orientation from both sides.
If the whole upper canopy rotated relative to the lower stem, reduce movement with appropriate support and monitor the transition zone. Avoid forcing the plant back to a perfect visual alignment in one motion.
Reinspect the branch after water weight leaves the canopy
A branch that sags under wet flower mass may recover some of its normal angle as the canopy dries. That is why the post-storm inspection should distinguish temporary wet-load deflection from permanent structural change. Photograph the same heavy branches again after the plant has dried.
If the branch returns close to baseline, support may still be useful for future storms, but the urgency is different. If it continues to drop, the union is opening, or the support point is slipping, treat it as an active structural problem.
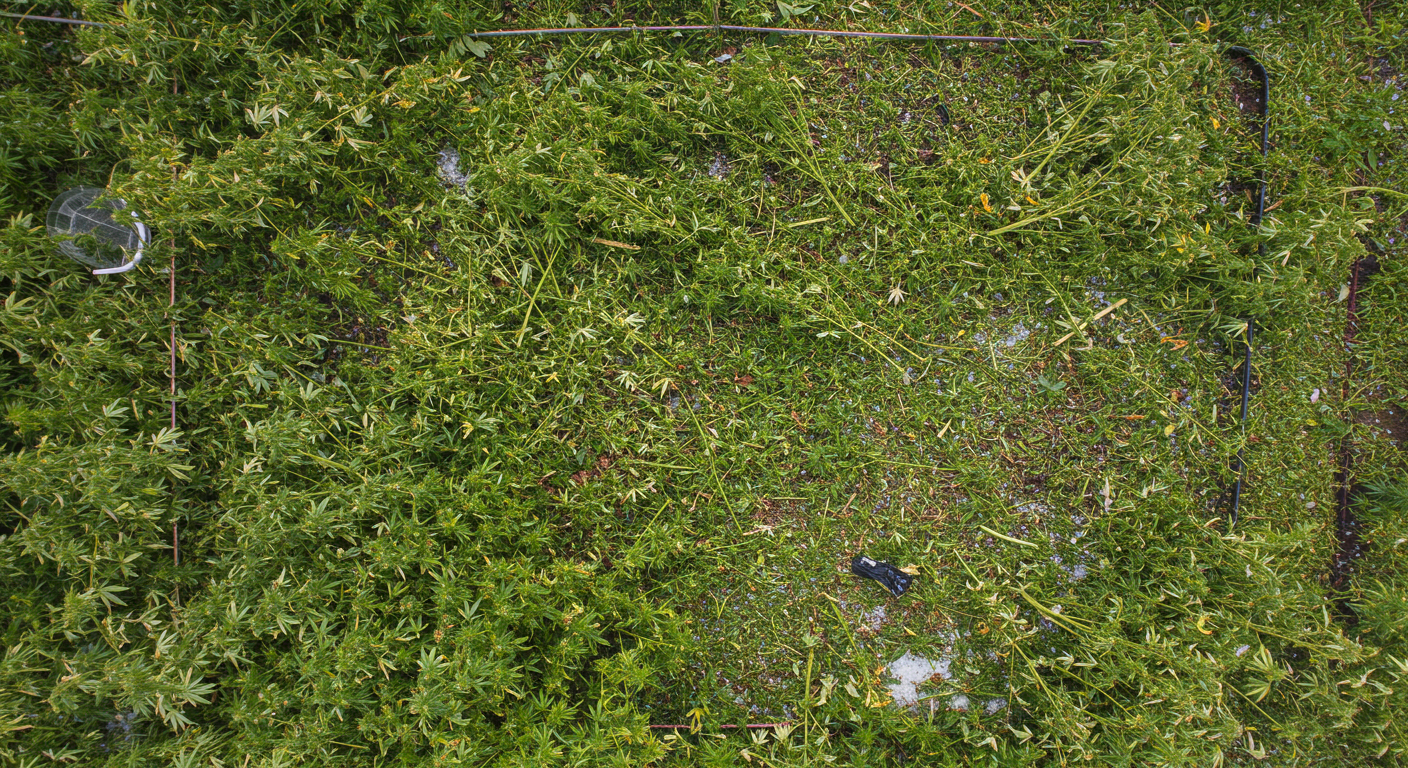
Inspect Leaves, Shoots, Support Points, and the Canopy Pattern
Only after the base and major structure are understood should you read the canopy. Leaves are useful indicators, but they are noisy ones. Storms can cause tearing, abrasion, transient wilting, wind scorch, hail impact, saturated-root wilt, heat stress after the storm clears, or residue from dirty splash water. The pattern matters more than one damaged leaf.
Map damage by canopy side and height
Stand back and divide the plant into top, middle, lower, windward, and leeward zones. Is damage concentrated on the storm-facing side? Are upper leaves shredded while sheltered interior leaves are intact? Is one whole branch wilting while neighboring branches remain normal? These patterns help separate direct mechanical injury from a root or vascular problem.
Wind and hail usually create an exposure pattern. Root-zone stress is more likely to affect a larger portion of the plant. A single wilting branch can point back to a split or crushed vascular connection lower on that branch.
Look for abrasion, bruising, and hail impact
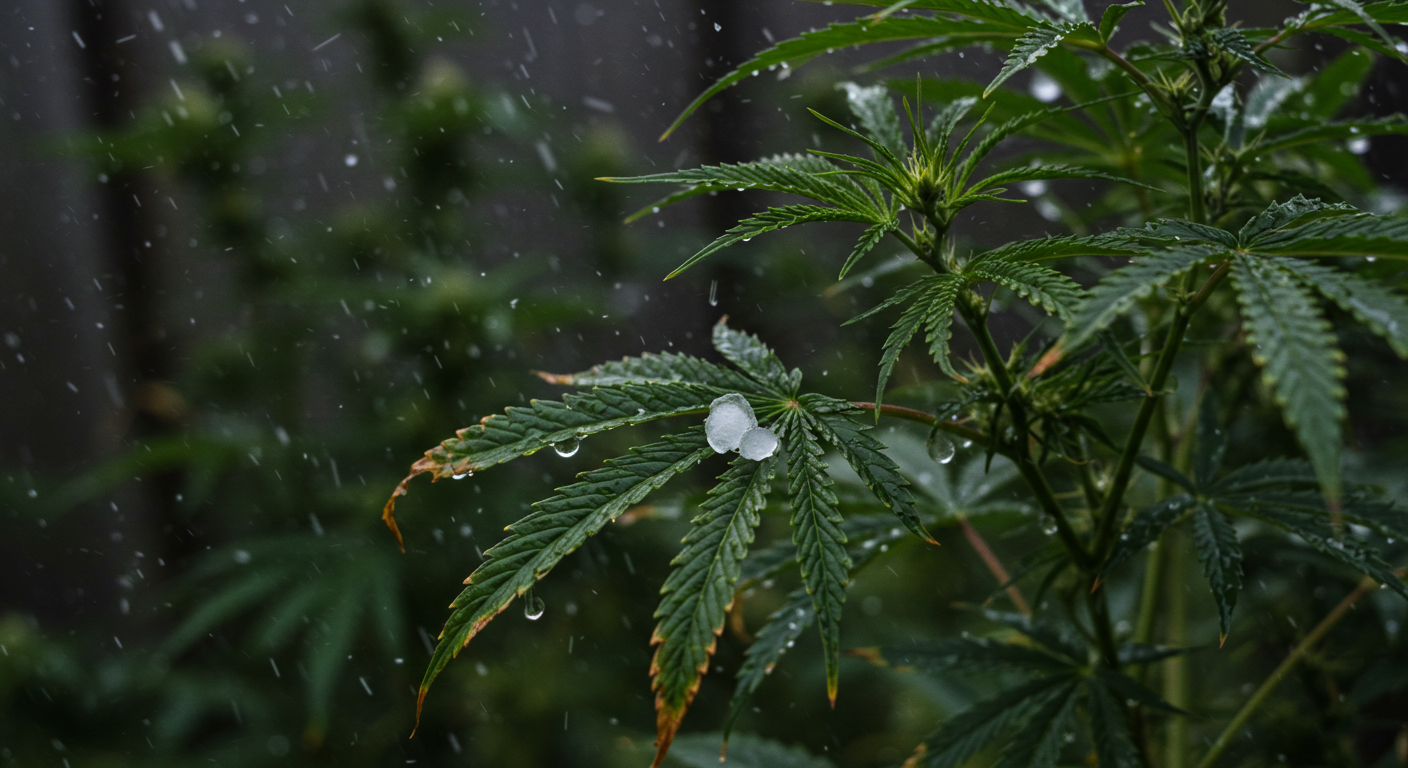
Hail can create punctures, bruised patches, shredded leaf margins, broken petioles, and damaged young shoots. Wind can rub leaves and stems against netting, stakes, trellis lines, or neighboring branches. Do not confuse fresh mechanical injury with a disease lesion simply because tissue later darkens.
The timing is useful evidence. Damage that appears immediately after a known storm and follows the exposed side of the plant is strongly suggestive of mechanical injury. Disease may colonize damaged tissue later, but that is a secondary process and should be evaluated during reinspection.
Remove only clearly failed tissue during the first pass
A heavily damaged canopy can tempt growers into aggressive cleanup. Avoid turning one stress event into several. Remove branches or shoots that are fully detached, hanging dangerously, crushed beyond support, or contaminating flowers. Leave tissue that is still functional and structurally stable while you see how the plant responds.
Clean cuts are preferable to ragged hanging tissue when removal is necessary. Use clean tools and avoid dragging damaged material through healthy flowers. Do not leave piles of wet plant debris under the canopy.
Inspect every tie, trellis opening, and contact point
Storm movement can reposition a branch inside a trellis cell, tighten a tie, or pull a flower cluster against netting. Walk around the plant and inspect places where plant tissue contacts support material. A support that prevented breakage may still need adjustment after the storm.
Restore useful clearance without forcing rigid geometry. Branches should be supported, not clamped. Late-flower stems can be less forgiving of aggressive repositioning than younger vegetative growth.
Recheck anchor behavior after saturated soil begins to drain
Storm supports can behave differently while soil is saturated than they do a day later. A stake or anchor may move during the storm, then appear firm once the surface starts drying. Mark the original position of important stakes and posts during the first inspection. At the 24-hour and 72-hour checks, compare those marks rather than judging stability only by feel.
If an anchor shifted, ask why before tightening everything around it. The problem may be insufficient depth, poor placement, a concentrated load, soft soil, or a branch support that is pulling at an unfavorable angle. Simply pulling the tie tighter can transfer more force into the same weak anchor. Correct the load path, not only the visible slack.
Check for soil splash on lower foliage
Heavy rain can splash soil and organic debris onto lower leaves and stems. This is different from floodwater contamination but still changes sanitation around the canopy. Remove loose debris carefully and improve clearance between lower foliage and the wet soil surface where practical.
Avoid unnecessary spraying of dense flowers just to make them look clean. Added water can extend wetness duration. If contamination is suspected rather than simple rain splash, treat it as a separate safety issue.
“Most of the leaves are torn after hail. Should I strip the damaged ones immediately?”
Question sent by: Matthew Bennett, via Facebook page.
Do not remove leaves only because they look imperfect. Keep tissue that is still attached, green, and not creating a sanitation or structural problem. Prioritize fully broken, crushed, or decaying material. The plant has already lost photosynthetic area during the storm, so unnecessary cleanup can increase the loss.
Recheck irrigation hardware before the next scheduled watering
Wind, runoff, and branch movement can pull emitters out of position, kink tubing, bury a dripper, or disconnect a line. Before the next irrigation event, run the system and observe delivery at representative plants. Do not assume that a rainstorm means the irrigation system is still physically intact.
If the root zone remains saturated, delay irrigation based on measured moisture rather than the calendar. If the storm delivered uneven rain under a dense canopy or shelter, some areas may still need water sooner than others.
Inspect Flowers Last for Water Retention, Bruising, and Rot Risk
Flower inspection comes last because dense inflorescences are easy to damage when wet and because the rest of the plant provides context. If a branch split, a trellis rubbed, hail struck one side, or the root zone flooded, you want to know that before deciding what a discolored flower means.
Cannabis flowers can maintain a more humid microclimate than the surrounding air. Research measuring humidity inside inflorescences found higher internal relative humidity than ambient conditions, especially in the morning. After storms, this matters because an apparently drying garden can still contain wet, humid pockets deep in flowers.
Inspect representative flowers instead of squeezing every cola
Choose flowers from the top, middle, sheltered interior, storm-facing side, and any branch that was bent or rubbed. Use clean hands or gloves and gentle visual inspection. Avoid compressing wet flowers. Look for retained droplets, bruised bracts, torn tissue, lodged debris, flattened surfaces, and places where two wet flowers are pressed together.
Record which zones remain wet longest. That information is useful beyond this storm because the same locations may be the first places to develop problems after future rain events.
Compare wet-load position with the dry baseline
Heavy flowering branches often sit lower immediately after rain because retained water adds temporary mass. Mark or photograph several representative branch angles while the plant is still wet, then compare them again after normal drying. This gives you a practical way to separate temporary wet-load deflection from a branch that permanently lost structural support.
The same comparison helps identify flowers that repeatedly trap water. If one large inflorescence remains visibly wet after neighboring flowers have dried, note its position, surrounding branch density, and exposure to morning sun and air movement. That flower becomes a priority inspection point after future storms even if it remains healthy this time.
Give priority to flowers around mechanical wounds
Botrytis and other pathogens can take advantage of injured, senescing, or persistently wet tissue. Cannabis disease literature identifies cool, wet conditions as a major risk context for Botrytis bud rot in field crops, and mechanical injury can create additional vulnerable tissue.
This does not mean every bruised flower will rot. It means the combination of injury + retained moisture + poor drying deserves closer follow-up than an undamaged flower that dried quickly.
Look for drying pattern, not just ambient RH
Check whether the outer flower surface dries while the interior remains damp. Early morning is often the most informative inspection time after a storm because dew and overnight humidity can reveal slow-drying zones. Recheck later in the day to see whether the same flower interior dries.
A nearby weather station or ambient sensor cannot tell you exactly what is happening inside every dense inflorescence. Use environmental data as context and the flower itself as the final field check.
Do not treat questionable floodwater exposure as an ordinary rain event
If flowers contacted uncontrolled floodwater that may contain sewage, chemicals, petroleum, or other contaminants, isolate the affected material. Do not rely on rinsing, drying, or curing to make unknown contamination disappear. Follow applicable local safety and testing guidance.
Separate bruising from developing rot
Fresh mechanical bruising appears in the context of the storm and is usually localized to impact or contact points. Developing rot tends to progress. Tissue may become softer, discolored, collapsed, or visibly colonized over time. The distinction becomes clearer at the 24-hour and 72-hour checks.
Do not diagnose Botrytis from brown color alone. Brown tissue can result from hail, tearing, pressure, senescence, or other causes. Progression, texture, odor, internal spread, and surrounding moisture conditions all matter.
Restore airflow without creating violent movement
If flowers are crowded together after the storm, reposition supported branches gently enough to reopen existing air spaces. Remove failed leaves or broken shoots that are lying across flowers. Avoid aggressive shaking of heavy wet branches. The goal is to help normal drying, not to whip water out of the plant.
Temporary rain covers or storm protection should also be checked. A cover that kept direct rain off the plant but now traps humid air may need ventilation or removal when conditions allow.
Do not spray a stressed flowering canopy reflexively
After a storm, growers sometimes want to disinfect, feed, rinse, or apply a foliar product immediately. That can complicate diagnosis and add more moisture to damaged flowers. Unless a product is legally permitted for the crop and clearly justified, the first response should be inspection, sanitation, structural correction, and drying.
Flower-stage pesticide and biocontrol decisions are highly jurisdiction-specific and product-specific. Do not improvise a chemical response because tissue looks damaged.
Separate Storm Damage From Disease, Drought, Nutrient, and Root-Zone Problems
A storm often reveals problems that were already developing. It can also create symptoms that resemble common cultivation issues. The best way to avoid overcorrection is to compare timing, distribution, and mechanism before changing the feeding or watering plan.
| Observation | Possible Cause | How to Confirm | Immediate Response | Recheck |
|---|---|---|---|---|
| Whole plant leans | Root-ball shift, container movement, main-stem bend, or support failure. | Inspect root plate, soil gaps, stem base, and support anchors before moving the canopy. | Stabilize the foundation and prevent further movement. | Compare lean and root movement after 24 hours and as soil dries. |
| One branch wilts | Split union, crushed stem, tie injury, or vascular damage. | Trace the branch from tip back to the main stem and inspect every union. | Support the branch and remove only clearly failed tissue. | Watch turgor and split stability over 24 to 72 hours. |
| Whole canopy wilts while soil is wet | Waterlogged root zone, root damage, heat after storm, or structural root movement. | Measure root-zone moisture and inspect drainage and root-plate stability. | Do not add water automatically. Restore drainage conditions where possible. | Track moisture decline and canopy recovery. |
| Ragged holes and bruises on exposed side | Hail or wind-driven debris. | Match injury orientation with storm direction and sheltered tissue. | Remove only failed tissue and preserve functional leaf area. | Watch wounds for drying versus progressive decay. |
| Brown flower tissue after wet storm | Mechanical bruising, senescence, Botrytis, trapped wet debris, or prolonged humidity. | Inspect progression, texture, internal tissue, moisture retention, and nearby injuries. | Improve drying conditions and isolate clearly decaying tissue. | Inspect the same flowers at 24 and 72 hours. |
| Leaf yellowing several days later | Root-zone stress, damaged roots, natural aging, nutrient disruption, or unrelated deficiency. | Compare plant-wide pattern, root-zone recovery, stage, and pre-storm records. | Avoid large nutrient changes without confirmation. | Use new growth and root-zone trend over the following week. |
Storm timing is evidence, but not proof
If damage appears immediately after hail or wind, the storm is a strong clue. If symptoms begin three or four days later, the storm may still be involved through root stress, infection, or damaged vascular tissue. But unrelated nutrient, pest, and disease issues do not stop simply because a storm occurred.
Use your pre-storm photographs and notes. A yellowing pattern that was already present should not be rewritten as storm damage. Likewise, a branch that was sagging before the storm may have simply crossed the threshold into failure.
Do not interpret wet-root wilt as a request for more water
One of the easiest post-storm mistakes is to see wilted leaves and irrigate again. If the root zone is saturated, additional irrigation can extend oxygen stress. Measure moisture first. The leaf symptom tells you the plant is under water-balance stress, not automatically that the soil is dry.
Do not interpret torn leaves as a nutrient deficiency
Mechanical damage can alter leaf color as injured areas dry and die. Hail bruises can darken. Wind abrasion can create pale or brown patches. Nutrient problems usually follow characteristic plant-wide or age-related patterns rather than the exposed side of one storm-facing canopy.
Watch for delayed disease around damaged tissue
Storm injury changes the next several days of risk. Wet wounds, damaged flowers, and dense sheltered zones deserve repeated inspection even when they look acceptable on the first day. Cannabis disease reviews identify Botrytis as a major inflorescence pathogen under cool, wet field conditions, which is why delayed reinspection matters.
A first-day inspection answers, “What broke?” The later inspection answers, “What is recovering, and what is becoming biologically unstable?”
“The plant looked okay the morning after the storm, but one branch wilted two days later. Can storm damage show up that late?”
Question sent by: RainyWindow, via contact form.
Yes. A partial split, crushed vascular tissue, root-zone stress, or developing decay may not be obvious immediately. Trace the affected branch back to its union, inspect the support and root zone, and compare the same area with your first-day photographs before making a broad feeding or watering change.
Use one-variable corrections whenever possible
If the root zone is wet, a branch is split, and flowers are slow to dry, you already have three different mechanisms. Correct each at the level where it occurs. Stabilize the branch, stop unnecessary irrigation, and restore airflow. Do not simultaneously change fertilizer concentration, add several foliar products, prune heavily, and move the plant to a radically different exposure.
Multiple simultaneous changes make the next inspection harder to interpret. Post-storm recovery improves when the grower can tell which condition actually changed.
Recheck at 24 Hours, 72 Hours, and One Week Before Declaring Recovery
A post-storm inspection is a sequence, not a single walk-through. Many structural injuries are obvious immediately, while root-zone symptoms, tissue death, and flower disease risk develop over time. Rechecking the same marked points is how you separate recovery from delayed failure.
The first 24 hours: stabilize and establish direction
At the 24-hour check, compare the root-ball position, stem-base crack, supported branches, and the wettest flowers with your first photographs. Ask whether each problem is stable, improving, or worsening. A branch support that holds position without cutting the stem is a positive sign. A crack that continues to open is not.
Check root-zone moisture again. If the site is still saturated, note whether drainage is progressing. Check the lowest and densest flowers for continued wetness or early tissue collapse. Remove only clearly failed material.
The 72-hour check: look for progression
Three days is often enough for differences between simple bruising and progressive tissue failure to become clearer. Reinspect wounds, flower interiors, and any branch that was partially split. Compare color, texture, turgor, and branch angle with the baseline.
Also inspect ties and anchors again. As the plant dries, weight distribution changes. A tie that seemed loose under wet load can become tight once a branch rebounds. A stake in saturated soil may move as the soil settles.
The one-week check: judge function, not appearance
By one week, ask whether the plant is functioning normally enough to continue the season. Look for stable root anchorage, normal new growth where growth is expected, branches that maintain position, flowers that dry normally after dew, and wounds that are not expanding.
The plant may still look cosmetically damaged. Torn leaves do not need to become perfect again. The goal is structural and physiological stability, not restoring the appearance of the pre-storm canopy.
| Recheck | What you are verifying | Escalation trigger |
|---|---|---|
| Immediately | Site safety, root movement, major splits, support failure, flooding, contaminated water contact. | Unstable structure, displaced root ball, major main-stem failure, suspected contamination. |
| 24 hours | Whether stabilization is holding, drainage is progressing, and flowers are beginning to dry normally. | Increasing lean, opening split, persistent saturation, spreading soft or collapsed flower tissue. |
| 72 hours | Progression versus recovery in wounds, branch turgor, flower condition, and support points. | Progressive wilt, decay, spreading discoloration, unstable support, or new root-zone symptoms. |
| 1 week | Functional recovery, stable structure, normal drying, and absence of expanding disease or root decline. | Continued canopy decline, persistent root-zone dysfunction, repeated structural failure, or expanding flower rot. |
Use fixed inspection points
Choose the same root-zone location, the same two or three branch unions, and the same representative flowers for every follow-up. This reduces observer bias. If you inspect a different part of the plant every day, it is easy to mistake normal variation for progression.
Mark photographs with the date and storm event. For repeated outdoor storms, these records become a useful history of which canopy zones, branch types, and site conditions fail first.
Create Green, Yellow, and Red outcomes
A Green outcome means the root zone is returning toward normal, structure is stable, wounds are drying, flowers are not developing progressive decay, and support points remain safe. A Yellow outcome means one or more areas need continued monitoring, such as a partial branch split, slow drainage, or a flower zone that remains wetter than the rest of the canopy. A Red outcome means instability, progressive tissue collapse, contaminated floodwater exposure, major structural failure, or a site condition that cannot safely support the crop.
This simple classification keeps the post-storm plan focused on mechanisms. Yellow does not mean “apply something.” It means you do not yet have enough evidence to declare recovery.
Base to Flower
- Confirm the site is safe before entering.
- Distinguish pooled rainwater from potentially contaminated floodwater.
- Take wide photographs before moving plants or supports.
- Map standing water, erosion, sediment, and storm direction.
- Check container position, root-ball movement, and drainage.
- Inspect the stem base from every side.
- Follow the main stem upward and inspect every major branch union.
- Check old training sites, previous repairs, and support contact points.
- Separate temporary wet-load sag from permanent branch failure.
- Map leaf and shoot injury by canopy side and height.
- Remove only clearly failed or hazardous tissue during the first pass.
- Run irrigation hardware before the next scheduled irrigation.
- Inspect flowers last and avoid squeezing wet inflorescences.
- Prioritize flowers around mechanical wounds and slow-drying interior zones.
- Do not reflexively spray or feed a stressed flowering canopy.
- Reinspect the same points at 24 hours, 72 hours, and one week.
- Use Green, Yellow, or Red status to decide whether the crop is recovering or needs escalation.
Update the storm plan from what failed first
The final purpose of inspection is not merely to document damage. It is to improve the next storm response. If the root ball shifted before branches broke, improve anchorage and drainage. If one trellis edge cut stems, redesign that contact point. If the same interior flowers remained wet for two days, improve spacing and drying conditions before the next prolonged rain period.
Do not solve every lesson by adding more structure. Sometimes the correction is a stronger stake. Sometimes it is a wider tie, better drainage, fewer branch collisions, a more open support layout, or an earlier seasonal finish window.
Recovery means stable function, not a perfect-looking plant
A storm-damaged cannabis plant can carry scars for the rest of the season and still function well. Leaves may remain torn. A repaired branch may never return to its original angle. The useful question is whether the root system, structural skeleton, water balance, and flower microclimate are stable enough to continue safely.
That is why the base-to-flower method ends with repeated verification. The grower who inspects the same root zone, branch unions, and flowers over time can distinguish a plant that is healing from one that only looked acceptable on the first morning.
Master Advice: After a storm, inspect from the ground up and correct only what you can explain. The plant does not need every scar erased. It needs the failures that threaten stability, drainage, drying, and flower health brought back under control.
Share this article
A quick overview of the topics covered in this article.
Follow us
Latest articles
October 18, 2026
October 18, 2026
October 18, 2026
October 18, 2026
