Bar LED vs Quantum Board: Which Design Fits Your Canopy?
Bar-style LEDs and quantum-board-style LEDs can use the same diode families, similar spectra, similar drivers, and similar total power. The main difference is where the emitters are physically spread across the fixture. That geometry changes how easily a fixture can cover a particular canopy, how much beam overlap develops at a given height, where hot spots and weak edges appear, and how the light interacts with a tent or room.
For most growers, the better choice is therefore not “bar LED” or “quantum board” in isolation. It is the fixture whose measured PPFD map fits the real canopy at a workable hanging height while meeting the required photon output, efficacy, dimming, electrical, thermal, and service needs. A well-designed board can outperform a poorly designed bar fixture, and a well-designed bar fixture can solve coverage problems that a compact board cannot.
This resource focuses on that one decision. For the broader fundamentals of PPF, PPFD, PPE, spectrum, HID versus LED, and light schedules, use the complete cannabis grow-light guide rather than turning this comparison into a second lighting pillar.
Bar LED or Quantum Board: The Short Answer
If two fixtures are otherwise comparable, a bar-style design often gives a grower more physical freedom to distribute emitters across a broad, flat canopy. A compact board-style design can be easier to fit into a small tent or narrow vertical stack and may offer a simpler, lighter, or less expensive package. Those are tendencies, not guarantees.
The deciding evidence should be the complete PPFD map at the canopy size and hanging height you can actually use. Fixture dimensions matter because an emitter cannot illuminate an edge from the same geometry as it illuminates the center. Moving diodes farther apart can flatten a light field, but moving them too far apart can create stripes or valleys when the fixture is hung close. Packing them onto a smaller board can simplify the fixture, but it can also create a steeper center-to-edge gradient if the board is small relative to the canopy.
That is why a 4 x 4 ft tent does not automatically need bars and a 2 x 2 ft tent does not automatically need a board. Compare the measured distribution, not the nickname.
Remember: Fixture form factor changes photon distribution. It does not, by itself, determine spectrum, PPE, PPF, diode quality, driver quality, yield, or flower quality.
| Decision Factor | Bar-Style LED | Quantum-Board-Style LED |
|---|---|---|
| Emitter layout | Diodes spread across several separated linear bars. | Diodes concentrated on one or more flat printed circuit boards. |
| Typical physical footprint | Often broad and open, with emitters distributed across much of the target canopy. | Often compact relative to the canopy, although large multi-board fixtures also exist. |
| Potential strength | Can reduce the distance photons must travel from the fixture center to canopy edges. | Can provide strong output from a compact, simple fixture that fits smaller spaces well. |
| Potential weakness | Wide bar spacing can create striping or valleys when hung too close. | A compact emitting area can produce stronger center concentration on a larger canopy. |
| What proves performance | PPFD map, PPF, PPE, spectrum, mounting height, dimming, and real canopy measurements. | Exactly the same evidence. The board label is not a performance rating. |
What Actually Changes Between the Two Designs
The easiest mistake is treating bar LED and quantum board as two different light technologies. They are better understood as two common ways of arranging LED emitters and thermal structures. Both can use phosphor-converted white diodes, deep-red diodes, ultraviolet or far-red supplemental channels, passive heatsinks, remote drivers, dimming, or external controllers.
What a bar-style LED fixture is
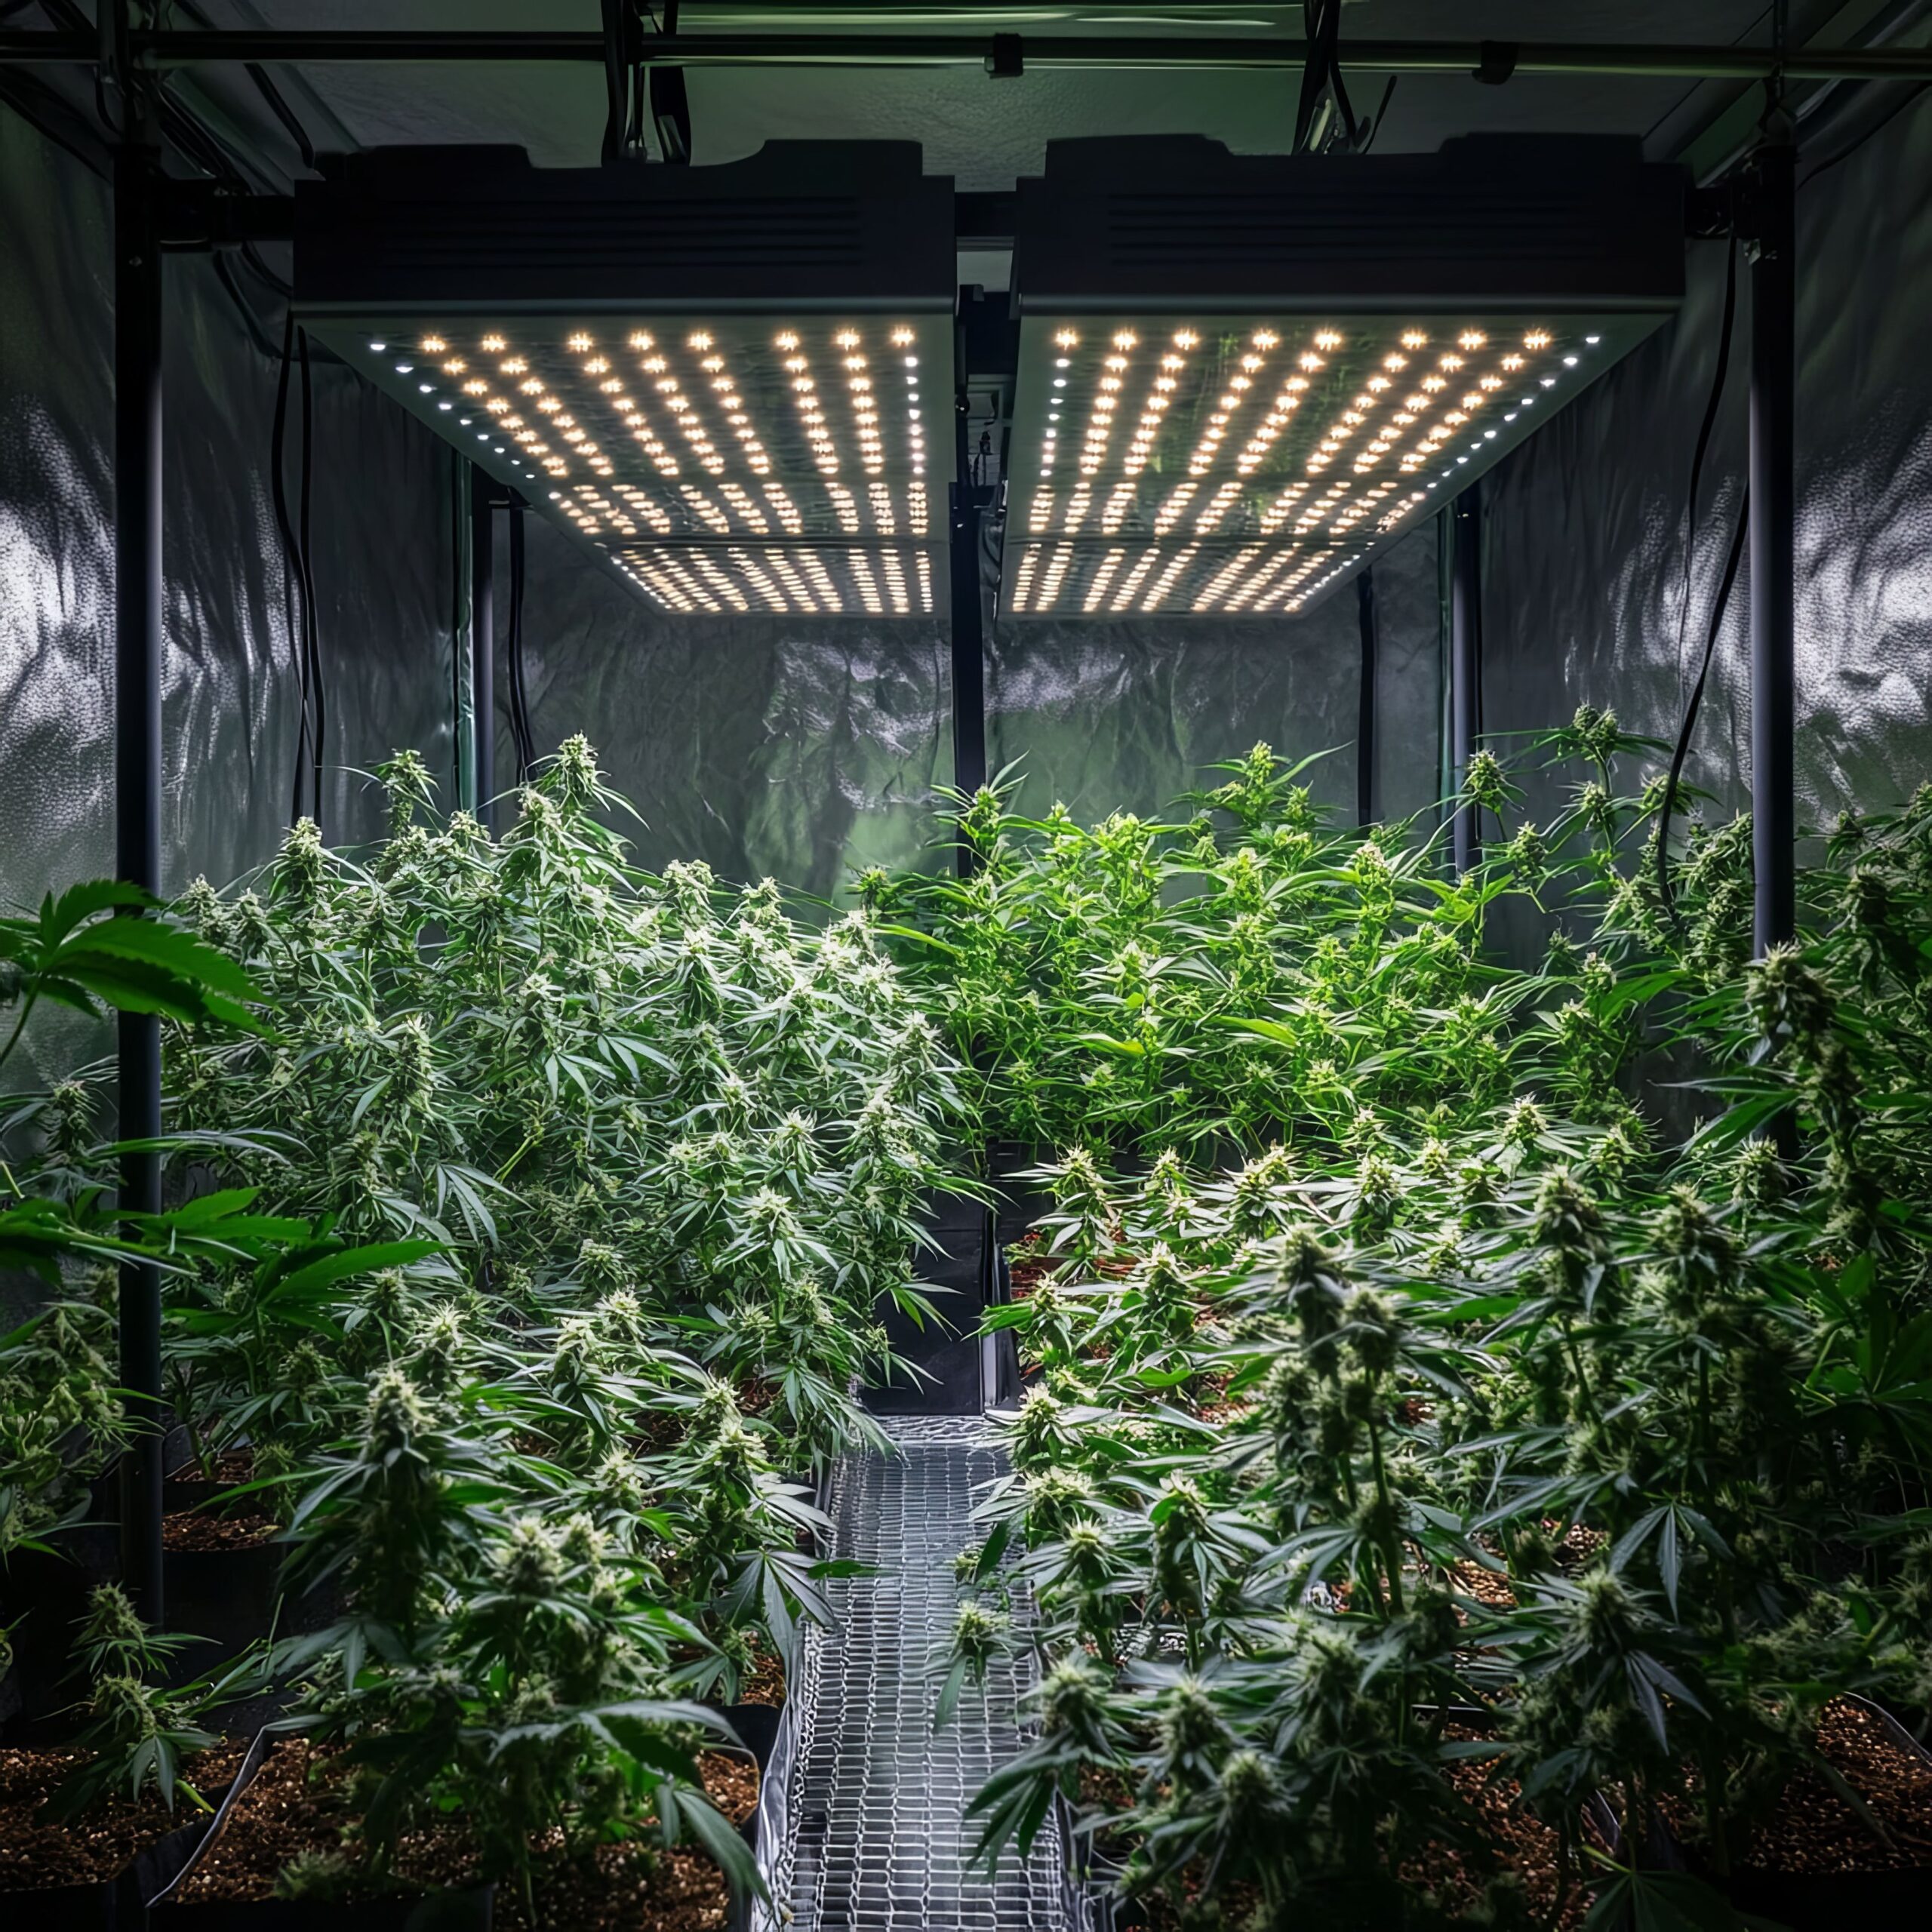
A bar-style fixture divides the light engine across multiple linear members. Depending on the fixture, each bar may carry one continuous printed circuit board, several boards, or another linear LED assembly. The bars are spaced apart and held by a larger frame.
This layout increases the physical emitting footprint. When the bars are positioned well for the intended canopy, the canopy receives photons from several directions rather than mainly from one compact central area. That can make it easier to reduce center peaks and support the edges without relying on a very high mounting position.
What growers usually mean by a quantum board
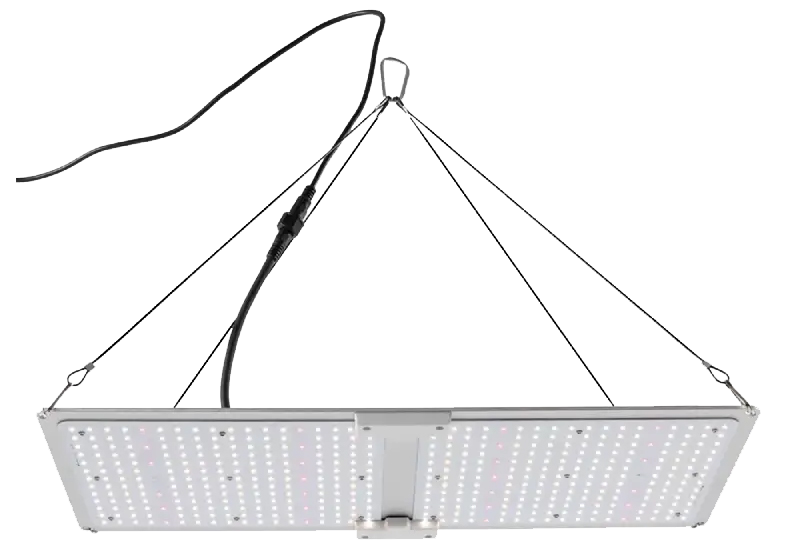
In common grow-light language, a quantum-board-style fixture uses a flat printed circuit board populated with many small LEDs. One fixture may use a single board, while larger fixtures may combine two or more boards on a frame or heatsink.
Quantum board is a form-factor term, not a performance standard
The phrase describes a dense LED board layout in common horticultural use. It does not certify photon efficacy, spectrum, coverage, safety, thermal design, or diode quality. Treat the term as a description of physical architecture, then verify the actual specifications.
A large board can spread diodes across a substantial area, while a small board can act more like a concentrated source. Two products both described as quantum boards may therefore produce very different PPFD maps. The same is true of bar fixtures with different bar counts, spacing, optics, dimensions, and drive levels.
The emitting footprint matters more than the marketing family
Imagine two fixtures with the same PPF. One spreads its emitters across most of a square canopy. The other produces the same total photons from a smaller physical area. The compact fixture may need more mounting height to blend those photons across the same footprint. If height is limited, the broader emitter layout may have an easier job producing a flatter map.
Now change the example. Put both fixtures over a small canopy that is narrower than either light engine. The advantage of the larger frame may disappear, while the smaller fixture becomes easier to hang, move, inspect, and fit around filters or ducting. Geometry only has meaning in relation to the target area.
Optics can change the behavior of either design
Do not assume that exposed diode position tells you the complete beam pattern. Lenses, covers, reflectors, diffuser materials, diode emission angle, nearby surfaces, and the fixture frame can all change where photons land. A board with purpose-built optics can distribute light differently from another board using the same diodes. A bar fixture with narrow optics can behave differently from a broad, diffuse bar fixture.
For this reason, visual inspection of the hardware is useful for understanding the design, but the PPFD map remains the better evidence for canopy planning.
Important: Do not infer PPE from fixture shape. Efficiency depends on the complete electrical and optical system, including diodes, drive current, driver efficiency, operating temperature, spectrum, and optical losses.
How Fixture Geometry Changes PPFD Distribution
PPF tells you how many photosynthetic photons leave a fixture each second. PPFD tells you how densely those photons arrive at a surface. For a canopy decision, the second number is where fixture geometry becomes visible.
A grower does not cultivate one point directly beneath the center of a fixture. A productive canopy occupies an area. Light therefore has to be judged across that area, including center, intermediate positions, edges, and corners.

Emitter spacing changes beam overlap
Every diode or optical element produces a spatial distribution. As the distance from the fixture increases, distributions from neighboring emitters overlap more. This tends to smooth local peaks and valleys, although total intensity at the canopy also changes with distance and room geometry.
Bring a fixture closer and you reduce the distance available for that mixing. With a dense board, the individual emitter spacing may be small enough that the field still blends well. With a bar fixture, the spaces between bars can become visible in the PPFD map if the fixture is very close and the bars are widely separated.
Research on close-canopy LED systems has shown exactly why this matters: when individual light engines were too widely spaced, shortening the fixture-to-crop distance reduced beam overlap and created non-uniform light conditions. The practical lesson is not that close mounting is bad. It is that a fixture must be designed for the distance at which you intend to use it.
“Do bar LEDs always have better PPFD uniformity than quantum boards?”
No. A broad bar layout can make even coverage easier across some large canopies, but uniformity depends on bar spacing, fixture dimensions, optics, hanging height, walls, and the measurement footprint. A well-designed board can produce a flatter map than a poorly matched bar fixture.
Question sent by: Ethan Brooks, via email.
Fixture width and canopy width work together
A fixture that physically occupies more of the canopy width starts from a different geometry than a compact source. Photons reaching an outer branch do not all need to travel diagonally from the center if emitters already exist nearer that branch.
This helps explain why distributed arrays can be useful over broad, flat canopies. It also explains why a compact board can still perform well in a small footprint. If the board itself occupies a large fraction of the growing area, the center-to-edge distance may already be modest.
Hanging higher can improve blending, but it is not free
Increasing mounting height often smooths the pattern because light from more emitters can overlap before reaching the measurement plane. It may reduce a strong center peak and improve relative edge coverage. However, increasing height can also reduce the photon density reaching the canopy and can increase the fraction of light that reaches walls or spaces outside the productive area.
The correct height is therefore not simply “as high as possible for uniformity” or “as low as possible for intensity.” It is the height that produces a useful average, acceptable high and low zones, and workable environmental conditions across the real canopy.
Reflective walls can change the map
A PPFD map measured in an open room is not automatically comparable with a map measured inside a reflective tent. Side walls can return photons toward the measurement plane, especially near edges and corners. Recent lighting simulations have also shown that open and enclosed reflective environments can produce different uniformity and optical-utilization results for the same spatial LED arrangement.
This is one reason product maps should always be read with their test conditions. A beautiful edge value means much less if the manufacturer does not state the footprint, height, dimmer setting, or enclosure conditions.
Field Advice: If two fixtures are being compared, use maps produced at the same canopy dimensions and similar hanging heights whenever possible. Otherwise, you are comparing both fixture design and test setup at the same time.
Canopy uniformity is more than one ratio
Minimum-to-average PPFD is a useful quick indicator, but it does not describe the whole distribution. Two maps can have the same minimum-to-average ratio and still place their bright and dim zones differently. Research on indoor crop lighting has shown that spatial histograms and the full pattern can reveal differences hidden by one uniformity ratio.
For a grower, the practical version is simple: look at the whole grid. Ask where the weak zones are, whether the brightest points form one center hot spot or repeated strips, and whether the shape of the strong zone matches where flowering branches will actually sit.
Match the Fixture to Canopy Shape, Tent Size, and Height
Fixture selection becomes easier when you stop asking which design is better in general and start with the actual canopy rectangle. Measure the usable plant area, not just the outside dimensions printed on the tent carton. Reserve space for circulation, equipment, access, and anything else that reduces the productive footprint.
The grow-room setup guide covers that broader room-planning step. Here, the question is narrower: once the usable canopy is known, which fixture shape is easier to match to it?

Small square canopies
On a compact square canopy, both formats can work very well. A board-style fixture often makes practical sense because the physical light does not need to span a large distance. If its PPFD map already covers the corners at a sensible height, adding a large bar frame offers no automatic plant benefit.
A compact fixture can also leave more mechanical space around the perimeter for hangers, ducting, circulation paths, sensors, and access. In a short tent, though, the board still needs enough emitting area to avoid forcing an excessively high center peak at the height available.
Large square canopies
As the canopy expands, physical distribution becomes harder. A single compact board may have enough total PPF but still require more height to spread that output to the edges. A larger multi-board array or a multi-bar fixture can reduce that geometric challenge by placing emitters closer to the outer canopy.
Do not convert this into a fixed tent-size rule. A very large board assembly can cover a large square well, while a narrow bar fixture designed for another footprint can perform poorly. Fixture dimensions relative to canopy dimensions are the useful comparison.
Long rectangular canopies
A long rectangle rewards a light engine with a similar aspect ratio. Bar systems are often easy to engineer this way because bars can extend along the long axis and the frame can distribute several light lines across the short axis. Rectangular board arrays or multiple smaller boards can do the same job.
The mistake is placing one compact square source over a long rectangle and then trying to fix dark ends by increasing power. That raises the center before it solves the geometry.
Multiple fixtures and overlap
One large fixture is not the only way to create a broad light field. Several fixtures can overlap. This can improve flexibility because each unit can be moved, dimmed, or replaced independently. It can also create seams, local peaks, extra drivers, more cables, and a more complicated hanging plan.
When multiple fixtures are used, evaluate the combined PPFD map, not the map from one fixture multiplied mentally across the room. Neighboring fixtures change each other’s edge conditions through overlap.
Match emitter footprint to productive canopy
Compare fixture length and width, PPFD distribution, hanging height, and edge behavior against the area where flowers will actually develop.
Do not buy by tent label alone
A fixture advertised for a certain tent size may have been mapped at a height, dimmer setting, or stage that does not match your flowering canopy.
Vertical clearance can reverse the decision
Low ceilings often favor fixtures that produce acceptable uniformity without needing a long blending distance. A distributed bar fixture may do this well, but some bars require enough separation for the spaces between them to blend. A dense board may also perform very well close to the canopy if its emitting area is large enough for the footprint.
Measure the complete vertical stack: container and tray, plant height, support net, safe working gap, fixture thickness, hangers, filter, ducting, and ceiling hardware. A fixture that looks ideal on a map at 24 inches is a poor fit if your room can only provide 10 inches above the mature canopy.
“Can I hang a bar LED closer than a quantum board because the light is more spread out?”
Sometimes, but not as a universal rule. The closer you hang any fixture, the more its exact emitter spacing and optics matter. A bar fixture with wide gaps can develop stripes at low height, while a dense board may blend smoothly. Use the PPFD map for the intended distance, then verify with a meter on your canopy.
Question sent by: Julia Schneider, via contact form.
Uneven plant height is a canopy problem before it is a fixture problem
A flatter light map does not make an uneven canopy flat. Tall branches remain closer to the fixture and can receive much higher PPFD than shorter branches. If one plant is 20 cm taller than another, the light field experienced by those tops is no longer the same plane shown on a published map.
Training, support, cultivar architecture, plant count, and timing all influence whether the canopy can use the fixture’s designed distribution. A bar system can provide broad coverage, but it cannot compensate for a canopy with isolated tops pushed into the light.
Heat, Airflow, Efficiency, and Driver Placement
Bar fixtures are often described as cooler than boards. That statement needs to be separated into three different questions: total heat entering the room, temperature of the fixture surfaces, and how that heat is distributed physically.
Total room heat follows electrical input more than frame shape
Almost all electrical energy consumed by an indoor light eventually contributes to the room’s energy balance as heat unless some energy leaves the space as transmitted or exhausted radiation. A 500 W bar fixture and a 500 W board fixture do not create radically different room heat loads simply because one spreads its LEDs across more aluminum.
The better comparison is actual input power plus photon efficacy. A more efficient fixture can reach the same photon requirement with less electrical input, which can reduce the thermal load required to produce that canopy light. The actual wattage versus equivalent wattage guide explains why real wall draw belongs in electricity and heat calculations.
Surface temperature can still differ
Two fixtures with the same input wattage can distribute heat very differently. A broad bar frame has more separated thermal paths and more exposed surface area in many designs. A board may use a large heatsink that spreads heat across one plate. Either approach can work well if the thermal engineering is appropriate.
A cooler touch point does not prove lower total heat output. It may simply mean the energy is spread over more metal. Conversely, one hot heatsink does not automatically mean poor efficacy. Surface temperature should be interpreted with the manufacturer’s operating limits, driver placement, airflow, and long-term reliability data.
Open frames can change air movement
Air can pass between the bars of many fixtures, which can reduce the amount of solid material blocking vertical air movement. This may be useful in dense canopies or low rooms. However, circulation is a whole-room design problem. Fans, ducting, plant density, netting, wall distance, driver position, and leaf area can matter more than the fixture frame alone.
Do not assume that an open bar fixture automatically solves canopy airflow. Measure temperature and humidity around and within the plants, not only above the light.
“Do bar LEDs run cooler than quantum boards at the same wattage?”
They may spread heat across a larger frame and may have lower temperatures at some surfaces, but the room still receives energy from the electrical input. Compare actual wattage, PPE, driver location, measured fixture temperature, and room HVAC demand rather than assuming one form factor is heat-free.
Question sent by: MapleGrower, via Facebook page.
Remote drivers can matter more than bars versus boards
The driver converts mains power for the LEDs and produces heat of its own. Some fixtures place it directly on the frame. Others allow it to be mounted remotely within specified cable and environmental limits. Moving an approved remote driver outside a small tent can relocate part of the heat source, although it does not change the fixture’s photon requirement.
Only use remote mounting when the fixture is designed for it. Cable length, connectors, enclosure rating, strain relief, ventilation, and electrical safety still apply.
Do not modify a fixture to create a remote-driver setup
Removing drivers, extending low-voltage leads, opening enclosures, or changing connectors can create electrical, fire, warranty, and certification problems. Follow the fixture manufacturer’s approved installation method or use a qualified electrical professional when permanent wiring is involved.
PPE is not a bar-versus-board metric
The DesignLights Consortium’s current Horticultural V4.0 requirements use standardized horticultural performance reporting and a minimum PPE threshold for qualifying LED fixtures. The standard does not award efficiency based on whether a fixture is a bar or a board. That is the correct mental model for growers as well.
Compare measured PPF and actual input watts. Then compare how well that output is delivered to the canopy. A highly efficient fixture that wastes photons outside the productive area can still be a poor room fit.
Compare PPFD Maps Before You Buy
A PPFD map is the strongest practical bridge between fixture geometry and your canopy. It reveals what the product shape is trying to accomplish. It also exposes when an impressive total output is concentrated in a small center zone.
Maps are only comparable when the test conditions are reasonably comparable. A higher map does not automatically mean a better fixture if it was measured closer, over a smaller footprint, at a higher dimmer setting, or inside a more reflective enclosure.
Start with the mapped footprint
Check the length and width of the test area. Do not assume the map fills the tent named in the marketing text. If the fixture is mapped over 3 x 3 ft and you need 4 x 4 ft, the missing outer band is part of your problem, even if the center values look excellent.
Check hanging height before reading the numbers
Height changes both intensity and distribution. A board mapped at 18 inches should not be compared directly with a bar fixture mapped at 30 inches and treated as a pure design comparison. If several heights are available, compare the height you can actually use.
Read the average and the pattern
Average PPFD tells you the overall density delivered to the map. The minimum and maximum reveal spread, but also inspect where those values occur. A fixture that produces one intense center and weak perimeter behaves differently from one that produces several small peaks between broad, usable zones.
For a flowering canopy, the practical goal is not mathematical perfection. It is to keep the productive branches inside a light field that the plants can use without forcing some tops far above the intended dose just to rescue weak edges.
| Map Check | What to Ask | Why It Matters for Bar vs Board |
|---|---|---|
| Footprint | Is the map the same size as my productive canopy? | A compact board may look strong on a smaller map, while a broad bar system may be designed around a larger receiver plane. |
| Height | Can I reproduce this fixture-to-canopy distance? | Emitter spacing and beam overlap change with distance. |
| Average PPFD | Does the average support my intended stage and photoperiod? | Total useful delivery matters more than one center number. |
| Low zones | Are corners, ends, or gaps between bars weak? | The location of weak zones reveals whether the fixture geometry matches the canopy shape. |
| High zones | Is there one center hot spot or repeated narrow peaks? | Boards may center-peak; widely spaced bars can stripe when close. Neither pattern is universal. |
| Test enclosure | Was the map measured in open space or with reflective walls? | Wall reflections can strengthen perimeter readings and change apparent uniformity. |
| Dimmer setting | Was the fixture at full power or a stated percentage? | You need the same operating state to estimate electricity, heat, and DLI. |
Pro Tip: Save the map before you buy. After installation, reproduce the same footprint and approximate measurement height with a quantum sensor. The difference between published and real-room data tells you more than online arguments about fixture families.
Do not compare only maximum PPFD
Maximum PPFD is often the most visually impressive specification because it creates one large number. It can also be the least useful number for choosing between form factors. A compact source can produce an extremely high maximum directly beneath the center while still needing more height or reflection to cover the edges.
For canopy matching, a lower maximum with a stronger average and better edge performance may be more useful. That does not mean lower maximum is always better. It means the distribution must be interpreted as a complete field.
Do not assume one uniformity formula tells the whole story
Some maps report minimum divided by average. Others use minimum divided by maximum, coefficient of variation, or a proprietary percentage. These values are not interchangeable.
If the raw grid is visible, you can compare maps without relying entirely on the brand’s chosen metric. Inspect the values and pattern directly. For a deeper measurement workflow, How to Estimate Fixture PPF from PPFD Maps is a planned supporting resource and should only be linked here after its live URL has been verified.
Install, Measure, and Verify on the Real Canopy
Buying the fixture is not the end of the comparison. Published maps are controlled reference conditions. Your tent changes the result through wall reflectivity, fixture position, canopy height, neighboring fixtures, driver location, and the shape of the plants.
A repeatable field check turns the form-factor decision into data.
Step 1: Mark the productive canopy rectangle
Use the area that will actually contain productive branches. Do not automatically use the full floor. If you leave a perimeter for fans and access, exclude it from the lighting target unless branches will occupy it later.
Step 2: Record fixture position and operating state
Record fixture height above the measurement plane, dimmer position, driver location, wall condition, and which other fixtures are operating. These details allow you to reproduce the test after a change.
Step 3: Measure a grid, not one point
Use a quantum sensor when available. Keep the sensor level and measure center, edges, corners, and intermediate positions. The grid does not need to copy a manufacturer’s exact point count to be useful, but it should be consistent enough to reveal the spatial pattern.
If you are still learning the lighting metrics, the indoor growing basics guide explains how PPF, PPFD, PPE, and DLI relate before you build a detailed measurement plan.
Step 4: Compare average, lows, highs, and location
Record the numerical average, but also mark where the peaks and valleys occur. For a bar fixture, look for repeating bands aligned with the bars or gaps. For a compact board, look for a steep center gradient. Do not assume either pattern will appear. You are testing for it.
Step 5: Change one variable at a time
If the center is too strong and edges are weak, raise the fixture in a controlled step and remap. If the whole canopy is too strong, dim the fixture and recheck. If only one area is weak because the fixture is physically off-center, reposition before adding power.
Changing height, dimming, plant position, and fixture position at the same time makes it difficult to know which change solved the problem.
Step 6: Recheck after the canopy develops
An empty table is not the same optical environment as a mature cannabis canopy. Leaves intercept, reflect, and transmit photons. Plant height also changes the fixture-to-leaf distance. Recheck after major stretch, training changes, or a substantial shift in canopy height.
Master Advice: The best fixture geometry is the one you can verify and keep stable. A theoretically perfect map has little value if the fixture cannot be hung at that height once the canopy reaches full flower.
Common Bar LED vs Quantum Board Mistakes
Most bad comparisons start by isolating one specification from the rest of the lighting system. The following mistakes are common because they sound simple, not because they are reliable.
“Bars are always more uniform”
Bars can distribute emitters broadly, which is useful. But the number of bars, spacing, fixture dimensions, optics, height, and canopy dimensions decide the final map. Widely spaced bars can produce visible valleys when mounted close.
“Quantum boards always create hot spots”
A small compact board over a large canopy may create a strong center gradient. A large board or multi-board array can distribute emitters across much more of the canopy and may produce excellent uniformity. The map decides.
“A larger fixture always covers better”
Physical size helps only when the emitter layout, output, and optics use that size effectively. An oversized frame can be awkward in a small tent, block access, and force mounting compromises without improving the productive light field.
“More bars mean more photons”
Bar count is not PPF. A six-bar fixture can produce less total light than a four-bar fixture if it uses lower power, fewer diodes, lower drive current, or lower-efficacy components. Compare measured output.
“The cooler fixture is more efficient”
Surface temperature is not PPE. Thermal design influences diode operating conditions and reliability, but efficiency must be measured through photon output and electrical input. A wide frame may feel cooler because the heat is spread over more area.
“The published map will look identical in my tent”
It probably will not. Reflective walls, the actual hang height, fixture tolerances, neighboring equipment, voltage, dimmer calibration, and plant canopy all influence the field. A published map is a planning tool that should be verified after installation.
A Practical Bar LED vs Quantum Board Decision Framework
The following framework does not declare a universal winner. It shows which evidence should move the decision in one direction or the other.
| Your Situation | What Usually Deserves a Closer Look | What Still Must Be Verified |
|---|---|---|
| Broad, flat canopy with limited vertical clearance | A distributed bar fixture or large distributed board array. | PPFD map at the low hanging height you can actually use. |
| Small square tent or compact cabinet | A compact board or small bar fixture that physically fits without crowding equipment. | Corner intensity, driver heat, dimming, and remaining vertical space. |
| Long rectangular canopy | A fixture or fixture group with a matching rectangular emitting footprint. | End coverage and cross-axis uniformity. |
| Very low fixture-to-canopy distance | Dense emitter spacing and a map tested at a similar distance. | Striping, center peaks, leaf temperature, and safe manufacturer clearances. |
| Modular room that changes layout often | Several independently dimmable fixtures may provide more flexibility than one large frame. | Combined overlap, wiring, controls, maintenance, and total PPF. |
| Electricity and cooling are major constraints | The fixture with better verified PPE and better canopy utilization, regardless of form factor. | Actual wattage, PPF, map, driver location, and HVAC response. |
Notice what is missing from the first column: “I want maximum yield.” Yield is not a bar-versus-board specification. It emerges from usable photons, cultivar, canopy management, root health, temperature, humidity, CO2 availability, irrigation, nutrition, plant density, and the rest of the production system.
FAQ: Bar LEDs and Quantum Boards
Is a bar LED better than a quantum board for cannabis flowering?
Not automatically. A bar fixture may be easier to match to a large flat canopy because it can distribute emitters across a broad frame. A board can be equally suitable when its PPFD map, output, and physical dimensions fit the flowering footprint. Compare the exact fixtures rather than the category names.
Do bar LEDs penetrate the canopy better?
“Penetration” is often used loosely. Fixture geometry can change the direction and uniformity of incident light at the top of the canopy, while leaf arrangement and internal shading determine what reaches lower leaves. A bar layout may illuminate top branches from more distributed positions, but it does not create a universal deep-canopy advantage independent of plant architecture.
Are quantum boards outdated?
No. Board-style fixtures remain a valid LED architecture. Current performance depends on the diodes, drive conditions, thermal design, optics, driver, spectrum, controls, and physical match to the canopy. The existence of bar fixtures does not make a well-designed board obsolete.
Are bar LEDs more efficient?
Not because they are bars. Compare verified PPE in micromoles per joule. A bar design may help distribute photons across a canopy, but electrical-to-photon efficiency is a separate metric.
Which design is better for a low tent?
The better design is the one that produces an acceptable map at the short fixture-to-canopy distance available. Distributed bars often deserve consideration, but widely spaced bars can stripe when very close. Dense boards can also work well. Measure the vertical stack first and use maps tested at similar heights.
Should I choose the fixture with the highest center PPFD?
No. Center PPFD is one point. Compare average intensity, edge and corner values, the full spatial pattern, footprint, and hanging height. A lower center value can be more useful if the rest of the canopy is substantially stronger and more even.
Decision Checklist: Which Design Fits Your Canopy?
A fixture earns its place by matching the canopy you can actually build, not by belonging to the more fashionable design family. Use the checklist below before committing to either format.
Verify the canopy fit before you buy
- Measure the productive canopy length and width, not only the enclosure floor.
- Measure the maximum realistic fixture-to-canopy distance at full plant height.
- Compare fixture dimensions with the canopy shape and aspect ratio.
- Check actual input wattage, measured PPF, and PPE.
- Compare PPFD maps over the same or very similar footprint.
- Confirm the hanging height and dimmer setting used for each map.
- Inspect center, edges, corners, and any repeating stripes or valleys.
- Check whether the map was measured in an open or reflective environment.
- Confirm driver location, fixture thickness, hanging hardware, and safe clearances.
- Plan circulation around the real fixture frame instead of assuming open bars solve airflow.
- Prefer measured canopy delivery over bar count, board size, diode count, or marketing wattage.
- After installation, map the real canopy and change one variable at a time.
- Recheck after stretch or major canopy-height changes.
If the bar fixture gives you a flatter usable field at a practical height, choose the bar fixture. If the board gives you the same or better canopy delivery in a smaller, simpler, or better-priced package, choose the board. The correct answer is the fixture that fits your canopy geometry and proves it with measurements.
Share this article
A quick overview of the topics covered in this article.
- Bar LED or Quantum Board: The Short Answer
- What Actually Changes Between the Two Designs
- How Fixture Geometry Changes PPFD Distribution
- Match the Fixture to Canopy Shape, Tent Size, and Height
- Heat, Airflow, Efficiency, and Driver Placement
- Compare PPFD Maps Before You Buy
- Install, Measure, and Verify on the Real Canopy
- Common Bar LED vs Quantum Board Mistakes
- A Practical Bar LED vs Quantum Board Decision Framework
- FAQ: Bar LEDs and Quantum Boards
- Decision Checklist: Which Design Fits Your Canopy?
Follow us
Latest articles
October 1, 2026
October 1, 2026