Cannabis Harvest Readiness: Trichomes, Pistils, Sampling, and Staged Harvest
One flower at the top of a cannabis plant may have swollen bracts, darkening stigmas and opaque gland heads while the lower branches are still building small, loose clusters. Another plant may carry brown pistils after heat or physical contact even though its flowers are developing. Neither a seed-pack finish date nor a photograph of one exceptional bud can resolve these differences. Harvest readiness is a decision about which healthy flowers are sufficiently developed, how representative the observations are, and whether waiting exposes the remaining crop to unacceptable risk.
For a practical first decision, inspect intact glandular trichomes on multiple actual flower bracts at different positions, record the overall structure and the pattern of fresh versus aging stigmas, and compare the same positions again rather than relying on a single snapshot. Use weather and flower-health inspections as independent safety checks. When one region is clearly ahead, consider separate harvest groups only if the remaining plant can continue safely. If suspicious decay is present, safety takes priority over the preferred maturity pattern.
This resource concerns the decision to harvest and the evidence needed to support it, not a universal trichome percentage, a harvesting-and-trimming manual, or a complete drying and curing guide. It covers lawful indoor and outdoor flower production, with special attention to unequal outdoor ripening. For the entire outdoor season, see the Outdoor Grow Comprehensive Guide. For the full seed-to-harvest framework, use Grow Basics.
Define Harvest Readiness Before Reading the Resin
There is no single harvest day written into the species. A useful definition starts with the product and the plant: harvest readiness is the point at which the intended flower sites have reached a defensible maturity window while remaining sufficiently healthy and clean to harvest, and any additional waiting offers less expected benefit than its real cost and risk. That definition is not a chemistry assay. It is a documented field decision using several imperfect indicators.
When Is Cannabis Ready to Harvest?
Begin by separating physiological development, visual ripening, chemical composition and harvest safety. Flower mass may continue increasing after some chemical concentrations plateau. Pistils can age without telling you the concentration of THC or CBD. Glandular trichomes can mature asynchronously on the same bract. A visibly finished flower can still be unsuitable because of mold, contamination or pest injury. The answer therefore needs a named flower group and more than one source of evidence.
The most useful home-scale determination is a maturity window, not an exact laboratory-equivalent date. A grower can compare representative flower bracts over several observations, note whether bracts are still expanding, and identify whether upper, middle and lower sites agree. If a chemical specification matters for regulated production or a particular cannabinoid target, properly designed laboratory sampling is the stronger evidence. No visual method substitutes for accredited chemistry, microbial or contaminant testing where these are required.
How to Judge Outdoor Cannabis Harvest Readiness
Outdoor decisions add a second clock: the weather. Follow the maturation trend, but also inspect dawn moisture retention, rain forecasts, flower interiors, caterpillar entry points and any new brown or collapsed tissue. The biologically ideal finish may not remain achievable during a series of wet or freezing events. Conversely, one cool evening or a rainy forecast is not itself proof that all healthy flowers must be harvested. Compare the expected maturation benefit with the specific risk to the flower group and the actual time needed for the canopy to dry.
A major outdoor plant is not a single uniform sample. A sun-exposed top, a shaded side branch and a dense interior cluster may have different histories. Assign them separate observation positions. Do not interpret one mature top as evidence that every lower flower is ready; do not delay a healthy, mature top solely because a newly formed lower cluster is immature.
Maturity evidence: actual flower-bract trichomes, repeated flower development and pistil pattern. Representation: enough labeled positions to describe the portion you plan to harvest. Risk: weather, disease, contamination, handling and the feasibility of leaving the rest. A weak layer is a reason to investigate, not a reason to average everything into one convenient color.
What the best studies can and cannot tell you
Research makes the limitations clear. A 2023 microscopy study compared glandular trichomes across two high-THC genotypes and found that plant age and genotype affected trichome types, stalk formation and senescence, with different developmental stages present together on bracts. A 2025 study involving 25 genotypes found that peak measured cannabinoid concentrations often coincided with later stigma-color stages, but several genotypes peaked earlier. In controlled CBD-rich material, harvest timing that maximized dry mass was not always identical to timing that maximized cannabinoid output. No single cultivar result supplies an amber percentage or flowering-week rule for every outdoor plant.
A 2026 study of a CBDA-dominant medicinal cultivar combined trichome phenotypes with cannabinoid measurements and identified a cultivar-specific harvest window. Its thresholds and ten-stage model are useful evidence that visual and chemical measures can be studied together. They do not establish an amber percentage for all THC-rich cultivars or predict a particular consumer effect.
Sample Representative Flowers and Record Their Positions
The most common sampling error happens before magnification: the grower chooses the most attractive, sunniest flower, points the lens at a frosty leaf and treats the image as a whole-plant result. Replace that with a small, reproducible sampling map. Its purpose is not to claim statistical precision without a study design; it is to make your observations comparable and expose disagreements that a beautiful close-up conceals.
How to Check Trichomes on Representative Flowers
Sketch the plant from above or photograph it from a fixed direction. Name flower groups by canopy level and exposure: upper sun-exposed, middle side, lower shaded, and any separately concerning dense or wet region. On an indoor bench, the analogous groups may be center versus edge, front versus back or different cultivars. Select multiple accessible, healthy flowers from the group being considered, rather than moving between random locations every visit. The minimum useful number depends on how uneven the canopy is; there is no experimentally validated universal home-grow sample count.
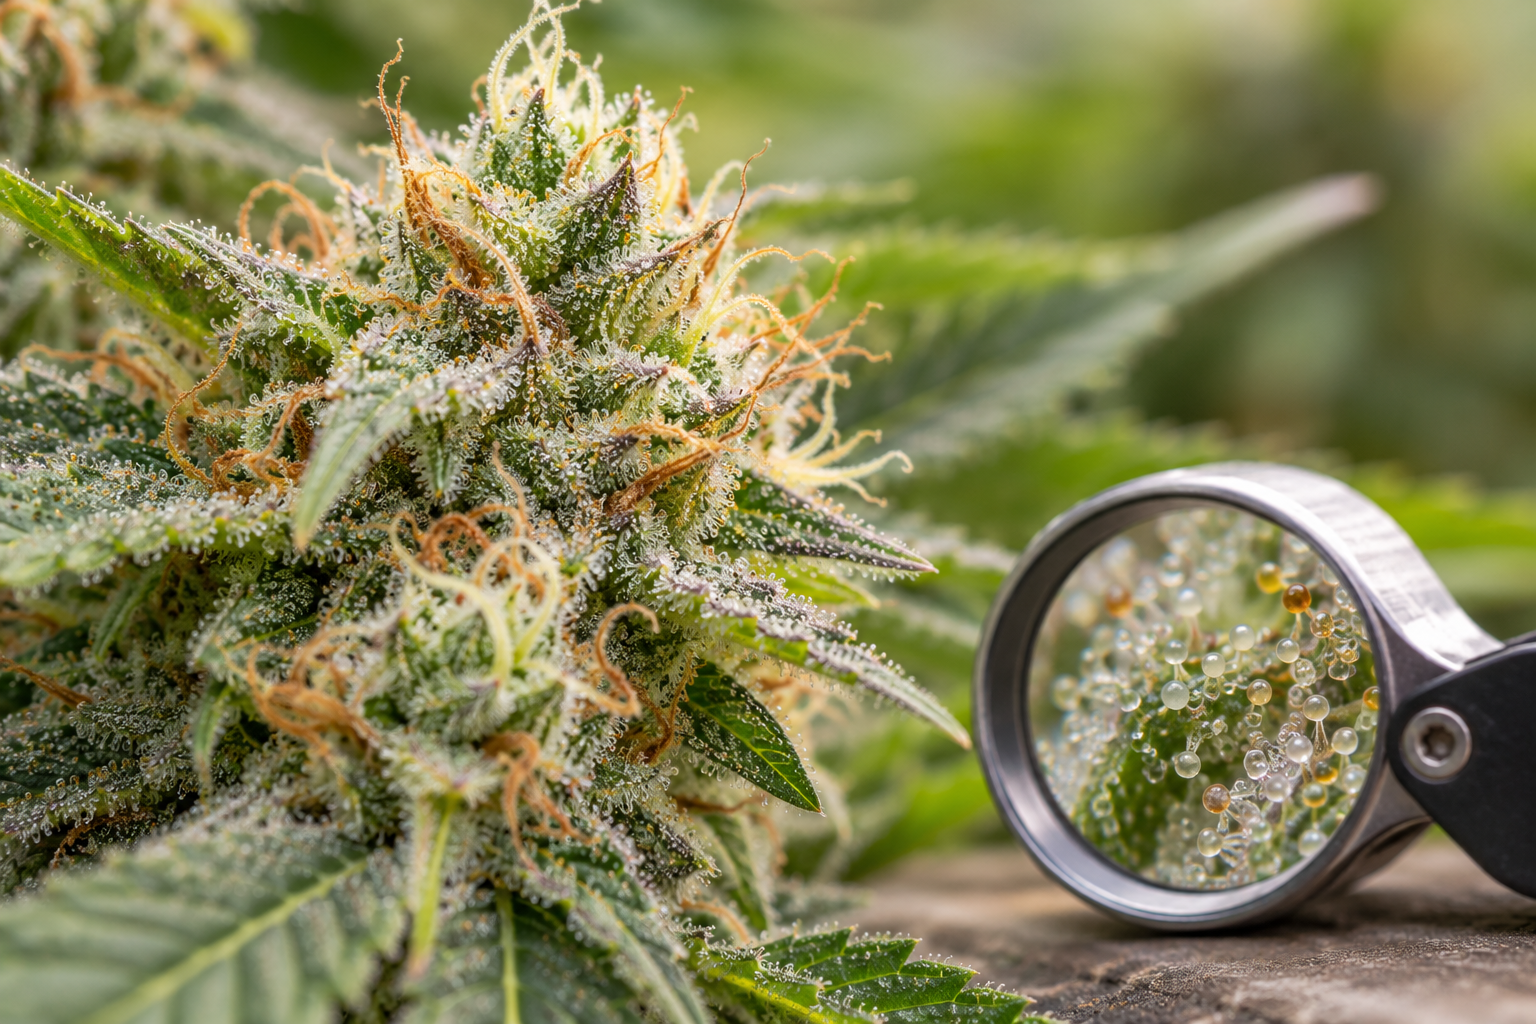
Use a clean loupe or digital microscope that resolves individual glandular heads. Inspect attached flower-bract surfaces in several spots per flower, protecting tissue from pressure and abrasion. If the equipment requires harvesting a tiny sample, take it from a comparable small bract with clean tools and record the sampling site; a detached or drying sample may not look exactly like a fresh intact gland. Avoid repeatedly dissecting the same dense flower because damage and contamination would compromise the next inspection.
Observe in comparable diffuse light, keeping lens, illumination and camera settings similar between visits. Amber-looking resin under warm light, reflected glare that makes heads seem clear, and aggressive phone processing can change apparent color. Clean the lens and stabilize your hand; use the same magnification whenever you compare trends. Photograph a wider view before the close-up so you can relocate that flower later.
Trichomes on Flowers vs Sugar Leaves
The sampling target is the resin-bearing surface of the actual flower bracts, not a convenient nearby sugar leaf. Small leaves can carry abundant trichomes and can look dramatic under a microscope, but leaf tissue differs from floral tissue in developmental context and gland composition. Research on cannabis distinguishes stalked glands on mature inflorescences from gland types and biochemical profiles on leaves. It does not validate a fixed conversion such as ‘sugar leaves amber X days sooner.’ A maturity decision about consumable flowers should examine the flowers themselves.
To avoid mistaking leaf for bract, find the compact overlapping floral organs that enclose the female reproductive structures. These are often called ‘calyxes’ in grower language, although the visible swollen structures are more precisely bracts. The small sugar leaf projects from the cluster and has a flat blade and veins. Move the lens between several intact bract surfaces without scraping heads or pulling the cluster apart.
Field Tip: Photograph the entire selected flower, then a middle section of its bracts, and finally a second bract surface. That three-view sequence keeps a striking leaf-tip macro from silently replacing your actual flower assessment.
Keep the sample comparable through time
Write the date, cultivar or plant ID, flower group, branch identifier, inspection time, recent weather and camera setting. Use simple qualitative descriptions consistently: predominantly transparent-looking, mixed transparent/opaque, predominantly opaque, visibly brown heads, or indeterminate because of glare or damage. These labels are observational categories, not standardized chemical grades. If a flower is cut, record it as removed and choose a replacement site with a note. Comparing today’s shaded lower flower against yesterday’s top is not a trend.
| Sample location | Why include it | What to record | Common sampling failure |
|---|---|---|---|
| Upper sun-exposed flower | Represents early-looking, bright sites | Bract heads, flower expansion, exposed-side damage | Treating one spectacular top as the whole crop |
| Middle or side flower | Shows main harvestable branch variation | Several bract surfaces, fresh pistil pattern, support condition | Changing branches without recording the switch |
| Lower or shaded flower | Tests whether a single harvest date is realistic | Development, trichomes, density and persistent moisture | Calling shade-induced differences a fixed maturity delay |
| Dense or recently wet flower | Independent safety inspection | Interior discoloration, collapsed tissue, odor and moisture | Disturbing suspected mold above healthy flowers |
“My top flower looks cloudy. Can I cut the entire plant?”
Question source: Common grower question.
Not from that observation alone. Compare the middle and lower harvestable flowers using the same lens and lighting. Record which zones meet your maturity criteria and which remain clearly behind. A full harvest may be reasonable if the overall crop is acceptably consistent or weather makes further holding unsafe. Otherwise, assess whether a limited staged harvest is feasible.
Read Trichomes, Pistils, and Flower Development Together
Each visible signal describes a different component of flowering. Trichome appearance describes aspects of gland development and age. Stigmas, commonly called pistils by growers, describe parts of the female flower and their changing appearance. Bract expansion describes flower development. None of these directly assays cannabinoid concentration or proves microbial safety.
Cannabis Pistils vs Trichomes for Harvest Timing
Use stigma color as a supporting overview and trichomes on representative flower bracts as the closer morphological observation. White, extended stigmas often accompany fresh flower formation; older stigmas may recede and darken. But a flower cluster can contain generations of flowers, with newly emerged white stigmas next to older brown ones. A few white threads therefore do not automatically mean immature flower, and mostly brown stigmas do not guarantee a finished cannabinoid profile.
In the 25-genotype stigma study, most genotypes attained measured cannabinoid concentration peaks in later color categories, while a minority peaked sooner. That supports the use of stigma changes as a useful contextual indicator. It directly contradicts a universal pistil percentage that must hold for all genetics. Record whether fresh flower formation is slowing on your sampled branches and whether the bracts have developed, rather than counting every brown hair as a timer.
What Pistil Color Can and Cannot Tell You
A dark stigma can be the result of ordinary aging, but handling, contact, pollination, spray exposure or adverse weather can also alter the surface. A branch brushed during inspection may show local change that neighboring, undisturbed flowers do not. If one flower suddenly has brown pistils but still has small undeveloped bracts and many transparent-looking gland heads, investigate recent events before declaring the crop ripe.
Plant-wide or branch-wide patterns are more informative than an isolated color. Record the emergence of new white stigmas over successive observations, bract expansion, flower stacking and whether the cluster still changes in size. In a heavily pollinated flower, seed development can alter structure and timing. The problem then belongs to pollination assessment as well as harvest maturity, not merely to a ‘pistils turned orange’ rule.
Clear, cloudy and amber are descriptions, not effect settings
At useful magnification, gland heads can look more transparent, more opaque or yellow-brown. These appearances relate to developmental changes but do not form a perfectly synchronized progression across every gland. Heads can be damaged, collapsed or stained, and light can make an opaque head appear clear. A 2023 imaging study tracked color-class patterns during maturation in four cultivars and explored how color phenotypes describe development; it did not establish a universal THC peak or a fixed subjective effect from each color category.
Do not tell a reader that a specified amber percentage will guarantee sedation, an energetic experience, a particular terpene profile or an exact THC concentration. Clinical evidence for simplistic CBN-to-sleep claims is insufficient, and subjective effects depend on chemical composition, dose, product and person. The appropriate claim is narrower: repeated observations of intact floral gland heads can help describe morphological maturity, particularly when paired with whole-flower development and cultivar-specific history.
A loupe cannot assay cannabinoids, terpenes, pesticide residues, mycotoxins or pathogens. Amber is not a validated universal ‘sedation setting.’ If a defined composition or regulatory specification is essential, use appropriate laboratory methods and representative samples rather than a color percentage.
Check the flower beneath the resin
Examine the same flower without the microscope. Are bracts still noticeably expanding? Is the central cluster still loose or immature compared with older flowers on the same plant? Has the rate of new floral growth slowed? Does the aroma seem consistent across recent visits, recognizing that smell is not an analytical test? Heavy frost may appear early in some cultivars. A dense-looking flower may be stalled by weather, root problems or disease rather than physiologically mature. More resin coverage is not the same as more mature flower.
In one CBD-rich controlled-environment study, inflorescence dry weight continued increasing as harvests progressed while total CBD concentration differences across the tested dates were not significant; cannabinoid yield reflected both mass and concentration. Another high-CBD study found that the timing for maximal flower dry mass did not simply equal the timing for maximal cannabinoid output. These results explain why harvest objectives and actual flowers matter more than a single visual ‘peak’ formula.
Remember: A maturity interpretation should describe an intact flower group at a known position and date. It should not claim that a single microscope image measures whole-plant chemistry.
Understand Why the Harvest Window Changes
The most useful harvest window is cultivar- and crop-specific. Genotype influences flowering architecture, bract development and trichome formation. Light exposure, flower position, canopy density, weather and root function modify the context in which those traits appear. Changing one variable can shift which sites seem to finish first without proving that the entire plant is biologically younger or older.
Genetics, phenotype and developmental history
Flowering-duration descriptions are planning estimates, not contracts. Two seed siblings may flower or finish differently, while named clones can express different growth under contrasting conditions. Autoflowering lines also vary in their progression, and photoperiod plants may show interruptions when light cues are disturbed. Preserve the identity of each plant or phenotype and the date its actual flowers began developing. Do not subtract a fixed number of days from a seller’s estimate and call that harvest readiness.
Upper, middle and lower flowers can disagree
Within-plant differences are measurable, not merely a grower myth. A controlled CBD-cannabis study analyzed top, middle and low flower fractions and found significant position effects on measured total CBD concentration. That study does not prove that every bottom flower matures a particular number of days later, but it makes single-site sampling difficult to defend. Position changes light, floral development and potentially disease risk, so document actual sample zones.
If the upper and middle flowers show comparable development but the lowest shaded sites remain small, decide which portion belongs in the intended harvest. Do not let numerous tiny late shoots force the whole plant to remain standing indefinitely. Conversely, a single exposed top with brown glands may not warrant harvesting the main productive canopy if it is still demonstrably developing and weather remains safe.
Outdoor season, weather and cultivar density
Late-season humidity, cold nights, rain, heavy dew and poor morning dry-down can change the value of waiting. Dense flowers may trap water internally even after surrounding leaves look dry; a loose flower may shed water more readily, but density is not a guarantee of disease resistance. Inspect flower interiors where practical without shredding intact, healthy clusters. Watch for caterpillar injury, retained dead tissue or branch contact that can increase localized decay.
For rainy regions, a sensible decision is not ‘harvest everything before rain’ or ‘leave everything until the amber target.’ Compare the currently healthy mature fraction with the forecast, canopy drying behavior and ability to inspect or protect flowers. A flowering plant that survives cold does not prove its remaining flower quality is improving. The decision changes when the next visit may be impossible or unsafe.
Harvest size, lawful access and receiving capacity
A harvest is not ready operationally if clean handling space and appropriate drying capacity are unavailable. Cutting a large crop into a crowded, uncontrolled room can create avoidable moisture and contamination hazards. Plan separate labeled groups if harvesting in stages, reserve enough clean hanging or tray space, and avoid piling cut branches in warm bags or sealed containers. This article does not prescribe drying temperature, humidity or curing schedules; those belong to post-harvest resources such as The 60/60 Rule for Drying Cannabis Explained, where the tradeoffs of that rule are examined rather than treated as a guarantee.
Cutting a mature portion while leaving a less developed portion can separate clearly different harvest groups. It cannot guarantee that lower flowers will mature, increase in cannabinoid concentration or become mold-free. The remaining plant still needs water, functioning roots, support, protection and a realistic finish window.
Identify False Readiness and Safety Failures
Before declaring a flower ripe, rule out explanations that do not represent maturation. Before deciding to wait, rule out circumstances that could make the remaining flower unsafe. These are different diagnostic tasks: one corrects the maturity interpretation, and the other may demand immediate containment regardless of maturity.
A frosty sugar leaf or photogenic top
The leaf often looks resin-rich because it is easier to position under a lens. But its glands are not interchangeable with the bract glands on the product being evaluated. Inspect bracts from several positions; if those observations disagree, document the disagreement. Do not average leaf heads and flower heads into a false precision percentage.
Brown pistils after weather, handling or pollination
Where browning appears abruptly on one face or after a recent event, compare an undisturbed flower in the same canopy zone. Look for actual bract development and subsequent growth. When seeds or reproductive changes are suspected, confirm through appropriate flower inspection instead of attributing every changed stigma to maturity. A visual sign that is sensitive to several causes cannot be an exclusive diagnosis.
Amber-looking heads that are damaged, dirty or poorly lit
Compare intact glands using consistent neutral illumination. Old crushed samples, resin smears, dust and color-corrected photographs are weak evidence. Gland head senescence and collapse are real developmental phenomena, but not all dark pixels are amber mature heads. If a photograph is inconclusive, mark the site and collect a better image later rather than inventing a percentage.
Flower rot, wet cores and contaminant concerns
Brown, soft or collapsing tissue inside a flower, unusual gray growth, suspicious odor or a wilting sugar leaf emerging from a failing flower warrants a disease and safety inspection. Affected material is not ‘extra mature’ or suitable to salvage by trimming the visible surface. Avoid shaking or squeezing suspect tissue above healthy flowers. Segregate affected material, follow applicable disposal and testing requirements, and seek qualified diagnosis when the cause is uncertain. Do not consume visibly moldy flower or blend suspect material into a clean batch.
A clean-looking remainder is not automatically proven safe; risk assessment depends on disease extent, handling and any applicable microbial testing. In commercial settings, hold and segregate suspect lots according to the governing protocol. Do not invent a universal safe cutting distance around mold, assume rinsing removes contamination, or treat a drying process as a sterilization step. For the wider outdoor seasonal risk context, refer to the Outdoor Grow Comprehensive Guide.
Visible mold or suspicious internal decay is not a cue to wait for clearer trichomes. Stop ordinary harvest handling around the affected region, isolate it and protect healthy material from cross-contamination. Harvesting other sound flowers early may be an option when the risk of waiting is unacceptable, but it does not make diseased flower safe.
Calendar, potency and effect folklore
A vendor’s flowering week, a fixed proportion of brown hairs, a single clear-to-cloudy-to-amber chart or a claim about ‘more couch-lock after 30% amber’ cannot replace repeated crop observations. A resin color label is not a cannabinoid test and a cannabinoid percentage is not a direct prediction of a person’s experience. Also, the flower that has the highest concentration is not necessarily the flower that provides the greatest total yield of a compound; mass and percentage are different measurements.
“The pistils went brown after a storm. Should I harvest tonight?”
Question source: Common grower question.
Check whether browning was abrupt and exposed-side specific, then inspect multiple flower bracts and the interiors of the wettest clusters. Compare flower expansion and earlier photographs. If healthy sites are close to maturity but the forecast presents a genuine disease risk, a partial or earlier harvest may be justified. If flowers are still immature and drying conditions improve, a documented recheck may be more informative. Suspect mold is handled as a separate safety problem.
Use a Repeatable Harvest and Staged-Harvest Workflow
A repeatable decision must name its units. The unit may be a single plant, a top group or a lower branch group. ‘The garden is ready’ is too broad unless the garden is demonstrably uniform. Use the sequence below to make the first judgment, choose the next action and verify the result.
Step 1: Identify the actual harvest unit
Write which plants or branches would be cut if you harvested now. Distinguish mature marketable or intended-use flowers from small, shaded or newly formed flowers that may not be worth a separate harvest. Make a simple labeled diagram; note the date when first substantial flowers developed and the history of major weather events. This prevents an apparent change in maturity from being an accidental change in sampled material.
Step 2: Perform the health and safety screen first
Inspect branch joints, damaged flowers, wet interiors and pest entry points before moving between flowers with the same tools or gloves. If suspect decay is present, stop ordinary sampling of that group and move to appropriate disease containment. Do not sample a moldy core and then brush the loupe or fingers across healthy flower. Sanitize equipment according to the actual hazard and applicable protocols; routine tool cleaning alone does not prove pathogen elimination.
Step 3: Sample the representative flower bracts
Use the preselected upper, middle and lower positions, adjusting the map for the plant’s actual architecture. Photograph identifiable flowers at whole-flower and close-up scale with consistent light. Record the gland appearance as a qualitative range, along with the degree of visible bract expansion, new stigma production and recent changes. If a portion is very heterogeneous, subdivide it rather than pretending a pooled impression is uniform.
Step 4: Sort observations into a decision table
Apply the table separately to each flower group. It is a practical observation framework, not a scientifically validated universal classification or numeric trichome threshold. Where commercial standards apply, they supersede this field framework and may require laboratory evidence.
| Observed situation | Decision | Next action | Verification |
|---|---|---|---|
| Healthy flower still expanding; most bract glands appear immature; new stigmas continue | Wait if environmental risk is acceptable | Mark and recheck the same flowers; keep routine care stable | New bract growth and change across comparable samples |
| Several representative flowers show mature-looking bracts and a consistent gland pattern | Consider harvest for that group | Confirm health, lawful handling and receiving capacity | Document sampled positions and actual harvested group |
| Mature upper flowers but clearly less developed middle or lower flowers | Evaluate staged harvest | Harvest a defined upper unit only if remaining crop can safely continue | Reinspect labeled residual flowers and wound/support points |
| Trichomes or pistils disagree sharply, or photos are unreliable | Do not force a diagnosis | Correct sampling, compare history and repeat the observation | Agreement or a documented persistent difference |
| Suspect rot, contamination, irreversible damage or unsafe holding conditions | Safety decision overrides maturity target | Isolate suspect material and evaluate sound portions independently | Appropriate inspection, diagnosis and required testing |
Step 5: Decide whether staged harvest is worth the extra handling
Staging helps only when groups genuinely differ and the remaining flowers have a plausible, safe maturation opportunity. It creates extra cut surfaces, branch movement, handling, labeling and drying logistics. If differences are modest and the crop is acceptably uniform, a single harvest can be simpler and less disruptive. If upper flowers are clearly ready but lower sites are immature, compare the benefit of separating them against incoming weather, disease pressure and how much usable lower flower actually remains.
Staged Harvest for Uneven Outdoor Plants
Mark the selected top or branch group and photograph it before cutting. Confirm neighboring flowers are healthy, then use clean, sharp tools for controlled cuts that do not tear supporting branches. Avoid dragging heavy cut tops across the remaining canopy, dislodging trichomes or shaking suspect tissue. Transfer the harvested portion promptly to a clean, appropriately managed receiving area and label it with plant, position and cut date. Do not combine it with a later batch before checking each batch’s health and post-harvest condition.
After a partial harvest, inspect the remaining plant’s exposed stems, ties, branch balance and new sun exposure. A removed top may change load paths and leave previously shaded flowers exposed, but more light after staging is not proof of a guaranteed increase in final yield or maturity. Keep irrigation and root care appropriate for the living remainder, and inspect again under the real weather conditions. If wet weather, damage or disease emerges before the remaining flowers mature, reevaluate immediately instead of honoring a planned second date.
Step 6: Set a recheck based on risk, not a magic number
Recheck often enough to detect meaningful change before the opportunity is lost. Stable indoor conditions can allow a different cadence from wet outdoor autumn conditions; fast-changing weather and suspect flowers demand more prompt observation. There is no single experimentally established universal ‘every 48 hours’ harvest-check interval. Your record should state what new information the next visit is expected to provide, not simply schedule photographs for the sake of routine.
Field Advice: If you cannot explain which branch group the microscope represents, you cannot explain which branch group you are ready to harvest. Label first, inspect second, decide third.
Protect Quality and Verify the Harvest Decision
Harvest readiness is not finished at the cut. The decision should preserve the identity and condition of the sampled flower group until its outcome can be evaluated. That does not require turning this page into a drying manual; it requires preventing the harvest process from destroying the evidence or quality the grower was trying to protect.
Handle mature flowers as a fragile, moisture-rich crop
Prepare clean cutting and transfer space before starting. Support heavy branches during separation, avoid pressure on resinous surfaces and move material out of sun and hot piles without delay. Do not cram wet flowers in airtight bags or leave severed branches on soil. Separate any suspect material and discard visibly moldy flower rather than attempting to cure it. Protect healthy batches from tools and surfaces that contacted disease.
Flower size and initial moisture vary widely, especially after outdoor rain or when tops and secondary flowers are harvested separately. Sort or label groups so the receiving process can account for them rather than treating all material as equally dry. A drying room with insufficient capacity is an operational reason to stage or adjust harvest logistics, not a reason to leave cut wet plants sealed while waiting. Detailed humidity and moisture stabilization belong to a separate post-harvest workflow.
Keep staged batches separate long enough to evaluate them
Record date, plant, position, conditions, inspection evidence, visible defects, disposition and whether the cut was planned, risk-forced or based on maturation. Use separate labels for first-cut tops and later lower flowers. If both groups were processed similarly, comparing their usable dry flower and any properly obtained laboratory results can inform the next run. If drying, trimming or sample selection differed, describe those differences before attributing quality entirely to harvest date.
Verify the result without rewriting the history
After harvest, compare the maturity expectations with the actual intact flowers, the proportion of discarded or suspect material, the amount of usable dry product and any valid analytical results. A cultivar whose lower branches never reached acceptable maturity may need improved preharvest canopy planning next season, not another week of risky standing time. A top that was cut too early should be recorded as early even if curing improves aroma. Visual predictions should remain visual predictions unless chemistry or microbial evidence confirms something more.
One CBD-cannabis study observed different chemical concentrations by canopy position, and harvest-date studies show that dry flower mass and cannabinoid output do not always peak together. These are reasons to document what you harvested and why, not permission to import a study’s ideal week into every cultivar. The strongest reusable result is a labeled history: which sampled flowers matched the eventual product and which did not.
Use labeled positions, consistent photos, batch identifiers, health checks and comparable post-harvest handling. Where testing is required, follow valid sampling and chain-of-custody procedures.
Do not claim a cloudy photograph proved peak THC, a brown pistil proved quality, or an apparently clean neighboring bud proved an entire mold-affected lot safe.
“If I harvested the tops today, how do I know whether leaving the bottoms helped?”
Question source: Common grower question.
Keep the cut dates, positions, photographs and drying conditions separate. Measure usable dry flower with the same trim standard and inspect the remaining flowers repeatedly for progress or new damage. Compare only like with like, and treat any perceived potency or effect change as subjective unless suitable analysis supports it. A staged harvest is successful only if the extra time produced useful, safe flower without creating unacceptable losses or handling problems.
Harvest Readiness Checklist and Related Resources
Use this checklist immediately before cutting a plant or a defined portion. It is designed to prevent the most consequential errors: choosing the wrong tissue, using one flower to represent an entire canopy, chasing an unsupported color percentage and overlooking disease while waiting.
- Identify the exact plant and flower group under consideration.
- Confirm lawful access, safe harvest handling and adequate clean receiving capacity.
- Inspect flower health, interiors, weather damage and possible contamination first.
- Examine intact trichomes on several representative flower bracts, not just sugar leaves.
- Use comparable illumination, magnification and labeled observation positions.
- Record bract development, changes in new stigma production and differences across the canopy.
- Do not assume a fixed amber percentage proves potency, effect or safety.
- If upper and lower flowers disagree, compare a single cut with genuinely feasible staged harvest.
- Recheck remaining flowers, support points and weather risk after any partial harvest.
- Label and handle separate harvest groups; document losses and test results where relevant.
- Record why each group was harvested, held, rejected or discarded.
The broader Outdoor Grow Comprehensive Guide covers the season surrounding this decision. Grow Basics provides the full cultivation overview, while The 60/60 Rule for Drying Cannabis Explained addresses the separate post-harvest drying tradeoffs. The next good decision is not another color target: it is an inspection record that identifies exactly what was harvested, why and what happened to it afterward.
Educational content. Follow your local laws and applicable product-testing and handling requirements.
Share this article
A quick overview of the topics covered in this article.
- Define Harvest Readiness Before Reading the Resin
- Sample Representative Flowers and Record Their Positions
- Read Trichomes, Pistils, and Flower Development Together
- Understand Why the Harvest Window Changes
- Identify False Readiness and Safety Failures
- Use a Repeatable Harvest and Staged-Harvest Workflow
- Protect Quality and Verify the Harvest Decision
- Harvest Readiness Checklist and Related Resources
Follow us
Latest articles
October 4, 2026
October 4, 2026