Outdoor Cannabis Troubleshooting Decision Tree
Outdoor cannabis troubleshooting gets easier when you stop asking, “What deficiency does this leaf look like?” and start asking a sequence of smaller questions. A symptom is evidence, not a diagnosis. Wilt can come from a dry root zone, a saturated root zone, damaged roots, heat, wind, vascular disease, a broken stem, or an irrigation failure. Yellowing can reflect nutrition, root stress, normal aging, low light, salt accumulation, disease, or several problems acting together. A good decision tree does not name the problem from one photograph. It narrows the possibilities until the next measurement or inspection can separate them.
This resource gives you that sequence for lawful outdoor cultivation. It begins with site and safety, then moves through pattern, timing, root-zone condition, weather, plant parts, pests and diseases, nutrition, mechanical injury, and verification. The goal is not to make every diagnosis at home. The goal is to know what to check first, what not to change blindly, when evidence is strong enough to act, and when a laboratory or local specialist is the safer next step.
Use the tree on one clearly identified plant or problem area at a time. Compare affected plants with healthy plants exposed to similar conditions, record the date and recent weather, and avoid correcting five variables at once. If you already know the problem belongs to a narrower topic, follow the linked Weedth resource instead of repeating the entire branch here.
Start With the Decision, Not the Symptom Name
The first decision is not whether a leaf needs nitrogen, magnesium, or a spray. It is whether the situation requires an immediate safety response, a short diagnostic inspection, a measured correction, or escalation. University diagnostic programs use the same broad logic across horticultural crops: collect history, describe the symptom, look for a pattern, separate living causes from environmental or cultural causes, inspect for signs, and verify rather than relying on resemblance alone.
For outdoor cannabis, the first thirty seconds should answer four questions. Is the site safe to enter? Is the crop or material potentially unsafe to handle or consume? Did a major event happen recently? Is the symptom isolated, patterned, or widespread? Those questions change the order of everything that follows.
Warning
Stop troubleshooting if the site itself is unsafe
Do not enter a garden during active lightning, wildfire evacuation, unstable storm damage, flooding, downed electrical lines, chemical application nearby, or another immediate hazard simply to inspect a plant. Human safety comes before crop diagnosis. If contamination, spray drift, sewage, floodwater, visible mold, or another product-safety concern is plausible, isolate the affected material and investigate the exposure rather than trying to prove safety from appearance.
The outdoor troubleshooting decision tree in one pass
| Decision point | If yes | If no | Useful evidence |
|---|---|---|---|
| Was there a recent extreme event? | Start with weather, mechanical injury, waterlogging, heat, cold, wind, or drift exposure. | Continue to pattern and root-zone checks. | Weather log, irrigation history, site map, photographs. |
| Is the root zone unusually dry, wet, hot, salty, compacted, or unevenly wetted? | Stabilize the root-zone problem before diagnosing leaf nutrition from color alone. | Continue to plant-part and pattern branches. | Moisture at depth, pot weight, drainage, input/root-zone EC and pH where appropriate. |
| Can you see a causal sign? | Identify the organism or direct evidence and confirm it is associated with the injury. | Keep biotic and abiotic causes open. | Insects, mites, eggs, frass, webbing, sporulation, mycelium, galleries, lesions. |
| Does the pattern follow irrigation, terrain, wind direction, shade, a spray path, or one cultivar? | Investigate the matching environmental or management factor. | Look for plant-to-plant spread, random foci, root problems, or hidden pests. | Map of affected plants, neighboring vegetation, emitter zones, slope and exposure. |
| Did one measured correction change the next observation? | Keep monitoring and verify that new injury stops. | Reopen the tree and test the next plausible cause. | Marked leaves, repeat photos, new growth, moisture/EC trend, pest counts. |
Define the problem before you explain it
“My plant is sick” is too broad. “The oldest fan leaves on the lower half of plant P04 have become uniformly pale over five days while new growth remains green” is useful. “The west side of three plants has dry brown margins after two days of strong wind” is even more useful because it includes distribution and timing. A diagnostic description should capture the affected plant part, position on the plant, severity, rate of change, and how many plants or zones show the same pattern.
Definition
Symptom, sign, pattern, and cause
A symptom is the plant’s response, such as chlorosis, wilt, necrosis, distortion, stunting, or decay. A sign is direct evidence of a causal organism or factor, such as an insect, frass, webbing, fungal growth, spores, or a visible wound. A pattern is how injury is distributed across plants, plant parts, space, and time. A cause is the factor that explains the evidence well enough to guide a correction. Similar symptoms can have different causes.
Separate urgent crop-safety decisions from ordinary plant stress
Some problems justify immediate exclusion even before the exact species or mechanism is known. Visible mold on harvestable flower is not a “watch and see” nutrient problem. Suspected chemical drift onto reproductive tissue is not solved by flushing the soil. A split main stem in high wind may need mechanical stabilization before you study leaf color. A failed irrigation line during a heatwave may need water delivery restored before a full nutritional investigation.
Other problems can tolerate a slower approach. A few older leaves fading late in the season, mild tip burn that stopped progressing, or one chewed leaf with no active pest may simply need documentation and follow-up. Troubleshooting is partly the skill of matching the speed of the response to the speed and consequence of the problem.
Field Advice: Before touching the plant, take one site photograph, one whole-plant photograph, and one close view of the affected tissue. Record the date, recent weather, irrigation, and the last major input or intervention. Those thirty seconds protect the evidence you are about to change.
Do not let a color chart become the decision tree
Cannabis nutrient research has produced valuable photographs of induced deficiencies, but controlled studies also show why visual matching has limits. Symptom timing, tissue nutrient concentration, cultivar, growth stage, root condition, and the rest of the nutrient program can change what you see. In one controlled drug-type cannabis study, visual deficiency development and elemental analysis did not always correspond neatly. The authors recommended an integrated diagnosis using growing-media information, irrigation or leachate chemistry, symptomology, and strategically sampled tissue rather than leaf appearance alone.
That matters even more outdoors. Rain can change root-zone aeration and leaching. Containers can heat unevenly. Wind can increase water loss on one exposure. A clogged emitter can make one plant appear “deficient” while the rest of the row remains normal. Before adding a nutrient, ask whether the roots can currently take up the nutrients already present.
Read the Pattern Across the Site and Plant
Pattern is one of the fastest ways to shrink the list of possible causes. Outdoor gardens provide more diagnostic information than a single close-up because weather, terrain, irrigation, neighboring plants, and exposure create spatial clues. Walk far enough back to see the whole planting before you kneel beside the worst leaf.
Map affected plants before you disturb them
Mark each affected plant on a simple site sketch. Note whether injury is concentrated at the low end of a bed, the hot edge near pavement, the windward side, one irrigation lateral, one cultivar, one recently amended area, or the whole garden. A uniform problem across unrelated plants after the same event often points toward an abiotic factor. A problem that begins in scattered foci and expands can increase suspicion of a living agent. Neither pattern is absolute, but both are stronger clues than color alone.
Include healthy comparison plants on the map. Diagnostic laboratories and extension programs repeatedly emphasize comparisons because “normal” depends on cultivar, stage, and site. A purple petiole on one cultivar may not carry the same meaning as the same color appearing suddenly across previously green plants after cold weather. A naturally sparse lower canopy is different from rapid leaf drop that begins after waterlogging.
Use plant position as a diagnostic filter
Record where symptoms begin: older leaves, new growth, one side, interior canopy, exposed top, lower shaded leaves, stem base, branch unions, roots, or flowers. Nutrient mobility can make some deficiencies appear first on older or younger tissue, but do not stop there. Root injury, pH, EC, transpiration, disease, light exposure, and weather can create similar distributions.
One-sided injury often deserves an exposure check. Wind, salt spray, radiant heat, overspray, physical rubbing, or a broken root sector can create directional symptoms. Whole-plant wilt deserves a root and stem check before you assume the canopy itself is the primary problem. Flower-only browning late in the season demands a closer look for moisture, caterpillar injury, Botrytis, mechanical damage, and natural maturation rather than a general nutrient correction.
Describe distribution before naming a cause
Record which plants, which side of each plant, which plant parts, and whether the pattern follows terrain, irrigation, weather exposure, or cultivar.
Treat the worst leaf as the whole diagnosis
A damaged leaf can be old evidence from a problem that has already stopped. Base decisions on the active pattern and recent progression.
Timing can be as diagnostic as location
Ask when the problem began and how quickly it changed. Injury that appears across many plants immediately after a frost, heat event, storm, spray exposure, or irrigation failure belongs on a different branch than lesions that slowly increase from plant to plant. Biotic problems often develop and spread over time as an organism reproduces, but environmental stress can also progress if the condition persists. The useful distinction is not “fast equals abiotic, slow equals disease.” It is whether the time course matches a plausible mechanism.
Use the previous seven to fourteen days as a working history window, not as a universal biological cutoff. Review rain, irrigation, minimum and maximum temperature, unusually strong wind, cloud cover, smoke, nearby spraying, fertilizer changes, pruning, transplanting, and any equipment failure. Some injuries become visible after the triggering event has passed.
Compare affected cannabis with nearby non-cannabis vegetation
Neighboring plants can reveal site-wide exposure. Similar scorching or distortion across several unrelated species raises suspicion of an environmental or chemical factor. Damage restricted to cannabis does not prove a cannabis-specific pathogen because crop care, irrigation, nutrition, and genetics may also be unique. Still, the comparison is valuable. Herbicide-drift investigations, for example, use gradients, affected neighboring species, wind history, and barriers as evidence rather than relying on leaf shape alone.
?
Grower Question
“All three plants started curling after the same weekend. Should I assume a virus?”
Question sent by: Ethan Brooks, via email.
No. Simultaneous injury across several plants makes the shared history especially important. Check heat, wind, irrigation failure, root-zone moisture, recent sprays or cleaners, fertilizer changes, and nearby chemical applications. A virus or viroid remains possible when other evidence supports it, but leaf curl by itself does not identify one.
Build a minimum evidence record
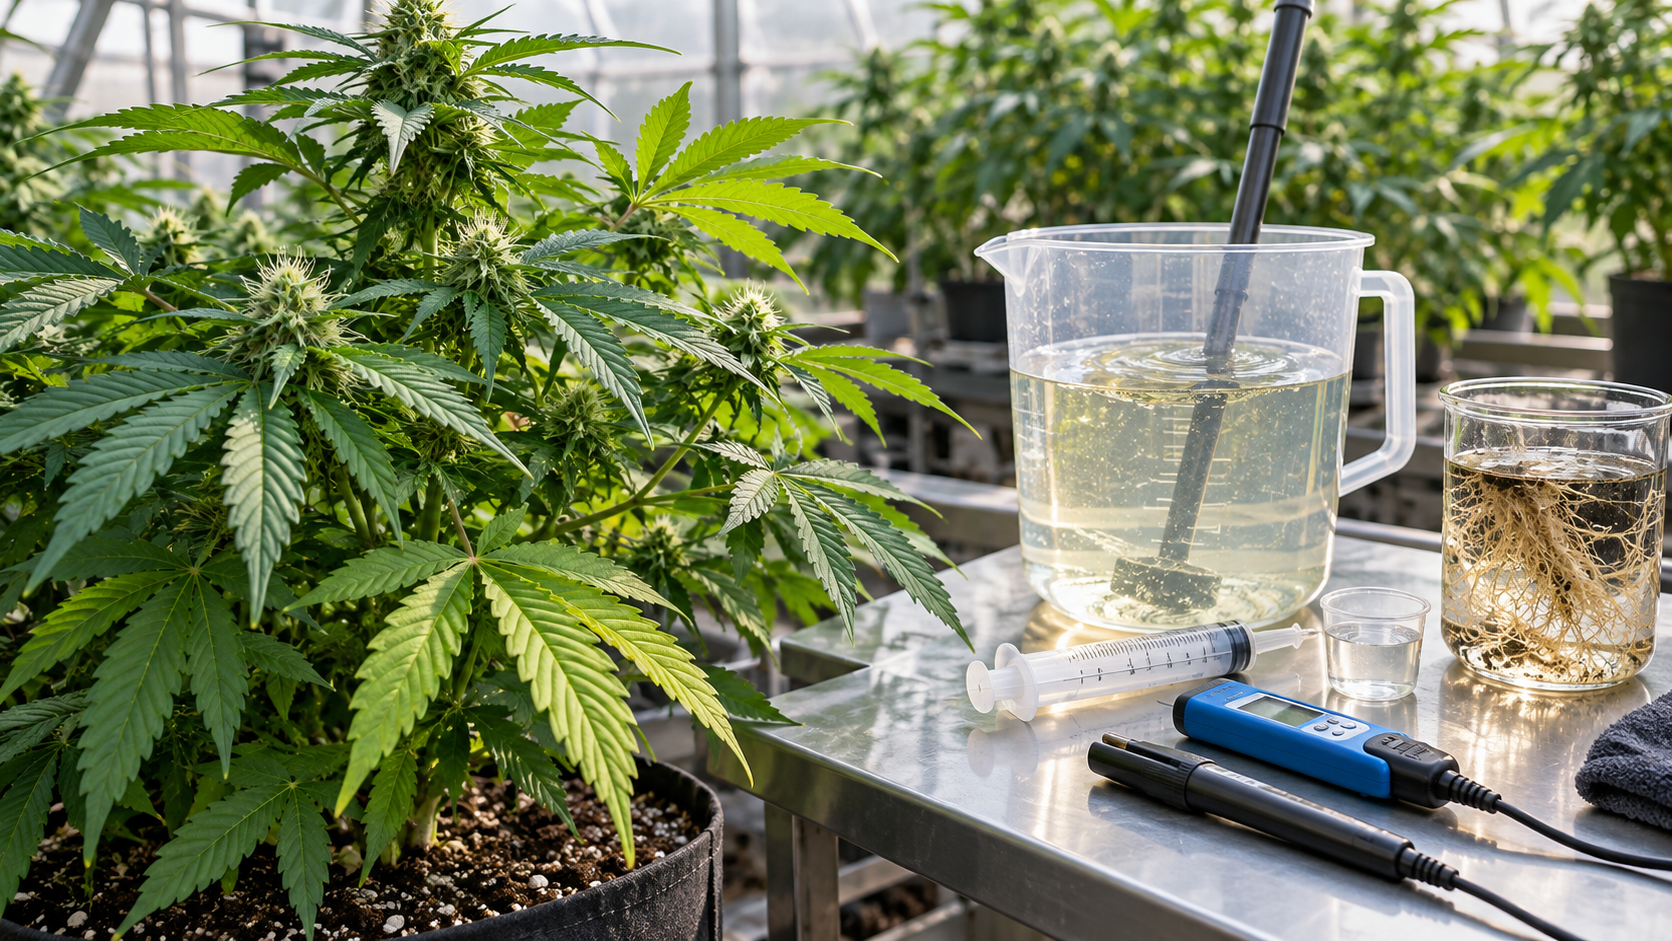
You do not need laboratory-grade instrumentation for every problem, but you do need enough information to make the next step reproducible. Record plant ID, cultivar if known, stage, first observation date, affected plant part, percentage or rough extent of injury, recent irrigation, recent rainfall, notable weather, last nutrient or amendment change, and any pesticide or foliar product used legally on the site. Add labeled photographs from the same angles at follow-up.
If you maintain an outdoor grow journal, use it as the evidence layer for this decision tree. The journal should tell you what changed before the symptom appeared and whether the correction actually changed the next observation. Without history, troubleshooting becomes a sequence of guesses.
Test the Root Zone and Water Branch First
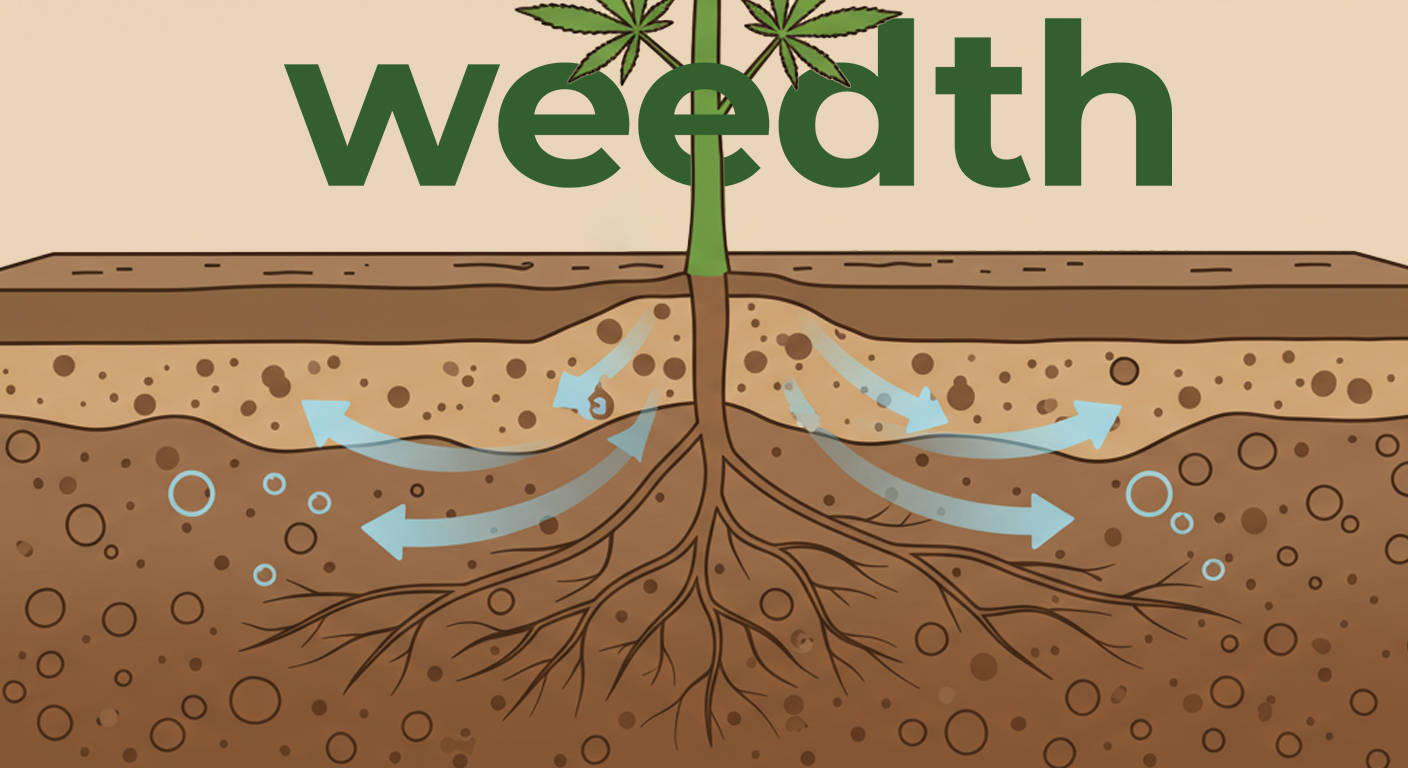
Many outdoor symptoms that look like foliar problems begin below the surface. Roots need water, oxygen, workable temperature, and a chemical environment that allows uptake. Both drought and saturation can produce wilt. Root damage can produce yellowing that resembles a nutrient shortage. High soluble salts can make a wet root zone physiologically difficult to use. Uneven irrigation can create healthy and stressed sectors on the same plant.
That is why the root-zone branch comes early in the decision tree. If the plant is wilted, pale, stalled, dropping leaves, or suddenly using much less water, measure the root zone before adding fertilizer or another irrigation cycle.
Check moisture at more than one place and depth
Surface appearance is not enough. Mulch can stay damp over dry soil. A fabric pot can look dry at the edge while the center remains wet. Water can channel through hydrophobic media and create runoff before the root ball is evenly rewetted. Heavy clay can appear dry at the surface while remaining saturated below. Use a clean probe, appropriate moisture sensor, careful hand sampling, or pot-weight comparison to check representative positions without repeatedly damaging roots.
In beds and native soil, compare the active root-zone depth with a nearby healthy zone. In containers, check center, edge, and lower profile where practical. With drip, verify that emitters actually deliver the intended flow and that the wetted pattern reaches the root volume. A timer finishing its program does not prove that each plant received usable water.
Ask whether the plant is dry, waterlogged, or unevenly supplied
| Observation | Dry-root-zone branch | Saturated/low-oxygen branch | Uneven-delivery branch |
|---|---|---|---|
| Moisture at depth | Low through much of active root volume | Persistently high or saturated | Wet and dry pockets in the same root zone |
| Plant response | Loss of turgor as depletion increases; may improve after correct rewetting | Droop and slow growth despite available water; water use may fall | One side, plant, or irrigation zone declines first |
| Useful next check | Irrigation volume, infiltration, container storage, recent heat/wind | Drainage, compaction, standing water, root condition, recent rain | Emitter flow, pressure, channeling, root distribution, hydrophobic media |
| Avoid | Small surface splashes that never rewet the root profile | Adding more water because the leaves are wilted | Assuming equal timer runtime means equal wetting |
If the question is primarily water demand, use How Much Water Does an Outdoor Cannabis Plant Need?. For cross-system fundamentals, use Cannabis Watering Basics. This decision tree only needs enough water diagnosis to decide whether you should stay on the root-zone branch or move elsewhere.
Root symptoms are informative but rarely specific
When roots are accessible without destroying the plant, compare healthy and suspect tissue. Look for a reduction in fine active roots, dark soft tissue, sloughing, abnormal odor, or a root ball that remains wet for much longer than comparable plants. Root-rot references caution that similar above-ground symptoms can result from too much water, too little water, excess fertilizer, cold injury, chemical damage, or pathogens. Dark roots do not automatically identify a pathogen.
In native ground, destructive root inspection may be unnecessary or harmful. Start with drainage, soil moisture pattern, irrigation history, compaction, and plant distribution. Escalate to a plant diagnostic clinic or laboratory when the result will change management and the suspected disease cannot be separated confidently in the field.
Remember: A plant can be wilted while the root zone is wet. Wilt describes water status in the shoot, not the amount of water visible in the soil. Measure before irrigating again.
Separate water quantity from water chemistry
A plant can receive the correct volume of unsuitable water. Source-water salinity, alkalinity, sodium, chloride, fertilizer concentration, and root-zone accumulation are different questions. EC measures overall ionic conductivity, not the identity of the ions. pH does not tell you alkalinity. A normal-looking source-water pH does not rule out high sodium or chloride, and a high EC does not identify which salt is responsible.
If several plants share marginal burn, poor growth, or apparent drought despite moist soil, review source water and root-zone chemistry. Use the same sampling and extraction method each time so the trend is comparable. When source-water chemistry is the real question, follow Cannabis Irrigation Water Chemistry rather than interpreting one leaf as a laboratory report.
Use response to irrigation as evidence, not proof
If a genuinely dry plant improves after the root zone is correctly rewetted, that supports water deficit as part of the problem. It does not prove why the deficit developed. The root ball may have become hydrophobic, the emitter may be undersized, the container may be too small for peak demand, or wind may have temporarily increased water use. Continue one step deeper until you know whether the correction will hold through the next comparable weather period.
?
Grower Question
“My plant droops every afternoon but the pot is still heavy. Should I water anyway?”
Question sent by: Julia Schneider, via contact form.
Not from droop alone. Check moisture at root depth, root-zone temperature, drainage, recent weather, and whether the plant recovers as heat and atmospheric demand fall. During hot weather a plant can temporarily wilt while the medium still contains water. If the root zone is already saturated, another irrigation can make oxygen stress worse.
Separate Nutrient, Weather, Chemical, and Growth Look-Alikes
Once the root zone is reasonably characterized, return to the plant. Leaf position, symptom type, timing, and exposure help narrow the next branch. The aim is not to memorize every nutrient photograph. It is to decide whether the pattern behaves more like a nutritional limitation, environmental injury, normal developmental change, chemical injury, or a local mechanical problem.
Older leaves first: keep several causes open
Uniform fading on older leaves can be consistent with mobile nutrient shortages such as nitrogen, but it can also appear with weak roots, prolonged saturation, low root-zone EC, poor light penetration, or normal senescence. Marginal scorch on older tissue can reflect potassium stress, salt accumulation, drought, or root injury. If lower leaves are the only affected tissue, compare their light exposure and age before interpreting color as an emergency.
Check input and root-zone pH and EC where those measurements are meaningful for the medium. Review fertilizer concentration, recent leaching or heavy rain, and root health. If the plant has been in the same soil all season, consider whether a true nutrient shortage is plausible, but do not increase several products at once. Cannabis deficiency research supports symptom guides as useful tools, yet it also shows that tissue analysis and visual symptoms must be interpreted together.
New growth first: broaden beyond micronutrients
Pale, distorted, twisted, or damaged new growth can occur with deficiencies or uptake problems involving less mobile elements, but it can also result from root dysfunction, pH problems, high humidity and weak transpiration, mites, viruses or viroids, chemical exposure, or rapid environmental change. New growth carries strong diagnostic value because it shows what the plant is doing now, but it is not a shortcut to a single bottle.
Inspect shoot tips with magnification when tiny arthropods are plausible. Look at the underside of young leaves. Review recent sprays and nearby herbicide applications. Compare multiple plants and cultivars. If a genetic or pathogen problem remains plausible and management depends on the answer, laboratory testing can be more informative than repeated nutrient changes.
Leaf spots and necrosis: distinguish lesions from burns and wounds
Leaf spots can come from pathogens, spray injury, sunscald, wind abrasion, pests, splashed soil, mechanical damage, nutrient disorders, or cold injury. Describe the lesion margin, whether it expands, whether similar lesions appear on new leaves, and whether there are fungal structures, spores, frass, punctures, or feeding signs. Map the distribution. A row-edge gradient after a spray event tells a different story from scattered lesions increasing after wet weather.
Do not diagnose fungal disease simply because a spot is brown. Likewise, do not dismiss expanding lesions as “nutrient burn” because the plant was recently fed. The history can point you toward a branch, but direct signs and progression are stronger.
Tip and margin burn: test water, salts, wind, and roots
Burnt tips and edges are among the most overinterpreted cannabis symptoms. They can follow excessive fertilizer concentration, repeated dry-back that concentrates salts, saline water, drought, hot dry wind, root restriction, chemical injury, or some nutrient disorders. Outdoors near coasts or salted roads, directional exposure may matter. In containers, compare EC trend, irrigation pattern, and root-zone moisture. In native soil, laboratory soil and water tests may be more useful than runoff collected from one event.
If the symptom stops progressing after the underlying condition is corrected, the old brown tissue will not turn green again. Judge recovery from new growth, new lesions, water use, and the next measured root-zone cycle.
Stunting and weak growth: diagnose the ceiling before the nutrient
Small plants do not always need stronger feeding. The growth ceiling may be short direct-sun duration, root restriction, saturated or compacted soil, chronic drought, low temperature, heat stress, disease, HLVd, repeated pest pressure, or simply a shorter-season genotype. Compare internode length, branch development, leaf size, root-zone condition, and neighboring plants of the same age.
The 2024 review of cannabis pathogens highlights root rots, Botrytis, powdery mildew, and hop latent viroid among important disease problems in production systems. Several can reduce vigor, and more than one problem can occur on the same plant. A stunted plant with healthy roots and no visible pests belongs on a different branch than a stunted plant with decaying roots or progressively distorted growth.
Use nutrition as a measured branch
Combine symptom position with root condition, medium chemistry, water quality, fertilizer history, and tissue analysis when the stakes justify it.
Stack supplements until the leaf color changes
Several products added together can raise EC, change pH, create antagonisms, and destroy the diagnostic trail.
For a deeper feeding diagnosis, continue with Nutrients and Fertilizers. The purpose of this decision tree is to decide when nutrition is actually the most plausible branch, not to duplicate a complete fertility program.
Chemical injury and drift deserve their own branch
Suspect chemical injury when symptoms follow a foliar product, contaminated sprayer, unusual tank mix, spill, soil treatment, or nearby application. Look for sharp boundaries, spray patterns, droplets, windward gradients, drift shadows, and similar symptoms on weeds or neighboring species. Herbicide symptom references caution that visual injury can mimic disease, nutrient deficiency, environmental stress, and compaction. Positive confirmation may require tissue or soil analysis while residues are still detectable.
Document first. Do not apply another product to “neutralize” an unknown chemical. Preserve labels and application records. If exposure could affect crop safety, follow local agricultural, environmental, and public-health guidance rather than assuming that time, rain, or a rinse has made the material safe.
Run common symptom routes before you choose a treatment
A decision tree becomes easier to use when you practice it on recurring symptom groups. The examples below are routing examples rather than diagnoses. Each starts with the same visible problem but deliberately keeps multiple causes open until a measurement or direct sign separates them.
Route 1: the whole plant is wilted
Start with site safety and recent weather, then go directly to root-zone moisture. If the root zone is dry through the active profile, investigate delivery, storage, infiltration, and weather demand. If it is saturated, investigate drainage, compaction, recent rain, low root-zone oxygen, and root condition. If moisture is reasonable, inspect the stem base and major branch continuity, then consider heat, wind, root disease, salinity, or vascular problems. A plant that wilts because a main stem is partially split requires a very different response from one that wilts because the container is dry.
Next, compare timing. Midafternoon wilt that resolves as atmospheric demand drops is different from morning wilt that persists through the cool part of the day. Neither pattern proves a cause, but the time course can tell you where to measure next. Record whether one plant, one cultivar, one irrigation zone, or the whole garden behaves the same way.
Route 2: lower leaves are yellowing
First decide whether the change is gradual seasonal senescence or active decline. Compare new growth, flowering stage, lower-canopy light, root-zone moisture, root condition, pH and EC trend, fertilizer history, and recent heavy rain. If the lower leaves are shaded and the rest of the plant is vigorous late in flower, the decision may be to monitor rather than feed. If yellowing accelerates while roots remain saturated and water use falls, root stress may be more important than the color chart. If root conditions are stable and tissue testing or a consistent nutritional pattern supports a deficiency, then the nutrition branch becomes stronger.
Do not judge success by whether old yellow leaves turn green. Track whether the progression stops and whether new growth remains healthy under a corrected root-zone and nutrient program.
Route 3: new growth is twisted, pale, or unusually small
Inspect the growing tip and leaf undersides closely. Review root-zone pH, waterlogging, heat, recent sprays, nearby herbicide use, and small arthropods. Compare affected and unaffected plants of the same cultivar. If multiple unrelated plant species show similar distortion on the same side of the property, a shared environmental or chemical exposure moves higher on the list. If only one cannabis plant shows progressive abnormal growth despite normal root-zone measurements and no visible pest, a laboratory-tested pathogen or genetic problem becomes more relevant.
This is a good example of why “new growth problem” cannot be translated directly into “add calcium” or “add micronutrients.” The location of the symptom narrows the field, but it does not finish the diagnosis.
Route 4: brown spots are appearing after wet weather
Record whether the spots are on lower splash-exposed leaves, upper exposed leaves, flowers, or the whole canopy. Look for expanding lesions, halos, fungal structures, soft tissue, feeding punctures, or residue. Compare plants in wetter and drier zones. Review how long leaves and flowers stayed wet and whether air movement or canopy density differs between locations.
If lesions continue to appear on new tissue and direct signs support a pathogen, isolate and escalate the disease branch. If the spots are static on the windward side after a storm, mechanical injury may fit better. If every sprayed leaf developed sharply bounded injury shortly after an application, phytotoxicity deserves attention. The event supplies context, not the diagnosis.
Route 5: one branch is collapsing while the rest of the plant looks normal
Trace the branch from the wilted tip back toward the main stem. Inspect every tie, union, bend, wound, bore hole, lesion, and point of abrasion. A split branch or constricting tie can interrupt flow to one sector while the rest of the root system functions normally. If no mechanical failure is present, examine vascular discoloration and local disease or borer evidence. Compare the branch with an unaffected branch on the same plant so whole-plant nutrition and irrigation are less likely to distract the diagnosis.
Local branch failure is one of the strongest reminders that plant-wide treatments can be unnecessary. Pouring more fertilizer into the root zone cannot repair a broken branch union.
Route 6: flower quality is declining late in the season
Separate maturation from injury. Inspect flower density, internal moisture, caterpillar or frass evidence, stem integrity, odor only as a secondary clue, visible fungal growth, recent rain, dew persistence, and temperature swings. Look inside suspicious flowers carefully without spreading material between healthy sites. A few browned pistils are not the same as soft internal tissue or gray sporulation. Likewise, a flower that is simply smaller in a shaded lower branch does not belong on the same branch as a flower with progressive rot.
If visible mold is confirmed, treat it as a safety and contamination problem rather than a ripeness question. If no decay is present and the issue is slow development, return to light, plant health, season length, root function, and cultivar timing rather than applying a late corrective product by default.
Measure the variable that can actually falsify your hypothesis
A useful measurement is one that could prove your current explanation wrong. If you think drought is responsible, a wet root zone at multiple representative points weakens that hypothesis. If you think an emitter is clogged, measured output should differ from comparable emitters. If you think high EC is responsible, use a consistent validated sampling method and compare the result with a relevant baseline rather than relying on crust at the soil surface. If you think a pest is causing damage, repeated scouting should connect the organism, fresh injury, and population trend.
Measurements that cannot separate the alternatives create false confidence. Air temperature alone cannot tell you root-zone moisture. Runoff EC alone cannot identify sodium, chloride, or a specific nutrient. A tissue nutrient result without symptom position, root-zone condition, and sampling context can be difficult to interpret. A pest photograph without plant injury may identify the organism but not whether management is necessary.
Open the Pest and Disease Branch Only With Evidence
Outdoor cannabis hosts insects, mites, fungi, bacteria, viroids, and other organisms, but the presence of an organism does not automatically mean it caused the symptom. Beneficial insects can be mistaken for pests. Saprophytic fungi can appear on already dead tissue. A pest may be present at low levels while drought is the main reason the plant is collapsing. Disease diagnosis becomes stronger when the organism, sign, tissue pattern, timing, and environment fit the same explanation.
Inspect in the same order every time
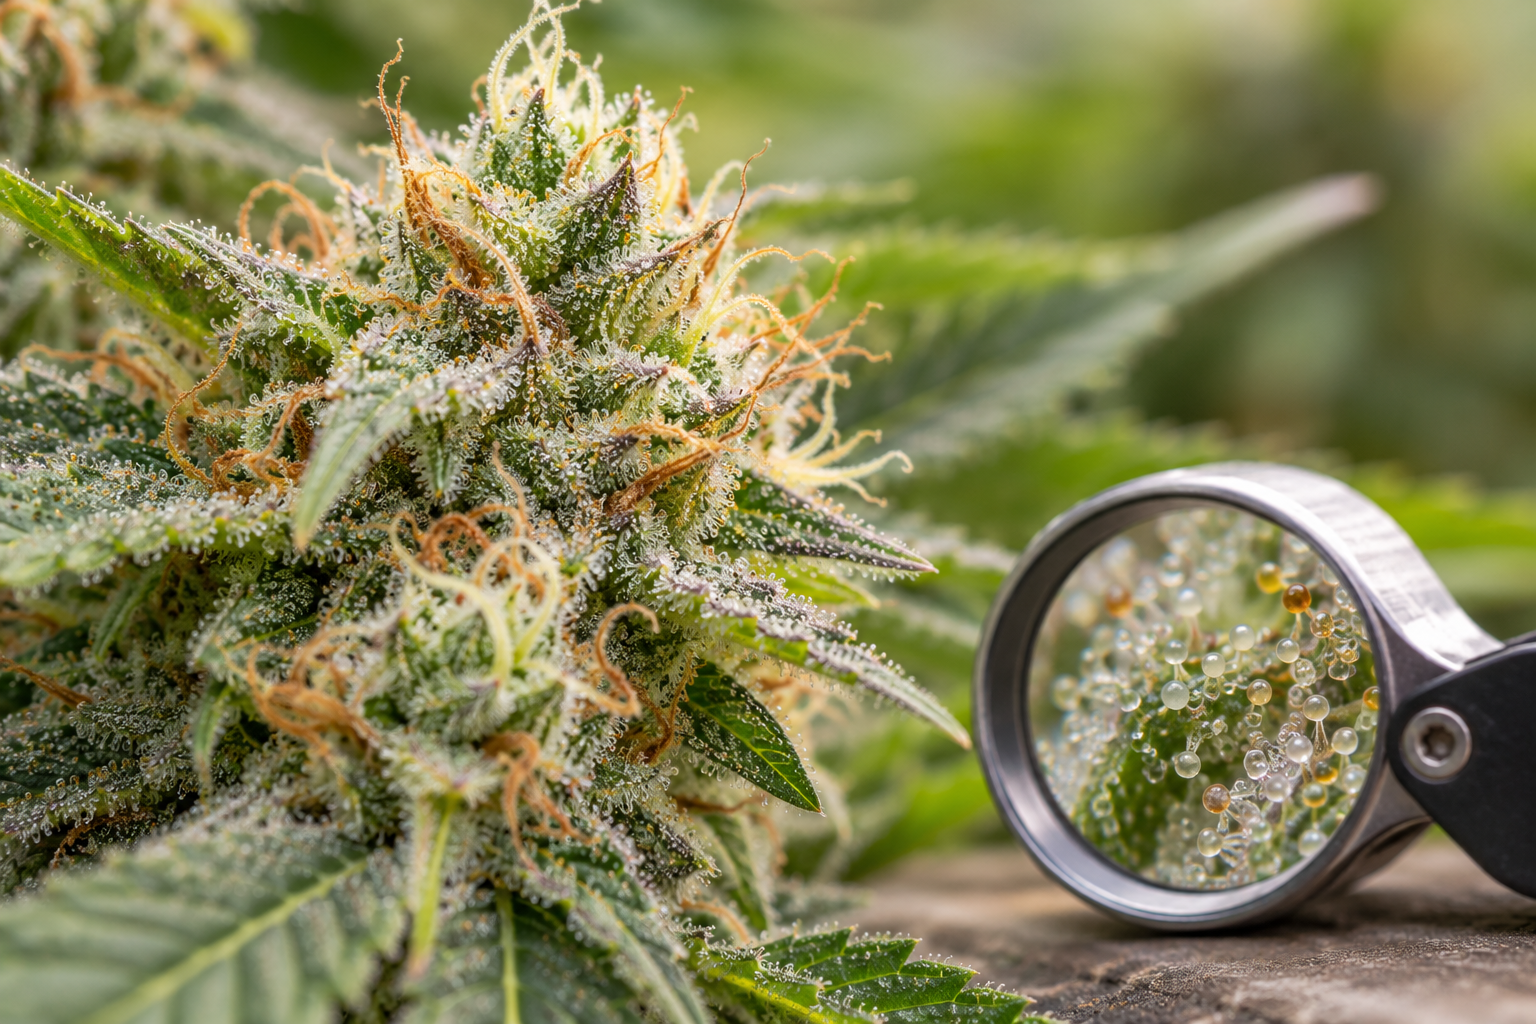
Start at the root-zone surface and stem base, then move upward through branch unions, lower leaves, upper and lower leaf surfaces, shoot tips, inner canopy, and flowers. A consistent route reduces blind spots. Use a hand lens for small arthropods and fungal structures when appropriate, but recognize its limits. Very small mites, spores, viroids, bacteria, and root pathogens may require microscopy, molecular testing, culture, or another validated laboratory method.
Look for direct evidence: eggs, insects, mites, webbing, honeydew, frass, chewing, stippling, mines, galleries, bore holes, sporulation, mycelium, soft decay, vascular discoloration, or characteristic lesions. Photograph the sign and the associated injury together whenever possible.
Do not spray first and identify later
Broad treatment can remove beneficial organisms, obscure signs, injure already stressed tissue, create residues, and make the next diagnosis harder. Weedth’s Beneficial Insects vs Pests resource separates organisms by function and plant damage rather than appearance alone. That distinction belongs inside any outdoor troubleshooting system.
Where pesticides or fungicides are legal, the crop, site, application method, timing, worker precautions, pollinator considerations, residues, and local regulations matter. In the United States, pesticide labels are legally enforceable directions; elsewhere, different regulatory systems apply. Do not extrapolate a product recommendation from another crop or jurisdiction.
Important
Visible mold on flower is a product-safety decision, not a cosmetic defect
Do not smoke, vape, taste, or otherwise consume suspicious flower to identify it. Isolate affected material and inspect adjacent flowers and conditions. Cutting around visible mold does not establish that the remaining flower is safe. If the crop is commercial or regulated, follow the applicable testing, quarantine, disposal, and reporting requirements.
Powdery material is not automatically powdery mildew
White material can be fungal growth, mineral residue, foliar-spray residue, dust, trichomes, or another deposit. Powdery mildew commonly forms expanding powdery colonies on susceptible plant tissue, but appearance should be combined with distribution and progression. Gently inspect with magnification and compare untouched new lesions. If wiping or spraying has already altered the surface, rely more heavily on fresh symptoms and professional identification.
Brown flower tissue needs an internal inspection
Late-season browning can come from Botrytis, caterpillar feeding, physical breakage, dead pistils, heat injury, water trapped in dense flowers, or natural maturation. Do not squeeze suspect flower repeatedly and spread material through the canopy. Separate the flower carefully, inspect the interior for soft tissue, gray growth, frass, feeding tunnels, damaged stems, and the direction of spread.
Weather history matters. Dense flowers exposed to prolonged wetness and slow drying deserve a higher index of suspicion for decay than a single dry bract after a mechanical injury. If the plant recently passed through heavy rain or wind, use Post-Storm Cannabis Inspection: Base to Flower for the full structural and moisture sequence.
When to suspect a root or vascular disease
Persistent wilt despite an adequately moist root zone, one-sided branch decline, vascular discoloration, progressive stunting, or root decay can justify a disease branch, especially when irrigation and environmental causes have been checked. These symptoms remain nonspecific. Root rot can be caused by pathogens, but similar root decline can follow saturation, fertilizer injury, cold, or chemical damage. Preserve representative roots and affected tissue according to the receiving laboratory’s instructions if testing is warranted.
When laboratory confirmation earns its cost
Escalate when the likely causes require different or conflicting management, when a transmissible pathogen could threaten the rest of the garden, when symptoms recur despite measured corrections, when crop-safety decisions depend on the result, or when the plant has economic, breeding, or legal significance. Ask the laboratory what tissue, stage, packaging, temperature, and shipping method it requires. A poor sample can turn an expensive test into an ambiguous result.
?
Grower Question
“I found tiny insects on a yellowing leaf. Does that prove they caused the yellowing?”
Question sent by: MapleGrower, via Facebook page.
No. Identify the organism, estimate where and how many are present, and look for feeding signs that match its biology. Then compare the root zone, water history, and unaffected leaves. Outdoor plants can carry predators, incidental insects, and low pest populations at the same time as an unrelated irrigation or nutrition problem.
After narrowing the biological and root-zone branches, compare the pattern with the weather and site history.
Connect Symptoms to Weather, Season, and Site
Outdoor troubleshooting is inseparable from weather because the same plant can move from cool wet soil to hot dry wind within days. The site also changes the weather the plant actually experiences. A forecast station may report one temperature while a dark container in afternoon sun reaches a very different root-zone temperature. A low corner can remain saturated long after the rest of the garden drains. A wall can create a calm humid pocket on one side and a hot reflective zone on the other.
Heat branch: separate atmospheric stress from dry soil
During hot weather, first compare leaf posture with root-zone moisture and time of day. Temporary afternoon wilt can occur even when the root zone still contains water because atmospheric demand temporarily exceeds replacement. A truly dry root zone requires a different response. Root-zone heat, salinity, wind, and an undersized container can amplify both.
If the problem is heat-specific, use Heatwave Response for Outdoor Cannabis. The troubleshooting rule here is simple: do not turn every hot-day wilt into an extra irrigation without checking the root zone.
Cold and frost branch: use event timing and tissue texture
Cold injury can produce water-soaked, limp, darkened, or later necrotic tissue, particularly on exposed tender growth. The strongest clue is often a known temperature event followed by injury on exposed tissues and similar sensitive vegetation. Do not immediately prune every damaged part while the full extent is still becoming visible. Stabilize the plant, document the event, and reassess viable tissue after conditions improve.
Cold can also slow root activity and water use. A plant that was irrigated on a warm schedule may remain wet much longer during a cold period, creating a secondary root-zone problem. That is why the weather branch loops back to the moisture branch rather than standing alone.
Wind branch: look for directionality and mechanics
Wind can increase transpiration, desiccate exposed margins, tear leaves, rub stems against ties, loosen root balls, tip containers, and break loaded branches. Compare the windward and sheltered sides. Inspect ties, stakes, branch unions, stem abrasions, and container stability. If one side of the plant is scorched while the opposite side remains relatively healthy, exposure belongs high on the list.
After severe wind, do not diagnose every wilted branch as disease. Trace the branch back to its union. A hidden split can interrupt water movement and create rapid flagging above the injury. Mechanical failure is often visible once you follow the affected tissue toward the main stem.
Rain branch: follow water from canopy to drainage
Heavy or repeated rain can saturate soil, leach nutrients, erode beds, splash contaminated soil onto lower leaves, collapse supports, and keep dense flowers wet. The response depends on what actually happened. Check runoff paths, ponding, lower root-zone moisture, container drainage, support stability, canopy drying, and flower interiors. Do not feed automatically because rain occurred, and do not irrigate automatically because the regular schedule says it is time.
Shade and sun branch: distinguish chronic site limitation from acute injury
Chronic low light can produce weaker growth, longer internodes, less productive lower branches, and a slower-drying canopy. Abrupt exposure of previously shaded tissue to intense sun can produce bleaching or scorch. Map sun duration and recent pruning or relocation. The same pale leaf can mean something different when it is deep inside a shaded canopy than when it appeared suddenly on newly exposed top growth.
Season and photoperiod change what “normal” looks like
Outdoor cannabis follows changing day length, temperature, and weather windows. Cultivars differ in photoperiod response and finishing time, so calendar dates are poor universal diagnostic thresholds. Late-season leaf fade can be part of maturation, a root-zone issue, disease pressure, nutrient depletion, or several factors together. Judge whether the change is gradual, symmetrical, and consistent with healthy flower development, or whether it is rapid, patchy, accompanied by lesions, wilt, root problems, or other signs.
Latitude affects day length and seasonal timing, but it does not by itself tell you when a specific cultivar should flower or finish. Record actual developmental stage: preflower, stretch, early flower, bulking, late flower, or senescence. Then interpret symptoms in that biological context.
Contamination and access are separate from plant health
A plant can look healthy after an unsafe exposure. Floodwater, sewage, industrial runoff, contaminated soil, smoke deposition, pesticide drift, or other environmental events may create product-safety questions that visual plant diagnosis cannot answer. Likewise, a hidden or difficult-to-access site can create emergency, fire, wildlife, or worker-safety problems even when the plant grows well.
Do not use this decision tree to guess local cultivation law, setback requirements, pesticide legality, water rights, or disposal rules. Confirm jurisdiction-specific requirements with current government sources. Do not use dangerous traps, concealed wires, poisons, or improvised security devices around a grow site.
Important: Plant recovery and product safety are different outcomes. A plant that resumes growth after an exposure is not automatically safe to harvest or consume.

Correct One High-Confidence Cause and Verify It
A decision tree is only useful if it changes what you do next. Once one cause has enough evidence to justify action, make the smallest effective correction that addresses that cause without creating a second problem. Then repeat the same measurement or observation that made you act.
Rank causes by evidence, consequence, and reversibility
Write the top two or three plausible causes, not ten. Give priority to causes supported by measurements or direct signs, causes that can damage the plant quickly, and corrections that are safe and reversible. If the root zone is saturated, the immediate priority is drainage and oxygen recovery, not choosing between three micronutrients. If a branch is split, mechanical stabilization comes before a fertilizer experiment. If visible mold is present on flower, exclusion and containment come before yield optimization.
Change one major variable at a time
When possible, avoid simultaneous changes to irrigation volume, fertilizer strength, pH, pruning, foliar sprays, container position, and pest treatments. Multiple corrections may be necessary in a real emergency, but routine troubleshooting improves when each intervention has a clear reason and a follow-up metric.
For example, if one container is dry because its emitter output is low, restore measured emitter flow and verify the wetted pattern. Do not simultaneously increase fertilizer EC. If the plant recovers, you have preserved a useful causal link. If it does not, reopen the tree with better information.
Define success before you intervene
Old necrotic tissue rarely becomes healthy again. Therefore “the damaged leaf is still brown” is not evidence of failure. Match success to the mechanism. After correcting uneven irrigation, success may be a more uniform moisture profile and stable plant turgor during the next comparable day. After reducing a pest population, success may be no increase in fresh feeding injury and lower counts on the same scouting route. After a nutrition correction, success may be healthier new growth and a stabilizing root-zone or tissue trend rather than instant repair of old leaves.
| Correction | Verify with | Good sign | Reason to reopen diagnosis |
|---|---|---|---|
| Restore irrigation delivery | Measured flow plus root-zone moisture at the same locations | Distribution normalizes and new wilt stops under comparable demand | Flow is correct but one plant remains stressed |
| Reduce saturation / improve drainage | Time to drain, moisture trend, root condition, new growth | Root zone re-aerates and plant water use resumes | Roots continue to decline or vascular symptoms progress |
| Adjust nutrient program | Input/root-zone chemistry, new growth, optional tissue analysis | New injury stops without EC escalation | Symptoms continue despite confirmed chemistry |
| Manage an identified pest | Same scouting route and plant parts | Population and fresh injury decline while beneficials recover or persist | Damage advances without the target organism |
| Stabilize mechanical injury | Branch turgor, union stability, wound progression | Branch remains supported and healthy tissue above stays functional | Wilt advances, tissue darkens, or the union continues splitting |
Use marked leaves and fixed photo points
Mark a few representative leaves or branches without constricting tissue. Photograph from the same distance and angle at each recheck. Include a scale or reference when lesion expansion matters. Fixed photo points are especially useful outdoors because memory is poor at comparing slow changes over several days.
Do not track only the worst tissue. Include one healthy comparison plant or branch. Recovery is easier to interpret when you can see whether the whole garden changed because of weather or only the corrected plant changed.
Set a recheck interval based on mechanism, not impatience
Some changes are visible within an irrigation cycle. Others need several days of new growth. Disease testing may follow a laboratory-specific schedule. There is no universal “wait 24 hours” rule for every outdoor problem. Choose a recheck window that allows the measured variable to respond without waiting so long that serious damage can spread unchecked.
Fast-moving flower rot, severe wilt, stem collapse, or a suspected transmissible pathogen deserves close monitoring and possible escalation. Mild historical tip burn that is no longer spreading can be checked less aggressively. Record why you chose the interval.
Know when a failed correction is useful information
A measured correction that does not work is not wasted effort if the intervention was safe and the result was recorded. It removes or weakens one hypothesis. If a plant remains wilted after confirmed root-zone moisture and normal emitter flow, investigate roots, stem continuity, vascular disease, heat, salinity, and other branches rather than simply adding more water.
Diagnostic Principle
Verification closes the troubleshooting loop
Observation creates a hypothesis. Measurement decides whether the hypothesis is plausible. A targeted correction tests the hypothesis in the real garden. Reinspection determines whether the expected response occurred. Without that last step, troubleshooting is only intervention.
Use the Decision Tree as a Weekly Field Procedure
The strongest outdoor troubleshooting system is not the one you remember during a crisis. It is the route you use before the crisis becomes obvious. A short weekly inspection gives you healthy baselines, catches irrigation failures early, reveals pest trends, and makes seasonal changes easier to distinguish from sudden injury.
Pre-season: build the comparison points
Before plants become large, map the site. Record sun exposure, shade movement, slope, drainage, irrigation zones, water source, prevailing wind, low cold pockets, reflective surfaces, neighboring land uses, and safe access. Photograph the empty or early-season site from fixed positions. Test irrigation delivery before the canopy hides emitters and before peak demand makes failures expensive.
Record each plant or cultivar ID and planting position. If containers differ in size or medium, record that too. Troubleshooting later is much easier when “plant P06 is different” can be separated from “P06 always had half the root volume of the others.”
Every weekly inspection: walk the same route
Begin with the whole garden. Look for color differences, height changes, leaning plants, gaps, and wilt. Then inspect representative plants from root zone to flower. Check irrigation hardware while it is operating when safe to do so. Look under leaves, at growing tips, inside dense canopy zones, and around branch unions. During flower, inspect moisture-prone interior flowers without crushing or contaminating them.
Record new abnormalities before treatment. If you find an insect, identify its function before deciding it is harmful. If you find a spot, determine whether it is old or new. If one plant is dry, compare the rest of the irrigation zone. If several plants changed at once, reopen the weather and shared-management history.
After rain, heat, cold, or wind: add an event inspection
Do not wait for the normal weekly day after a significant event. After heavy rain, check drainage, root-zone saturation, supports, and flower dry-down. After high wind, check ties, stakes, branch unions, container stability, and directional scorch. After unusual heat, compare soil moisture, root-zone temperature, and recovery after peak demand. After cold, document exposed tissue and adjust irrigation to the slower water-use period.
The practical troubleshooting sequence
Outdoor Troubleshooting Decision Tree
Run these checks in order before making a major correction
- Stop for safety: Do not enter an unsafe site or consume suspect material as a diagnostic test.
- Record the baseline: Photograph the site, whole plant, affected organ, and close symptom before disturbing it.
- Define the pattern: One leaf, one branch, one plant, one irrigation zone, one cultivar, one exposure, or the whole garden?
- Check the timeline: Sudden or gradual, and what weather, irrigation, feeding, pruning, spraying, or disturbance preceded it?
- Check the root zone: Dry, saturated, compacted, hot, cold, salty, unevenly wetted, or normal relative to healthy plants?
- Inspect plant position: Old leaves, new growth, windward side, shaded interior, stem base, roots, or flowers?
- Look for direct signs: Pest bodies, eggs, frass, webbing, galleries, mycelium, spores, soft decay, wounds, or broken tissue.
- Compare look-alikes: Nutrition, water, heat, cold, wind, salt, drift, mechanics, pests, disease, and normal seasonal change.
- Choose one high-confidence action: Correct the best-supported cause without stacking unrelated interventions.
- Define verification: Decide what measurement, new growth, pest count, moisture profile, or lesion trend should improve.
- Recheck at a mechanism-appropriate interval: Record what changed and what did not.
- Escalate when needed: Use a diagnostic clinic or laboratory when identification changes safety or management and field evidence is insufficient.
Common failure points in the decision tree
The first failure is starting too deep. A grower sees yellow leaves and jumps directly to magnesium while a blocked emitter has left one side of the bed dry. The second is changing too much. Several nutrients, a foliar spray, extra watering, and heavy defoliation are applied at once, so even improvement cannot identify the successful action. The third is trusting a single number. One pH, EC, or moisture reading from the easiest place to reach is treated as the whole root zone. The fourth is forgetting time. Old injury is mistaken for new progression, or a weather event from four days earlier is ignored because conditions are normal today.
The fifth failure is assuming every organism is an enemy. Outdoor gardens contain predators, parasitoids, decomposers, pollinators, and incidental visitors. The sixth is assuming every abnormality can be solved in the garden. Some problems need laboratory confirmation, and some contamination or legal questions belong with qualified local authorities rather than a cultivation guide.
Build a season-level feedback loop
At the end of each major incident, add three lines to the grow journal: what you first thought the problem was, what evidence changed your mind, and what measurement finally confirmed or weakened the diagnosis. Over a season, those notes become a local diagnostic reference more useful than a generic symptom chart because they connect the cultivar, soil, water, weather, and equipment you actually use.
Patterns across seasons matter too. If the same low bed stays saturated after storms, fix the site rather than diagnosing “overwatering” plant by plant next year. If the same irrigation lateral clogs during fertigation, investigate filtration and chemistry. If one cultivar repeatedly develops dense wet flowers before the local autumn rain window, treat that as a site-and-cultivar planning issue rather than a surprise disease event.
Master Advice: The best troubleshooting decision is often the one that prevents you from treating the wrong problem. Every time the tree tells you “measure first,” it is protecting the plant from an unnecessary correction.
Know what this decision tree cannot prove
No field decision tree can identify every pathogen, contaminant, nutrient disorder, or pesticide injury from appearance. Scientific cannabis data are also uneven. Many nutrient studies are controlled-environment experiments, disease reviews often include greenhouse systems, and extension diagnostic principles come from broader horticulture. Those sources are valuable because plant physiology and diagnostic logic carry across systems, but outdoor drug-type cannabis introduces cultivar, site, and regulatory variables that should not be hidden.
Use the tree to become more precise about uncertainty. “Possible root stress, not yet confirmed” is better than a confident but wrong diagnosis. “White growth consistent with powdery mildew; sample sent for confirmation” is stronger than “definitely mildew” when the crop decision is significant. Good troubleshooting reduces uncertainty step by step instead of replacing it with a label.
Share this article
A quick overview of the topics covered in this article.
Follow us
Latest articles
October 4, 2026
October 4, 2026