
Broad Mites on Cannabis: Identification, Containment, and Control
Broad mites on cannabis can injure the newest growth before the mites themselves are noticed. Fresh leaves may emerge twisted, narrow, hardened, glossy, blistered, or cupped. Internodes may shorten, growing tips may stall, and flower development may become distorted. Those signs justify a close inspection, but they do not prove broad mites. Herbicide exposure, spray injury, heat, light stress, re-vegetation, viruses, and several nutrient-access problems can create overlapping patterns.
The broad mite, Polyphagotarsonemus latus, is a microscopic tarsonemid mite with a wide host range. It is documented on hemp and cannabis, but the cannabis-specific research base is still smaller than the literature for crops such as pepper, citrus, and ornamentals. That distinction matters. General broad-mite biology can guide inspection, while cannabis decisions still need crop-specific observation, legal label review, and verification.
This guide explains how to confirm broad mites, separate their injury from common look-alikes, contain movement, choose stage-appropriate controls, and verify that clean new growth is replacing damaged tissue.
What Broad Mites Are
Broad mites are minute plant-feeding mites in the family Tarsonemidae. Adults are much smaller than two-spotted spider mites and are difficult to resolve without strong magnification. They favor protected plant tissue, especially unfolding leaves, shoot tips, buds, and the undersides of young leaves.
Broad mite
Polyphagotarsonemus latus, a microscopic, oval, translucent-to-amber plant-feeding mite whose eggs have distinctive pale surface bumps. It concentrates on young developing tissue and can cause persistent distortion after the mites have moved away.
Broad mites are not spider mites
Broad mites and spider mites are both mites, but they belong to different families and produce different evidence. Two-spotted spider mites are larger, usually feed across expanded leaves, create fine stippling, and may produce webbing as populations grow. Broad mites are smaller, prefer tender developing tissue, and do not create the characteristic webbing used to recognize a heavy spider-mite infestation.
The management overlap is also incomplete. A predator, pesticide, or monitoring method used for spider mites may not perform the same way against broad mites. Identification should come before selecting the control program.
Feeding injury appears as the leaf develops
Broad mites pierce young cells and feed in protected growing points. Injured tissue can continue expanding unevenly after feeding, so symptoms may become more obvious when a leaf opens. This delay creates an important diagnostic trap: the mite may be difficult to find on the visibly damaged leaf because the active population has moved to newer tissue.
Extension descriptions commonly associate broad-mite feeding with hardened, brittle, bronzed, cupped, or distorted leaves and malformed buds. On cannabis, the strongest suspicion comes from a compatible injury pattern combined with mites or their characteristic eggs on the newest tissue.
The cannabis evidence needs careful boundaries
Broad mites are listed among important protected-crop hemp pests in several extension and government resources, and acarological surveys have recovered P. latus from cannabis. At the same time, some regional hemp reviews report limited direct evidence of damaging populations in their production area. The responsible conclusion is not that broad mites are imaginary or universal. It is that geography, source plants, production system, and confirmed specimens all matter.
Do not use the phrase “broad-mite damage” as a substitute for finding the organism. When the decision would affect an entire room, mother stock, or flowering crop, preserve material and seek qualified identification.
Important: Twisted new growth is a symptom category, not a species identification. Broad mites move higher on the list only when the plant pattern, recent history, and microscopic evidence agree.
How to Identify Broad Mites on Cannabis
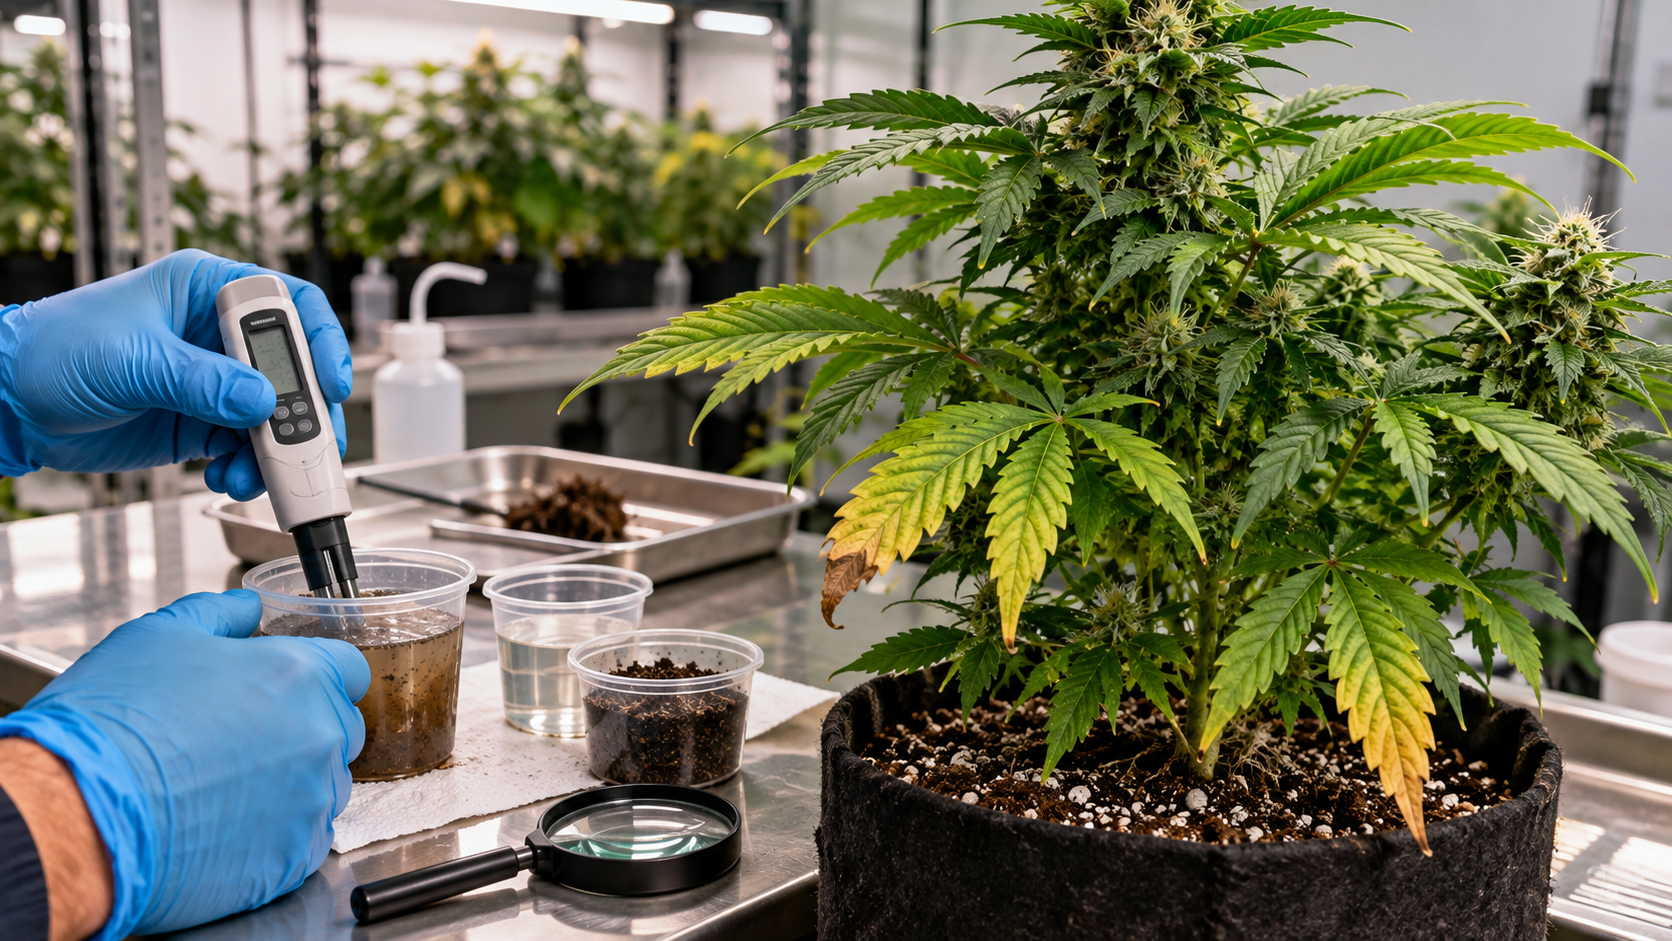
Broad-mite confirmation depends on inspecting the tissue that is developing now, not only the leaves that were damaged earlier. Use a clean sampling method, compare suspect and healthy plants, and look for several life stages. A microscope is preferable when the result will change a crop-wide decision.
Start with the youngest protected tissue
Inspect the smallest unfolding leaves, shoot tips, leaf folds, bud scales, petiole bases, and the undersides of recently expanded leaves. On a branched plant, compare affected tips with apparently normal tips. In propagation, examine the newest leaves on both cuttings and their source plants.
Broad mites often occupy shaded, humid micro-sites. A quick scan of the upper surface of a mature fan leaf can miss them. Sampling only the most deformed leaf can also fail because the colony may already have shifted to the next growing point.
Eggs provide one of the strongest field clues
Broad-mite eggs are translucent, oval, and covered with rows of pale raised spots or tufts. Under good lighting they can look dotted, beaded, or diamond-studded. This surface pattern helps separate broad-mite eggs from the smooth eggs of cyclamen mites and from the rounder eggs associated with spider mites.
A 20× hand lens may reveal the eggs to a practiced observer, but a stereomicroscope or suitable digital microscope makes confirmation more reliable. Photograph the egg pattern, nearby mites, and the plant surface at more than one magnification. Include an intact leaf tip so the laboratory or specialist can connect the specimen with its feeding site.
Adults are nearly microscopic and easy to overlook
Adult female broad mites are roughly 0.2 to 0.25 millimeters long. They are oval, pale, and somewhat translucent, often with a light stripe along the back. Males are smaller and faster and have enlarged hind legs. Larvae have three pairs of legs, while adults have four pairs.
Color is not enough for identification. Lighting, leaf color, life stage, and specimen condition can change the appearance. A pale moving dot on a shoot tip could be a pest mite, a predatory mite, or another tiny arthropod. Body structure and the egg surface carry more diagnostic value.
Use a repeatable sampling method
Choose the same type of tissue from each plant, such as one unfolding leaf and one recently expanded leaf from a marked tip. Record the plant, room, bench, cultivar, date, and whether the sample came from a symptomatic or comparison plant. Examine both surfaces and the folds around the growing point.
A clear-tape lift can capture surface organisms, but pressing tape onto a delicate shoot may damage tissue or crush evidence. Another option is to place the intact tip in a clean labeled container for examination. Follow the receiving laboratory’s instructions if a professional diagnosis is planned.
Do not carry an exposed suspect cutting through clean propagation or place it on a shared microscope station without containment. Bag or box the sample first, inspect it in a designated area, and clean the surface and tools afterward.
Read the crop pattern with the specimen
Broad-mite injury often concentrates on active tips while older expanded leaves retain the history of earlier feeding. Affected plants may form a patch associated with one incoming batch, mother plant, bench, or handling route. New symptoms can continue to appear for a period after control because already injured tissue is still unfolding.
Map confirmed mites separately from visual symptoms. That separation prevents old damage from being counted as a living colony and prevents a clean-looking plant from being released when eggs remain in protected tissue.
“My newest leaves are shiny, twisted, and narrow. Is that enough to call broad mites?”
Question sent by: MikeH_78, via email.
No. That pattern makes broad mites worth investigating, but it also fits spray injury, herbicide drift, heat and light stress, nutrient-access problems, re-vegetation, and some systemic disorders. Inspect the youngest protected tissue under strong magnification and look for dotted eggs and compatible mites before naming the cause.
Broad Mite Look-Alikes
New-growth distortion is one of the least specific cannabis symptom groups. The plant has only a limited number of ways to show that developing tissue was disrupted. The table below separates broad-mite evidence from several common alternatives.
| Finding | More consistent with | Best distinguishing check |
|---|---|---|
| Dotted translucent eggs and minute oval mites in unfolding leaves; hardened or bronzed new growth | Broad mites | Microscopic examination of several active tips |
| Fine stippling across expanded leaves, two dark body spots on adults, and webbing as pressure rises | Two-spotted spider mites | Inspect mature leaf undersides and webbing with magnification |
| Very slender, wedge-shaped mites; bronzing and upward progression; no broad-mite egg pattern | Hemp russet mites | Use higher magnification and qualified mite identification |
| Distortion follows one spray event or a clear drift edge; no mites or eggs in repeated samples | Spray or herbicide injury | Reconstruct application, airflow, dose, tank history, and spatial pattern |
| Upper-canopy cupping or bleaching follows increased light or heat; exposed tops are strongest | Light or heat stress | Measure canopy conditions and compare shaded tips |
| Single-bladed or irregular leaves follow a disrupted dark period or return to vegetative lighting | Re-vegetation | Audit timers, light leaks, and recent photoperiod history |
| New growth is distorted across a root-zone or feed pattern without confirmed mites | Nutrient availability or root stress | Check roots, pH, EC, irrigation history, and untreated comparison plants |
| Persistent stunting and abnormal branching follow a source line or clone batch | Systemic disease or source-plant problem | Review mother stock, propagation records, and appropriate diagnostic testing |
Spider mites leave a different feeding map
Spider mites commonly feed on expanded leaves and create pale stippling that can merge into bronzing or scorching. Webbing is a late but highly useful clue. Broad mites concentrate more strongly in young protected tissue and do not produce the same webbing. Use the Spider Mites on Cannabis guide when stippling, colonies on mature leaves, or webbing dominate the pattern.
Hemp russet mites require stronger magnification
Hemp russet mites are eriophyid mites with a long, narrow body and only two pairs of legs near the head. They can cause curling, bronzing, brittle foliage, shortened growth, and flower injury. Their body form, distribution, and eggs differ from broad mites, but both are easy to miss with a basic lens.
Do not combine them into a generic “microscopic mite” diagnosis. Species matters because the best sampling locations, biological controls, and treatment performance can differ. Preserve multiple tips and include symptomatic and apparently healthy tissue when expert identification is needed.
Spray injury follows exposure history
Oils, soaps, salts, disinfectant residues, incompatible tank mixes, high concentrations, poor water quality, and applications made under strong light or heat can deform developing leaves. Herbicide drift can also create cupping and distorted tips that resemble broad-mite injury.
A sharp boundary along an airflow path, one application date followed by synchronized symptoms, or injury limited to sprayed surfaces increases the weight of chemical exposure. The absence of mites in one sample does not end the investigation, but repeated well-targeted negative samples make the exposure history more important.
Re-vegetation changes the architecture
A flowering plant returned to a longer photoperiod may produce twisted, smooth-edged, or single-bladed leaves and irregular shoots. The pattern follows the photoperiod event rather than a patch of confirmed mites. Review timer records, controller logs, light leaks, and recent plant movement before treating unusual leaves as a pest.
Confirm broad mites from protected young tissue and their characteristic eggs, then map which plants and source batches are positive.
Diagnosing every blistered or twisted tip as broad mites and applying repeated sprays without finding the organism.
How an Infestation Develops and Spreads
Broad mites can complete a generation quickly under favorable protected-crop conditions. Published development times vary with temperature, humidity, and host plant, so one laboratory number should not become a universal cannabis schedule. The practical point is that overlapping generations can build while the visible injury is still unfolding.
Incoming plants are the highest-value pathway to investigate
Infested cuttings, clones, mother plants, ornamentals, and other living hosts can carry eggs and mites on tissue that looks normal. A canopy-only receiving check is weak protection because the organisms are minute and favor folded growth. Inspect source plants and representative cuttings under magnification before combining batches.
Keep clone source, mother plant, arrival date, propagation tray, and destination records connected. If one plant is confirmed later, those records define the first inspection map.
Workers, tools, and touching plants can move mites
Broad mites can crawl between contacting leaves and can be moved on plant material, hands, gloves, tools, stakes, carts, and reusable trays. Moving a suspect plant through a narrow aisle may brush it against many clean plants. Taking cuttings from a colonized mother can distribute the pest across the entire propagation system.
Work from clean zones toward suspect zones. Change or clean tools and handling materials according to the facility procedure before returning to clean plants. Keep diagnostic samples sealed during movement.
Whiteflies may carry broad mites
Research has documented phoresy, a transport relationship in which broad mites attach to whiteflies and use them for movement. This does not mean every whitefly carries broad mites or that whiteflies are required for spread. It means a confirmed broad-mite case should raise the value of checking for whiteflies and vice versa.
Sticky cards can reveal flying whiteflies, but broad mites themselves are not meaningfully monitored with ordinary sticky cards. Inspect the plant tissue directly and use the Whiteflies on Cannabis guide when adults, nymphs, or honeydew are also present.
Warm protected environments can support rapid turnover
Broad mites often perform well in warm, humid greenhouse conditions, but their response is not a simple “higher is always faster” rule. Temperature and humidity interact, and extreme conditions can reduce survival. Deliberately stressing cannabis with excessive heat or low humidity is not a sound control plan.
Use environmental data to explain changes in pressure and to keep biological controls within their operating range. Do not replace identification and direct suppression with a climate shock that can injure the crop.
“Only one clone in the tray looks damaged. Should I treat it as an isolated plant?”
Question sent by: GrowinWithDan, via contact form.
Not yet. Isolate the suspect plant, but inspect the mother, neighboring clones, tray edges, handling tools, and every destination supplied by the same source. One visibly damaged clone may be the first plant to express injury rather than the only plant carrying eggs or mites.
What to Do When Broad Mites Are Suspected
The first response should prevent movement while preserving evidence. Do not begin with a room-wide spray based only on distorted leaves. A rushed treatment can injure young tissue, disrupt predators, and make the original pattern harder to interpret.
Contain before carrying the plant elsewhere
Stop routine movement of suspect plants and cuttings. Create a designated inspection route and handle clean plants first. Prevent leaves from touching clean stock during removal or examination. Bag disposable material before transport and keep reusable carts, trays, and tools within the suspect zone until cleaned.
If air movement can push touching plants together, increase separation without creating a new heat or airflow problem. Do not use strong fans as a pest-removal method.
Preserve evidence before treatment
Collect several active tips with unfolding leaves, not only damaged mature leaves. Include mites and eggs when possible. Photograph the whole plant, the affected shoot, the underside of young leaves, and the microscopic evidence. Label the plant, cultivar, source, room, bench, and date.
When the result will determine destruction of mother stock or a costly flowering room, use an extension service, diagnostic laboratory, crop consultant, or qualified acarologist. Ask how the sample should be packaged before shipping.
Map plant and source connections
Mark confirmed plants, symptomatic plants, and sampled negative plants as different categories. Trace mother plants, propagation batches, workers, tools, carts, and rooms. Add whitefly observations if present. A source map is more useful than an undifferentiated list of twisted leaves.
Sample outward from confirmed plants. Compare the same tissue type from nearby plants and from plants that share the source but not the location. That comparison helps separate local spread from a propagation-batch introduction.
Stabilize the crop without erasing the evidence
Correct obvious timer failures, extreme canopy conditions, irrigation faults, and unsafe spray practices, but avoid stacking many changes at once. Keep records of any intervention. If the plant improves without mites ever being found, that is important evidence, but it does not retroactively prove the initial cause.
Do not use a homemade hot-water dip, unregistered systemic product, or concentrated oil treatment on valuable cannabis because a temperature or material worked on another crop. Plant tolerance, exposure time, formulation, crop stage, and legal status must all be validated for the actual use.
Propagation, Vegetative, and Flowering Response
The pest does not change identity with crop stage, but the risk and available response do. Propagation can distribute a hidden infestation quickly. Vegetative plants provide the widest recovery window. Flowering plants create stricter residue, coverage, and quality constraints.
Propagation is a source-control problem
Cuttings concentrate the tender tissue broad mites prefer and are moved frequently between people, trays, and rooms. A positive clone should trigger inspection of its mother plant and sibling cuttings. Pause distribution of the implicated batch until the inspection boundary is clear.
Preventive predatory mites are used in some commercial programs, but success depends on species, release timing, food, temperature, humidity, residues, and supplier guidance. A sachet or release date is not proof that the crop is protected. Inspect the tissue and record both pest and predator findings.
Vegetative plants offer the best recovery window
Vegetative plants can often tolerate isolation, pruning decisions, repeat sampling, and a longer verification period better than flowering plants. Severely damaged tips may never look normal. Evaluate success from clean, normally expanding new growth and declining live pest stages.
Do not remove every growing point before identification. Over-pruning can hide the progression pattern and impose a second stress. If heavily colonized disposable plants are removed, contain them before they move through clean areas.
Flowering increases residue and coverage concerns
Dense flowers provide protected sites and make complete coverage difficult. Oils, soaps, microbial materials, and other contact products can affect flower appearance, aroma, drying behavior, beneficial organisms, and residue outcomes. A product registered for ornamentals or another crop is not automatically permitted for flowering cannabis.
Review the local crop label, permitted site, application method, re-entry interval, preharvest interval, testing requirements, and worker protections. Late rescue attempts may create more quality risk than controlled removal and containment.
Mother plants require a distribution audit
A confirmed mother plant is not only one infested plant. It may be the source of many cuttings already placed elsewhere. Trace the cutting history, rooms, dates, and recipients. Sample the mother and representative descendants even when they still appear normal.
Replacement stock should come from a verified clean pathway. Taking one apparently clean tip from a positive mother does not reset the risk.
Control Options and Their Limits
Broad-mite control is difficult because the mites and eggs occupy protected tissue and the visible injury can lag behind the living population. A useful program combines clean stock, source removal, sanitation, biological control where appropriate, legally permitted direct controls, and repeatable microscopy.
Removal can reduce a concentrated source
Discarding heavily infested disposable plants may remove more mites and eggs than repeated attempts to reach every protected leaf fold. Make the decision from crop value, plant stage, distribution, available controls, and the risk of spreading the infestation during removal.
Seal plant material before moving it. Clean the immediate bench, trays, tools, supports, and handling surfaces according to the material and facility sanitation plan. Sanitation supports plant removal, but it does not substitute for inspecting the plants that remain.
Predatory mites work best as a planned program
Government cannabis IPM guidance and greenhouse literature identify predatory mites such as Amblyseius swirskii and Neoseiulus cucumeris for broad-mite programs. Laboratory and crop research on other hosts shows that A. swirskii can consume broad mites. Performance on cannabis still depends on release timing, canopy distribution, environment, residues, and prey availability.
Work with a knowledgeable supplier to match the predator, formulation, and release plan to the crop. Confirm that previous sprays are compatible. Record living predators and broad-mite stages rather than treating release quantity as the outcome.
Contact products need access to protected tissue
Oils, soaps, and other contact materials may be allowed in some cannabis jurisdictions, but labels and regulations vary. Coverage of unfolding leaves and protected tips is difficult, and eggs or hidden mites can survive incomplete applications. Repeat use can also injure tender growth or interfere with biological controls.
Before using any pesticide, confirm that the exact product is legal for cannabis, the target site and pest are covered, and the application fits the plant stage. Test crop safety on a small representative group when the label and local program allow it. Never improvise concentration or application frequency.
Heat treatment is not a universal cannabis protocol
Extension resources describe carefully controlled hot-water immersion for certain potted ornamental plants. That information demonstrates that broad mites can be heat-sensitive; it does not establish a safe cannabis treatment. Cultivar, root-zone temperature, plant size, water quality, exposure time, and equipment control all affect injury risk.
Do not turn an extension example into a home recipe. If heat is being considered in a commercial sanitation or propagation program, it requires validated crop-specific procedures and accurate temperature control.
Resistance and non-target effects still matter
Repeated use of one mode of action can select for survivors, and broad-spectrum materials can remove predatory mites that would otherwise suppress pest populations. Product names are not modes of action. If registered miticides are available, use a qualified local IPM plan and protect compatible natural enemies.
Control should reduce living mites and eggs across the connected crop, not only make damaged tips look less active. Existing injury cannot be sprayed back to normal.
Combine source control, protected-tissue coverage, compatible predators, sanitation, and repeated microscopic checks.
Repeating harsh applications because old leaves remain distorted or because one quick inspection failed to find a microscopic survivor.
“The new tips still look damaged a week after treatment. Does that mean the mites survived?”
Question sent by: Canuck420, via Facebook page.
Not by itself. Tissue injured before treatment may continue opening with distortion. Inspect the newest protected leaves for living mites and eggs, compare marked tips over time, and look for clean normal expansion beyond the damaged nodes. Continued fresh injury plus confirmed life stages carries more weight than the appearance of old leaves.
Prevention and Verification
Broad-mite prevention begins with the movement of living plants. The goal is to keep microscopic colonies out, detect them before propagation distributes them, and verify control with new tissue and direct sampling.
Quarantine must include magnified tip inspection
Keep incoming plants physically separated from established clean stock. Inspect unfolding leaves and shoot tips under suitable magnification at defined intervals. Record the source, batch, cultivar, arrival date, inspector, sampled tissue, and release decision.
Quarantine duration alone is not evidence. A plant can sit in isolation while eggs remain undetected. Define what will be inspected, how many plants will be sampled, and what happens after one positive finding.
Mother blocks need scheduled surveillance
Mother plants can distribute broad mites before showing dramatic injury. Build magnified tip sampling into routine mother-block scouting, especially before a cutting cycle. Keep tools and workers moving from verified clean material toward higher-risk material.
Watch for repeated distortion in descendants from one source. A clone-performance record can reveal a mother-line problem that an isolated canopy inspection misses.
Count life stages separately from damage
Choose a repeatable unit, such as a fixed number of marked tips per bench. Record eggs, larvae, adults, predators, and fresh injury separately. Old distorted leaves are a historical record, not a live count. A falling pest count with clean new growth is stronger evidence than cosmetic improvement alone.
There is no universal cannabis threshold that can be copied across facilities. A mother block, clone nursery, and late-flowering room have different consequences from one confirmed mite. Build action rules around plant stage, spread, source risk, available controls, and repeated observations.
Verify beyond one life cycle
Set early and later reinspection dates before treatment. The early check can identify crop injury, surviving mobile stages, and coverage gaps. Later checks should determine whether eggs hatched, reproduction continued, and new plants became positive. The exact interval should reflect environment and the control mechanism rather than a fixed internet schedule.
Release a zone only when repeated targeted samples remain negative, new growth expands normally, no new plants become symptomatic, and connected source material has been addressed. Keep the records after the room looks clean.
Broad mite verification checklist
- Inspect unfolding leaves, shoot tips, leaf folds, and recently expanded undersides.
- Confirm the dotted surface pattern of broad-mite eggs and compatible mite structure.
- Compare symptomatic tips with healthy plants of the same cultivar and stage.
- Separate living pest counts from old distorted tissue.
- Preserve intact representative tips when expert identification will change the response.
- Map mother plants, clone batches, benches, tools, workers, whiteflies, and destination rooms.
- Contain samples and plant material before moving them through clean areas.
- Review spray, herbicide, light, heat, irrigation, and photoperiod history.
- Select controls by legal label, crop stage, protected-site coverage, and predator compatibility.
- Reinspect the same marked tips and connected plants after intervention.
- Verify clean new growth and the absence of new eggs and mobile stages across repeated checks.
- Escalate to qualified identification when broad mites and hemp russet mites cannot be separated confidently.
Broad mites become easier to manage when distorted growth is treated as a prompt to inspect rather than as the diagnosis itself. Find the pest on the tissue it uses, protect clean source material, map connected plants, and judge the program from living stages and new growth.
The goal is not to make damaged leaves look normal. It is to stop reproduction, prevent distribution, and produce clean, normally expanding tissue without creating a second problem through unnecessary treatment.
Share this article
A quick overview of the topics covered in this article.
Follow us
Latest articles
October 22, 2026
October 22, 2026
October 22, 2026
October 22, 2026