
Canopy Access Lanes and Inspection Design
A garden can look open from the gate while becoming almost impossible to inspect at branch level. Leaves close the spaces between plants, training ties cross the places where hands need to move, and a support frame that held young branches comfortably may force you to brush through heavy flowers later in the season. When the only way to check a hidden leaf or flower is to pull the canopy apart, the layout is no longer serving the crop.
Design an access lane around the inspection you need to perform, not simply around the space available on planting day. Keep a safe walking or working route, identify the reach needed from that route, mark repeatable inspection positions, and check that the same route remains usable as branches expand. A second route, removable panel, or outside access point may be more useful than cutting a corridor through healthy foliage. The design succeeds when you can see and check representative plant organs without leaning into unstable supports or repeatedly touching neighboring plants.
This resource deals with lawful outdoor cultivation and the interface between canopy geometry and field inspection. It does not prescribe universal plant spacing, train every branch, or replace a full scouting protocol. For site selection and the season-long growing system, use the Outdoor Grow Comprehensive Guide. Here the question is narrower: can the garden be inspected reliably, safely, and with minimal plant disturbance throughout the season?
What an Inspection Access Lane Must Actually Accomplish
Access is a working property of the garden. It has to persist when the canopy is large, when the soil is wet, and when the task is more demanding than standing back to admire the plants. You may need to identify an organism on the underside of a leaf, examine a shaded branch union, photograph a wet interior flower from the same angle, or trace a damaged branch to its support. Each task requires a different combination of footing, reach, visibility, and hand movement.
Separate the lane, the inspection position, and the viewing window
A lane is the space used to travel or stand. An inspection position is a repeatable place from which the operator examines a specific plant or zone. A viewing window is the actual line of sight and gentle hand access to the target tissue. One does not guarantee the others. A wide path alongside an opaque wall of leaves may provide excellent footing and almost no information about the middle of the canopy. A gap between two large branches may reveal the center but be unusable if the only way to reach it is to stand on an irrigation hose.
Mark these three elements separately on a simple map. Where a viewing window can be created by repositioning a flexible branch or moving a support line, do that before considering removal of functional foliage. Where two-sided inspection is possible, shorter reaches from two safe locations may be preferable to one long reach through flowers. Where only one side is available, the planting arrangement itself must allow inspection from that side as plants mature.
Inspection access
The combination of safe physical approach, stable working position, clear sightline, and practical reach needed to examine a chosen plant organ without causing unnecessary damage. A visual gap alone is not complete access.
Define the tasks the route must support
Write down what the grower actually does during routine visits: inspect new growth and leaf undersides, look inside shaded branch unions, examine the stem base, observe the root-zone surface, read a sensor without stepping into the bed, check support contact points, and assess flowers after rain. Add sample handling or emergency removal only where relevant. This list defines where inspection positions should exist and prevents designing the entire garden around a single attractive overhead photograph.
Separate brief observations from work requiring equipment. A small hand lens inspection may need room for one person with both hands free. A sample bag or branch removal requires an unobstructed route for carrying material without brushing it against adjacent flowers. If the garden has multiple workers, account for their access requirements and safe passage as well. The needs of a person using a mobility aid are a design constraint in their own right, not a variation on a cannabis spacing rule.
Set functional success criteria instead of a magic corridor width
The lane passes its first test if the intended user can enter, turn where needed, remain stable, reach the marked organ, and leave while carrying normal inspection equipment. Perform that walk with the equipment actually used. Record bottlenecks and the plant or support causing each one. A narrow route may pass when the canopy is small and fail when loaded branches project over it; that is a reason to remeasure at maturity, not evidence that the first measurement was wrong.
Published accessible-garden recommendations give dimensions for particular users, surfaces, carts, and mobility devices. Those figures should not be recast as a universal cannabis lane width. Follow applicable accessibility and workplace standards for the actual site and users. For home layouts without a prescribed standard, choose sufficient working space by a physical walk-through and retain room for future growth.
Field Advice: Design for the most awkward legitimate inspection, not the easiest view from the gate. If examining a lower leaf underside requires an unsafe lean, the route is unfinished.
Map Walking Routes, Reach, and Hidden Zones Before Changing the Canopy
Begin on paper or with a photograph taken from above the plot. Mark the lawful site boundary, garden entrance, plant centers or containers, beds, fixed structures, water connections, drainage lines, support posts, gates, and any route that must remain clear for people or emergency access. Include shade and the usual direction of wind-driven plant movement. This map need not be scaled precisely, but its labels and fixed reference points should remain consistent.
Walk the perimeter before choosing the inner route
The perimeter often gives the cleanest overview, especially for large individual plants. Walk around the garden without touching foliage. From each side, identify which stems, leaf undersides, and flowers you can see; note the middle zones that disappear behind outer branches. Make a rough division into near side, interior, far side, lower canopy, and upper canopy. If a plant is pressed against a fence or neighboring crop, classify that hidden face as an access problem now rather than hoping it will become easier to reach in flowering.
Use the existing main path when it works. Extra paths consume growing area and can complicate drainage, equipment movement, and structural supports. Conversely, a single dead-end corridor may force the inspector to reverse through a wet canopy or carry suspect material past every other plant. The right number of routes depends on whether the entire garden can be inspected and exited safely, not on a fixed row layout.
Mark permanent obstacles and temporary obstructions separately
A post, fence, bed wall, or building is a permanent boundary. A hose, movable container, tie, temporary net, wheelbarrow, or leaning branch is potentially movable. Do not solve a removable hose obstruction by pruning an otherwise healthy plant. Place irrigation lines so they do not cross normal foot positions, keep tools out of walkways, and make sure a drainage solution does not create a slippery walking surface. If a hose must temporarily cross the route, manage the hazard before anyone enters and remove it promptly afterward.
A support line can be invisible in the late-afternoon light and still catch a sleeve or cut into a stem. Walk the route in normal working light and mark where lines intersect body or carrying space. Do not move primary load-bearing supports without checking what they carry. A clear lane produced by releasing the wrong tie can transfer the problem from access to structural failure.
Do not treat an unstable or inaccessible route as a pruning problem
If a wet slope, electrical hazard, leaning support, blocked exit, or unstable overhead frame makes access unsafe, stop the inspection. Resolve the site hazard with an appropriate qualified person when necessary; do not climb a trellis, step on a root ball, or force your way through the canopy to complete a routine check.
Map the reach you can actually sustain
From each proposed inspection position, reach toward the target with the body balanced and feet on sound ground. Do not count a leaf as accessible if you can only touch it by pulling a branch toward you or leaning your body over a loaded stem. Record the inaccessible zone and whether an alternate side would solve it. Repeat using the hand lens, phone, or sampling container used in practice, since those tasks change the effective reach.
For small container gardens, moving a container may be an option only while it is light enough and its base and roots can be kept stable. In-ground plants and mature pots should be treated as fixed. A rotating plant may expose hidden sides early in the season, but do not base the design on being able to rotate a rooted or heavily loaded specimen later. Plan a second safe inspection position instead.
Test the route under ordinary working conditions
Observe where water stands after rain and where soil or mulch migrates onto the path. Where possible, choose or improve a firm, drained surface rather than relying on stepping stones through a bed. Inspect in the footwear and with the equipment normally used. Outdoor conditions that are safe on a dry afternoon may be slippery after dew or irrigation; postpone contact-heavy work in wet foliage when practical because general plant-disease guidance warns that wet handling can spread some pathogens.
Use a simple access map key: open, constrained, or inaccessible. Note why a position fails: footing, reach, sightline, obstructing tie, flower contact, or unstable support. These are measurements of the present layout, not biological thresholds. A written reason points directly to the least invasive correction.
“There is a path all around my plants. Why do I still miss pests in the middle?”
Question sent by: Ethan Brooks, via email.
A perimeter path only establishes where you can stand. Inspect an actual lower leaf underside and an interior branch from each side. If both are concealed, mark a viewing window or a second approach and include representative interior plants in the sampling map. Do not assume the reachable outer canopy represents the interior.
Build Reach and Sightlines Without Sacrificing Plant Function
Plant architecture changes what is visible. Broad fan leaves, long laterals, intersecting shoots, expanding flower clusters, and layered support can all make a plant look denser than its planting distance suggests. An access lane therefore has to work in three dimensions: along the ground, into the canopy, and vertically from crown to growing tip.
Build a reach map by plant organ
Stand at a marked position and follow one plant in a consistent order: whole-plant silhouette, newest tips, representative upper and lower leaf surfaces, underside and petiole, shaded interior, branch unions, stem base, root-zone surface, and flowers when present. At each target record one of three states: visible without contact, reachable with minimal careful movement, or not accessible. Do not grade the entire plant accessible merely because its top can be seen.
A low interior leaf may be easy to reach from underneath while an adjacent flower remains inaccessible without compression. Distinguish the targets because forcing the same access technique onto every tissue damages the canopy. For a suspected insect, a hand lens and a selected underside may suffice. For a flower problem, look for a safe viewing angle rather than pulling apart every inflorescence as routine practice.
Prefer viewing windows to wholesale defoliation
Look first for an existing gap between branches. Gently reposition a flexible shoot within its natural range or shift an adjustable support to uncover a repeatable sightline. If the plant is already trained, the support geometry can sometimes be adjusted to separate two overlapping leaders. Keep the original load path intact and check for rubbing, constriction, or newly exposed unsupported flower weight after adjustment.
Removing functional leaves is a tradeoff, not a default access solution. Foliage supports photosynthesis and regulates local microclimate, while excess density can hide symptoms and retain humidity in some systems. The correct response is not to strip everything that obstructs a photograph. Remove tissue only when there is a separate, justified pruning purpose and the plant can tolerate the intervention. For cutting technique and wound hygiene, continue with Clean Pruning Cuts and Tool Hygiene.
Open a selective viewing window
Use the existing gaps, a second inspection position, or a modest support adjustment to expose the target. Recheck that leaves, stems, and flowers are not rubbing or pinched.
Create access by stripping the whole middle
Do not assume removing large amounts of healthy leaf area improves flower quality or guarantees disease control. It may sacrifice growth and create wounds without making hidden tissue meaningfully easier to inspect.
Separate inspection access from ventilation performance
A person-sized gap between plants does not prove air can move through the inner canopy, and an airy-looking top does not prove dense flower interiors have dried. Cannabis greenhouse experiments have measured higher relative humidity within inflorescences than in ambient air. Improved forced circulation reduced bud-rot outcomes under particular controlled conditions, but those experimental fans and microclimate readings do not establish an outdoor lane width or a universal disease-free canopy.
Treat visibility, physical reach, leaf movement, and flower drying as related but distinct observations. Look at which foliage remains still in ordinary breezes, which flowers stay wet after neighboring material dries, and whether the proposed adjustment changes those patterns. A path may make observation possible while leaving a shaded humidity pocket untouched. Conversely, a dense but readily inspectable plant is not automatically diseased.
Leave room for a safe camera and sample position
If repeat photographs are part of monitoring, identify where the camera can be held at the same angle without resting it against flowers. A small marked standing point can matter more than a dramatic new opening in the foliage. For close-up work, use stable footing and a scale reference when size matters, then record plant ID, side, and date. If a specimen is needed, prepare the container and clean handling route before disturbing the target.
Remember: An access improvement has to reveal information without destroying what you came to inspect. A wide gap created by crushed bracts or torn branches is not a successful design.
Create a Repeatable Inspection Route and Sampling Map
A reliable lane should make scouting repeatable, but route convenience can introduce bias. The easiest plants to see are often those bordering a path, while concealed center plants may experience different moisture, light, and pest pressure. Divide the garden into inspection zones before choosing a sampling pattern, then keep enough of the route consistent for comparisons without examining the same accessible edges exclusively.
Give plants, lanes, and sides stable IDs
Label each bed or row and assign plant IDs that will still make sense when plants expand. In a small garden, a simple map showing plant A, B, and C, north and south sides, and the standing positions is enough. For larger areas, divide the layout into blocks, with a reference map that records row ends, center positions, low areas, neighboring vegetation, and any known high-risk pocket. Keep labels legible without tying them tightly around growing stems.
A record such as B3, west face, lower interior leaf is more useful than “third plant on the left” when the inspector changes entry direction. Use the same reference for photos, traps, sampling bags, and follow-up notes. If containers move, update the map rather than silently shifting their identity. A location-specific history is only useful when it continues to refer to the same thing.
Use fixed sentinels plus deliberately changing coverage
Choose a few sentinel plants or fixed organ positions for direct time-series comparison. Include accessible representative plants across the plot rather than only the most vigorous or most damaged. Add known hotspots such as a shaded boundary, persistent wet pocket, or recently introduced plant, but record these as targeted observations. Do not combine only-hotspot findings with representative counts and call the result a whole-garden estimate.
General crop scouting guidance recommends examining different areas and varying the route to avoid missing patterns. A useful outdoor cannabis design reconciles this with repeat photography: retain a fixed spatial backbone and designated sentinels, then deliberately vary starting direction and sample additional plants elsewhere. The exact number of plants depends on garden size, pest distribution, inspection objective, and the statistical question. Field-crop sample counts are not universal cannabis sampling requirements.
Sentinel plant versus representative sample
A sentinel is a marked plant revisited to observe change over time. A representative sample is selected to characterize conditions across a larger group. A sentinel near a known hotspot can be useful for early warning without representing the average condition of every plant.
Follow the same inspection sequence within each chosen plant
Use a consistent organ order: overall posture; growing tips; upper and lower leaf surfaces; leaf undersides, veins, and petioles; shaded interior; main stem and branch unions; crown and root-zone surface; and flowers when present. Select the order to limit unnecessary contact, leaving delicate or suspect flowering material until you have the broader context. If the target pest has a known preferred tissue, add that tissue explicitly rather than replacing the entire route with a generic glance.
Observe without touching first. Record live organisms separately from feeding injury, suspect disease from confirmed disease, and normal senescence from new deterioration. A sticky card can flag movement of flying adults but does not prove the same pest is reproducing on the nearby plant. A close-up photograph documents a symptom but does not identify its cause on its own. Keep the diagnostic method appropriate to the question and escalate to microscopy or a laboratory when field evidence is insufficient.
Create one record that can survive personnel changes
For each inspection write the date, observer, route or entry direction, plant IDs, organ positions, crop stage, recent weather, findings, and whether the target was fully visible. Record the number examined and the number positive for a clearly defined observation if you intend to calculate incidence. Keep severity and spread as separate fields. If two areas are inaccessible, record them as not inspected, not as disease-free or pest-free.
A photograph is useful when it can be matched to the same location again. Begin with a site view, then the full plant, the marked branch or organ, and a close-up with a scale where size matters. Include a healthy comparison if it helps interpretation and avoid repeatedly opening or squeezing flowers for documentation. Use the same camera angle for a suspected progression point so later comparisons show actual change rather than a different viewpoint.
“If I inspect the same five easy-to-reach plants every visit, is the monitoring consistent enough?”
Question sent by: Julia Schneider, via contact form.
It is consistent for those five plants but may be unrepresentative of the entire garden. Keep them as fixed sentinels, then add plants from interior, edge, shaded, and other relevant zones using a documented selection pattern. Record where access was impossible so a zero count does not disguise missing observations.
Adjust Branches, Supports, and Paths With Minimal Disturbance
Once the map identifies a failing access point, make the least invasive correction that solves its actual cause. The problem may be a hose underfoot, a support line across the path, a branch projecting into the walking space, or an opaque leaf layer blocking an interior view. These call for different fixes. Removing leaves cannot make a slippery path safe, while moving a hose will not reveal a concealed stem union.
Step 1: identify the exact obstruction and preserve a baseline
Stand at the failing location and name the task you cannot complete. Photograph the obstructed view and mark the target organ. Record whether the obstruction is physical footing, reach, sightline, worker safety, or a fragile plant contact. Check whether the route is usable from the opposite side and whether the obstruction is temporary. This diagnosis prevents indiscriminate thinning and lets you assess whether the eventual change made inspection possible.
Step 2: correct non-plant obstructions first
Move tools and idle containers out of the lane, route hoses away from normal foot positions, and correct standing-water problems when it is safe and practical to do so. Keep equipment where it can be retrieved without crossing beds. Mark low or awkward cross-lines and adjust access arrangements instead of leaving a trap that becomes harder to see as foliage grows. Never compromise a building exit or safe garden egress in the name of making more growing area.
Where a support frame is the obstruction, identify which lines are structural and which are adjustable access components. A designed opening or removable access panel can provide repeat visits without detaching load-bearing material. Ensure the opening cannot spring closed onto a worker or snag loaded branches. Record its normal closed configuration if it has to be restored after inspection.
Step 3: reposition only branches capable of safe movement
For a flexible, stable shoot, use the existing natural range and a soft, adjustable tie or support if needed. The purpose is to keep the selected viewing window open without kinking the stem or pulling on the root ball. Confirm a stable anchor before applying any counterforce. Do not use a container rim, thin stem, or weak stake as an improvised tie point if the force can tip the pot or strain the root mass. Mature flowering limbs should not be treated like small vegetative shoots.
LST decisions and the boundaries between flexible and rigid stems belong in training-specific resources. This article uses those principles only to decide whether a minor repositioning is safe for access. If movement produces cracking, new droop, sharp resistance, soil movement, or a support that shifts under normal load, stop and stabilize. A more open view is not worth a weakened branch or root system.
Step 4: reassess whether cutting is needed at all
Only if non-plant corrections and gentle repositioning fail should a justified selective cut be considered. Identify the precise tissue, why it must go, the clean cutting point, and how the plant will be inspected afterward. Avoid cutting a large quantity of leaf area simply because the growing point or interior became hard to photograph. During flowering, avoid unnecessary wounds and contact with developing flowers, especially in wet weather or on stressed plants.
If suspect disease is present, change the workflow from ordinary layout correction to containment. Inspect healthy material before suspect material where feasible, use appropriate clean tools and gloves, contain removed tissue, and do not drag it along the crop. For pathogen-specific hygiene boundaries, use Tool Disinfection Between Cannabis Plants; an access article should not invent a disinfectant recipe.
Step 5: walk, reach, and load-test the result
Return to the original standing mark. Can you see the chosen organ without pulling another branch? Can you examine its underside without crushing flowers? Does the tie have room for growth, and is the plant or support stable after your hands are removed? Can the worker turn and exit with a sample container? Photograph the same angle and record any newly inaccessible area caused by the adjustment.
Test under normal calm conditions, not by forcefully shaking plants or pulling branches to their limits. If the fix improved one side but closed access to another, it is incomplete. A correction is accepted only when the intended organ can be inspected repeatedly and the plant structure remains stable.
Correct the real obstruction
Choose a clean walking line, adjustable support, alternative viewing position, or minimal justified plant change according to the documented cause. Then retest the same location.
Cut first and discover consequences later
Do not prune healthy tissue to compensate for a hose, unstable post, poor path drainage, or avoidable route design. Do not trade access today for branch failure as flowers gain weight.
| Access problem | Decision and verification |
|---|---|
| Path blocked by hose or tools | Clear or reroute the object; walk the route again carrying normal inspection equipment. Do not prune the plant to solve a ground-level hazard. |
| Interior leaves cannot be observed | Mark a second observation position or modest viewing window; confirm the actual underside can be examined without compressing adjacent flowers. |
| Support line crosses the approach | Check its load-bearing role; use a safe redesigned access feature or reconfiguration. Confirm supported branches remain stable. |
| Branch enters lane as it grows | Compare original and mature projection, adjust a flexible branch within its safe range, and monitor tie pressure and structural stability. |
| Only suspect flower requires access | Plan a low-disturbance containment route; avoid broad canopy manipulation that might contact nearby flowers. Use the dedicated removal protocol. |
| Wet, unstable or obstructed ground | Stop entry until safe footing and site conditions are restored. Do not claim an inaccessible plant has been inspected. |
Account for Flowering, Weather, and Common Access Failures
Access changes through the season even if posts and paths never move. Rapid vegetative expansion closes gaps; flowering increases branch load; rain makes plants heavier and paths slippery; and neighboring vegetation can alter shade and pest movement. The original layout is a starting hypothesis. Reinspect it at meaningful structural transitions rather than assuming the planting-day photograph still describes the present garden.
Vegetative expansion: the corridor closes gradually
As laterals extend, compare present branch projection with the baseline map. Identify where a growing tip now reaches the lane, where plant canopies meet, and where an inspection view has disappeared. Adjust gently while tissues are flexible and the root zone is stable, if a change is necessary. Avoid repeated architecture changes merely to maintain a symmetrical aisle; the goal is access to specified organs and stable canopy function.
Containers can move in winds or irrigation conditions, and added water or mature plant mass changes how safely they can be repositioned. Mark their location and inspect pot bases and root-ball stability before any proposed move. A narrow container gap that only works when you turn heavy pots weekly is unlikely to remain reliable in late flower.
Flower transition: recheck the load and the no-contact boundary
Early flower sites often appear open before inflorescences expand. Predict which branches will occupy the route and identify future points where flowering clusters may rub against a fence, net, or neighboring plant. Adjust support while the system is still manageable. Avoid making major bends in increasingly rigid stems simply to regain a perfect corridor. A safe alternative approach may be less damaging than forcing the original lane to remain geometrically straight.
A useful late-season lane allows inspection from the side without brushing developing flowers on every visit. Where physical access would repeatedly contact bracts, trichomes, or suspect tissue, reconsider the path or observation method. A phone photograph from a safe position may provide a preliminary view, although it cannot replace direct examination when identification needs a lens or laboratory sample.
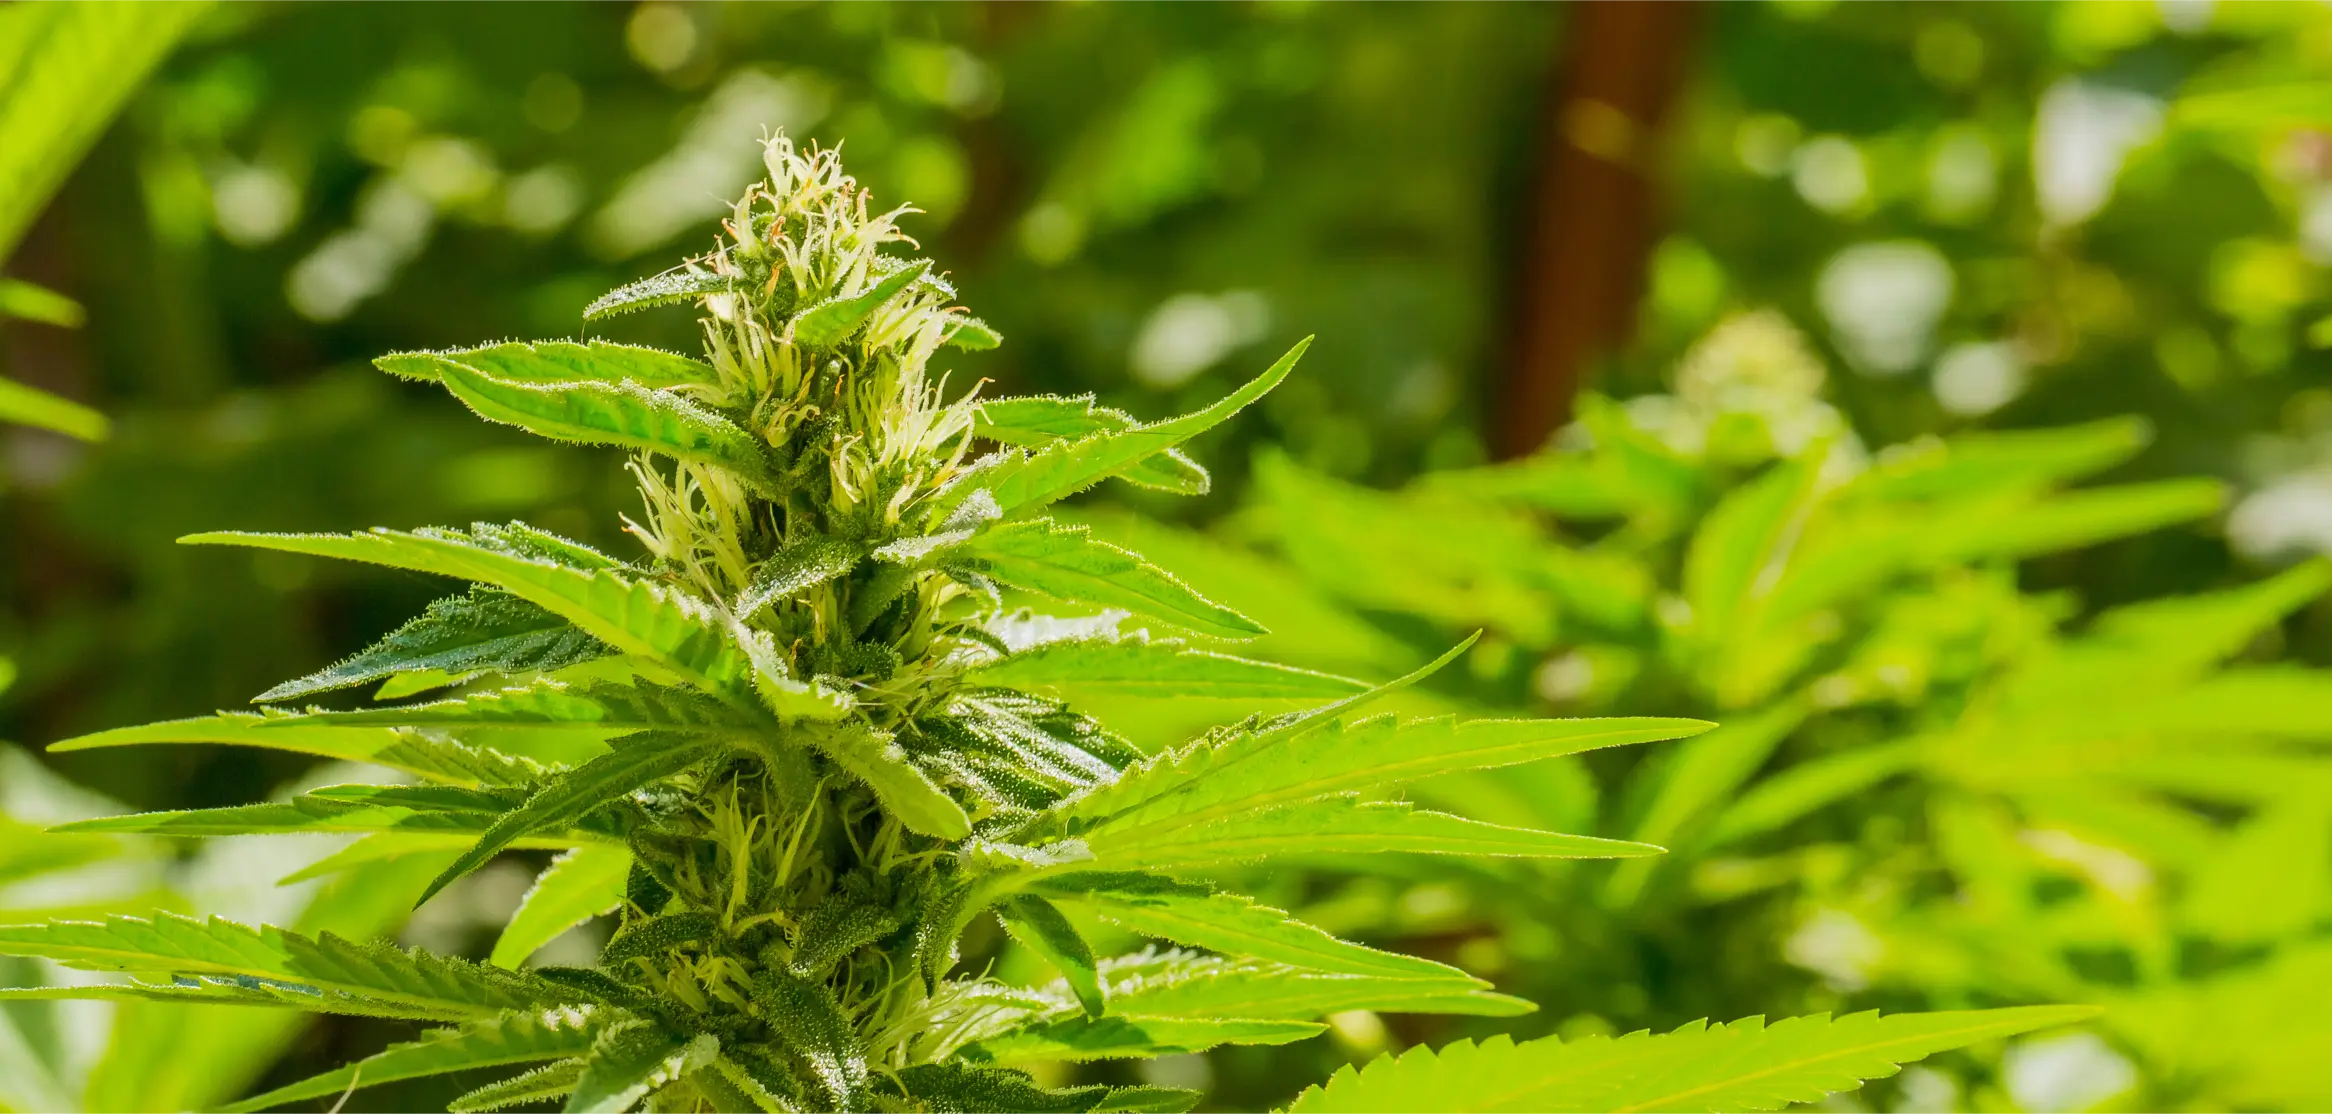
After rain: do not confuse an open lane with a dry canopy
Measure the problem that matters. A clear path lets you see whether branches have sagged, supports shifted, flowers are pressed together, or low areas remain wet. It does not prove low humidity within a dense inflorescence. Cannabis greenhouse research found that flower interiors may retain a distinctly different microclimate from ambient conditions. Outdoor wind and open sky change the setting, so do not copy an experimental greenhouse fan speed or measured RH difference into an outdoor aisle target.
After wet weather, start with the safe ground and support system, then inspect leaves and flowers only as conditions allow. If foliage is wet, postpone routine contact-heavy scouting when practical, while still addressing urgent hazards or clearly deteriorating material through an appropriate containment procedure. Compare the same flower zones after drying. The dedicated post-storm inspection resource covers the complete base-to-flower assessment; this page only explains how to keep its inspection locations reachable.
Wind and heavy flowers: protect the load path and inspection lane together
A lane may open briefly as wind pushes branches outward, then close or snag the worker when the direction changes. Never assess access in a storm by forcing entry. During calm preparation, inspect whether posts, ties, and trellis openings preserve passage with branches in their normal positions and under anticipated wet flower load. Avoid placing the only access opening beneath a branch that could fail or a support that may fall.
In the branch-support and storm-preparation guide, the central problem is transferring loads to stable supports. Here that knowledge becomes an access criterion: supports cannot block an essential inspection position, but neither should they be sacrificed to improve it. Design both needs together before the canopy becomes heavy.
Recognize the misleading signs of a working layout
The path looks wide from above, but its usable standing space is taken by containers. A leaf wall looks green and healthy, but its inner lower surfaces were never examined. A fixed route produces identical counts, but it visits only the easiest plants. A newly opened interior looks airy, but flowers stay wet. A support line is no longer in the aisle, but the relocated tie is cutting into a stem. Each case shows why the outcome must be tested at the point where the intended task occurs.
Do not create new flower-contact or biosecurity risks to make a path look tidy
Repeatedly brushing, dragging or shaking suspect flowers can damage tissue and potentially move contaminated material. Do not route workers from obviously suspect plants through healthy flowers with shared unclean tools or open debris. If there is progressive rot or an unknown pathogen, switch from routine lane maintenance to a targeted containment and diagnostic workflow.
“My trellis is holding everything up, but I cannot reach the flowers behind it. Should I cut the net?”
Question sent by: MapleGrower, via Facebook page.
First determine which strands are carrying branch loads. Cutting an active support may release heavy stems or damage flowers. Check whether you can use a designed opening or a different safe inspection side, and plan a supported reconfiguration if needed. Treat structural stability and flower access as separate requirements that must both pass after the change.
Commission the Design and Verify It Still Works
Commissioning means testing the finished access plan as though the garden were already in its most demanding ordinary operating state. Do not stop at measuring an aisle once. Prove that a real person can complete the inspection, capture repeatable observations, and leave without damaging plants or becoming trapped. Then repeat that test as growth and weather alter the layout.
Perform the dry-run inspection with the actual equipment
Take the route from its normal entrance. Carry the lens, phone, notebook, sample container, and any protective equipment used routinely. At every marked inspection position, stop, place your feet, reach the designated leaf or branch, and photograph a target without moving adjacent flowers. Confirm that you can set down equipment if needed without contaminating the plant or leaving a trip hazard. Walk back or complete the exit route while carrying a closed sample container.
Make a simple access log: plant ID and side, target organ, fully visible or partially visible, comfortable reach, flower or stem contact, footing condition, and support movement. These fields reveal whether a wide-looking lane works in practice. Note failures honestly. A missing view is not corrected by recording “no disease seen.”
Measure access completion rather than inventing a biological threshold
For a defined inspection task, count the planned inspection points and those actually completed. The access completion rate is the completed points divided by planned points, multiplied by 100. This is an operational metric for the route, not a cannabis disease, pest, or yield threshold. Keep the list of missed points and reasons, since a high percentage can conceal one high-risk flowering interior that nobody can reach.
A separate contact log can capture unintentional branch, leaf, or flower contact at each station. Compare the log before and after moving a hose, adjusting support, or adding a viewing window. If the same target becomes reachable with fewer contacts and the support holds its position, the adjustment is working. Do not set a universal acceptable contact count for every garden; the target organ and hazard determine how much interaction is appropriate.
Confirm scouting quality alongside access quality
Check whether the sample still spans edge, middle, different exposures, and marked hotspots. Revisit sentinels from the same angle but change starting direction or inspect supplemental plants to prevent route bias. Compare new injury, live pest evidence, incidence, severity, and spread where relevant. For suspected disease, photograph progression and use the appropriate field or laboratory verification method. Better access does not establish that a visible lesion is caused by a particular organism.
If one zone continues to be missed, revise either the working position or the sampling map and disclose that the earlier observations were incomplete. It may be impossible to assess a specific organ without unacceptable damage. In that case, do not force a view and do not infer an absence of problems; use a safer observation approach or escalate the diagnostic question.
| Stage / Period | Plant Status | Main Task | Risk / Check |
|---|---|---|---|
| Before planting or early setup | Paths, plant centers and support locations can still change. | Map entrance, exit, firm footing, service lines, projected mature canopy and intended inspection positions. | Do all users and required equipment have a safe route, and can every planned plant be approached? |
| Active vegetative expansion | Branches are extending and gaps are closing. | Walk the route, test target organs and update positions; adjust non-plant obstructions first. | Hidden interior, branch pressure, unstable root balls and poor sampling coverage. |
| Flower transition | Potential future loads become clearer. | Retest access without flower contact and assess support geometry before branches become rigid or heavy. | Tight ties, blocked trellis openings and projected flower rubbing. |
| After rain or strong wind | Paths, root zone and supports may have changed. | Check site safety, entry, support stability, and marked high-risk viewing points. | Slippery footing, moving posts, wet flower contact and false claims of dry interiors. |
| Following a design correction | One obstruction has been deliberately changed. | Repeat the same route and organ check, record contacts, photographs and support position. | Access improves in one place but new blind spots or structural problems appear elsewhere. |
Use clear pass, revise, and stop decisions
Pass means the target inspection can be completed from stable footing without avoidable contact and with representative coverage documented. Revise means the route is safe but a viewing window, sampling coverage, or equipment arrangement remains inadequate. Stop and correct safety first means unstable supports, dangerous ground, blocked egress, or risky contact prevents safe entry. These are local workflow labels, not legally defined access classifications or biological action thresholds.
Set an event-based recheck: after a branch grows into the route, after support installation, after a meaningful training change, during flower expansion, or after major weather. A calendar reminder can help, but no universal number of days preserves access in all cultivars and sites. The correction works only while the same tasks remain possible without developing new damage. Photograph the same view at every significant change.
Master Advice: A layout is finished only when a full inspection can be performed, logged and repeated safely. Garden appearance is secondary to the quality of observations it allows.
The Field-Ready Access and Inspection Checklist
Use this checklist in the order you would walk the garden. It links design, scouting, and correction so the next person can repeat the inspection without relying on your memory. Keep the map and log with the garden records and revise them whenever plants, containers, routes, or support structures change.
Access Lane and Inspection Commissioning
- Confirm the location is lawful and every required entrance and exit remains unobstructed.
- Mark plant IDs, fixed obstacles, supports, irrigation lines, standing-water areas and normal approach routes.
- Walk the proposed lane with the actual user and everyday inspection equipment.
- Verify sound footing, safe turning and exit, and no exposed hose or tool trip hazards.
- Mark inspection positions and the exact upper, lower, inner, basal and flowering targets.
- Record target areas not visible or reachable instead of counting them as clear.
- Choose fixed sentinels and representative additional plants from more than one garden zone.
- Inspect target organs in a repeatable sequence without pulling through neighboring flowers.
- Move non-plant obstructions before changing healthy plant tissue.
- Check anchor and root-ball stability before any branch or support adjustment.
- Retest viewing windows, tie clearance, flower contact and branch load after every correction.
- Keep access assessment separate from flower dry-down, pathogen identity and treatment decisions.
- Recheck the route during expansion, flower transition, after weather and whenever supports change.
- Document completion, missed positions, contact events, photographs and the next corrective decision.
If inspection fails, state the failed task and its cause, then correct that cause. If sampling fails, change coverage rather than assuming the accessible edge is typical. If a structural or safety hazard develops, stop entry before handling the canopy. And if symptoms remain uncertain after a safe, representative inspection, move to the appropriate diagnostic method rather than turning improved access into false diagnostic certainty.
The lasting result is not a permanently straight aisle. It is a working layout that lets a grower return to the same plant, inspect the same tissues, discover what changed, and intervene only when the evidence supports it.
Share this article
A quick overview of the topics covered in this article.
- What an Inspection Access Lane Must Actually Accomplish
- Map Walking Routes, Reach, and Hidden Zones Before Changing the Canopy
- Build Reach and Sightlines Without Sacrificing Plant Function
- Create a Repeatable Inspection Route and Sampling Map
- Adjust Branches, Supports, and Paths With Minimal Disturbance
- Account for Flowering, Weather, and Common Access Failures
- Commission the Design and Verify It Still Works
- The Field-Ready Access and Inspection Checklist
Follow us
Latest articles
September 27, 2026
September 27, 2026
September 27, 2026
September 27, 2026
